The end of the year is oh-so-close and I couldn’t wait to share with you some of the projects that we have tackled in the recent month. One of them was #4 on our DIY To-Do list:
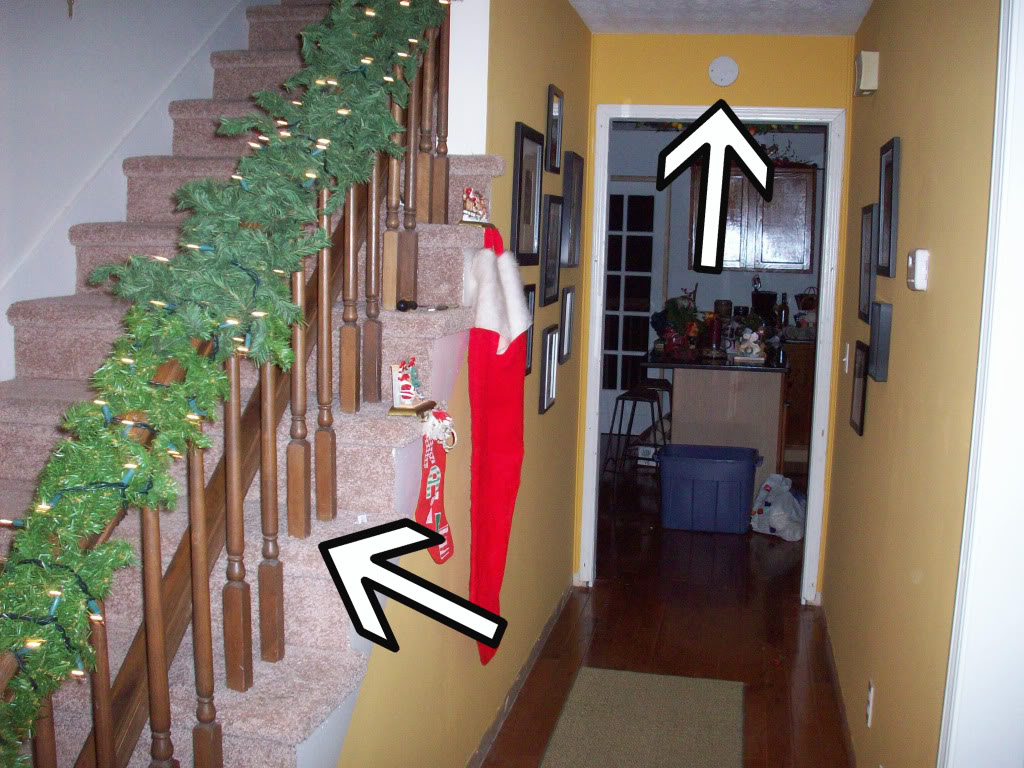
The stairway railing.
And we were able to tackle this monstrosity of a task with the massive help from True Value. For those of you who forgot with the Christmas chaos (or just now joined us here at ABP), we were one of the lucky folks chosen to participate on the DIY Blog Squad. This group of home-improvement-lovers tackles and blogs about real-life projects and True Value foots the bill by providing the supplies.

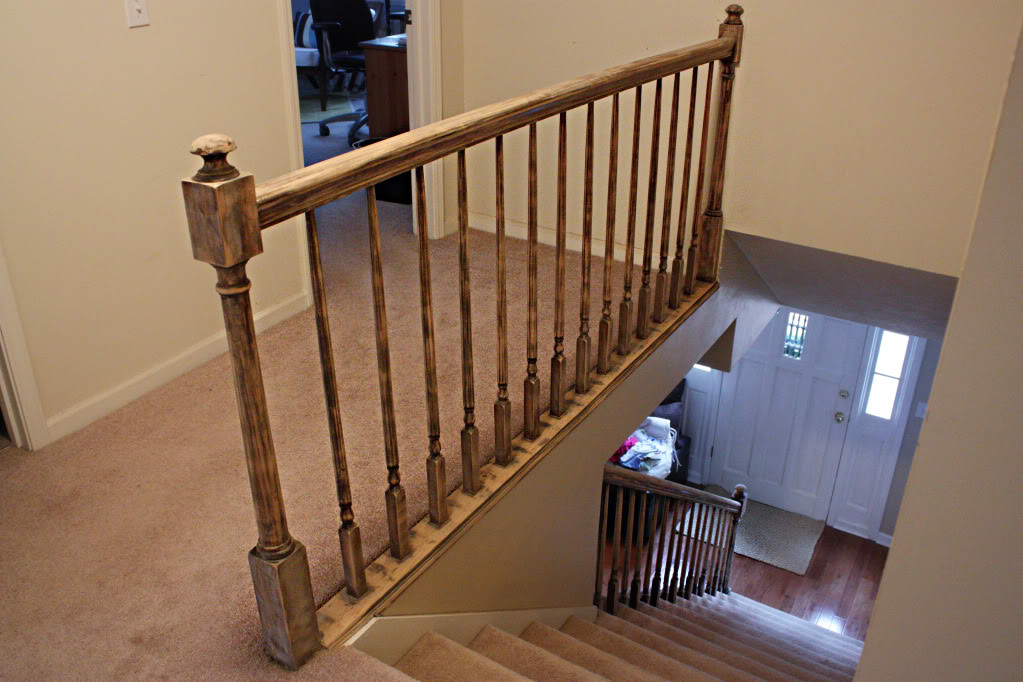
One of our chosen projects lives in the foyer of our house. It was this worn out brown railing that needed a little color CPR.
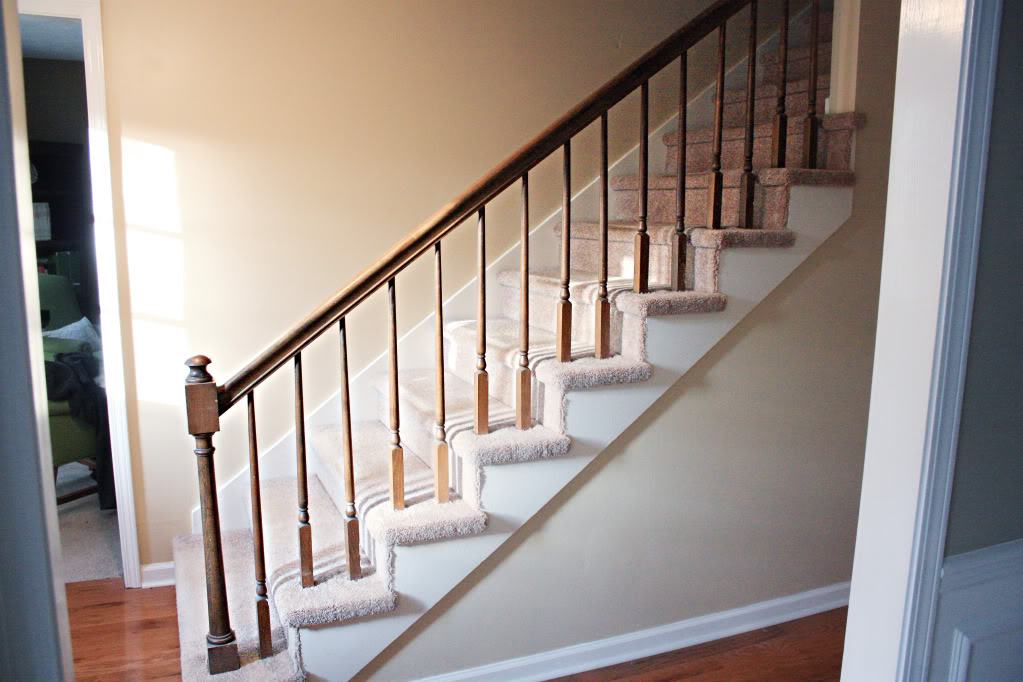
As you can see, the railing goes up to the wall on the bottom half and the top half separates the little landing next to the office & guest bathroom from the stairs.
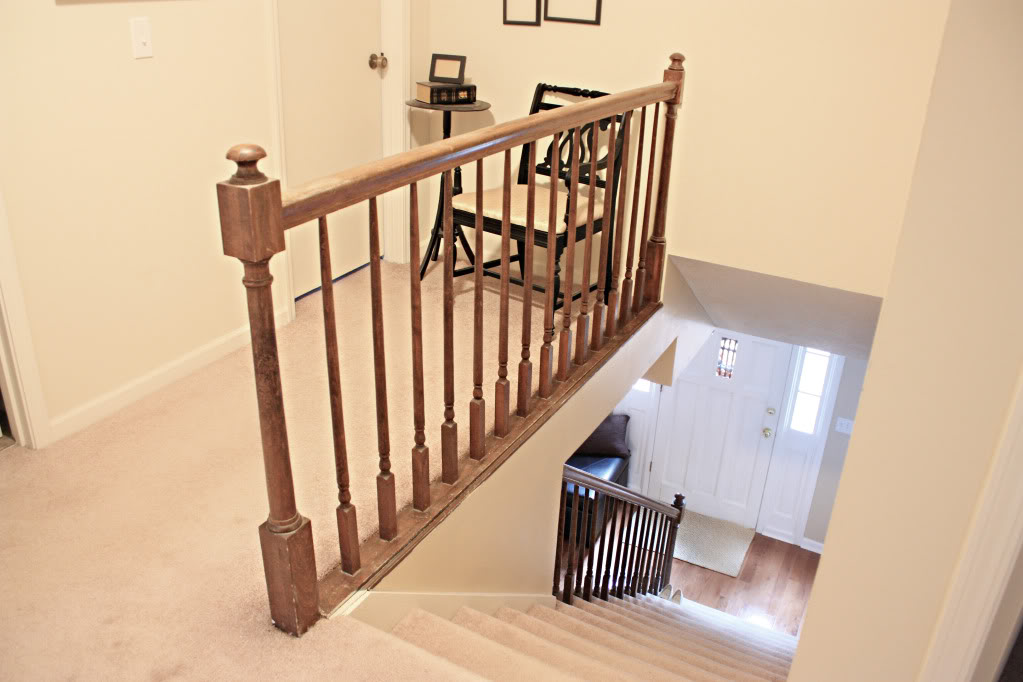
The handrail on the other side was removed and we have been trapsing up and down the steps without guidance for the two years we have lived here. As my pregnant belly grows, I have noticed that a handrail really would come in handy (heehee…hand-y!). Especially for top hip head heavy peeps like me.
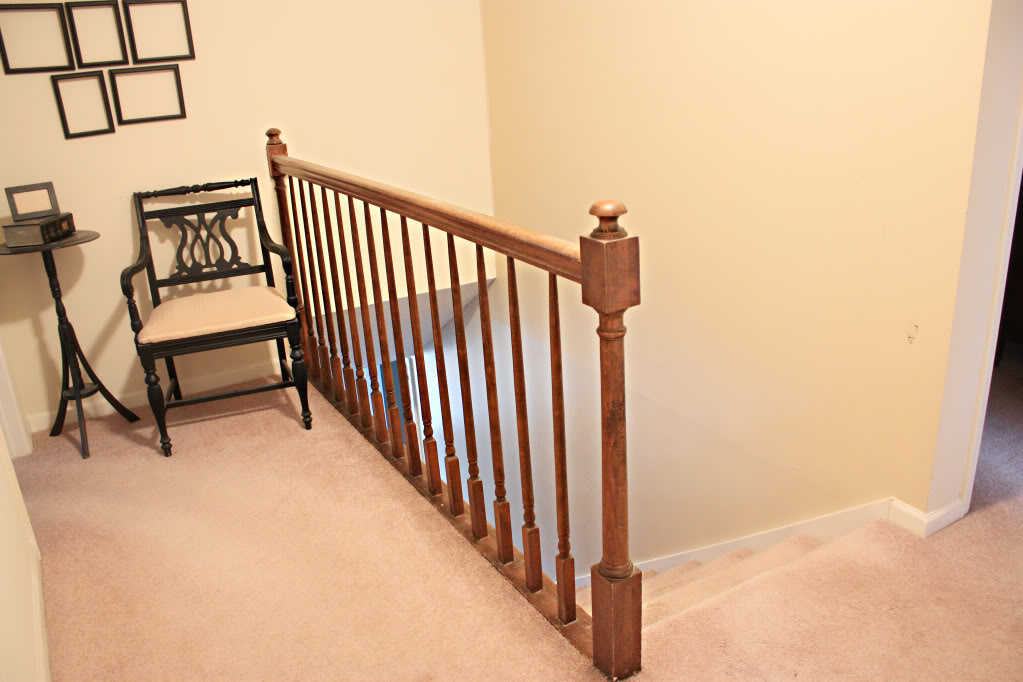
But now that we have finished this project, we are here to share the How-To with all you home improvers. So if you are in the mood to change your own stairway railings, just follow these easy peasy steps to get a whole new look for your stairway.
1. BUY SUPPLIES
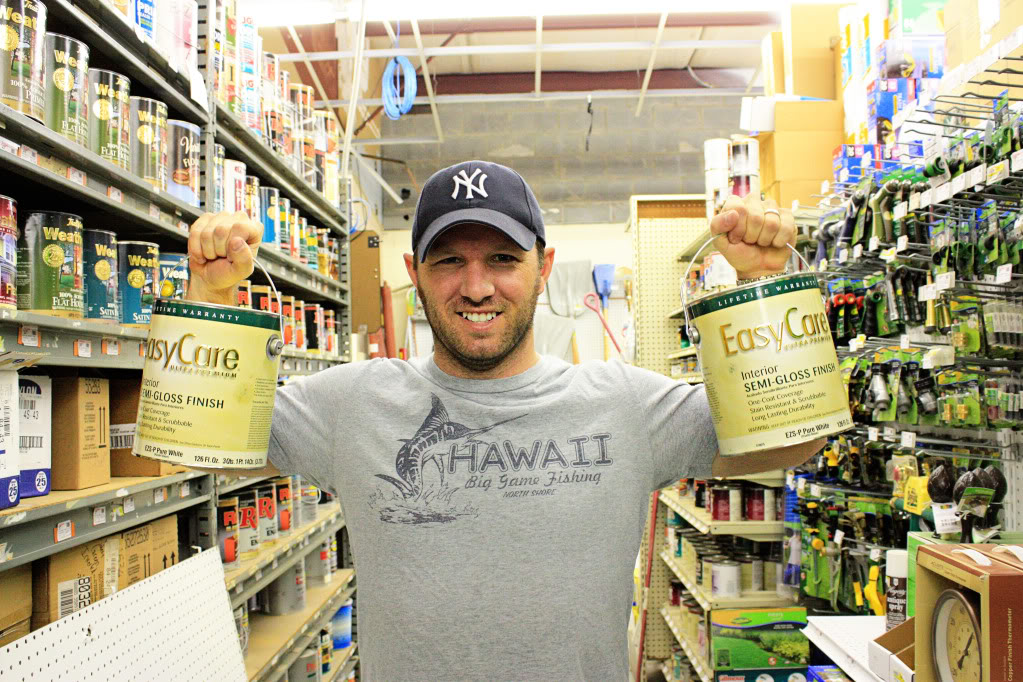
Typically, we buy Benjamin Moore paint for our trimwork. But since True Value carries paint – we decided to pick up a few gallons of their Easy Care Pastel White semi-gloss instead. And actually, it worked just as well. The coverage was good and we didn’t have any problems with drips or inconsistencies. We also decided to purchase a gallon of the Kilz oil-based white primer too.
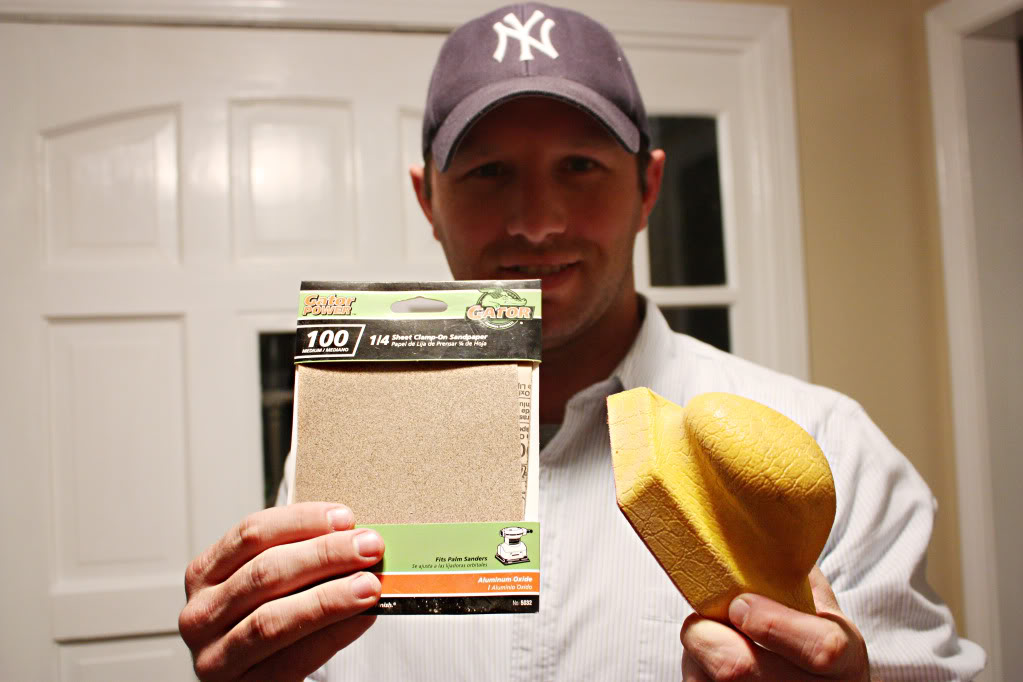
Also on our shopping list was sanding equipment. We have an electric sander so we just needed some refill sanding papers and my boyfriend snagged some loose full-sheet sandpaper and this nifty squishy sanding tool that can fit in the small nooks and crannies of the railing (where the bulky sander won’t fit!).
2. SAND YOUR RAILING
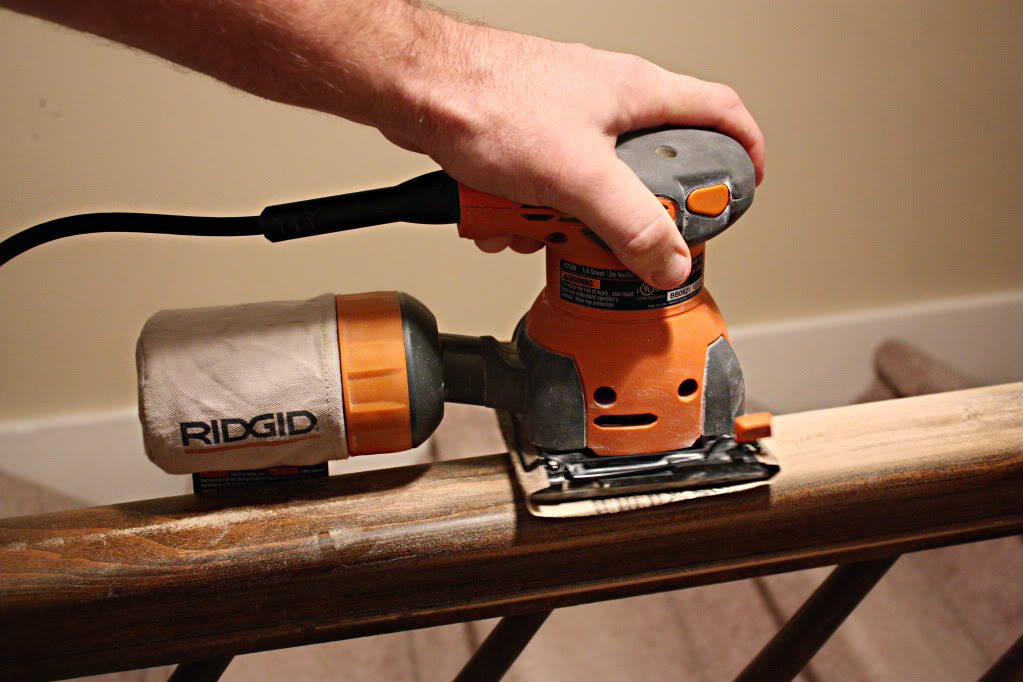
Using our electric sander, we tackled the railing to rough up the surface and give the old finish a run for its money. On the spindles, we used the sander where we could and then wrapped the entire pole with a piece of loose sandpaper to really finish the job. And the squishy sander came in handy on the little parts (like the underside of the railing and the rounded areas of the newel and spindles).
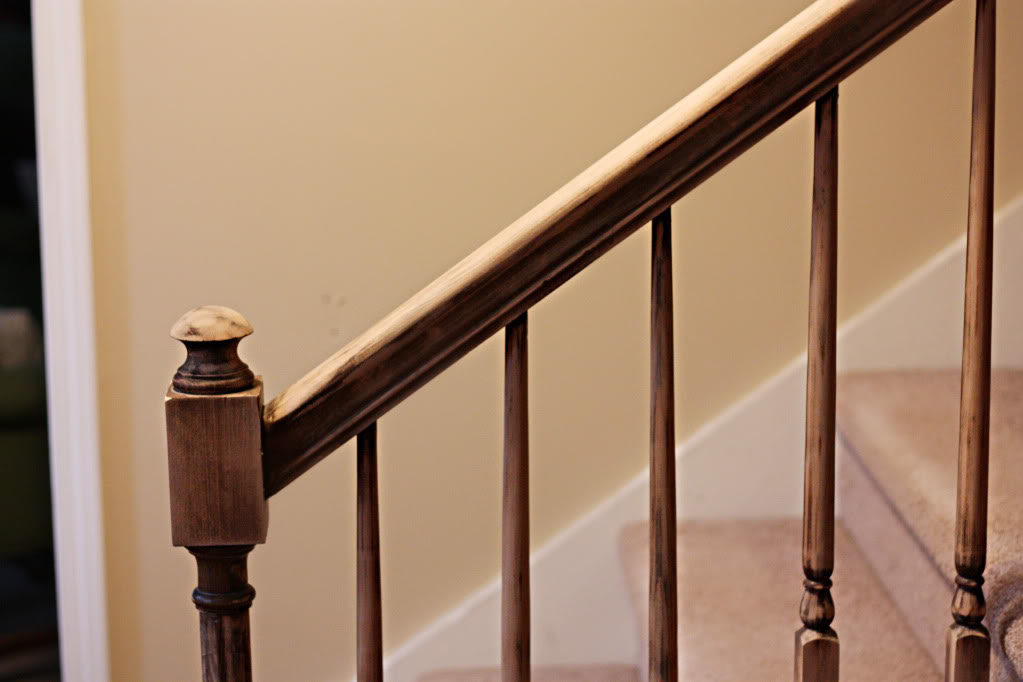
You want to sand the entire railing until the finish is no longer shiny (if you are planning on painting) or until the previous stain color is gone and the raw wood color is the only evident hue (if you are planning on restaining).
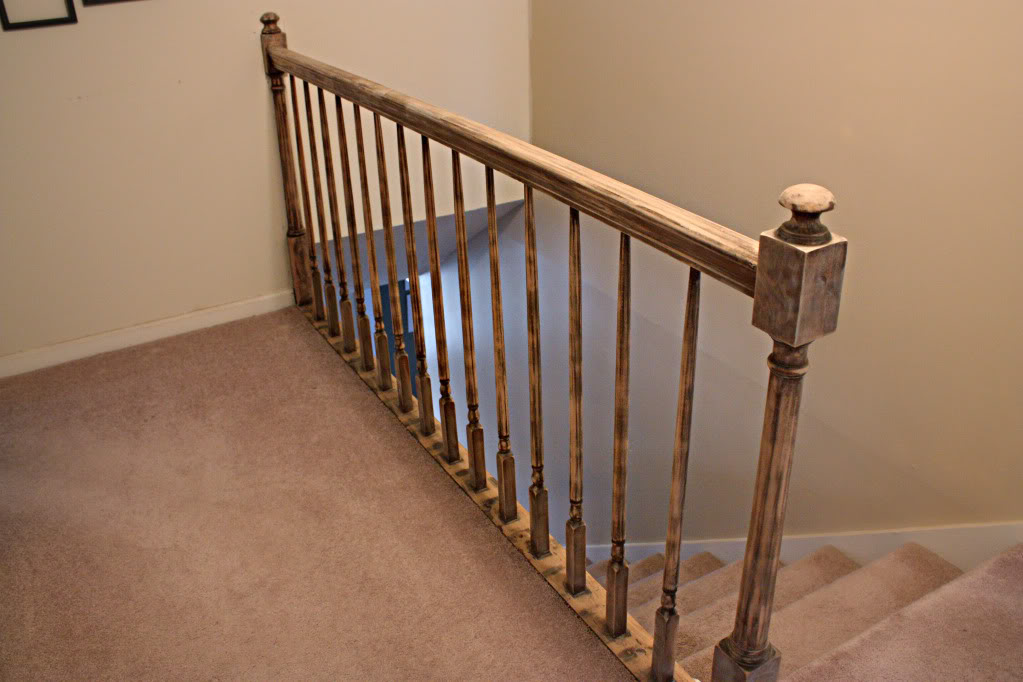
Also, start with a heavier grit sandpaper and then go to a medium grit to get your wood surface ready for primer.
3. PREP & PROTECT
It’s time to prep your surface. After sanding, you will want to make sure you thoroughly wipe down the surfaces that you just roughed up. That means getting a damp rag and removing all dust, dirt, and debris. We like to wipe it down with a rag and then vacuum around the area, then wipe it down with a tackcloth (a sticky rag you can purchase at any home improvement store) and then lastly do a wipe down with a different none-fluffy rag. The numerous wipe-downs ensure that no dust particles get under your primer or paint which can cause a grainy surface instead of a smooth finish.
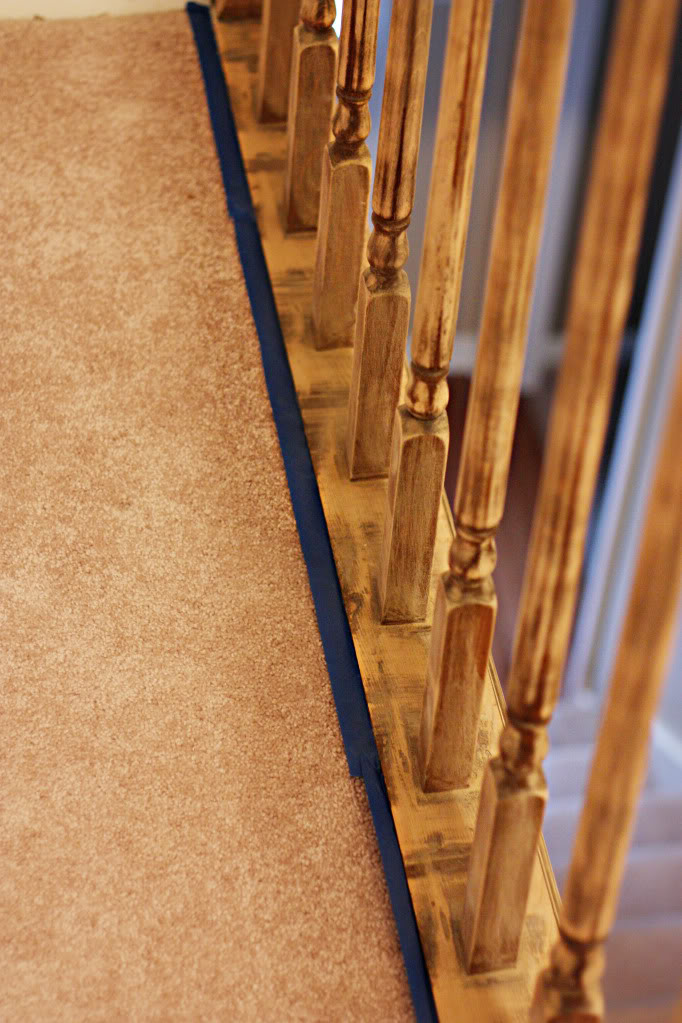
Then we tape off the surrounding areas including carpet, walls and other trimwork that has already been painted.
4. PRIME TIME
Prime your wood surface with a coat of oil-based primer. We used Kilz brand for this project just making sure that we had no drips or spots left bare.
5. PAINT & SAND & WIPE
Using an angled bristle brush, we applied a thin coat of our semi-gloss pastel white paint to our fully dried & primed surface. Then we allowed the coat of paint at least 24 hours to dry. Using a superfine-grit sandpaper, we lightly sanded the surfaces that would be touched…like the handrail itself, the top and sides of the newel and the spindles. This is the time to sand out any drips if you have them.
After sanding, wipe down completely using a damp rag and allow your surface to dry. We noticed that the areas that we sanded were MUCH smoother to the touch and actually looked glossier too.

6. REPEAT STEP 5 UP TO 3X
We decided to NOT polyeurathane this project. Poly can be applied to painted projects to protect the finish and to prevent peeling or cracking and to allow easy cleaning. But, and this is a big but…like JLO sized…wait, does she even have a butt anymore?!….poly can also yellow. And since we knew that it would probably happen on our handrail, we figured that painting an additional coat of semi-gloss down the road would be easier than sanding poly and applying a new finish.
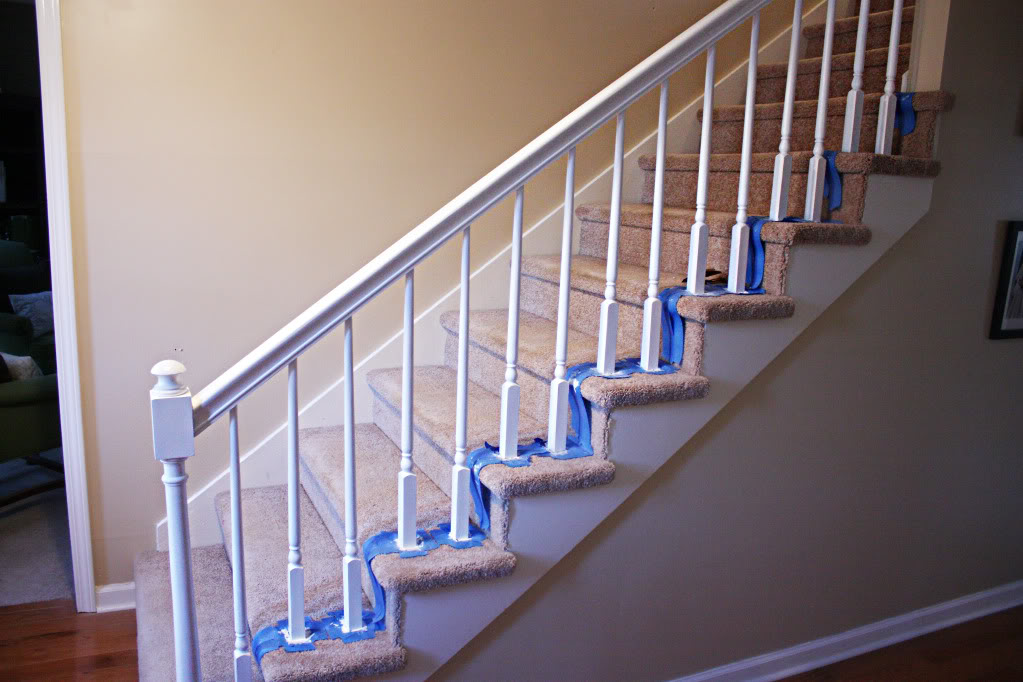
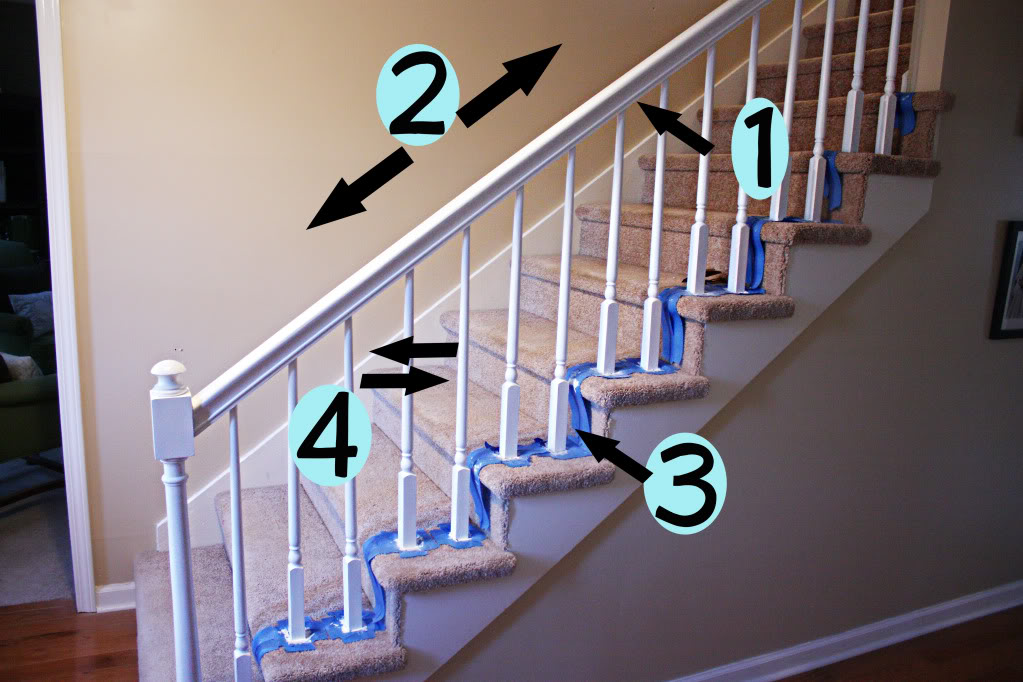
TIPS FOR PAINTING STAIRWAY RAILINGS
-
Paint the underside of the handrail first.
-
Paint the top of the handrail second. Make sure to check for any drips.
-
For square bottomed spindles, paint the bottom of the spindle with vertical strokes third.
-
For round spindles, paint the entire spindle with horizontal strokes using a VERY small amount on your brush. (It works best and quickest if you use a whipping motion).
-
CHECK FOR DRIPS and wipe any immediately
7. CELEBRATE YOUR SUCCESS
I recommend dark chocolate or bacon biscuits but really any chocolate will work and anything with bacon is cause for celebration. Just make sure to show off your new railings to all your friends and family. Prepare for massive amounts of ooohing and awwing.
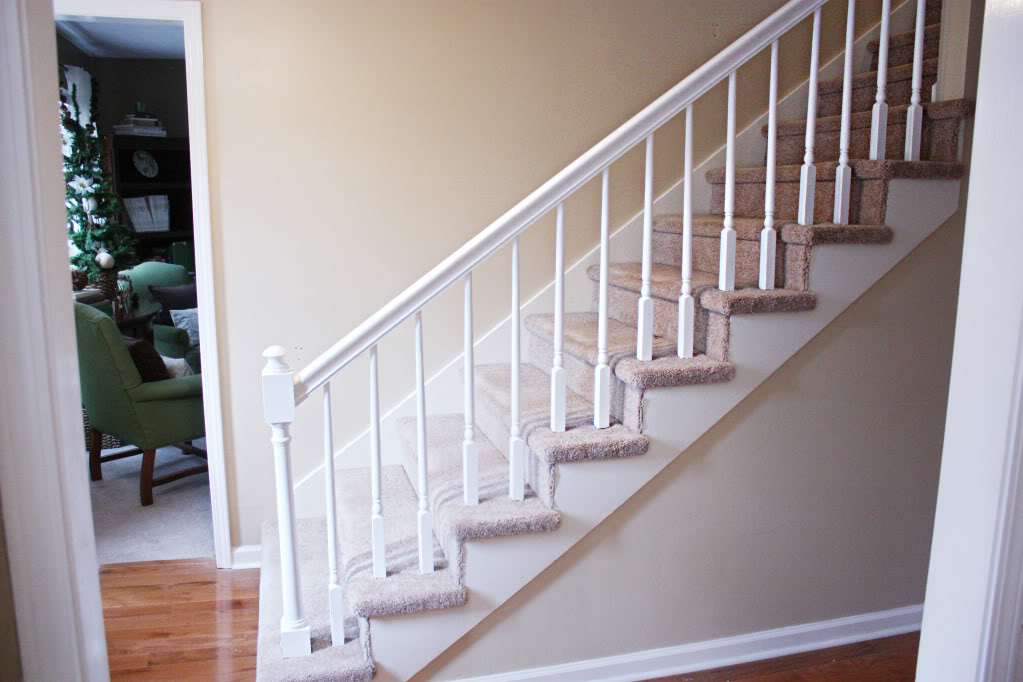
We actually love the new look. It looks 100% more crisp and clean and the new handrail is great for preggos like me.
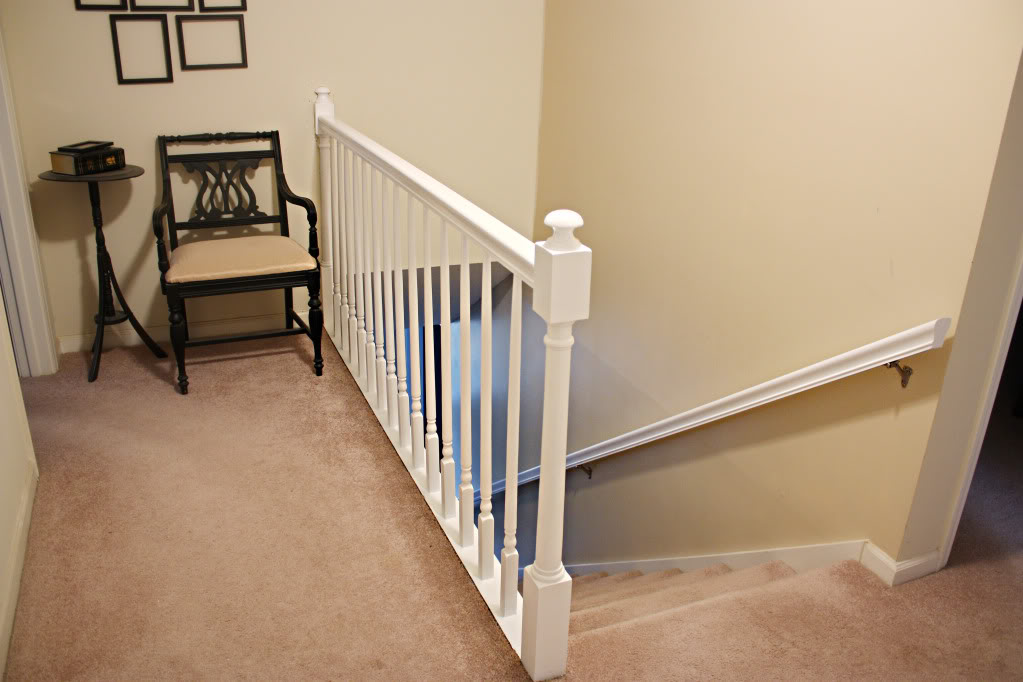
It makes me wonder how I ever tried to go downstairs before. Oh right. It was on my tush. Seven year old style 🙂
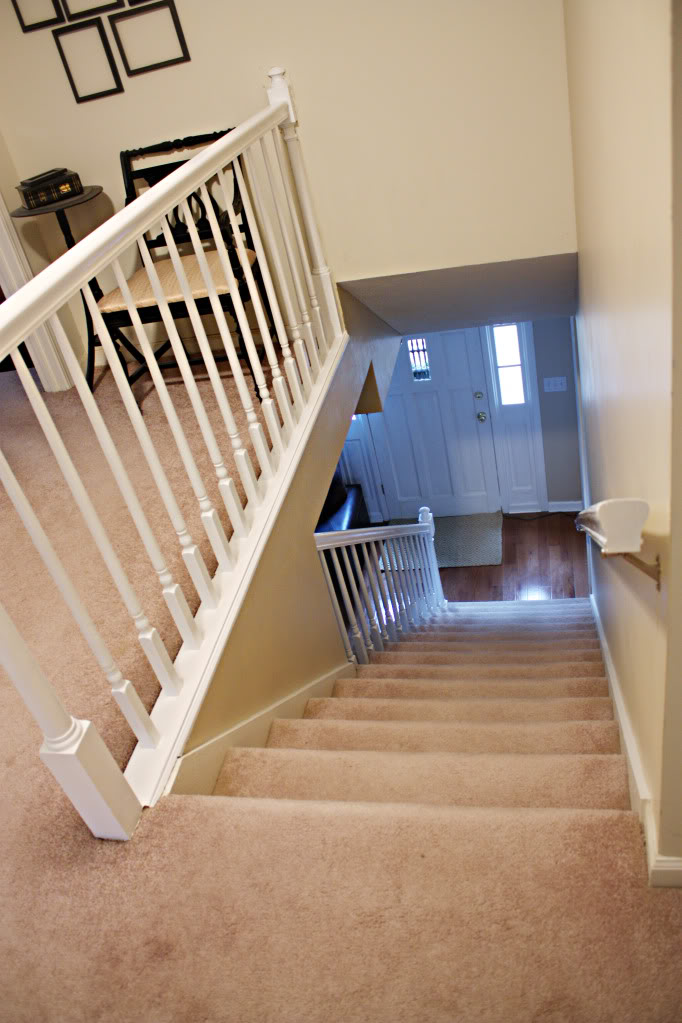
So what do you think? Was it a worthy transformation or just a so-so change? Anyone else out there giving your old handrail the heave-ho? Well, consider just a color switch…it really does breathe new life into a worn-out stairway. And it makes me realize that I need to clean my baseboards more often – eeks! Lastly, I would be remiss to not to thank True Value once again for suppling the paint and sandpaper…this project would had to wait till 2010 or 2011 without you! MUCHOS KISS-OS!
For more Bower Power projects that were made possible by the fine folks over at True Value – click here, or here, or here, or here, or here. WHEW!
“I was one of five bloggers selected by True Value to work on the DIY Squad. I have been compensated for my time commitment to the program and my DIY project as well as my posts about my experience. I have also been compensated for the materials needed for my DIY project. However, my opinions are entirely my own and I have not been paid to publish positive comments.”
Your railing looks great! I just painted mine about two weeks ago! It took me three coats..but the results are worth it! 🙂
looks fabulous! so fresh and clean!
Wow! That made a huge difference and looks great! 🙂
Hey Katie. Looks great. The white really brightens things nd makes it pop. This is a timely post for me. I’ve stripped the wallpaper in my upstairs hallway, painted and am vacillating on what to do with the black wrought iron railing. At minimum it needs a new coat. I’ve been toying with changing the color from black (the walls are a greyish color upstairs and cream in the living room). Any thoughts?
O! O! O! (That’s my version of santa without all the bad Tiger jokes) Only kidding…bad, and cheesy I know! I was so excited when I saw this post as my stair rail looks (Yawn!) T.I.R.E.D. I’ve hated it since we moved in two years ago, and have dreamt of doing this project, even down to replacing the ballusters with pretty iron ones! After seeing this I’m ready to take it on!!
Totally a worthy transformation! Great job, and I’m glad you shared your tips!
Oh, thank you, thank you, thank you! I HATE my railing and have wanted to paint it since I moved in but have been a little chicken-thanks to your step by step I think I will go for it. It looks amazing, well worth the effort!
(here’s my hideous one, similar to yours. http://www.flickr.com/photos/rockingthesuburbs/4221912161/)
I love the white! So fresh and clean. It definitely updated the look of the whole staircase!
Beautiful!! Totally worth it. We tackled a similar project at our place but we opted to stain instead. I had high hopes of stripping and staining all the woodwork in our house but, well, after tackling the staircase I decided I would never finish so I didn’t even start the rest of the house! You can see our pretty-fied staircase here: http://germannsaga.blogspot.com/2009/10/one-step-at-time.html
OMgosh! I opened your blog this morning and chuckled. We actually just started the same project a week ago! Our stairs had white spindles and wood end banisters and top rails, I wanted it white to match our trim as well. Our project is a very slow one. We have a very busy body 3 year old so I have to paint one section at a time to insure that she doesn’t go touching the paint on the stairs!
Yours looks great!!!
Awesome Cindy. That is a huge undertaking! They look brand new! Now lift your arm all the way up, bend it at the elbow and give yourself a pat on the back from me!
XO – KB
Looks great! You’re stairway looks more open in white (and so fresh and so clean!). Have you tried water-based poly? It’s doesn’t yellow and is so easy to use. We used it on our oak floors in the back of the house and oil-based poly in the front of the house and the water based looks better and was so much easier to use.
That looks good! Thanks for the play by play. I’ve been painting all of my baseboards white and came to a pause at the stair railings. I’ll have to give this a try. Thanks.
It looks great! It is amazing what a little paint can do. However since we painted our staircase I know that a “little paint” is more difficult than it sounds because of all the awkward angles. You guys did a great job!
Much better 🙂
Love it, love it. Looks so crisp. High five.
This looks great!
Hey katie, The transformation is beautiful.
Thanks for thr step by step instructions.
Began sanding off my stair railing yesterday.
One down 4 more to go
Hey, was wondering if you have considered
having faux panels in the stair way.
I have seen quite a number of houses with them.
Is it something that would complement a contemporary house??
Thanks
Hi Luiz,
In my opinion the faux panels in a stairway tend to give off more of a traditional vibe. They are beautiful but since my railings were already traditional in feel, I wanted to keep it going with a clean and clutter-free look. I think it could complement a contemporary house but I would consider painting them the same color as the wall to keep the more uniform feel to it.
Happy painting darling!
XO – Katie
Thanks katie. Thats what i was thinking but wasnt quite sure..
Great tips! I know this is something we will want to tackle soon too.
It looks fantastic!
I had my kitchen cabinets painted several years ago and my painter puts a water based poly urethane directly into the paint (1 part poly to 2 parts paint) for the second coat which strengthens the final coat of paint without the extra step of coating your finished project with a poly finish which may yellow. The cabinets still look brand new-no chips with three teenagers in the kitchen all the time!!! He also suggested an oil based primer which is little messier but keeps the paint on better. I am planning on painting my stair rails soon and welcome your suggestions. Keep up the good work, you project came out great!
Hi there! I know this post is almost a year old but it is exactly what I’ve been looking for! I too have the nubby beige carpet surrounding the most glorious expanses of Faux-oak spindles and rails you have ever seen. My question is did the tape let you cover enough of the base of each spindle so that the wood underneath didn’t show once the tape was removed?
I’m worried to tape around spindle bases on carpet, only to take the tape up and see a stripe of faux-oak at the bottom of each spindle. How did you handle that? Or have I just created the ultimate procrastination excuse ever not to start this project? LOL
Dharma,
we did have to push the carpet down a bit before applying the tape (which needs to be WIDE tape to work)…then after we painted and removed the tape, I went back around making sure that I couldn’t do a quick touchup with a tiny 1/4 inch craft brush. It really wasn’t as bad as you might think.
xo – kb
Hey Katie,
We painted our living & dining rooms last week and it’s made our home look absolutely great! NOw I’d like to wake up our stair rails. Ours are already white, but the color is worn down and we want to re-paint them white. Do you think that we need to sand off the current paint, or can we just paint over the current white paint?
thanks a bunch!
Hi Funmilayo,
It all depends on the condition. If they have a glossy coat on them…yes. If they are chipped, pocked, or otherwise beat up….yes. If they need smoothing out…yes. Otherwise, you can just do an oil-based white coat or a lacquer that will help the entire railing look refreshed and renewed.
xo – kb
Thanks again. I think they do have a glossy coat on them…oh well, i guess this is going to be more work that I thought…but I’m sure the finished results will be worth it! 🙂 Oh, and, how do i get a picture to show up with my comments on here :)?
Painting our railings is really easy for you can be able to do this on your own. Being able to follow these instructions would be very helpful for you because this would be able to protect your railings making it last longer.
I want to paint my handrailing but am nervous. Any tips to make it easier?
Thanks,
Karen
Really Amazing Blogs….
Thanks for Sharing..!!
This is fantastic, Katie! I know this is old, but I found it at a perfect time! We are take on our carpeted stairs very, very soon!
Your spindles are beautiful. I’m planning on doing the same (but with white spindles and black railing) but want to be clear about something: did you use oil based primer and oil based paint? I was thinking of using water base but not sure. Right now ours are oak and very glossy. Wasn’t sure if I could use water base primer and water based paint instead?
Thanks!
Laura
I used oil based primer on these but water based paint.
I would hesitate to use water based primer just simply because the handrails are touched a whole lot – which means there would be a lot of oils and grease and dirt which would prevent the water based primer from getting good adhesion.
xo – kb
Hi Katie,
Beautiful job! Such Inspiration! How long did it take you from start to finish in terms of hours to complete this project? Thank you!
AD
Probably two hours per coat. So then do the math…I’m no good at it 🙂
xo – kb
Holy Jumping Overkill !!
There is no need to sand 4 times, or 1 time.
Use Isopropyl alcohol to strip off any hand oil or dirt off the railings. Prime with Bin. Put on 2 coats of paint. “A few gallons of paint, and a gallon of primer” for 30 feet of railing? You can do half a house with that! Your hardware store must love you.
There is definitely more than one way to skin a cat (or paint a railing)…and you probably won’t use the whole gallon – but it’s always best to have more on hand when tackling projects!
xo – kb
Looks great! Gives me courage to do mine in the near future.
To “Joe The Painter” . You say don’t sand just prime with Bin. What is Bin? And, are you saying you don’t need to sand off the old finish at all or just don’t sand in between the white coats?
Katie,
How does one get a nice and smooth surface with NO brush strokes on the rail? My rail is approximately 25′ long and I don’t want the paint to set up too quickly before I finish with that last stroke. I also don’t want to be able to detect where I stopped and then picked up again.
Thanks,
Terry
Very impressed! Thanks for all the tips I will attempt to paint mine!
Googled the topic. Wife was inspired to do exactly what you’ve done.
Great job and good accurate information given. Were just in the sanding stage at the moment. Stripped the varnish – cleaned it with mineral spirits – 80 grit – 120 grit
Planning to put 2 coats of Oil primer – Sand in between with 400 grit – 2 coats of water based paint – Sand in between with 400 grit – 3 coats of polyeurathane – Sand with 400 grit in between with the final coat of poly having it sand prior with 600 or 800 grit. Whatever we can find.
Its important to get good quality paint and primer from what I’ve read.
So glad I read this!!! I just painted our banister white – we have almost the exact same set up as you. I was online trying to decide if I should poly or not. I just had an issue with water-based poly and a shelf turning ever-so-slightly yellow in the thicker spots and was worried about that happening to my new paint job. You make a great point – I’d rather give a fresh coat of paint in the future than have to redo the rails now. Phew! I just want to sit an stare at my work all day, LoL. Thanks!
Except… I’m not a big fan of the paint/sand/wipe plan. It makes me so nervous to sand what I just painted. What is the purpose of sanding exactly?
The sanding is what makes it super smooth…like a factory finish!
xo – kb
Your railings look 100% better. Thanks for the tips….!! 🙂
xo, Crystelle
Crystelle Boutique
Hi Katie!! Major “UHH OH” moment going on> *HELP!*
After going thru the process of sanding/taping/priming, etc I just now noticed that you recommend using OIL based primer ~ and (of course! ) the one I had bought and just used was WATER based. So my question is: Should I go & buy an oil based primer and use that for a second coat ~OR~ just hope for the best and use what I have?????? Mine was one of those hideous, super glossy 80’s oak railings that came with the house and have been so super excited to change it so I really want it to look as nice as possible. Thanks a bunch and SUPER job on yours by the way~ really freshened it up, love it!
If you plan on sealing it afterward, it should be fine with just the water based stuff.
xo – kb
Hi there
Great job on these rails! I am just wondering about the oil based primer also as you mentioned that you were pregnant during this project. Any problems with the fumes? I am also pregnant and thinking of painting the wood in the house, just not sure about the best primer that is safe for me to use.
Thanks
Oil based paint should only be used with proper ventilation and with a mask on….one that is not for particles, but fumes 🙂 I don’t recommend it to anyone who is pregnant…just a risk I took myself.
xo – kb
This is amazing, thank you for sharing this one. I should take note of this.
This is amazing, looking forward to seeing a more relevant article like this.