Our current adventure is attempting to finish Weston’s room. Yes. He is ten months old now. Up until recently we co-slept. It is not for everyone but we love the sharing until it turns into ‘my-ten-month-old-is-the-world’s-biggest-bed-hog’. It seems as if our boys turn into cover-snatching, perpendicular-laying, face-kicking sweat-factories at exactly nine months old. And so we were in a hurry to finish up the painting and get him in here ASAP.
We had already painted his room Benjamin Moore’s Metropolitan Gray and then painted all the trim and ceiling. After that we decided to add an accent wall of faux brick. You can read about the installation process here.
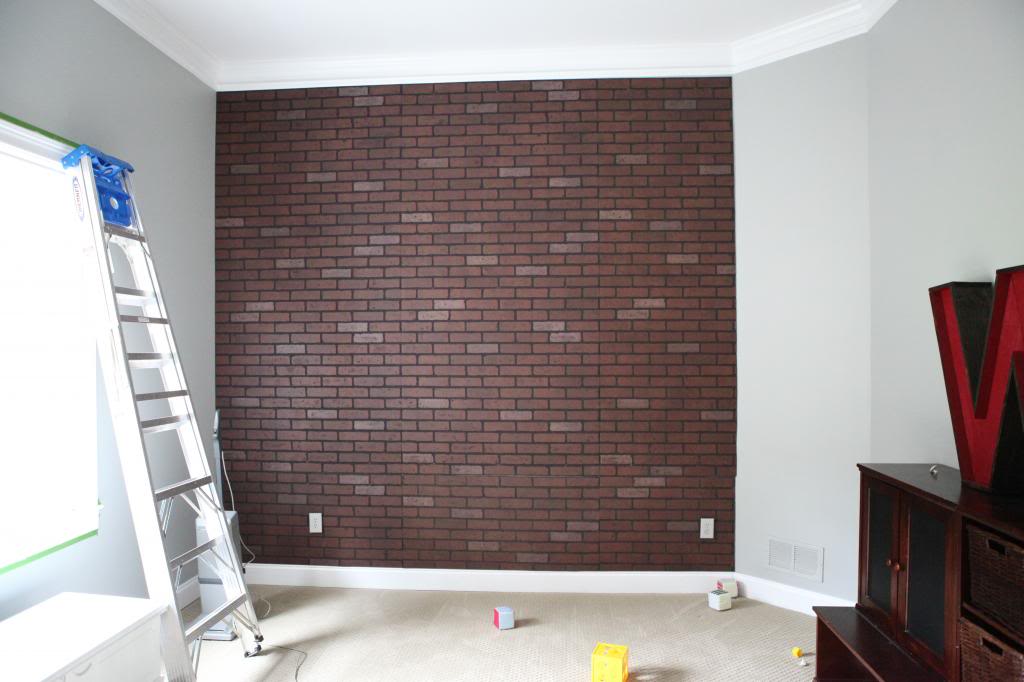
Well, right now it looks like this…
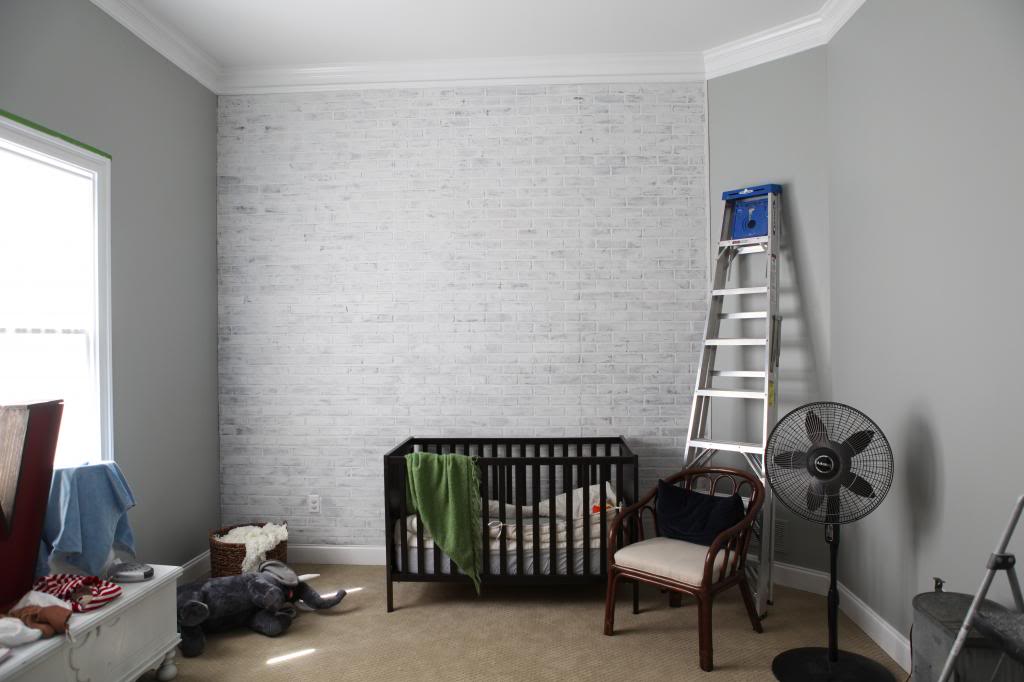
Ignore the blankets everywhere and the ‘in-progress’ of it all.
This post is more about painting the panels than discussing my apparent lack of all organization. So the first thing you will need to know is that this was a complete learning process. I read a lot of articles and blog posts about painting real brick…but didn’t think to google how to paint fake brick. That fake word is really important. Both in watches, diamonds and panels. You see…these faux brick panels don’t absorb like real bricks do. And so it complicates things.
I started out just with a watered down version of my semi-gloss white paint. I would paint an entire section…let it dry a bit….then wipe some of it off with a dry cloth.
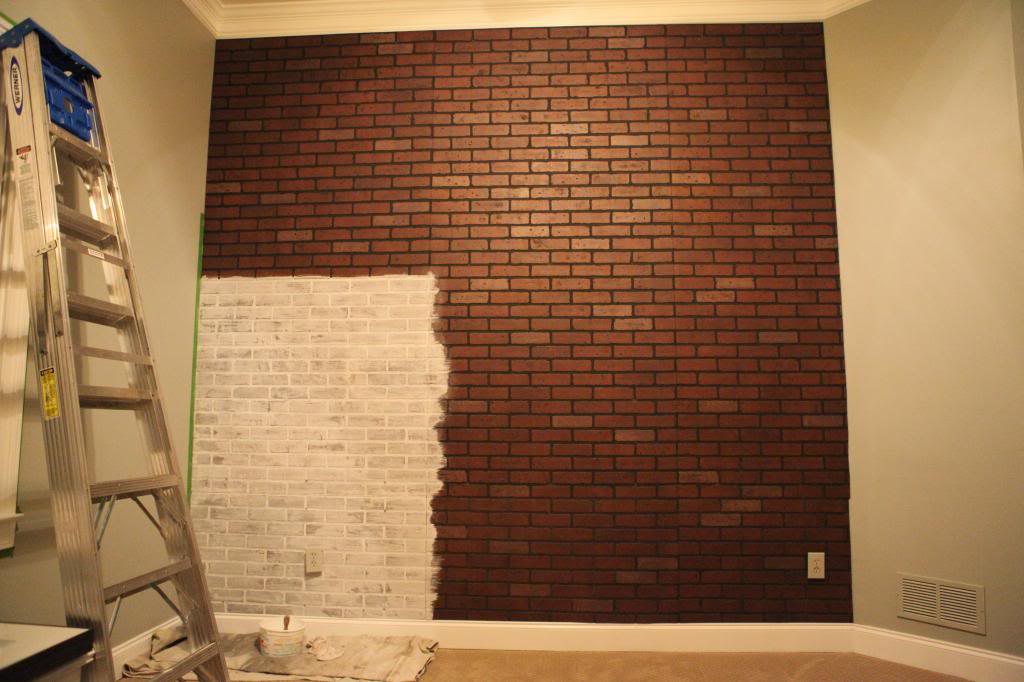
Then I started on the next section. See how I was basically painting squares?
First mistake. Don’t do that. It makes for really obvious painting seams.
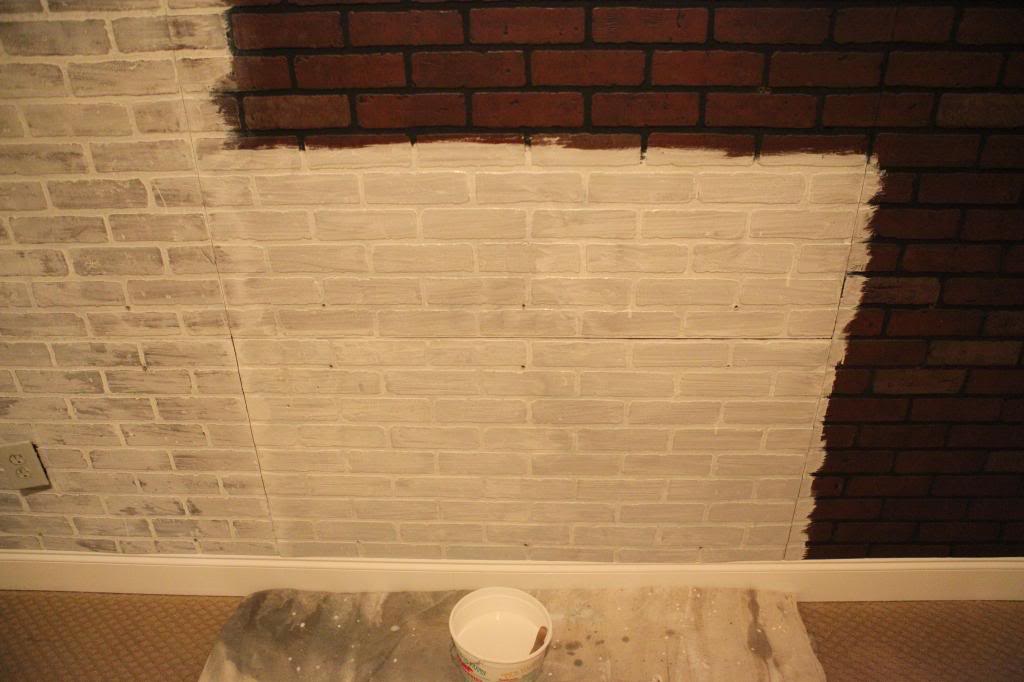
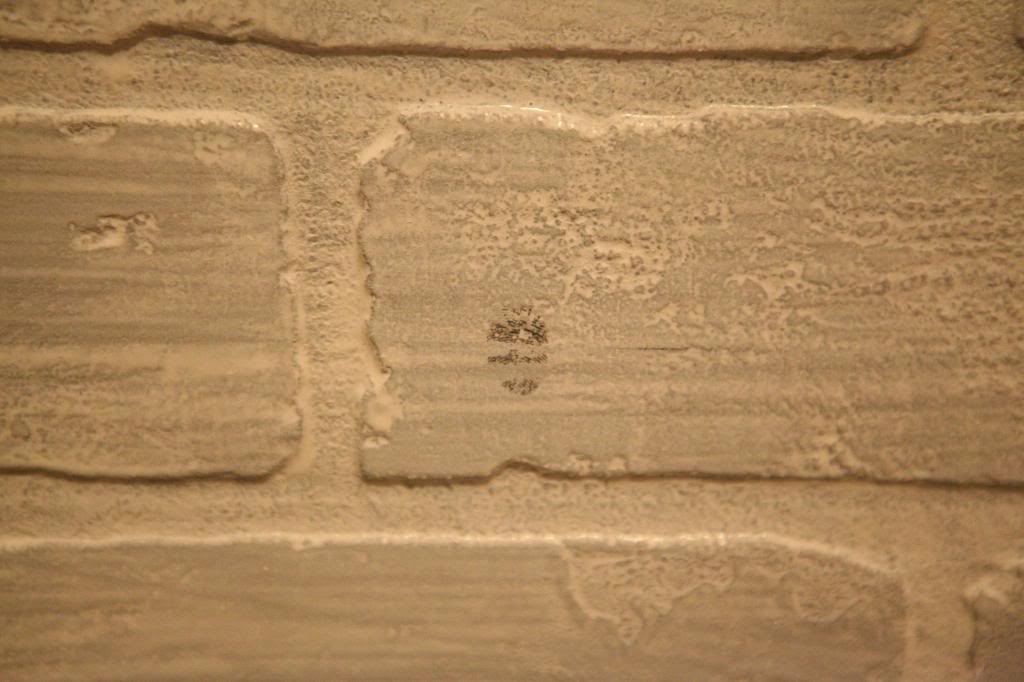
Also, when I was doing the one-coat dry-cloth method, the cloth would leave lots of strokes…and took off more paint than I liked.
At one point I let Will participate in painting. I figured he couldn’t mess it up more than I already did.
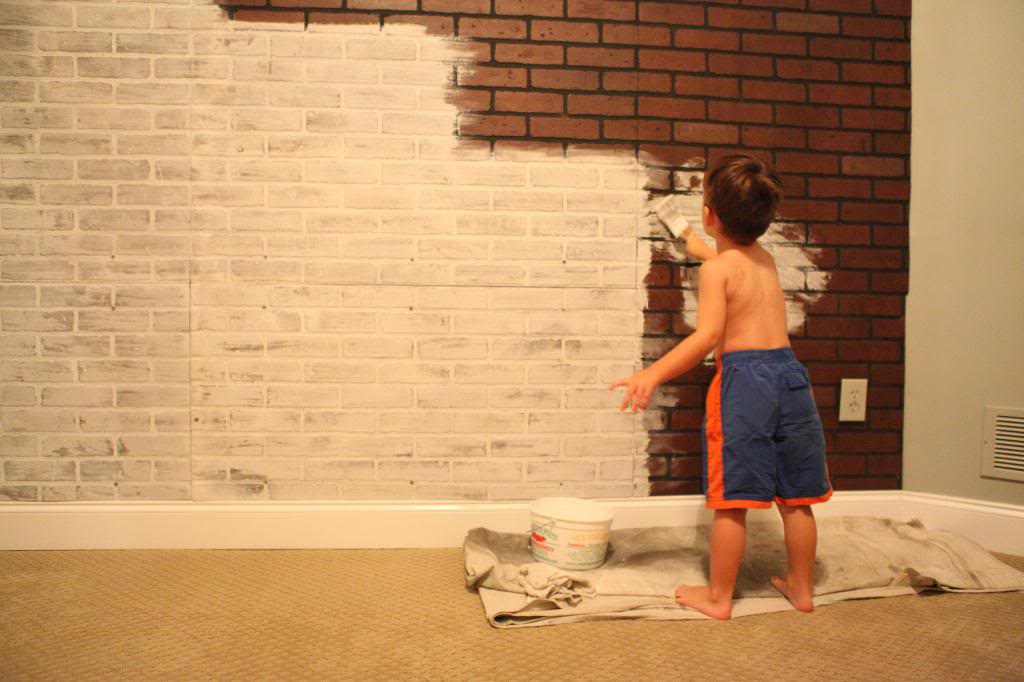
My lens was all wrong for this photo opportunity but just look at the joy in his face. He kept on telling me that he could “paint like a big boy…all by my’s self”.
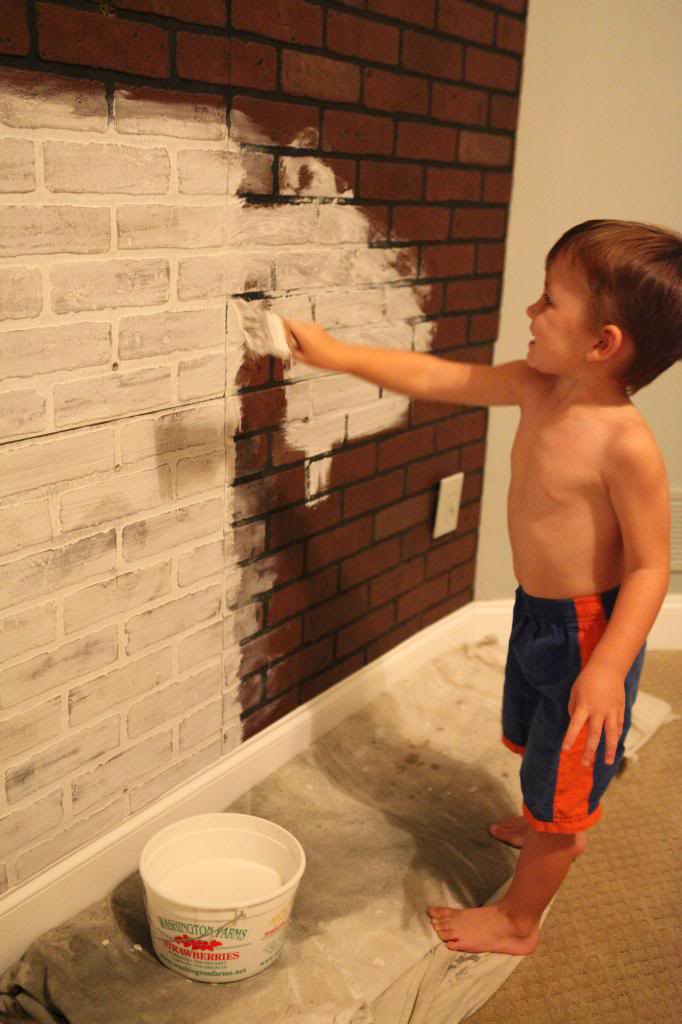
Right now he is going through his terrible three’s and he loves being in charge. And as much as I lose my patience with him or get frustrated at answering the million ‘WHY?!” each hour, he really does LOVE to help and do projects with us…which is basically the most endearing and sweetest things ever. Plus…I feel like it’s good training. One day he’s gonna have to work (like we all do) and my parents and Jeremy’s parents work like dogs and I feel like they taught Jer and I to work hard too. In fact, that is one big reason (out of the million) that I really was first attracted to my boyfriend.
So to see that trait in Will…where he asks to help and wants to ‘wok hard’….it makes my heart soar. And melt. It’s like a flying oozing mess. It’s like out of all these mistakes I make every day, this thing…this kid…he’s a good one. We, by the grace of God, are doing at least one thing right.
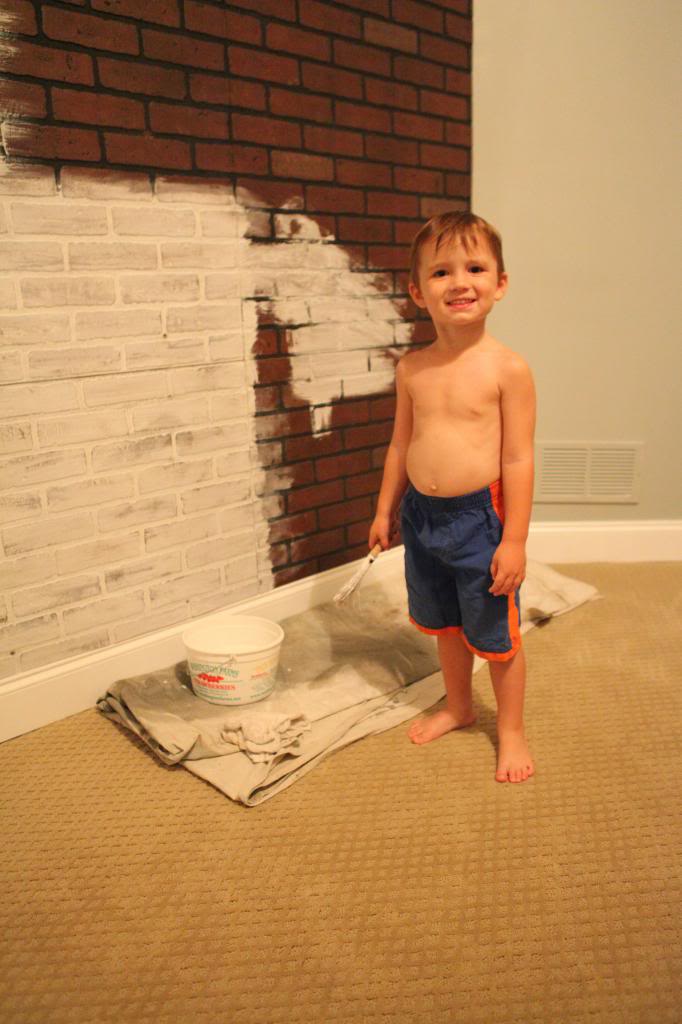
So after I finished that section, I realized that I was making a lot of errors and it was eating up a lot of time. And that first panel (on the far left) is way too gray…and not enough variation for my taste.
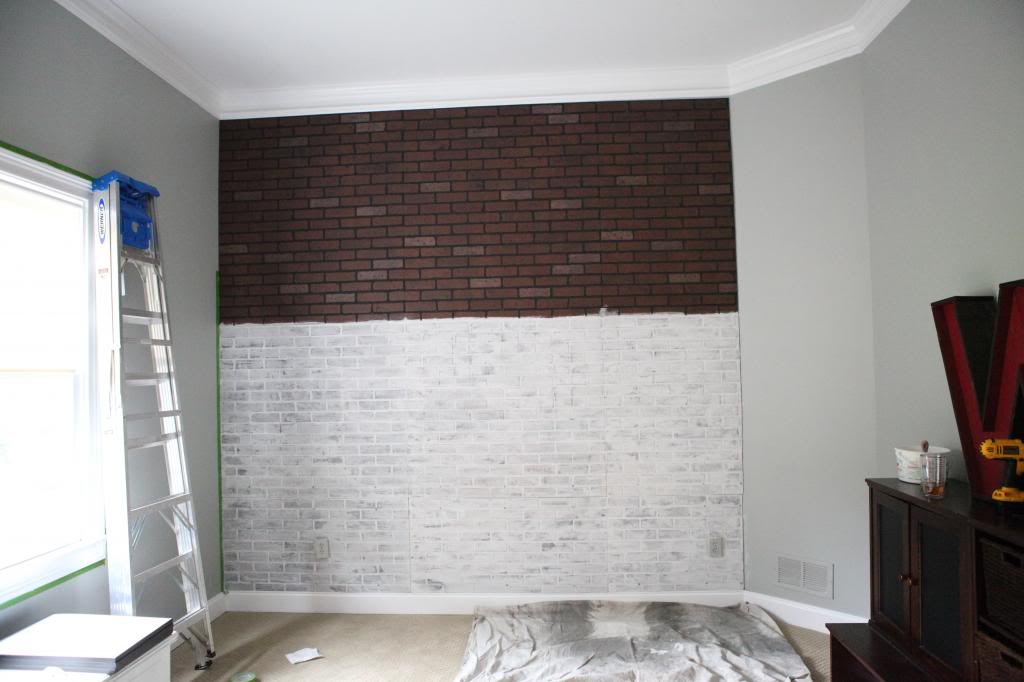
That’s when I learned the ‘hump method’. First, you want to paint a whole section and make it have humps. See how I painted the bricks to form sideways mountain peaks? Those humps help make your seams less noticeable.
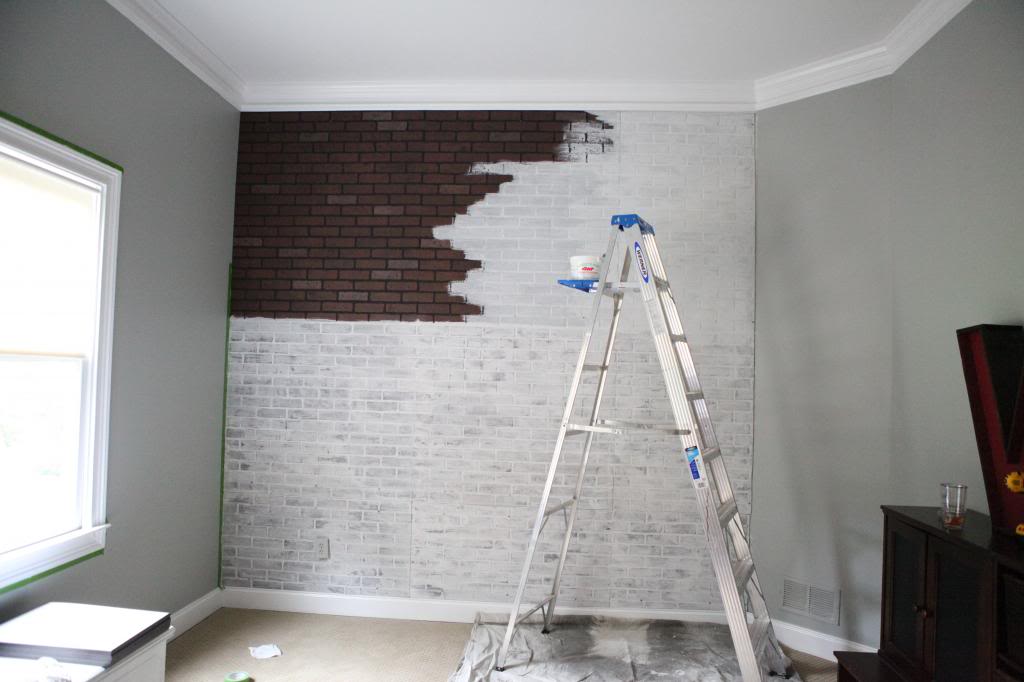
So you do a coat (with humps) and let it dry. Then you do a second thin coat. Also let that dry. I found the easiest method is to do a thee foot section with one coat and then when you go back to do a second coat….continue on and make that second coat be a first coat in the next section. Does that make sense?
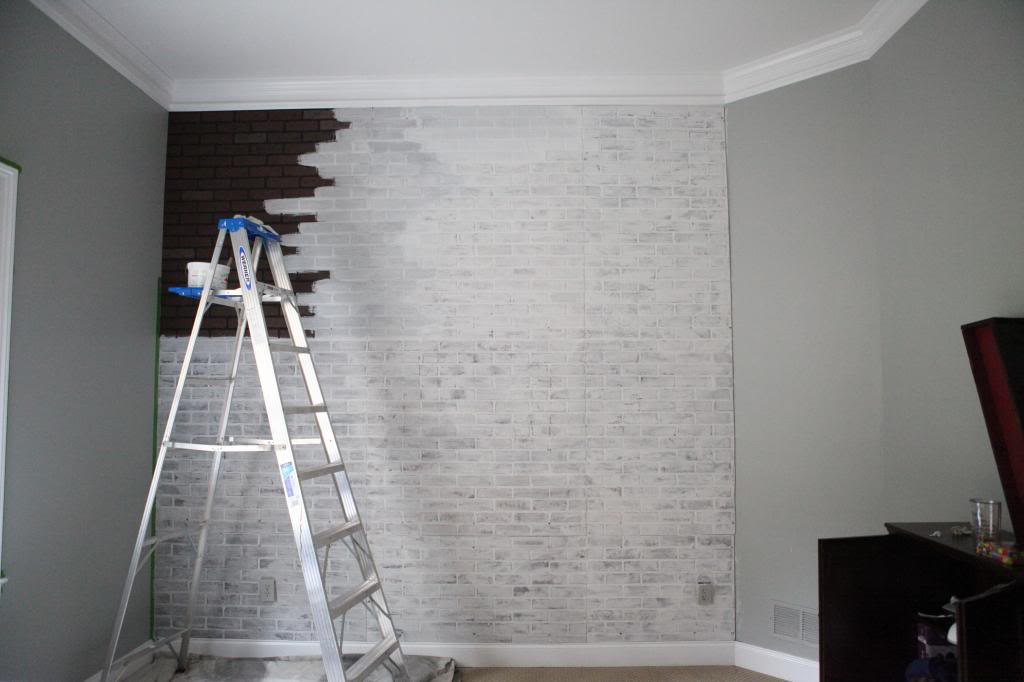
Then when your second coat is dry, take a DAMP rag and wipe down the bricks. It will require some arm power and some rinsing but believe me…the finish is worth it.
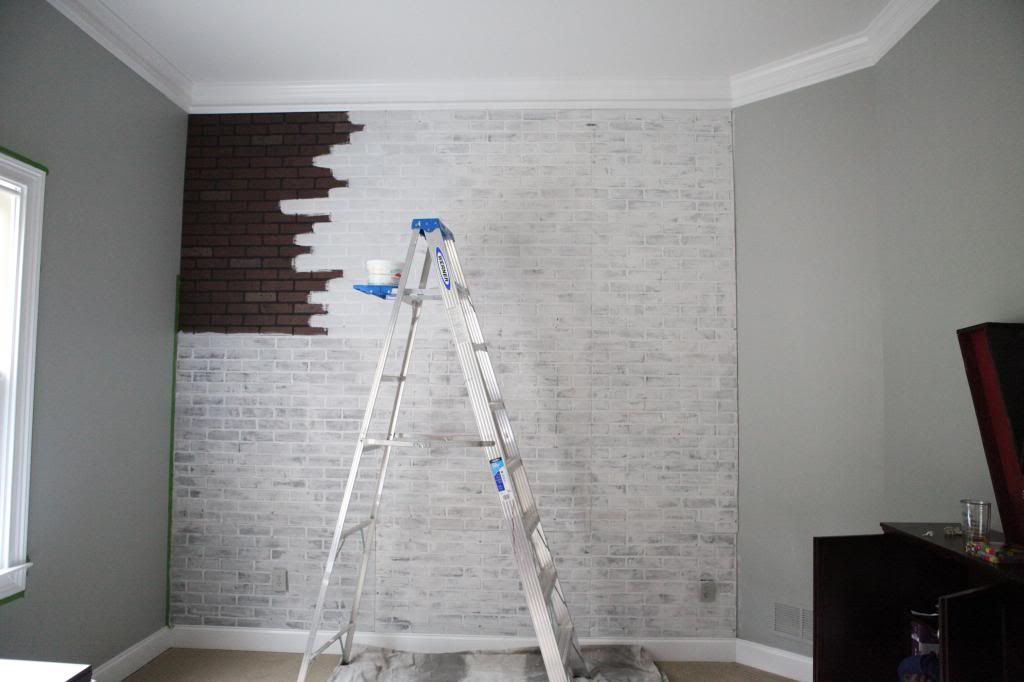
Okay – this is just for a teaching example…
See that top section? The first section on the left is one coat. The second section is two coats…not wiped. And beyond that is two coats wiped.
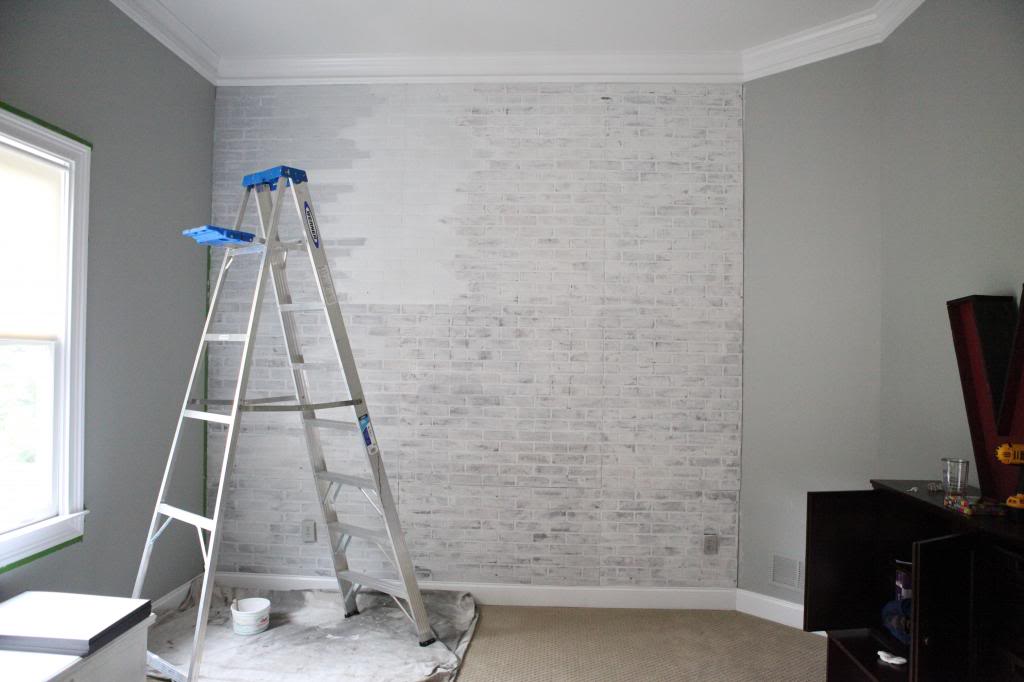
I used a cloth diaper…just one of those ones that doubles as a burp cloth. It had some gnarly stains on it and a tear already so it was the perfect absorbancy.
At certain points I would climb down and look at the whole wall to see how it was varied. If there was an overwhelming white section or gray section, I would either wipe more or add more paint to allow to dry.
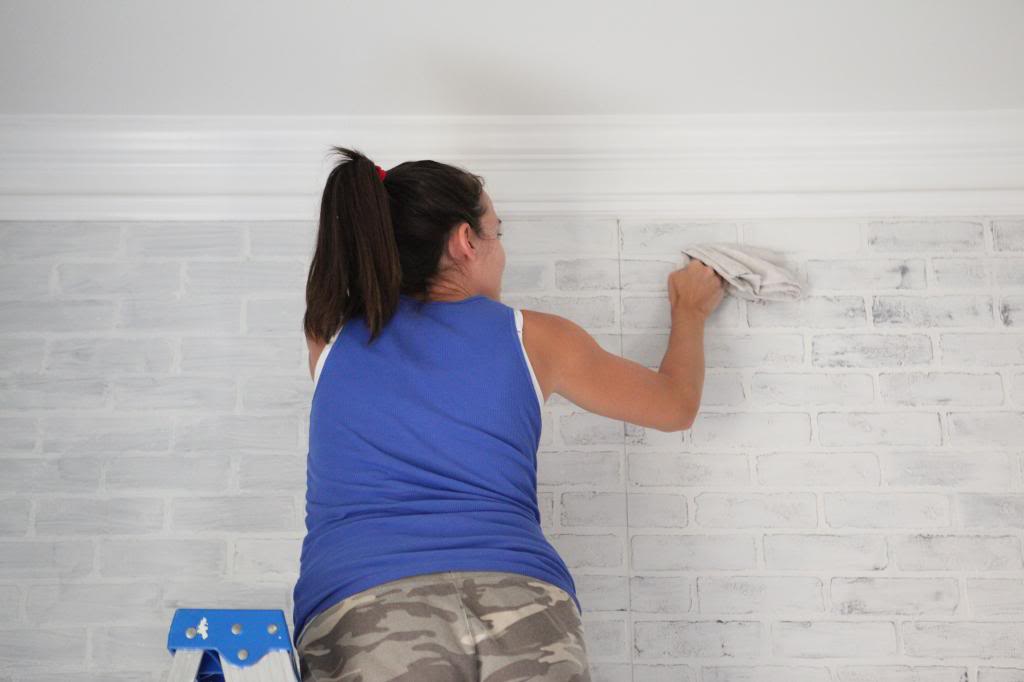
It was exhausting work because the panels are rough and my upper body is weak.
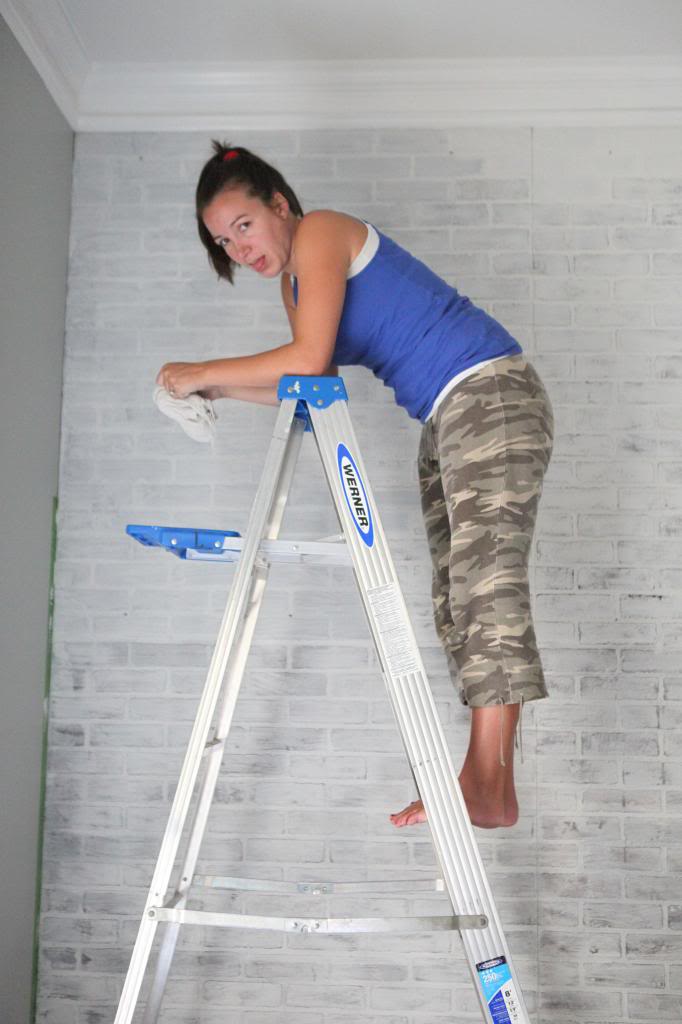
Jeremy said look less like I’m gonna puke and then I said “But that’s how I kinda feel right now”. I mean seriously. This was like working out on a ladder. Not two of my favorite things buddy.
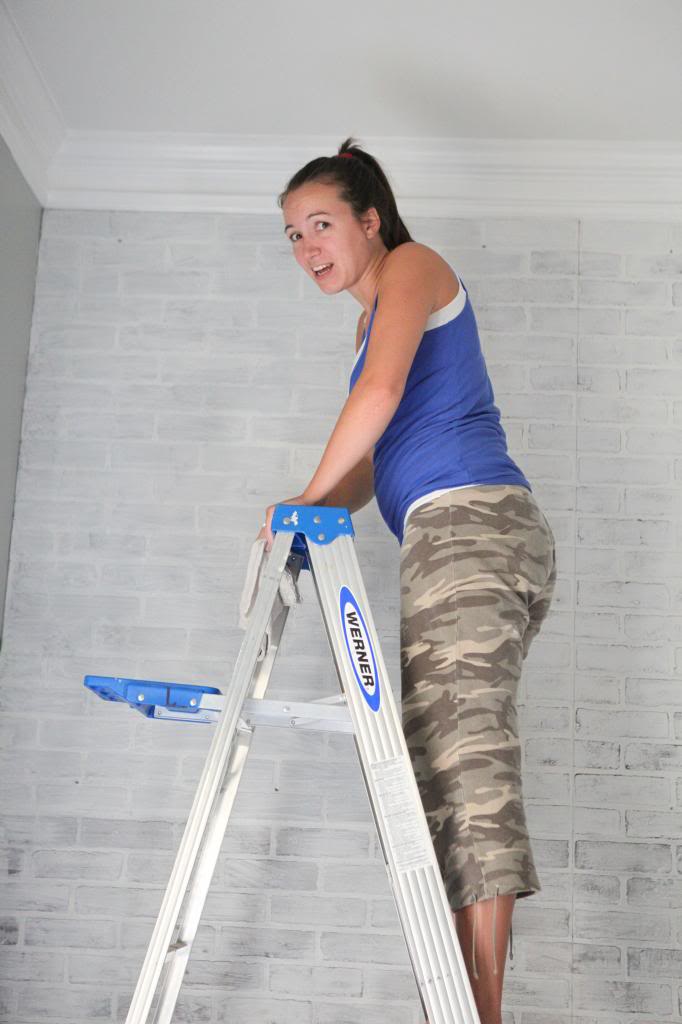
After the paint was all dry, we needed to address the crack situation. That should be the name of a rap song.
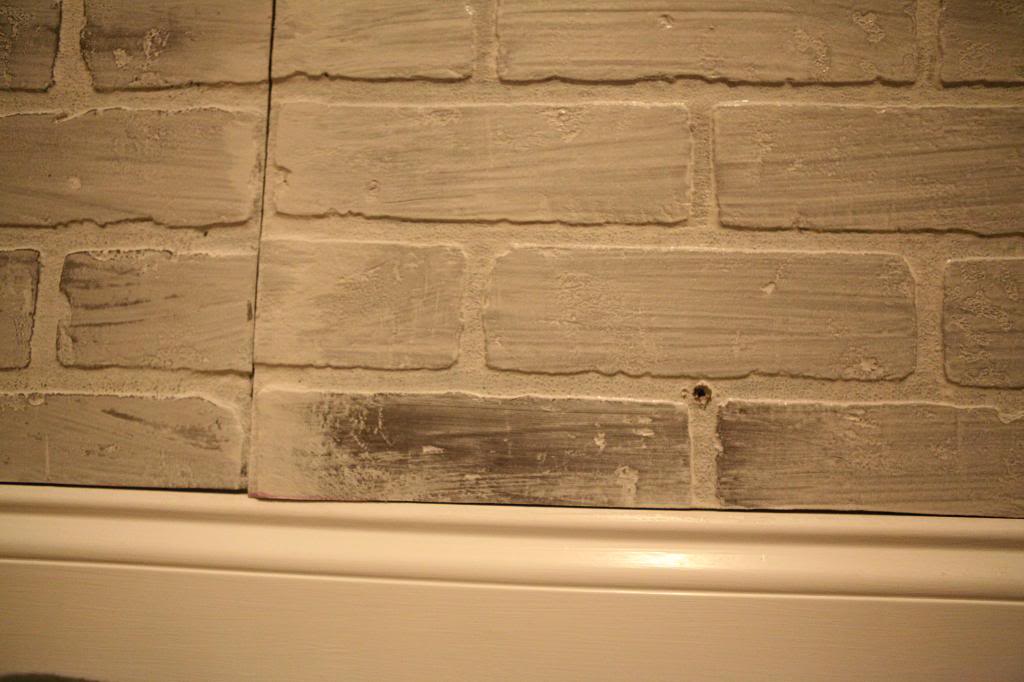
Anyhoo. The cracks between the panels were really obvious. Plus, the white paint made them even more in-your-face. I picked up some regular old white caulk and filled them all and all the screw holes.

You can still see them but they are way less obvious after the caulk. Like they always say Do your best and Caulk the rest!
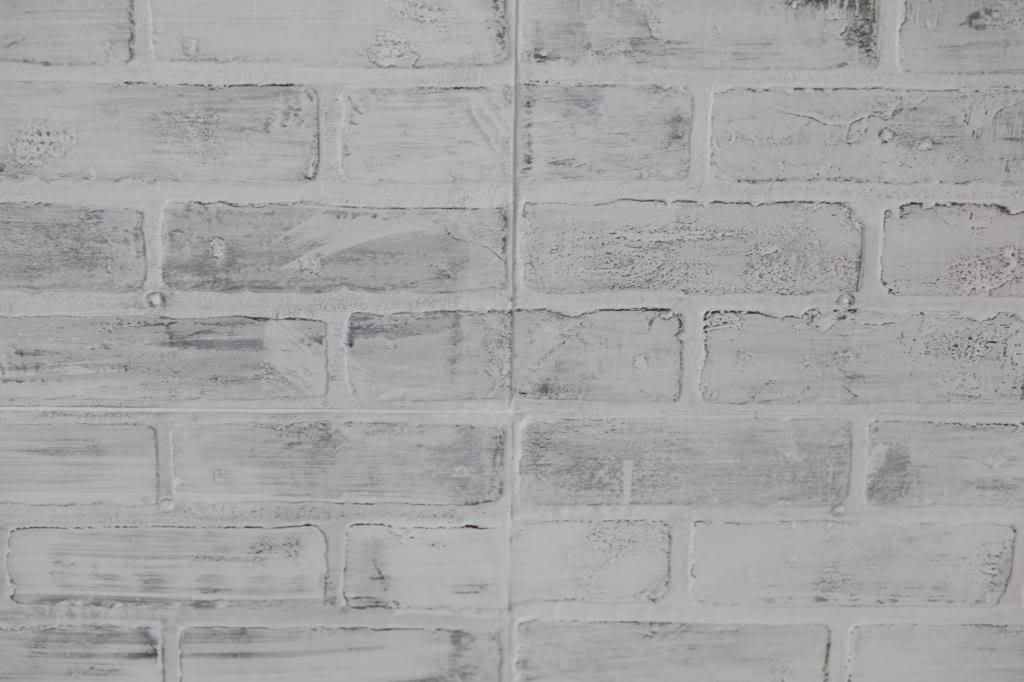
We also added some cheap plastic 1 inch molding on both sides (here is the photo with it on the right side only) to make the edges look perfectly clean. The attachment was easy. A few brads in it and it was good to go. It was around $3 for a 8 foot section but personally I think the ten bucks for both sides was worth it to make it look more clean and finished.

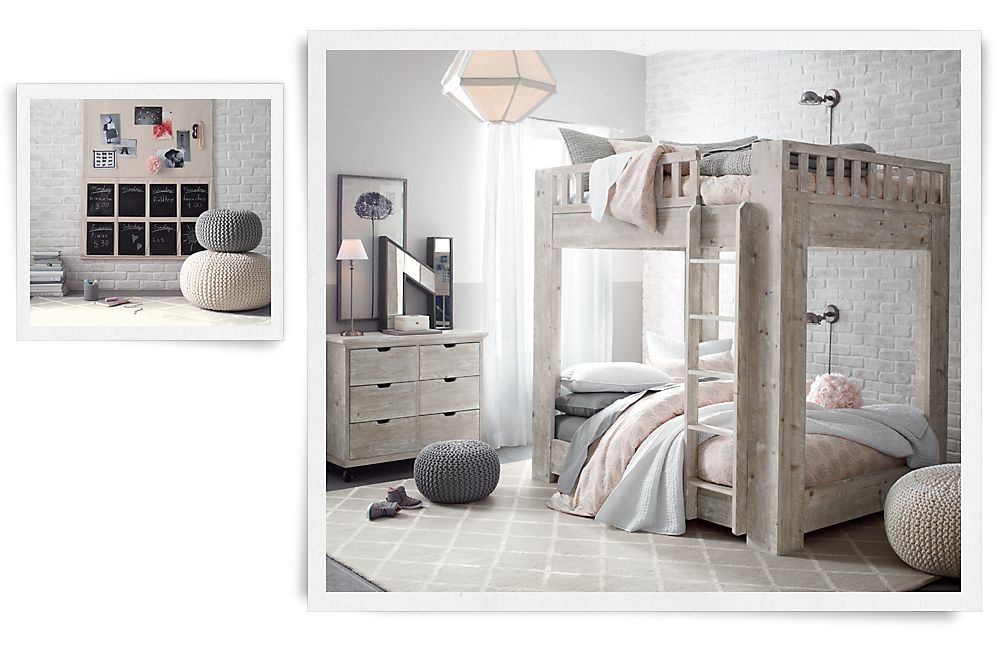
So there you have it folks. A very white washed brick wall. Doesn’t it look like my inspiration photo from Restoration Hardware baby?
I am loving it. Like might actually kick Weston out of here and move in myself kinda love. Seriously people. I don’t mind sleeping in a crib for an accent wall. I’ve done far more for far less.
Next on the docket….a new chair…a new dresser…some curtains….maybe a bit of art?!
Update : Looking for more info on something you see in our house? We have a Shop the Bower House page with paint colors and links to accessories, furniture and decor!

I loooove how it turned out! Definitely wishing we weren’t renters so I could copy that for my daughter’s room.
Wow, that looks fantastic and exactly like the inspiration photo!! Good work! Can’t wait to see the whole room come together now. Are you thinking of having the same sort of white washed furniture like the inspiration photo as well? By the way, I am totally taken with that rattan chair in the last photo. Where did you get it?
Looks great Katie!! Can’t wait to see what’s next!
The bentwood chair is from Goodwill 🙂
And probably not get the same kind of furniture. I am thinking a nice rocker/recliner (because we cheaped out last time and I regret it) and then maybe white furniture. I might change my mind.
xo – kb
It looks fantastic! Well done, I love how much effort you always put into your babies rooms, it’s very special 🙂
That is a gorgeous wall!
I think your wall is even better than the inspiration photo! I love the way you and Jeremy work together. Of all of the bloggers, you two are the real deal and are so genuine and honest and a true inspiration. Well done!
I love it! And, yep, nine months seems to be the magical age when families start sleeping in the shape of an H and having bruised ribs.
I love this. My husband and I recently remodeled a home for our daughter (thats what we do for a living) Her exterior brick was dated and we white washed it. I love this look, and I love how it looks on a interior wall!
That looks so good! I cannot wait to see the room completed.
I love how this turned out! It’s a really great idea. We have these fake bricks in our basement that look awful but I’m afraid to take them down because I don’t know what’s underneath them, but I’m thinking that maybe I should do this with it!
Hi there,
I’m curious as to what the rationale was behind painting the brick after it was mounted on the wall versus painting/white washing first (on the ground) and then mounting and caulking/ finishing it?
Thanks,
Rachel
I’m not generally a fan of white washed brick … but apparently I am a fan of white washed faux brick because I really like the way your accent wall looks! Good job, Katie.
I LOVE this. It is gorgeous and I like the textural element it adds to the room.
I about busted a seam when you talked about the “Hump method” and was totally expecting you to quote some Black Eyed Peas at any second! 😎
Christy @ Creating a Beautiful Life
Wow–looks just like the RH one!
Wow that looks awesome! Now I want to do that on one of our walls… maybe our master bedroom ?!
Your wall looks wonderful. I love that you shared your learning process – wrong turns and all.
Have you read the “You know you have a threenager when…” It’s a good read. Totally can relate!
http://blogs.babycenter.com/mom_stories/you-know-you-have-a-threenager-09232013-when/
I love it! Like, this may even be more of a favorite than the plank wall, and I LOVED the plank wall! So excited to do an accent wall of my own. 🙂 Great job, Katie!
It looks great and I am sure was quite a workout!
I am curious to see what Will’s room looks like now too- is he in a “big boy” bed? It would be great to see pictures of both rooms when you finish Weston’s 🙂
Man that looks great. Thanks for sharing all of your dos and don’ts!
The faux brick wall looks amazing!! bravo!
I love the wall! Can’t wait to see how the rest of the room comes together! First time commentor but long time follower. Question on painting while pregnant. I’m expecting #2 around the same time you are due and we just recently bought a new/old house. My husband could really use some of my help but I wasn’t sure how much I should be around all the paint. (We aren’t living in the house yet – hello living with the in-laws). We have to primer the walls with oil-based because of the previous wallpaper, but after that is done I bought all Zero VOC paint. Any other tips and advice?!?
Love! Love! Love!
Seriously looks amazing!
http://happinessiscreating.com/
Gaaaaaahhhh, you’re up on a ladder! 🙂
The wall looks amazing, just like the inspiration photo. We’re expecting our first in two months and are working on the nursery now — you’re making me want to go back and change everything I already had planned to make an amazing brick accent wall. I’ll try to resist because I don’t think MY “boyfriend” would be too thrilled with undoing all of the work we’ve done so far.
I LOVE this. I am sitting here trying to think of every wall in my house I could faux-brick!
Wow I’m loving it! Are you still using the big red W? I can’t wait to see how it all comes together.
This turned out SO great! I’d love it if you could provide a budget break down of the project!
Looks amazing! Also, how tall are your freaking ceilings?! Wowzers!
It’s looking great!
Just wondering, is that the IKEA Sundvik crib?
Love it! It looks fantastic. I can always count on great ideas from you. Can’t wait to see the finished room.
I’ll admit I was skeptical when I saw the panels before paint (though I love an exposed brick wall), but it looks awesome – and even better than the inspiration! Your kids are adorable, by the way, though you probably already knew that.
This looks so incredible! Sometimes, oddly.. I get more inspiration from RH baby than RH… and I am 22 with zero children. Yikes. Oh well… there’s always the future. Can’t wait to see the final nursery reveal! 🙂
Oh em gee that’s phenomenal!!! I LOVE it! Can I move in? Would that be creepy? Just a little bit? But seriously that turned out soooo well!
Love it!!
Beautiful! How did you transition Weston from co-sleeping to crib?
I won’t lie, I was a little skeptical when you brought out the faux wood paneling in the last post but this seriously looks awesome! Kudos! I can’t wait to see how you style the rest of the space!
Katie, you did an amazing job! It looks fabulous!!
Katie, that looks great! All that effort and re-thinking of the process was totally worth it. I can’t wait to see how it all comes together.
It looks awesome!!
Love it Katie! Can’t wait to see the finished room.
Off topic here but are you going to do any Fall/Halloween decorating posts? I feel like I need a Katie Bower table setting post for Fall. Love those!
Looks amazing – great job! I didn’t even know you could buy those panels, so I kind of have some ideas brewing now!
Oh, Katie, this is so awesome! It is something that can even grow with Weston as he grows. But, if you are like me, you will want to change it up eventually…just because!
Brilliant . You do great work Katie! I must say you look marvelous…..so thin, so stunning…even in your work clothes!!!
When is baby due and when will you find out blue or pink?? Just curious.
Can’t wait for Weston’s final room reveal. Exciting.
B.
Looks GREAT! Maybe one of my favorite projects you have ever done!
You look wonderful too! 🙂
I love it…………….looks so good I might try it myself someday 🙂
I love this! I think this would work perfectly in my boys room also. They are 11 and 12 and want their room to look like a bunker from World War II. Not sure how to pull it off exactly, but this might just be the start I need to figure it all out. I can’t wait to see Weston’s room when you get it done, but I also love to see the progress and how you make each decision. There is something about seeing how other people put a room together that is so inspiring.
Seriously, how do you have the energy to do all of this? I’m amazed. And it looks great…one of the best whitewashed projects I’ve seen.
Oh I’m in love!! With u and the room! 🙂 looks perfect can’t wait to see it finished!
I love the white washed accent wall! All your hard work was well worth it 🙂
Looks great!! I really love the two greys together. Lovely!
It looks very cool! And I love your mantra “do your best and caulk the rest! lol
First of all, this looks ridiculously awesome. Second of all, and I have been SEARCHING for someone in a similar boat, how, oh please tell me how, are you moving him from co-sleeping to his own crib/room? Our daughter is 19 months and still co-sleeping and we have our second baby on the way. I need her out of our bed, into her own crib and into her own room but I can’t figure out a way to do it that won’t be traumatic for everyone involved. Helpppp please?
It looks so great! So brave of you to tackle ladder plus strenuous wiping. 🙂
This seriously looks amazing! I love it- Cant wait to see the end results. Have you thought of an accent color?
Out of curiosity and because I cant remember the layout of your house when baby #3 is older where will he/she go? Are there enough rooms for all or will the W’s share a room? Im just asking because you put so much work into the rooms!!
Hope pregnancy is going well.. I think we are due around the same time (month anyway) Im the end of March and its baby #2.
Ok, I’ll admit, when you first put up the brick I was on the “not loving it” train, and now I’m waiting to board the “loving it” train. Can wait to see where this is all going….
🙂 Justynn
Thanks for the inspiration…now I have to figure out what wall in MY house I want to do!! It really looks great!
Y’all have TALL ceilings!! I seriously love this, his room is going to be one sweet nursery!
I LOVE this! Now I want to do it in our house…but I rent, darn! Seriously this looks amazing. Also, I usually think Will looks more like your boyfriend but in the pictures of you on the ladder, you can see Will looks a lot like you, too! Cuties 🙂
It’s SO fantastic. I must faux brick white wash something!!! (says the girl with a painted brick house, painted brick fireplace surround, and painted brick exposed chimney. hmmm……)
Love it! It’s looks so great 🙂
Funny thing, while I was reading the post I saw chalk instead of caulk and kept thinking how did they use chalk? No instruction on that- I then went back to reread that section- oh caulk that actually would work haha
I shall take your idea for my own room.
It will be awesome.
I will hear cheering from friends and family and peeping neighbors.
You did a great job. I wasn’t sure it was a look I would care for it after reading install post, but love it with the white paint and gray walls.
OH MAN that looks great! I’m loving that. A lot. I’m trying think where I could use this in my house.
I’ve never really liked the painted brick look but I freaking love this. Looks awesome!
Okay, I’ll admit that I was totally skeptical that this would look good. 😉
But it turned out really well and adds so much texture and depth to the room. I’m a really surprised, not just pleasantly surprised. It’s like when I went to “The Avengers” movie with my DH thinking it will suck and then walk out not being able to stop thinking that being a super hero would be so fun. Plus, you have really tall ceilings – jealous.
haha! I will be cheering you on too!
xo – kb
We went cold turkey. I had an appointment with his pediatrician (I thought he had an ear infection…nope…just discovered the hole!) and asked if he was ok to go to his own bed and he said to go for it. He said that it’s different for everyone but the fact is, if we aren’t sleeping…it’s most likely because he is not sleeping and sleep is critical for development. We always made sure they had their comfort items and we always put them down in their bed for naps and bedtime. If they still end up in your room, try to make it less and less time 🙂
xo – kb
I love this. I wanted to do this in my basement. I showed my husband eagerly anticipating his enthusiastic “yes!”. He gave me a “no.” Sad Karly.
Well, I am thinking red since that is what color his giant W is. But I’m up for anything 🙂
And baby number three will stay with us in our room probably the first nine months or so…at that point we have to see where we are with sleeping arrangements (is Will in a twin? has Weston transitioned to a toddler bed or a twin? are the boys gonna want to share? does baby love have any special needs?) It’s all still up in the air.
xo – kb
In March and I hope to find out soon!
xo – kb
YUP!
Can’t wait!
xo – kb
He’s in his crib but it is converted to a toddler bed…so yes and no.
xo – kb
off to read it!
xo – kb
We had never installed it before and we were unsre of what it would entail…so we wanted to make sure that it was installed properly first before painting.
xo – kb
I’m not sure…I borrowed it from a friend.
xo – kb
Looking good! The caulk really made all the difference-those cracks disappeared. I like the whole look and can’t wait to see how it comes together.
12 foot in there! I know! Really tall.
xo – kb
4 panels @ $22.97
3 trim pieces @ $2.97
TOTAL = $101
Everything else we already had…but I imagine that it could tack on another $50 if you didn’t have paint or brushes or a ladder.
xo – kb
Probably 🙂
xo – kb
If you still feel like you need added protection, there are some great options out there for masks and you can always open windows, doors and add fans for needed ventilation. Hope this helps!
xo – kb
He has always been in our room with the same fan and the same noise machine and his comfort items…so when we put him down for the night, I would do the same routine and then lay him in his pack n play (which was kept beside our bed) and if he woke in the middle of the night to nurse, we would just keep him in the big bed. So when we started the transition, everything was the same but in his own room…and then if he woke up, we would go comfort him but lay him back down in his own bed.
Hope this helps!
xo – kb
Kyle,
We also went completely cold turkey and if our son had a hard time staying in his bed we would comfort him and explain why he needed to stay in the bed. We also made it fun for him, he picked out new sheets, his very OWN pillow and a new teddy bear. We went to Target and got that stuff there so we didnt spend a fortune. I feel like making it a fun, exciting thing helps with any fear they may have.
I hope this helps!
X Melissa Ricci
agreed!! my favorite kind of posts! you rock mama!
It looks awesome! And awesome for you while doing that (all the way up to those high ceilings) with your 2 little kiddos and feeling sick!
Love it! I have been on a white and light color binge while setting out nursery for our little one arriving later this year. When I couldn’t find a white recliner that I like and found a beige one instead, my hubby refuses to give me any opinion on it. He said “I’m afriad you’ll try to get me to paint that recliner white too”. Haha… But anyway, I love your style! It’s really lovely what you are doing for Weston’s room. 🙂
You can buy whitewashed brick panels, though it probably is a lot cheaper to diy if you don’t have a store that sells them locally.
This looks awesome!
Katie, you did an awesome job and I LOVE how it turned out. I was surprised to see you up on the latter with your fear of heights and all. Totally, worth it! I can’t wait to see how the room turns out.
I remember from a previous post that Weston’s walls are 15 feet high. Do you find it hard to decorate with such high ceilings? There is so much wall space above his crib. I wish I had that problem in my own house :)!
loooooooooooooooooove.
They are 12 I believe. Although I could be wrong. And yes…it is hard to decorate in such big spaces because it makes all normal furniture look miniscule.
xo – kb
Good recommendation!
xo – kb
Looks awesome! I know the pain of whitewashing on a ladder…completed the replace in our vaulted family room and man that was a workout.
Can’t wait to see more.
my daughter had sleep apnea for the first 4 years of her life until she had surgery, I was a nervous nelly so I was wishy-washy about letting her sleep with us. After her surgery, we went cold-turkey and put her in her room. It was up and down for a few weeks, but eventually she slept in her room. Obviously by that time she was much older and understood.
This looks awesome! I did a similar project last year on my fireplace….it totally transformed it!
http://www.wifeinprogressblog.com/white-washed-fireplace/
Jenna @ Wife in Progress
I’m not gonna lie… I was skeptical when I saw the panels. I’m new to this DIY stuff so I don’t have a skill for envisioning what something will look like, but I now want to faux panel everything in my house! It’s gorgeous!! I’m working on our 5 month old’s nursery, and I may have to copy this. Imitation’s the sincerest form of flattery (and lack of my own vision, but whatever) 😉
It looks great! And I am really impressed with what a great tutorial you wrote.
Loving it!!
Love it! Awesome! You nailed! Want to come over and tackle a feature wall in our place? Secondly, careful on that ladder momma! Total time taken to complete?? I’m excited to see the room when you’ve worked your magic!
Well, I had to spread it out across a few days just simply because life happened…so I would estimate probably seven hours of actual painting and rubbing? And then another hour or so to fill all the holes and cracks.
xo – kb
Is this a hint!? I feel like this means its a girl!!!
I don’t know! I wish I did! I have a gut feeling it’s a girl…but who knows?!
xo – kb
I love this!!! Great job, KB! 🙂
This looks AMAZING!!! Pinning and hoping for a chance to use this idea one day 🙂
Wow, I am loving it too! Looks identical to your inspiration pic. Way to go!
I found that lying in the bed with them, reading a story, singing a song and praying (or whatever routine you prefer, but be consistent) made the transition easier. When you decide to do it, you have to be serious and committed! Kids don’t understand the back and forth. Good luck!
wow! Looks GREAT! I am 8 months pregnant and still not sure my plan for the whole sleeping thing. I feel confidant that I can make the right decision for my baby and myself but it seems like everyone has such a strong opinion on this issue! C0-sleeping sounds great to me:) If only the hubby agreed.
I like the rhyme “your best and the rest”. Your hard work inspires a lot and seems you should start designing baby-rooms, no really. No jokes here 😉 You are creative and nice lady. But I have one question that disturbs me a lot. Do we actually need semi-gloss paint or we can use any other? Thanks. Take care.
Look into Mythic paint. It isn’t cheap but non-toxic. If local stores don’t carry it, they ship for free.
I love this accent wall! I have a brick fireplace and a brick wall in my kitchen that I would love to whitewash, but I don’t think I’m brave enough. Maybe I’ll just print a picture of this wall and see if taping it up has the same effect : )
My first thought was this: “A random brick wall? Really????” and then when I saw the pic of it white-washed with the crib, I thought this: “I LOVE IT!”
I think you did a great job recreating a look from a magazine/catalog. Can’t wait to see how you pull the whole room together!
I think you probably could use any other. I used semi-gloss because it’s what I had and I chose it over flat because I figured it’s more wipeable 🙂
xo – kb
Why not just tell everyone that they’re Frye Harness 12R boots instead of linking to boots that are no where near similar?
Because they are from Target?
Wanna come over and look?
xo – kb
p.s. here is the old blog post where I was inspired to purchase them!
Just love it Katie! We already painted one fireplace last year, but not white washed, we’re trying to keep semi-true to the house’s mid-century details and as much as I love the white wash, I had to go full white. Our brick is that super skinny elongated kind that just looks too modern for white wash…However would love to know your opinion on gray with a white mantle? (We actually have two fireplaces, one is still that awful deep red with amber wood built-ins)
This looks great! I like how the brick is mostly painted, instead of just a light wash of white, it is a really nice focal point in the room.
Steph
I totally think that could work! I just always warn people about gray and how it can really cool down a room unknowingly…so make sure you add back warmer elements to soften the overall feel of the room 🙂
xo – kb
Thanks Katie! I will definitely keep that in mind. Also I think I’ll have to mock up some pics to show the husband before he’s on board…Or just open up a bottle of wine before the discussion;-)
Wow I LOVE that accent wall, I’m usually not a fan of accent walls but this is fantastic! From a distance it looks like marble subway tile. I love how your wall is a variation of gray and white vs the all white in your inspiration photo. I don’t blame you for wanting to move into his room 😉
Hi. We did the Supper Nanny thing with both kids … One kid just recently.
The first nights are not easy (new sheets or a glow-worm might help).
Nite 1: worst night ever (1-1.5 hrs of crying). You sit near the door, do not look @ your kid (iPod or phone was ok to keep & play with). They fall asleep. If they wake in middle of the night, comfort & put back in bed. Crawl out quietly & cheer.
Nite 2: better! 45 mins tops. Kids are smart 😉
Nite 3: 15-20 min
Nite 3 and beyond … Gets better & better!
(I did naps the same). Both my kids (ages 2.5 and 1) practically jump in bed. They sleep 10hrs & nap 2-3 hrs in afternoon. A nice nighttime routine, nightlight, sound machine & excitement about ‘our’ baby coming all helps! Good luck Hun! You’ll get thru it!
Love it! Just got home from Lowes with the faux brick panels. How much water did you add to your paint? I’m afraid to add too much and ruin my gallon of paint. Thanks!
I did about two parts paint to one part water.
xo – kb
I absolutist love the way your wall turned out! I am debating between this and a rustic wood accent wall for my living room. I think I’m going to go with this! It looks amazing. Well done!
Do you think I do this with cream? Maybe achieve a cream city brick look? My carpets and walls are more creamy beige and I can’t get away with the bright white/grey But I really want to try this.
Absolutely! People have been painting brick for years and there is every color under the sun!
xo – kb
pretty, pretty! *GREAT* tips re: painting & caulk for uniformity! I’ve been eyeing RUSTIC BRICK FLOORS & man I wish this would be a good solution for my UGLY ’80s tiled entry. The only thing I read online was e-how & they said yes you can put veneer brick wall panels down….but it won’t be resilient or hold up to water. But sheesh for the price? My tile store has something called ‘brick-a-floor’ & it’s 6.99 sq.ft! & we’ve gotta 60+ sq.ft. in our entry! it’d mostly be covered w/ a pretty gray runner…. hmm. I’ve been scouring the web for tutorials & yours by far turned out the best. 🙂
Hi I was wondering how much water you put in your white paint? Thank you!!
Nvm I just saw someone else asked the same thing. Thanks
It probably ended up being a 50/50 mix.
xo – kb
i love how this turned out. painting fireplaces is a great look
This looks INCREDIBLE. I am going to attempt the same thing, but I wanted to know— would it be a bad idea to paint the brick panels before installing them? I would rather paint a panel on the floor and then install it, since I think my upper arm strength would not be enough to complete the project otherwise! Thanks in advance 🙂
I don’t think it would be bad – you would definitely need to do touch ups later but that would be a lot easier 🙂
xo – kb
Hello,
what did you put on the exposed edge, just some molding?
Yup! Just some regular ole molding tacked in place!
xo – kb
So than would you think it would be okay to paint panel first than install when done (knowing that I will have to touch up cracks/ holes after hung). Also did you also liquid nails the panel as well as bolt down. I installed paneling in my living room 6 yrs ago for an accent wall and both glued and added brads but after 6 yrs the paneling has pulled off wall in spots leaving a big gap!
thanks
Tara
As long as you are screwing the panels into studs with long enough screws, you should never need the liquid nails. I would NOT use brad nails…but heavy duty screws that are 2″. After you have them up, yes you will have touchups but it should be good to go 🙂
xo – kb