Last we chatted, I showed ya’ll how I bought a Goodwill chair and started a transformation for our upstairs landing. It started off looking like this:
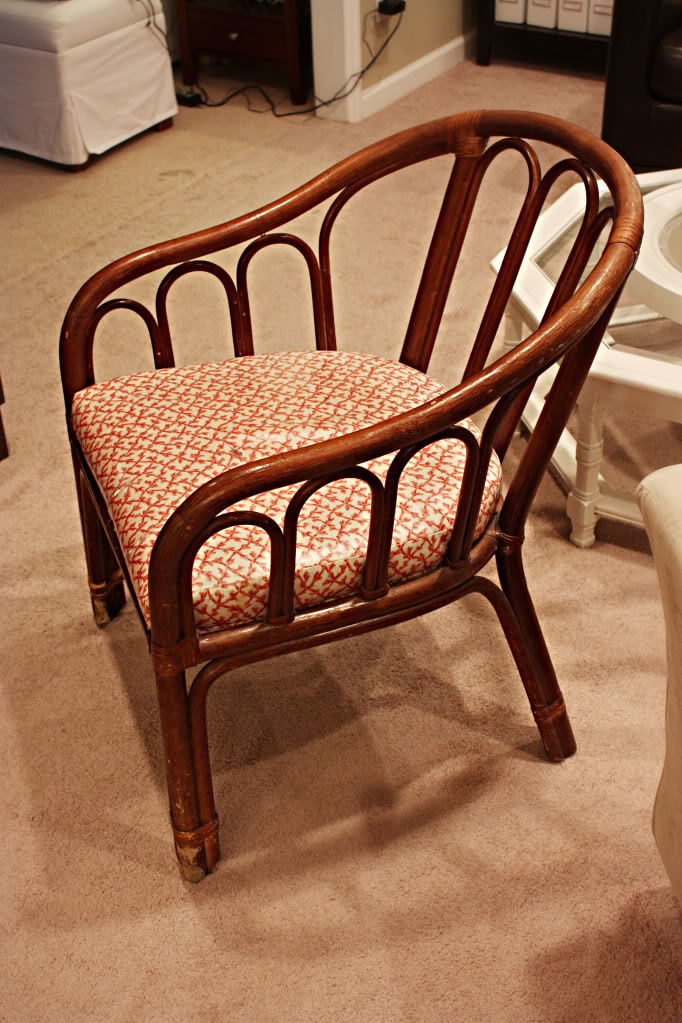
I removed the seat and cleaned and restained the entire thing to breathe a little new life into the casual style frame.
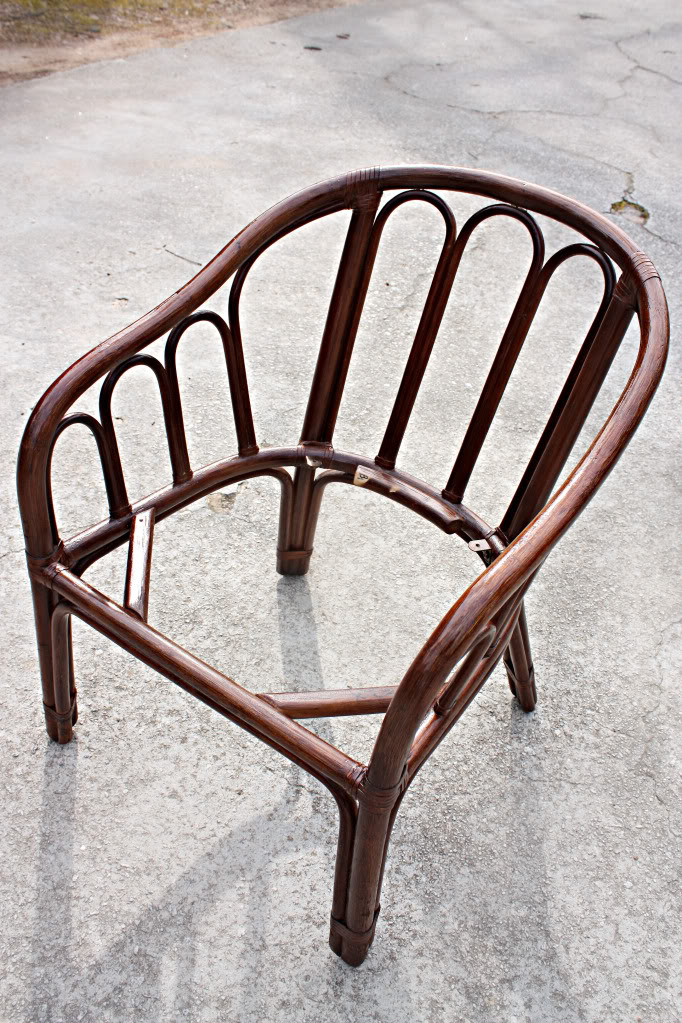
So that’s where we left things. And now I am back with another post on how we finished off the seat.
First thing you must know is that this illustration is the best way to learn how to upholster entire chairs. WHY? Because this simple seat is the most basic format of all upholstery. It has a frame, padding, upholstery which required some sewing, and trimwork. Figuring out how to recreate this chair cover but with a different fabric can be your first lesson in reupholstering. Sure – you may have tackled a chair that requires no sewing (a simple “staple and go” kinda seat – just like on this chair) …but this puppy? This is the next building block in reupholstery techniques. Conquer this and you can learn how to redo almost anything.
Secondly – I want this chair to be neutral and simple. I am warning you guys that this seat redo is meant to be monochromatic and somewhat boring. The existing vinyl was pretty punchy with it’s red choral design but the new fabric is supposed to be more flexible than a Cirque du Soleil dancer. Shocking. I know 🙂
Let’s get started, shall we?
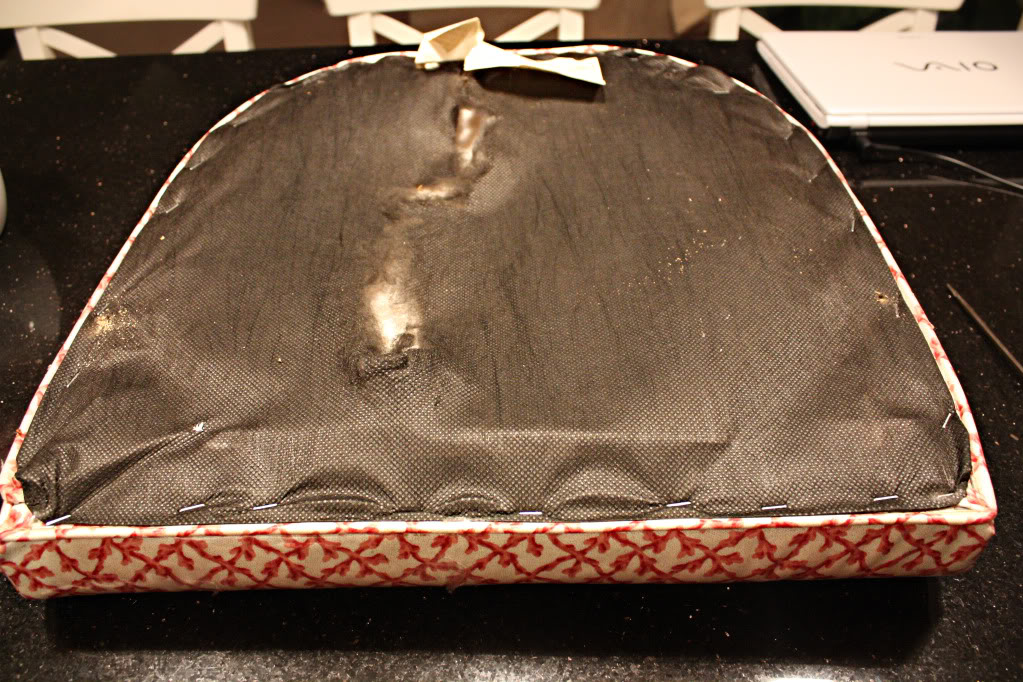
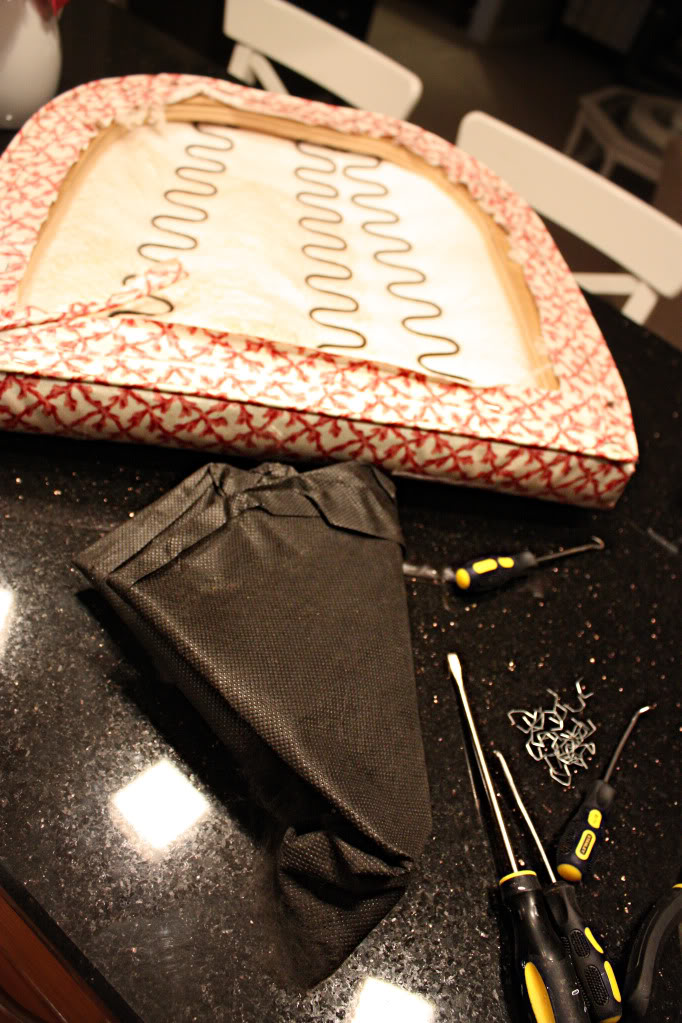
Most seats that have been reupholstered have been finished with a sheet of black thin polyester fabric. It’ll be the first thing you remove when redoing a chair (and the last thing you want to apply after reupholstering). Usually the staples are exposed and easy to pry out.
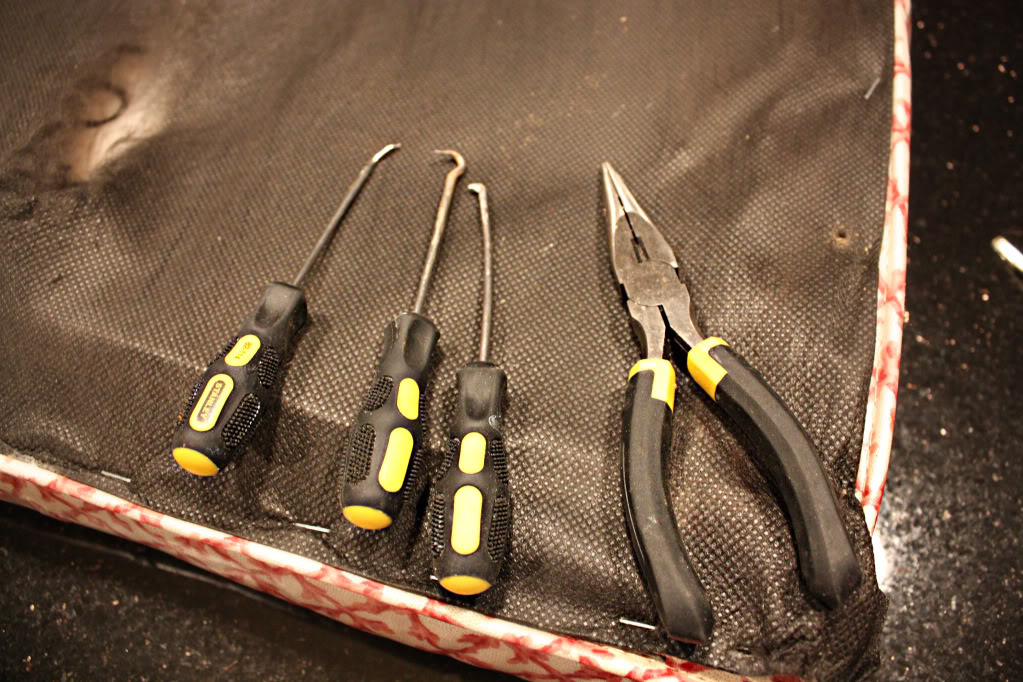
Speaking of prying out staples, arm yourself with the right tools. I use a set from Stanley that includes a hook, and a little crookedly spear thing. Another great thing to put in your upholstery toolbelt is a pair of needlenose plyers. Ok. You are ready.
After you pry out all the staples holding in the black fabric, bribe your boyfriend to give you a hand massage.
I’m not kidding. It’s only gonna get worse.
Now…time to note that the #2 item you remove (hence the second to last thing you ADD when applying your new cover) is the trimwork. In this case, the trimwork was pipe cord covered with the matching fabric.
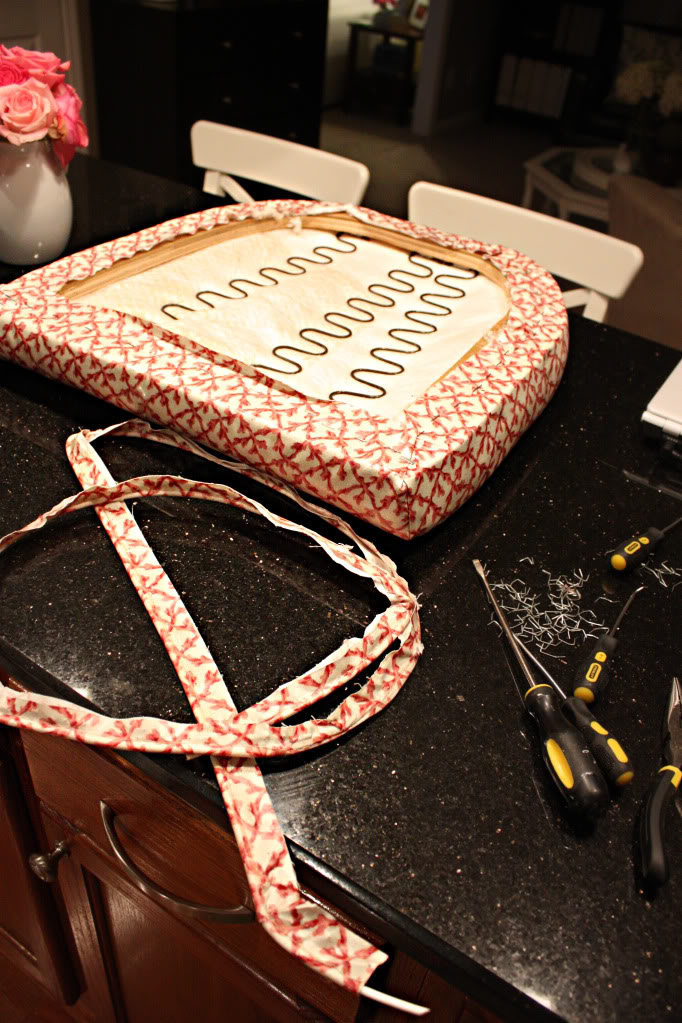
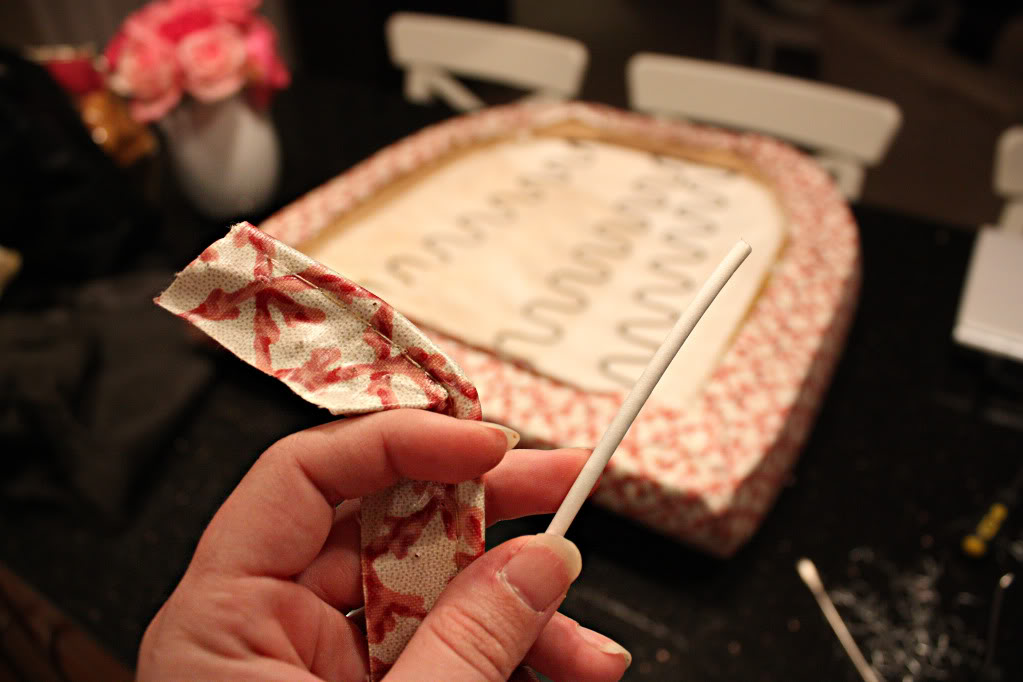
Typically I recycle the internal cording. It’s cheap to buy but I have found that this method creates less waste and is cheaper (and you know how frugal I am!). All you need to do is remove the cording from the fabric and cut a piece of your new fabric that is about two inches wide and as long as your cording. If you are picky then cut the fabric on the bias. Then sandwich your new fabric around your cord and use your sewing machine (with a zipper foot) to sew closely to the pipe cord.
Now comes the last item to remove from your seat – the main cover. Remove the staples and peel back from the rest of the seat.
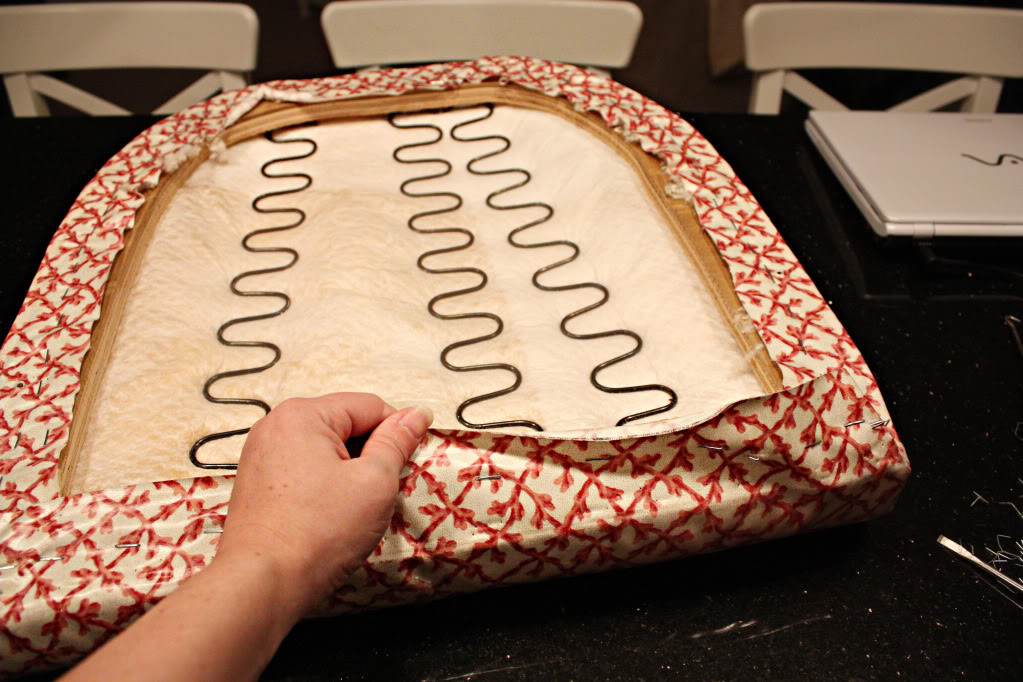
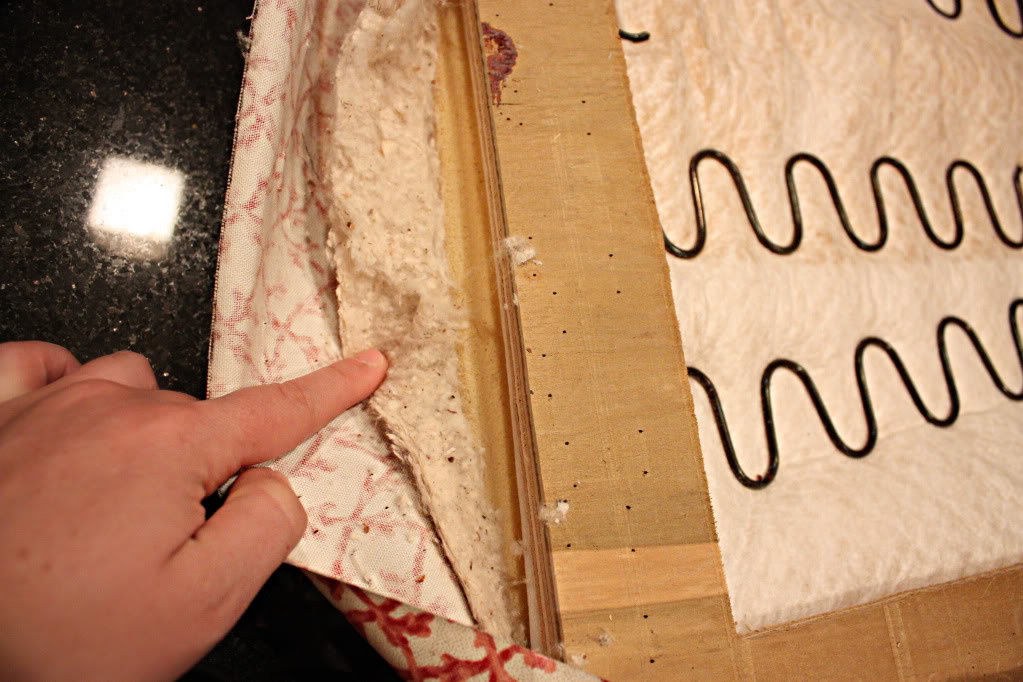
Here’s a peak into the innerds of my seat. As I mentioned earlier, the seat has a frame (the wood), then cushioning of some sort, and then the cover. Each internal makeup of a seat can be a little different so be aware that you might have to replace the innerds if it has mildew or a smell that resembles sumo wrestlers armpit. yum.
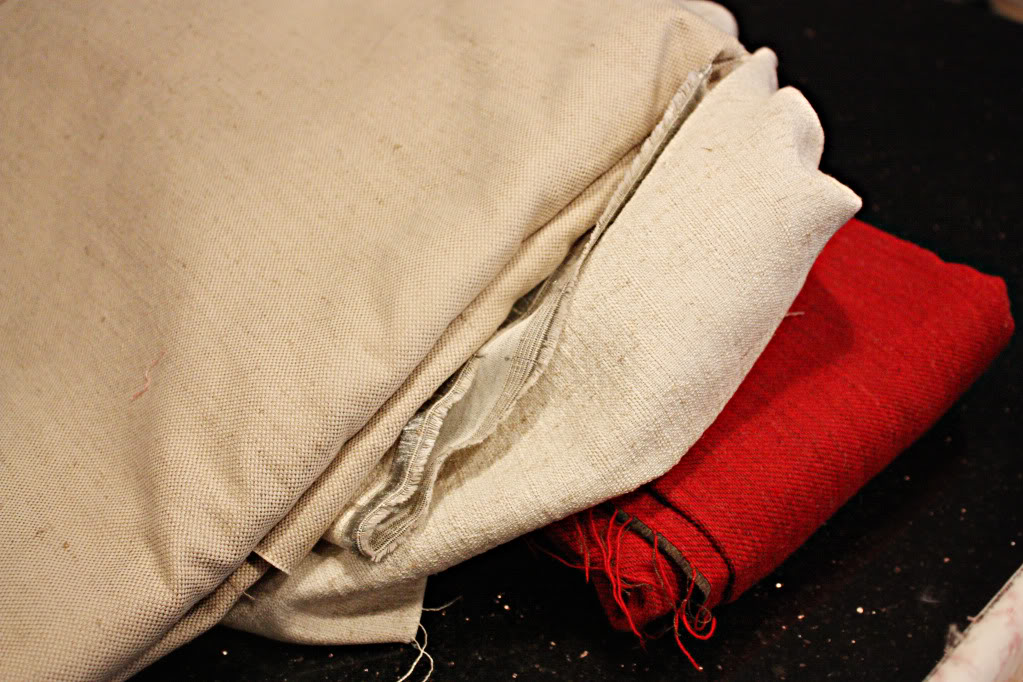
Since my cushioning looked (and smelled) ok, I was able to move on to picking fabric for my new cover. I had several on hand but in the end decided to go with a twill in tan (the far left fabric below). It looked like it would hold up well to little fingers and was warm hued enough to keep the finish of the chair in check.
Then I simply looked over the previous cover. It was created from two pieces…one main cushion cover and one long skinny piece that was sewn directly to the other to cover the cushion’s forward-facing vertical sides.
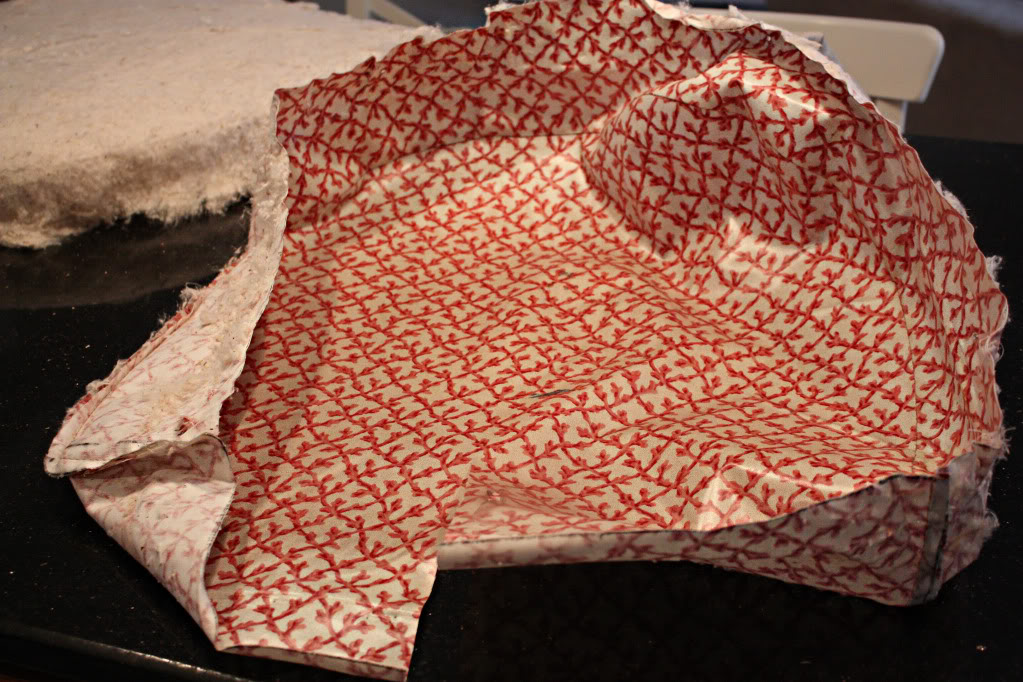
It was easy to separate the two pieces by ripping the seam.
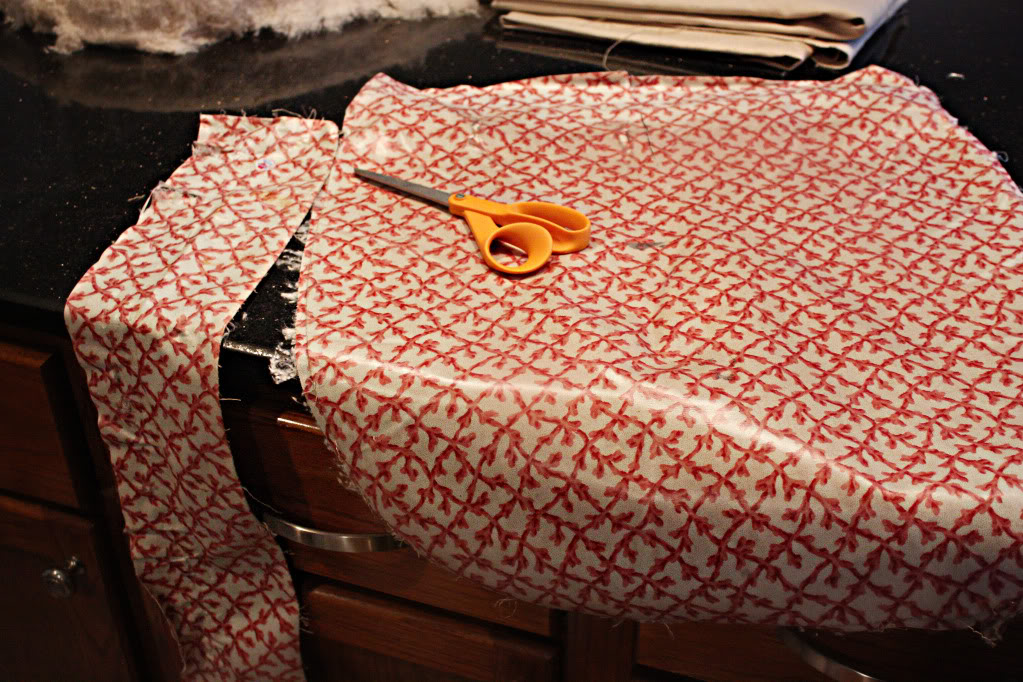
And it was really easy to cut similar sized pieces for all three upholstery parts (the main cover, the side cover, and the cording) by using the existing upholstery as a pattern. I made sure to leave a large seam allowance too because of my inept sewing skills. I soon covered the pipe cord with the long strip of tan. Then I attached the side cover to the main cover.
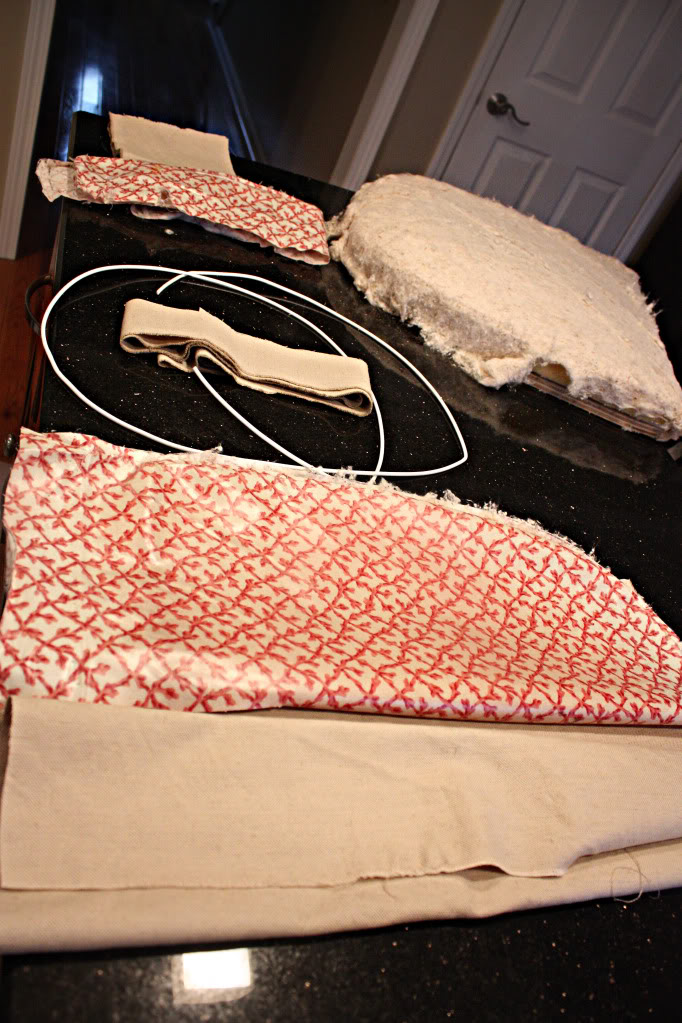
A little ironing later, I was ready to attach the new fabric to the seat.
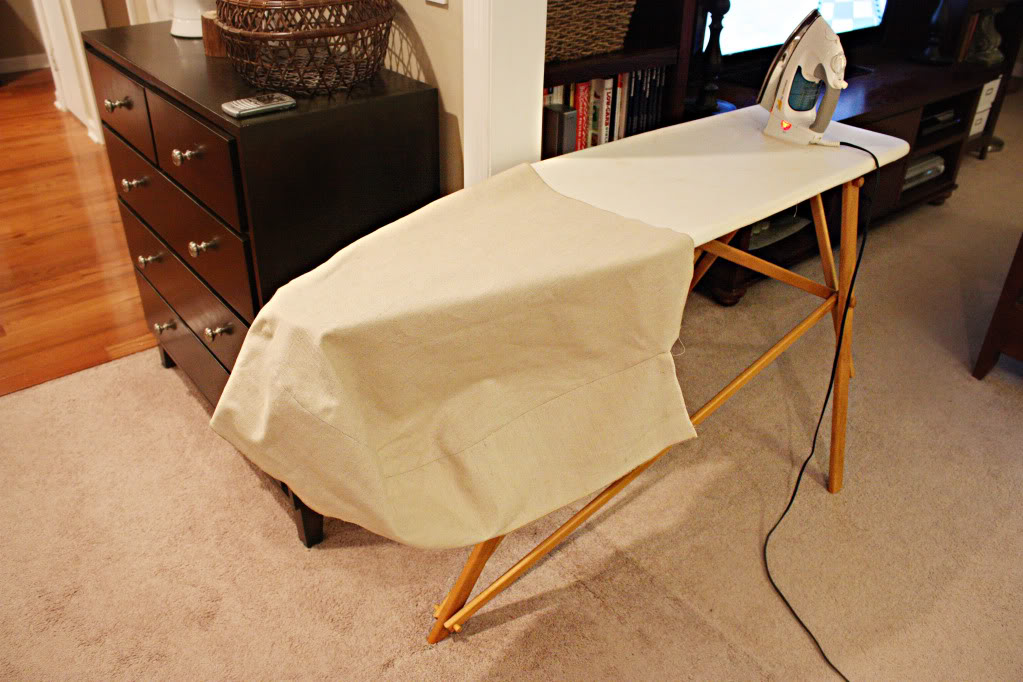
It’s as simple as laying the new fabric on the cushion,
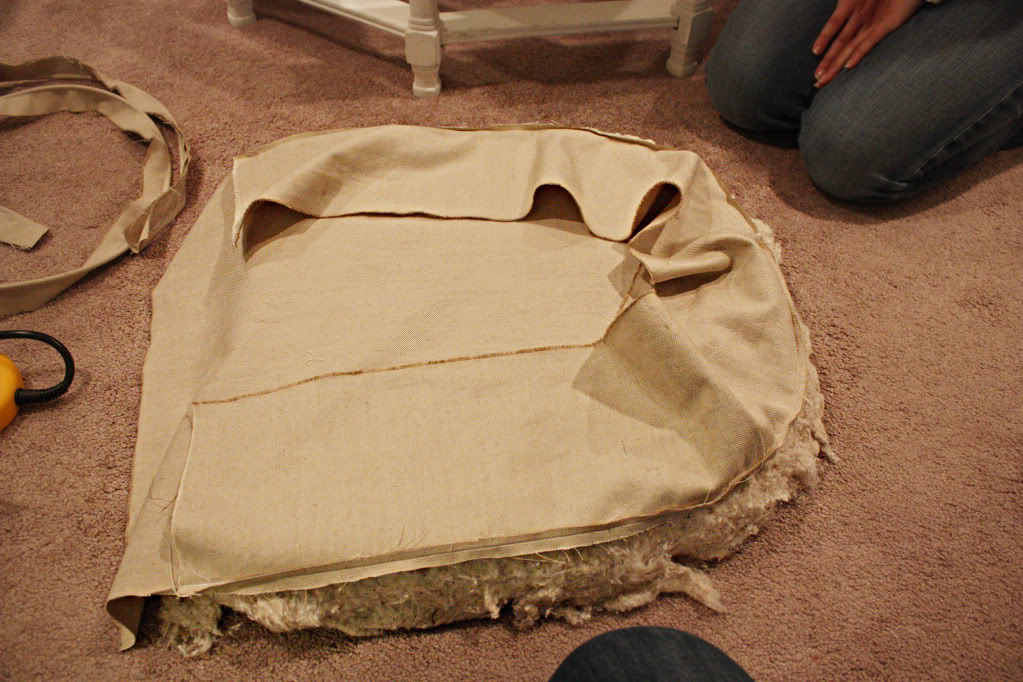
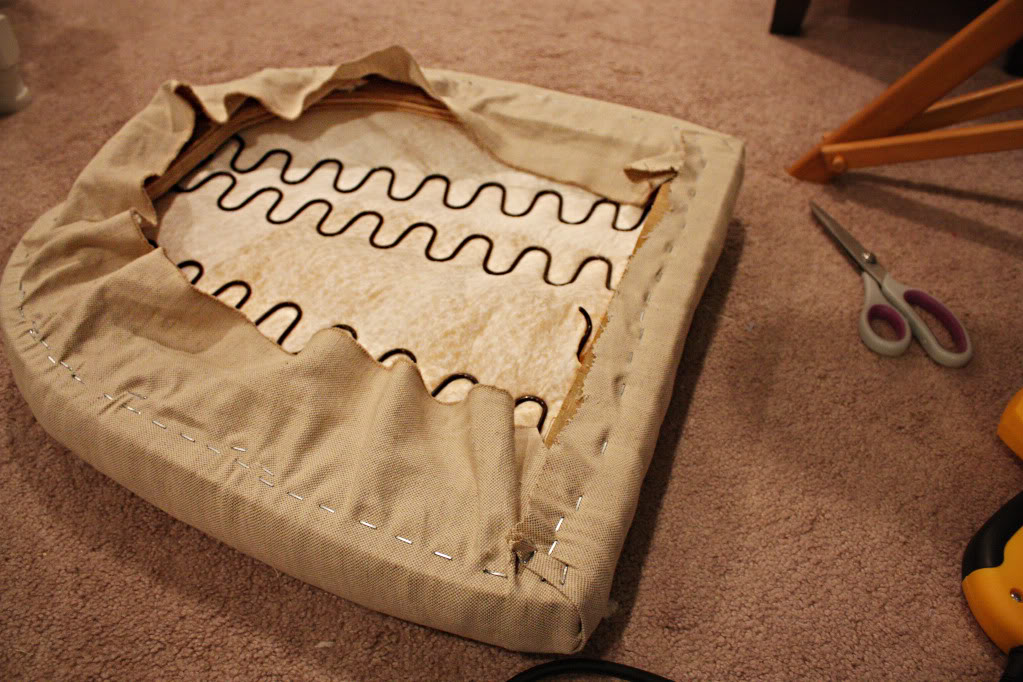
and then turning the cushion over and using a staple gun to attach the fabric to the frame. It’s very important to keep the fabric taunt so that the other side is smooth.
I also used the staple gun to reattach the trimwork so that the cording was exactly the same as before. Then I screwed the seat back to the chair frame and moved it upstairs.
While I was at it, I also switched out the side table for a shorter one that was a better scale and added a lamp and a few framed pieces to finish off the more casual landing. The white frames are from Ikea and the art was a gift from my buddies over at YHL. Thanks Sher-bear 🙂 (And if you guys wanna get this same art for your own home, check out this site!)
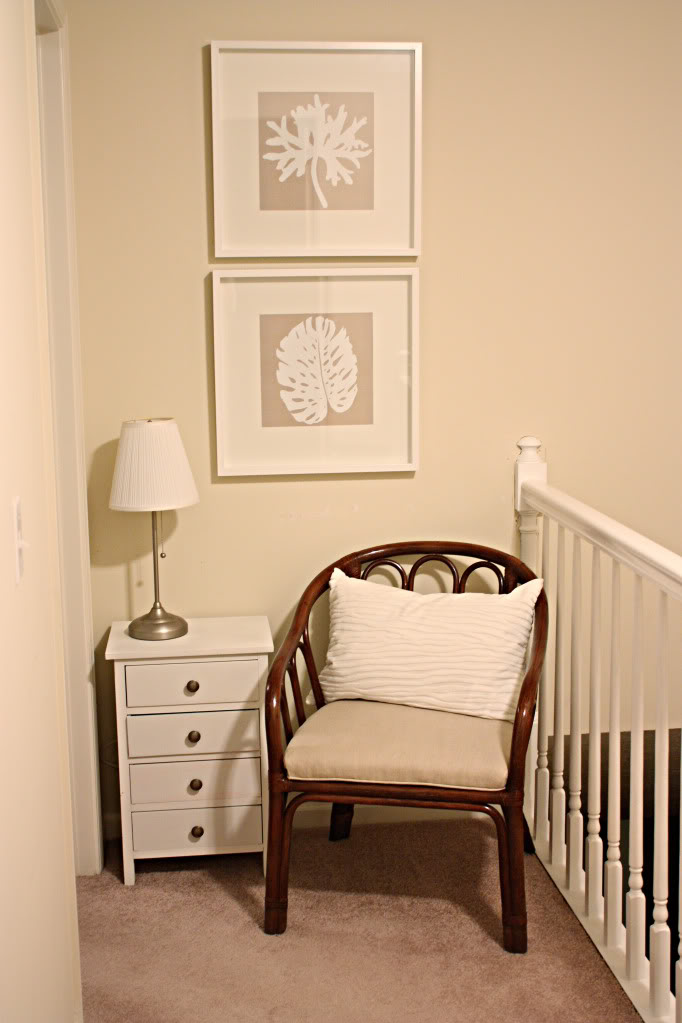
So there it is…a new little landing fit for our laid-back lifestyle. Quite a difference from before, huh?
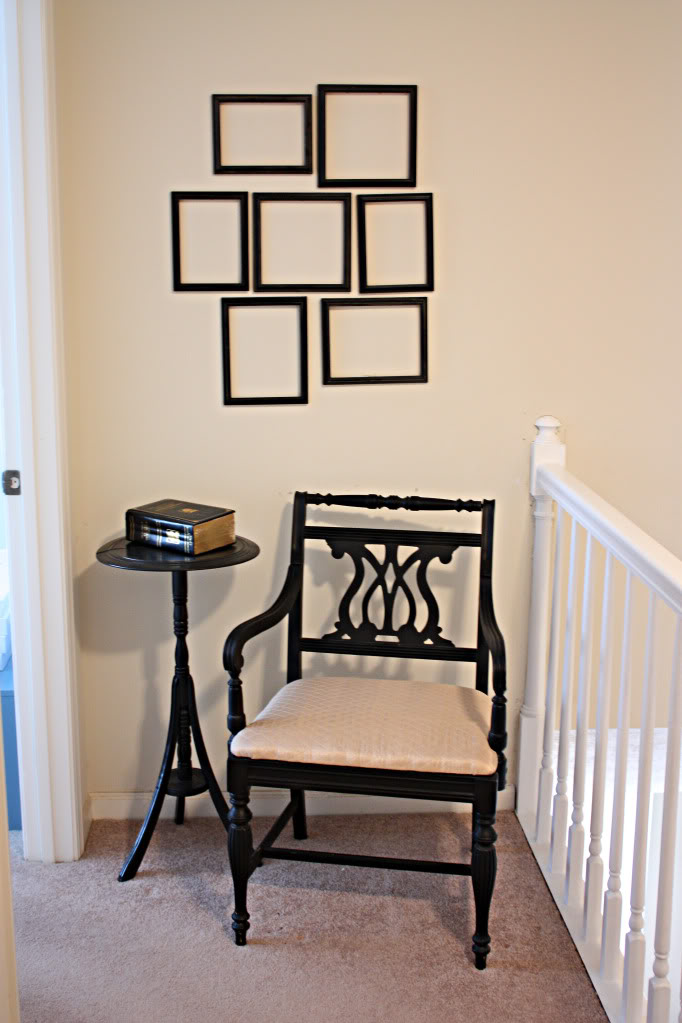

I love the new look. And the best part is that I can apply pretty much any color to the walls…it’s that versatile. Plus, it’s way more inviting. I can imagine myself collapsing into this chair right after putting Will down for bed and listening for the slow rhythmic breathing of baby-sleep to begin. Bonus points to the little sidetable for being big enough for a cup of tea and the storage that it provides.
So now, I have a another surprise….a few more plans for this space. I want to switch out the white pillow for a more colorful one and do a little paint treatment to the sidetable. But for now, let’s chat about this chair – not bad for $17 total, right? And you have me convinced about the previous black chair – it will stay in my house but get a makeover for a different space. Thanks to all of you who encouraged me to keep working with it! And a big hug for all those who linked up in the previous post – your makeovers were splendid…I love the transformations almost as much as I love eating an entire box of Girl Scout cookies.
Looks so great Katie! You’d never have thought that chair came from a thrift store. Looking forward to seeing more nursery progress, too!
p.s. I follow YHL and I am so in love with those prints! They look beautiful in your home.
Love the colour of the newly stained wood and the fabric looks great with the prints!
Love the change! The nook looks so much fresher & inviting! Good choice!
Oh, I LOVE it Katie! It really turned out great and its a nice soft look for a nursery!
I love the chair makeover! But i love the first chair just as much, you have inspired me to paint anything a new color! Ok, question where did you get the dresser/buffet table in the picture above with the ironing board. It’s exactly what I am looking for!!! (14th pic down) Thanks!!!
Great transformation Katie. At first, when you said you were going with a tan fabric, I thought it might look a little dull. But the color is perfect against the wood – love it! Question – how did you attach the cord to the seat? Do you staple through the cord, or leave extra fabric to staple to the base? How do you get it to lie straight? Did you cover the base with the black polyester fabric at the very end?
I thought you were a wee bit crazy getting rid of the other chair but as usual you know what you are doing and this looks great!
Love it! I have that same lamp – IKEA! Where is the table/stand from? IKEA too?! Totally recognized YHL art – looks great there! It’s such a cute little nook now!
Love it! And I love the art on the wall from Young House Love!
Amy –
When you sew the fabric around the cording, there will be an extra tab of fabric that runs along side the pipe cord. I just turned the seat over and lined the cord facing out and stapled through the adjoining fabric to the frame. And yes, I put black poly fabric back on at the end 🙂
XO – Katie
Great makeover on that chair! I would so keep the other chair, maybe put it in your closet room? and re-paint it – or use it again in a little girls room in the future
Turned out great! I love it.
I love the updated corner! The art from YHL is such a nice change from the empty black frames. It looks very relaxing now, and the chair looks a million times better than it did before you got your paws on it!
Katie,
The chair looks great. The whole corner looks nice and cozy.
Since you are a thrift store furniture magic maker I wondered if you would look at my coffee table I got at a thrift store. I just don’t know how to spruce it up. Is there something I’m not seeing or did I just an ugly coffee table? You can see it here: http://mmhassler.blogspot.com/2010/03/in-need-of-some-creativity.html
If you get a chance or don’t want to no worries (I’ll still read your blog..:) )Thanks!
The chair is super cute. For your cup of tea in your tea corner, I recommend Red Leaf Raspberry tea. I’ve been drinking it for a few months now. It is reputed to tone the uterus for labor. My midwife recommended it but I’ve also read about it in many sources. Whatever helps. And I have been experiencing “practice” contractions, which means I’m getting ready.
Oh, I really like it with the white drawers and YHL prints! The look it much more inviting. Nice work!
thanks so much for the great tutorial! I’m always so intimidated by the thought of reupholstering a chair when I find one I like for cheap. Thanks for this great post!
Howdy Katie, do you have a shot of the cording reattachment when you placed it back on you could share?
Great job!!
CUTE! The new table is so practical with all the drawers. They will be filled with matchbox cars and stick collections soon!
Looks great! I actually really like the white pillow and white drawers. It seems so relaxing and calm!
Thank you so much for this tutorial–this really helps. The chair looks great! I’m glad you are also keeping the old chair, and giving it a makeover. Can’t wait to see the results of that as well!
I do have a question (whoops, almost forgot!) It looks like at least one of the springs is missing/broken. Did you consider replacing it? Or perhaps in this case the cushion just sturdy enough without? (And I hear springs can be spendy). Either way, would you have any advice on buying and replacing a new spring? Thanks!
Jenni,
Actually you are right – one of the support springs is missing. Although it isn’t there, the support is just fine and so I thought it best to forego on replacing it. As for advice – there are plenty of great online upholstery supply stores that sell them for under a buck. Here’s a link to one of my favs. Good question!
XO – Katie
Love the makeover! Great job on the chair cushion redo. You made the corded trim look so easy to do!
I love those prints from YHL. Are those IKEA frames the RIBBA style? Thanks!
JoDi,
Yup! They are Ribba! Keen eye!
XO – Katie
Your skills are AH-MAZING!
You have come to my rescue!!!! I love the results and the way in which you did it. I bought your identical chair and a bunch of other pieces in Habitat for Humanity in Florida several years ago. I paid a whopping $39.00 for a glass top round dining table and 4 chairs. They have been through a lot, moved around, been outside in a New England back porch. I am now reclaiming them for myself as I gave our antique french farm dining table and chairs to our daughter when she married in October of 2014. So now I’ve downsized, and have this wonderful old wicker so I’m following your advice to the tee!
Roleen Sheehan
Madison, CT