In celebration of the new iPhone 5s coming out tomorrow, I thought it would be fun to recap some REALLY simple tips to improve your phone photography. This isn’t an exhaustive best-photography-how-to post. These are tips for the average folks out there that just want to know like one of the functions of their iPhone better and take a slightly better photo. Keep in mind that post processing aps and filters are all very helpful too but we won’t be going into that here. That’s another can of worms we can eat another day. And all the photo illustrations are from my instagram feed and most have been altered from their original state but ALL are phone photos.
Okay…so here goes…
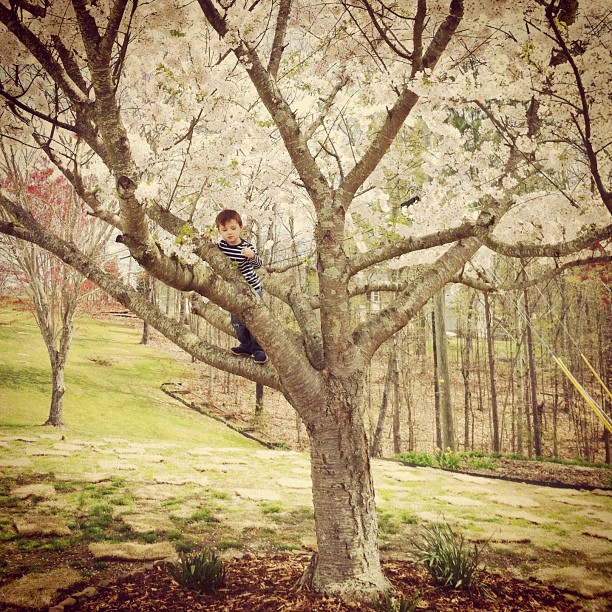


1. Hold your phone with both hands
Since you can’t adjust your shutter speed on the Iphone, it’s imperative that you try to make your subject and your camera as still as possible for super sharp images. I hold my iPhone with my left hand with my elbow tucked into my side for stability and press the shutter button with my right thumb or pointer finger. Remember that the shutter isn’t released until you take your finger off the shutter button on the touch screen.


2. Don’t zoom
iPhones were not created equally to lens with zoom capabilities. You will lose a ton of quality when you zoom. It’s actually better to take the best possible photo zoomed out and then zoom in on it later with editing software. But also there are MANY occasions where I have taken a photo zoomed all the way out and after the fact, I saw that if I had zoomed in, I would have lost a lot of the ‘story’ or good composition.


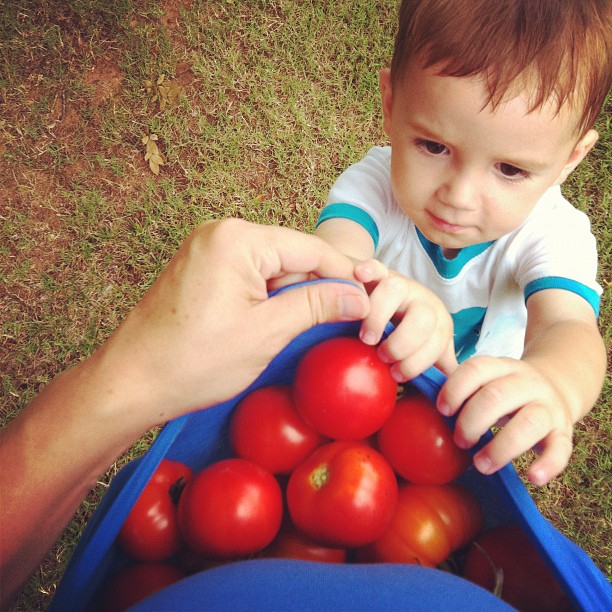
3. Details from here to there
Since you can’t adjust the shutter speed or the aperature or the ISO, limit your photos to include the most still subjects. That means no action, high speed items, sports, or fast moving wildlife. You may get lucky once in a blue moon when a red fox is howling but it’s still rare and difficult to capture great details on those subjects.
To focus your phone correctly, pull up your camera, widen your stance, set your elbows into your body or waist (this is called the human tripod position), determine what particular area you would like in focus and then tap that area of the screen. A square will appear on the screen to indicate what part of the image the camera is focusing on. Autofocus also automatically adjusts exposure and white balance.
For a more advanced method of focusing, use auto exposure/auto focus lock. This option actually keeps the iphone camera at the same settings for different shots so keep that in mind. To use it, you do all the same things as auto focus but instead of tapping, hold your finger on the screen right over the part that you would like to focus on for about three seconds. A focus box will flash. Release to save the settings and look for the AE/AF Lock text on the bottom of your cameras screen.
To clear the lock, tap the screen again, and the iPhone will auto focus again.



4. Go for simple, clean and repetition when it comes to background
If you are a parent and just trying to capture your kids (that’s like 99.99.99.99% of my readers), don’t let your photos swallow your kid. I say that because sometimes the background is actually so distracting or crazy that you don’t focus on the naked baby laughing hysterically with marshmallows stuck to their hair….but instead you look at that random guys leg photobombing the background…or the scene from Hoarders: Buried Alive playroom edition that is obviously the scene of the ‘cutest kid ever does the cutest thing ever’ photo. Create opportunities for your backgrounds to be just that…backgrounds. I personally dig repetition (like the rocks or the towel stripes) and it’s easy to make happen with a quick adjustment of your camera angle.
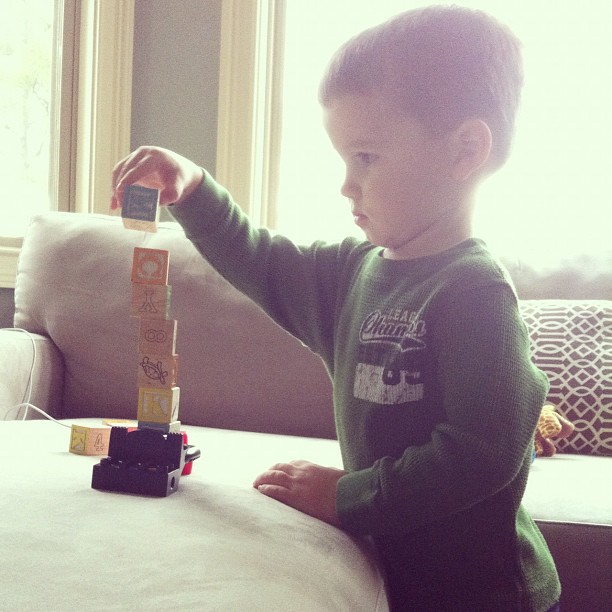


5. Use side and back lighting to create mood and drama
I talked about back lighting and side lighting in regular photography tips posts….well, the same applies here. The phone can capture your subject in a well lit situation if you allow the camera to focus on the subject. What I do is angle my phone toward a darker area of the room (whether it be the corner or floor) and adjust the lock-focus, then I readjust the camera to my subject and snap the photo to expose the subject correctly and not underexpose the cute profile or scene from Baby goes on a Picnic.
Think about exploring HDR. Click on options in your camera app and toggle the HDR to ON. HDR stands for high dynamic range and it is an option that can make even the most average Jane seem like a professional photographer. How it works is this: Instead of taking one photo at one exposure, HDR mode takes three different photos at different exposures and combines them to create a more natural looking photo. It’s not great in every situation but in good lighting (especially outdoor shots like cloudy skies), it can take that picture to a whole new level.



6. For square frames, think leading lines
This is great for photography in general, but think about leading lines in your photos. They can be anything that leads your eye from one side or corner to your subject. See how the shadows lead right to Will walking on the bridge? And the shorelines leads right to Jeremy having a daddy-son moment? Or the strawberry fields lead right to Will thinking about throwing the berry at my face? All of those can help add interest and keep your eye moving. So even if you are a bit confused about how to do ‘the rule of thirds’ in a square, the angled leading lines are like one page of the cheat sheet of square composition.
Well guys…that’s it for today. Off to camp out in front of my local Apple store….kidding. I don’t do sidewalks or cold or hungry. I do diapers and crying and chewed food in my bra.
wait. Now that I think of it….camping out sounds pretty nice…at least for one night 🙂
I love this! Thanks for all the tips!
Just so you know we’re out here, I read your blog every single day and I’m not a mom. 🙂
Hi Katie – great post. Which camera app do you recommend?
Great tips! Thanks!
I feel bad for you iPhone users who can’t adjust your cameras at all! I love your pictures, though. 🙂
Loved this post – great tips for an iPhone photo junky like me! Thanks Katie!! xx
Great tips! Since I end up taking 90% of the pictures I take with my phone these days, your post will be so helpful!
Thanks! This is a really helpful post! One question that is probably a stupid question (bear with me… I just recently got an iphone)… whenever I see pictures online taken with an iphone, they are always square. When I take pictures with MY iphone though, they are always rectangular. What is the deal with that? Are people cropping their pictures into squares at some point?
These are great tips Katie, thanks for sharing! I’d love to hear what your fave iphone photo editing apps and tricks are when you have time.
Love your blog!
YAY! I love hearing from you guys!
xo – kb
Yes! Most people use their camera photos for their Instagram feed which is an app that automatically crops to the square 🙂 All iPhone cameras have original photos in the rectangular format.
xo – kb
My brother in law says that all the time 🙂
xo – kb
Thanks Katie! I’m slowly getting the hang of my iPhone. I find that the pictures tend to be more candid and less smile and hold that face-ish. Do you typically develop photos from your phone? And how do you find their quality? Your family photos are terrific by the way!
Love this post, thank you!!
Love these tips! I’m an iPhone convert who would rather shoot with my Mark 5DII every day, but that sucker is HEAVY! More often than I care to admit all I’m armed with is my iPhone and there are just times Facebook and Instagram need to know what I’m doing!
http://jax-and-jewels.blogspot.com
These images are awesome and well I agree on your point of not zooming very much as however these companies might boast you can get the pictures so good after zooming highly..
Hi! (First time commenter, long time reader) Did you know you can actually trigger the shutter by pressing either of the volume control buttons on the side of your iPhone? It tends to help when you’re unable to fully steady your phone with both hands and you don’t want to press the shutter button on the screen. Also with the new ios 7 you can take photos in a square format directly from your camera–it also has a bunch of built in filters too. Can’t wait to see what you come up with when you’re finally able to upgrade.
Hi, I am not a mom either but I was blessed with a sister who shared her three kids with me. I love your blog and think your boys are adorable!
And the new iOS 7 update (free for your iPhone) gives you the option of taking square photos and includes Instagram-like filters. I love Instagram and highly recommend it, but even if you don’t use it, you can now easily take square photos.
My friends and I all read your blog, and we are twenty-somethings who are married with no kids. We love reading it! AND oddly enough, we are probably the ones who are most interested in pregnancy updates (hint, hint! 😉 ) I supposed it gives us insight into what’s to come? Thanks for the helpful post today!
Wow! I love this post! I don’t think about how I take pictures on my phone all that much…but I should! I always thinking my Instagram pictures come out just okay. Now I’m going to put some more value into how I take pictures with my phone!
Annoying little side note from a wedding photographer: Take a cue from Katie Bower, and don’t solely rely on your phone for photos. Use a real camera every once in a while. One day, you’re going to want to frame that really cute photo of your kid with the marshmallows stuck to his/her hair, and you won’t be able to print it bigger than a 4×6, because semi-crappy quality/resolution. That being said, I do also take a butt ton of photos with my phone, and I love Instagram! 🙂
Hey Katie! Love the post. I think things may have changed a bit for anyone who is running ios7. I think placing your finger on the shutter and holding it there now takes a series of quick snapshots vs. doing nothing until you release.
Yes, we are out here! I started reading around the time you announced you were pregnant with Will and I think I was in college then. Its crazy to think that was so long ago.
Love this post. I dont have a nice camera yet so my phone is what I use. This helps a lot!
I love this! I’ve only had an iPhone for a few months, and my pictures always seem to turn out more poorly than other people’s. Hopefully these tips (especially about how to focus for exposure) will help me look a little more competent. 🙂
Love this post – great tips! Still trying to learn how to master the iphone camera, so this helps a lot! Passed by an AT+T store on my walk into work and saw a line around the block for people getting their new gadgets 🙂
Another tip I would add is that you can use the volume controls on the side to “click” the photo to take a picture. That really helps with some added stability if you’re hands are full!
Did you know that when taking a photo, you can actually use the plus/minus volume keys as a shutter button instead of touching the screen? It helps me keep everything steady for horizontal pictures.
Play around with turning on the Grid and HDR found under OPTIONS when your camera is on.
Whoops ~ sorry…. I didn’t see the paragraph about HDR!! HA!! 😮
It doesn’t work within instagram, but on the regular camera mode, you can use the volume buttons to take the pic instead of pushing the “button” on the screen. I find this helps with stability since I can wrap my right hand around the phone and use my pointer finger to push the volume buttons.
Also, the new iOS7, square photos and filters within the regular camera mode! Love it! Still getting used to the rest of the new iOS though!
Thanks for the other tips, I’ll definitely be keeping them in mind!
The new iOS7 has the option for square photos now. 🙂
Sorry if this shows up twice. I hit “submit” and then don’t see my comment. Anywho…
Great tips. You mention holding the shutter until ready to take a photo. I think that changed with the ios7 update (but maybe you can revert back in settings). I was doing my usual “hold-until-son-is-still” yesterday, and rather than 1 photo, I had 10. Also, you can use the vol + button as shutter.
The new iOS7 now has an option to take photos in square format.
Thank you SO much for this post – so helpful!
Just to let you know, when you switch to the new iOS7 (which I LOVE) holding down the shutter button now gives your rapid fire shots. SOOO that means no more holding it down and only taking a picture when you release. (Hope that makes sense).
Loved this post, I’m going to share it with a few friends who are always posting crappy IPhone pics to Facebook, :)!!
Ok, I have read a ton of iphone tutorials and use mine for photos every single day and NEVER have I heard of the AE Lock feature…BRILLIANT. Thank you!!!! My iphone isn’t as good as my 5dmii of course but this will help a ton!!! Mind=blown.
Chewed food in my bra… glad I’m not the only one. Thanks, Katie B. for keeping it real! : )
“If you are a parent and just trying to capture your kids (that’s like 99.99.99.99% of my readers)”….I am that .001%!!!! Not married (i have a wonderful manfriend who i hope one day will be my hubby and then even laaater down the road, a daddy) and no children yet! but I LOVE YOUR BLOG! i have been reading for over two years and every single one of your posts i read! my house is COMPLETELY Bowersik copied,ehr, well i like to say Inspired. Cuz i am not as talented as you bloggy people.
It is so funny to me that i have been in my house for almost 3.5 years and i totally feel i have come into my own style with decorating. crazy how things change…like re-painting basically every room. thats ok though #thatswhatmymanfriendisfor
Just wanted to drop by and say HI- i hope your pregnancy is going well and that you are feeling good/no sickness/no whats-that-Sciatic- nerve- thingy- called?-pain.
xoxo from Cleveland!
Me too!
Same here!
I just failed to update bc we are getting the new phones today! Lazy bones here! Thanks for giving me the info!
xo kb
I was very frustrated with my iphone pics, but thanks to your tips, they are a whole heck of a lot better!
Oh, and I love your blog!
thank you for posting this! I always wonder how some people get awesome iphone photos and mine are always blurry and grainy.
These are such great tips! I use my iPhone photo like crazy and didn’t know about the HDR setting- thank you! I just finished a 30-day iPhone Photography Challenge where I made myself stop at least once a day for a month, and capture one of life’s random or sweet moments with my iPhone – I shared it on Twitter, Facebook, Pinterest, etc. I thought it would be exhausting but now I just kind of miss it! I compiled all the photos here: http://paintingsunny.com/iphone-daily-photo-project-2013/
Same here! No Kids! LOVE your blog.
Could you do a post about your most recommended filters and apps? I can’t believe the beauty you achieve with just your iPhone!!!!! Love these photos !
i don’t think you can claim ‘house poor’ anymore.
Oh definitely not…and I don’t. When I announced that Jeremy got a new job, I also mentioned that it included a pay increase (not much but it was some)…and then on top of refinancing both this house and the rental house, it helped us keep more of our monthly income. Even a couple hundred bucks helps, ya know?!
xo – kb
Love that!
xo – kb
Sure! I’ll put it on the list 🙂
xo – kb
I don’t ever develop them larger than a 4×6 because of the quality…but I know some folks do that and don’t mind a little grain or blur.
xo – kb
I like a whole bunch…but I use Instagram, Snapseed, and Afterlight the most.
xo – kb
Thank you for sharing!! Your photos are amazing 🙂
http://www.mydirtysho.es
I don’t know how to thank you. . . you have caused me to actually check out my phone’s camera. All I’ve done in the past was “take a picture.” Didn’t know it could do anything cool Thank you so much!
Awesome, awesome tips! My iPhone pics are less than stellar, and I’m excited to try out some of your tricks to see if I can make them better. Thanks so much, Katie!
~Abby =)
Wow! These are great!
http://happinessiscreating.com/
Just wanted to say… same here, too! At least not yet!
Great tips! I really enjoy the quality of the iPhone pictures, but nothing beats a good DSLR if you have one!
Hi! I am wondering if you take your iPhone pictures holding your phone horizontal or vertical? I usually take mine vertical, holding phone up. A friend told me recently you are suppose to hold the phone horizontal, side ways to get better pictures. What do you think?
Thank you.
I really love this post Katie! Especially about the angles of photos! I’ve done the angles thing in a few photos, but now I know why it looks cool! Haha.
I do both but I never thought that it might affect the quality…it is still just a lens.
xo – kb
I’m not sure if anyone else mentioned this already, but you don’t need to use the button on the touch screen to take the picture. You can use the volume buttons as your shutter release buttons. So if you hold it like a regular camera with the buttons up, you can just click it like you would a digital camera.
I have a few friends that didn’t know this and it totally blew their mind!