Ya’ll – you know how much I love to dabble in photography. I am not very good. Which is why I need all the help I can get. Enter Patti.
Patti is a bonafide photog. And she used a Canon Rebel in her early days. Which is why I was so excited to gleen all the information I could from her experienced eye. And luck be the lady, when I told her that I would love to share her brain with my readers…she officially accepted to be my first guest blogger. So if you are like me (a beginner in your paparazzi career) then this is definitely a post you won’t wanna miss! XO – KB

Hi! I’m Patti, and I own a small Photography and Graphic Design business located in Virginia. Since I tend to receive a lot of questions every week from hobbyist photographers who are interested in learning how to take better pictures, I thought I’d take a few moments to put together this little ditty with a few of my favorite tips, tricks, and downright quick dirty photography secrets for you all to enjoy.
Although my little factoids will be geared primarily toward Canon Rebel owners (any version xt, xti, xsi, xsabcdefg, etc.) you can probably tweak the tips for Nikon as well. Also, my points will cover portrait photography, since that’s my thing, and that’s the area I get the most questions about.
My first dSlR was a Canon Rebel, and although I’ve upgraded gear since then, I still get sort of sentimental every time I see someone walking around with one. Especially when it’s a mom trying to photograph her kids. I can typically envision the kind of pictures she’s trying to get, because I’ve taken that type of picture thousands of times. I always want to run up to her and give her the following formula for sensational snaps, but am often harnessed back by my cool-headed husband who has to remind me that not everyone wants to be accosted by my expertise. So, in an effort to soothe my inner helper, here’s the foolproof formula I often share for getting really amazing pictures without having to earn a MFA in Fine Art Photography.
1.) Turn off your flash. If you don’t know how to do it, consult your manual.
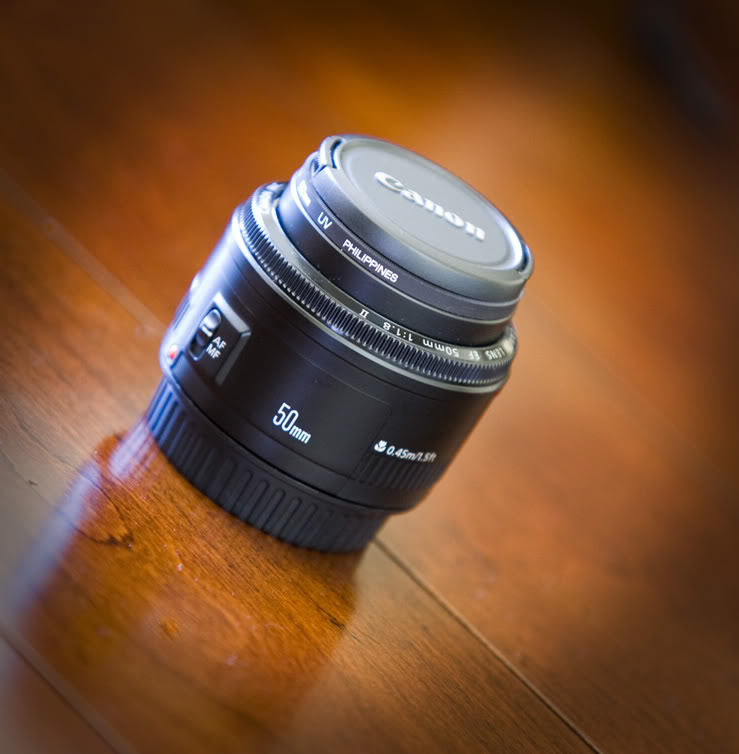
2.) Use a better lens. There flat out is no substitute for this tip. You won’t get better pictures without a better lens. However, you don’t need to stress out about forking over hundreds of buckaroos, because you can get some really great shots with some really cheap lenses. I suggest starting off with the Canon 50MM 1.8, which will only set you back about $100.

In fact, I took both of these pictures using a Canon Rebel, the Canon 50MM 1.8 lens, and window light:


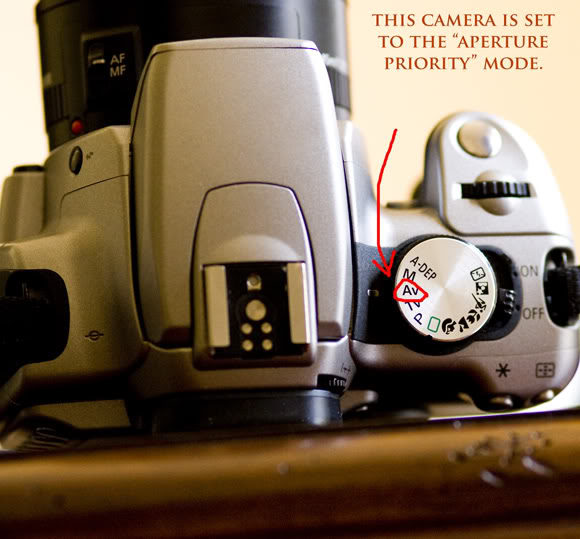
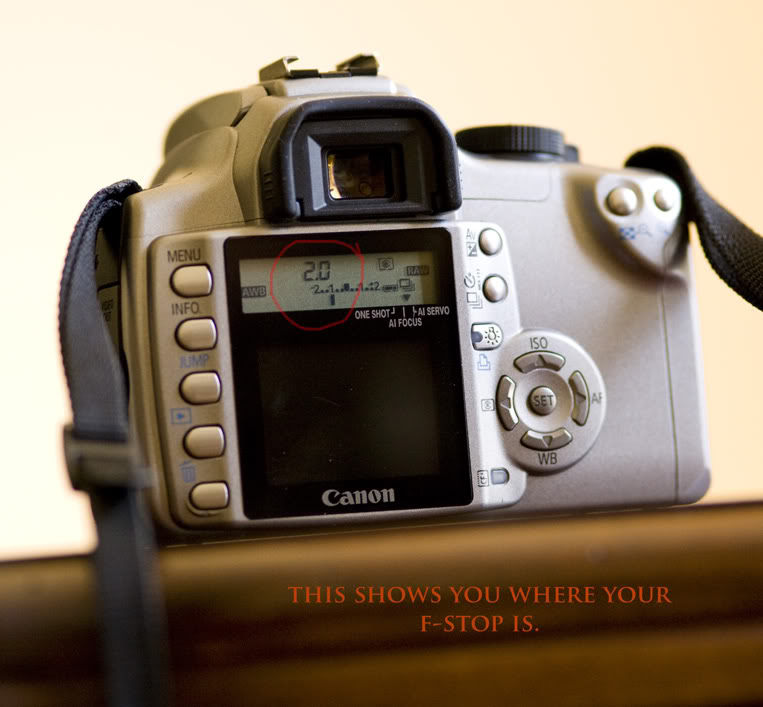
3.) Once you’ve got that lens, with your flash turned off, put the camera in AV mode (Aperture Priority mode) and set the f-stop to 1.8 or 2.0. Set your ISO to about 200 (again, if you’re not sure on how to do these things, you’ll have to look’em up quickly in that pesky User’s manual….sorry!)


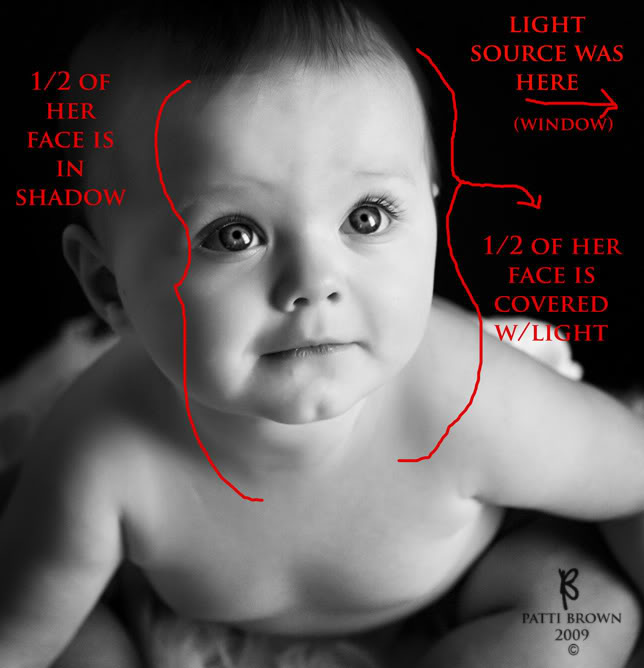
4.) Place your subject. Now, if you’re inside, place your subject sideways, about 2 feet away from a window (blinds should be raised, curtains drawn, etc.) and try to position him/her where the light that is coming in falls on about half of his/her face. You’ll have to use your eye for this – just look at the subjects skin, and determine what parts are illuminated by light and what parts aren’t. (Note: make sure that first you turn off all overhead lights, TV, lamps, etc. if you haven’t already. NO artificial light. None whatsoever.)

5.) Now, standing about 5 or 6 feet away, use your focus button to find what part of the subject you want to be sharpest or completely clear – typically the subjects eyes. (Note: If you haven’t figured out how to use your focus button yet, you absolutely must consult your manual. Seriously – it’s like trying to drive your car without knowing where the gas pedal is. Read the section on focus, and I promise I won’t make you pick up the manual again for a while.) Take your picture. Take 100 if you want (remember, pixels are cheap). Get in really close and fill your whole lens up with just your subject’s face, or even just your subjects eyes. While you’re using AV mode, the camera will automatically set shutter speed for you, but you’ll still need to adjust your ISO. If your pictures come out too dark, turn your ISO up. If they come out too light, turn it down.
6.) Pull your pictures up on your computer, and go through them. If enough of your subject isn’t in focus, set your f-stop to about a 4 or a 4.5 and try again. If they are over-exposed, turn your ISO down to around 100, and/or move your subject a little bit farther away from the light source, which would be the window in this case. You may want to practice this a few times over the course of a few days in order to improve and get a better feel for how and where light falls.
7.) Congratulations! If you’ve followed these steps exactly, you’ve probably got some pretty awesome shots! I’d suggest getting them developed at a reputable online lab like Mpix.com rather than at your local big-box store. Also, you can now show off your pictures to your friends, and go around saying things like ‘I strongly prefer shooting in natural light” and “I always try to shoot with a low ISO.” Feel free to feel smug.
That’s pretty much it! That’s my whole quick & dirty recipe for getting great shots from a Rebel with little or no experience and very little overall photography knowledge. I wouldn’t go touting yourself as a pro just yet, but you sure can get some awfully nice pictures this way.
I’d suggest upgrading to the Canon 100 mm 2.0 (around $400) when you’re ready to start tackling outdoor portraiture, or as a general longer lens for taking pics of your kiddos. Both lenses I’ve mentioned are inexpensive, they are fast, and when coupled with the AV mode, a fairly low ISO, and NO FLASH – they are practically foolproof!
Nowadays I shoot entirely on manual, but it takes a while to learn how to do that. Once you’ve mastered working in AV mode, you can move into Manual, but it’s not necessary. Unless you’re planning on going pro, or if you just want the additional creative control, there is nothing wrong with shooting in AV mode.
A few more things:
1.) When you want everything to stay in focus (like a group of 4 or 5 people) you can still use AV mode, just move your f-stop to about a 4.5 or 5. For even larger groups, move your f-stop to about f9 or f11 and make sure your shutter speed doesn’t fall below 120.
2.) Move your ISO up in dark spaces, but always try to shoot with a lot of light around. It just makes for prettier pictures overall.
3.) When shooting outside, try to find shade, and shoot in the shade instead of in the bright sun. Shoot mid-morning or mid-afternoon – never when the sun is directly overhead. Evening light – about an hour before sunset – provides really, really beautiful light too.
I hope you find these tips handy. Please feel free to drop me an email or visit my site at www.pattibrownphotography.com and as always, Happy Shooting! – PB
Thanks for breaking it down into amateur-speak. I’m going to try this out this weekend!
It is absolutely amazing how many people who want to take ‘those picturesque postcard’ type photos who refuse to turn off their flash. “but it becomes blurry when i turn off my flash!”…. sigh.
Some pretty nice points here, definitely helpful to those starting out who have bought SLRs and are confused why the pictures aren’t looking amazing.
Thank you so much for this! But now I have to go buy a $600 camera. Sigh.
You both rock! We just got a Canon XSomethingorother and I needed a easy tutorial to help 🙂 I can’t wait to try it out!
I absolutely love the Av mode as I just got a Canon 7D and this is my first dSLR. I want to move on to manual mode one day and like Patti said have all the creative control. For now, the Av mode does wonders. Great tips!
thank you so much for posting this! i use my dad’s canon rebel all the time and those tips will definitely help!!!
I love this post! Like you, I’m starting to dip my feet into the photography hobby. Unfortunately I’m still using my Nikon point and shoot camera, but I’m trying to learn to take advantage of its features until I take the plunge and buy a DSLR!
Great pictures and thanks for the tips!
Oooh, can Patti come back for more? Actually, can Patti move in next door to me and teach me every day? Thanks so much for featuring this KB!
Oh my goodness, thanks so much for the info! I love that you made it so simple and that you were actually willing to give a real tip. I feel so often other photographers are kind of snobby about it. So thanks!
helpful! thanks…
Thank you for sharing these tips! I, like Katie, am interested in photography, but all of the lingo scared me away from anything but a point-and-shoot. Thanks for dumbing it down! 🙂
I would love to learn how to open your own online studio that sells your own photos.
Thank you so much, Katie and Patti! This was very helpful.
Beautiful photos! I know nothing about photography, though. Just wanted to let you know that the mpix.com link in your entry doesn’t go to mpix.com (but hopefully everyone has figured out how to get there anyway!)
Excellent first guest blogger, Katie! Thanks Patti. That’s good stuff!
Thanks for this helpful post! I’m always hunting for tips geared towards SLR newbies. These really help and I actually convinced the hubby that I just HAD to have a 50mm lens…like NOW! Woo hoo! Thanks again!
So happy you all found this helpful! For the commenter who was curious about how to start an online Photography business, I use Photobiz – google’em – they are the absolute best! Tell them I said hi. 🙂 – PB
love this Katie, thank you for sharing this. I wonder how these techniques will work with my Nikon….Hummmm. We’ll see.
EEEEEEE! So happy to find this! We are a Canon Digital Rebel family as well- thanks for the tips!
Hey Katie – I was just wondering, what kinds of camera and lenses do you use? Thanks! 🙂
Everyone loves what you guys are usually up too. This kind of clever work and coverage! Keep up the terrific works guys I’ve you guys to blogroll.