This is a sponsored post brought to you by FrogTape for Bower Power’s FrogTape Fridays. AND CAN YOU BELIEVE IT? It’s actually happening on a Friday. That must be some kind of miracle. All opinions are mine.
Iiiiiisland. I am your lovahhhh.
(say that like “Luuuuke. I am your fathahhhhh.”) (seriously.) (go back and say it. R2D2 would. ya know…if he could talk without beeps and whistles.)
I am thrilled (THRILLED) to be able to finally get the island done. I can’t wait to wrap up the kitchen posts. I am so happy with the final product and just want to make sure I have this process completely covered. So speaking of covered…let’s get painting.
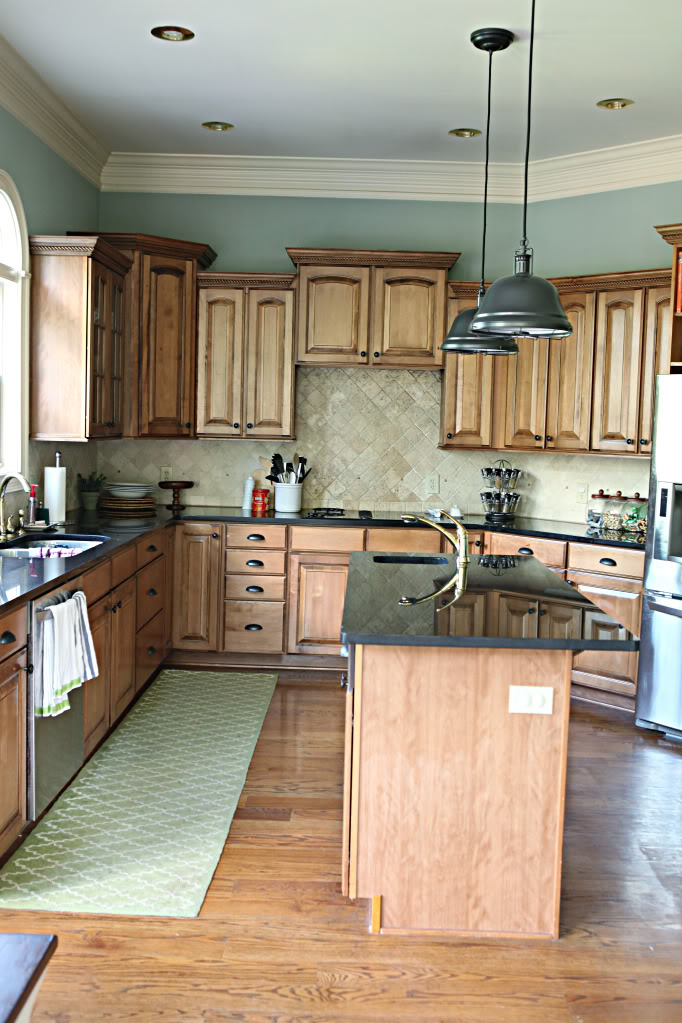
As you may remember, we started with brown cabbies…
and then we primed the cabinets for white. Then the island went to the dark side…
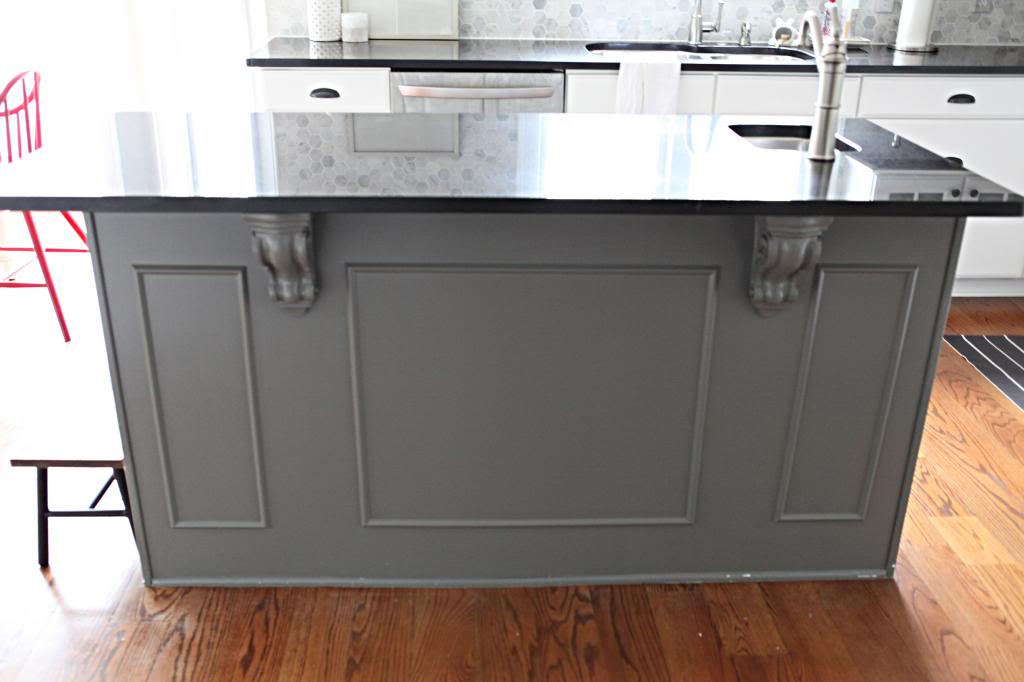
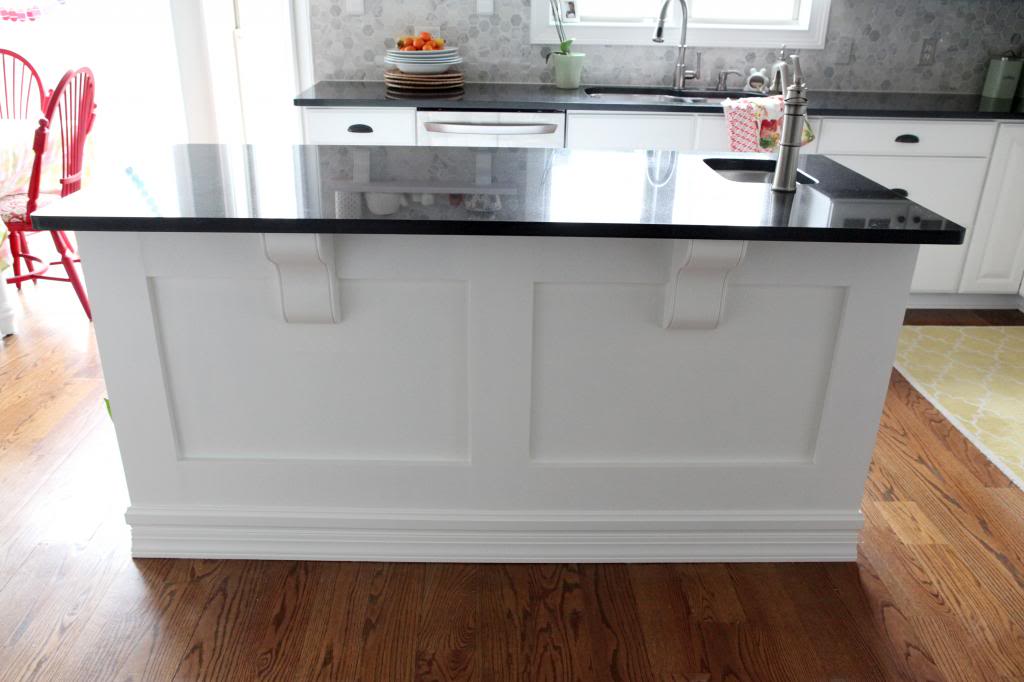
Well, the plan all along has been to build out the island to be more like a piece of furniture…and make it more symmetrical and chunky in the process. ya know…make it my dream baby. I like babies chunky. and symmetrical apparently. (?)
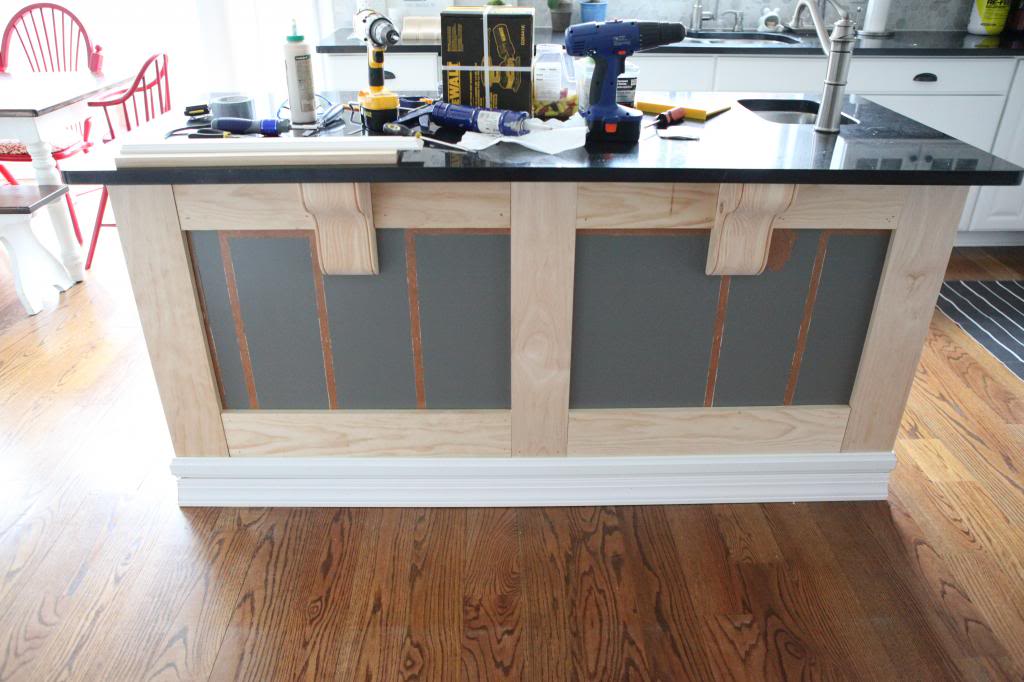
You can read all about that process in this post.
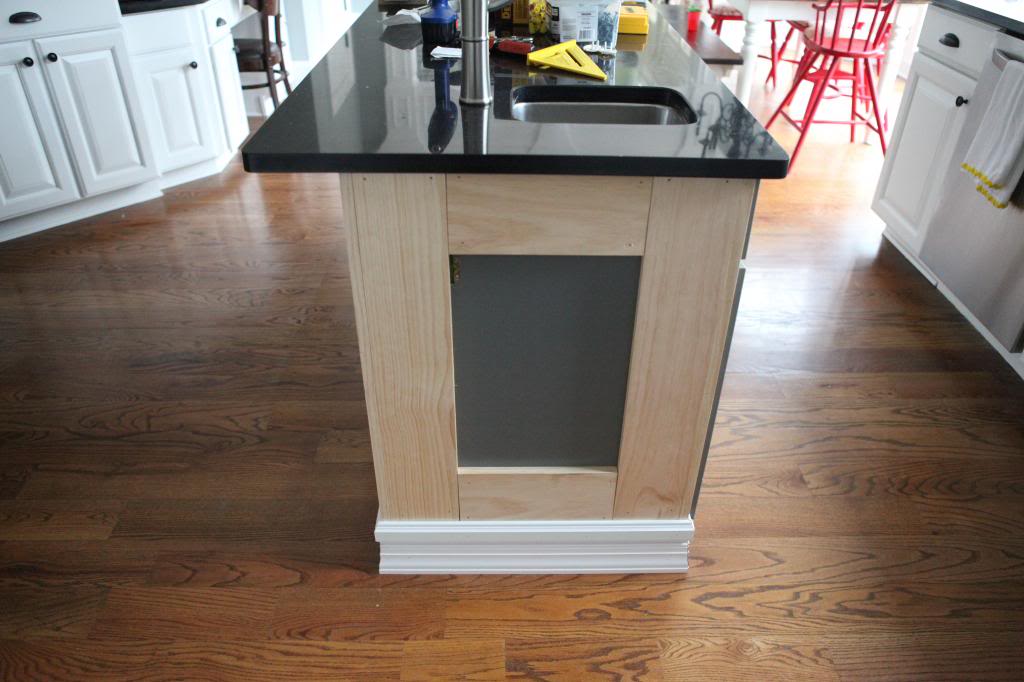
Yes, we needed to remove all of the knobs and doors before starting this next phase. Just in case I forget to mention that.
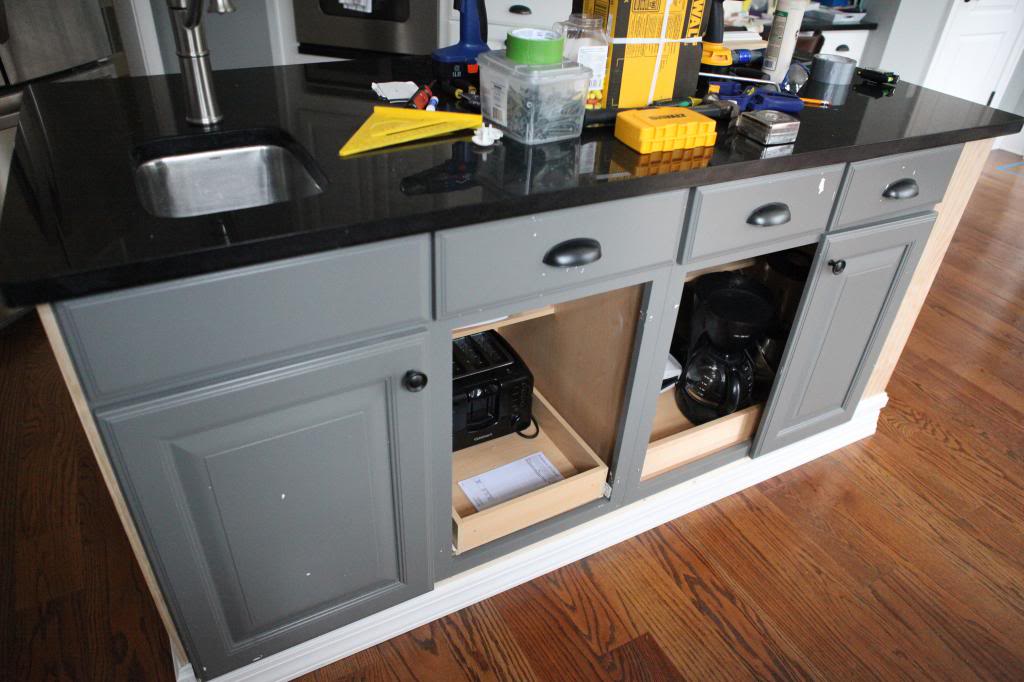
On the far end, we also added a shallow shelving area.
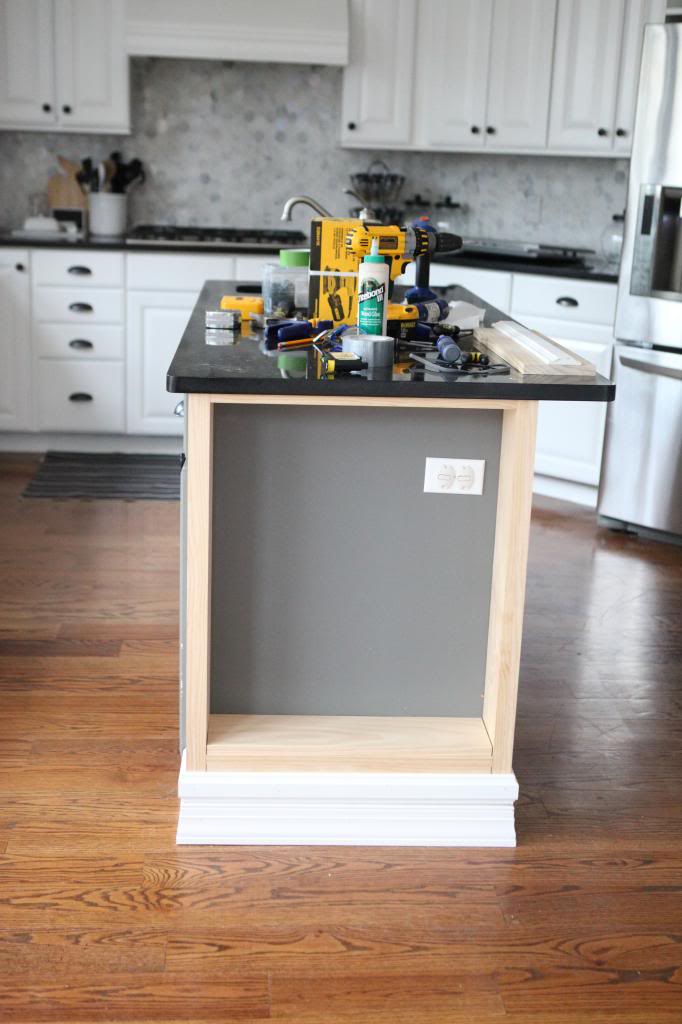
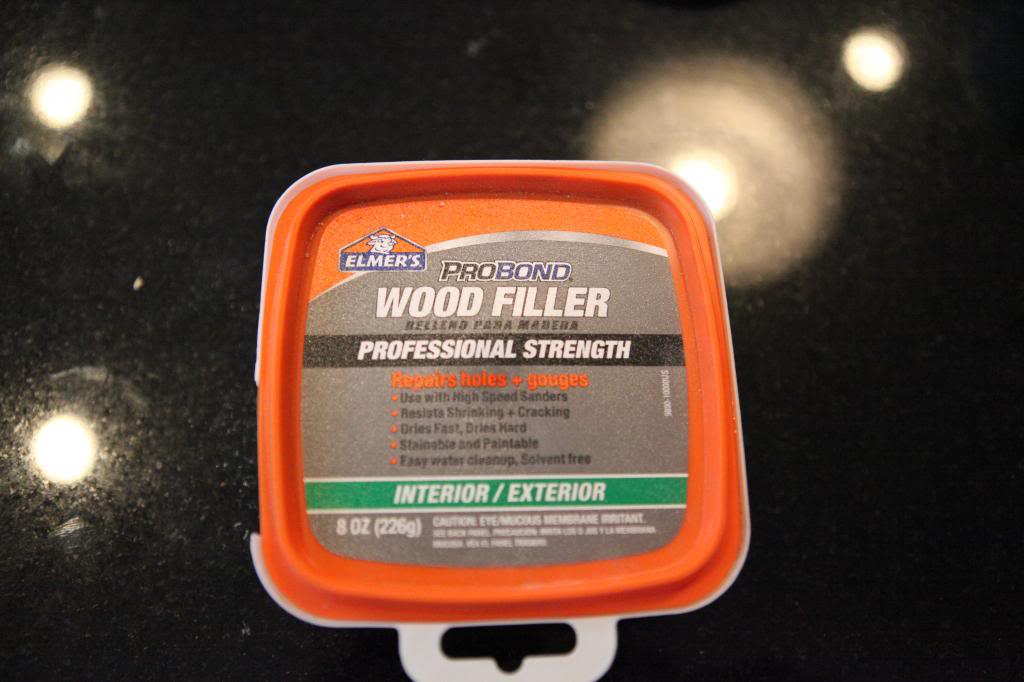
So before we got to the painting, we had to do a lot more prep work. I went to work with my favorite wood filler. I highly recommend this stuff…it’s called Elmer’s ProBond and I’ve been using it for years with no complaints.
I usually use a putty knife and just smear it all over. I’m not perfect…that’s what the sander is for.
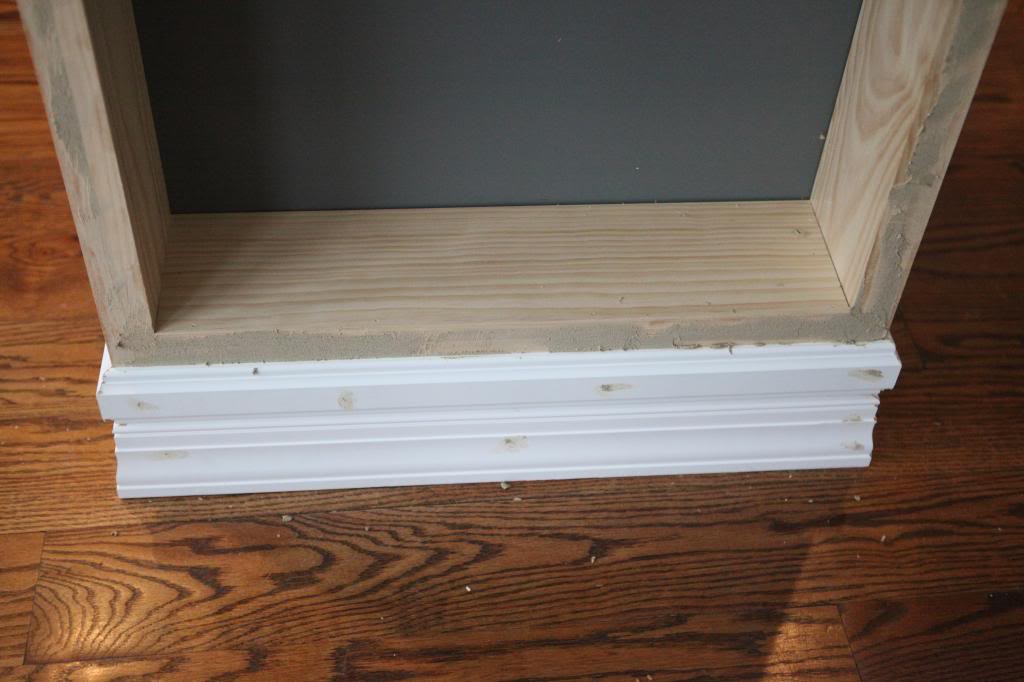
You have to just fill everything really well. I’m generous. and messy.
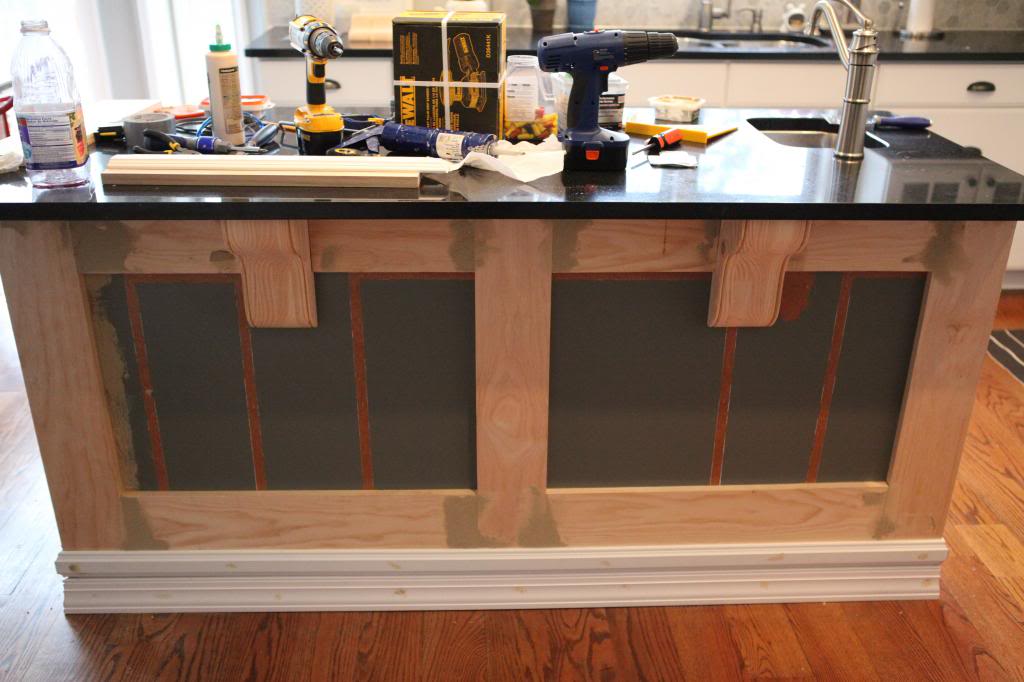
If the hole is really big and the wood filler might just push through, I put a piece of tape on the other side and then put a thin coat over it. Layering thin coats over the hole makes it a completely new wall.
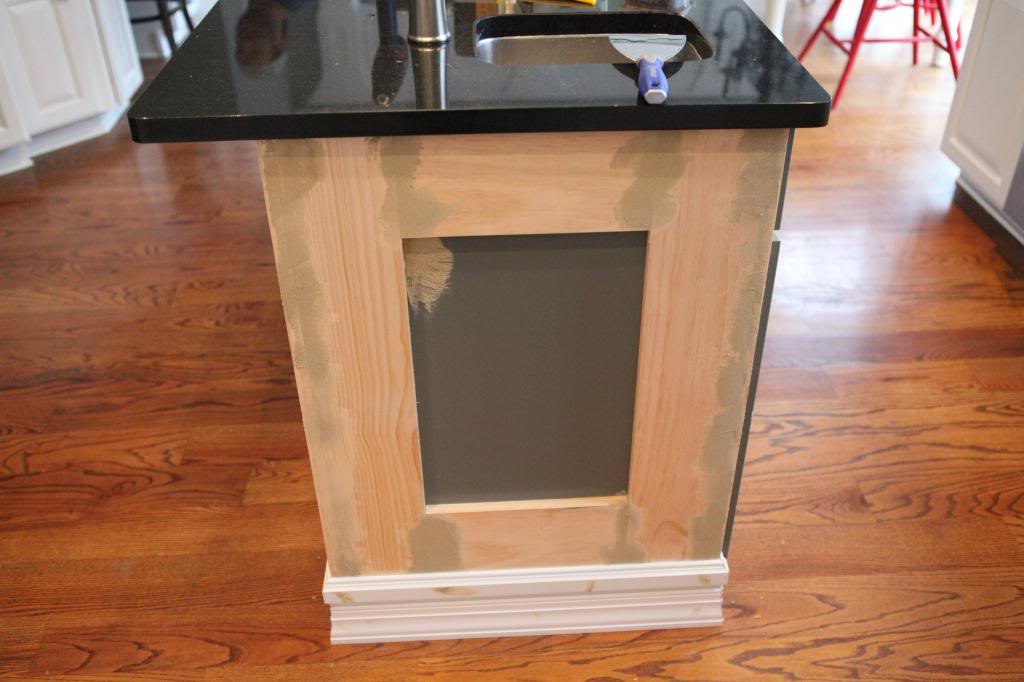
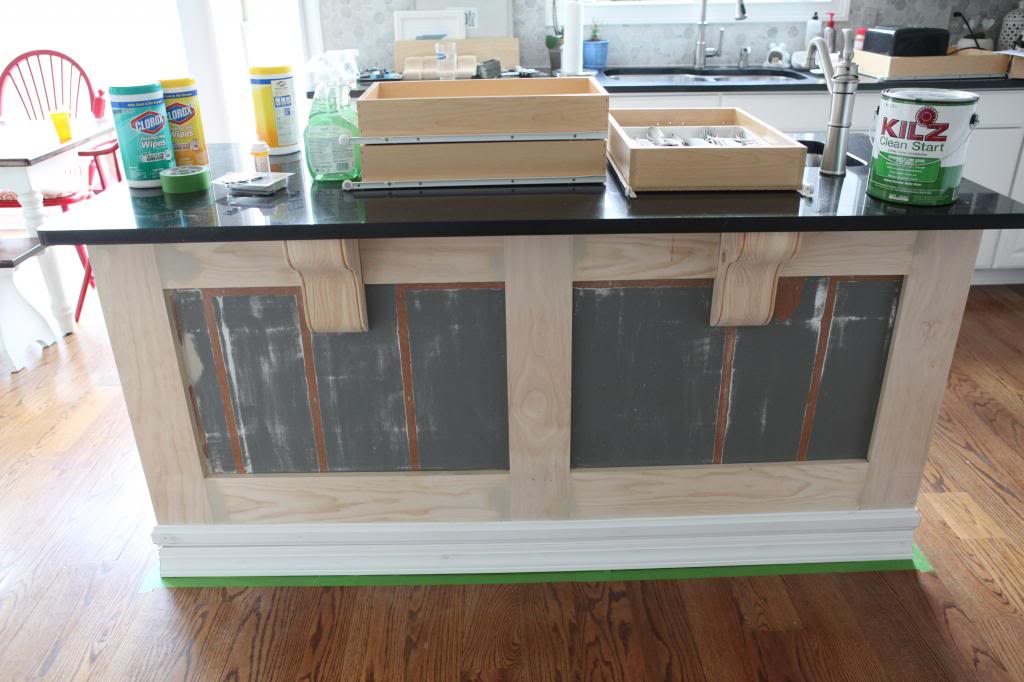
After the putty dried, Jer draped the entire island with drop cloth and hid under there with a sander and a light until the entire thing was super smooth.
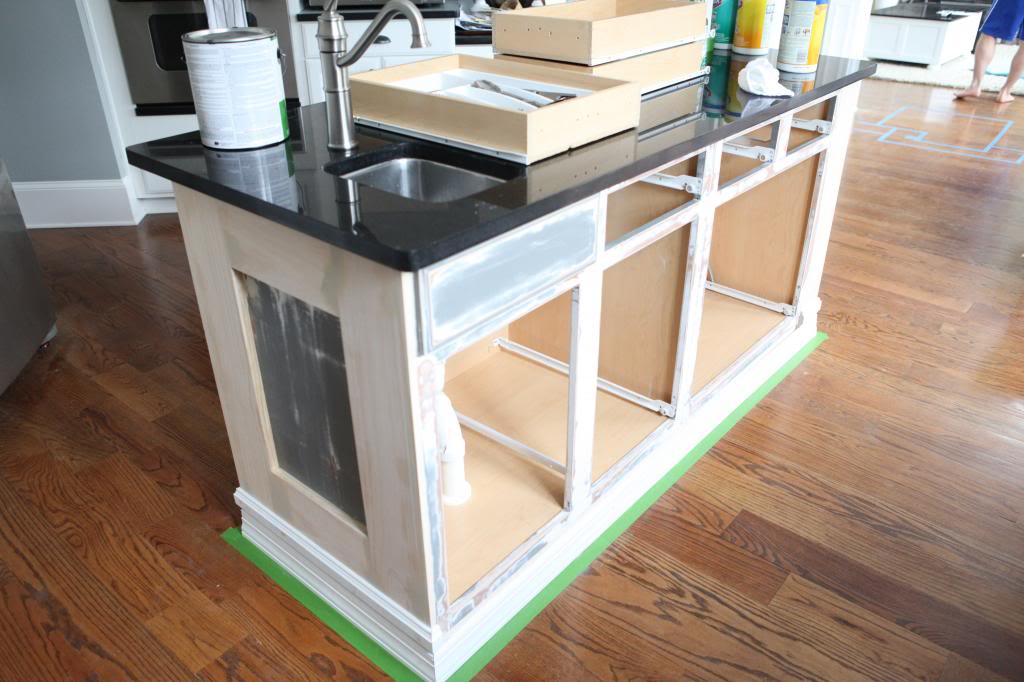
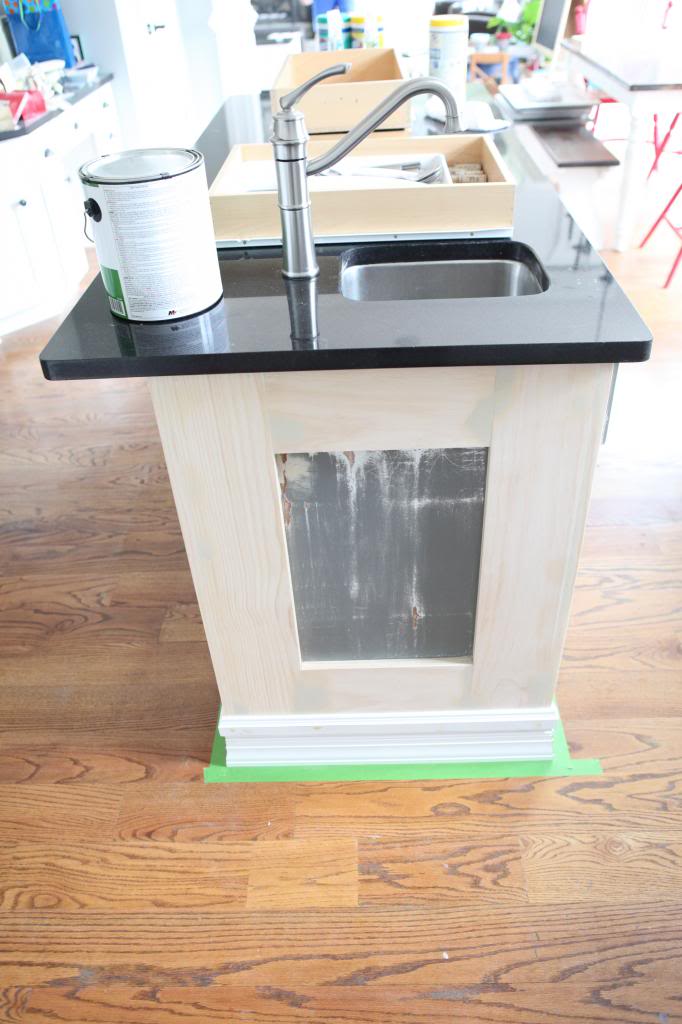
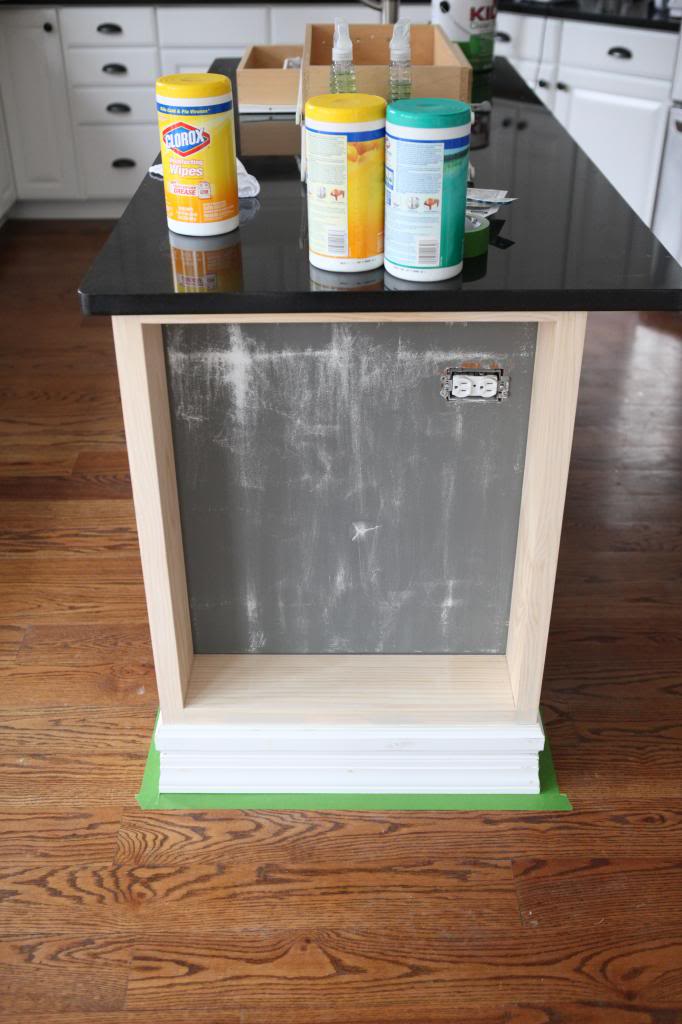
The corbels came sanded and paint ready, so he didn’t need to sand them but most everything else needed to be prepped to grab the primer.
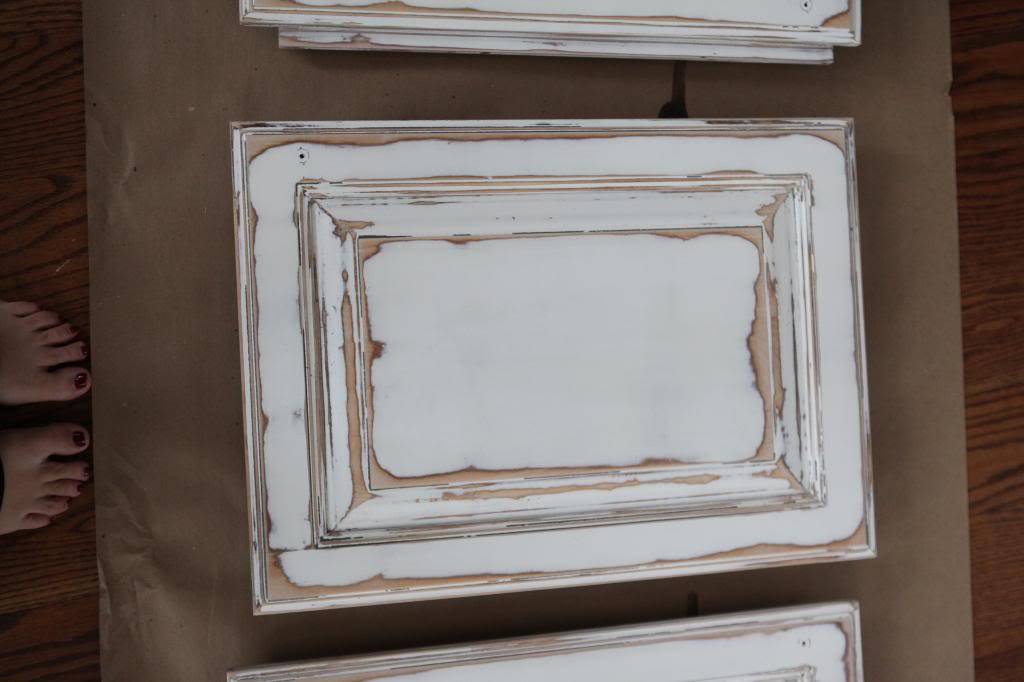
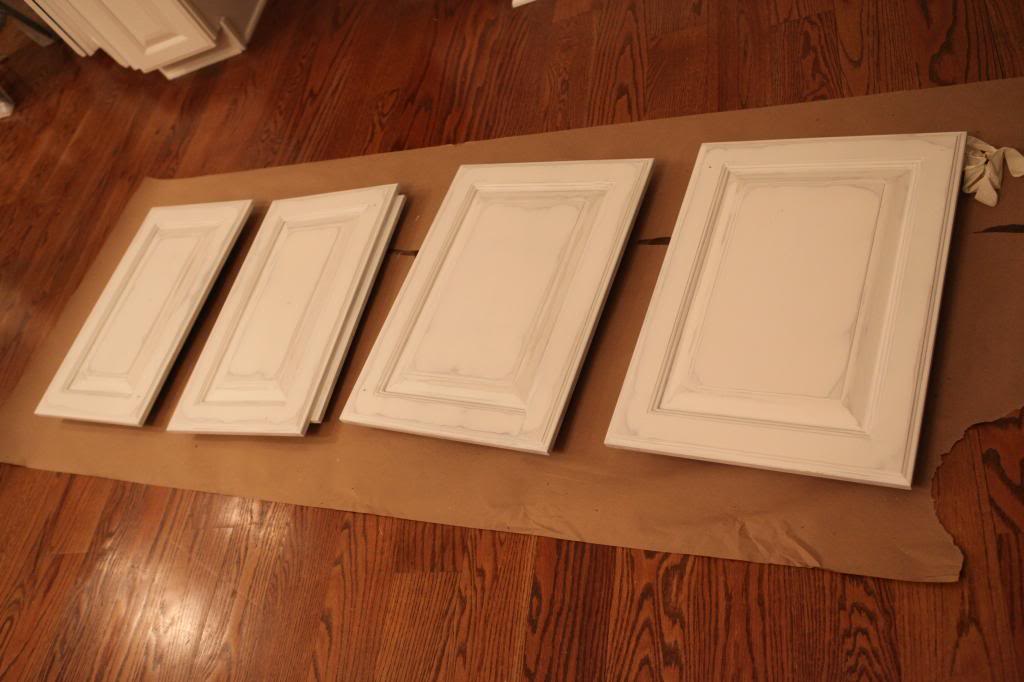
The doors also got sanded. This took the most amount of time…maybe about 45 min per door. It was hard to remove all the dark gray out of the nooks and crannies.
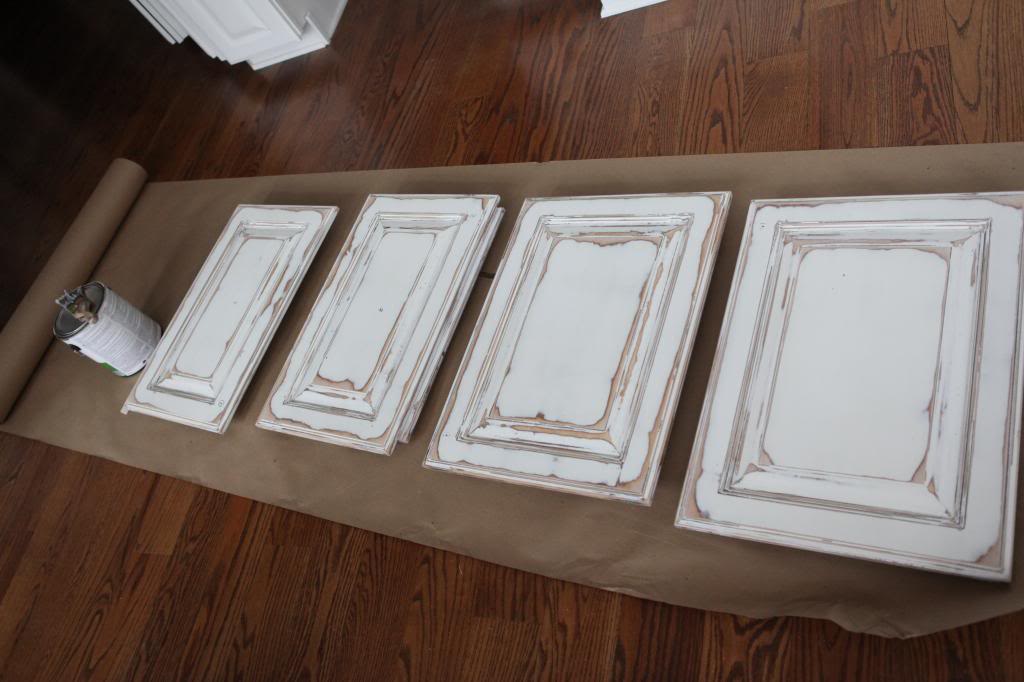
Both Jer and I love the way it looked after the sanding…if we had a tv console with doors that needed a little texture, we would totally rock this three tone look like a shabby chicster.
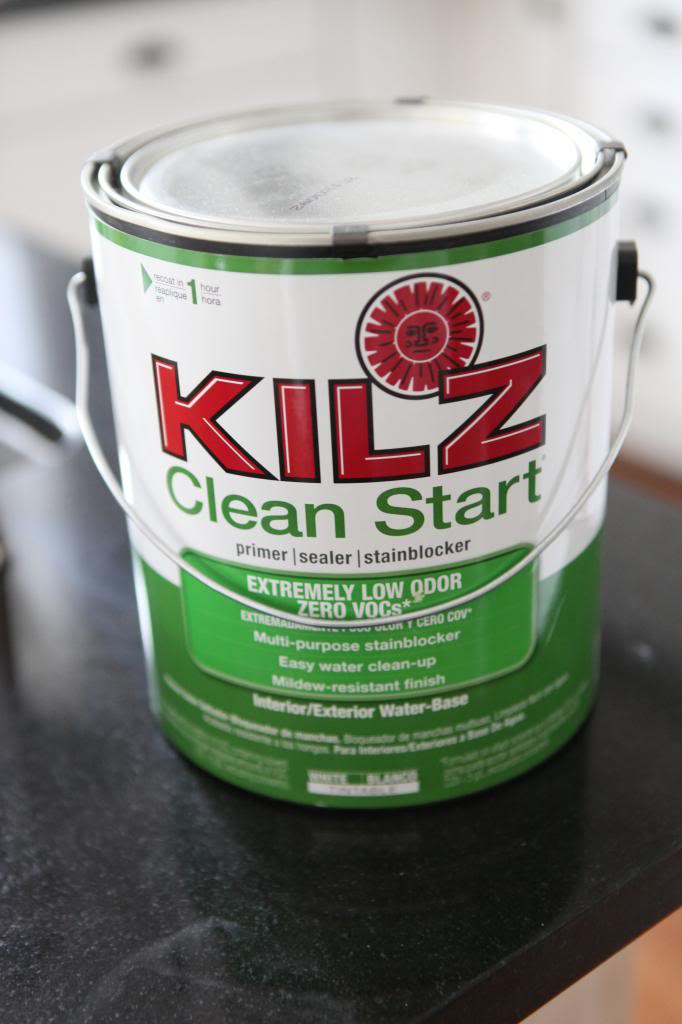
After the surfaces were perfectly wiped clean, it was time for the primer. If there is something that I learned from the whole Benjamin vs. Sherwin experiment, it’s that primer can be a reason that perfectly good paint can become chippy. So this time around, I got out the Kilz Clean Start primer (like it!) and went to town with the full intention of giving it one night to dry and putting on the paint the next day.
Here’s it post-primer pre-paint…
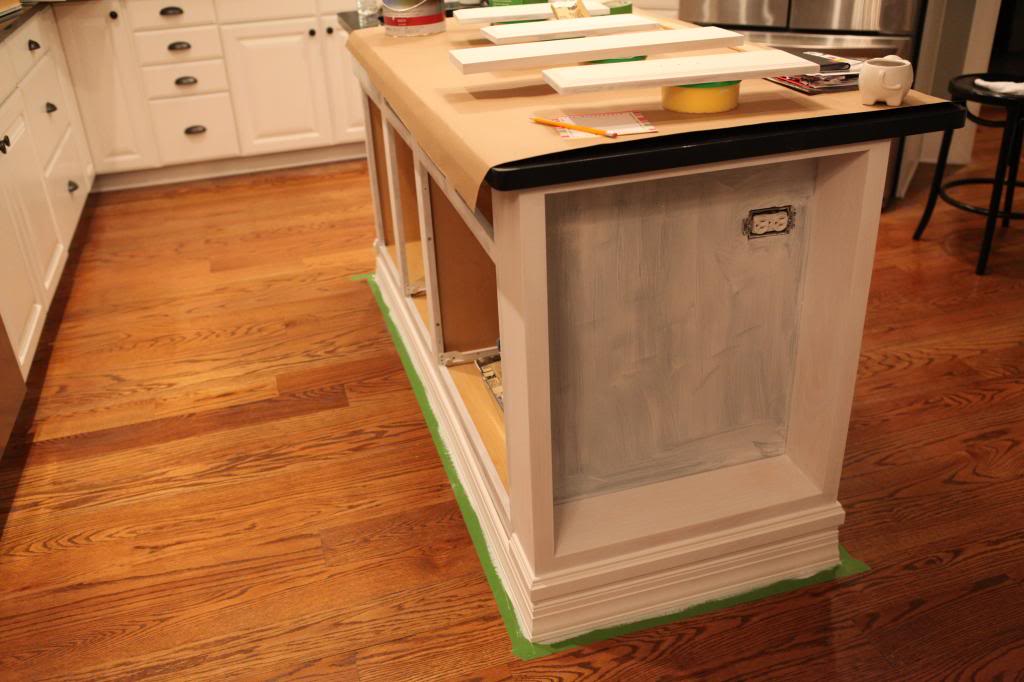
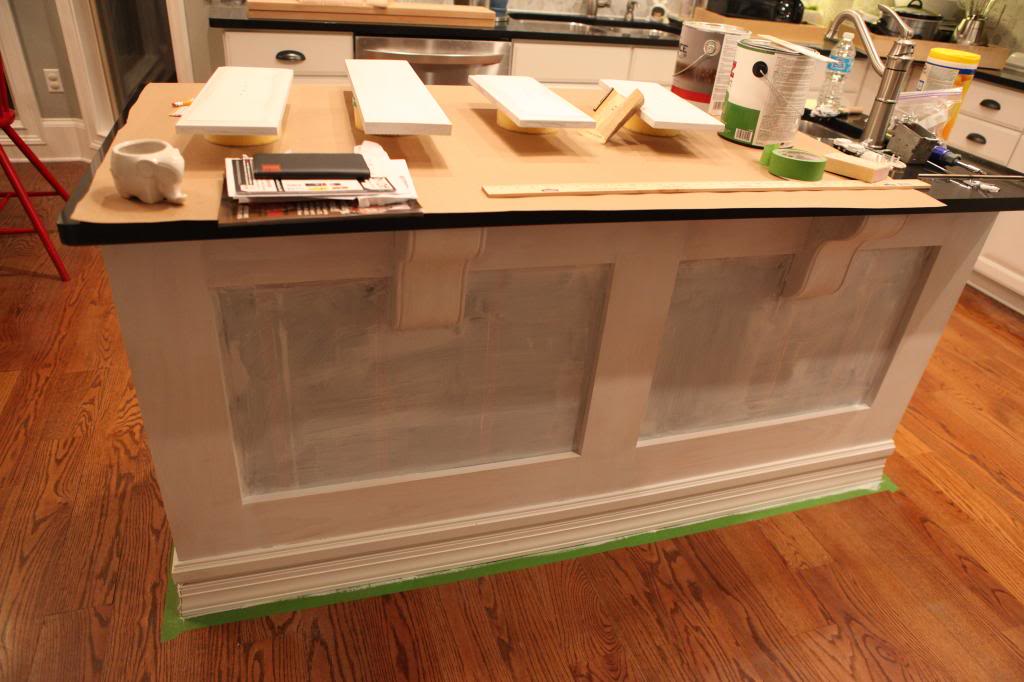
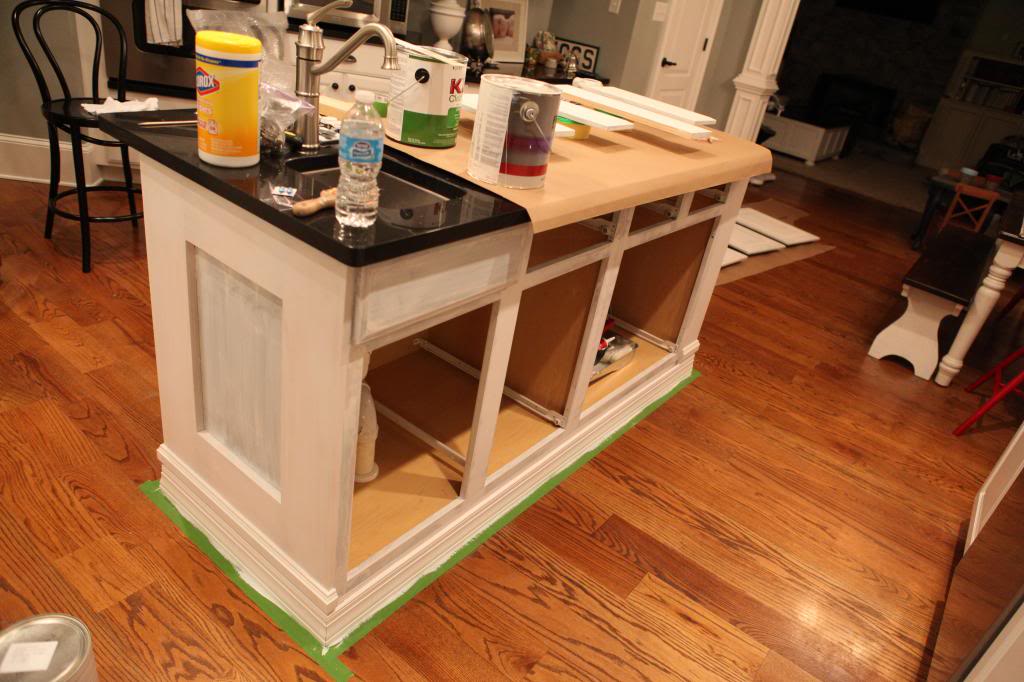
And this wouldn’t be a kitchen post without a shoutout to Frog Tape….you knew it was coming didn’t you!? Are you fully aware that I’m a fan yet? After this kitchen is over, I’m gonna have to stripe Weston or something. Kidding. Sortof. kinda wanna see that now 🙂
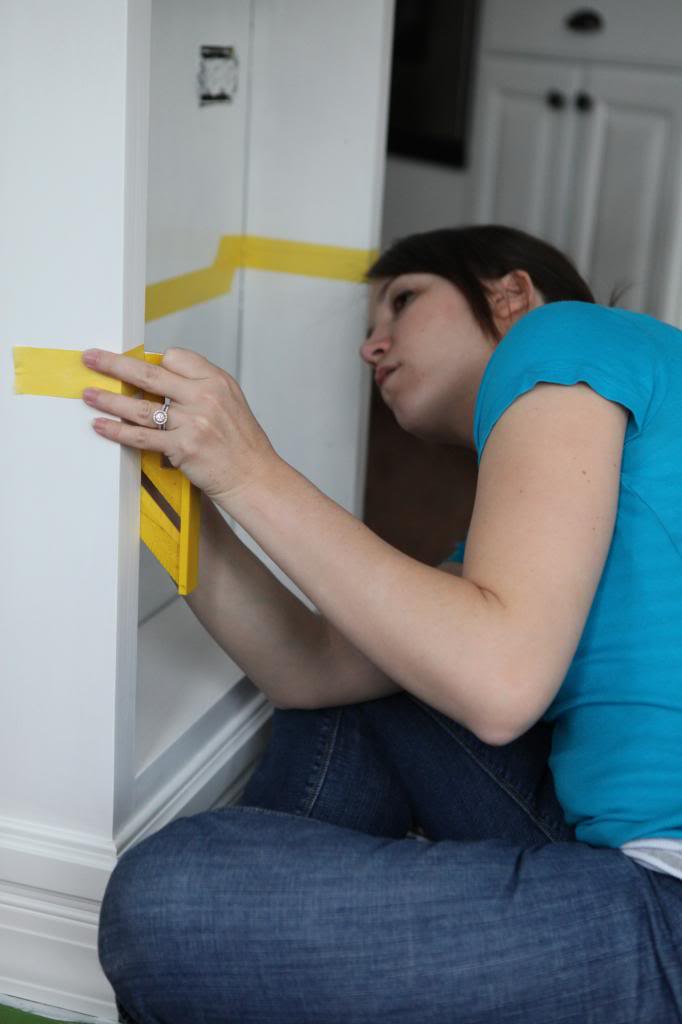
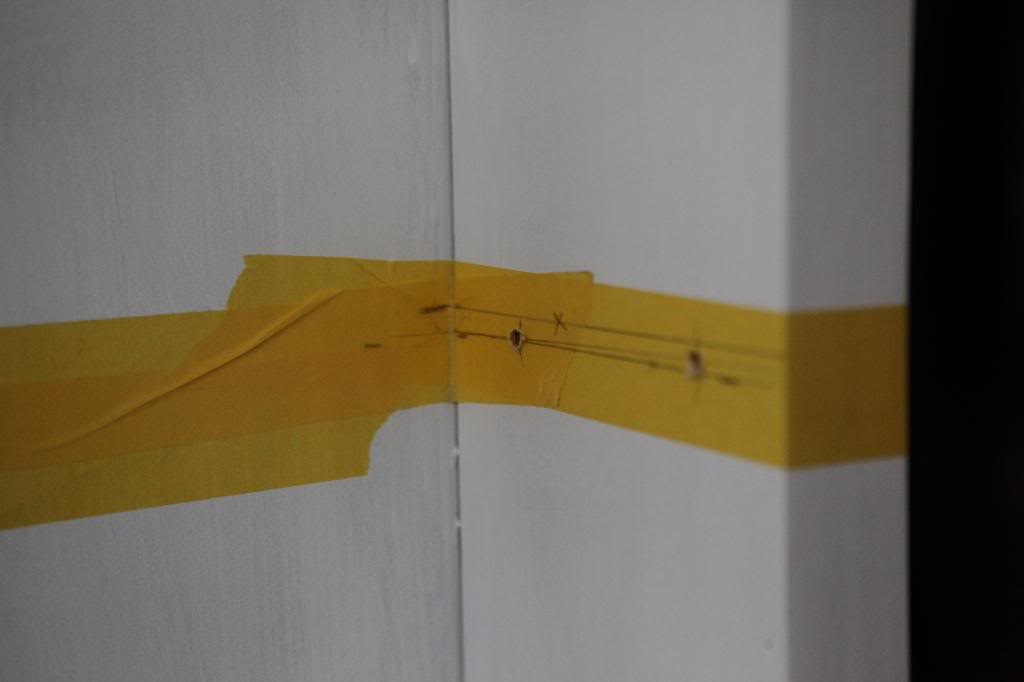
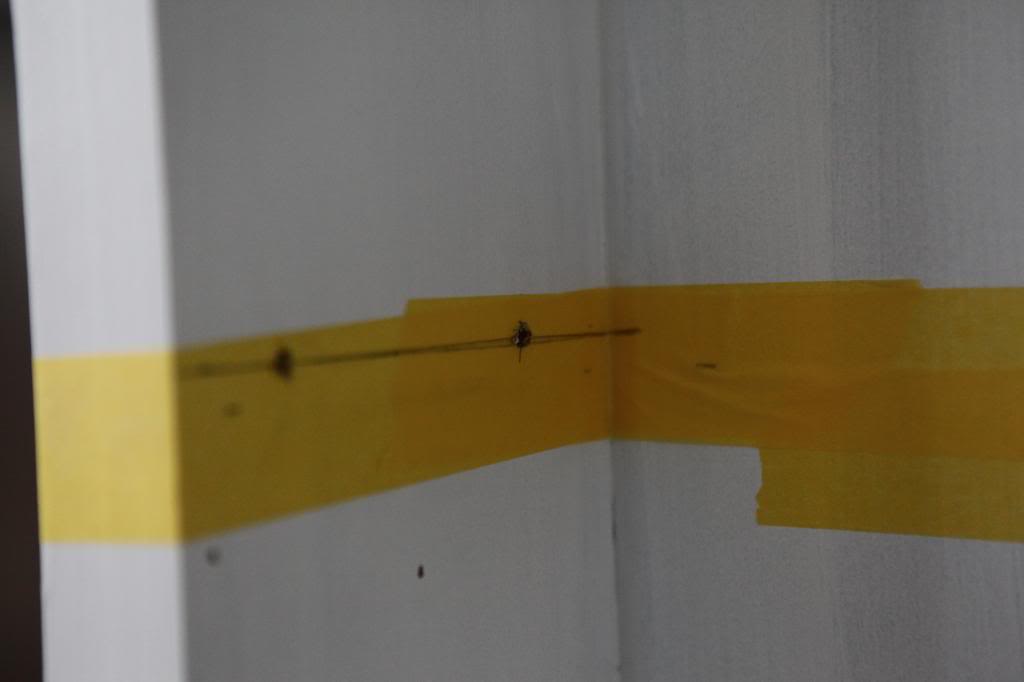
Not only did it help keep paint off the floor (yay for me not having to scrape paint off the hardwoods) but we used the sensitive surface YELLOW FrogTape for getting the perfect shelf holes. Here’s how I did it. First I held the shelf up exactly where I wanted it. Jer kept it steady while I leveled it and then put a strip of tape right under it. Then using a scrap of wood the same thickness as our shelves, I marked the lines on either side of the shelves for the correct location of the shelf holes.
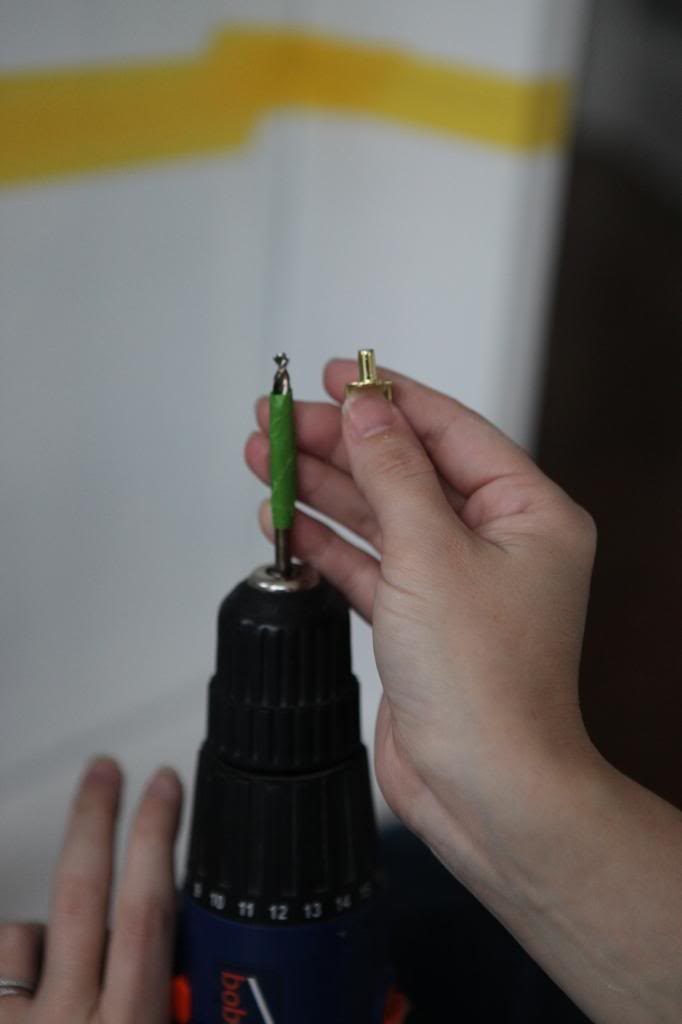
I got the perfect depth hole for our shelf pins by wrapping some more tape around the drill bit so that I didn’t drill too far into the wood but the pins would go in just right.
Yes, I was shaking like a leaf while drilling into the marks. But the tape helps keep things from splitting and splintering.
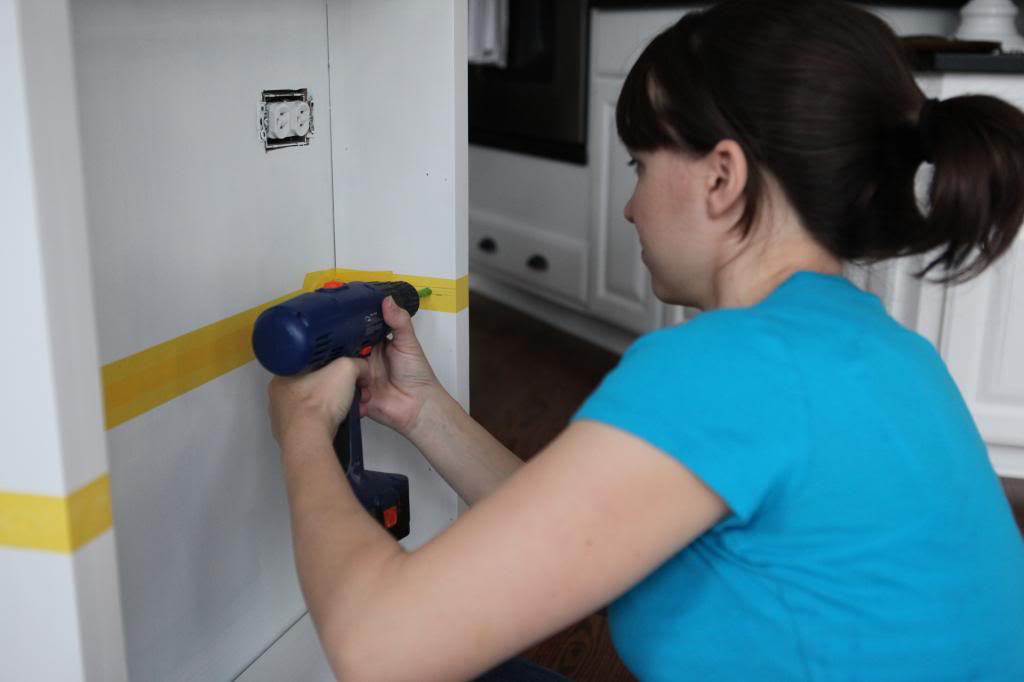
I made the holes about 1 inch from the edges. It just made sense. And gives you some perspective on how truly shallow these shelves really are.
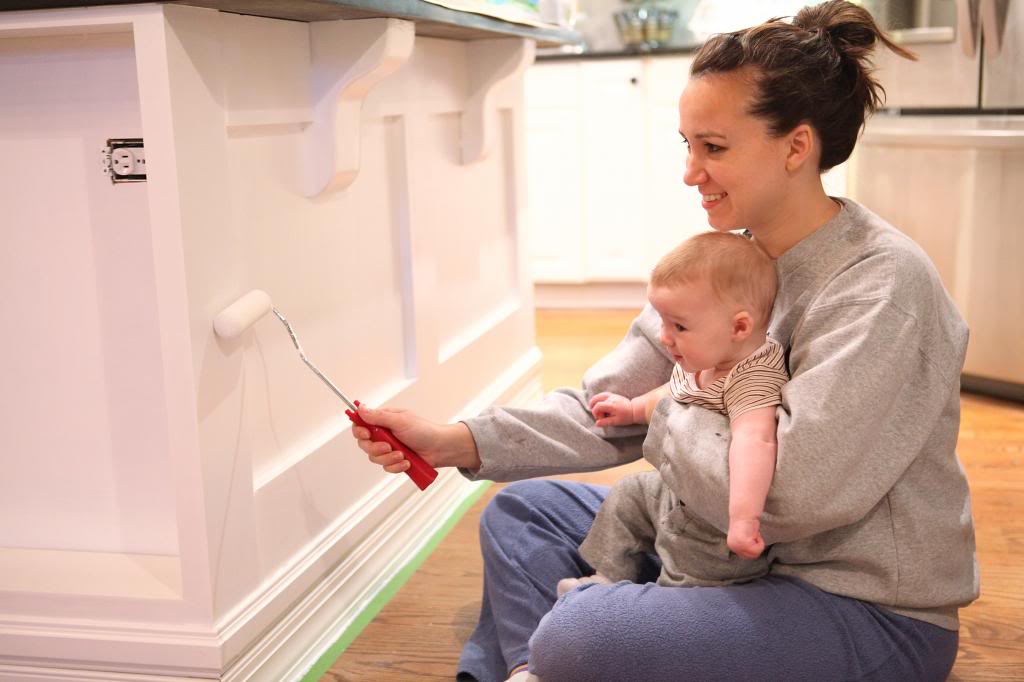
Then came painting. My little assistant was right there in my lap for part of a coat. My mom always tells the story about how I would sit in her lap as an infant while she DIYed furniture and redid her first home. Needless to say, I am really excited to pass that story down our line. And most excited that this time, the paint is lead free and has zero VOCs. It explains a lot though 🙂
After the three coats dried it was time for a little caulking and we were done. (!!!)
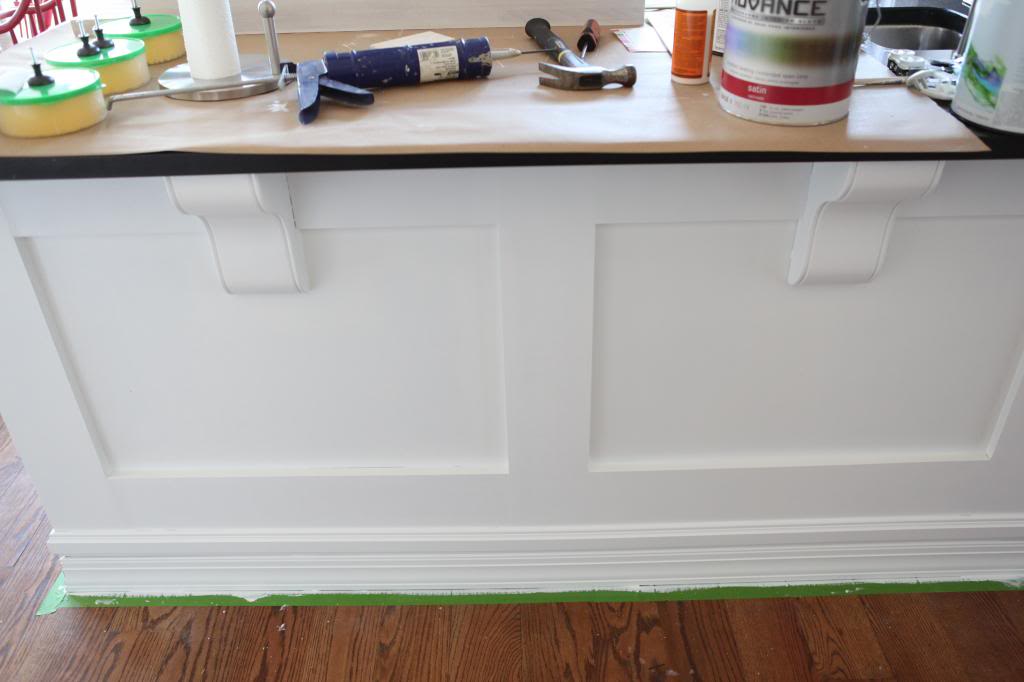
LOOKY! LOOKY! So freaking much better.
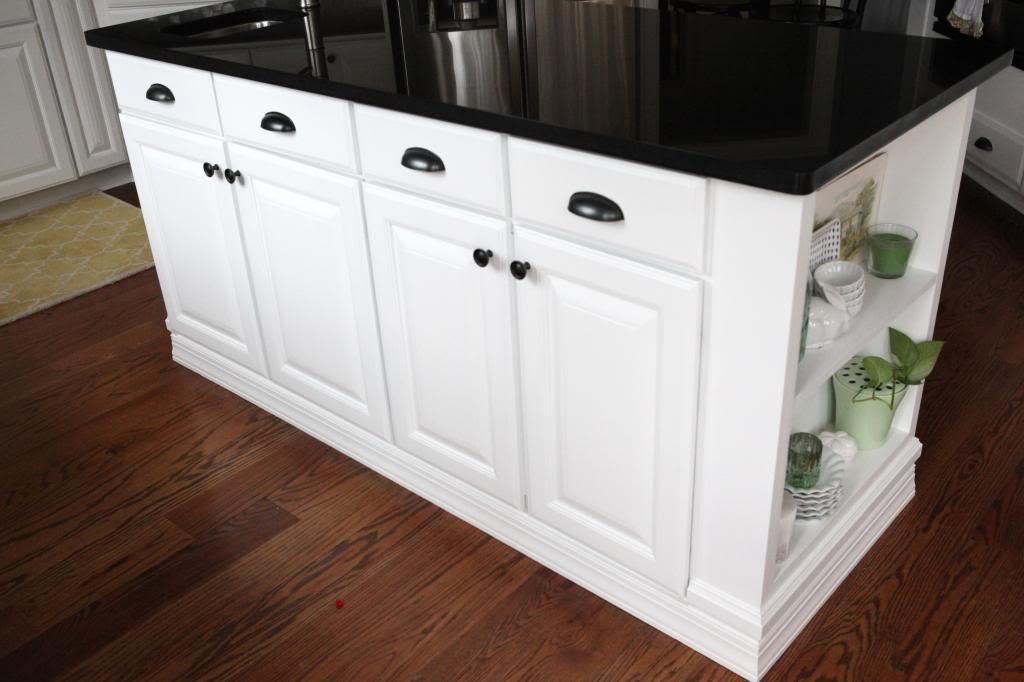
And the little shelf on the end…well, such a prettier view than what it was before.
A lot of you asked if Will messes with the stuff. No. He doesn’t. It’s not to say that Weston won’t try…or any future kids…but for right now, the little dishes and nicknacks are safe. I just threw them on there…nothing is styled…so put that down as a to-do list item. If we ever have grubby little fingers want to mess with the stuff, we may just put a little basket there with non-breakables like napkins and pretty plastic plates.

Also, we added the hardware back on. AND…we added that fourth cup handle to the last faux-drawer on the end. It was the right call…I’m obsessed with the contrast.
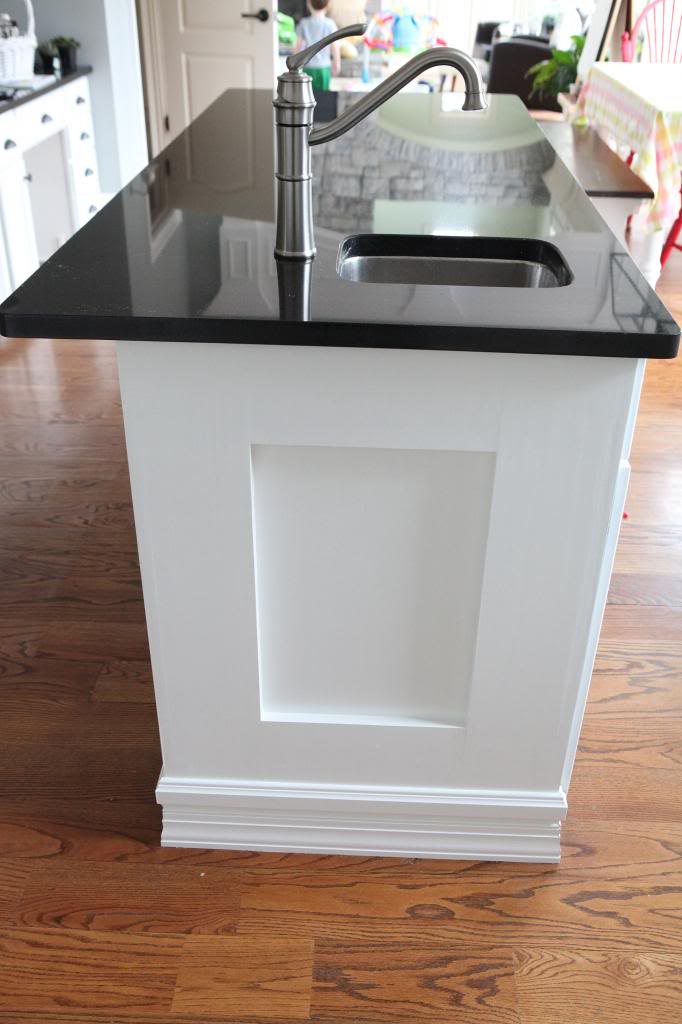
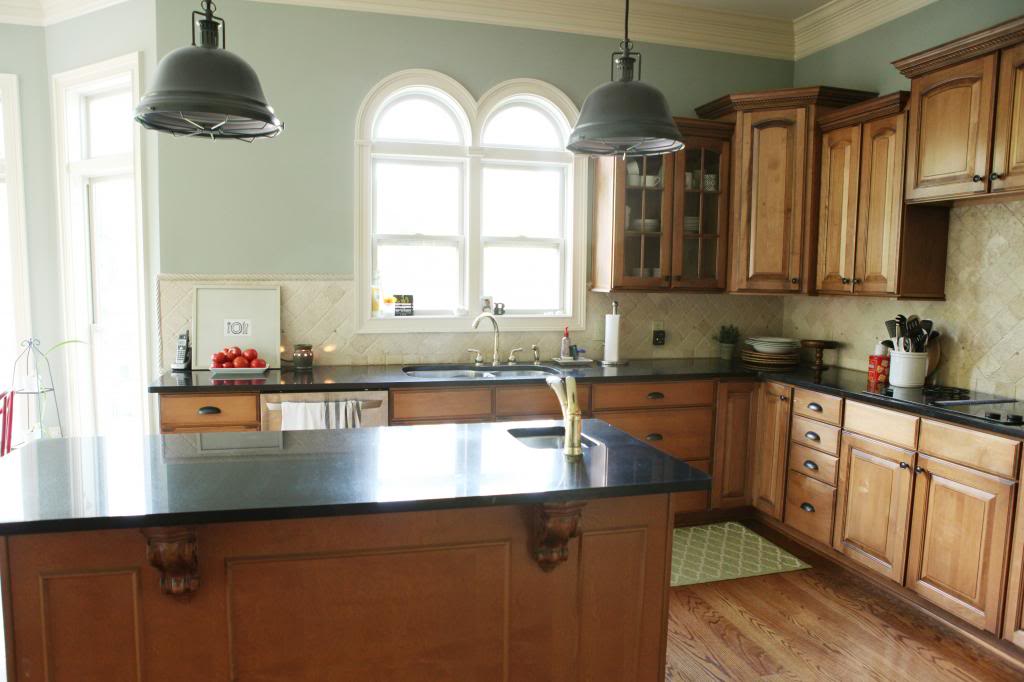
The crazy thing is the before and after.
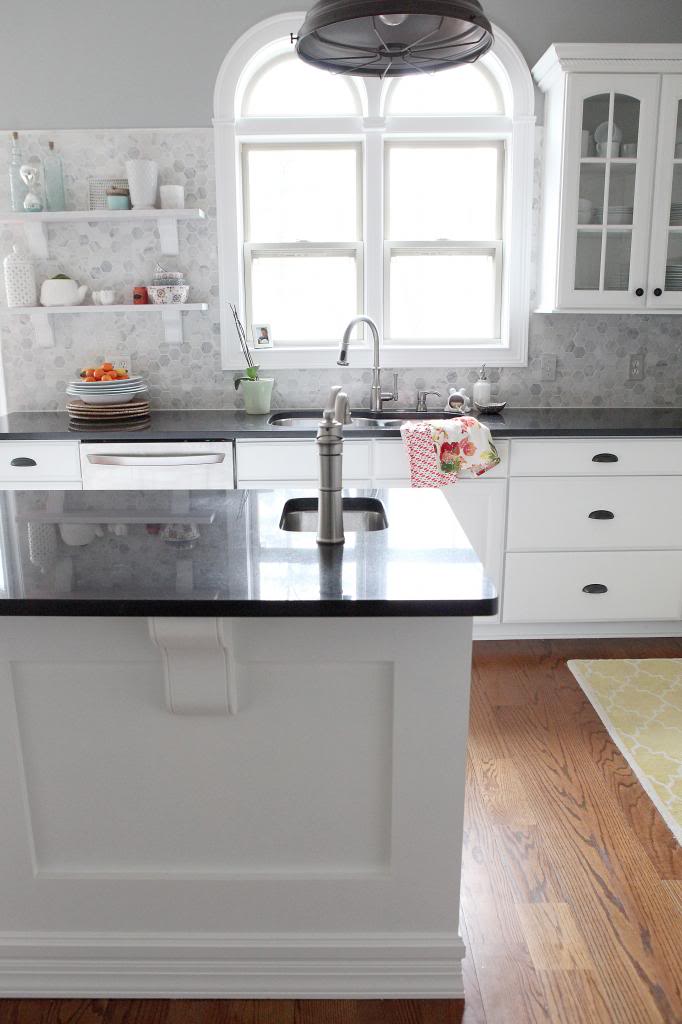
I’m really loving the little splashes of color too. I knew that it was way too monochromatic in there before…but the little bits of yellow and orange and green and blue here and there make it feel so fresh to me.
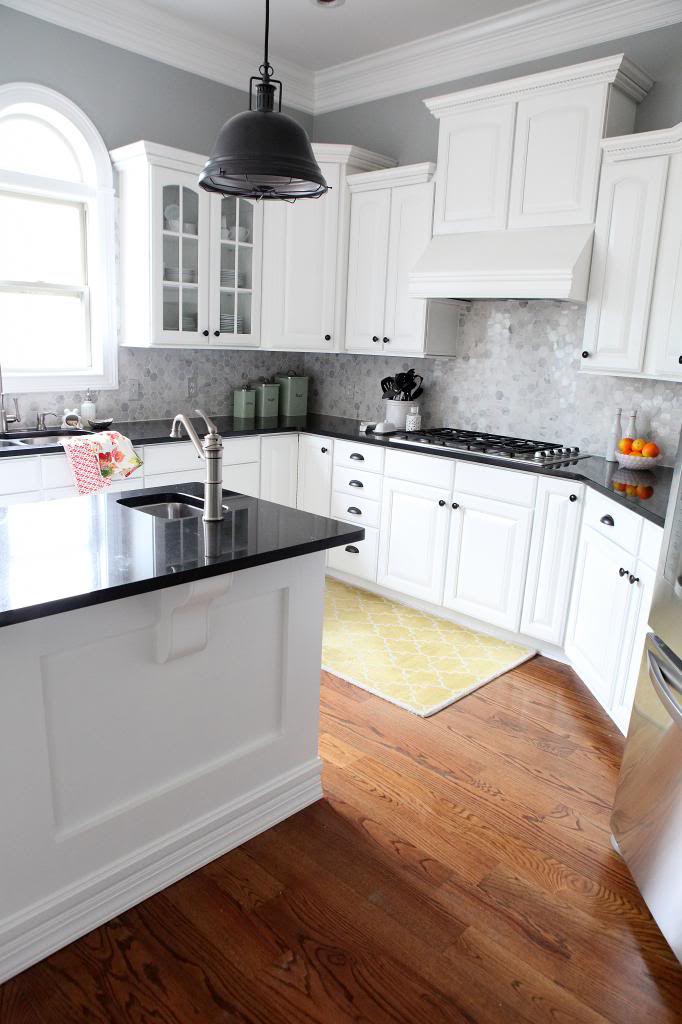
One of my favorite details is how the corbels on the island match the corbels on the open shelves on the tile wall. So much better than the lion foot corbels from before.
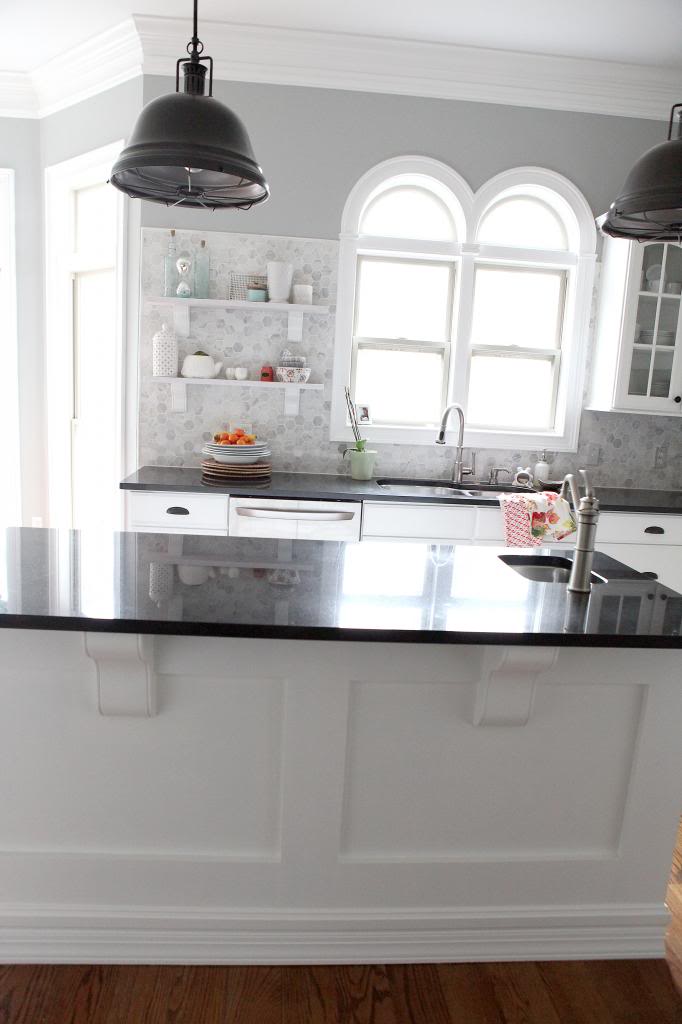
My favorite before and after…

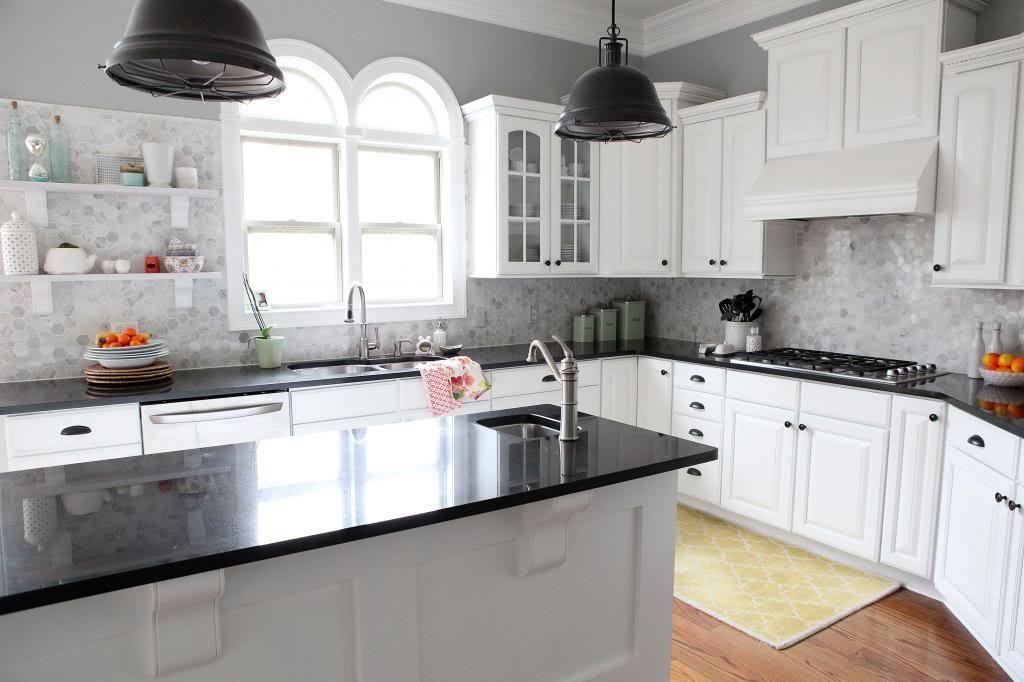
OKAY! Now that the major projects in here are wrapped up, I can not wait to share the details of our Tile Shop photoshoot. They came, they saw, they conquered. And hopefully, fingers crossed, the end result will be stunning. All I know is that there was a giant vase of limes and awkward poses involved. Apparently someone feels like they need to alter their height whenever someone taller or shorter or the same height stands next to them. Let’s just say it was weird and call it a day, mmkay!?
p.s. yes, there are fake oranges and real cuties in that photo above. don’t judge me for my affection to fake fruit…they are just so freakin’ real looking.
Update : Looking for more info on something you see in our house? We have a Shop the Bower House page with paint colors and links to accessories, furniture and decor!

Wow! It’s amazing how much bigger your kitchen looks painted white! I LOVE! Ps Weston is SO adorable! 🙂 x
Thank you so much for the inspiration! Your kitchen looks fantastic. I think I’m ready to take the leap and start mine.
Love, love, love. All the way from Tasmania, Australia x
Ready for this stalker status? In picture 20 there is a black Bentwood chair. Where did you procure this beauty? I am on the prowl and the only new ones I can find (for stability purposes) are at Crate and Barrel, at $150 a pop. Is that where yours is from? IDK how I feel about $600 for 4 chairs…. Please tell me you found them for $50 at some awsome store… 🙂
So fabulous! What a difference a little white paint {and lots of hard work} makes. Nicely done lady. Sounds like you REALLY deserve that glass o’ wine!
XO
~ J
I have been patiently waiting for the details on how you painted the old can lights. Please, please, please…
The entire redo is stunning! Congratulations!
I’ve been following your blog forever and it just makes me smile. I love your sense of humor and your boys are adorable. The kitchen makeover is amazing! Where did you find the corbels for the island?
OhMyGoodness Katie! It looks fantastic! Y’all have worked so hard. You’re such an inspiration. God bless!
Um, can you guys come and re-do my kitchen??!! I have GOT to show my hubby yours so that he believes one CAN paint ugly wood white and have it fresh and gorgeous. LOVE.
Absolutely love it! Did you seal your cabinets and island with a poly or wax?
Love it!! Never felt the dark island, this is really great. You both did a fabulous job. Such pretty, sparkly tile. Great place to cook and hang out now! Be proud.
It would be impossible for me to be more obsessed with your kitchen. It looks FANTASTIC!!!!! Seriously, I can’t even believe it is the same room. I would pet that tile and roll around on those countertops all day long. Not sure how you get anything done haha!!!
I love love love your kitchen update! It looks fabulous, so crisp, clean and bright. Great job guys!
The end result looks amazing, Katie! Will you come to my house and tell me how to fix my ugly brown cabinet and lack of storage situation?! 😉
Wow, that looks incredible! You guys have done a fantastic job!
Something I just noticed… The glass-front cabinets to the right of the sink. Before you painted the cabinets white, I didn’t even notice them. I was thinking, did they add the glass doors when they redid the kitchen? Crazy how nicely they are featured now with the white cabinets. Beautiful job on everything!
GORGEOUS, Katie! I love it!!!!!! It seriously looks awesome. Love the chunky island 🙂
Katie I absolutely LOVE your kitchen. I love all the little details. I love the classic color scheme. It’s stunning! You & Jer should be so proud of yourselves.
Looks great! Love those shelves on the side. Silly question, but where is your oven? My mind’s eye is trying to piece the whole room together : )
Man, Katie, you and I must share the same mind, because your kitchen looks just like my dream kitchen. Every single step of the way is something I would have done. Your backsplash is to die for (I only wish I could find some just like it that wasn’t so pricey!). I love the white cabinets, I love the dark counters, and I love how you redid the island with that chunky wood and shelving. You and Jeremy should be very proud, you have totally transformed this kitchen and it is GORGEOUS!!
My 6 year old’s opinion on the last before and after picture… “The first one was yucky and the second one is beautiful.” She is right! Great job!
haha…I love 6…they know all the right words 🙂
xo – kb
It’s on the opposite side of the open shelving…so it’s the wall to my back. When I do the full reveal post, it will be so clear!
xo – kb
Okay, the tin with yellow frog tape~ Seriously, LOLing. I love everything you do, but mostly love that you never take any of it too seriously. You’re the best, your kitchen is uh-mazing and have a wonderful weekend with your boys. 🙂
Nope. With a wax, we read that it would be a semi-soft finish and could have dirt and dust accumulate…and with a poly, we would have a potential problem with yellowing…so we decided to use Benjamin Moore’s Advance paint which hardens really well and cleans up easily. Hopefully it will be all we will ever need 🙂
xo – kb
looks so good!! i said it before…if you swap out those black fixtures for polished nickels (or something light and airy)….every other detail will shine that much brighter. photoshop it girlfriend!
LOVE it! Such a great upgrade. The shelf on the end makes it!
Oh been there done that! I love me a dark fixture! I love the fact that my backsplash can be my sparkly diamonds 🙂 I totally see how the polished nickel could look good but you know…you like what you like, right?!
xo – kb
This is the most amazing kitchen transformation. I love the way the island feels like a pice of furniture now. And the shelf on the end would be great for cook books, too. I don’t ever use them anyhow so they may as well look pretty.
Love it SO much! A huge transformation. It must feel so good to be finished and to just enjoy your kitchen now! Can’t wait to hear about the photoshoot!
Your kitchen looks amazing. That said, I think I might have totally missed a certain post – where did those lights above the island come from? I might be swooning a little.
Beautiful!! Such a difference in the kitchen overall!!
This is awesome, you did a great job! This kitchen looks so clean, elegant and classy! I also like the idea of putting the shelves on both sides. By the way, I admire you for being a brave woman, (this is for drilling the holes). Ha Ha, anyway, your baby is so adorable and it is so nice of you to share what you’ve experienced with your mother to your baby. 🙂
Even though I’ve been following right along with the kitchen makeover, I still can’t believe the before and after, it’s amazing what you’ve done. “Professional home makeover mama” should be added to your resume!!
Heres the post all about them 🙂
xo – kb
I love your kitchen. Like more than Norman Reedus.
Lucky girl.
Enjoy it for the rest of us.
Bye
holy. freaking. crap. that looks AMAZING! the shelves on the end are my FAVORITE and i never would’ve thought about it, but those corbels tying in to the open shelves are SUCH a great detail that ties it all together! you guys did an amazing job from planning to completion! congrats!
Fantastic Katie, really really beautiful.
I’ll blog about it soon!
xo – kb
Yeah. I feel ya. Those are from Crate & Barrel and it was crazy to think about the price. I did find some at Restoration Hardware that are practically the same except the finish. They were on sale last I saw.
xo – kb
This is seriously one of the most beautiful kitchen makeovers I have seen in blogland! At least for my taste. So pretty, Katie! And you two are one handy couple! So bright and happy now, I love your kitchen!
ah! I looked through again and caught a glimpse in picture 20 – with the pricey chair : ) It all makes sense now.
I have that exact chair in blue from Ikea where it was under $20. It’s not wood but it’s still cute.
It looks amazing! Such a transformation! I love the white cabinets and grey tiles, my favorite parts are the wall shelves and island shelves, I love how you styled them. Where did you find your tins for flour & sugar? So cute.
I’ve been looking for some faux-fruit, where do you find it?
I absolutely love your kitchen! This island has put so many thoughts in my head!! You did a fantastic job on it and it’s so inspiring!!
Ok its official, I just popped over having been on YHL and I’ve decided I want to live in BOTH your houses – your kitchens are both just so gorgeous! Great job kb!
Katie- The island is amazing. Every detail of your kitchen is perfection! WOWZA! And baby Weston painting with you is the cutest thing ever. His smile melts my heart. Enjoy the result. You guys certainly put your hearts and souls into it, and it shows.
this is definitely a transformation. aside from the nonworking items before, the kitchen seemed quite lovely. now? breathtaking. great job, team bower!!
It looks amazing. What a cute picture with baby Weston on your lap. I bet grandma loved it too.
seriously amazing! my favorite project you’ve done so far!
Hey Katie! Love the kitchen; y’all’ve done a really nice job with it.
Quick question. What plugin do you use for the “You may also like this…” thumbnails?
nRelate. Hope this helps!
xo — kb
The tins were from Pier 1 and the faux fruit comes from a bunch of different places. I think that Pier 1, Michael’s, Hobby Lobby and even places like TJMaxx all have realistic options. I only get them if they are under $1 a piece though…so keep those coupons!
xo – kb
I think the wildest part about the last before and after is that the cabinets look higher up to me. It somehow opens up the space between the counters and the cabinets. I LOVE it. Looks amazing. Clap clap clap!
Could you please explain the difference between “styled” and “just threw them on there,” (in reference to the shallow shelves)? They look pretty darn stylish to me. I love all the greens!
OBSESSED with your kitchen. You have such a great style! The tile makes me drool. Now, I love my white subway tile….but ooooooh yours is so pretty!
Looooks grrrrrrreat! At first I was like the eager school kid raising her hand saying “Ooo! Ooo! You should put your cook books in those pretty little shelves!” But then I saw them all pretty like in the shelves above the fridge and I was quietly retracting my crazy arm waves. Maybe when cute little Westey thinks about clearing the shelves, you could make it a sweet little kid zone. Books and basket of toys? Little play grocery store? Play kitchen? Oh the possibilities!
Looks SO amazing!! What a transformation! So beautiful 🙂
SUPER CUTE!!!!
Your kitchen is stunning 🙂
It does. Thanks, Katie!
oooooh, aaaaaaaahhhhh 🙂 Great job! It must look HUGE compared to the way it was…
Sorry … I have another quick question. 🙂 The “stuff that makes me drool…” section in your sidebar … did you create it with a plugin or by writing code?
I swear I’m not copying your site, but I am one of your (usually) silent, regular RSS readers.
I’m always working on improving my blog, http://reddoorreview.com .
Cheers!
Yellow Frog tape? I have never heard of such a thing- looks like I must immediately run to my nearest home improvement store and check it out! 🙂
I couldn’t help but notice how much Weston looks like Will in the picture of you holding him! Holy cow! It was like a mini-Will! 🙂 He’s getting so big!
I love the finished product! I can’t wait until I finish my kitchen (which has only taken me 3 years now… so maybe sometime around 2015?
Erica
Just code 🙂
xo – kb
haha…yes, I just threw them on there. If I style something, it usually means I spent time trying to make it the best it can be with the stuff I have.
xo – kb
I love the contrast of the black hardware/fixtures/counters with the white cabinets and backsplash! And now with the gleaming white island it is all so fresh! Great choice, Katie. I think polished nickel would be washed out in all the white and marble.
I had to comment again but this is seriously the most beautiful kitchen in all of blog land! Kitchen renovation consultant/designer should be your career 🙂 Questions: Is that a new yellow floor runner? And is it from Shades of Light? Also, how did you install hardware on the faux drawer on the island?
Love all of the island detail, especially the shelf.
I also LOVE your kitchen. I am a huge fan of gray and white.
http://happinessiscreating.com/
That looks amazing!! I love your new faucet!
Love, love, love the white kitchen!!!! Also love the lights. Where did you get them? Enquiring minds want to know!!!!!
Nope. It’s very old. And it’s from Pottery Barn outlet AGES ago. Here’s the post about it. We installed the hardware with some heavy duty adhesive on the back of the handle and just stuck it on and taped it down for 24 hours. Easy Peasy!
xo – kb
Here’s all the details about them!
xo – kb
I love that you made the piece chunky! It just ads more character to the whole kitchen. I have a similar layout in our kitchen I need to update and you have given me lots of ideas. Now just to get the will power to get the project going…Your ended up looking great, well done and enjoy.
I really like the look of a neutral base that you can add pops of color to. The overall feel so calm, but then you really get to notice and play with the fun details. Looking good, Katie!
You make painting with a baby in your arms look easy. That is a skill.
What color gray paint did you use for the walls? I love it!
It’s Benjamin Moore’s Metropolitan.
xo – kb
Ok, so in this post it looks like you rolled or brushed the BM Advance paint on your island rather than spray it like the rest of your cabinets. Did the finish turn out the same or do you wish you sprayed the island too?
We did brush/roll the island and sprayed the rest. The finish is SLIGHTLY different but it is not noticeable unless you are on the floor about three inches away (scrubbing with a Magic Eraser!). It might be different if it were eye level.
xo – kb
Hi guys,
I was curious if you knew what blue color paint you used before you redid the kitchen. Both kitchens are gorgeous!
Thanks,
Kristal
The kitchen before was not something we chose…it was here when we moved in. The paint colors that we ‘color-matched’ are in this old post 🙂
xo – kb