
Here’s what I’m feeling….excited, relieved, flattered beyond belief, and a little disappointment. It all has to do with the fact that the Pinterest Challenge is back.
Excited because it’s reveal day and I can’t wait to see what you all have come up with. Relieved because I got something done that needed to get checked off my to-do list. Flattered because three of the most gorgeous girls in the blogosphere are cohosting with me….so don’t forget to check out their projects too…
- Sherry of Young House Love
- Ana of Ana-white.com
- Erin of House of Earnest
And a little disappointed because this project didn’t turn out quite as fabulous as my feeble mind imagined it would. You win some, you lose some, right?!

Speaking of the project…..let’s get to it.
First, you should know that a while ago I discovered that our ‘stained glass windows’ in our new home weren’t stained glass at all. They were basically the redneck version…a la decals. When I tackled them in the living room, removing the sticky substance took FOH-EVAH. As in weeks and weeks. And many of you recommended some sticky-substance removers – some I had tried, some I had tried the off brand and some I didn’t give a whirl.
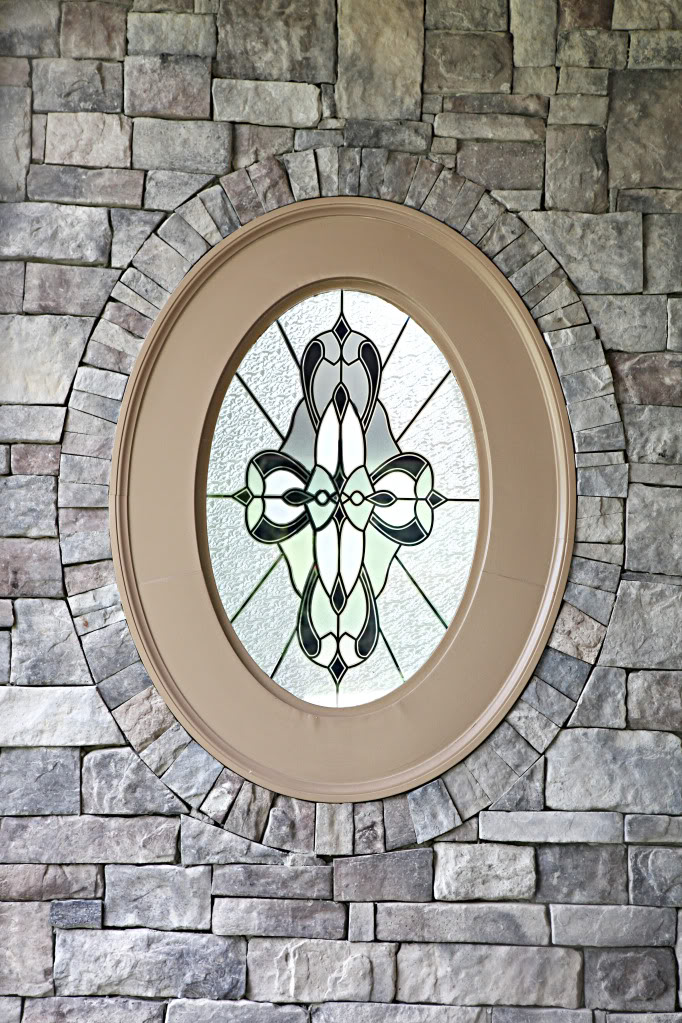
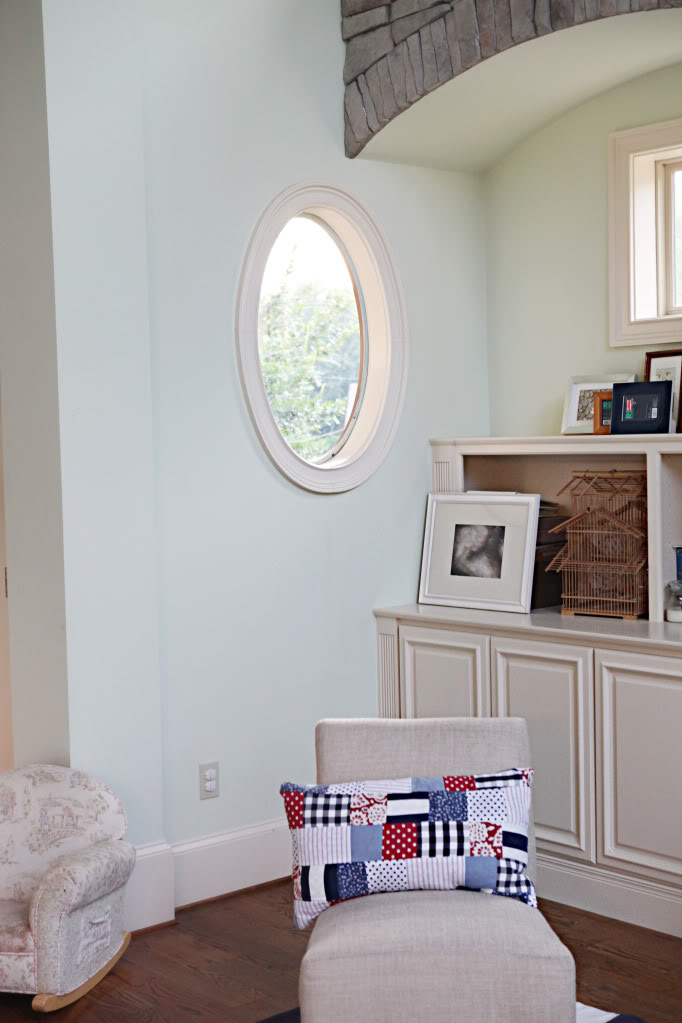
So you can imagine that this giant decaled window in our master bathroom was daunting to say the least. And that is why it simply sat on our to-do list untouched for weeks.
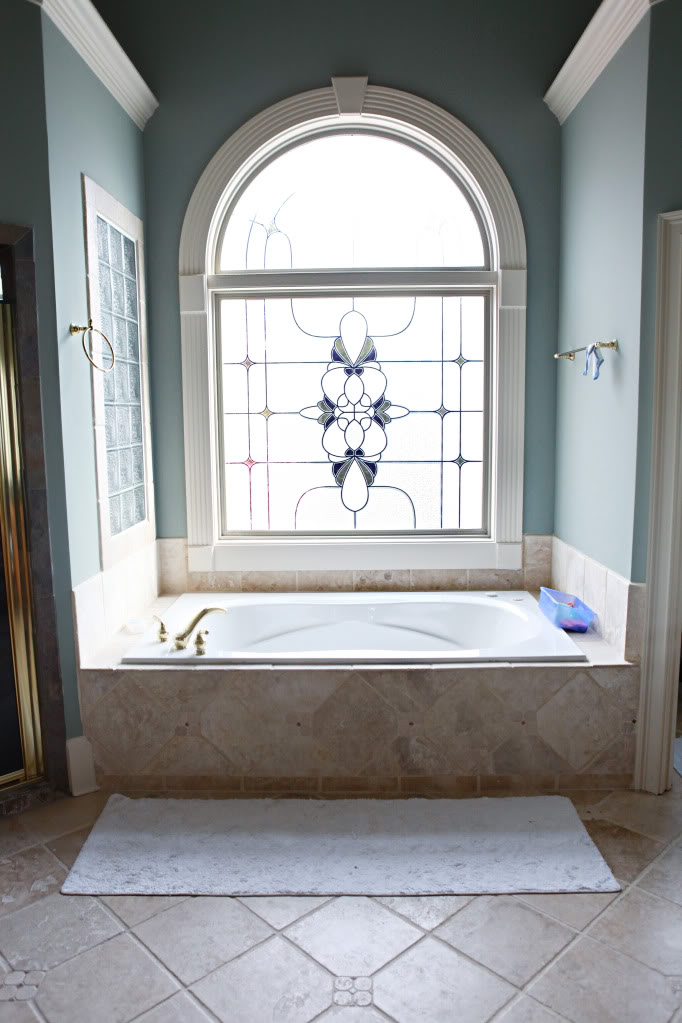
Why are we nixing the decal? For one, it’s grosser than showing up at a pumpkin patch with your teenage butt cheeks hanging outta your daisy dukes while you make out with your 50 year old hubby. (seriously it had hairs trapped under the decal and there is very little that skeeves me out than some strangers body hair staring me down while I’m soaking in the tub). Secondly, the pink, purple and traditional design just weren’t our style. (sorry about the difficult lighting)
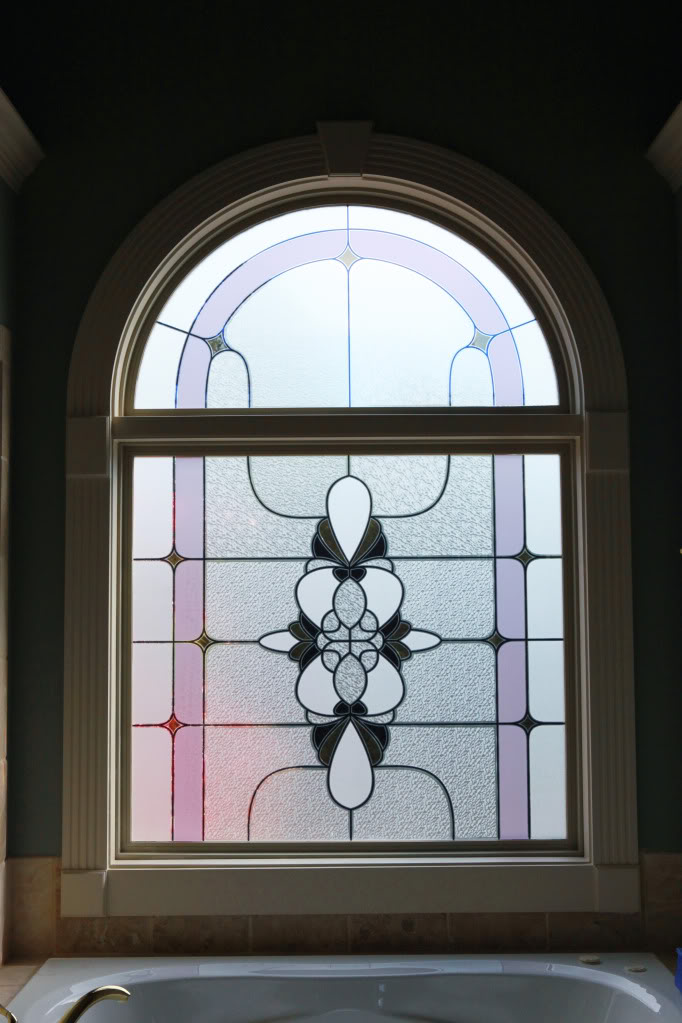
This time around I knew exactly what to expect when it came to peeling – go slow and steady.
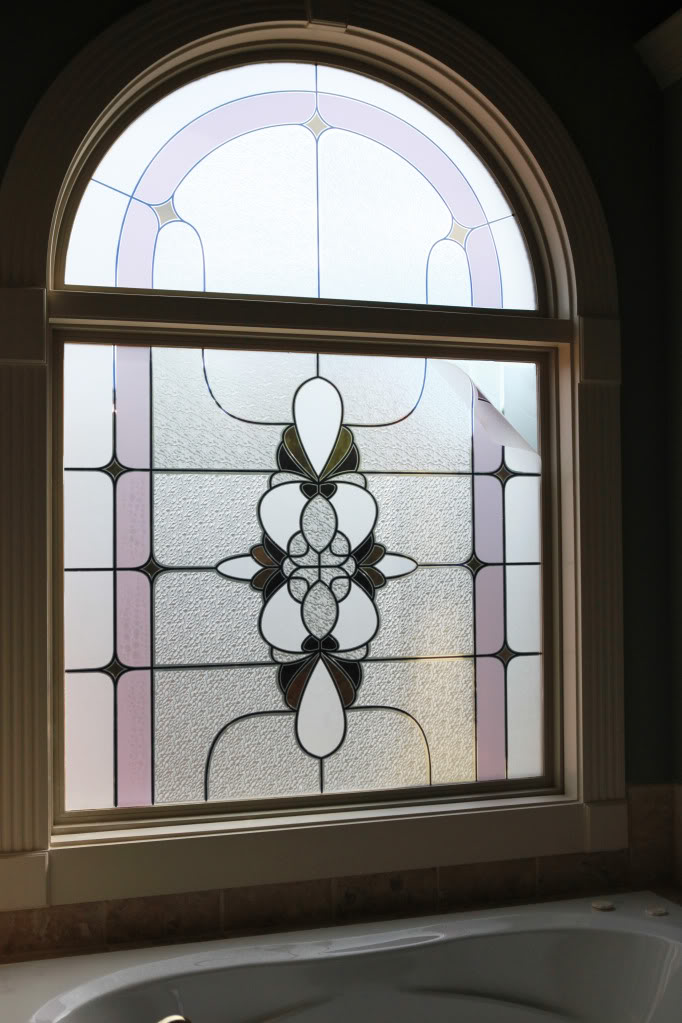
And expect the huge amounts of ‘stick’ when you peel off all the layers….
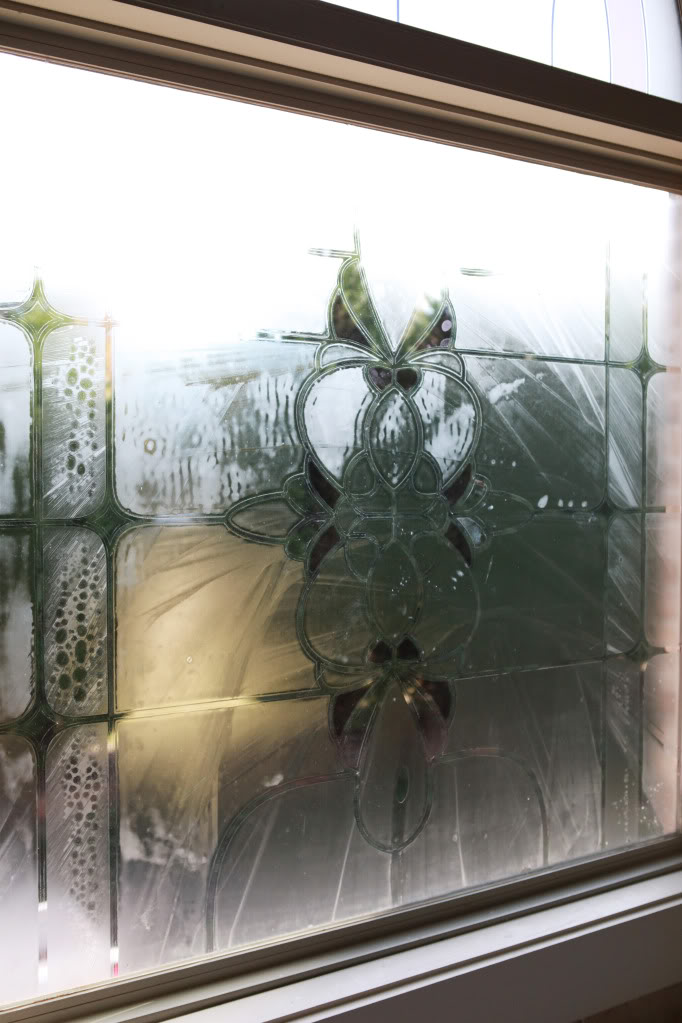
So here’s where I enter Scientist Katie mode. I really wanted to give the two highest recommended items a chance to rid the window of ‘the stick’…so I picked up a new bottle of both name brand items Goo Gone and Goof Off. Wanna guess who won in the battle of sticky-stuff remover?
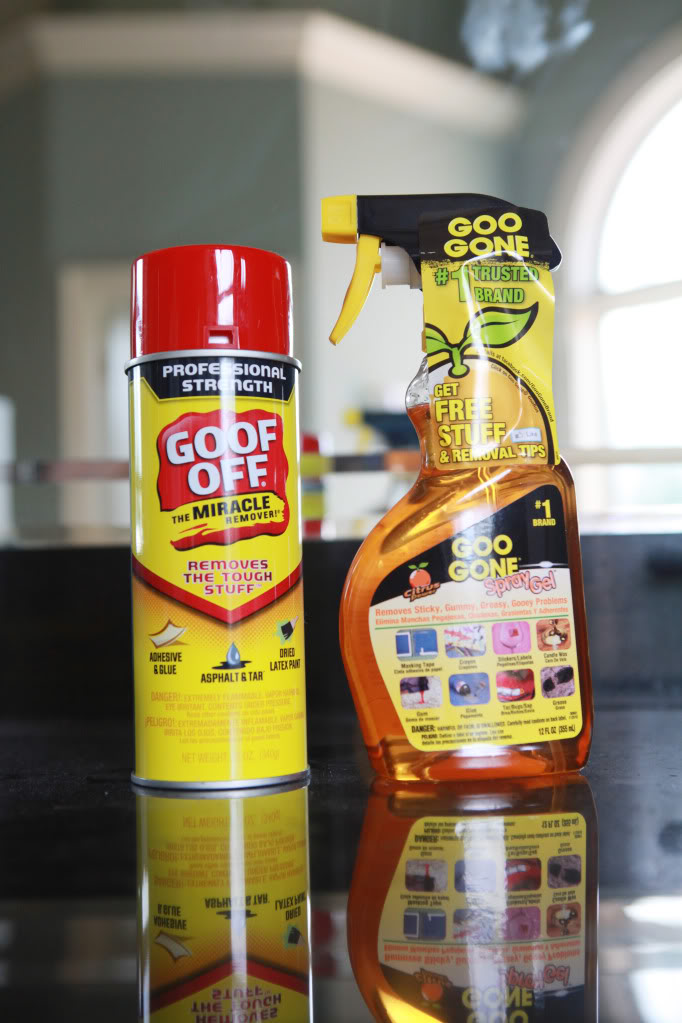
Goof Off!
I sprayed each on a separate corner that each had equal amounts of ‘the stick’ and let it sit for about a minute before wiping with a paper towel. The Goof Off took off 90% of the sticky stuff with twenty wipes whereas the Goo Gone took off about 30% with the same number of wipes. Winner winner chicken dinner.
So I finished the rest of the window with the Goof Off (while trying to avoid getting high as a kite!). At the very very end we ran out of Goof Off…and my darling boyfriend pulled out this air freshener called Citrus Magic. And do you know what? It worked too…just as good as Goof Off and it smelled better too. Crazy, huh?!
Finally it was clear as a whistle (note that some of the decal would not come off even with Goof Off and the trusty razorblade was one of the few things that excrutiatingly slowly removed the rest).
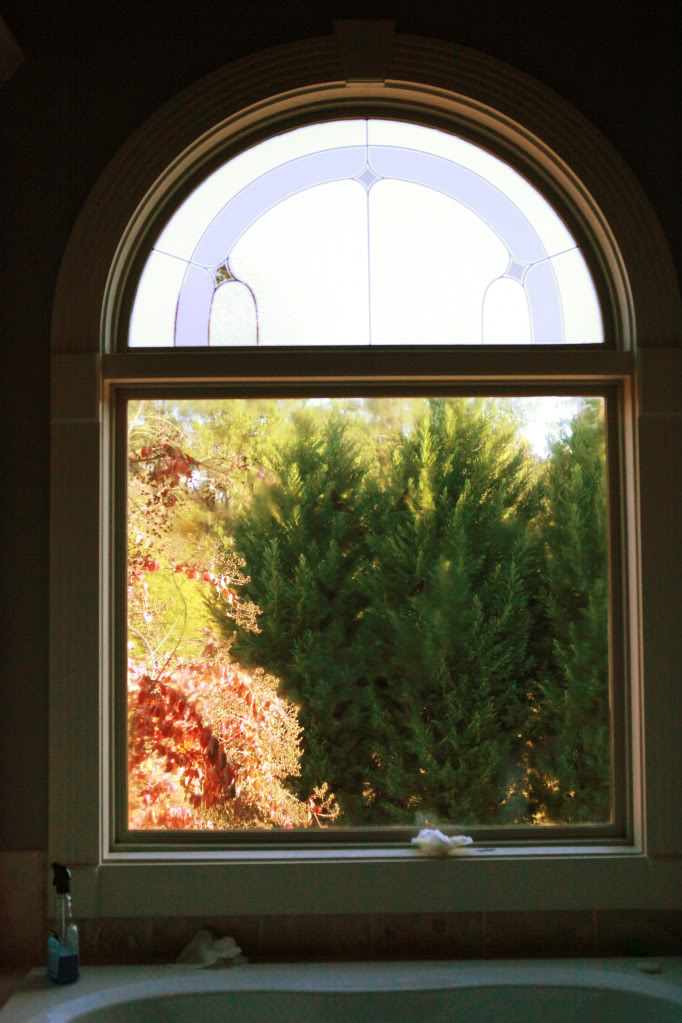
But we still have an issue. That there is a giant wide open window that is visible from our neighbors yard to see all of our freshly showered and bathed Bower bodies. My mutant midsection would be visible to the world! So we needed a solution.
I needed inspiration….enter this pin from Anna.
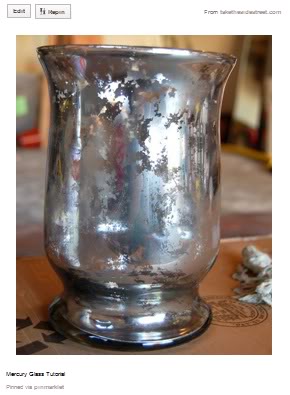
Anna is a blogger over at Take the Side Street and she did a whole post about how to make glass look like mercury glass. (here’s the original project link with full instructions!) And that inspired me to rethink how to obstruct the view of our bathroom.
You see, I have this stash of windows from my mom’s neighbor – Mrs. C. She was redoing her exterior and the plan included new windows (IT’S GORGEOUS) and I ran over there like a crazy person and asked her (as I gasped for air because I don’t run usually unless there is bacon involved) to save me some pretty pretty please. And she did. So my hair-brained idea was to take that big window and make it look like antiqued mirror glass and hang it in the opening of our bathroom window.
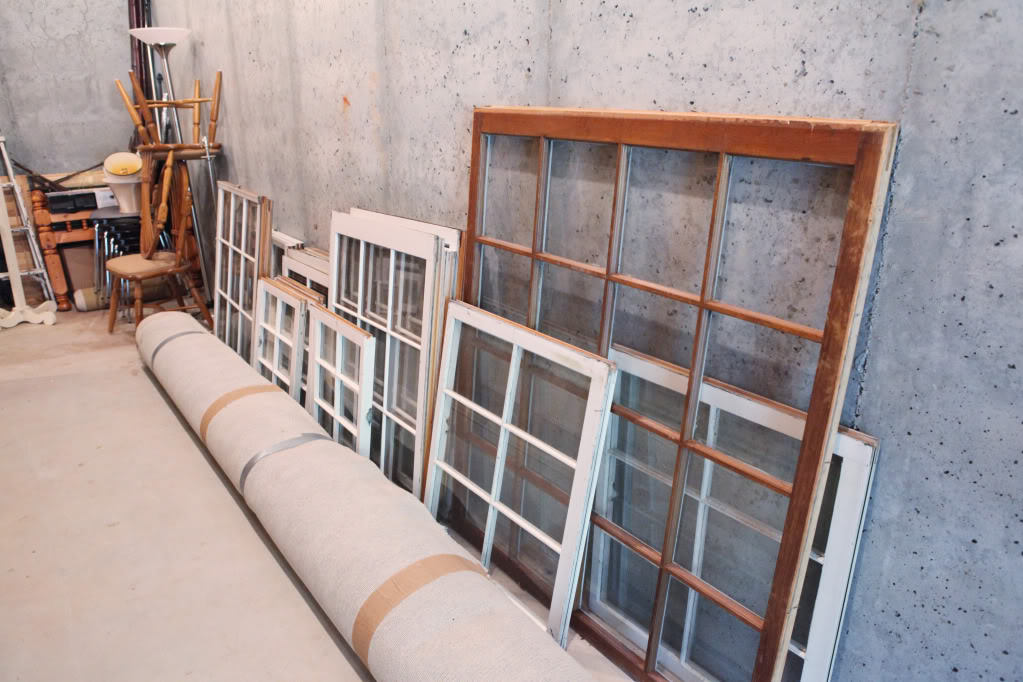
I know it sounds crazy…hanging a window in a window….but in my mind (crazy things happen in there), it seemed like it was gonna work and I would end up with this pretty antiqued looking focal piece. So I started with Anna’s instructions…cleaning the window and deciding what side to spray…
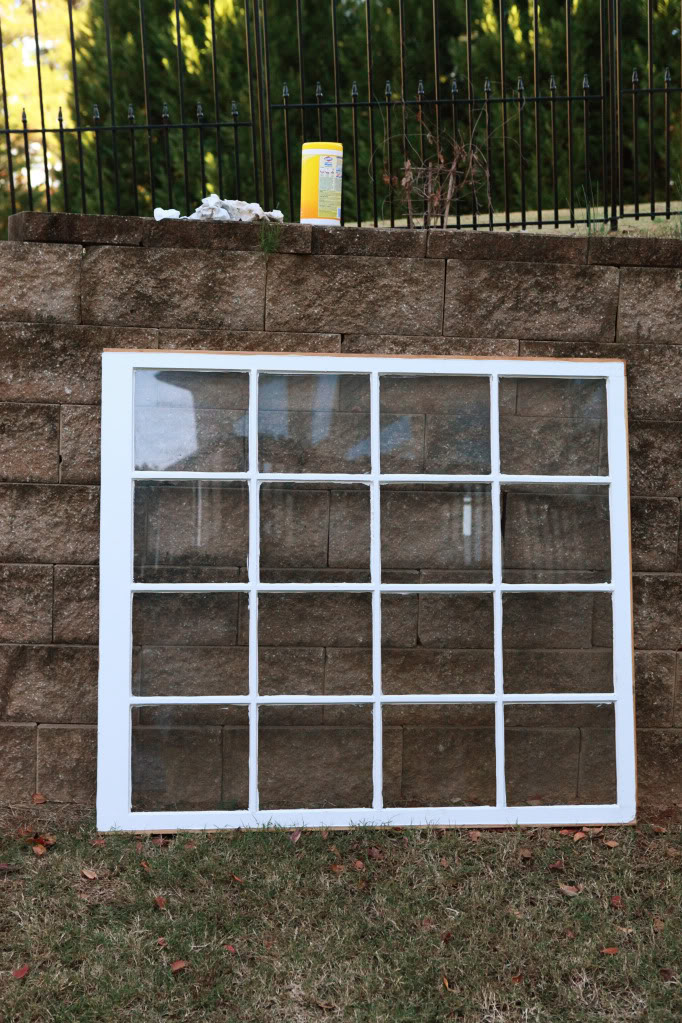
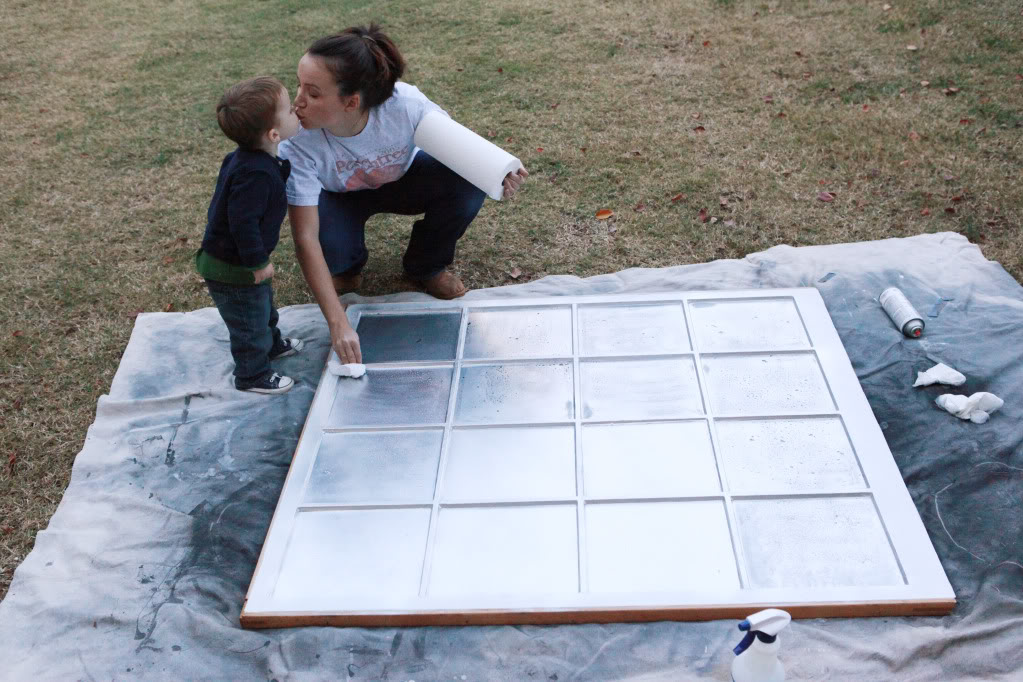
spritzing with water….(later I realized that I did Anna’s steps all wrong)…
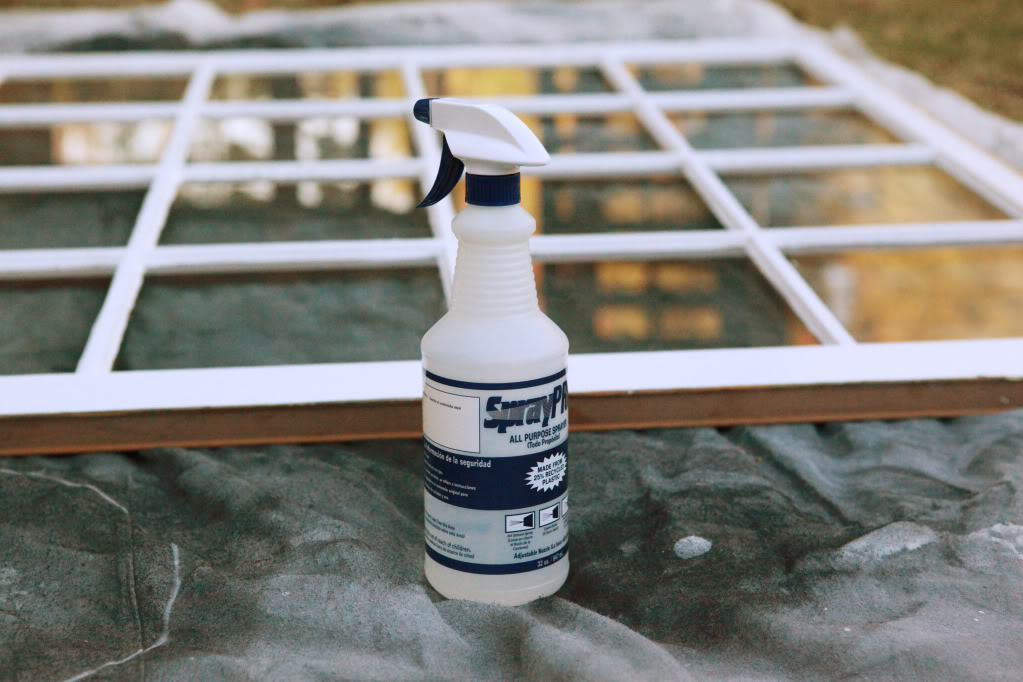
….spraying with my Looking Glass spraypaint…I sprayed way too much…
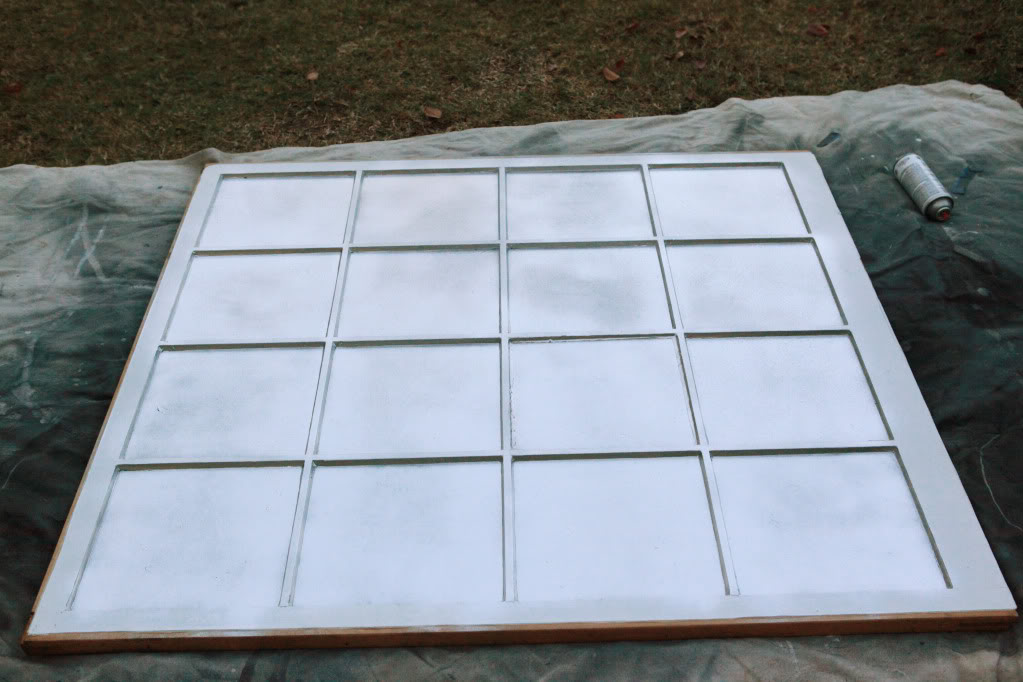
checking out my bubbles…letting it dry way too long…
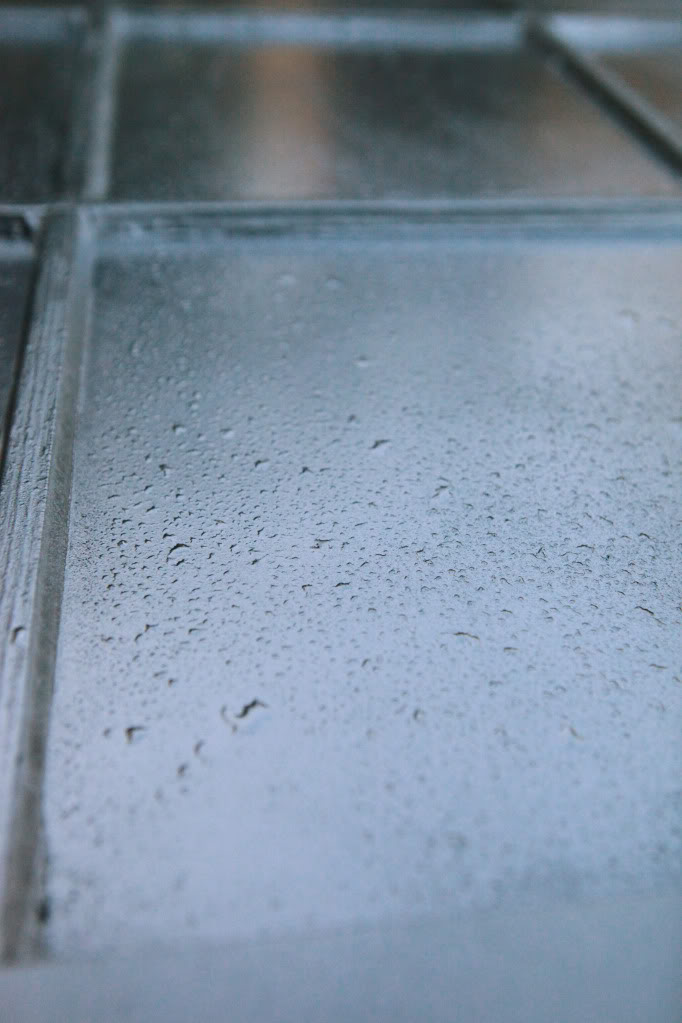
….wiping off the paint that landed on the bubbles….not nearly enough came off….
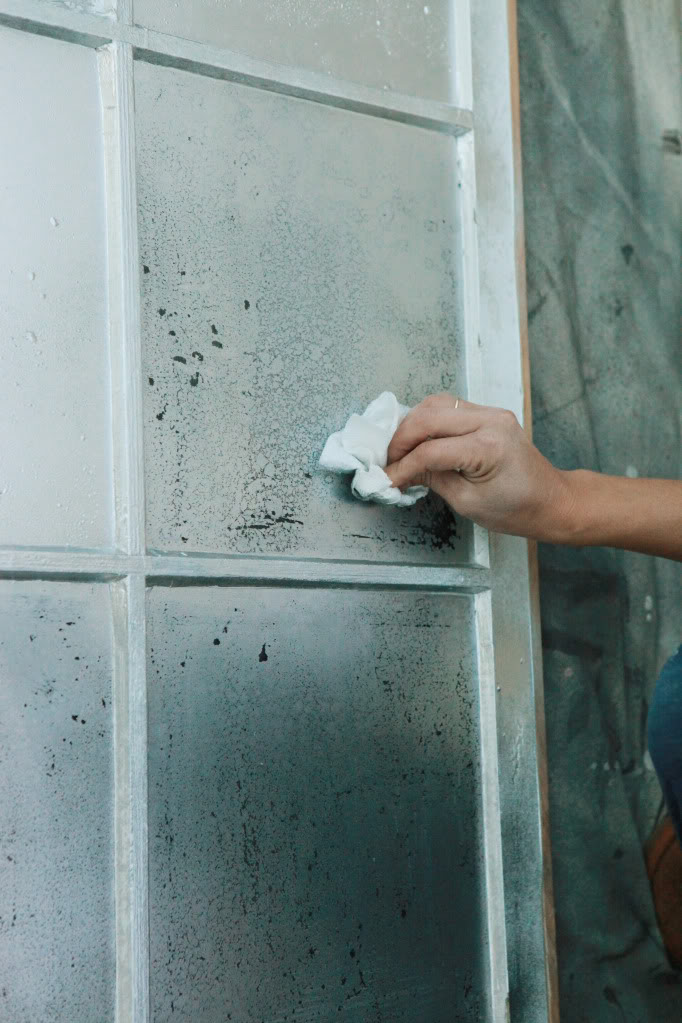
…getting sweet kisses from the baby….ok ok…technically this wasn’t in Anna’s tutorial…but I had to improvise a little….
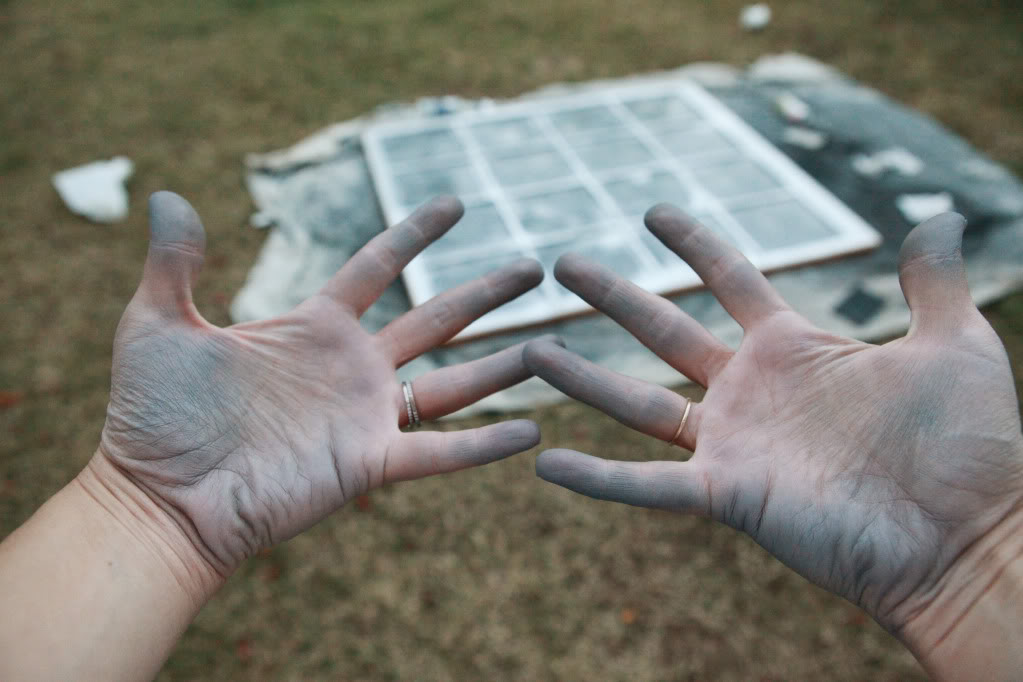
And then I accidentally skipped the vinegar step and just skipped to sanding with an ultra fine pad. The sanding was intensely dirty.
And I was left with this window with splotchy antiquey looking glass panes.
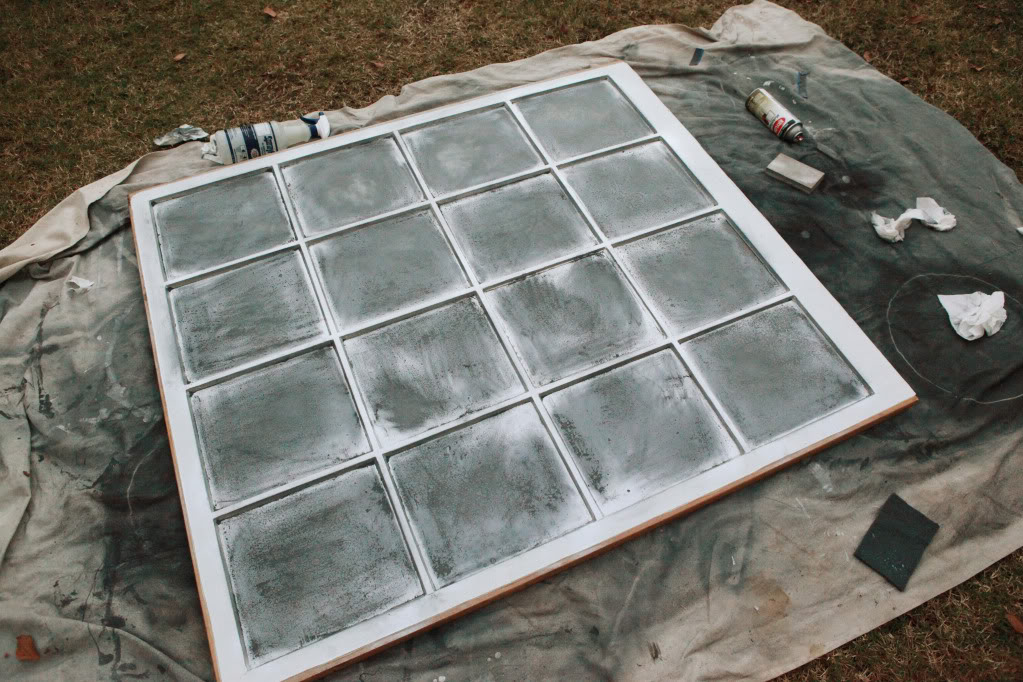
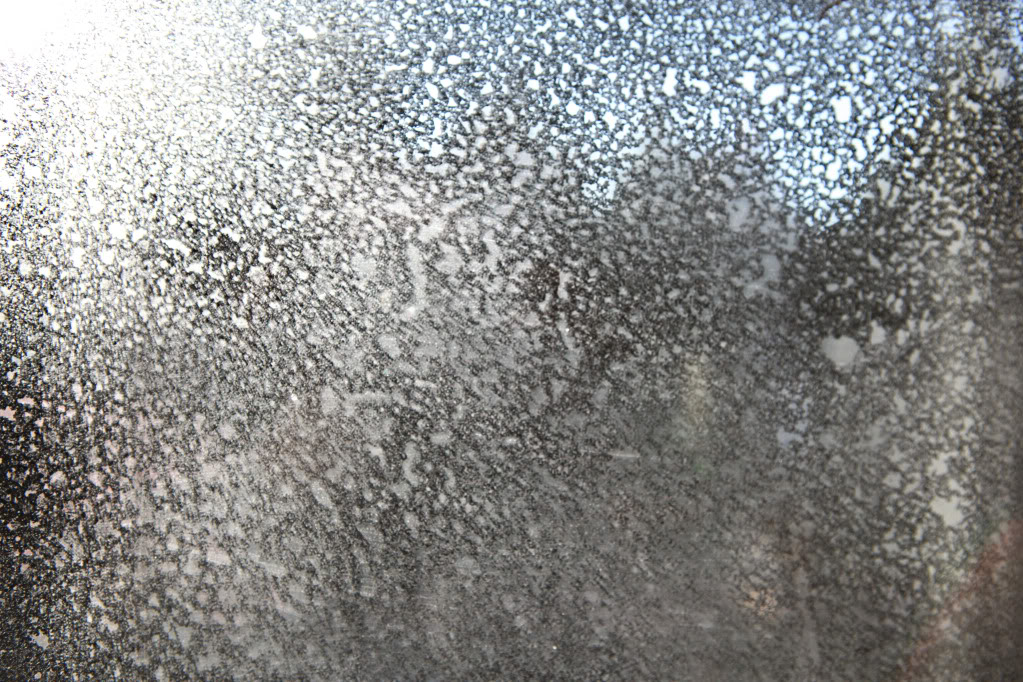
It didn’t really look like Anna’s glass piece at all. This is where I started questioning my instruction-following skills. Mine didn’t look like mercury glass…or a mirror…it just looked like old glass (which is fine – just unexpected).
We took it upstairs – yes our counters are dirty…don’t judge me…just keeping it real…..and planned on painting it the same color as our trim. I sprayed the backside with the Looking Glass so that’s why one side is brown and one is white.
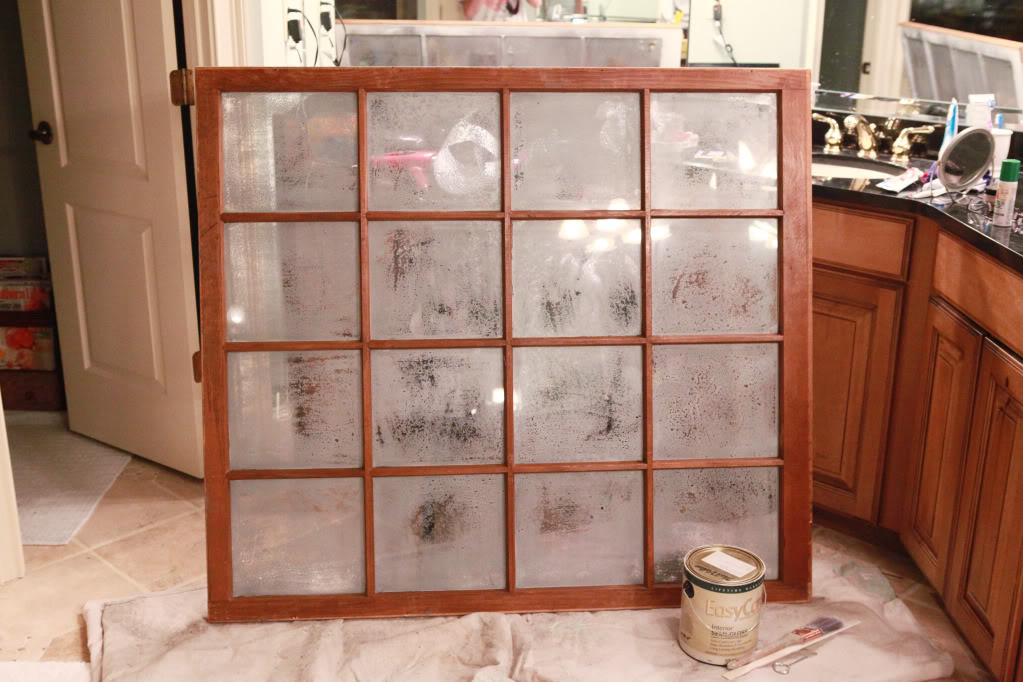
After letting it dry, my darling boytoy helped me attach it to the window frame with a couple regular hooks and a couple eyes.
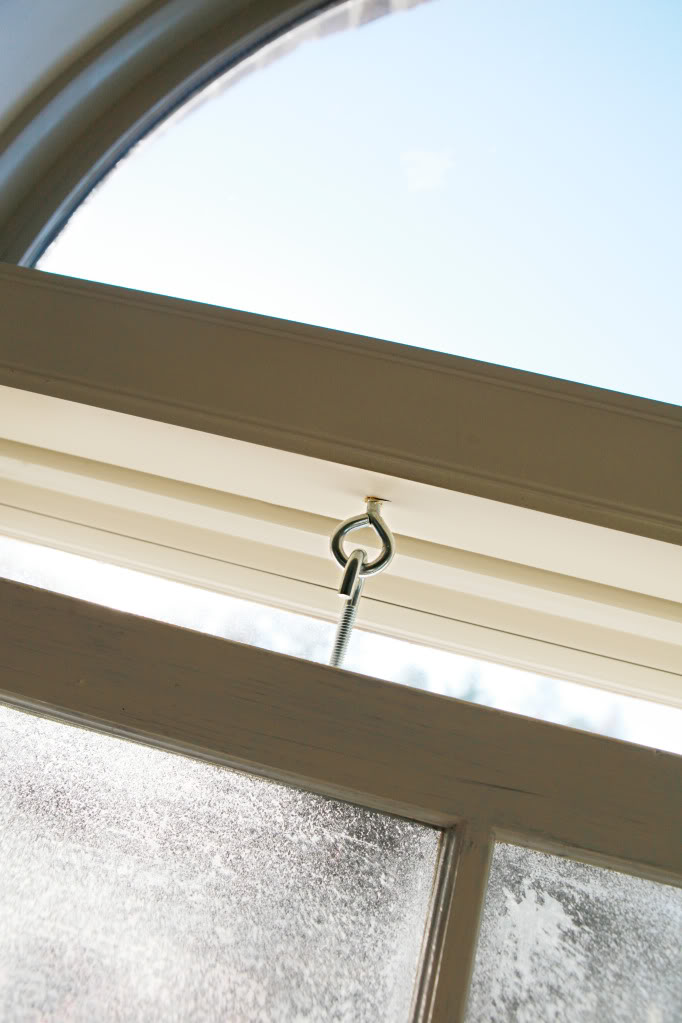
And now for the finished product:
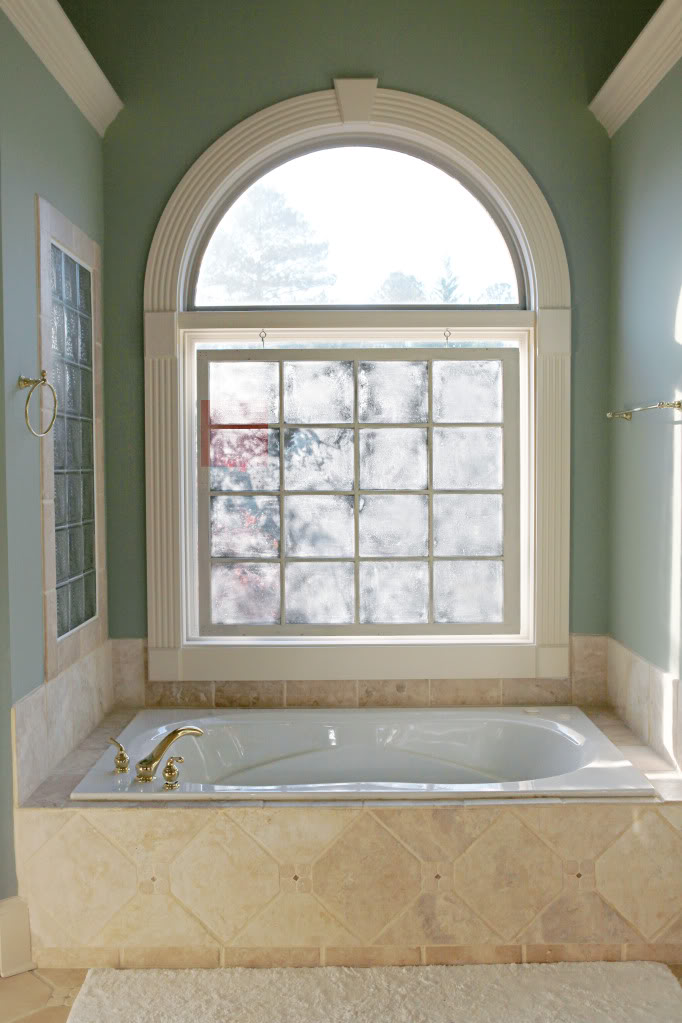
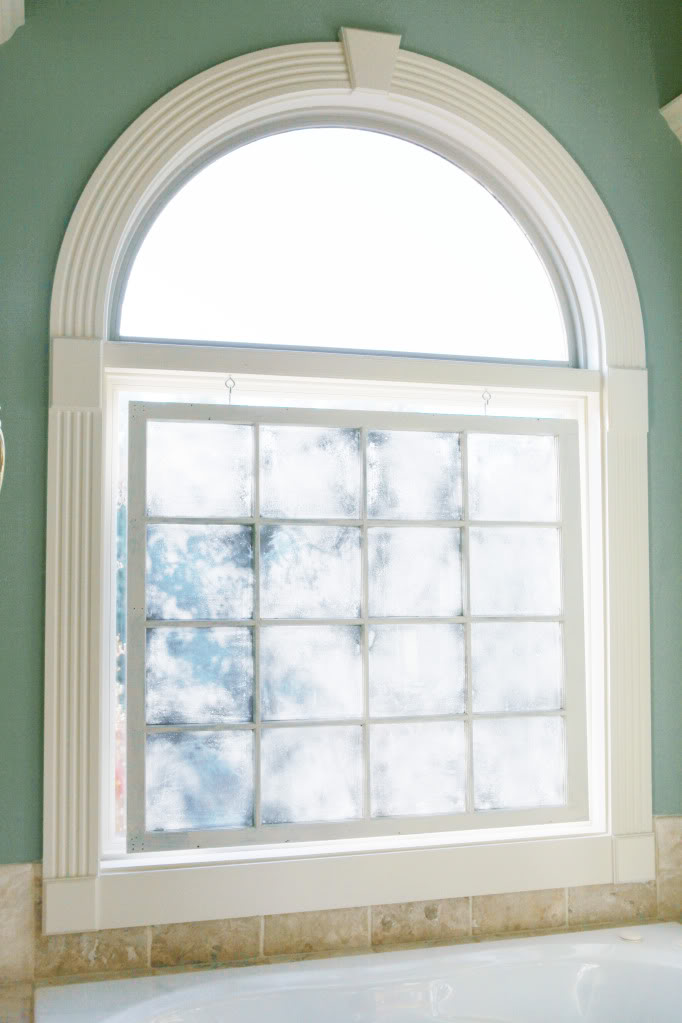
here’s the night view….
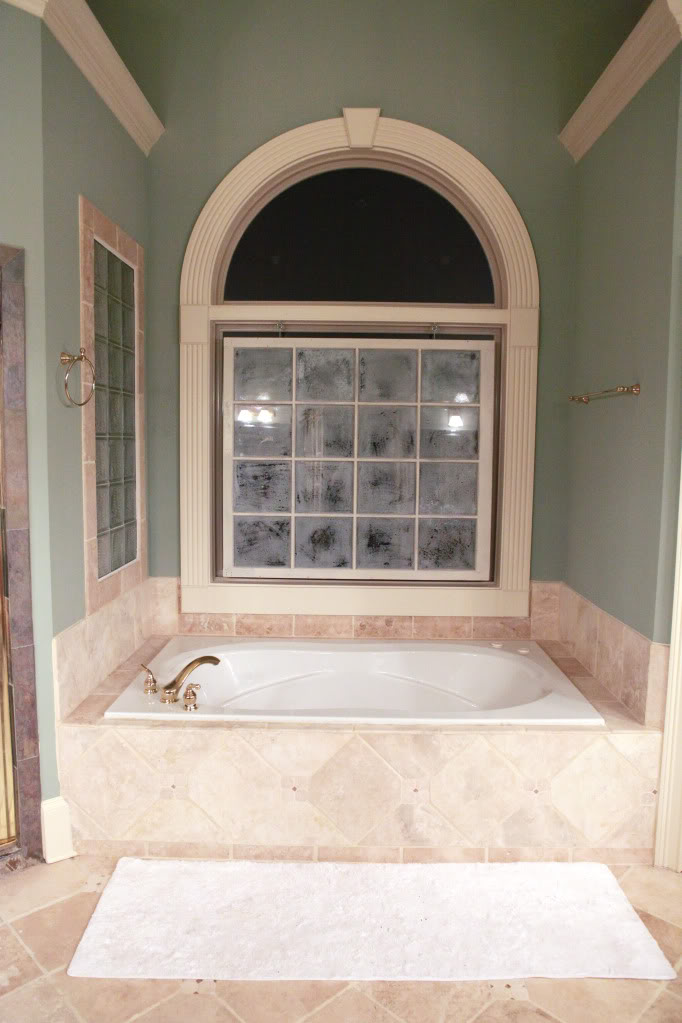
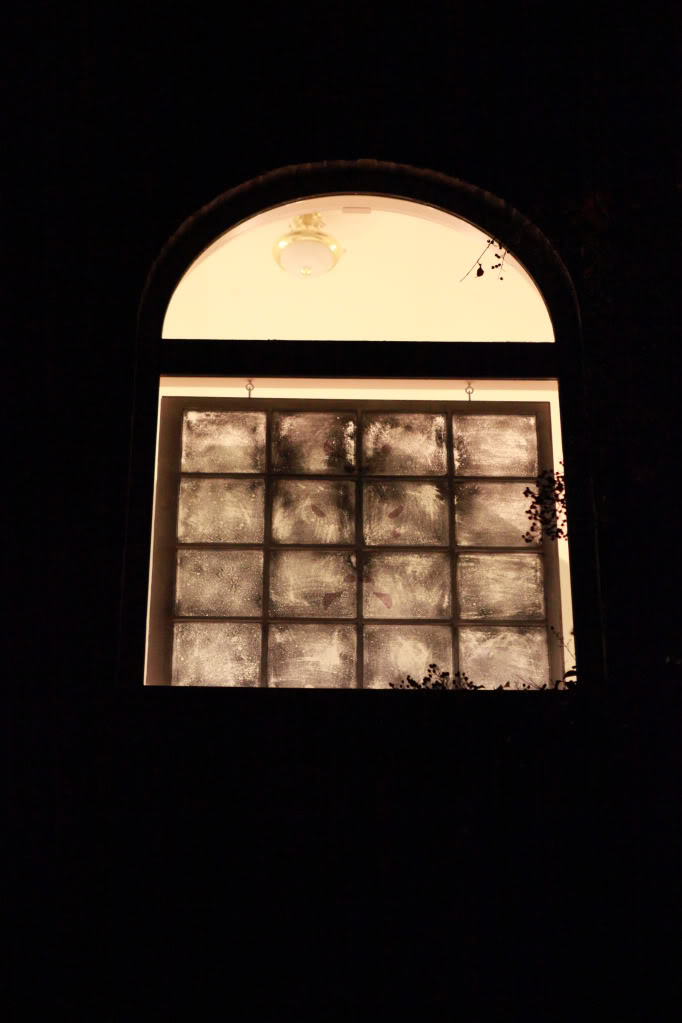
At night it looks more like fogged up glass…like someone just took a shower….which is okay by me because it is a bathroom.
And now for the gasp-inducing before & afters (please note that they don’t induce any reaction…it’s really quite subtle)…


All in all, it’s MUCH better than the decal in my book…although it’s not exactly what I imagined. Maybe one day I’ll scrape the panes and try again (following the instructions better next time!)…but for now it looks good enough. Plus it was a happy surprise to see that it actually let even more light into the space…and played off well with the glass block window into the shower and the tiles on the wall and floor. And it feels really good just to tackle something that I’ve been dying to try.
So now that you checked out my PC Project – did you see the other hosts? I DIED when I saw them. Literally this is me typing from beyond the grave. They are so inspiring and beautiful. Here’s the links again just in case –
- Sherry of Young House Love
- Ana of Ana-white.com
- Erin of House of Earnest
Did you guys play along? I’d love to see your projects (each host has the option to throw a linky party and I’d love if you linked up below so that I can see what you did and stand in awe of your amazingness!)
Here are the instructions if you are a linky-party newbie…
- click on the blue “Add Your Link” button at the bottom of this post – it has a blue frog head on it 🙂
- add a link to your PC project blog post in the url field (please do not link to your home page)
- for “name” write a short descriptive name for your project (e.g. “Antiqued Window”)
- pretty pretty please with baconsauce on top to remember to link in the body of your post to the Pinterest item and the original source of the photo on Pinterest as well as back to me and this editions hosts above – it’s just a big ole fashioned linky love fest! Oh and if nobody told you today…I like your smile 🙂
If you’d rather just link over to your project in the comment section, feel free to do that – or even add a link to a free photo sharing site like Flickr with your pics if you don’t have a blog (remember to set the gallery to public so we can all see it). Now let’s get to the party!
');
Katie- my sincerest thanks for kicking my booty into gear and making me finish TWO projects over the weekend. I finally tackled a couple of chalkboards- I think I’m #7? And your windows are flippin’ spectacular. Totally wish I had somewhere in my home to do that. Hope y’all are having a great day!
Thanks for hosting, Katie. Your window looks great! I love the Pinterest Challenge, soo fun. =)
~ Catie
I love Anna at Take the Side Street! I’ve been wanting to tackle that same project for a while now. I really like the idea of doing that to an old window!
I am LOVING this challenge. Thanks so much for hosting…and that window, AMAZING!
The window looks great! And no more questionable body hairs! Thanks for initiating the Pinterest Challenges. I love looking at all the projects!
I actually really like your window. My pinterest challenge did not turn out like I thought either…check it out: http://www.fortheloveofpainting.com/2011/11/a-pinterest-fail/
Waaay better! I love old windows! And who needs directions anyway? 😉
I can’t wait for the next Pinterest Challenge. Maybe you should do a Christmas edition so we can all share our holiday projects?
I think your window turned out cute! And I really love the look of it hanging there. I understand your frustration, but I really do like it.
Oh, and I don’t know if you will think this is way creepy or what, but I’m headed to Conyers/Snellville for a week over Thanksgiving to visit or BFFs who just moved there and I was wondering if you lived nearby. I’d love to meet up for lunch for coffee or whatever. You are one of my favorite bloggers! Let me know if you’d be interested in meeting up.
xoxo
Allison @ House of Hepworths
The change you made to your windows is much improved from the stain glass. Gotta love how projects never turn out how you imagine…but really your windows love great! PS: I watched the video with you and Sherry-What a hoot!!
I played along too, but didn’t put all the linky love in my post (you’re not the only one with problems following instructions) 🙂 Check out my YHL yellow front door! http://cherrycokecruising.com/?p=1437
I didn’t think the decal was that bad until you mentioned the body hair. *shudder*
Your new version is cool, even if it didn’t turn out quite like you expected.
I really like the layering look of the hanging window in the window!
Maybe not 100% what you envisioned but I still love it! The size is just perfect! Thanks again for encouraging all of us to “stop pinning and start doing”
I love the way it looks during the day! And you’re right at night it just looks foggy, no big deal! Do you have any plans for the top piece of the window or leaving it blank?
This looks LOADS better. I love the look of an old window pane this looks really cute hanging in a new window.
I tried the exact same tutorial! I was a little disappointed too. I got spray paint drippies and I was afraid to distress too much for fear of wiping off all the paint. Maybe it takes more layers of distressing, then painting, then distressing again?
(just curious, did you go to Grayson High School? I went to South Gwinnett. you know, 10 years ago)
huuuge improvement from the ‘faux’ stained glass. i too have a thing about loose hair. i would rather be mauled my an animal than see loose hair anywhere!
Amazing! I love it!
I think the window looks great! It’s so bright and airy and perfect for a bathroom. Even if it didn’t come out exactly as you were imagining it, it’s still gorgeous. (Here’s my project – also linked above – http://messybaker.wordpress.com/2011/11/02/the-pinterest-challenge-ii-gratitude-garland/). Thanks for hosting these! Such fun!
First off, loved the challenge. I can’t wait to share all the fun stuff I’ve been inspired to do! Second, I think your window turned out great! Thanks for all the wonderful DIY inspiration. It’s helped to get my butt in gear! 🙂
Madison
TheSeidlerFamily.com
That turned out great. I will admit I was a bit skeptical about the hole window in a window thing. You have made me a believer. Love you site. Thanks for all the inspiration!!
Hey Katie! I’m sorry your project didn’t quite turn out the way you liked, but it still looks great and the neighbors will no longer see your nakedness! LOL!! We have a similar issue in our bathroom, but I haven’t got to it yet. I probably should jump on that soon! We have a lot of trees in our yard so I’m hoping my neighbors can’t see me! I was thinking of doing something to my window similar to this project. Maybe it will work better for you too! http://7thhouseontheleft.com/2011/08/window/
Love, love, love! You read my mind with the mercury glass idea. I just pinned a tutorial on that yesterday (http://pinterest.com/pin/422888084/).
The window turned out beautifully. I too have a love of old windows – so glad to see this one put to good use!
Katie, I think you did an AWESOME job! I know it doesn’t look like what you imagined, but I think it’s gorgeous, seriously! You got lucky the window pane fit perfectly in yours. It definitely looks antique-y and is really beautiful. I’d take baths more often just to look at it!
I covered a lamp shade with fabric (kind of boring but I had limited funds and time but was dying to participate). It didn’t turn out quite how I wanted it, and I ended up dropping my 5d Mark II (that I just got with two lenses about a month ago) while taking photos of the project and damaged my glorious baby of a lens, the 50mm f/1.4 that I had been pining for for two years. It won’t focus so now I have to send it in. Oh, the things we bloggers do to capture a project!
I second that there should be a Christmas Edition of the Pinterest Challenge!!!
I love the new look! It makes the area look so much nicer.
Nice Courtney Stodden reference!
I LOVE that window. It looks super modern and gorgeous. And it fits your [actual] window perfectly 🙂 + it’s much better than doing it to the actual window, because now you can take it down (super easily). Way to go Katie. (500 points for you + 100 points for mentioning bacon ;))
Thanks for hosting this Pinterest Challenge! I wasn’t able to do anything myself, but my sister and co-blogger made some gorgeous ornaments that I am now going to attempt – hopefully I can give them away as Christmas gifts! Her project is #198.
I love what you did with the window! It’s amazing how perfectly it fits, too – looks like it was made to hang there 🙂
I dont think it’s all that subtle! I think it makes a huge difference…. immediately update/upgrade! love it. Great job!
First I saw Sherry’s project, then yours, then House of Earnest – and I hate to say this – but ladies – please stop Pinterest crafting. I know you guys are better than this. I see it all the time. I know I should keep my mouth shut, but I want to stop this before great blogs go bad. Just say no to Pinterest crafts projects. They’re just not your thing.
Sorry!
I actully just made votives last week with that tutorial for my sister’s shower. They turned out fantastic!! (and I saw how my fingers were turning silver, so I wore gloves). You do have to lightly spray about five coats than spritz with water/vinager mix and I than took a Q-tip to make it “fade” away. I can’t believe how great they look! I made about 20 candle holders and have since used them in my house. wish I could show you a picture but I don’t have a blog. :o)
I love the window though it looks great and it fills up the space nicely.
Big improvement! Decals can be awesome but I don’t think faux-stained glass falls under that category.
It’s frustrating when a tutorial doesn’t work out 100% as planned (I could totally see myself skipping a few steps!) but I love how it turned out nonetheless. Sweet, antiquey (that’s so not a word), and it adds privacy too!
Agreed. There are some beautiful decals out there…with cool patterns and designs…faux stained glass – at least this one was not one of them 🙂
xo – kb
Love the window! big inprovement from the stained glass!
Thanks for hosting this challenge! I had a blast.
I tried my hand at the cookie dough truffles. You can’t really tell in the tiny picture I linked above but I was heading to a tailgate and shaped them into little footballs. They were a big hit!
http://www.pinstersisters.com/2011/10/chocolate-chip-cookie-dough-truffles.html
I love how your new window turned out! What a perfect fit too 🙂 Thanks so much for hosting. I can’t wait to check out everyone’s Pinterest projects.
I can only say this for me…but the two Pinterest Challenge posts I’ve done are things that are BETTER than I would do without the inspiration available through Pinterest. Of course not everything I do is everyone’s cup of tea but that’s the beauty in diversity. And to be frank…Pinterest crafts are my thing. I get to decide that….just like you get to decide what your thing is 🙂
xo – kb
Love the Courtney Stodden reference! Have you seen this Anderson Cooper video. It’s hysterical.
http://www.cnn.com/video/#/video/topvideos/2011/10/24/ac-ridiculist-courtney-stodden.cnn
I super like the window- it gives you privacy with out cutting out the light!
I do live nearby and I’d love to meet up! Email me when you get a more definite date and we can hit up Starbucks 🙂
xo – kb
hmmm…I’ll talk to Sherry to see if we can squeeze that in!
xo – kb
Way to go Katie! I think it looks way better and it was a fabulous idea!!
ooh we also have window decals in our house =S and we don’t have any windows to hide from public view, but we’re too lazy to stick them up, however we are about to change our home so this tutorial will be a must in our new house, thanks!!..
Can’t wait! I’ll send you an email as soon as I know the specifics.
Katie, your Pinterest challenge linky party came at the right time for me. I’m doing my own “Pinterest challenge” this month to make myself do all the projects on my “things to make for Christmas presents” list. I linked back your post for today in my party project link and linked back your 10/26 post in my post for yesterday. It explains why and what I’m doing to challenge myself in November. Does that make sense? Clear as mud? Anyway, thanks for the par- tay!
I did a pinterest challenge Halloween costume for my 6 month old — who went as a SHARK ATTACK VICTIM!
http://nasagreen.blogspot.com/2011/10/shark-attack-victim-lifeguard-halloween.html
I originally added my link and picture below, but realized I didn’t refer back to your post and create the linkidy-link system… sooo I removed it. But, here is the link I’d like to share. Something I did I while back, but it excited me greatly, was super easy, and I wanted to share: http://ckbartlett.blogspot.com/2011/03/quick-project.html. Enjoy!
i think your window looks phenomenal hanging in the window. mercury glass was a great idea. love it
Jealous of your meet up! I’m in Conyers/Covington lol. Have fun!
I think it looks awesome! I hate when things don’t turn out the way we picture them. But hey, it IS better then that decal!!! I like the way it looks …It would also look pretty cute painted a bright color.
“Pinterest crafts” aren’t really a category of their own… It’s really just an easier way to get INSPIRED to make wonderful crafts with your own unique twist!
Pinterest Challenges are my favorite and I hope they stick around for a long long time! 🙂
Faboo! I love the window-on-window look and this is a twist on it I haven’t seen anyone do yet. A tip of the hat, m’lady!
Quick question — do you know if the product you used is removable? (I blog for renters & all of my projects have to be un-doable… so whenever I see something I like, I ask!)
They look awsome! I love it!
Well, I may be the only one without a blog! Just moved into a new place and need some furniture. The first project: a storage ottoman!
Pinspiration: pinterest.com/pin/430001592/and ana-white: pinterest.com/pin/258675572316664508/
Final product is posted on Flickr: http://www.flickr.com/photos/64881917@N08/6306572137/
Thank you Katie for all the inspiration as well!
Ohh i love it! I have a ton of old antique windows and I never thought of hanging them in front of other windows before. Thanks for the idea!!!
It’s the perfect size for that space. Even if it didn’t turn out like you’d hoped, I think it’s definitely an improvement!
I just requested an invite for Pinterest, but while browsing came across this, and I immediately had to come post it for you: http://pinterest.com/pin/430487794/
I love Pinterest, and even though mine did not turn out perfect, I love getting inspiration. PLEASE do a Christmas Edition.
Wow! It totally changes the look of that window. I love the optical illusion that the window is bigger now. It’s so much more clean & modern just by that simple change.
I think the general consensus is that pinterest challenges ARE fun and an extremely inspirational source to get the gears turning…i love pinterest and i cant tell you how many wonderful ideas ive gotten. I loved your window Katie and i loved the rest of the leading ladies crafts. I also have no idea how a four times a year event can really “turn a blog bad”. Anywho, blog on fellow bloggers, blog on.
Which product do you mean? The paint? I guess if you only painted the panes of glass then you could technically scrape it off just like any other paint…so as long as the rest of the wood was taped and protected then yes, it would qualify as renter-friendly 🙂
xo – kb
I have to admit I wasn’t crazy about the window on window action at first but after I finished reading the post and looked at it again…I kinda love it. It’s unexpected and far better than the decal!
Also, if you grow to hate it, I had a failed window fogging spray project in our first floor bathroom and the spray came off incredibly easy with nail polish remover. Could be way easier than scrapping it off – I’d give that a try first. 🙂
Emily
Fun party, Katie! Thanks for hosting.
I think your original idea was really cool, too. And the window does preserve and protect all that should be private so it wasn’t a horrible deal, all in all. Thanks for sharing your creativity with us!
My parents have a huge window in their bathroom like this and I always think they need to cover it somehow–this is a great solution. Thanks for sharing!
vanessa
Wow, I’m flattered that you singled my little project out. I love the window-on-window idea, and I think yours turned out really nice… even though it’s not quite what you were going for I still think it looks great. If you ever decide to give the tutorial another go and have any questions about the technique or steps please don’t hesitate to get in touch. 🙂
“Whatever happened to that Katie Bower chick?”
“Katie Bower???”
“Yeah, you know – Katie Bower. She was always making those bacon jokes.”
“Oh! That Katie Bower! Well I heard she did one of those Pinterest Challenges a while back.”
.___.
“Oh. That’s too bad. She could have been a really good blogger. If only she hadn’t gotten involved with all that Pinterest nonsense.”
“Well, you know those celebrity blogger types, they let it go to their head and think they can get away with anything.”
“Yeah. I guess she had it coming. But still, it’s too bad. I really do love a good bacon joke.”
It was nice knowing you, Katie ;D
Katie. Your window looks great! Very creative window solution. I love the Pinterest Challenge, soo fun and so cool how many people participate.
I linked up some sappy sentimental ornaments that I actually had such fun making, here they are:
http://simcoestreet.blogspot.com/2011/11/easy-diy-very-sentimental-ornaments.html
Sometimes happy accidents can be the best–the mercury glass look that inspired your project might not let in as much light. I like the window over a window look–much easier to change layer than scraping off a decal too.
And I work in public library where we use Goo Gone all the time, and v this kind works much better than the kind in the spray bottle: http://www.googone.com/GG-Browse-Products/Goo-Gone-8oz
Ummm, Katie…your window looks great!!! I still cannot believe that your windows actually had decals on them!?! Too funny. Our master bath bathtub (well that sounded awfully weird) is very similar except we have those square ice cube blocks that look like they are from the 80’s making up our window. I wish I could peel those off like you did your decals. And by the way, my favorite photo in this whole post is the one of Will giving you a big ole kiss! Aren’t boys the best and those kisses…I swear my boys are going to have a complex because I am always asking for kisses from their sweet lips! Adorable! Thanks for hosting this fun challenge and getting my rear in gear! I don’t think I have ever finished a project so fast! 😉
Wow….really? This is just sad….
Oh and no offense to anyone that has those ice cube looking windows! They are just not my favorite thing…they for some reason always remind me of 3 men and a baby…which oddly enough is a movie that I like…just didn’t want to offend anyone! 😉
I love how your window turned out, I think it’s absolutely perfect as is!
Thank you a million times for coming up with this challenge. It is awesome!!
Thanks Anna…I probably should have paid more attention to your tutorial instead of just oohing and aaahing over your pretty sparkly glass 🙂 And I will definitely hit you up if I decide to try again 🙂
xo – kb
Good to know! I think that last time I used a different kind (off-brand) and I must say that it’s crazy how even the same product can give such different results!
xo – kb
Are you talking about glass blocks? because I have them and hate them. I am right there with ya sistah!
xo – kb
Katie, I LOVE your brutal honestly! And I’ve been so curious about the mercury glass technique for my front window. I think it turned out great! Thanks so much for the motivation to change my Table into the Yellow Kitchen Cart I totally had been dreaming of (ever since seeing it on Pinterest)!!! I’m so stoaked to have a link on your site after following you for practically forever!!!
Aimee @ ItsOverflowing
I totally second, or fifth, or whatever number we’re on for a Holiday Pinterest Challenge. Yee-haw!
This made me laugh.
The initial comment for this thread was so odd though…
We used Valspar Frosting Paint and it worked wonders on our front door. Could be a possibility to try if you wind up not falling in complete love with the antique look. Here our front door after staining/frosting: http://jsrodriguez.blogspot.com/2010/05/welcome-to-4317.html and this is the exact product we used http://1.bp.blogspot.com/_YIUI_um_bCQ/S5hmQ-WL_rI/AAAAAAAAAoQ/lxlUOFTykkI/s1600/IMG_7512.jpg
Lol! I guess glass blocks would be the technical term! Tells you how much I know considering I called them ice cubes! I’m so glad you don’t like them either! You should have heard the conversation I was having in my head after I posted that I hated them!?! It went something along the lines of “omg what if she has them & loves them!” “what if she’s a huge ice cube glass thingy mabob lover & wants them put in all her bathrooms!” “I just totally offended someone who I think is a pretty cool chick”(not in a creepy way)…so relieved to read your comment!!!
I love how it turned out even though it doesn’t look like mercury glass! It reminds me of frosty windowpanes in the winter.
Yeah, the paint — Sorry! I can be Queen of the Confusing Questions :-/
And thanks… that’s what I figured, but like I said, I always like to ask somebody who’s been there. IMO, personal experience is the best instruction manual.
Oh, I really like that!
I’d like this too! I really want to do your Pottery Barn Santa Claus from last year, but I didn’t have the time to get to it for this challenge.
I really like the window in a window look! Oh, and it looks like you’ve already found a product that works, but I have found eucalyptus oil is the.best.sticky.stuff.remover ever. I use it on everything, and love that it’s got no chemicals etc. It’s great with cooking grime in the kitchen too. I think you have to use proper essential oil though, not just the diluted stuff. I live in Australia and we can buy it readily at the grocery store, not sure about America though.
OMG! I love it, it’s amazing! What a difference!
First- thank you for the Pinterest Challenge! I read some pretty strong opinions about the matter in the comments above, but I for one think it’s been a great way to be motivated and actually DO something I’ve pinned! (I mean, that’s the idea, right?)
Second- O love the new window. WAY better than the old stuff, which included someone else’s hair (ugh! I hate a dirty bathroom and the thought of hairs stuck to your window are almost too much…haha).
Finally- I posted one of my 3 pinterest ideas I have followed through with. I hope to have the other 2 posted soon! I know your super busy, but check them out if you get the chance!
(http://www.plantinginargentina.com/apps/blog/show/10019638-pinterest-challenge-1)
*abrazos* (spanish for hugs)
I love that you can see everyone else’s projects! I just opened a bunch in new tabs…it’s been great seeing all these new ideas.
Nice to meet you today at Goodwill! By the way, I’m link up #11 on this post. I found that headboard at the Buckhead Goodwill. I love that one! Have you been? They have good stuff.
Just have to tell you this. My husband and I were house hunting this weekend (worst.weekend.ever.) and saw a window that had a similar treatment to the one you made here. I got excited (weirdo) and started explaining to him about your project and how it looked cool even though it didn’t turn out as expected. I mentioned the mercury-look and treatment and how it kinda looked like frosted glass.
He got a confused look on his face and finally said, “Oh that mercury! I thought you meant the planet Mercury. I was trying to figure out how she had painted the planet on a window!”
Oh, men.
Great job on the window Katie!! I LOVE it! It changes the whole tub area to a more modern space.
I LOVE how it looks – so pretty. I would love to do a Christmas one, too. For my project, I made a paper quilt and I am definitely going to try it with Christmas paper for some holiday decor:
http://www.hardlyhousewives.com/2011/11/goodness-gracious-papers.html
Hi Katie!
My friend and I luRve your blog and we’re slightly obsessed with Pinterest so we had a little fun combining our love of the two. I should have added bacon and we would have had a trifecta. Here’s our pinterest challenge spin 🙂
http://semigradbloggery.blogspot.com/2011/11/pintrest-challenge-blog-stalking-style.html
HILARIOUS. You guys are so funny.
xo – kb
I personally think it’s super cute. However, if you wanted to (and by all means I’m definitely not saying you should- you’ve for sure made that best ever window hiding another window over a bath tub in the history of the modern world) you could try this: http://pinterest.com/pin/2040762300659877/
Seems super cute (and super time-absorbing). Anyways, just thought you’d like-a see it.
🙂
I think it turned out great too! I linked up the mirror project #433 and had some issues with how it turned out myself but sometimes you just have to live and learn and roll with it! That is what make all this DIY stuff an “experience’ fo sho!
I just love the windows, the things you can do with the windows is just unlimited 🙂 Makes me want to decorate and design a window and make it look like a designer has done it 😀 I love the way you made the tutorial detailed about everything. Thanks, Estella