
I’m back with my last Photoshop Tutorial of the season. For the past couple months I have been doing a regular feature called Photoshop Tutorials to teach you little tricks on how to manipulate my favorite photo editing tool. There are far better tutorials out there…ones that boast jaw-dropping photos and incredible mastery of Photoshop. That isn’t this. This is just a simple beginners intro on how to do little things to make your pictures a smidge better. Also, there are A TON of ways to skin a cat…so this is by no means the end-all to making a photo better.
Many of you asked that I keep these photoshop tutorials going. I would. But I have other things on my blog plate that I got to share with you. Here’s some of the photography related posts that are in the hopper…
- Better Iphoneography
- Tricks for phone photo editing
- Interior home photography (home bloggers stay tuned!)
- Small Product photography (perfect for etsy sellers!)
- Rockin’ the Instagram pics
And in the future, all tutorials are gonna be available for viewing at the very low cost of $3. It’s a small price to pay for such a goldmine in photography information. I lost my sarcasm font. With April fools day just a couple weeks away I couldn’t help it. Of course, the tutorials will be f to the r to the double e.
Okay all joking aside (haha) – let’s get to today’s post…how to lighten a photo. Here are four ways to take that dark, underexposed or shadowy picture and lighten the bad boy up. First, the things to note….I use Photoshop CS4…not all photoshop is created equal. This method is one of MANY easy ways to accomplish this task. Feel free to share additional relevant tips in the comments section! Let’s get started.
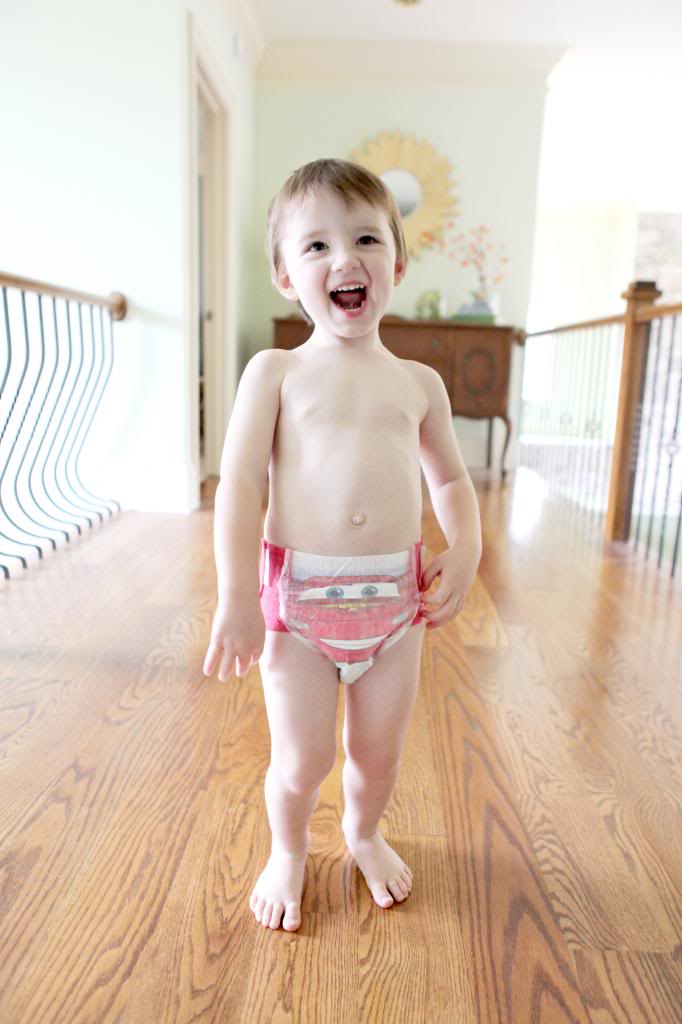
Here is my original – straight outta the camera…taken with a too high ISO so that I could show you how the grain is effected with each adjustment.
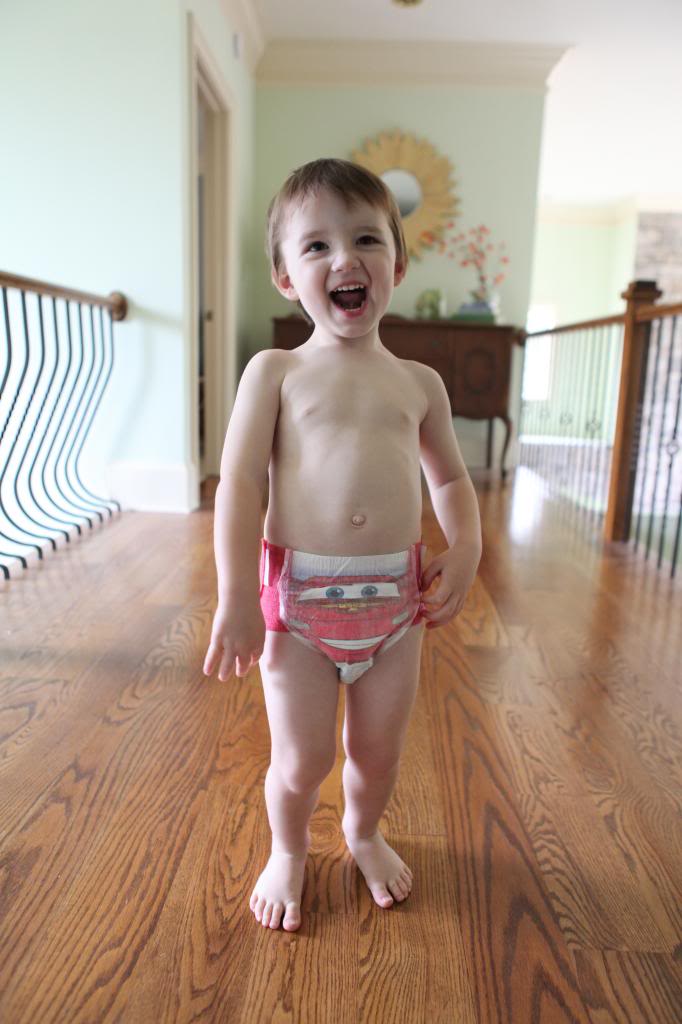
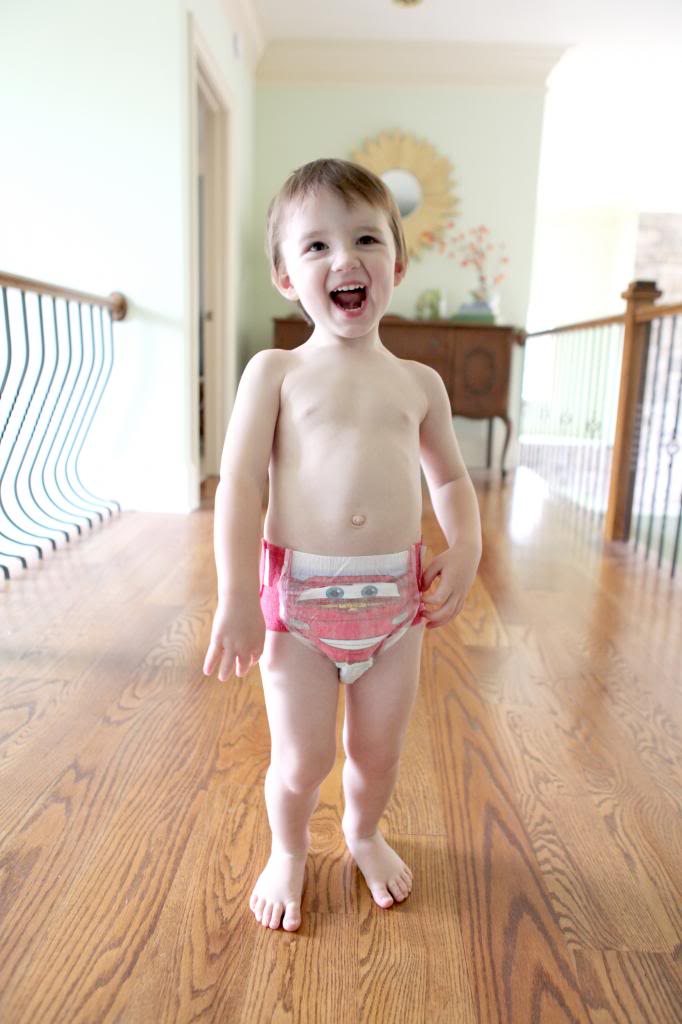
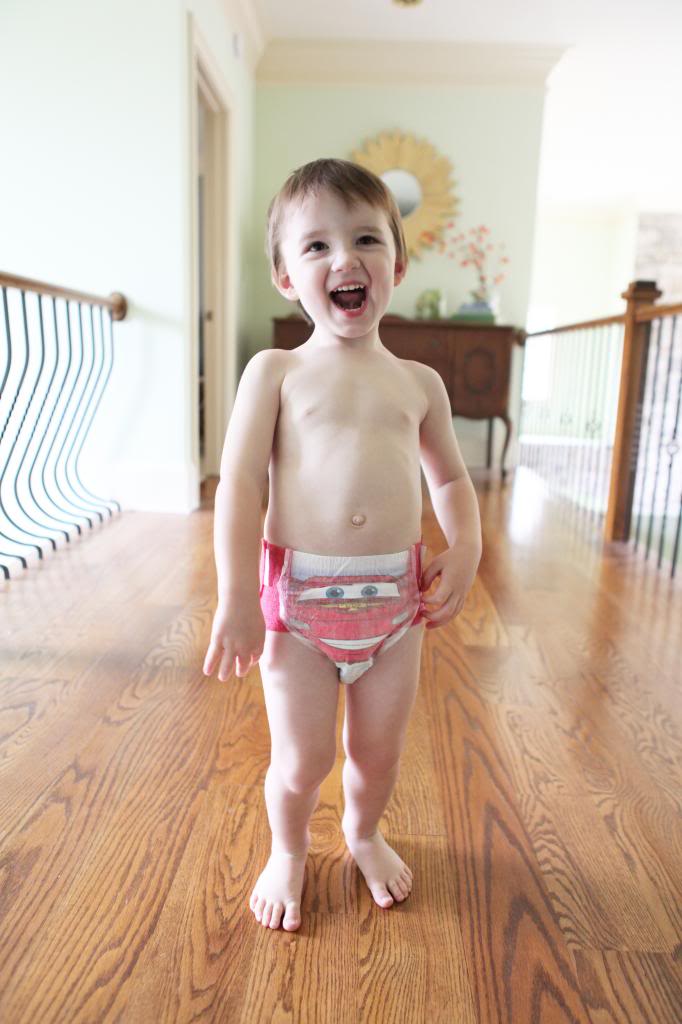
And here are the four results of our photoshop techniques today. Slight and subtle differences. It’s very hard to see but training your eye to see the differences is part of editing. And also, finding out what your eye likes best is part of finding your editing style.
Just for you photographers out there – the four methods of lightening a photo we are reviewing today are 1. Using a Curve Action 2. Using a Level adjustment 3. Increasing Brightness/Decreasing Contrast 4. Combining adjustments with Lovely & Ethereal Action. (these four methods correspond with the photos below so you can see how they differ).
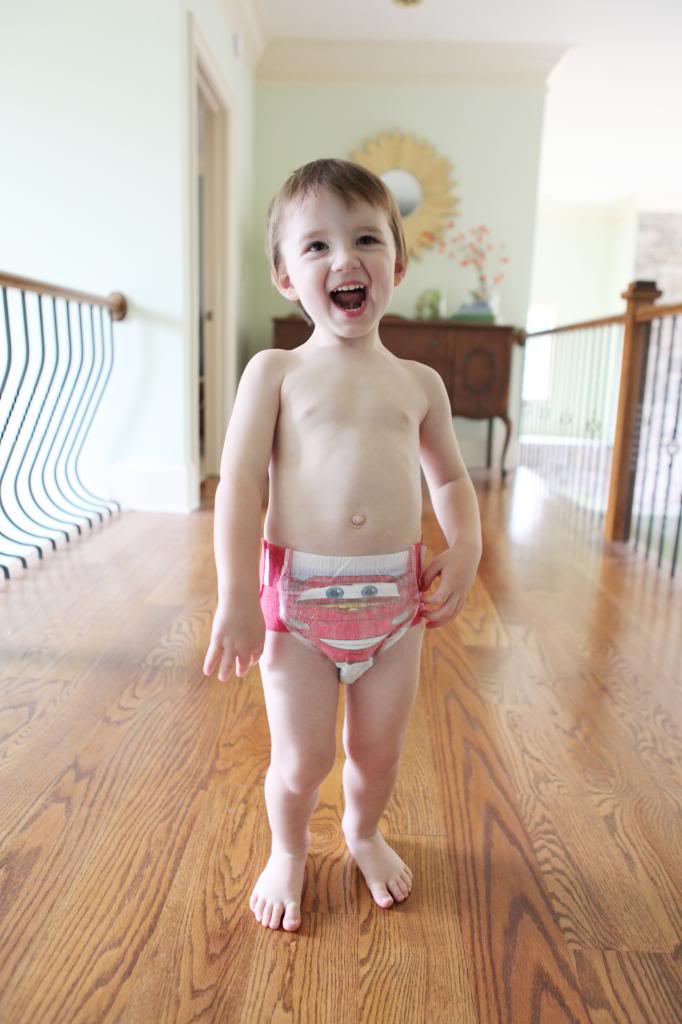
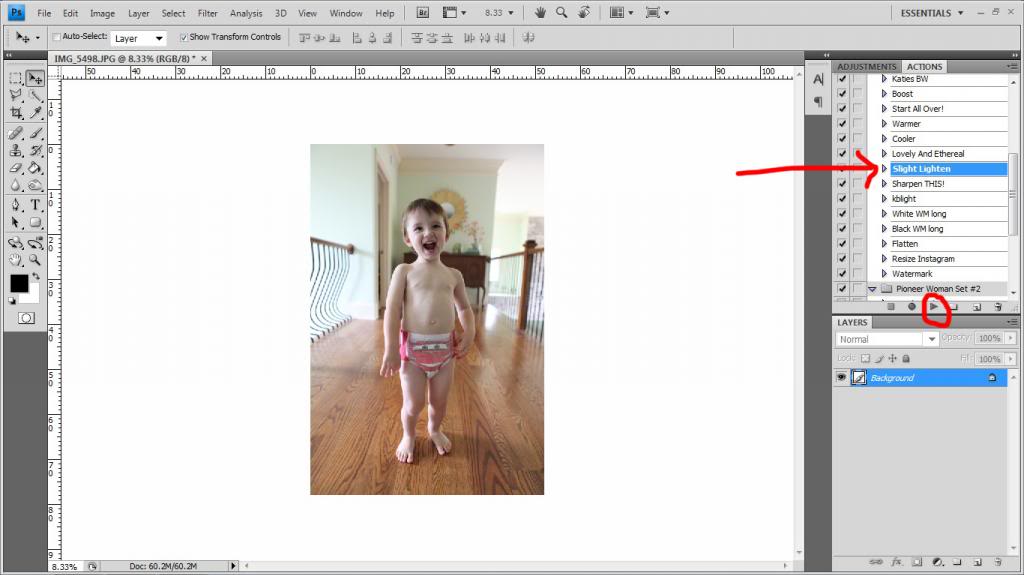
The first way we are gonna lighten our original photo today is to use the Pioneer Woman action called Slight Lighten. This is an action that activates a curves layer adjustment. It can be tweaked but we aren’t going over that today. Just click your slight lighten action and hit play (circled in red below).
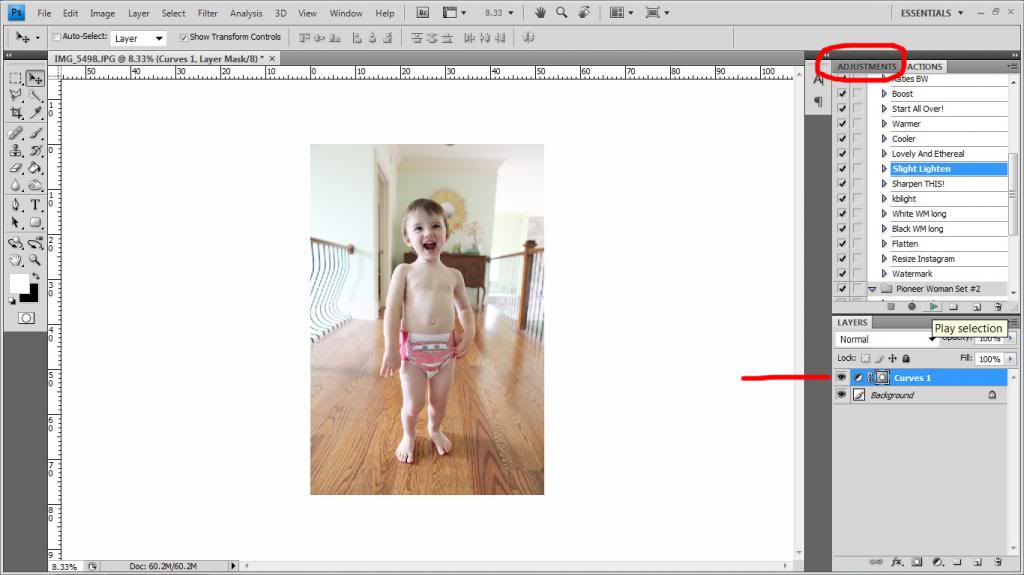
You can also go to Adjustments tab and select the Curves icon and adjust it manually.
The great thing about this method is that it is FAST. You can literally lighten a photo in seconds. The bad part is that it can get grain FAST. Pick your battles people.
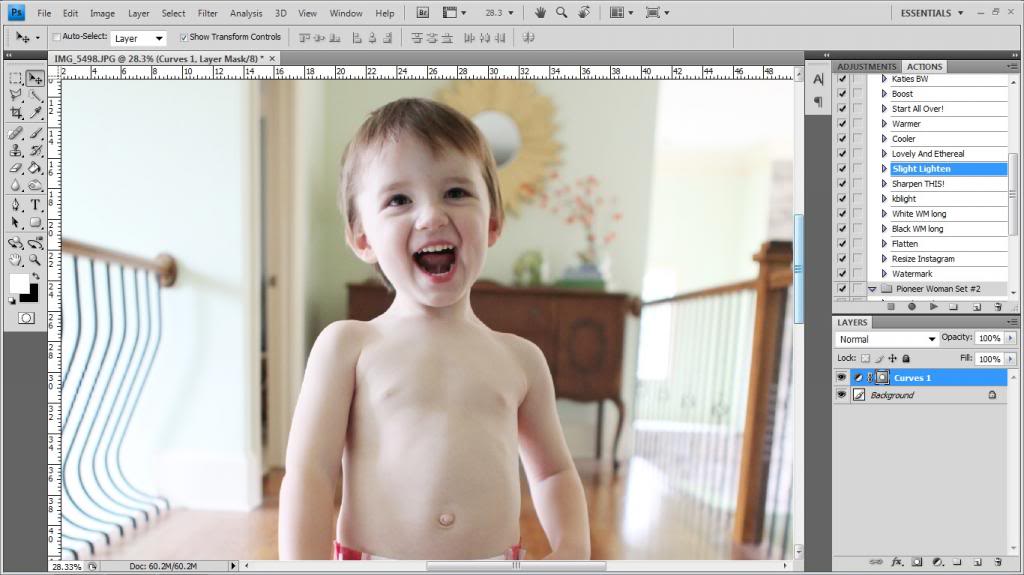
Bada Boom bada bing. Before & After using the Curves adjustment…


Now I wanna show you how to use a different adjustment called the Levels. Click on your adjustments tab (red arrow) and click on the “Create a new Levels adjustment layer” button (circled in red).
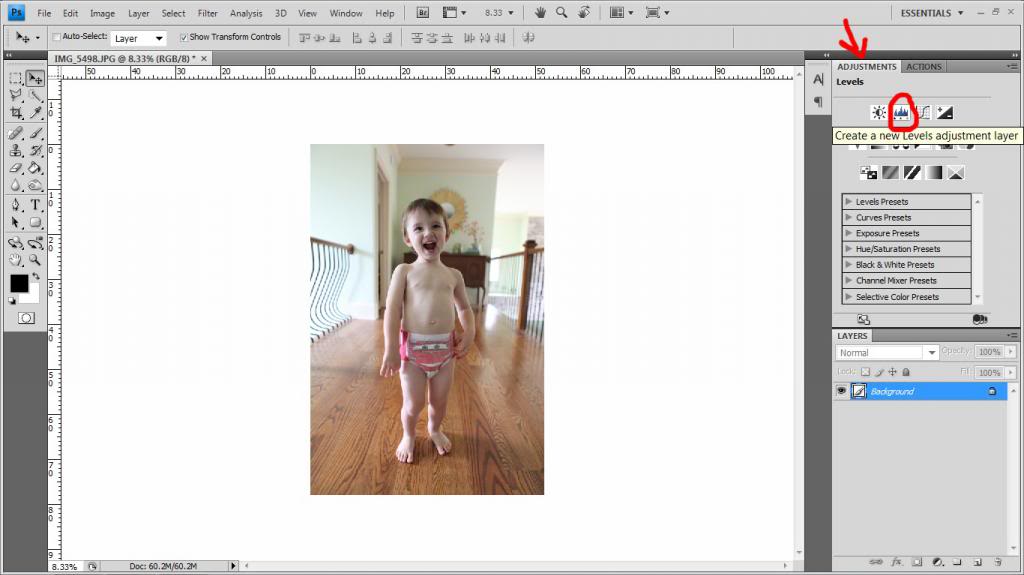
This shows you the histogram of the photo. There are a lot of great sites that explain a histogram and how your photo is effected by it…google it and see 🙂 Basically in order to lighten our photo today we are gonna play with our dark and light sliders (circled in red) to play with our shadows and our highlights.
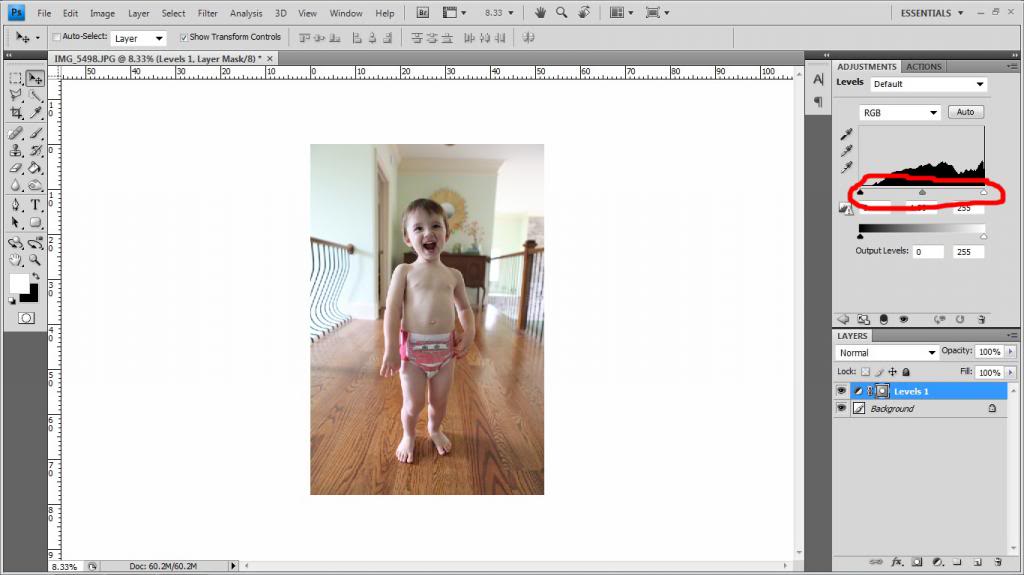
You will see that the low parts of the histogram are really important. I moved my sliders over till I liked the image. Usually this means moving that gray slider over to the left because it helps take out some darker shadows.
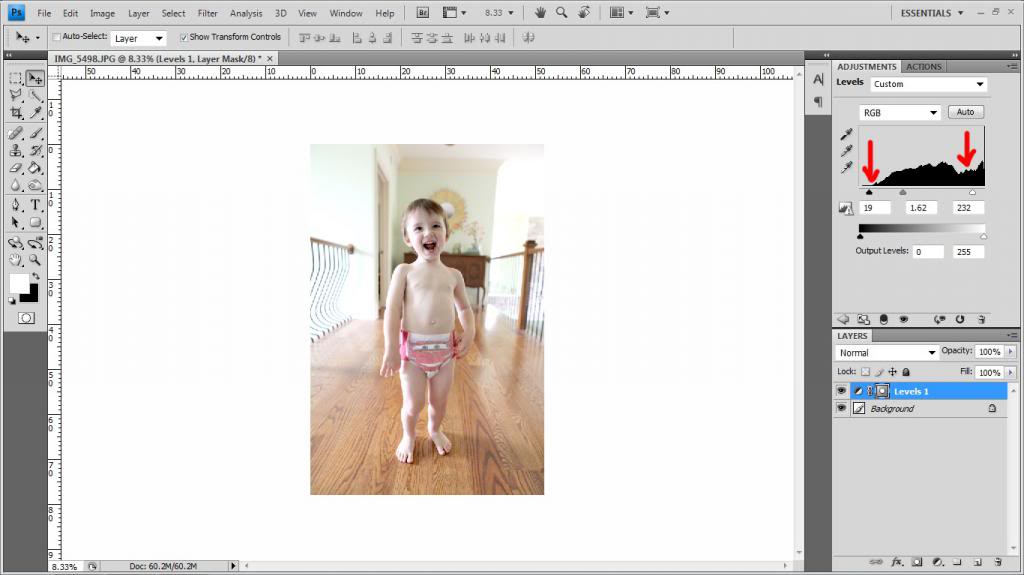
I like using this technique if there are some crazy shadows around the eyes…so that you can lighten it enough to see the whites in both eyes instead of having one evil eye. The problem with this technique is that you can actually make the grain of the photo way more apparent especially in dark shadows and black areas and blow out the highlights and loose detail there too.
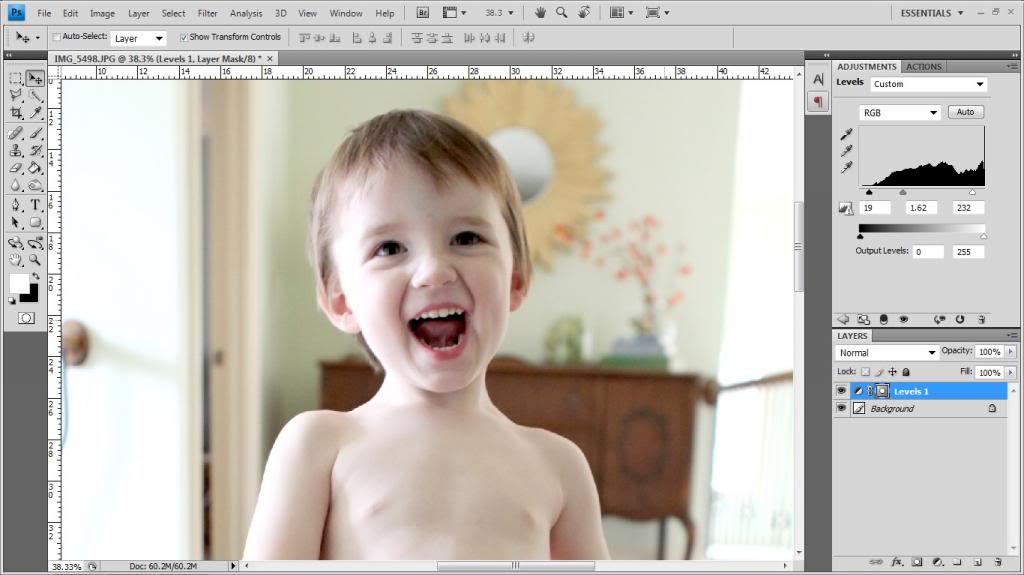
When you zoom back out though, this method can help the overall improvement especially with portrait work where people like more even skin tones.


The third way to lighten a photo is to use the Brightness/Contrast adjustment. Click on the adjustment tab and then click on the little icon that looks like a half sun/half moon (circled below in red).
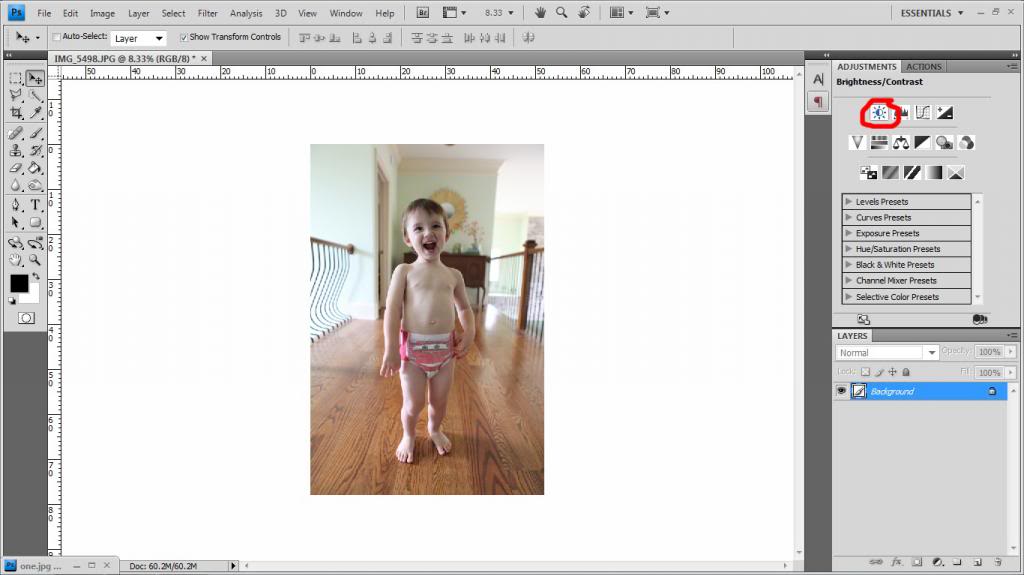
When I use this technique, I always slide my brightness slider to the right and the contrast to the left. The brightness will affect the entire photo so you want to make sure the contrast is brought back in.
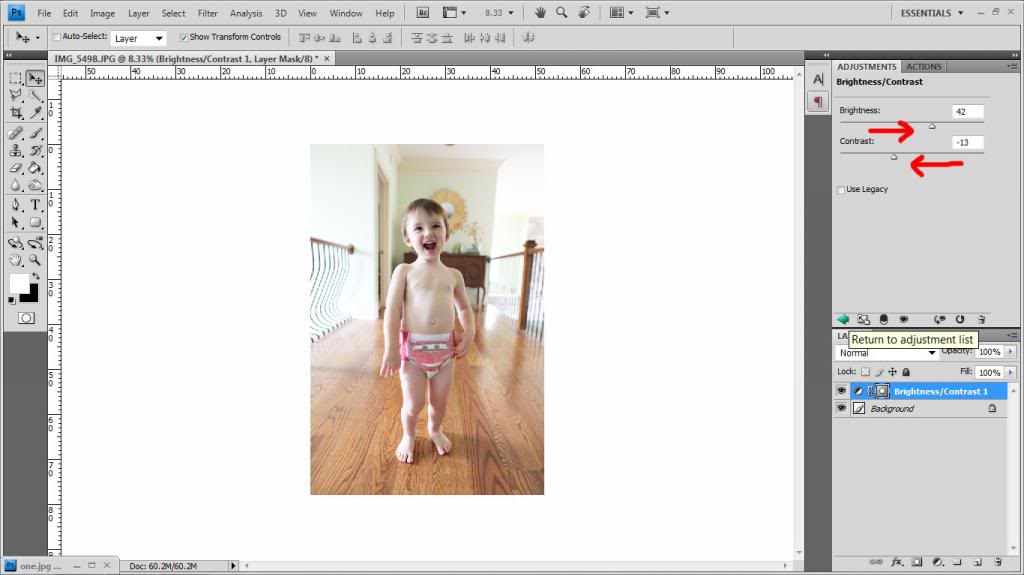
The issue I have with this technique is that you still have some crazy dark shadows even when you lighten the overall photo. It seems to work best on pictures that have a majority of midtones and few highlights/shadows.
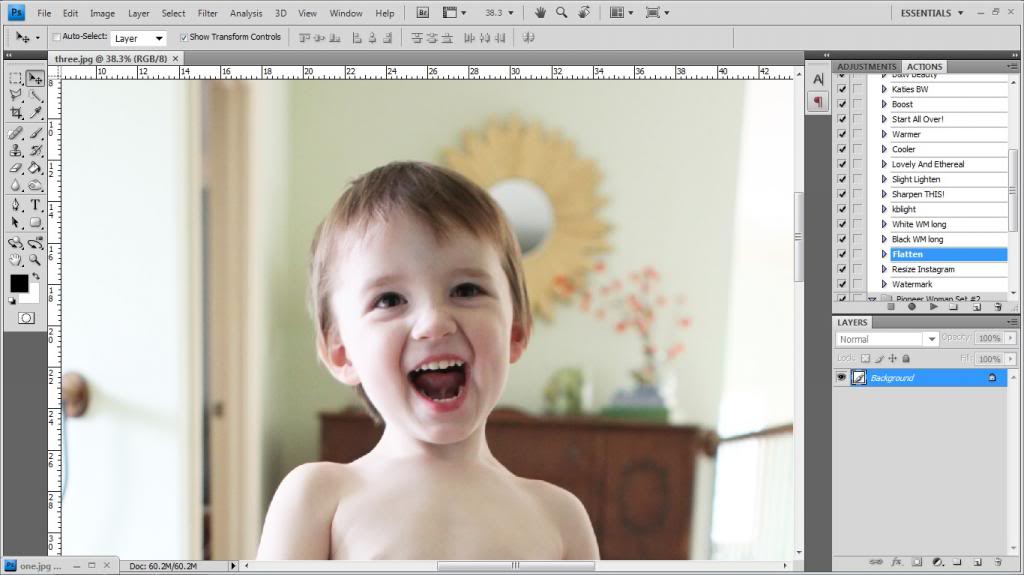
This last technique is a personal favorite because it is a blend of those ones I mentioned above plus an extra trick. First I apply all my lighten techniques but make them not visible by clicking the eyeball next to each layer (see the arrows). Then I use the Lovely And Ethereal action (also from Pioneer Woman) to soften my picture.
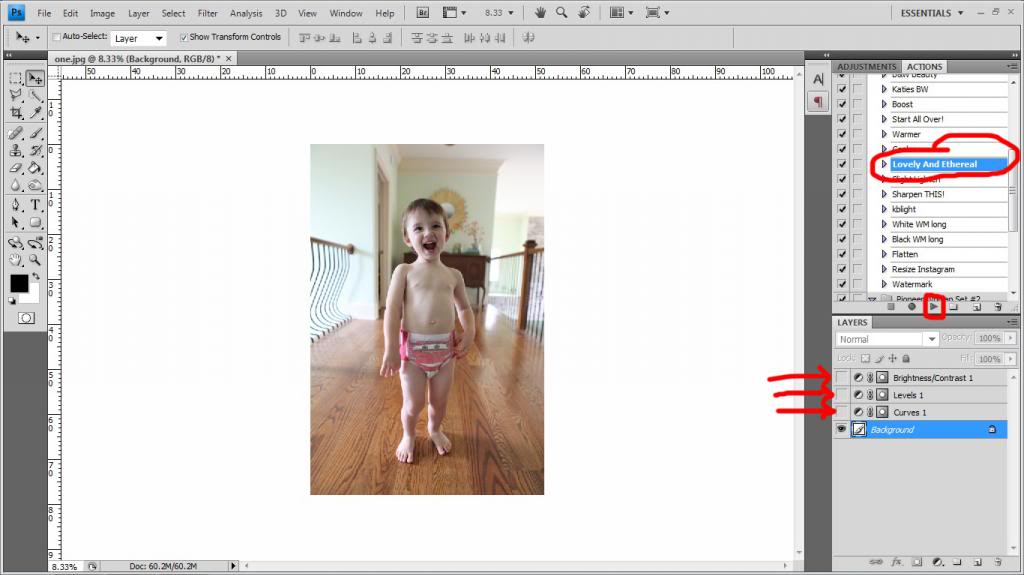
You can click on the little triangle arrow next to the action after it has applied to your photo to see each individual part of this action.
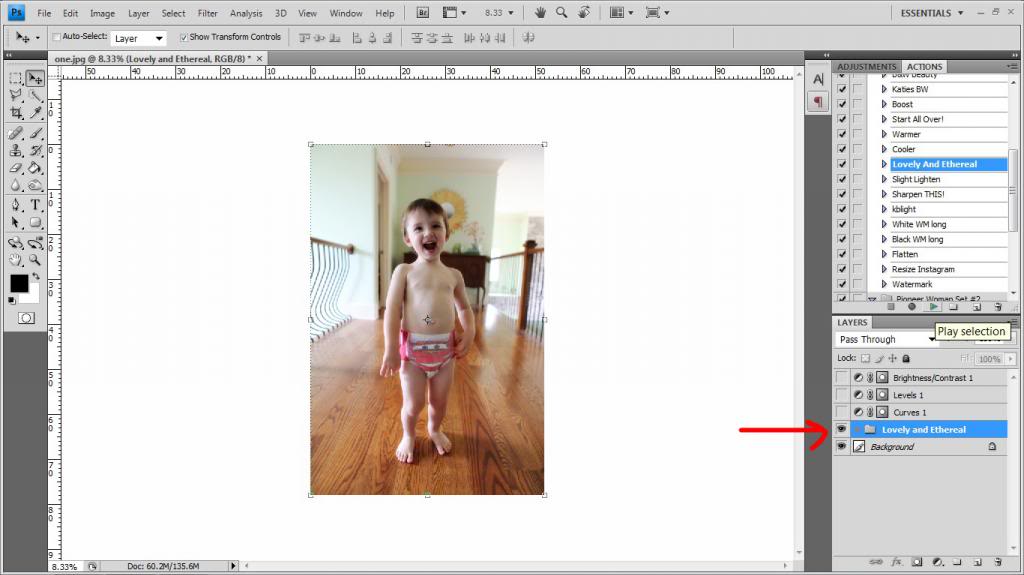
Once you click on that arrow (circled in red), the breakdown is visible…showing that the action consists of different parts – fix highlights, darken things, lighten things, and the lovely and ethereal bit. We are gonna remove the lovely and ethereal bit because it makes our photo darker and blurry…so click that eyeball to make it not visible.
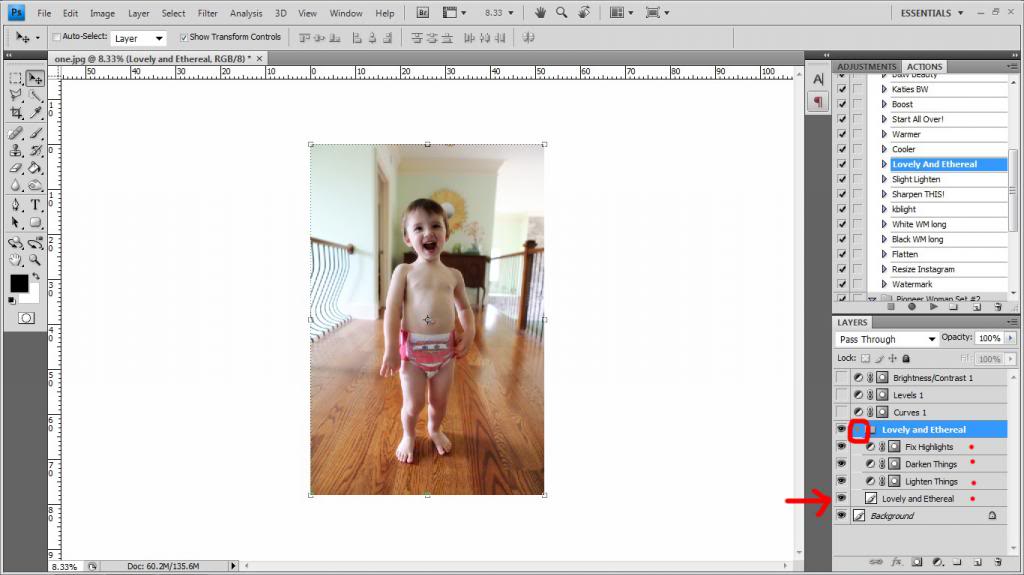
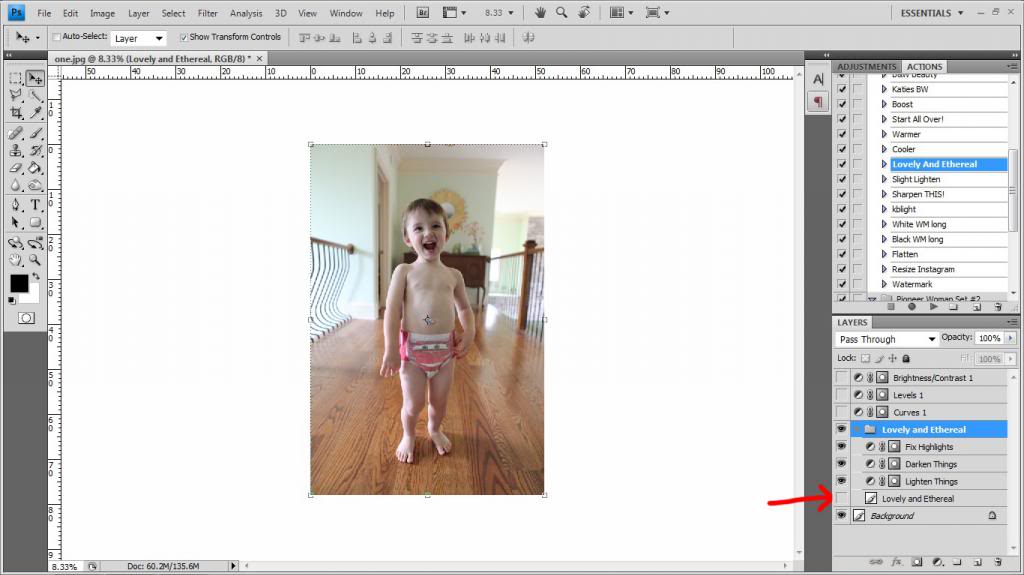
What we are left with is a photo that is evened out a bit. It is subtle but the highlights are darkened some.
Then you can go back and make your other adjustments (the ones we were playing with earlier) visible. Play around with the opacity of each (circled in red) till you get your photo that suits you. In this case, I used the brightness/contrast at 54% opacity and the levels at 100% opacity.
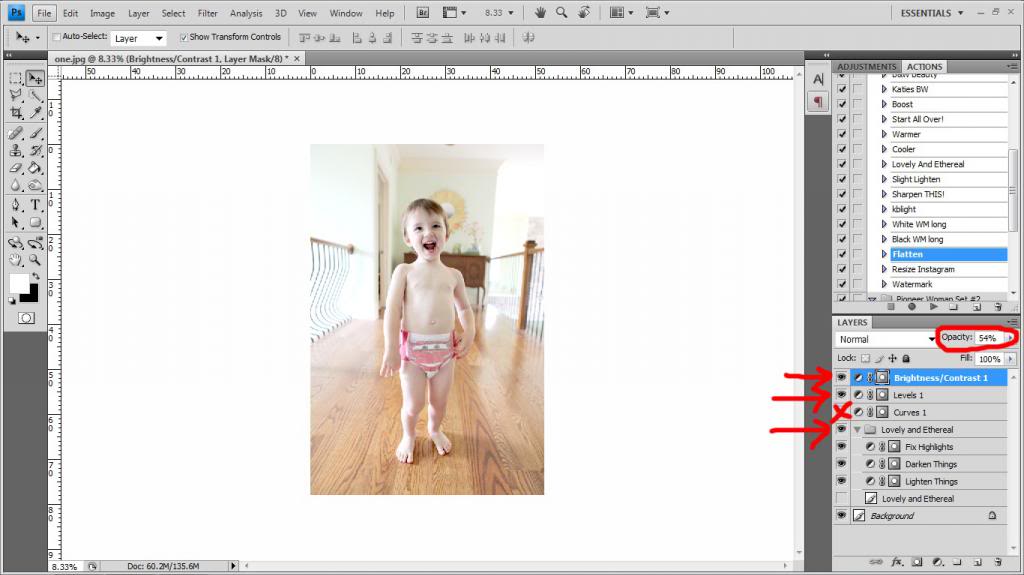
I love using that Lovely & Ethereal trick because it helps even things out. Not that I don’t love my sons crazy devil eyes 🙂
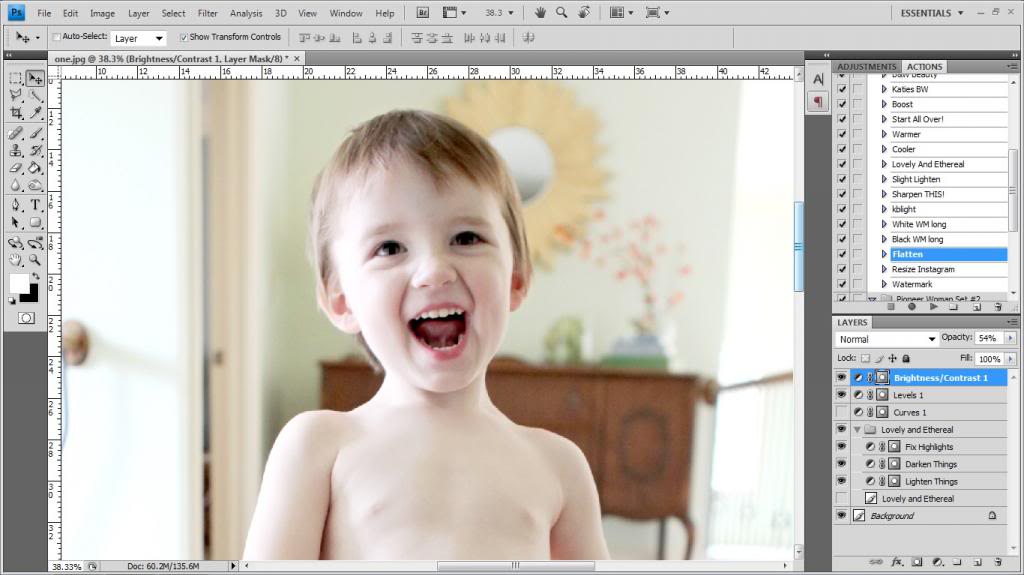
This is probably one of my favorite ways to lighten a photo (especially if it was taken in a rush but I love the expression and don’t want to part with it).


Of course, this is only post processing work and if you are a RAW user, then you can adjust the actual exposure. But most of you are probably beginners and would probably be working with JPEGs.
So that’s it! A few tricks to make those underexposed photos a little more photo album worthy 🙂 So like I say to Will about ten times a day…it’s time to lighten up!
What a tremendous difference this makes. Will is so handsome.
Ohhhhh I can. not. wait. for the home photography lessons!!!!
Seriously can you teach a class? Or better yet can you come over and show me how to take pictures of my house. I need HELP!
Can’t WAIT for your iPhone/Instagram tips! I’ve been using my phone almost exclusively for pictures (since it’s always with me) and would appreciate some know-how. 😉
I’m reeeeeallly excited to see your post on interior home photography! I think a good portion of my issue is that I’m using my Galaxy S3 camera (the only camera I have!), but another good portion of the problem is that my house is little and dark. I love your tutorials, I’m sure that’ll be another great one!
These are helpful. Photoshop overwhelms me!
Katie, I love seeing adorable pictures of Will. I did think you were using cloth diapers with him. Have you switched it up, are you just using disposables as pull-ups? I would love another cloth diaper post if you are still using cloth with either of your handsome guys. …well and if you aren’t why aren’t you. I am trying to decide if I should CD the little guy joining my fmaily here soon.
Oh man, I LOVE this series. Like, Thin Mint cookies from the freezer in the middle of August LOVE. I’m just learning to shoot with a DSLR and trying to figure out Photoshop on top of it…. You are a Godsend, girl!
I am currently using Aperture (for Mac) and I’ve slowly come to the realization that photoshop would just be way better:) When I finally get on board, I’m going to be stalking your blog for your tutorials. Thank you for making them!!
As a DSLR/photoshop newbie – I. LOVE. THESE. Hope you bring them back, from time to time! 🙂
Katie,
Can you do a tutorial on how to use actions? I feel like I’m really stupid because I can not master it/figure them out! Thanks!!!
I’m a DSLR beginner (just got my Nikon at Christmas), but I came across a channel on YouTube called Fro Knows Photo, which led me to his website. I’ve been shooting RAW ever since.
He’s got some great tutorials and equipment reviews. Definitely worth checking out for the DSLR nOOb. 🙂
Well Will is officially potty trained but before he was, he wore disposables for the last year. It was easier because we only had to change his diaper like four or five times a day…so a box would last a long time. Plus, it was time effective for us because for him to get through all his cloth diapers for wash, well, it took forever. So we opted for what would keep our cloth diapers last longer.
xo – kb
I’ll put that on the docket for the next round of tutorials…probably in the fall 🙂
xo – kb
thank you so much for all the tips and tricks! I need to get in there and just make myself figure out photoshop, and you certainly are helping to push me in the right direction!! here’s to taking (and producing!) better photos!
RAW is the way to go, hands down! I saved so much time post-processing once I switched over and editing in Lightroom. Even a “newbie” could do it, I swear! 🙂
Katie Bower, I love you. I can’t tell you how many poorly lit pictures I’ve made worse by making them brighter and grainy-er…granier? Either way, I thank you!
You probably know this already but, if you click on the drop down menu on the upper right corner of the Actions window that there’s an option to switch to button mode. In button mode you don’t have to click on the action and then click play. It just plays as soon as you click which action you want.
Thank you, thank you, thank you! This is exactly what I’ve been trying to figure out!! I only knew the way with increasing brightness and decreasing contrast. You rock!!!
Yes! I just found that out the other day…so cool 🙂
xo – kb
This was so helpful! And you totally got me. I was literally thinking, “wow, it doesn’t sound like KB to call herself a goldmine…”
me too! I have photoshop elements, and I figured out how to install them, and then didn’t like them because I didn’t understand how to tweak them.
One nice thing about Photoshop is that you don’t have to shoot in RAW to work on your photos in Camera Raw. I have my CS4 set up so that jpegs automatically open in Camera Raw (which is part of CS4). A lot of settings can be tweaked utilizing the power of Camera Raw and then you can proceed to open the image in Photoshop and finish it there. Click on Photoshop>Preferences>Camera Raw, and then adjust the settings at the bottom of the dialog box to: automatically open all supported jpegs.
I’m pumped for home photos and small product! I love these tutorials 🙂
Hello from Australia
Katie.
just wondering what photoshop program you use?
Thanks
Kirralea
CS4 🙂
xo – kb
Oh that is interesting! I didn’t know that! I’ll have to give it a whirl! Thanks 🙂
xo – kb
These tutorials are super-helpful! And allow me to read your blog at work (win-win)!! The white balancing post- in particular- was the one I needed the most. Thanks!
I’ve been loving these tutorials!! I hope you do more of them sometime soon!! 🙂
Thanks for this, came in really handy! I had to google it to find it again because it wasn’t on any of the links on your site to your photography tutorials or tips!