As promised, I am back to show you the play by play of our newly finished dining room faux paneling. And I am sooo excited that this project is being considered by so many of you as one of the potential ‘Honey-do’ items for your own home. You must share your ridiculously sick results people. MUST. And they will be sick. Sicker than the swine flu victims.
Anyhoo…first let’s see that fun before & after again so that we can see what we are getting into.
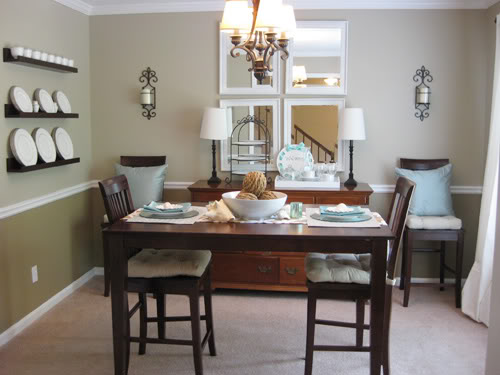
Before our dining room was simply a neutral room with a chair rail separating the upper part and lower part of our room. The upper part is painted Olympic’s Dusty Trail and below the chair rail, Stony Creek takes center stage.
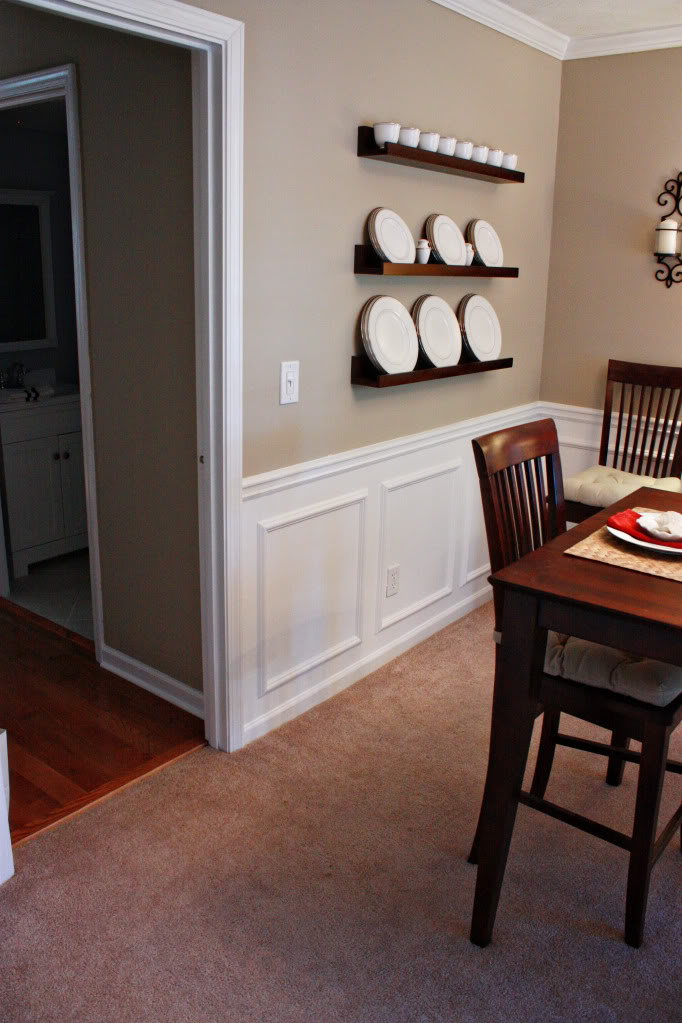
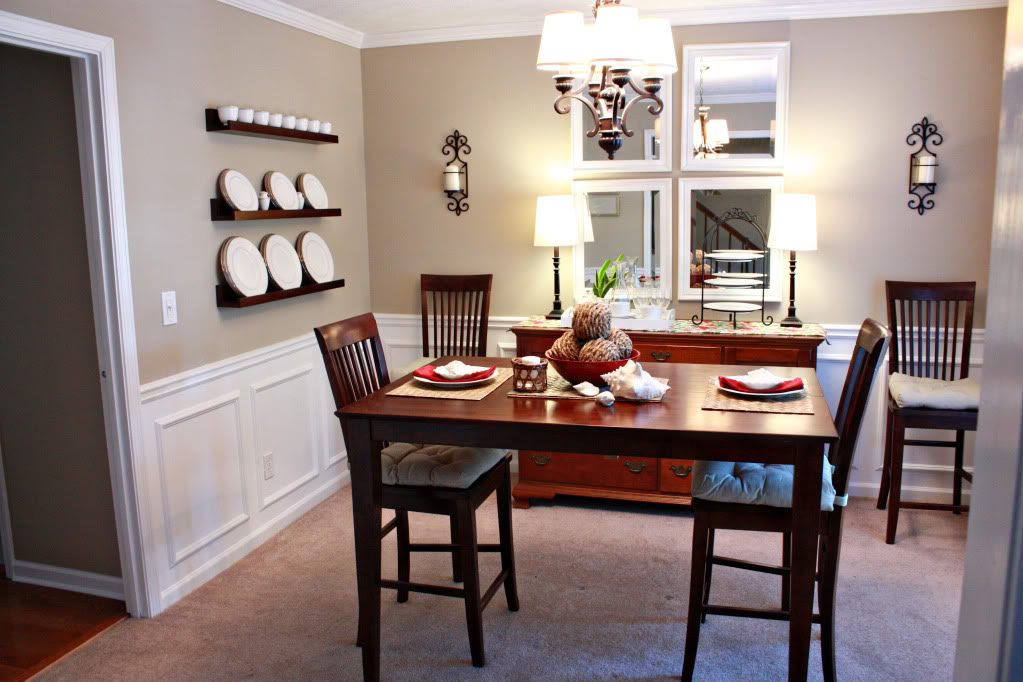
After 2 hours of measuring & remeasuring, 2 hours of installation and 2 total hours of painting, our newly spiff-ified room is lighter and brighter with new architectural interest and a bottom layer that is the same color as our trim.
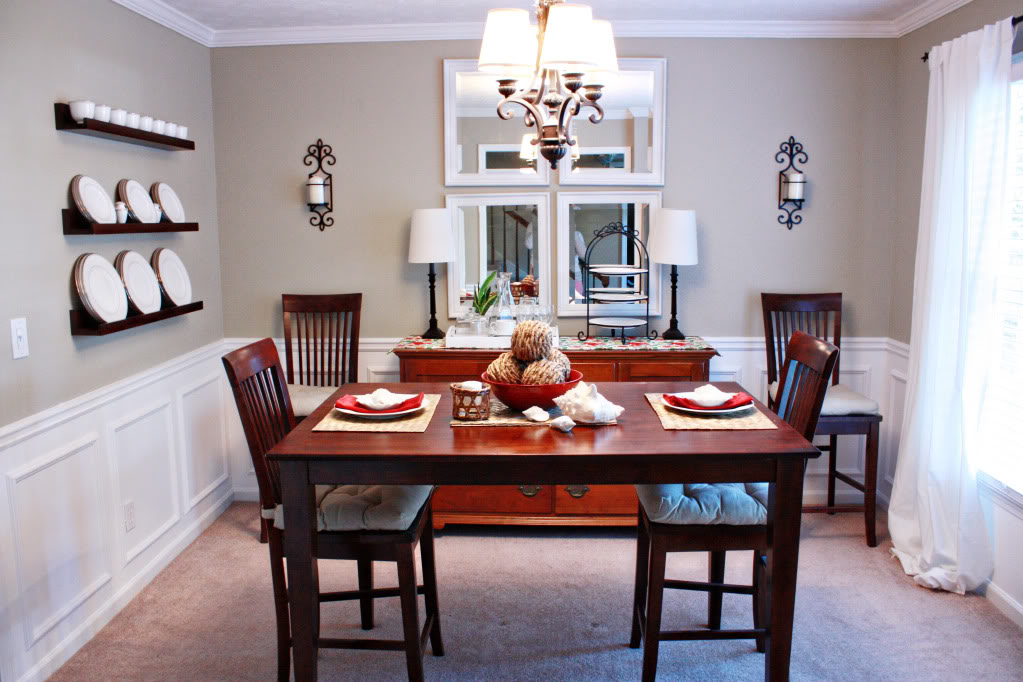
So how did we do it?
I am really glad that you asked.
First – we measured.
Then – we remeasured.
We know that each wall would require a different size box according to differing factors. We took into consideration the following :
- placement of the outlets or vents,
- the number of boxes that we thought would look right on each wall,
- and some general i-like-it-it-looks-good aesthetics.
I finally came to the conclusion that I prefer the look of five boxes per full wall. The rough part is that there was only one full wall (with no windows or doorways). Wall #1 reflects the wall that has the mirrors hanging on it. I decided that a 3″ allowance would give me enough visual space between each box and between the box and the wall, chairrail, and floor moldings. So then I measured my full wall – it was 135.5″ long. After subtracting out the space I needed for my allowances (total 18″), and dividing by 5 (the number of boxes I wanted), my result was the width of each box (23.5″). After double checking to make sure that this didn’t run box #4 into my outlet, I wrote down my lengths and moved to wall #2.
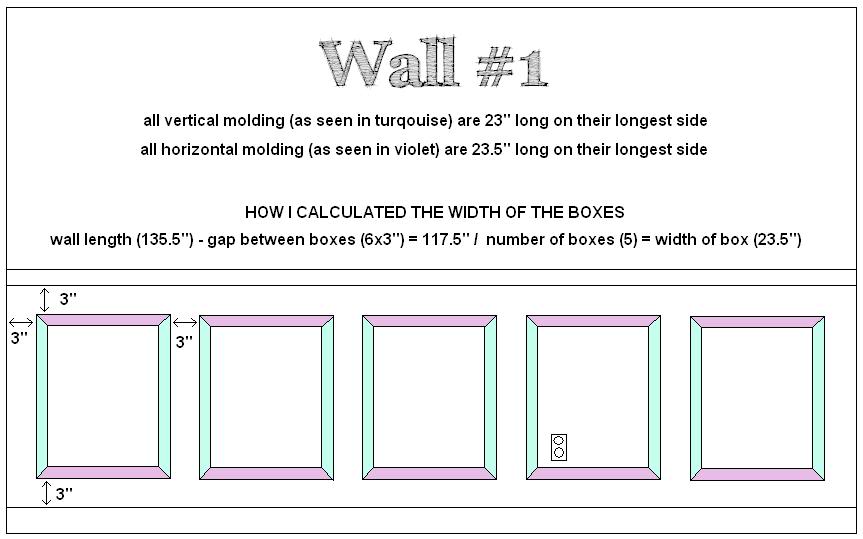
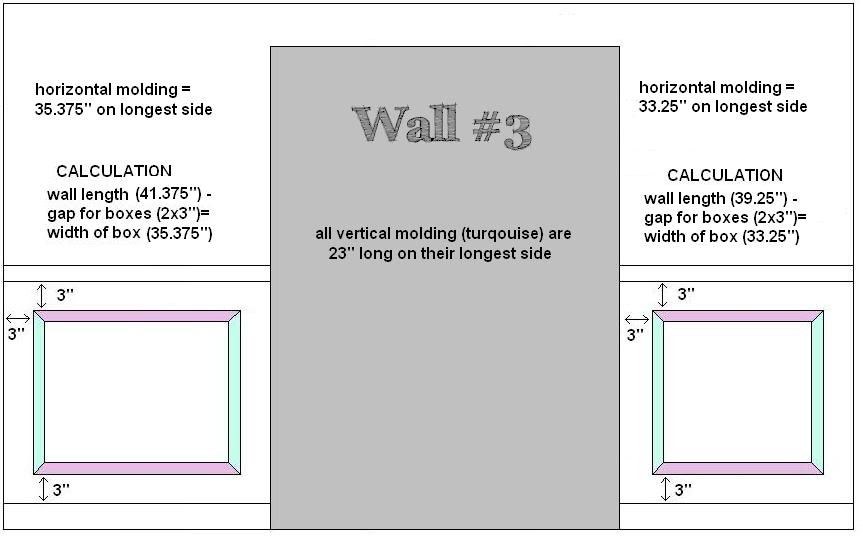
Wall #2 (it has the shelves holding my china) pretty much happened the same way – except for now I had to take into account the doorway. This door would eliminate the need for one of my 5 boxes. And it also registered with me that the box on the left hand side of the door would need a separate calculation than the three boxes on the right hand side.
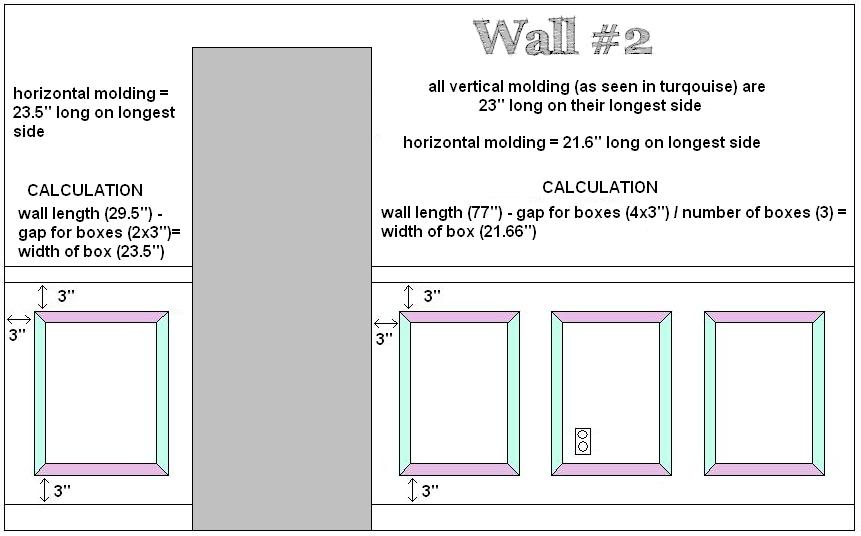
Wall #3 had just enough space to put some doubt in my mind. Do I try to fit four boxes or three or just go with two!?!? In the end, one box on each side of the extra wide doorway was just enough to look kinda like Jennifer Garner – structural and streamlined.
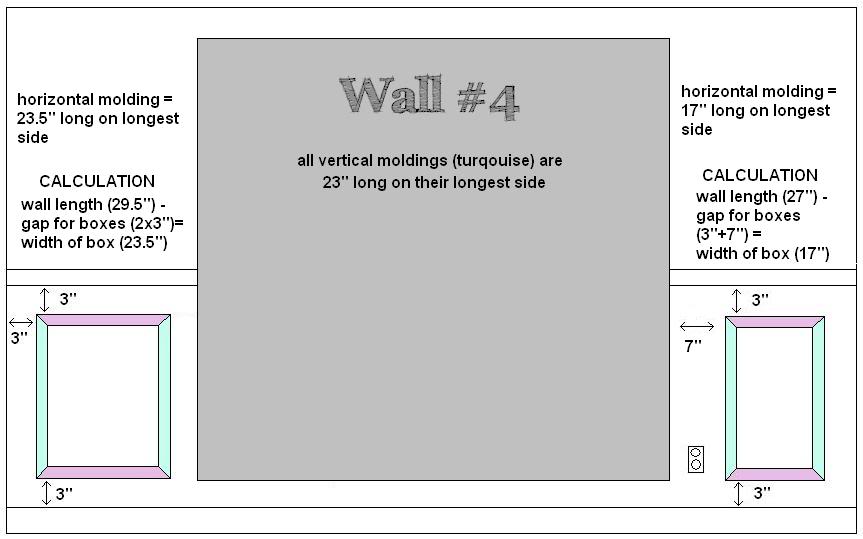
Finally wall #4 I ran into an issue with my boxes. On the right hand side of the window there was an outlet that was fairly close to the window trim…inhibiting me from having only a 3″ allowance. I decided that since there would be curtains that would cover this area, that the way to make it look best would be to scootch my box out a bit with a 7″ allowance and call it a day. In the end – it worked better than Ryan Seacrest at all 14 of his full time jobs.
After all the visual planning, it was time to get to work.
First I primed and painted the space below the chair rail to match the rest of the trim.
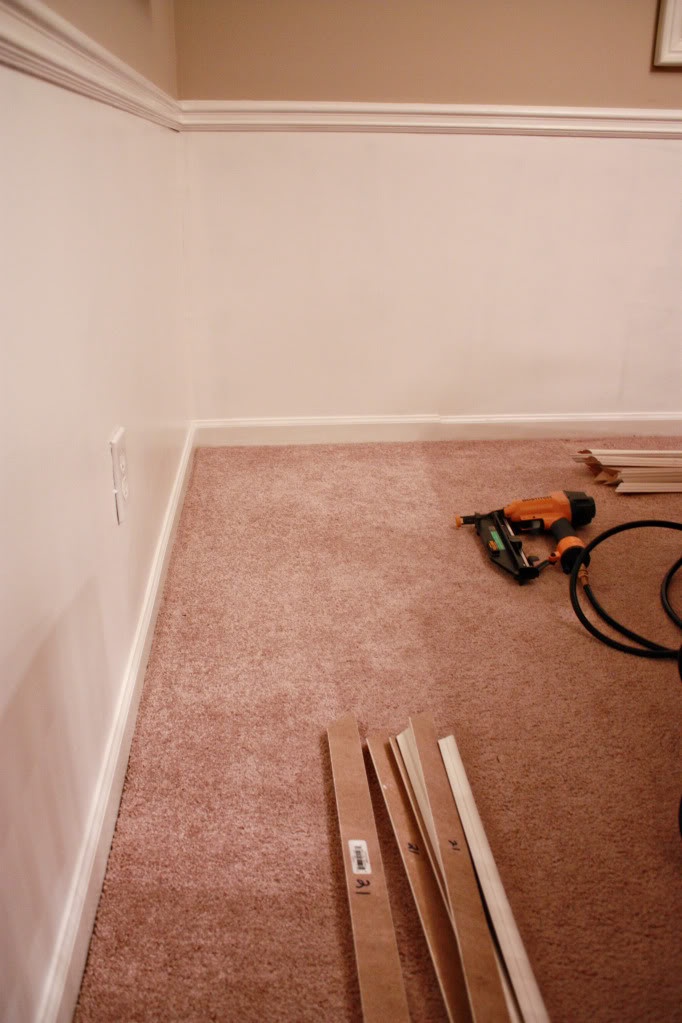
My dear boyfriend cut all the pieces we needed outta the basic 1.5″ flat-backed chair rail. In order to keep them all straight – he just wrote on the back the measurement of that piece.
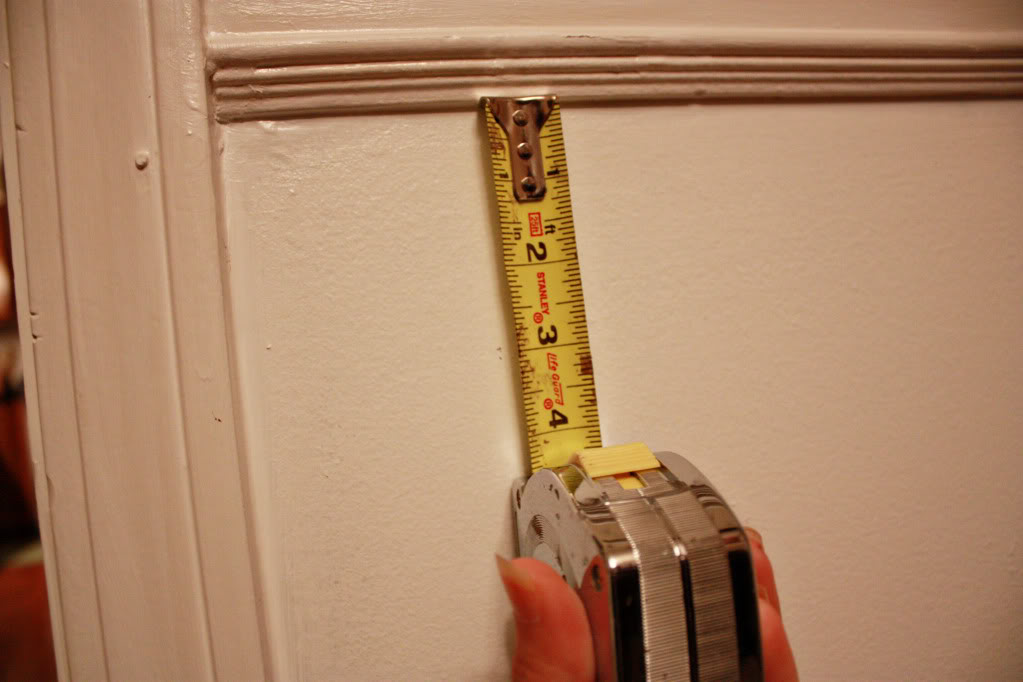
I then measured the allowance – 3″ for each wall, doorway, trim, floor moldings and chair railing – and marked it with a pen.
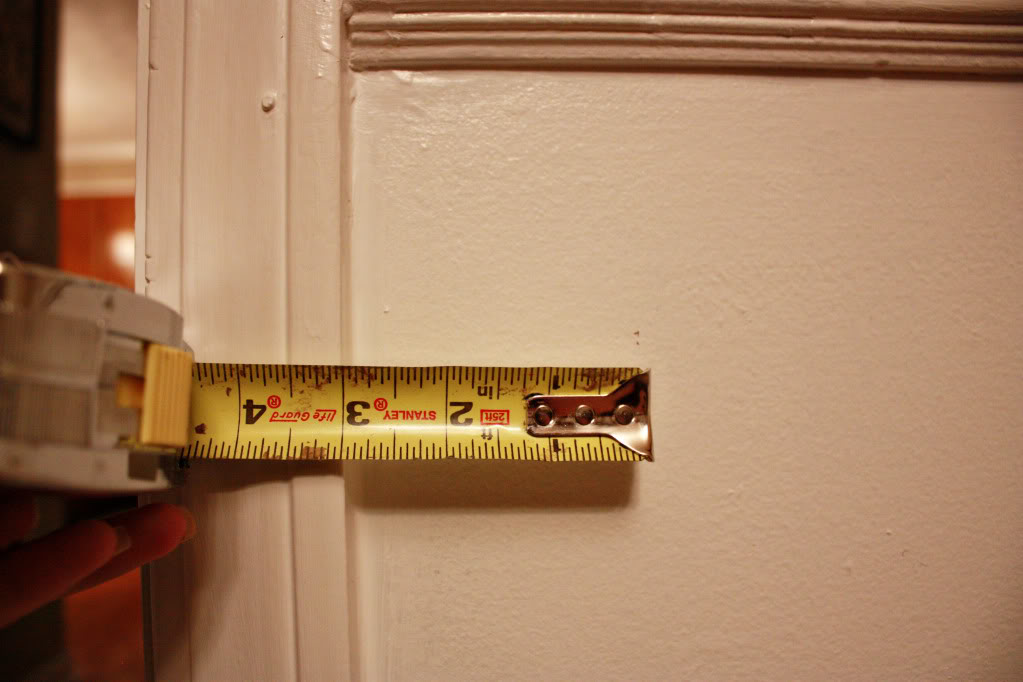
Making sure that my three inch mark was in just the right spot horizontally & vertically is important.
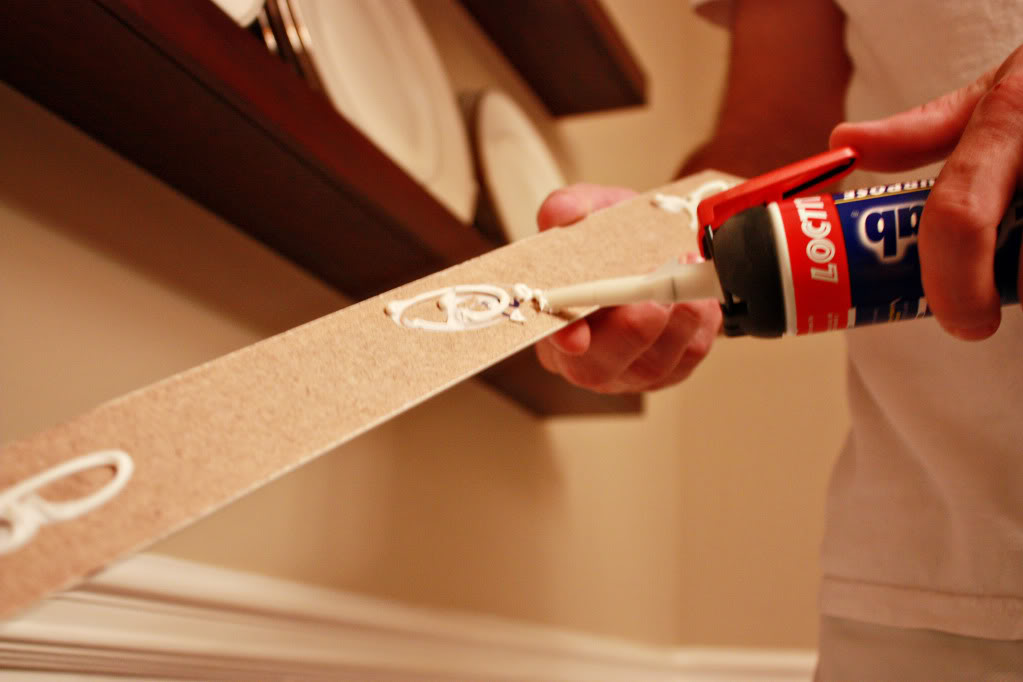
We then used some basic construction adhesive to the back of each piece.
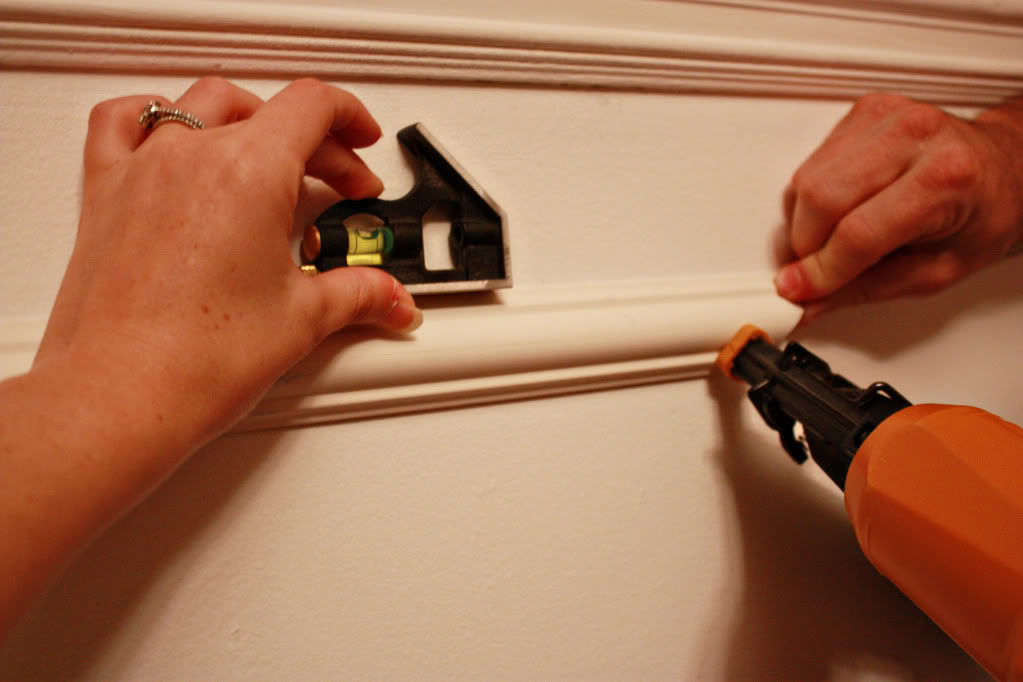
We first installed the top piece by ensuring that it was level, making adjustments with the naked eye and then nailing it into place with a couple finish nails. The side pieces and bottom piece were then installed the same way.
After all the boxes were installed, we were able to sit back and relax.
SIKE.
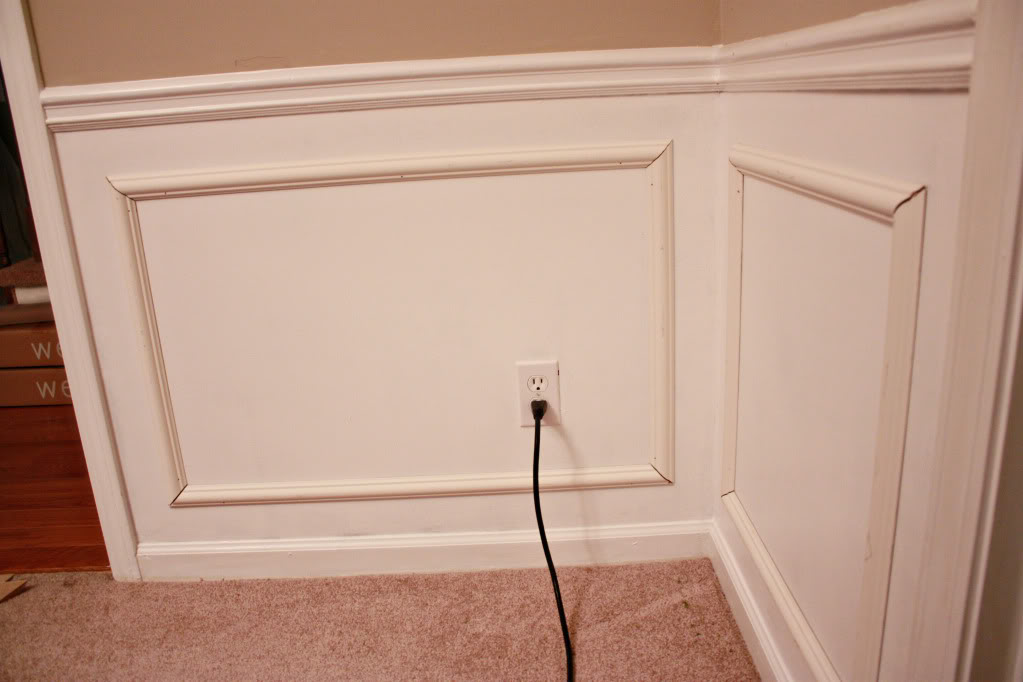
We…errugh…Jeremy then caulked the entire room. Filling in all the cracks and the seams really helps hide a multitude of sins. Wanna hear another sin? How my boyfriend pronounces ‘caulking’. go ahead and say it with a southern accent and no “L”….I dare you in front of your in-laws. and your pastor. Let the good times roll.
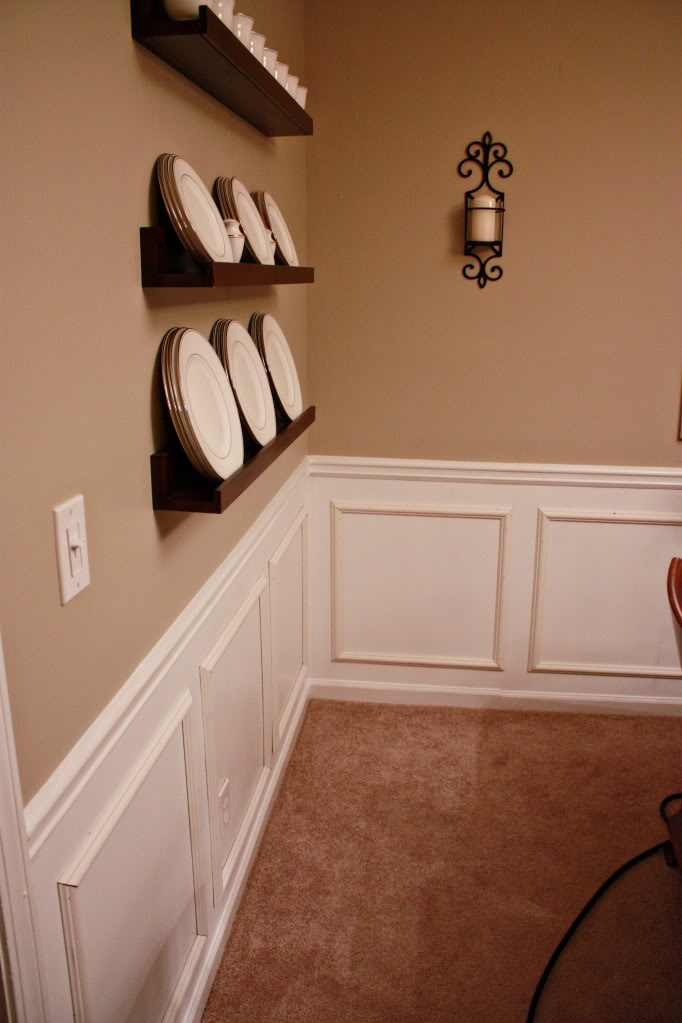
After the caulllllking dries, it is finally time to do your topcoat of paint.
And boy does it help make a difference.
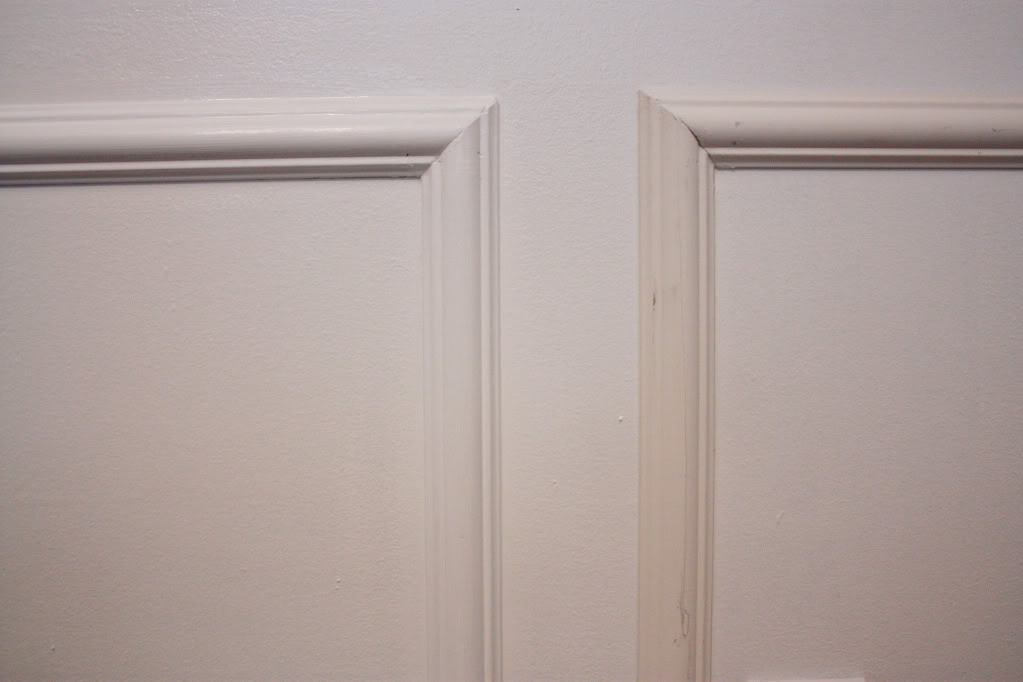
Just check out how that first painted box looks like an interesting and classy addition next to all those other boxes. It’s like Jackie O at a Kardashian family reunion.
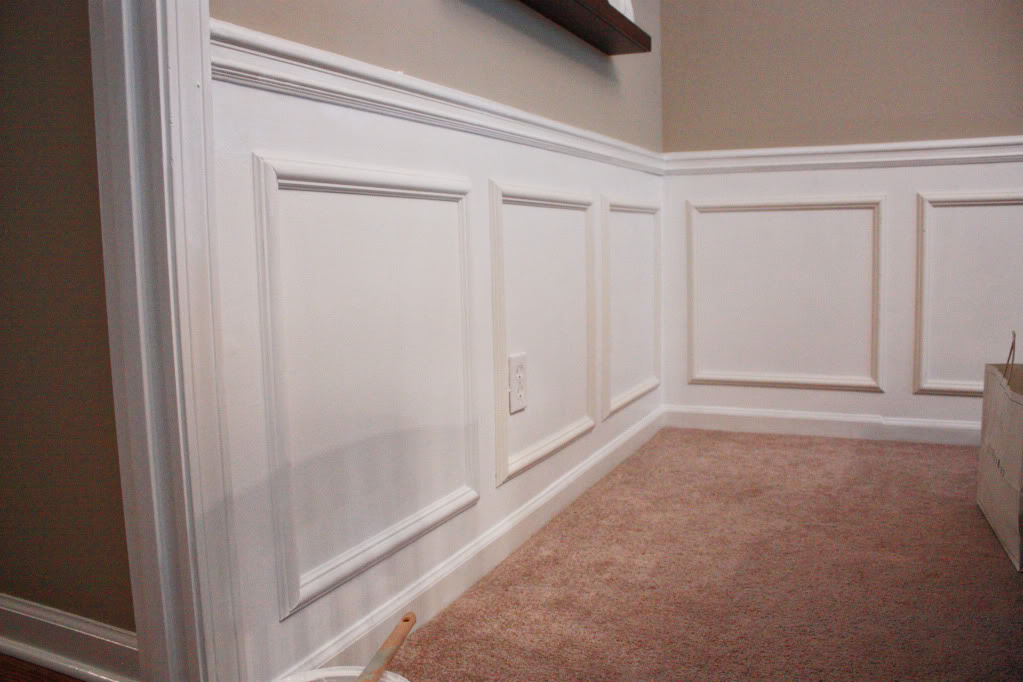
And now – you can see how well the finished product looks with a crisp coat of paint.
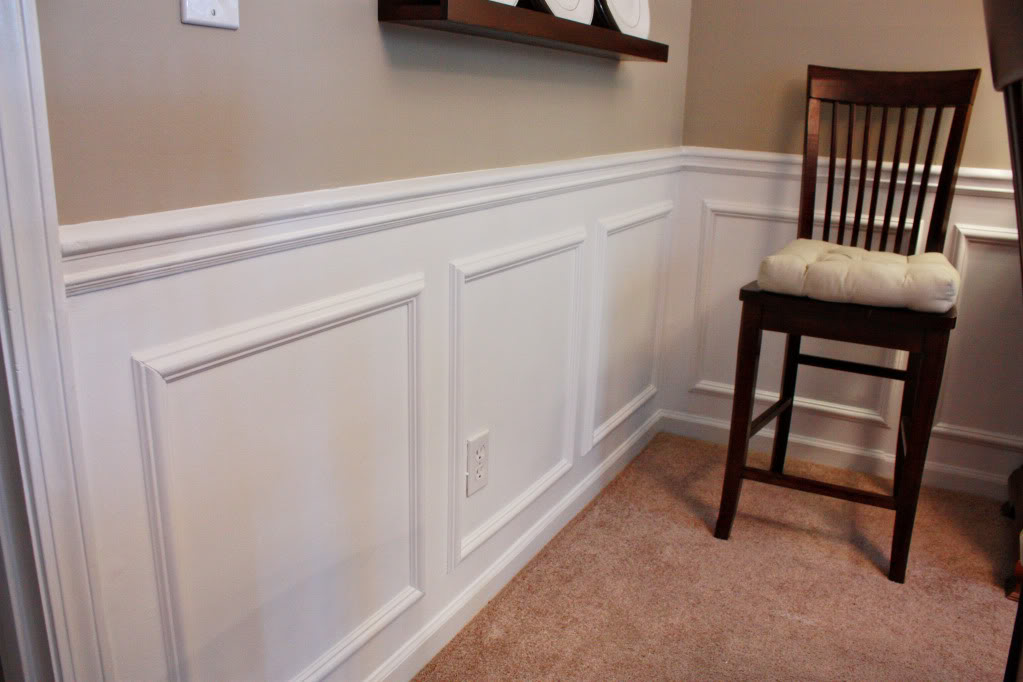
Even from afar, it looks much better than just a plain painted wall. I think that the boxes actually help balance out the room. If the bottom were white and the upper was that sandy brown, then I think it would look a little off…but with the help of those architectural boxes – it really beefs up the bottom to hold its own.
In the end, it was a relatively easy process. Although I do recommend some basic math skills and tools to get-er-done. Some of the tools and products that we used were –
- a miter saw (or you could use a miter box and a hand saw)
- a level
- an air compressor and finish nailer
- construction adhesive
- two tubes of caulk
- primer
- paint
- paint brush
- screwdriver (to remove your outlet plates)
- 144 feet of trim
And our final cost was just under $80 for the entire project.
So there you have it – a play by play of how we added faux paneling to our dining room. Hope this helps any of you DIYers out there and make sure you send me those photos when the Honey-did this in your own home.
XO – K to the Bower Power
p.s. For more paneling action – check out what Sara did over at Russet Street Reno.
Thanks so much for the play-by-play Katie! Question about the caullllllllking….so he filled in the ends where the two pieces were mitered if they didn’t meet properly? How did he finish off, just wipe down excess so it matched up with chair rail pattern? Hope this question makes sense, maybe if I had more of your great DIY experience under my belt I would already know!! : ) Thanks for sharing!!
Looks great! I’ve been contemplating doing this to my dining room for two years and just haven’t done it yet. They sell ready-made rectangles out of trim at Lowes for people who want all of their boxes the same size or for those who maybe don’t have the math skills or time to do it from scratch!
Mandy Dearest –
I could literally do an entire post on correct caulking. It takes skill and patience. But mostly just practice 🙂 The best way that we have found to caulk is to use the tip of the tube to push the caulk into any gaps (between the wall, the corners, the nail holes, etc.) while squeezing a small and steady amount out. Then take your clean and very moist index finger (No fingernails definitely helps – that is why my boytoy does the caulking around these parts) and wipe a smooth line…removing any excess and making sure that there is no noticable transition such as lines or bumps or bubbles. Then WIPE YOUR FINGER CLEAN and get it moist for the next swipe. It is very helpful to have a damp rag nearby or a small bowl of water for finger dipping.
That’s it! You are officially a caulker now 🙂
XO – Katie
Thanks for the play by play! My favorite part – “It’s like Jackie O at a Kardashian family reunion.” Too funny! It’s true, too!
Only $80? Wow, it looks custom! The dining room actually seems brighter now compared to the other photos. I love it!
I have two questions, one for Katie and one for Heather S.
Katie, What is the height of your chair rail?
Heather, can you please provide a linky?
Love it!! I’ve been pining to do this in my dining room, and now I just may have to. 🙂
Hi Erin –
The bottom of our chair rail measures about 33 inches from the floor.
Also – just a heads up about the pre-made boxes – we actually considered using them! We ended up going the other route because they are rather expensive (the cost of 1 would be the cost of three custom ones), they are all one size – making it difficult for those walls that are a little bigger or smaller, and finally they require just as much math to figure out the placement. I hope they work for your project – just be sure to take your room’s measurements into Lowe’s with you!
Good luck!
XO – Katie
Looks awesome! I’d love to do the same in my dining room, but I have two questions for you:
1. My window sills are about 3″ below my chair rail. Any ideas? Should I make the area under the window its own box that is lower than the others? Or make all of them 5″ below the chair rail (and 2″ below the window sill)?
2. I have 2 AC vents that stick up about 3″ from the 4″ floor molding. Any ideas there?
THANKS!
Jenn-baby,
Good questions – love it! And I think I have a couple solutions for you.
1. The window is no problem – don’t do 5″ all away around – keep that 3″ allowance and your boxes below the window will look just peachy. Here are two examples.
2. For your vent – you have two options. If you know that the vent is located behind a piece of furniture or behind furnitures, you may choose to do nothing except run your box into the vent and cut it to length to accomodate for that space. I wouldn’t change the bottom allowance for the whole room based on one little vent. Or if your vent is loud and proud and out and about, then you can build the trim around the vent for an oh-so-custom look. Here is an example of how they did that with a outlet. The idea is the same 🙂
Hope this helps and if anyone else has any ideas – please share! I would love to hear them 🙂
XO – KB
I have printed out a multitude of instructions on several websites on how to do the paneling, and I have to say your’s is by far the easiest for me to understand.
Hmmm…now I just need to gather the strength to attempt the project all by my lonesome. I think it will definitely make my home look much more elegant.
Thanks for the great how-to’s!
Great inspiration! You make it look so easy! Thank you for sharing!
Katie, I love your blog. The panelling looks fantastic. I also love the curtains in the room. Are you willing to share where you found those? Thanks!!
Wow, the dining room looks amazing. I LOVE what you did with it. Looks so easy, but I know I would mess that up 🙂
Ok, I need your professional opinion! But You’ll need to see pics first. Do you think I could email you my predicament? I would try to explain it to you but I’m not sure i could.
oooh i love it, i love it, i love it!
The room looks absolutely amazing! I’d been playing with the idea of smoothing out the plaster “swirls” below our dining room chair rail and doing this. I think it would balance out our swirly ceiling (I should totally send you a pic of our swirly ceiling – very unique, and only found in this area!). One question – did paint finish did you use? Thanks!
Oooooh love it! Thanks for your helpful guide 🙂
Oh and I’ve ALMOST decided on my free Olympic paint color! Sorry it’s taking so long! :p
It looks so beautiful. I have always dreamed of doing faux molding. I am going to add a miter saw and a nail gun to my Christmas list!
Awesome instructions!
It looks amazing! I would love to do this in the house we’re in the process of buying. You have such a beautiful home.
Whoa! That looks AMAZING you guys! Thanks so much for writing everything up and describing it so well, the details are wonderfully helpful. I’ll be linking to this.
It looks BEAUTIFUL!! 🙂 Great job!!
this turned out really well! i had a friend that did this in her library, and it ended up being a really nice look against a coral wall.
kelly
http://tearinguphouses.blogspot.com
Katie, thanks for the link! I also added a post with a link to your fabulous instructions!
http://www.russetstreetreno.com/2009/09/dining-room-picture-molding-faq.html
I totally linked this post to my friend AnNicole at OurSuburbanCottage when she was emailing me about wainscot up her staircase. This paneling is just pimpin. (Can I say that ? )
Thanks for adding me to your bloggy roll. I feel like I’ve just been initiated into a very cool club.
xoxo
Kate
Hi, quick question, how do you handle the chair rail with a window? Do you run the railing vertically when it gets to the window down to where the sill is, then cross the window under the sill then go back up? (makes a horseshoe shape)? Or waht?
Hi Rebecca,
Good question. When you are measuring your room for paneling and you come up to a window, your ‘box’ should run parallel to the vertical line of the window and continue down till you hit that 3″ mark and then make a clean square. Under the sill you can do smaller boxes if your window is high enough or just leave the wall plain (boxless) if your window is longer. I chose to not have boxes under our window so that we have a cleaner look.
Hope this helps!
XO – KBeeeee
Hi Katie,
I am getting ready to install paneling in my kitchen/dining room today – I have a quick question – what type of white paint did you use on the bottom half of your wall? Did you paint the wall semi-gloss like the trim? Our paint for the top half is satin. Any help would be appreciated!!
Hi Laura,
We used the exact same paint as our trim…it was a Semi-gloss Pastel White untinted paint.
Good luck!
XO – Katie
I love the paneling! I definitely want to try it in our ho-hum dining room. What program/software did you use to help conceptualize and draw-up the plans? It looks very handy, especially as I’m not the best drawer in the world!
Also, our dining room opens up into the living room, so there is one, long shared wall. How do we “end” the paneling in the dining room when it’s time for the wall to become living room space? I was thinking of adding a built-in open cabinet or book case to help mark the transition and solve the panel-stop connundrum… What are your thoughts?
Thanks!
Lydia
Hi Lydia,
I didn’t use a software to mock up the plans prior to installation. I just decided how many boxes I wanted on each wall and doublechecked that it wouldn’t run into an outlet. Also I think your builtin cabinet idea or bookcase is great or you could just use a piece of molding that runs from floor to ceiling to ‘mark’ the end of the space.
XO – Katie
Hi, I love the detail you provided on paneling a dining room. It really helped my “non-visual” husband understand what I am wanting to do.
Question: one of our walls is open to the staircase going up (first 5 steps). Would you make one of the boxes angled with the slope of the stairs? I was thinking if we stay with a 3″ rule from the wood trim it might be the way to go…would love your feedback.
thx, Dido
Yes Dido, I would. Here’s a good example of a friend who did it on her stairway with the slope.
XO – Katie
Very nice! We’re doing the same thing in our dining room. I’m curious how you handled the vertical pieces. Did you still nail those since they don’t necessarily line up with the studs? Also, any worries with hitting a power wire around the electrical outlets?
Yes Rob we did use the nails without driving them into studs. Since they were just finishing nails, they pierce the drywall but do not have the risk of hitting a power wire or plumbing. Also, most power lines installed by pros run in a room (like this one) at about 20 inches through drilled holes in the studs, so if you are using longer nails, you could try to avoid that height and go above and below it. In the end, the combination of the adhesive and the nails are together holding everything in place 🙂 As for your concern about electrical outlets, if your boxes are very close to an electrical outlet, you can always call an electrician to come tell you the safest depth in which you can nail through.
Hope this helps.
xo – kb
Hi- I am just now starting to redo our dining room and I loved the work you did in your dining room. However, we do have stained trim around the windows and baseboard and I really don’t want to paint it white- it was why I fell in love with the house. Is there a way to do the chair rail and raised paneling white and leave the window trim and baseboards alone or would that look to wonky. My plan was to paint the insides of the boxes sw restrained gold and the top sw ivoire. Thanks for your input.
sue
I think we were all doing this kind of project at the same time. If you are getting new “action” to this post, it is because Erin at Domestic Adventures has linked her post to yours.
I really LOVE the way faux wainscoting makes a room pop. Makes it feel more elegant and warm. No one (that is visiting) needs to know that it’s “faux” 🙂
You did a great job on the step by step and I may have to update my blog with this little project and link it to your step by step instructions – even if I didn’t get the idea from you, you still did a bang up job on the “manual”.
Good job.
I love the wainscoating….what about walls that are textured???? Do you sand them or do you suggest putting up a panel? Love your blog!!! Beautiful home and great ideas.
We’re looking at doing this to our nursery (aka the master bedroom we’re giving up to the twins). It has a plain plank chair guard and I’d like to make it look a little nicer. My biggest issue is the nail gun: can we hand nail finishing nails or will that cause the trim to split?
It’s only a small apartment room and the price of renting a nail gun and compressor is prohibitive.
Advice would be lovely! Thank you for the tutorial. I’m hoping it works out for us
I really don’t know! My first guess would be that it should work fine but that is really time consuming. Ryobi has a finish nailer that isn’t that expensive and it would be a great investment 🙂
xo – kb