Demolition is my favorite part of any project. Somehow there is something very theraputic about tearing out trim or cabinets or removing gross stuff. It’s like I have house bulimia. And when the cockroach poo has fallen in my open mouth, I actually consider daily purging. The point is…demo is disgusting. And freakin’ awesome.
So if you wanna attempt a project, don’t let someone take the demo away from you. It might be just the thing to release the pent up frustration that builds from dealing with your physician who insists that chocolate is not a major food group.
Now let’s look at the de-construction of my first floor bathroom.
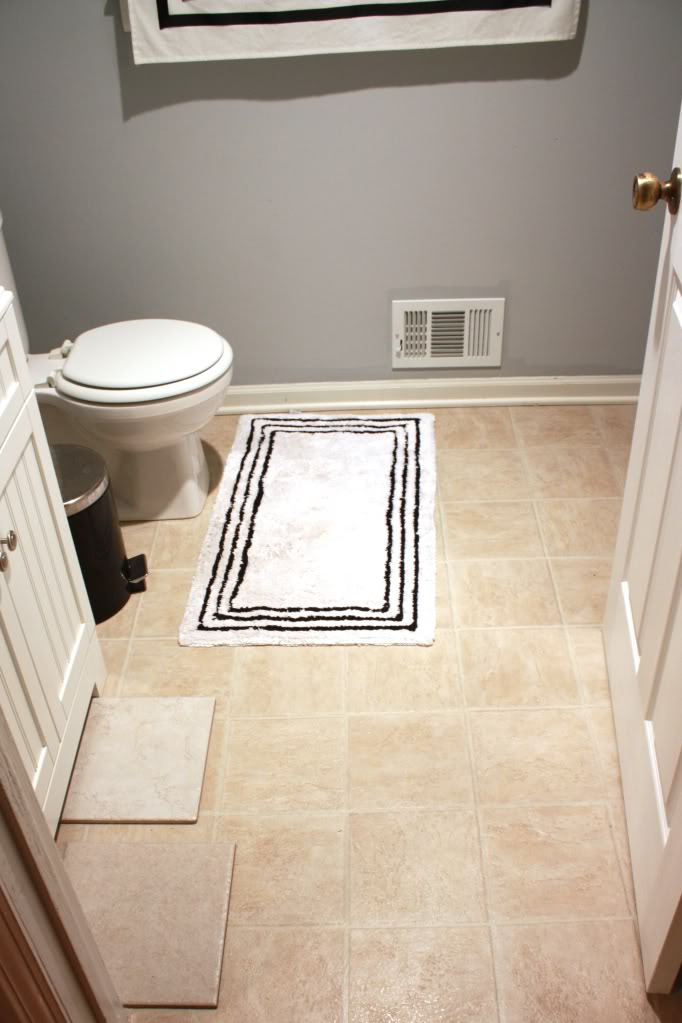
We start with a normal bathroom. My flooring before went a little something like this: The joists in your house are beams that hold up the floor, roof, or ceiling. They are important – do not mess with them during a bathroom tile job. Otherwise, the results are like Britney-with-an-umbrella, if you know what I mean.
On top of the joists come the subfloor. Yes, made of plywood. This is usually nailed directly to the joists and most importantly, needs to be dry. Why does it need to be moisture-free? Mold. Mildew. Wood rot.
Next comes the glue or adhesive that is holding the lineoleum down. If it is old then the lineoleum is ridiculously hard to remove. If it is new, it should come up pretty quick.
After the lineoleum is the trim…usually a 3″ to 5″ nailed board on the wall with a piece of quarter round finishing the look of the floor. Ours was partially made of pine, partially partical board…aka cheap…so it splinters upon removal. You have to remove the trim to remove ALL of the lineoleum. So obviously that is where I started.
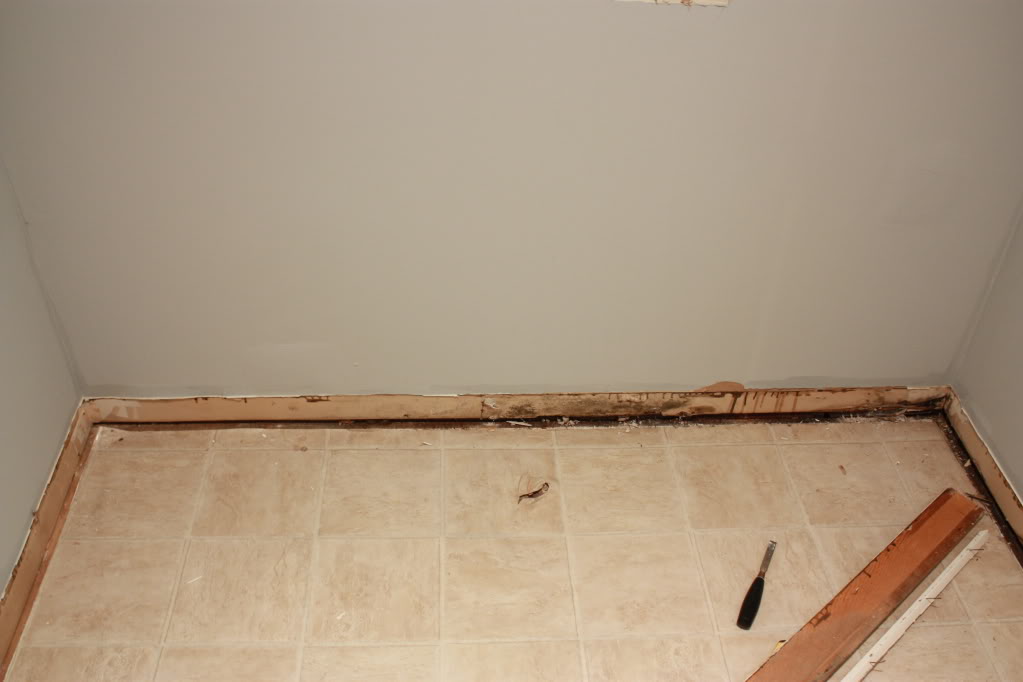
After the trim was off (yuck), I tried peeling up a corner of the lineoleum. Hallelujah – it came off easily. Fortunately for us whoever laid the lineoleum let the glue dry a little too long before putting on the actual floor. The lineoleum wasn’t even sticking. Basically the only thing holding it down was the trim and a few square feet where the glue did it’s job.
Unfortunately I discovered some issues. Take a look:
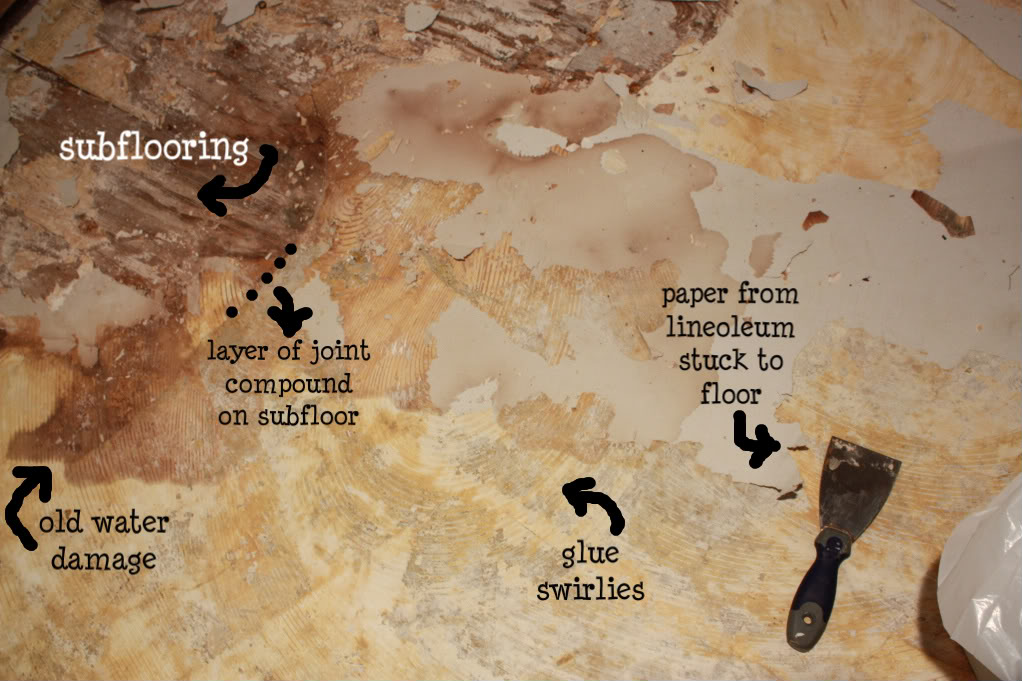
Swirlies were no problem. The paper could be scraped up using my handy dandy joint compound knife. The water damage was quite old and the subfloor did not suffer any damage from mold, mildew or rot. Whew. My only issue was the joint compound on the floor. I called my mom. She said that in older homes people sometimes used jc or plaster to ‘level’ the floor. Obviously in my home, they didn’t do a good job…only 3/4 of the room was covered…the other quarter was obviously lower. So I did my homework.
I found that you can apply mastic or thinset to the clean floor before fastening your Durock (or backerboard). Some people skip this step & fasten the board directly to the subfloor. But in our case, the thinset made sure our new tile foundation was completely level. But back to that in a second.
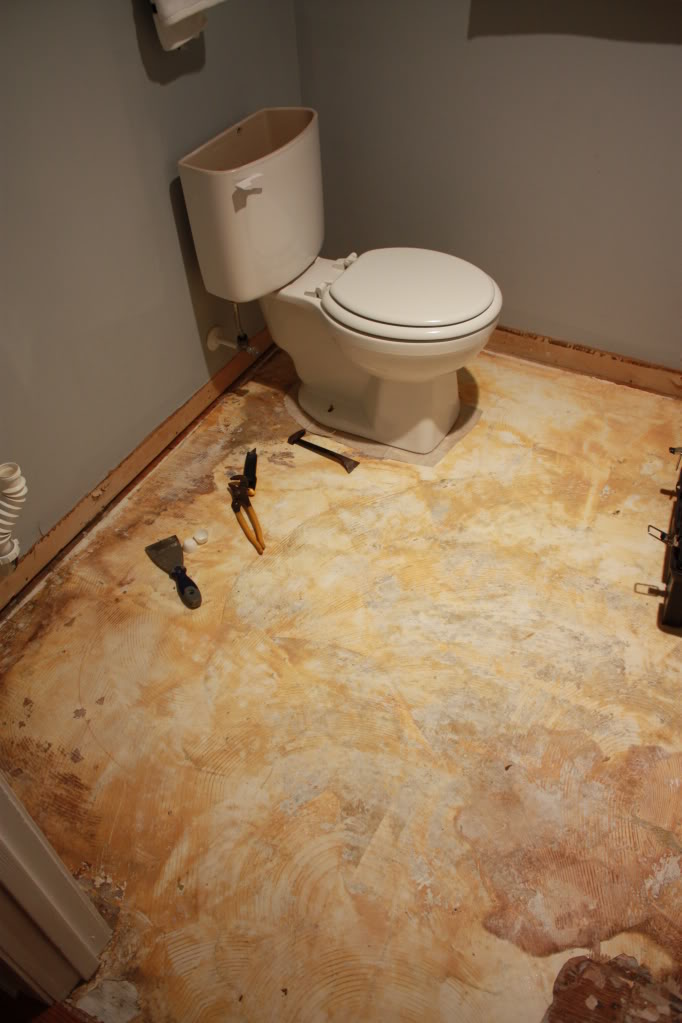
So I scraped, swept, cleaned and prepped the floor. When all the extra glue, paper, lineoleum and dirt was hauled off, I brought in the big guns to remove the toilet. Turn off water. Unscrew bolts. Lift toilet. Pretty easy right. My boyfriend and I hauled it to the garage.
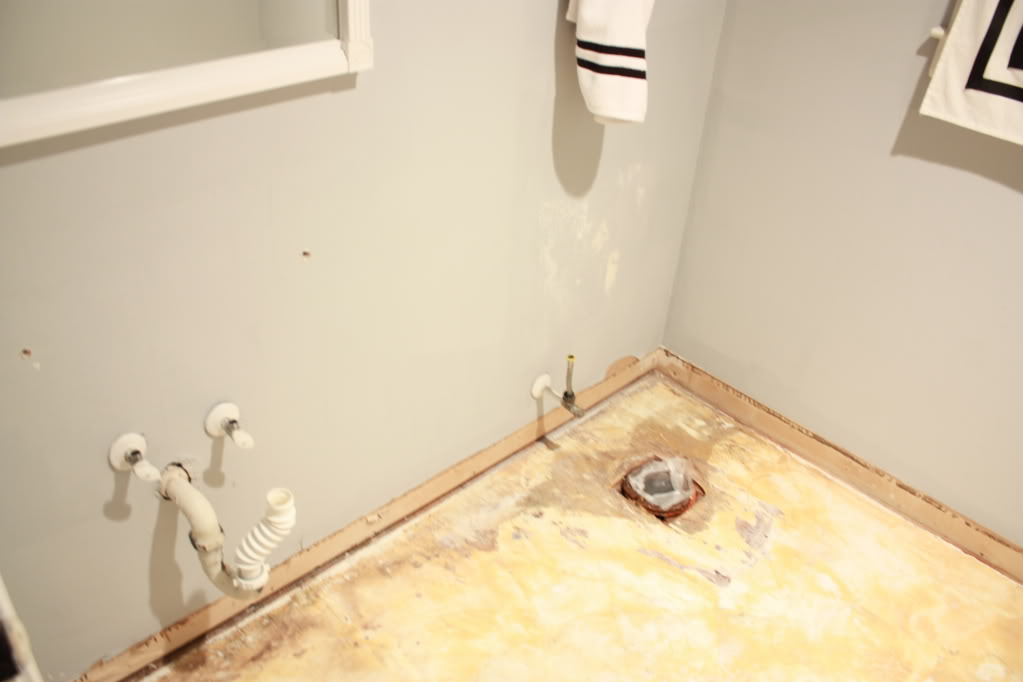
The toilet hole got some press-n-seal to keep that stank down. And I finally got behind the toilet to sand the rough wall behind the tank.
 |
 |
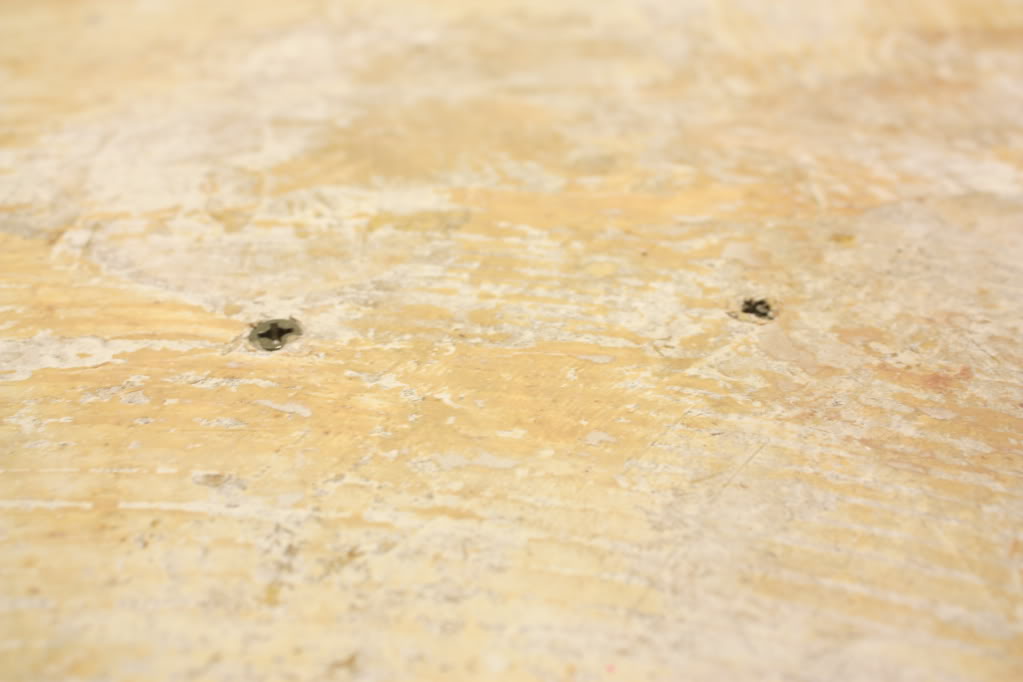
I also took this opportunity to get rid of a couple squeeky floorboards. I fastened the floor down to the joists with a couple screws…and just like Trump, I said “Not another squeek or you’re fired!”.
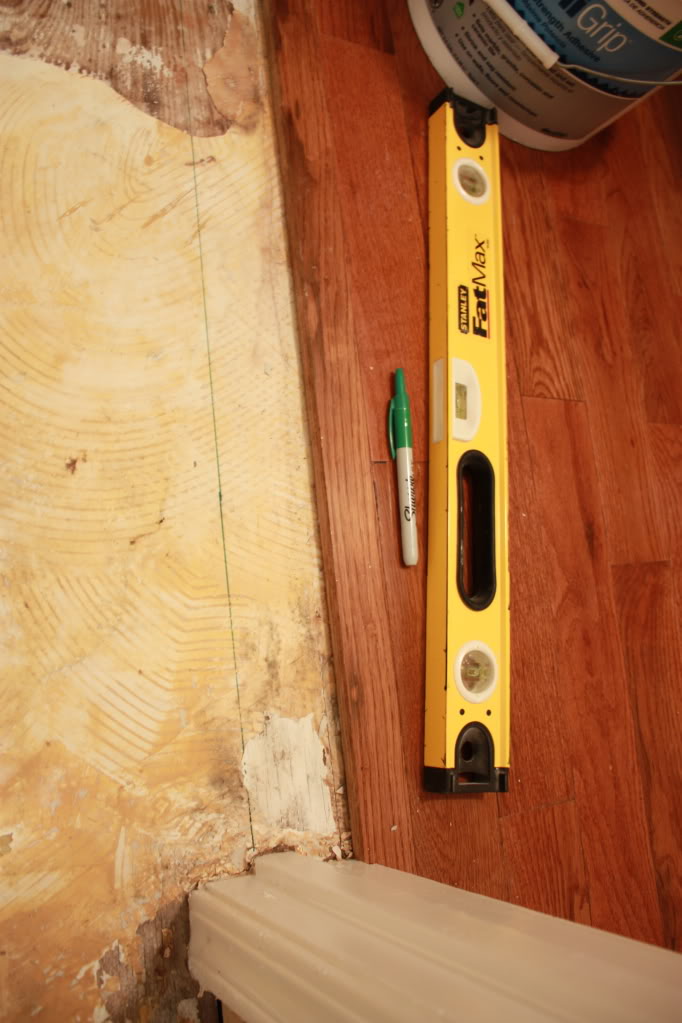
The photo on the right shows me marking my tile line. As you can see the old lineoleum went right up to the hallway hardwoods. But our new tile would only be in the bathroom. We needed to extend the hardwood by adding a few additional pieces and then the finishing touch would be a threshold stained to match the hall.
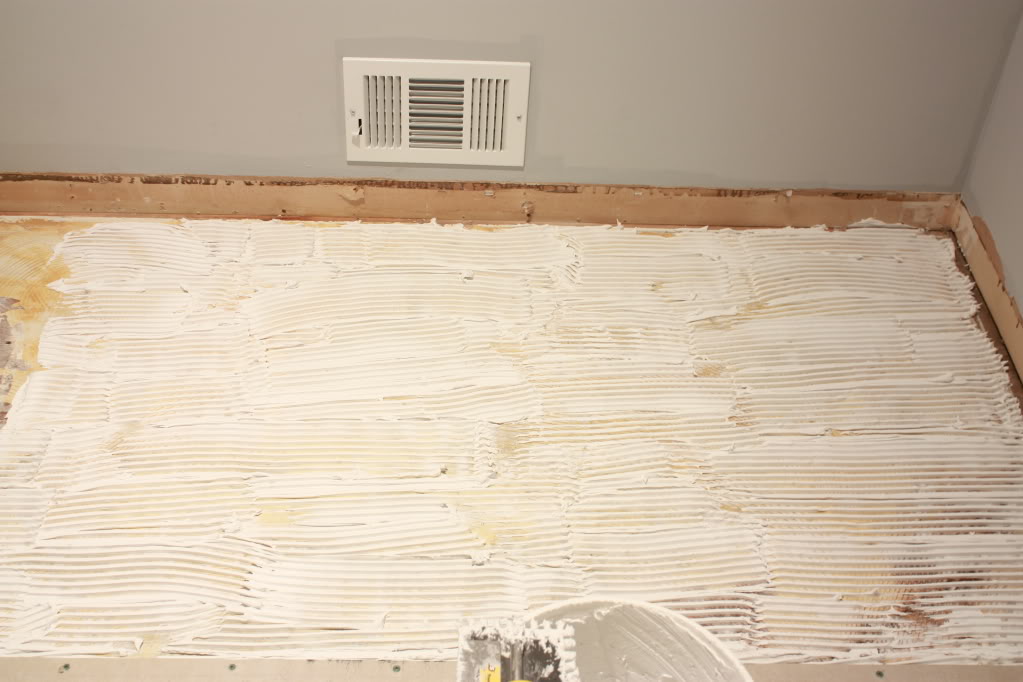
Then came my floor leveling event via thinset. Spread with a notched trowel. Then take your backerboard and lay flat on the thinset. Press down until level.
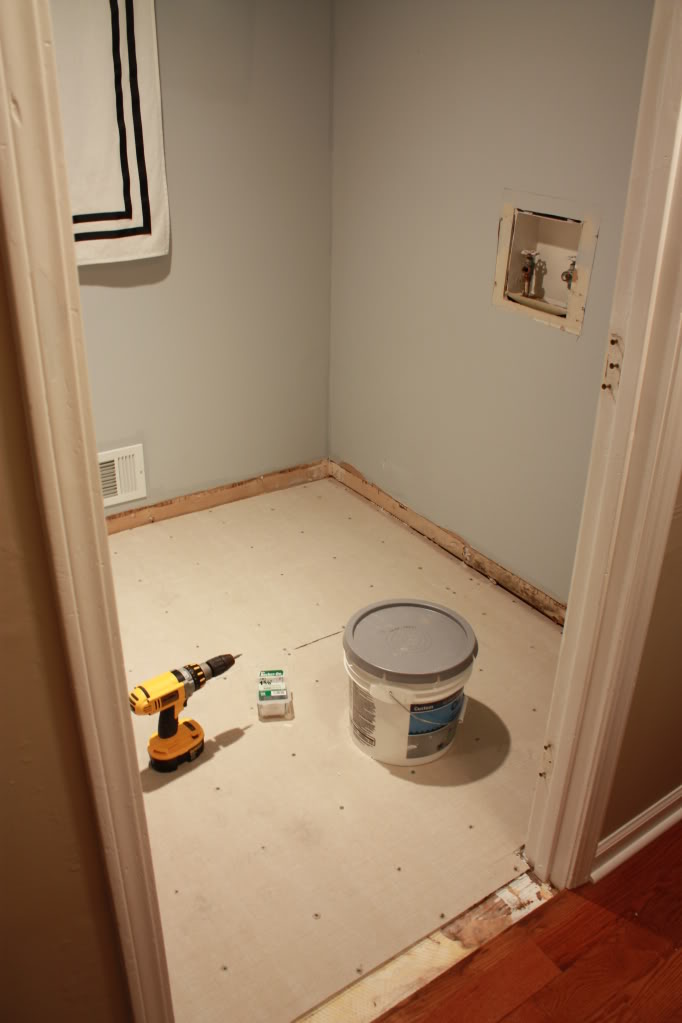
Then screw er in. The fine folks at your local home improvement center will hook you up with all the proper equipment.
Speaking of equipment – here are my top 6 bathroom demolition tools (so girls, make sure you have one of each in your pink tool belt (or within reach) the next time you rip out your loo):

So there you have it. One prepped and ready to be tiled bathroom. Demolition mission complete. Yeah, my next mission (if I choose to accept) may be suspending over a temperature, motion, and pressure sensitive room to get a NOC list…or I might leave that to the amatuers 🙂
Way to go! I’d love to rip out my ghetto linoleum in my kitchen and put in tile. Your post is a huge help (for when I decide to muster up and do it)
you’re the man.
Man I wish I could do all of that. I would love to retile our bathrooms and my kitchen. I need to work on being handy.
Oh how i wish i could rip out my kitchen linoleum and put nice clean tiles…but as this is just a rental we’re living in, i guess i should just keep dreaming,right? 🙂
Congrats on yours tough!!!
This brings back so many memories. Except we totally gutted our bathroom. So you can guess how much fun that was. It’s nice when it’s all done though.
You did a great job!
The demo is fun, but the part between demo and new construction is absolutely hideous and nasty and I hate that part. I wish I had the money to outsource that part!
I am not going to lie- this is a great tutorial- but seeing all the stages overwhelms me! I am sure when I actually have a house to work on I will feel different- but yeah. You are awesome.
You are my hero! Thanks for not shying away from the tough jobs and for explaining things so well. Your sense of humor is really great too!
FYI – backerboard should always, always, always, always, i repeat always be thinsetted to the subfloor. then screwed or nailed to the subfloor! whether your floor is level or not. my husband has been a professional tile installer for twenty plus years 🙂
Well there you have it folks – news from a pro – always thinset between your backerboard and the subfloor.
Thanks Tammy!
XO – Katie
We’re planning to rip up our linoleum in our new house soon to replace it with tile. One question–how did the use of thinset correct the unevenness of your floor? Wouldn’t you need to use leveling compound instead?
Love the new bathroom by the way (especially the diagonal pattern)!
Hi Mrs. Sarah,
Absolutely you can use a leveling compound…however since my experience is limited with L.C. and since my entire bathroom was sloped, I knew that I would have to build a 'wall' to keep the coumpound from draining down behind the wall. aka pain in the rear.
So after a bit of googling & calling my big brother (who happens to be a master plumber), I decided that the easier route in my situation would be to build the lower part of the floor using the thinset which I made sure was nice and thick under the parts that were lower. It was a challenge for my leveling skills but after smooshing out the excess on the higher level of the floor – it came out just right.
If you are planning a renovation like this – definitely ask a professional for their expert opinion.
Hope the helps!
XO – Katie
Hi Katie,
When you were leveling the floor with thinset and then smooshing on the backerboard until level, why didn’t then screwing it down un-level it? Did you wait for the thinset to dry first?
Thanks!
Jill
Hi Jill,
good question…the thinset acts as a buffer between the floor boards and the backerboard. If you don’t add thinset and the floor is uneven underneath it can actually break your tile in the long run. You don’t have to wait for it to dry because compressing the tile down by screwing it in will not squish all the thinset out… It’s pretty thick stuff 🙂
hope this helps!
XO – kb
This might be a dumb question but how did you know if all parts of the floor was level? Did you just put a level in a bunch of different spots? I’d like to do our bathroom and it *seems* level but I just want to make sure I have a good way to tell for sure.
Thank you!
Katie
Hi Katie,
I’m not really sure what your question is…we knew that the concrete board was level when we put it down because it is a flat board….the key was just to layer enough thinset to make sure it didn’t move…and the extra thinset squished out the sides when we walked on it and when we screwed it in. If you want, you could always use a level to double check…but from every tile job I’ve done, the key to the support boards is to make sure they don’t move and to use lots of thinset on the tiles themselves. You really want to make sure the tiles are level…more than the floor itself. Hope this helps!
xo – kb
Yes, that helps! I think I was thinking, our house is old and settled and the subfloor might not be level (if we put a ball on it it might roll to one side), but if I understand correctly that doesn’t matter so much as the concrete board under the tile needs to be perfectly flat, rather than resting on an uneven surface and sort of balancing back and forth. You mean level in the sense that all tiles are flat with eachother and none stick up higher than another, correct?
Wow – I’m having trouble articulating my thoughts! Thank you for even attempting to read! Love the blog and the help you provide newbie DIY homeowners 🙂
-Katie
You don’t want your concrete board to be rocking…ever…you want it to be perfectly stable….like without any movement whatsoever. Layer tons of the thinset and it should squeeze out the sides….then when you tiles, they need to be buttered up with enough thinset that it squishes out a bit too. And yes, the tiles need to be flat with one another and none sticking up higher. You can do it…even if we both have trouble explaining it 🙂
xo – kb
Katie – So I haven’t started with the floor yet but we just put up cement backerboard on the wall to tile the shower and now I know exactly what you mean. Our studs we’re totally level and I was paranoid that the backerboard was bowing and the tiles wouldn’t work (insert mild panic attack here). Anyway, while working on it I thought of this conversation and your great advice so I just wanted to say THANK YOU!
Crap! I hate grammar mistakes 🙂 I meant our studs weren’t totally level.