Happy 2016! So excited that this week you will get to see our finished laundry room! I love it so so much. Sometimes I just go in there and sit down and look around. Just to see it. Just to be IN IT. I totally turn into the laundry room creeper. It makes me so happy to walk in the back door and see it all finished and done! Just knowing that there is nothing else I have to do in there (ok ok, there is always more to do but you know what I mean), well, it makes me happier than a nerd with a Star Wars collectible.
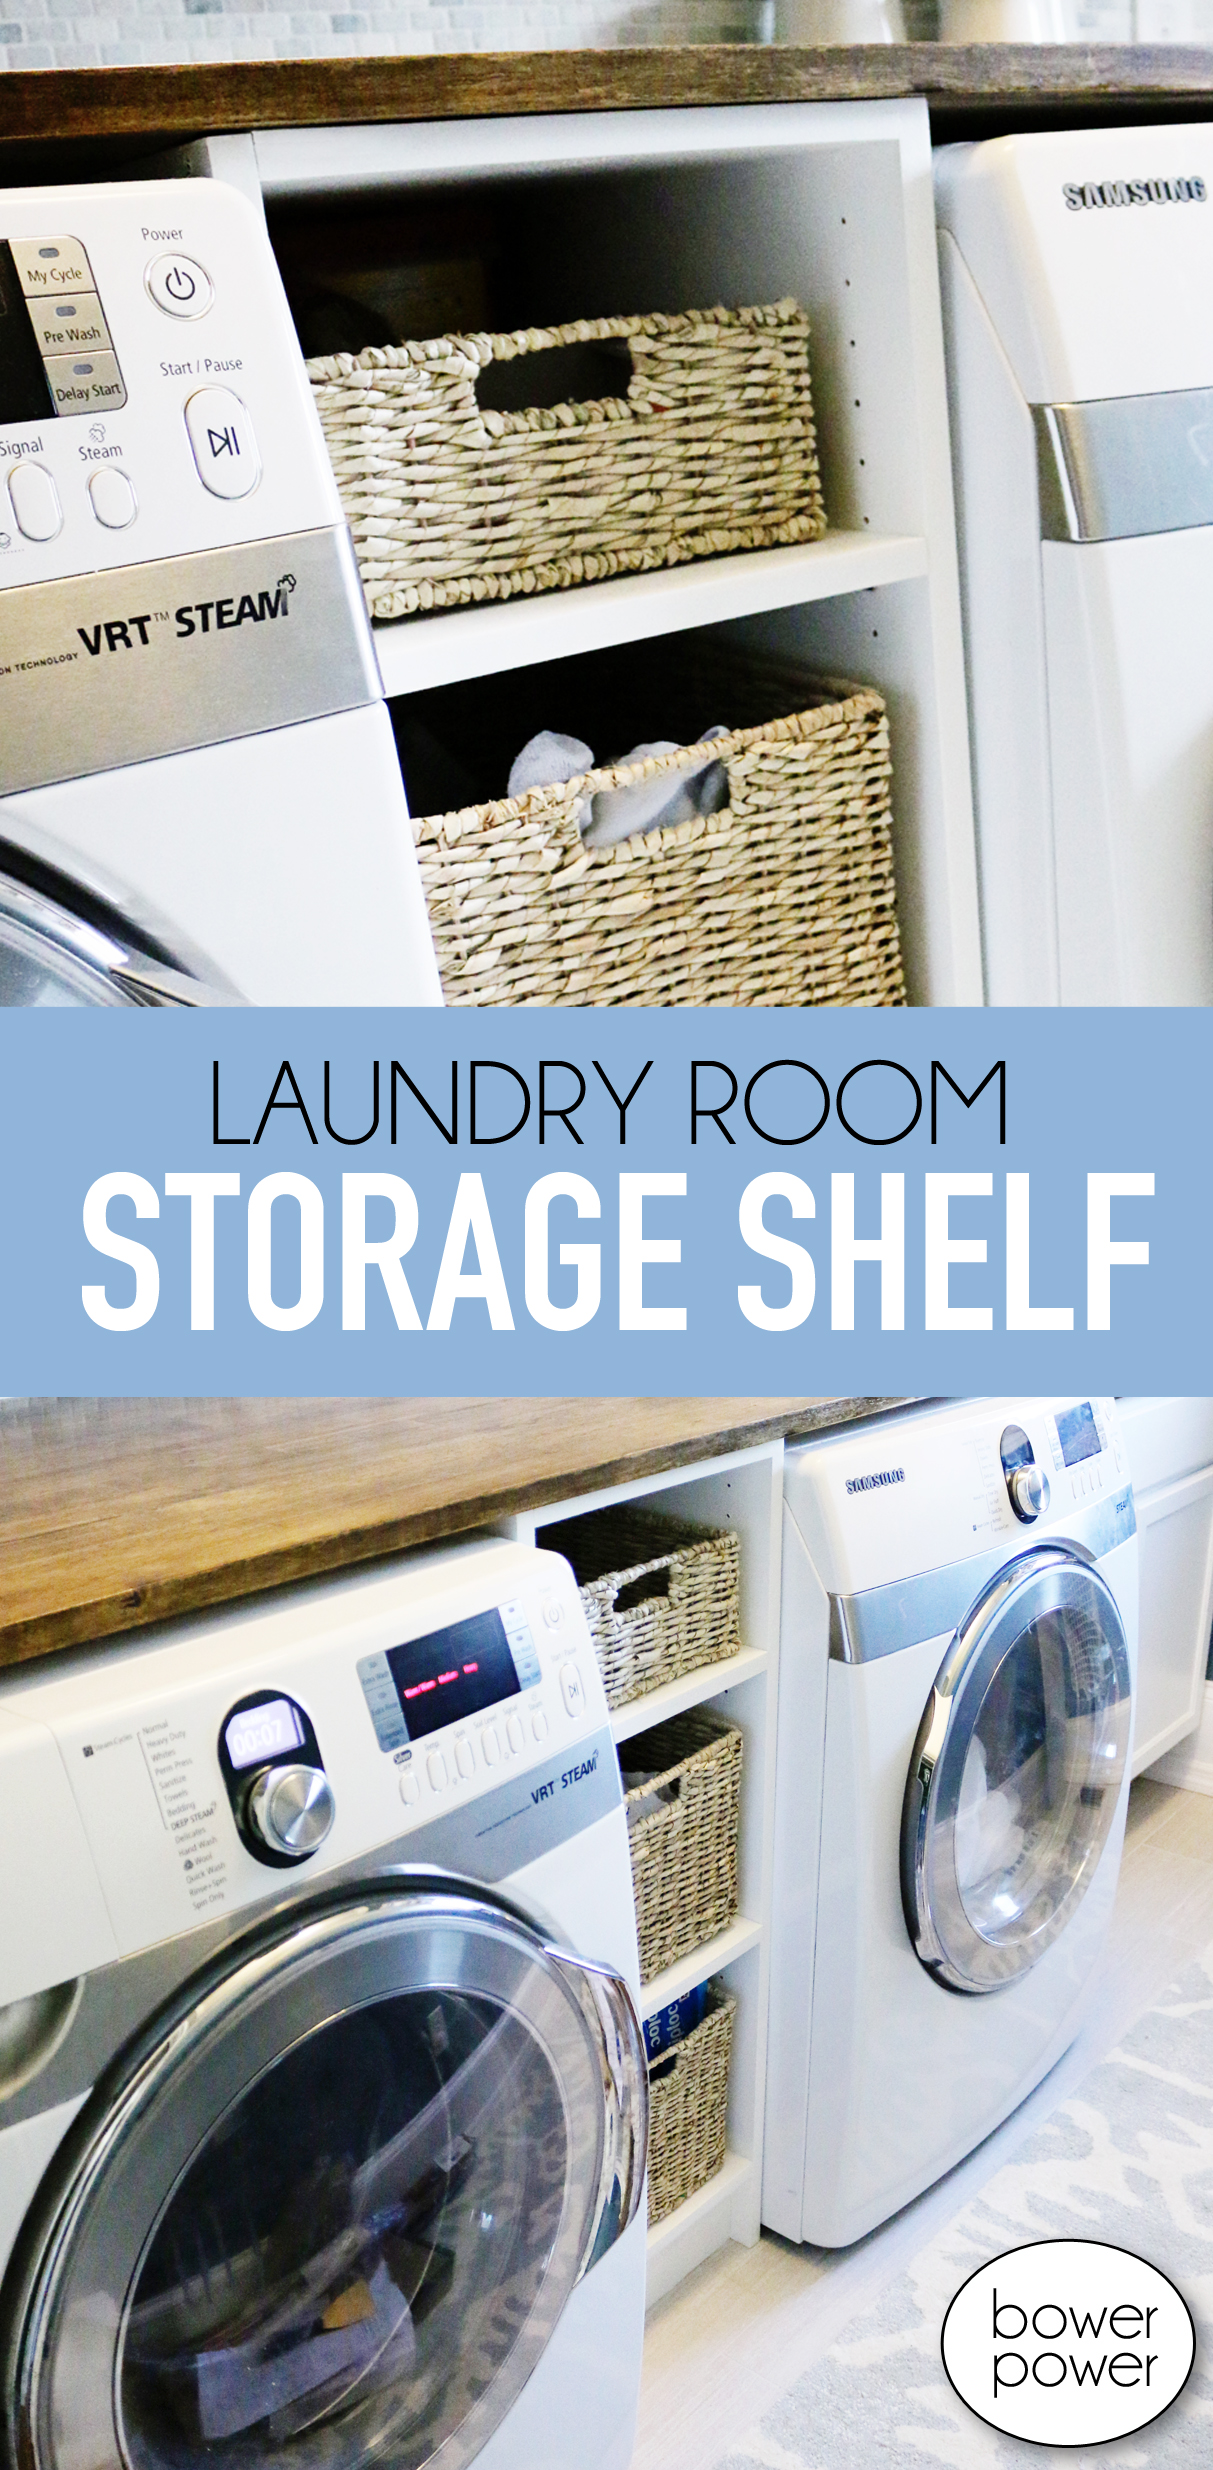
So today I wanted to share a couple more details – specifically the storage shelving unit that we built to go between the washer and dryer. Also – this is my Weston and let’s all just die from the cuteness….
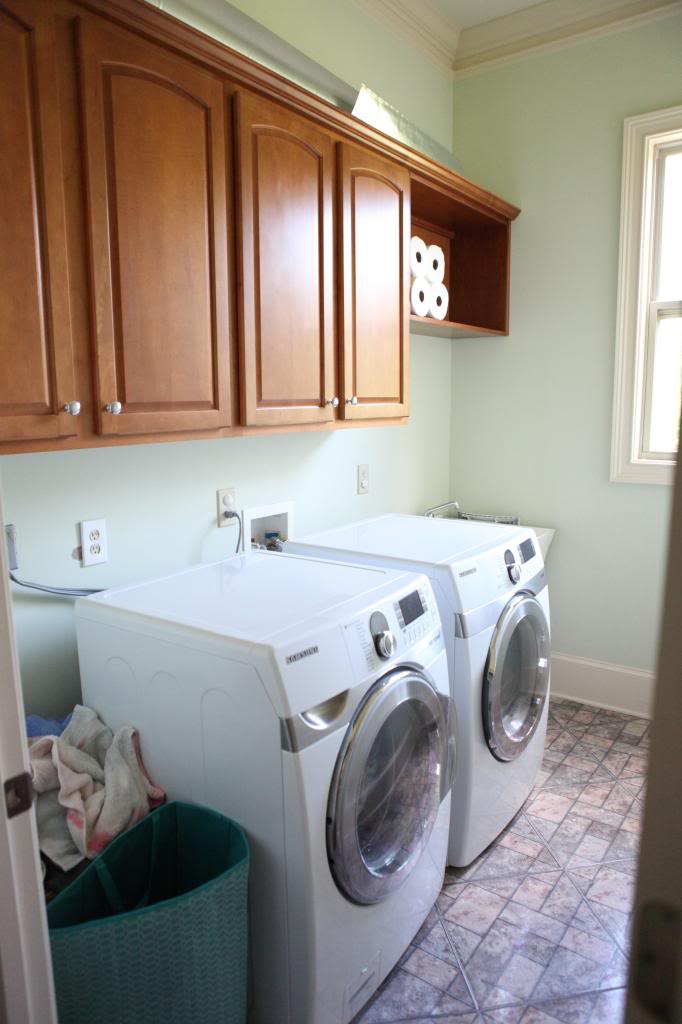
Okay so when we began this journey, the laundry room had upper cabinets but it really lacked any storage in the lower part of it. I don’t know how the previous owners did without a countertop (maybe they had top-loaders?) or storage (we always imagined that they had a small plastic rolling bin…like this….to hold things).
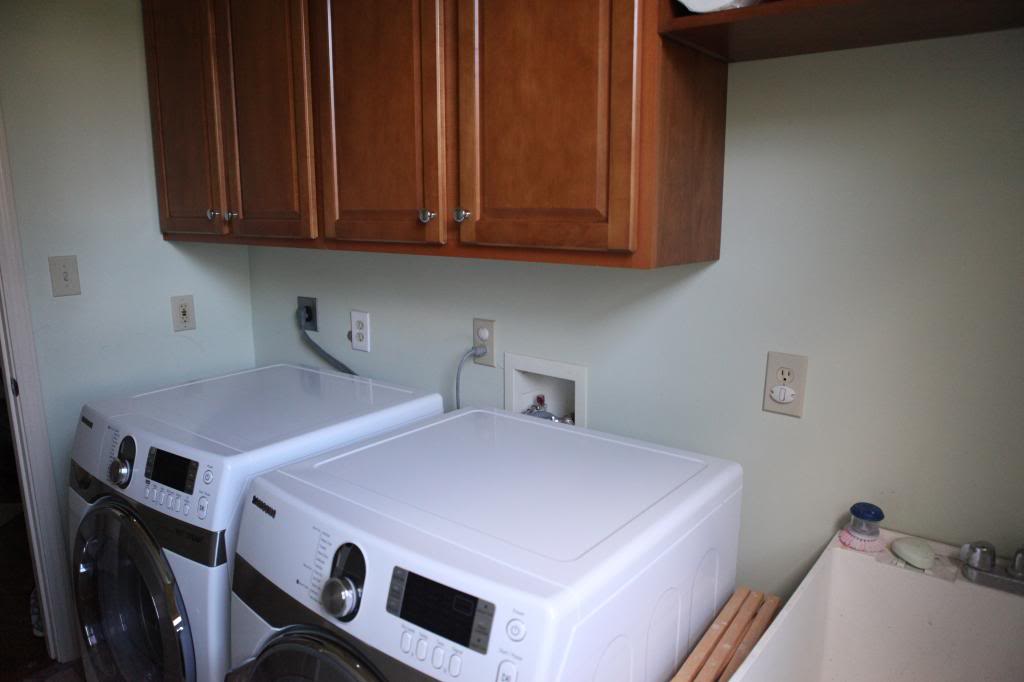
For us – it just didn’t make sense. We knew that with such a limited space, we could do one of two options….
- build pedestals under the washer and dryer and gain sorting baskets but lose a folding counter
- have a counter on top of the washer/dryer but lose sorting basket space
Either way, there wasn’t a way to keep the sink, keep the washer and dryer and countertop as well as add space for dirty clothing baskets. We decided that the folding space was more important and we could find another hamper situation for the dirty clothing. That is why we added the hampers to the upstairs hall. Now, whenever we want to wash the kid’s clothing or towels, we just take a load down and throw it directly into the wash. None of the dirty clothing gets ‘stored’ in this room. I wish the laundry room was bigger to accomodate for sorting baskets but I am sure it will be nice when the kids get bigger and I don’t have mountains of clothing in here 🙂
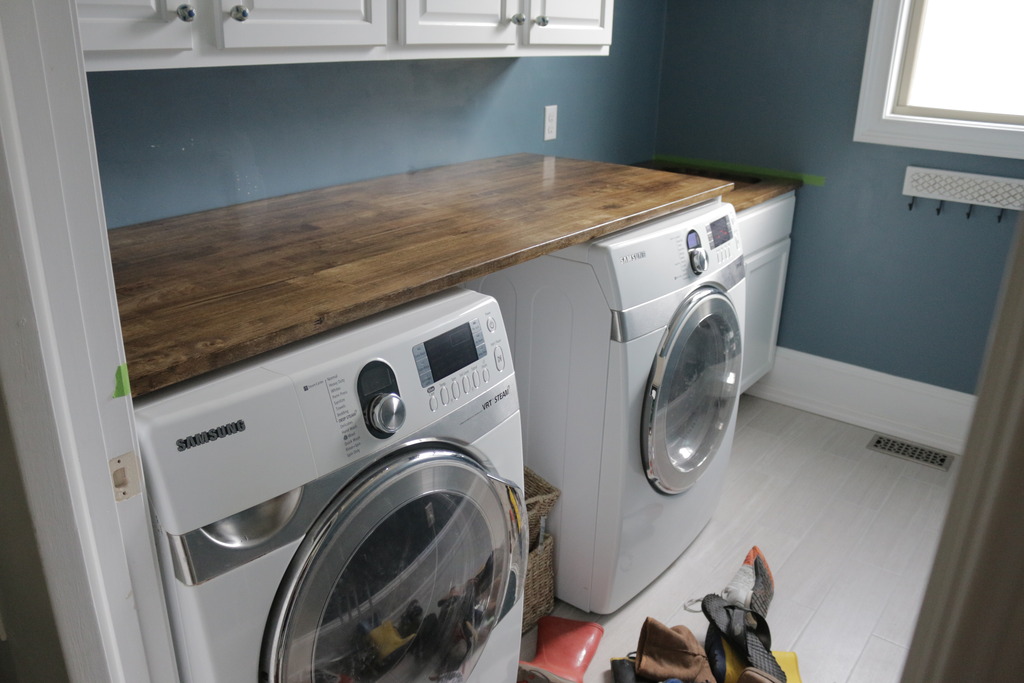
So when we added the washer and dryer countertop, we were left with a little space in between…roughly 15″ wide. We chose to do the gap in the middle vs one side because it balanced everything out and I am so thankful for that little gap. You know how you open the doors to your washer and dryer to transfer things? Well, now I have a little more room for myself and the little guys that are inevitably attempting to help 🙂
We also must have the washer on the left and the dryer on the right because the doors open that way so transferring of wet clothing to the dryer is MUCH easier. The only problem is…all the hookups are opposite. So that means we have ducts and hoses running behind the dryer and washer and we needed roughly 6″ of additional space back there under the countertops. From front to the back wall we had roughly 27 1/2″ to work with.
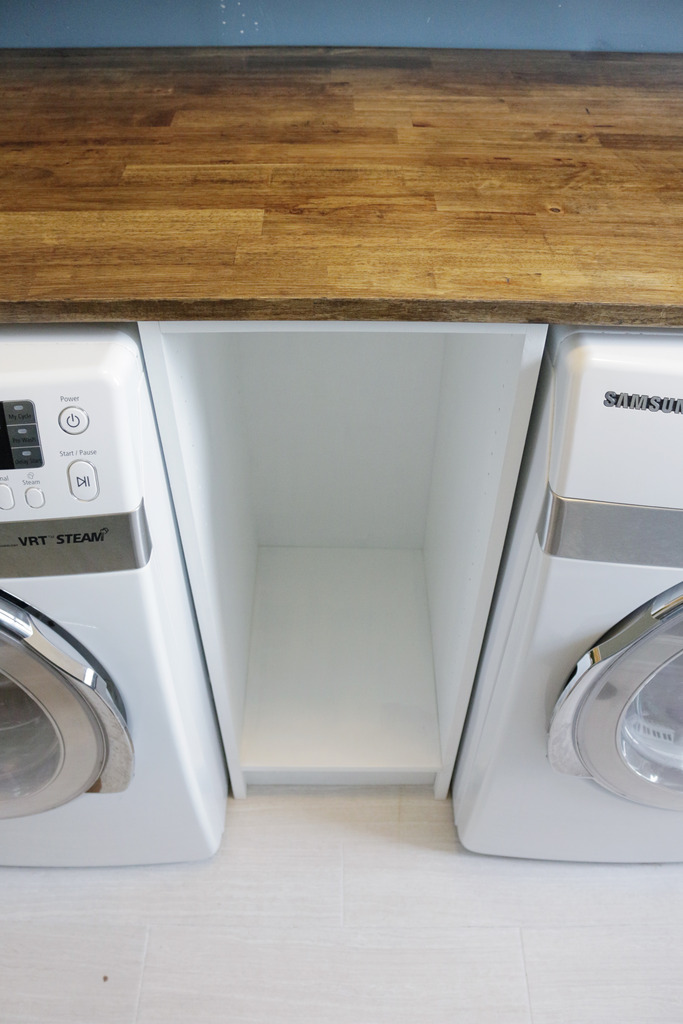
Fast forward through all the math and we ended up building a really easy shelving unit that was the perfect fit.
The unit was made from a large piece of 3/4″ MDF and fits under the countertop (adding support) and between the appliances (adding storage) but can also slide out and be removed if we need access to the hookups or hoses or whatever.
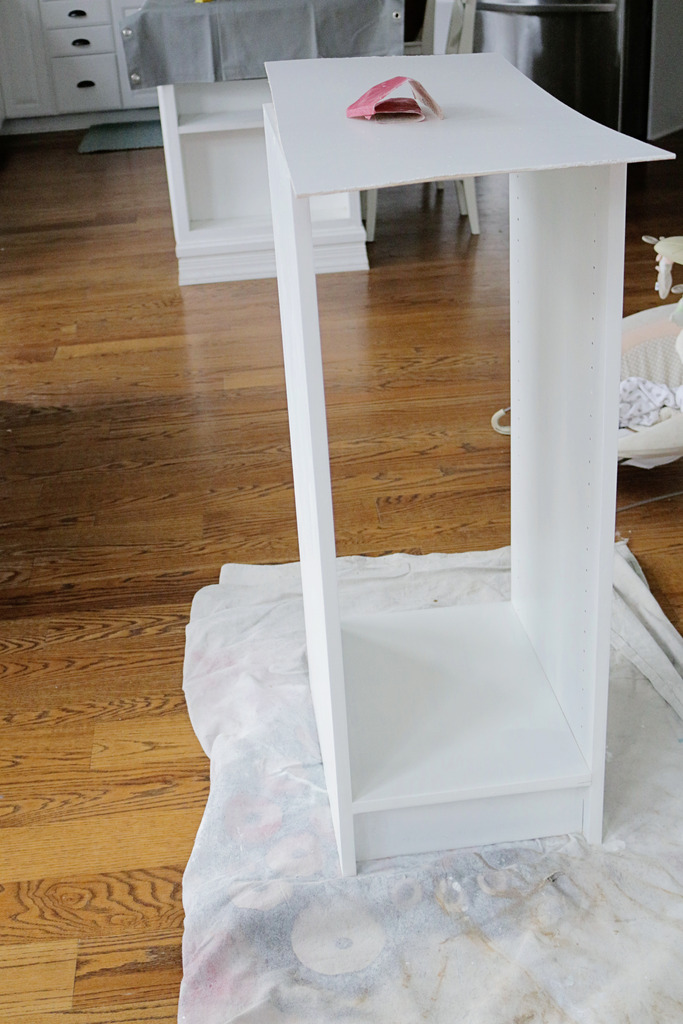
If you are looking to make something similar, here is the cut list:
(2) sides – 27 1/2″ x 39 1/2″
(4) shelves/top – 13 1/4″ x 19 1/4″
(2) bottom supports – 13 1/4″ x 4 1/2″
(1) back panel – made from thin scrap plywood – 15″ x 39 1/2″
Everything is screwed together from the sides (you won’t see the screws because they are on the outside).
On the side panels, we used a shelf pin jig (this one) to make the perfect holes for the shelves. This way they aren’t fixed and we can adjust them accordingly.
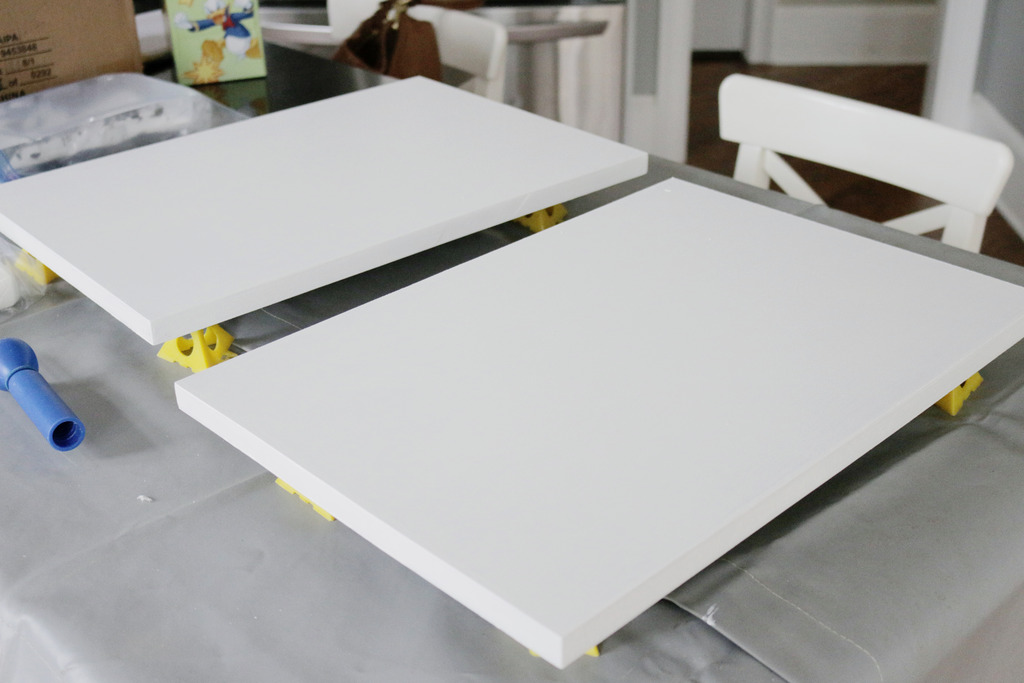
Once everything had a primer coat (we used water-based primer even though it’s not recommended and just knocked down any bumps before moving on) and a coat or two of paint, we used the brad nailer to put on the back panel before sliding it into place.
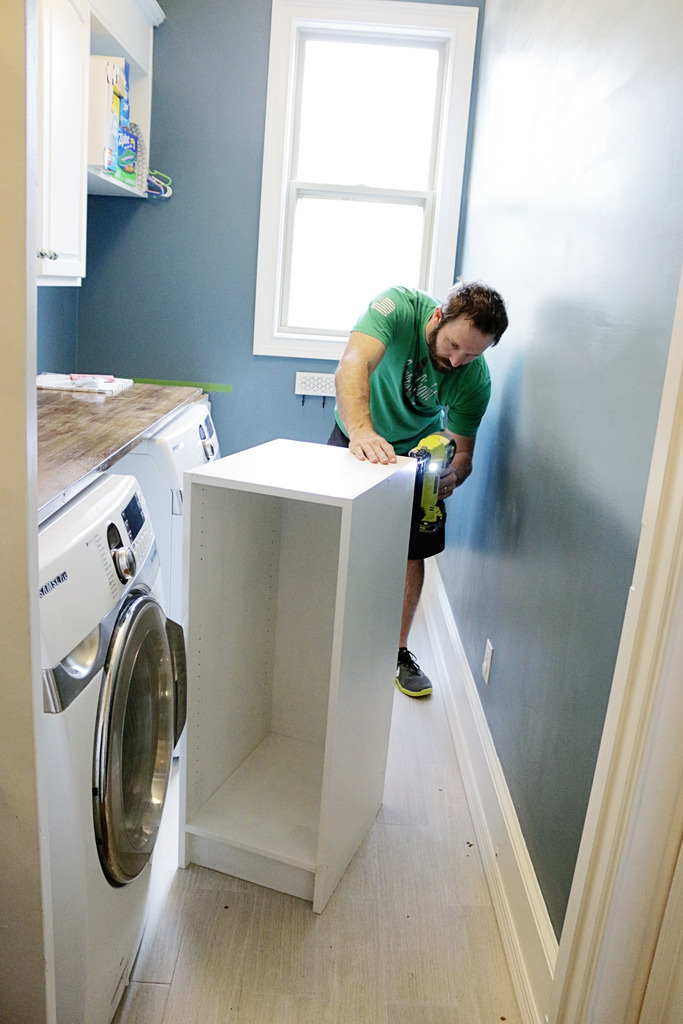
It should be noted that our unit did get ‘crashed’ (names will not be divulged but someone broke it who’s name starts with a W) before the back panel was on and so Jeremy did need to go get longer screws and put it all back together and we ended up with some cracks that you can see in this photo….
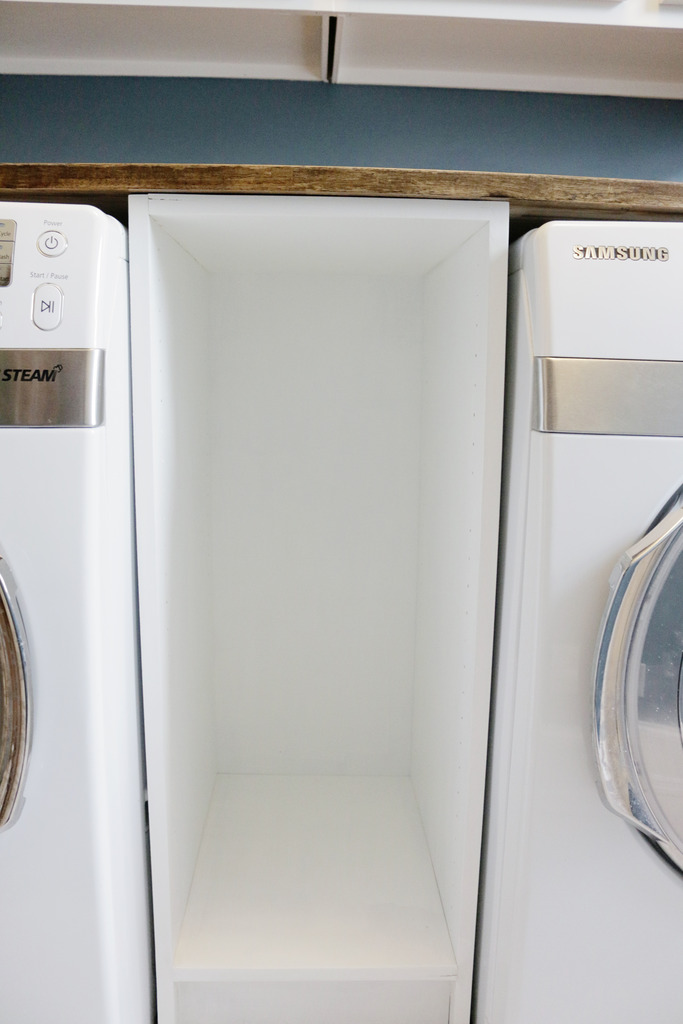
But it just goes to show that you should just do your best and caulk the rest 🙂
After a couple more coats of paint, we were ready for the shelves and the baskets.
Speaking of baskets, I got them at Michael’s during one of their Ashland Storage Essentials basket sales. We use them for ‘lost socks’ and one for extra supplies and one for dryer sheets and found items in clothing and all that.
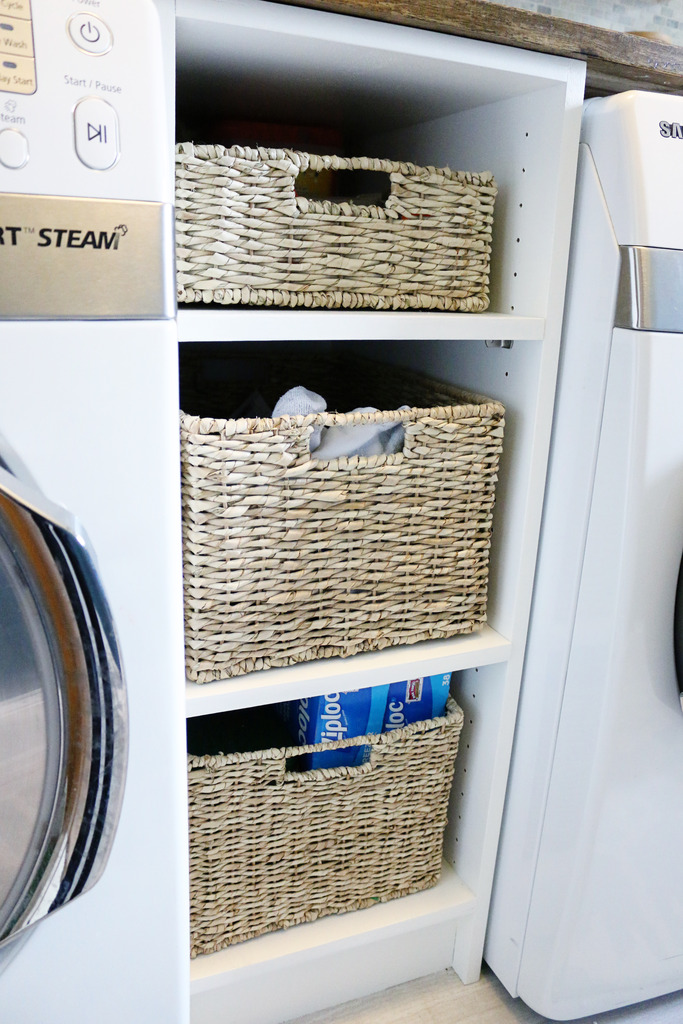
The tag for the baskets don’t say the size – just the price (we got one of the $14.99 and two of the $24.99 version). They fit perfectly width wise and the top one is a little deeper but it still fits perfectly. Plus, I like the lighter weave color…it’s a nice contrast to the countertop.
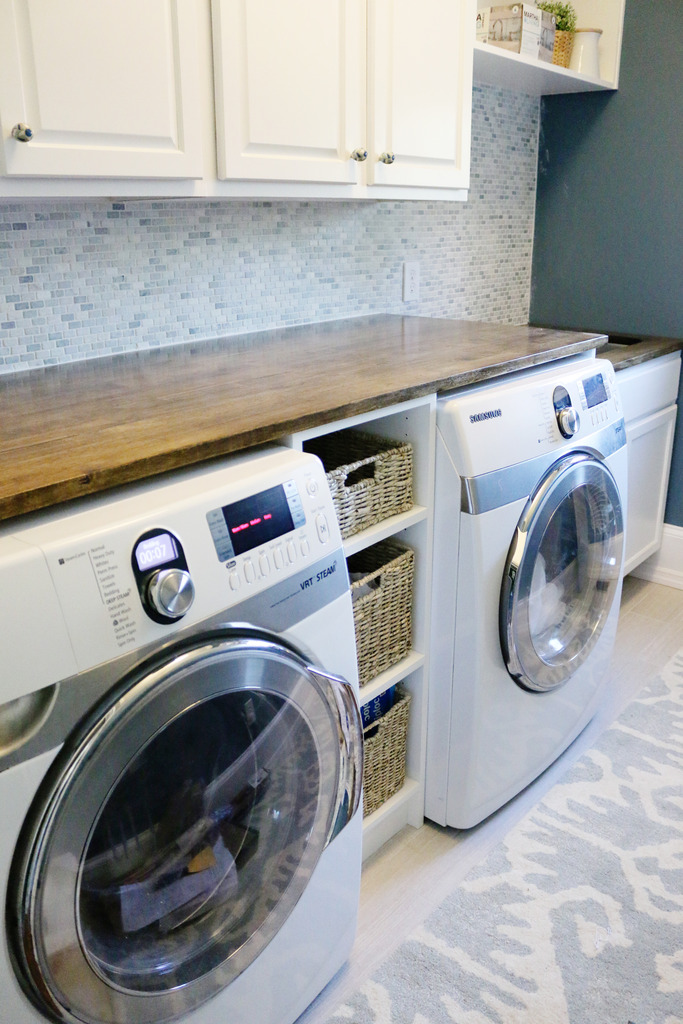
Not too shabby huh?!


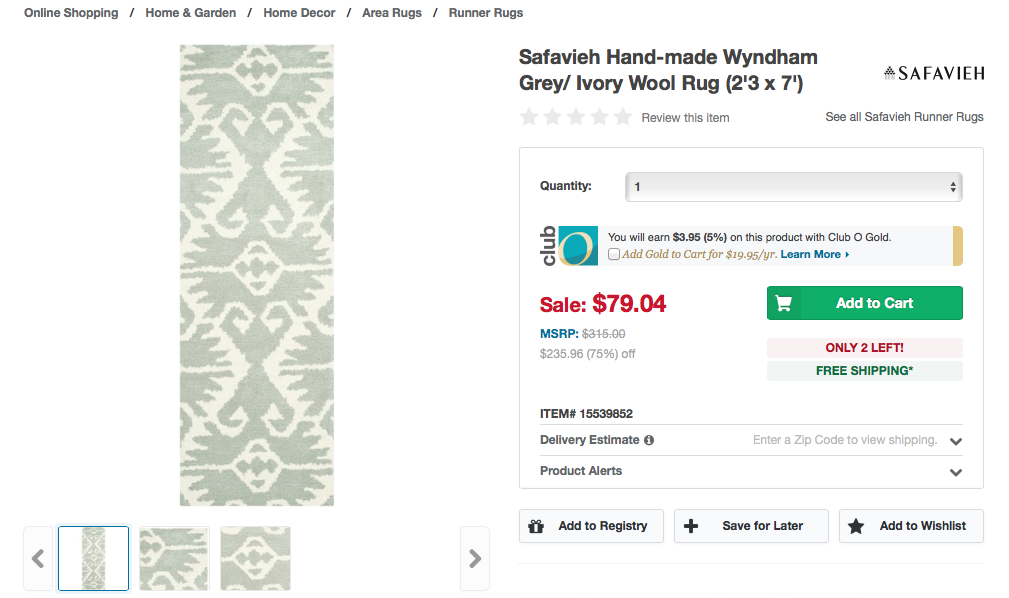
And did you see the rug? I have been scoping out RugsUSA for one that fit the bill but came up short every time. So I happened to go back to Overstock.com and checked out their options and found this Safavieh Wyndham wool runner that was listed for under $100. I wiggled my nose and blinked my eyes and Bah-boom! New rug. If only, right?!
It was listed for 75% off during their holiday sale and then I had a code that took off an additional 10% and so I got it for $71 with free shipping!
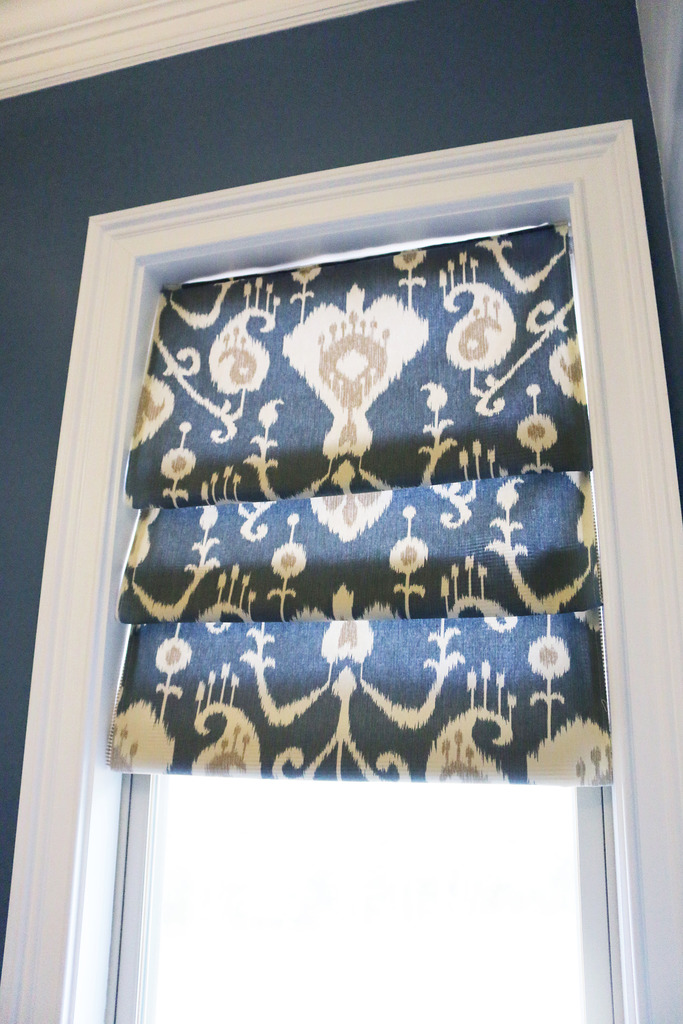
I also whipped up this window treatment. I KNOW. ALL THE IKAT ALL THE TIME.
I can’t wait to show you the rest! I think I might just do the reveal and then do the tutorial on how to make this easy shade (it’s reversible!) and how we installed the sink faucet (it was a tale meant for the strong hearted). I can. not. wait. I know that you will love it as much as I do. Then we can celebrate and drink wine and dance naked together. That’s metaphorically of course. I would never drink wine 🙂
If you want to catch up on the past laundry room posts – here are the oldie posts….
Laundry Room Posts
- Laundry Room Befores
- Venting a hood
- Demoing the Floor
- Painting the walls
- Painting an Ombre Wall
- Painting Cabinetry
- Installing Floor Tile – Part 1
- Installing Floor Tile – Part 2
- Building a Door
- Fixing the Dryer
- MDFing and A new Cabinet
- Countertop installation
- Tiling the backsplash
And make sure you come back tomorrow! I am gonna go shoot the finished room now and will try to reveal ASAP!
*******************************************************************************************************
FYI- Pretty sure you can remove front loading washer and dryer doors and mount them on the other side. They come with the hardware to be hinged on either side.
If you look in the user manual for the washer/dryer, it gives instructions in how to reverse the swing of the doors. I had to do the same with mine and it’s quite easy!
Sooo pretty!!! Looks GORG! It was definitely worth the wait, dontcha think?!?
I looked at that jig for the shelf pin holes…. I just couldn’t spend $30 for something with only a few holes for a long board…. so I picked up a piano hinge for $8. Just clamp it to the board and drill away. The holes might need to be made larger depending on the shelf pin, but it’s easy once the first holes are done.
I am wondering if you can tell me your laundry room dimensions? Mine is narrow as well.
Loving it! I’m like you I start bunch f projects and don’t finish. Word for 2016 is focus. Hoping to get some rooms done! And please share that shade tutorial asap!
Why is water based primer “not recommended”? Is it because of the mdf? Or is it because of where you installed the shelf? Just needed some clarification on that…(mostly because I use water-based primer on mdf all.the.time.) Thanks!
I love the shelf, that is so much nicer than the lame flimsy rolling cart I have between mine right now. My laundry room is the same layout. I used to want a huge laundry room but I don’t like storing dirty clothes in there anyways and for some reason when that space is clean I feel better. I wish I had a window though. I’m saving this idea!
Looks great, Katie! Just FYI, most brands of washers and dryers have the option to reverse the door swing, just in case you ever want to switch them around.
We looked with ours but they don’t…maybe because they are so old? I’m not really sure.
xo – kb
Well MDF absorbs moisture really quickly – like a sponge that gets bigger. When you paint it with the water based, it will swell on the edges (like raised pimples) and you will need to knock them down with sandpaper…vs. oil based primer which will keep it smooth and not require sanding (but it’s oil based and not really that great for you).
xo – kb
Ours didn’t! We looked! Maybe we should look again.
xo – kb
I love it 🙂
Am I the only loser who folds clothes on the couch while watching Netflix? Do people really stand and fold their clothes in the laundry room right when they’re dried? Our laundry room is in a questionable section of our basement so maybe that factors in.
Looks awesome!! So functional!
I would totally live in there. And you totally took me back with your basket for spare socks. My mom had this huge shoe box on her dryer and put all the spare socks in there. And the most dreaded chore in the house was doing “the sock box.”
That looks great! I love the baskets!
I work for an appliance manufacturer and you are correct not all models are made with the doors that are reversible.
I desperately need something like that in my laundry room. Actually first, I need a counter. Things keep falling behind and between my washer/dryer and it drives me NUTS!
Oh bummer. I know our dryer for can be flipped. Not sure about washer.
We are in the midst of tying up our laundry reno and were in need of a cabinet to fill the space between our appliances. Thank you!! Any thoughts on disguising hideous laundry hook ups that are above both appliances? I really don’t want to make my husband relocate the hook ups…but they are driving me bananas in our newly beautified space.
Yeah…I remember that someone said that way back in the day and we looked at ours and I don’t think it was reversible but I’ll have to double check.
xo – kb
Hahaha! We do that with socks and underwear 🙂 I stand because I have found it’s faster with the kids clothing! Plus, couch time is kinda precious 🙂
xo – kb
I’ve seen a bunch of different solutions…people do curtains and built in covers – I recommend looking on pinterest for hook up hiding!
xo – kb
You’re right!! I want to see more of that laundry room! Something about having a rug in your laundry room just feels luxurious! I have been contemplating my own laundry woes with the New Year- thanks for being inspiring as always, Katie!
Can’t wait to see the tutorial for that shade! I’ve been wanting to do one in my family room for several years now. I’ve even bought the fabric but I’ve been too scared to cut into it. I got it all on sale but it was still an “investment.”
Love the laundry room. I’ve never given much thought to mine but now I’m wishing it were a little more pleasant. Perhaps I’d fold more laundry if it were nicer. Probably not. Anyway, I like that you’ve made a folding station. I usually fold on my bed. It makes it tough when my night shift husband is sleeping during the day. I NEED one of these!
Beautiful room, and gorgeous rug!!
I really am starting to loathe the difference in sales and shipping between the States and Canada. I’d love to be able to swipe up great finds like that, and not break the bank.
“I don’t know how the previous owners did without a countertop (maybe they had top-loaders?) or storage”
Most houses have a laundry room more like the ‘before’ (or smaller). They use the cabinets for storage and most people have top loader washers, though front loaders were more popular for a few years. (I’ve had both and really prefer a good top loader.) People fold on top of the machines or from the dryer into a basket or on a couch, bed or dining room table.
I’m guessing you didn’t really expect an answer but I’ve seen a lot of laundry rooms so thought I’d offer some insight. : ) Yours looks great.
I love this so so much. I think it’s such a practical space – and pretty. Love the extra storage and baskets.
Do you really not drink wine (or beer or vodka or Fireball?!)? I don’t think we can be friends anymore… 😉
Oh. No. That was complete sarcasm.
xo – kb
It’s 9 by 5 1/2 feet 🙂
xo – kb
Can you tell me where you got or how you made the countertop that is over the washer and dryer?
We got it at Southeastern Salvage. Here is the post about it.
xo – kb
Any issues with the permanent countertop and being able to access the hoses, plug ins, etc when hooking up everything? You did a great job.
Nope. We left enough room to remove the center storage unit and we have a couple times. The heating element goes bad on our particular dryer so every couple years Jeremy removes it and replaces the part….and we periodically remove it to clean back there.
xo – kb