Journey is the perfect word for this adventure we’ve been on with our kitchen island. It’s been one of those experiences in home ownership where I knew we wanted to renovate it, but didn’t quite make up my mind until later….basically I was Taylor Swift and this island was all the men of Hollywood under the age of 25.
The island started off in the warm wood that the rest of the kitchen cabinets were…
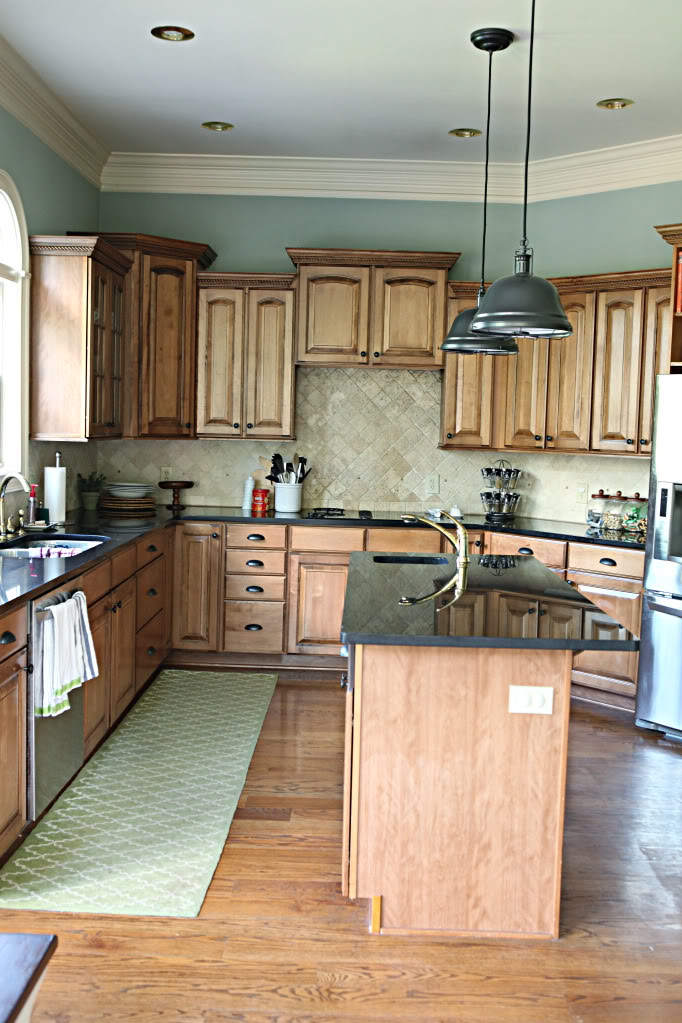
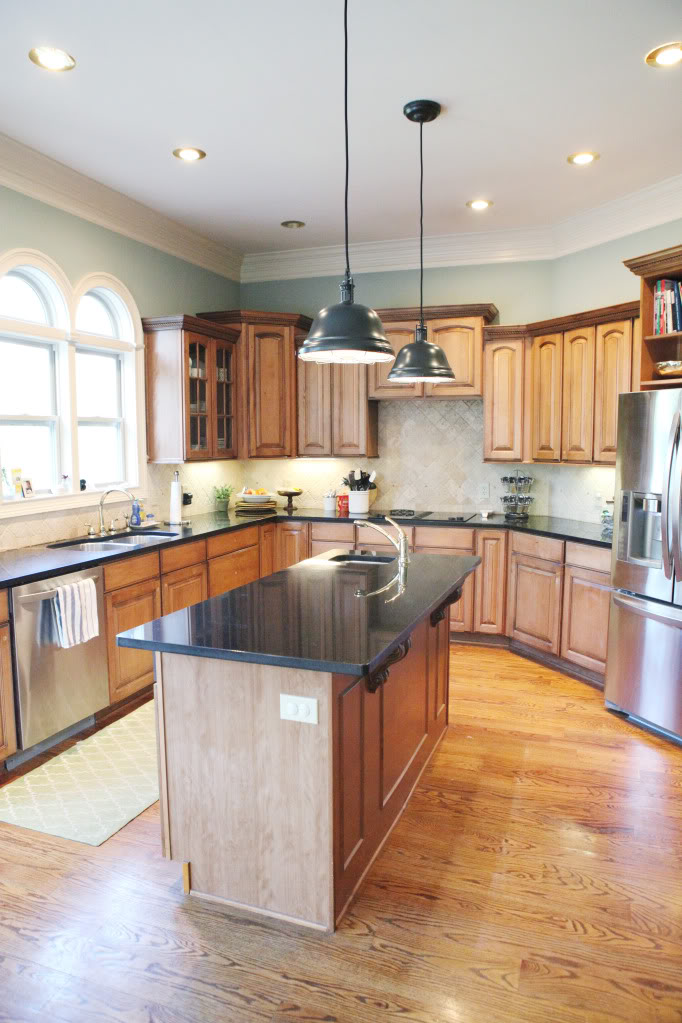
…then it got primed white (but never fully painted white because I thought an accent color would look nice)…
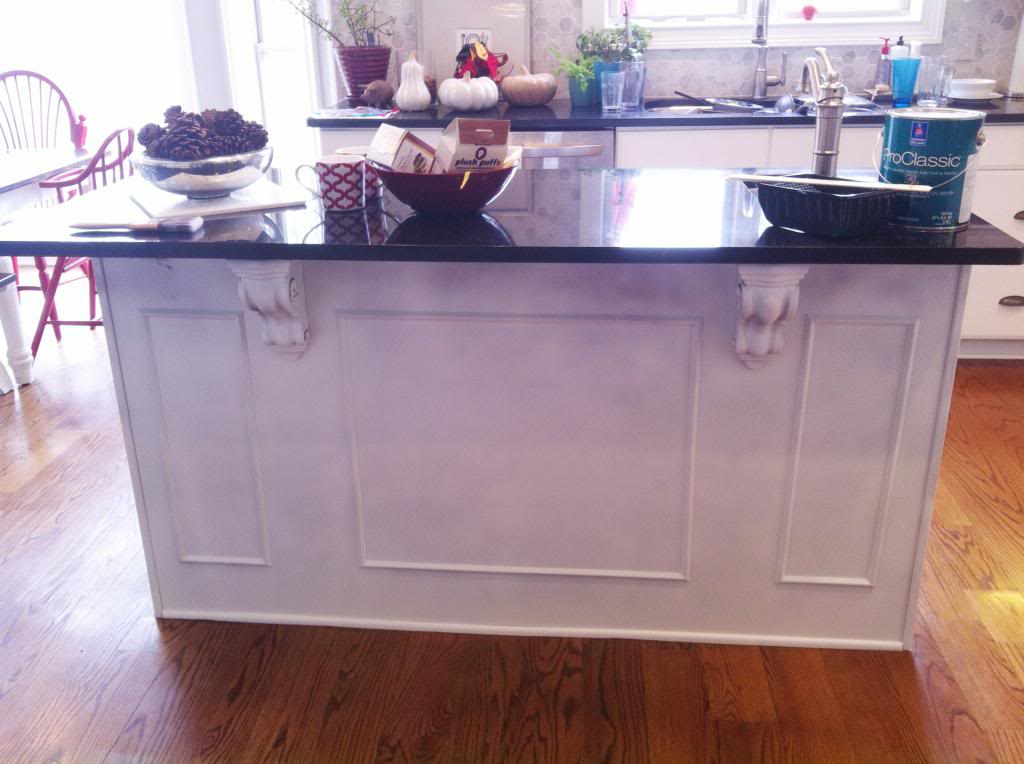
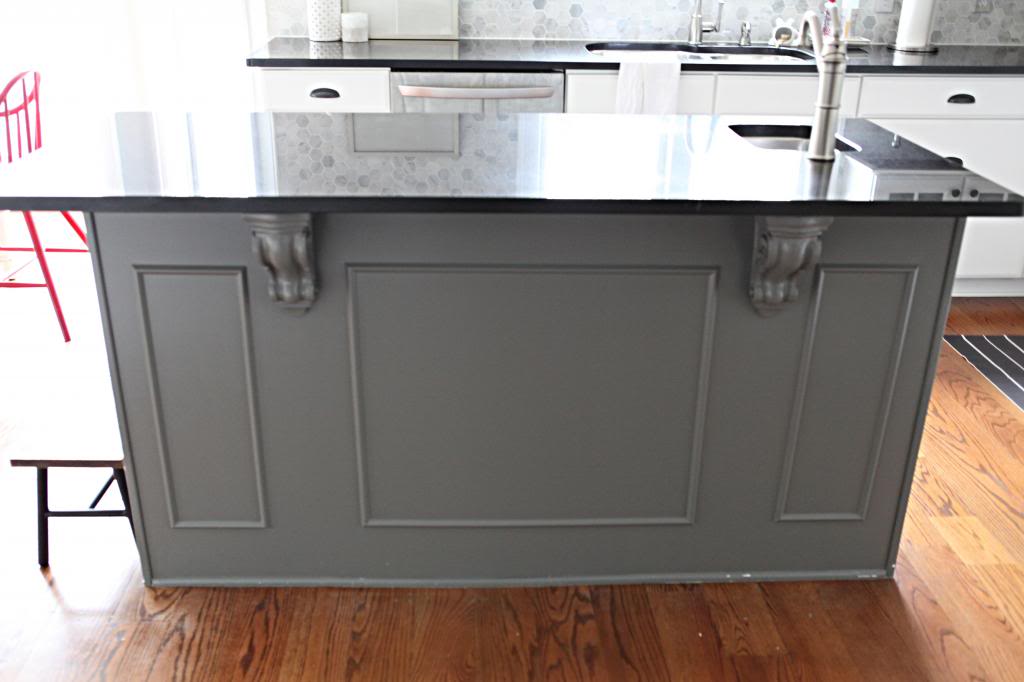
…turns out that the dark accent color was nice…but not for me. The undertones were slightly off and distracting me from our beautiful kitchen wall color (aka the other man). Plus, it was broke up the kitchen to make if feel more cramped. We have a house that is roomy and feels open and spacious…but the kitchen is probably the one room that has a lot of wasted space and weird layout. By painting the island dark, it made the space feel tight.
I knew that we were gonna redo the details of the island from the get-go. The corbels were very ornate for my taste and I wanted the ones on our shelves to match the island corbels in design. Plus, I wanted the little overhang on the left hand side of the island to be changed into narrow shelves.
Right before our Tile Shop photoshoot, we decided that it was high time to get this bad boy done. We immediately put Will to work.
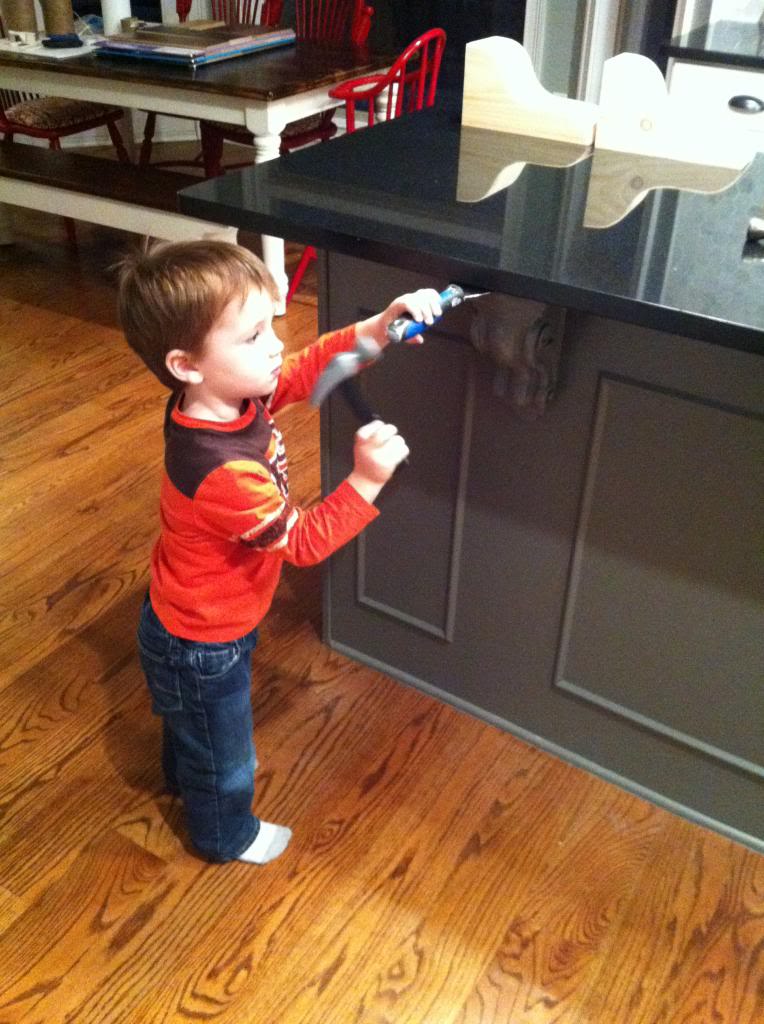
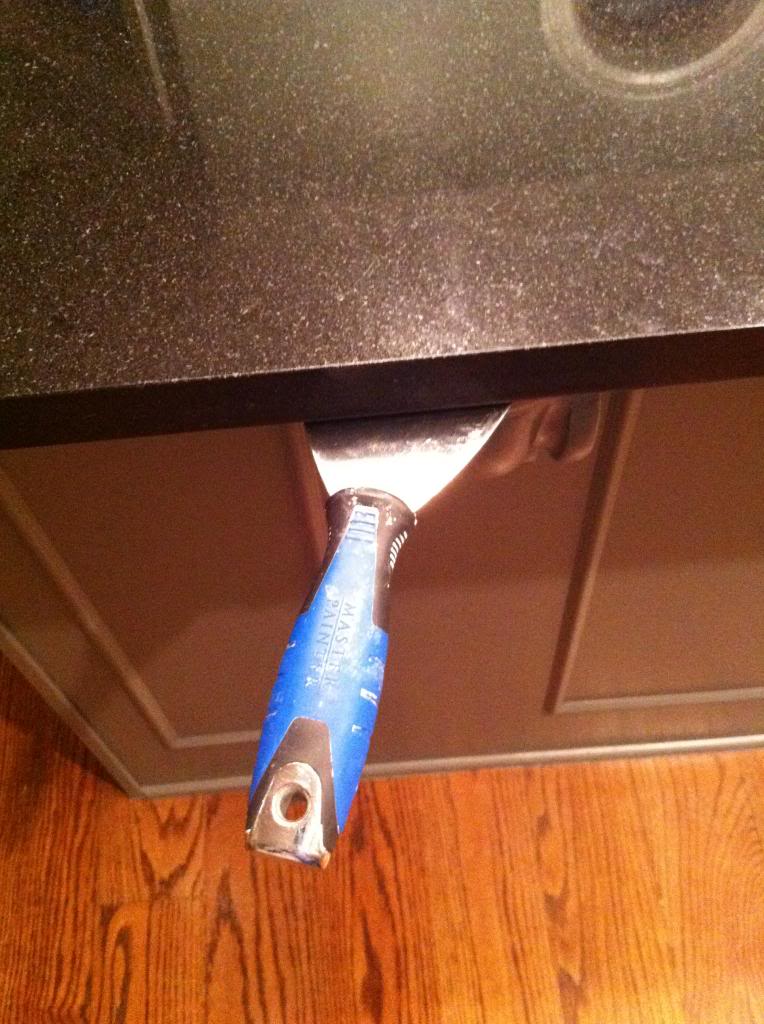
Not too shabby, huh?! He’ll be building his mama a chicken coop before I know it 🙂 Seriously kid…get on that.
Jeremy finished off the job…he just used a mud knife and a hammer to separate the glue on the corbel from the granite.
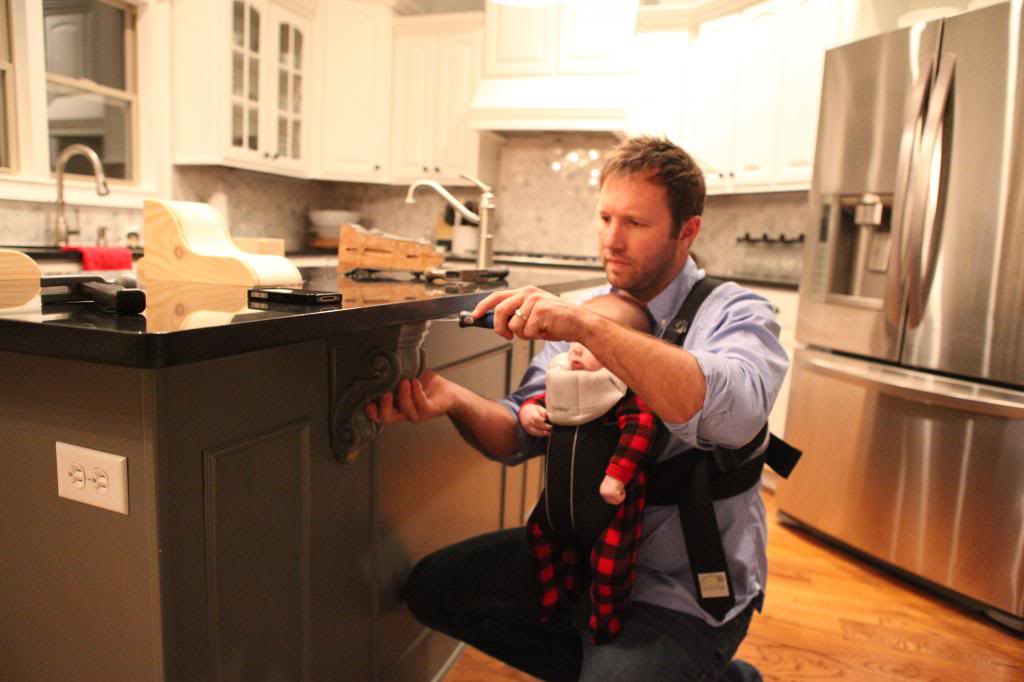
Then it came out with a gentle tug. The only thing besides the glue that was holding the piece in was a couple finish nails.
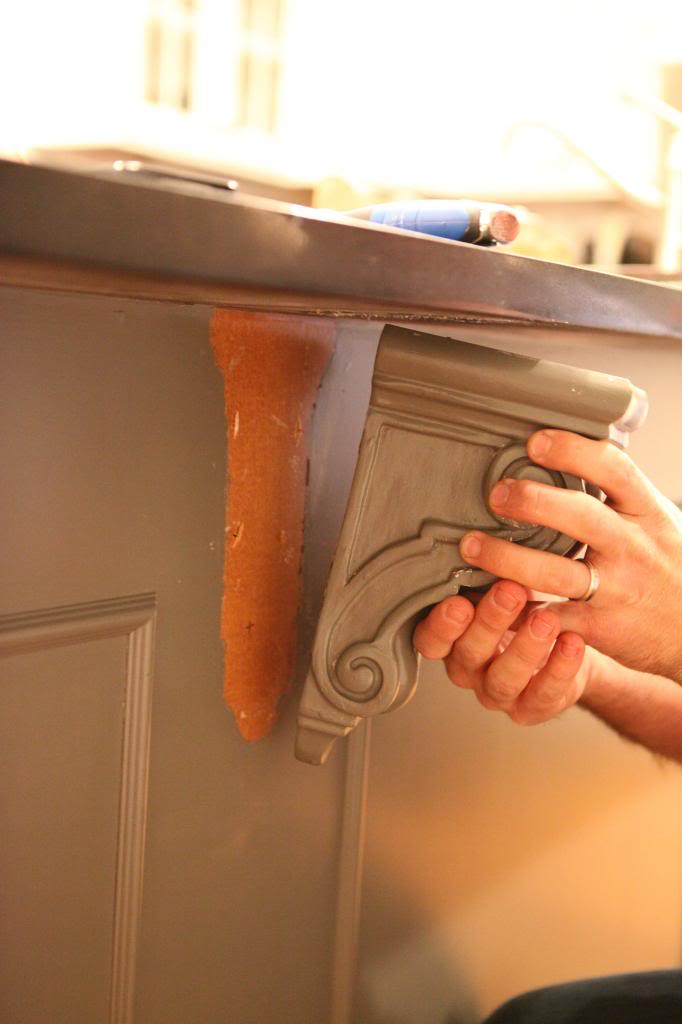
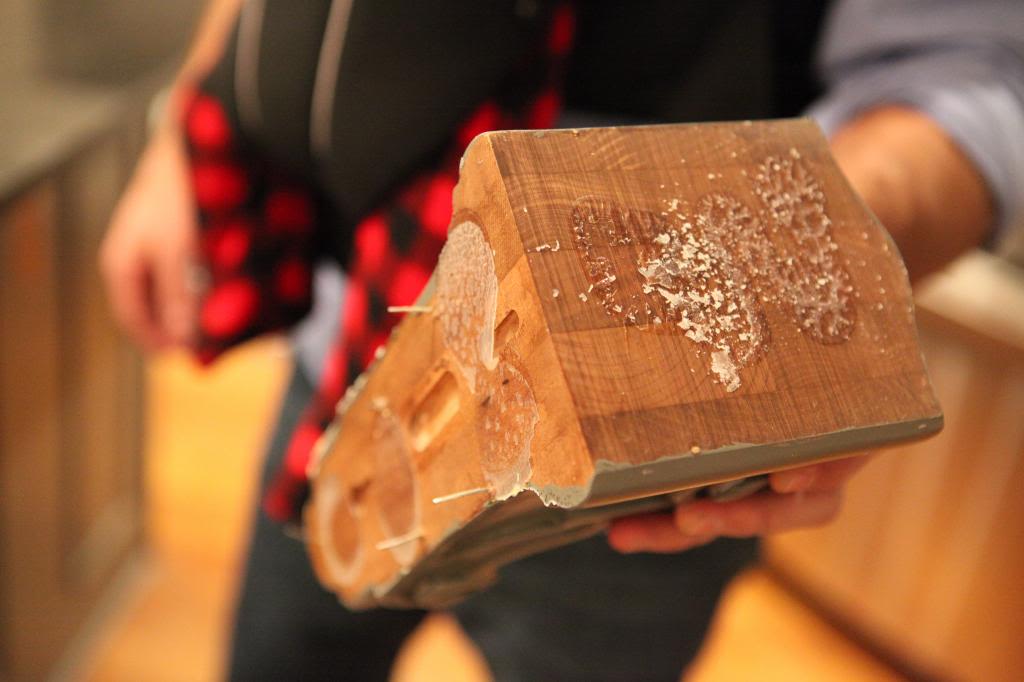
Demo was complete when we removed the quarter round around the base, some trim around the corners and the decorating mini trim on the backside.
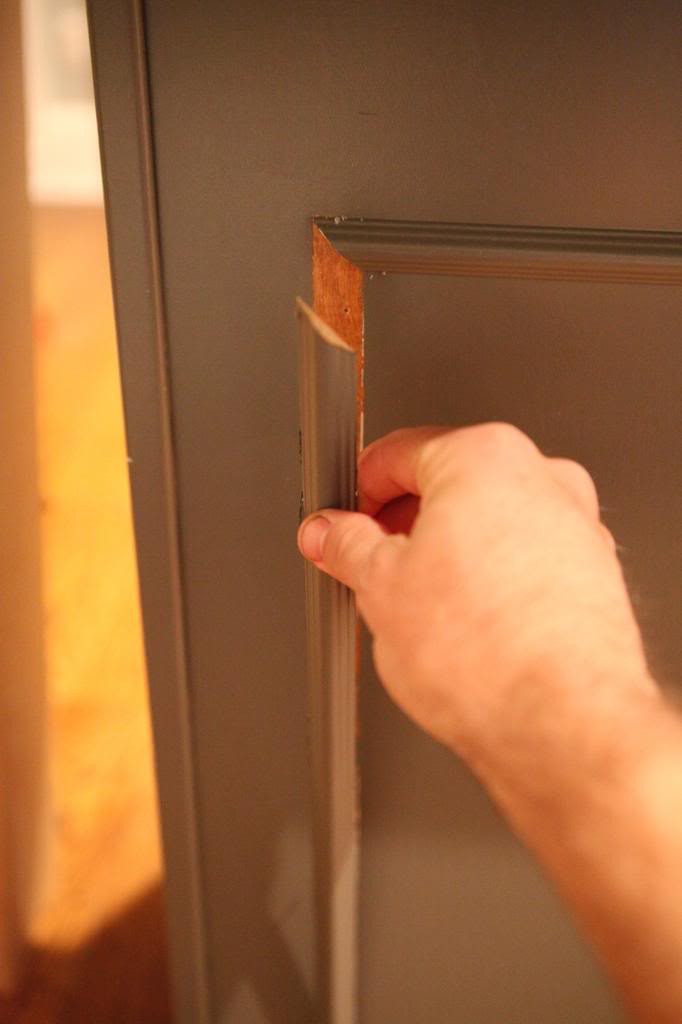
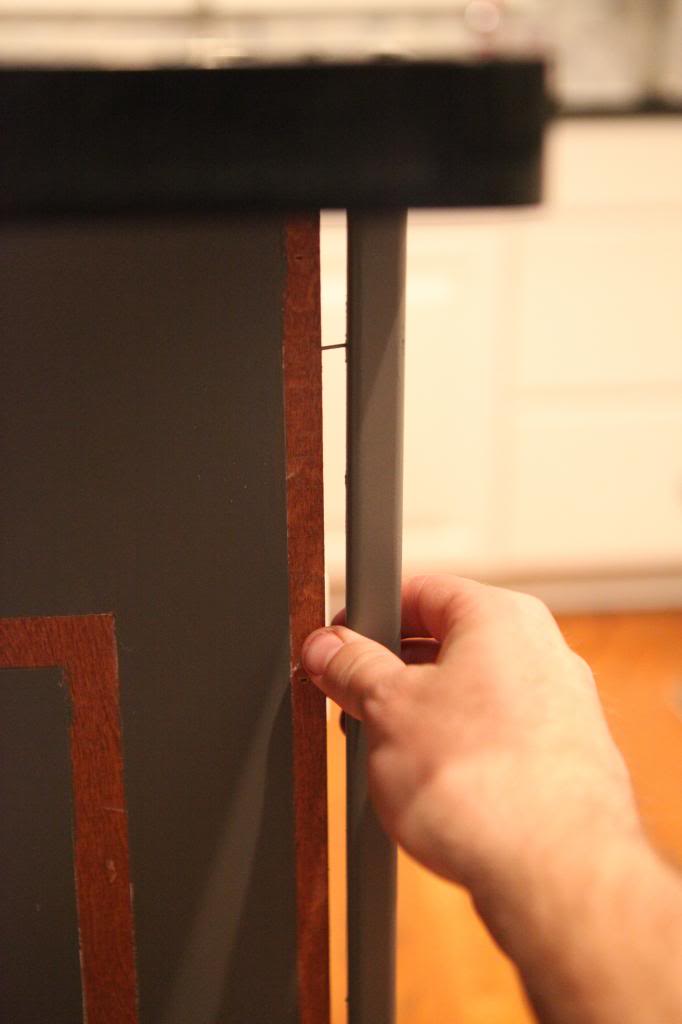
Most of the lumber that we used for this project was 1×6’s. We didn’t do a ton of planning…just knew we wanted something clean and I had a little sketch on a napkin. Jeremy was really patient with me with this one because I had to use words like “then the wood goes here to here and then the other wood goes on top of the wood and meets the wood here.” real nice Katie. way to be clear and concise.
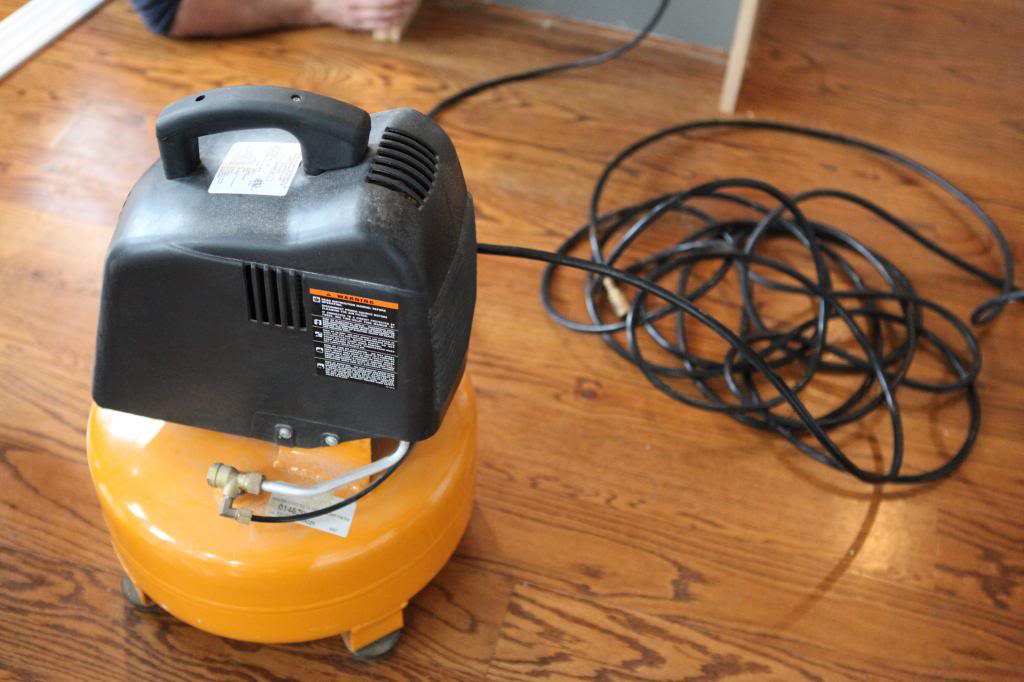
Here are our compressor settings just in case you wanna tackle this project.
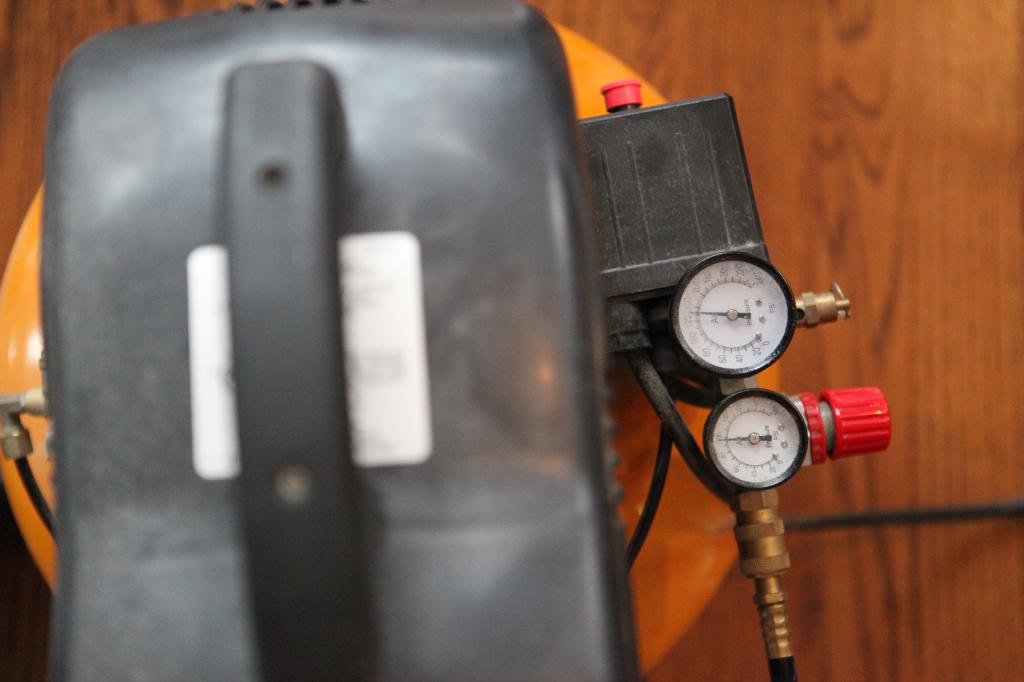
We love our air compressor for projects like this. I would definitely recommend it as a top tool for DIYers. It’s just so stinking versatile.
Okay…so building. Here we go with the hundred photos. Try to keep up….this is a crazy post.
So the first thing I wanted was to change the front of the island so that it looked more like a piece of furniture. To me that meant removing the toe kick area. I thought it would look better just straight down.
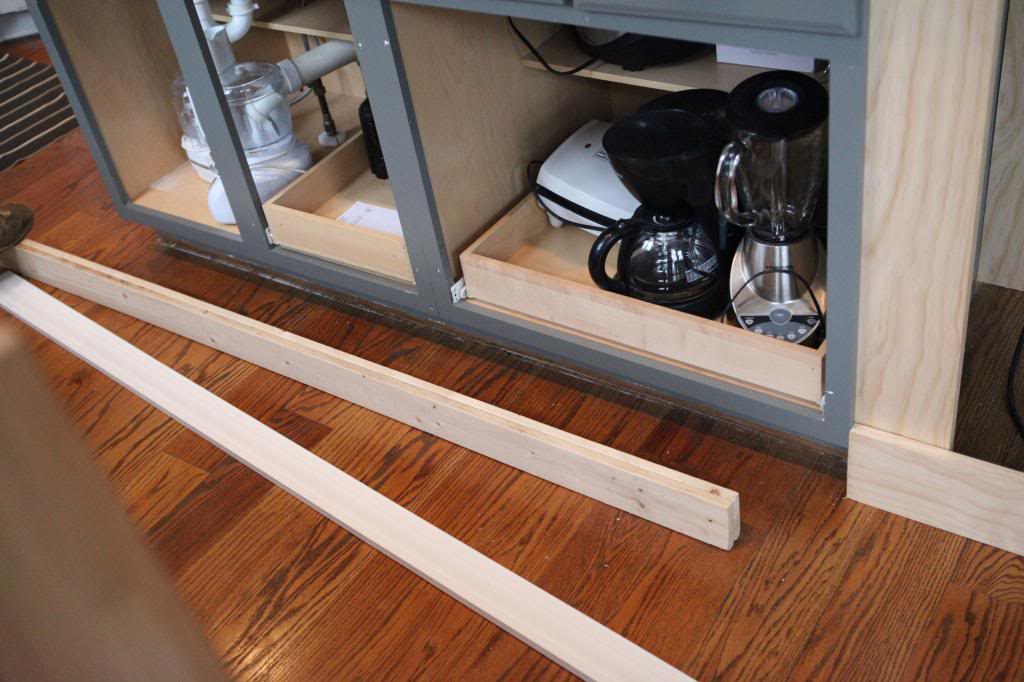
So Jer ripped some scrap wood to build out the toe kick and screwed them in.
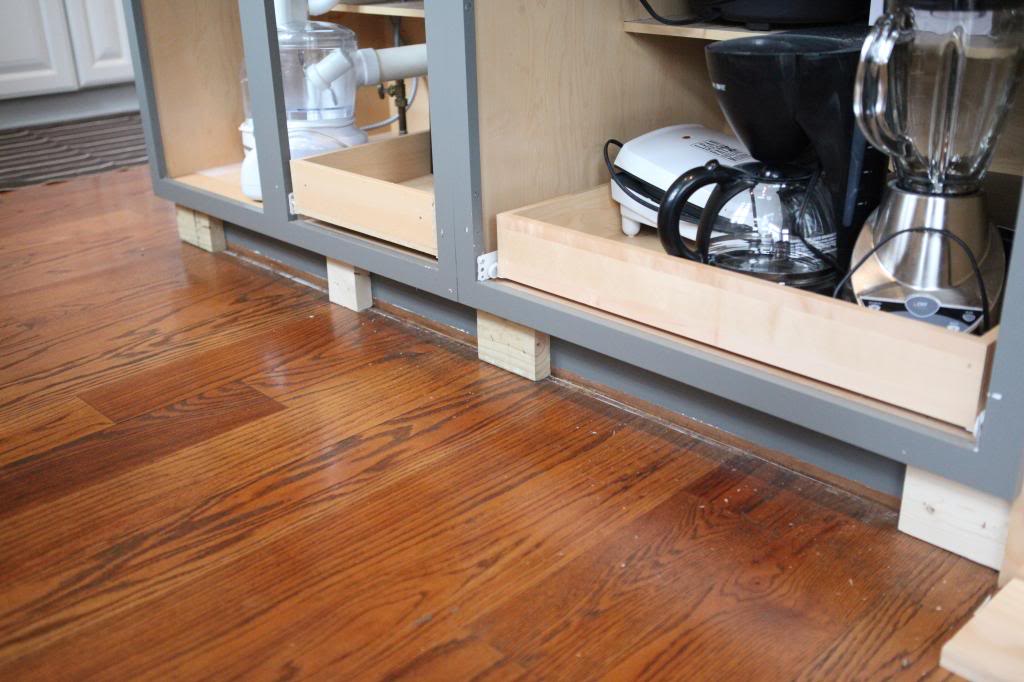
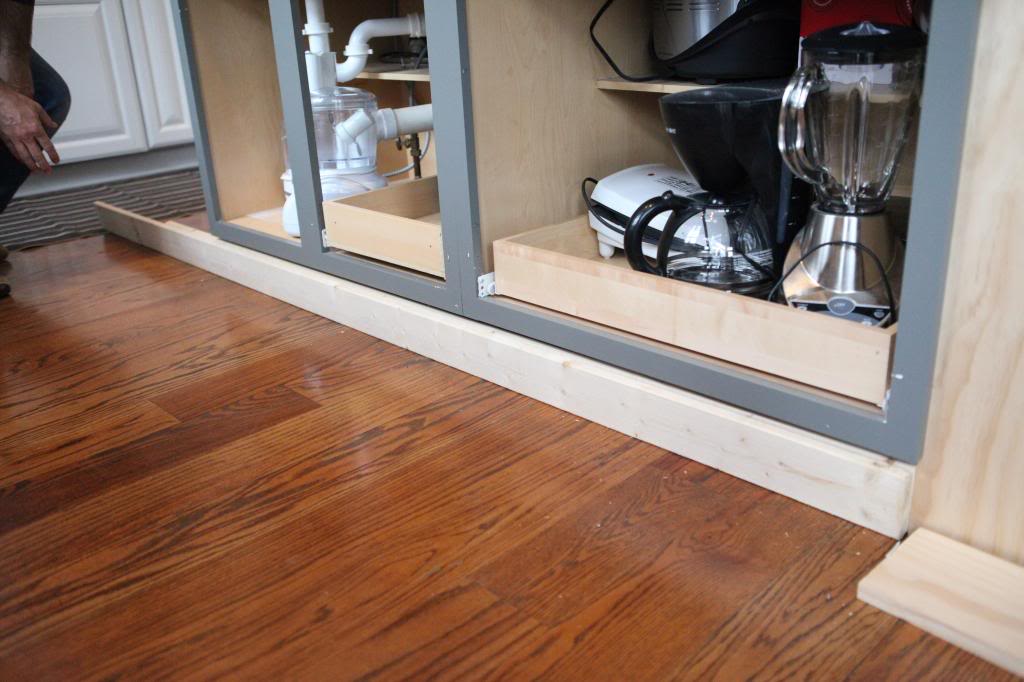
Then we used two 1×4’s sandwiched together attached the the scrap wood.
The end of the cabinet needed to be built out to accomodate my narrow shelves. So we cut four 1×6’s to length and attached two of them together for each side. The right hand side had to stick out…so the backside of the island would line up directly in the middle of our sandwiched boards. This will make sense later.
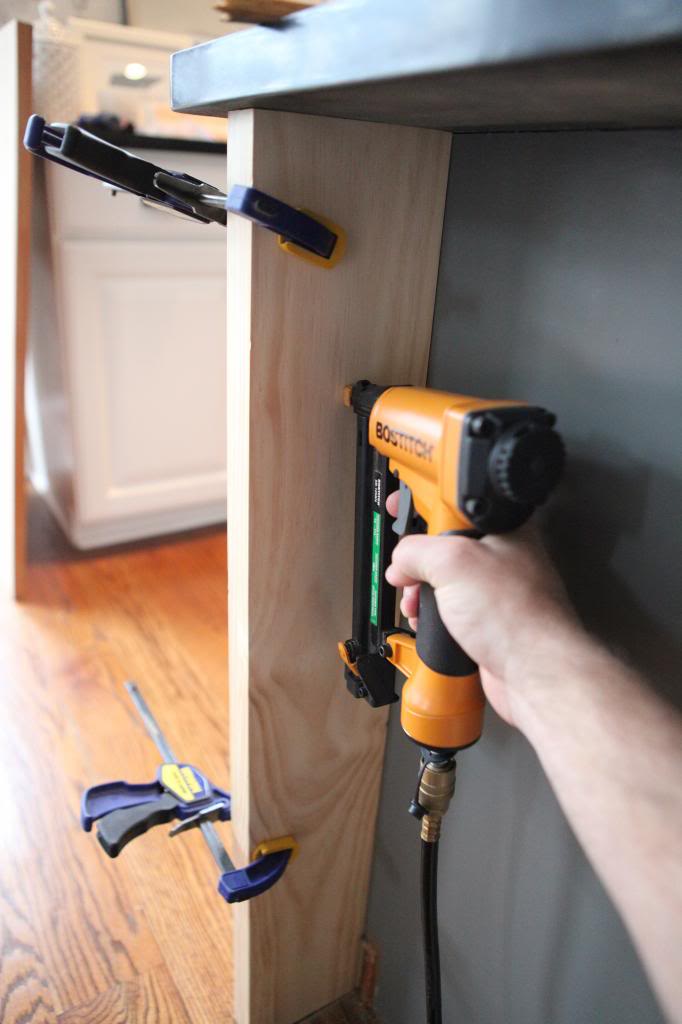
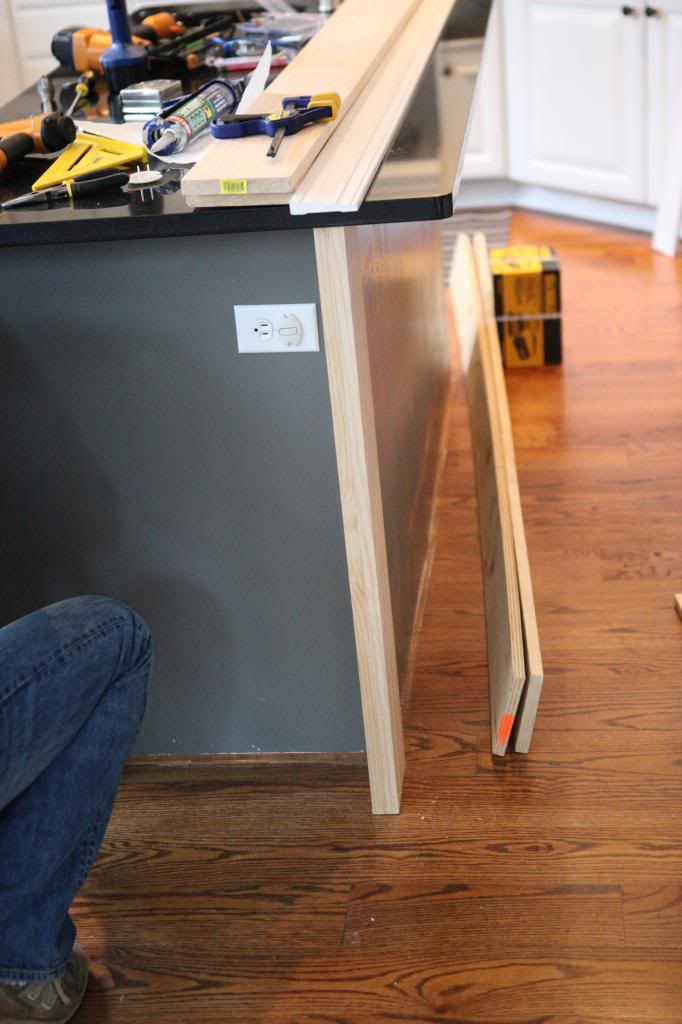
After they were attached together, it was time to attach them to the end of the island. Jer clamped…
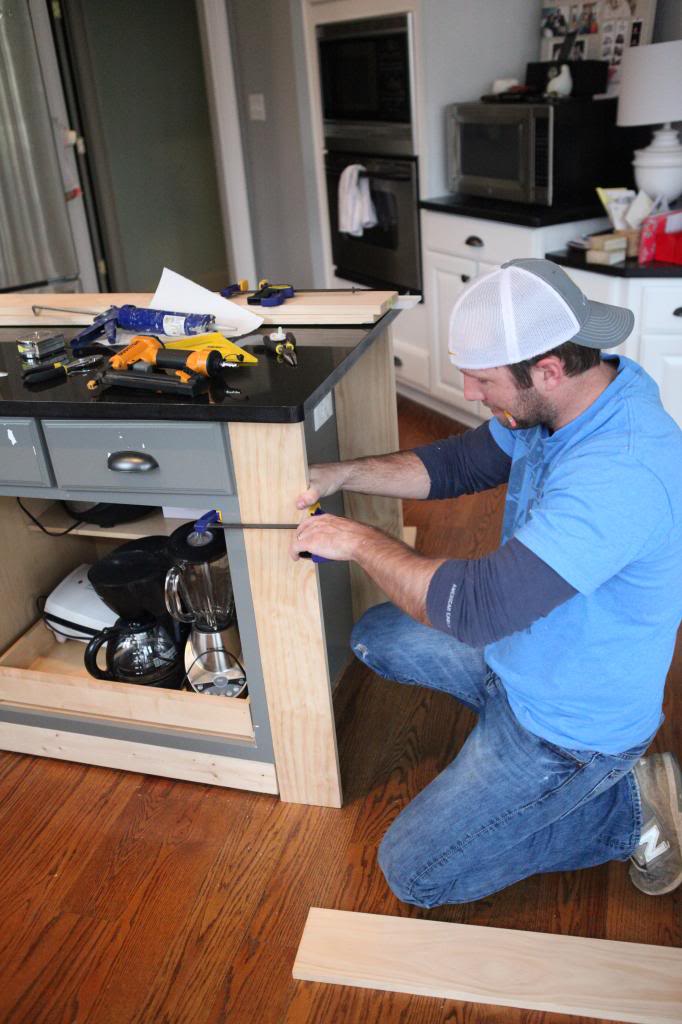
…he drilled pilot holes…
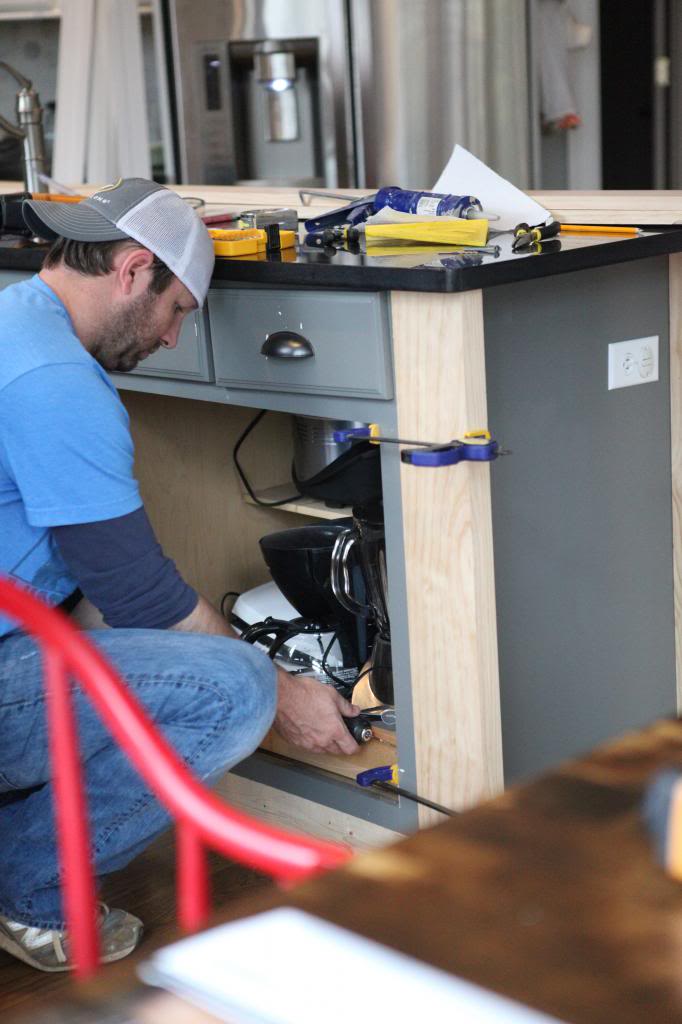
…then used long screws to attach it.
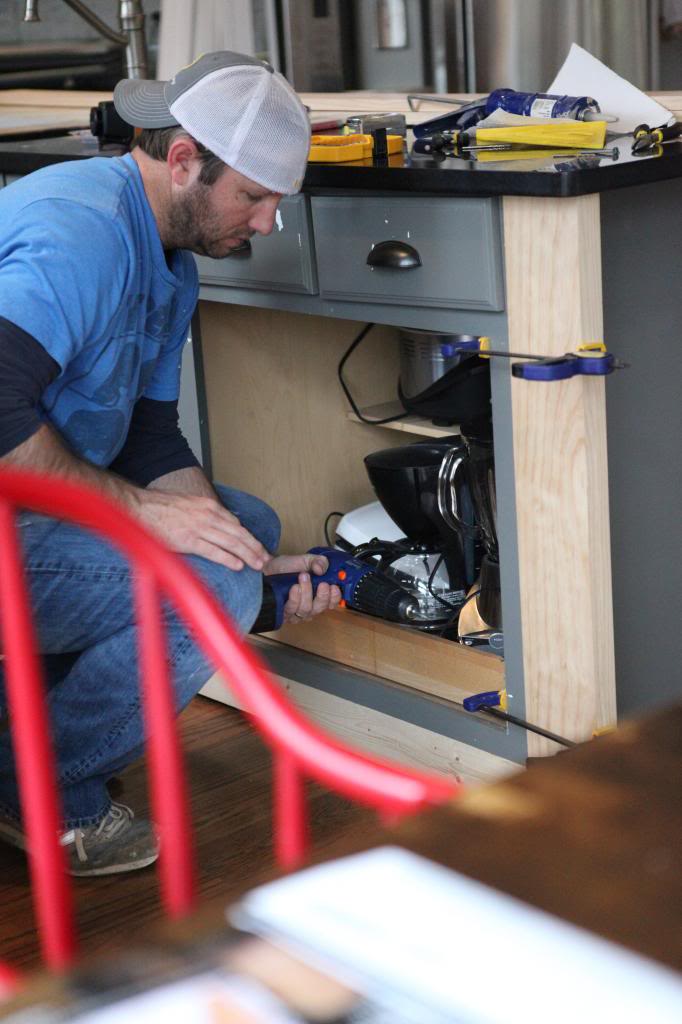
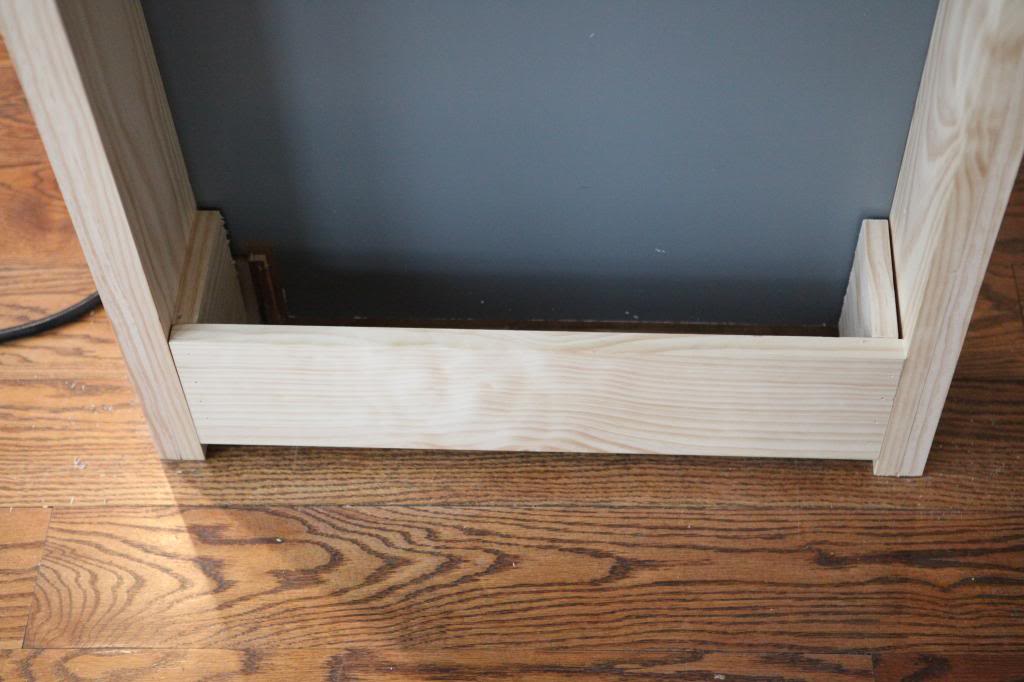
The bottom of the shelf area needed to built up to account for trim work so the base was built up like so…and yes, it did sit up off the floor because the trim that would wrap around the entire island would need an additional inch or so above it to look right. Again…it’s gonna make sense later.
The top of the shelving unit was attached with glue directly to the granite and then clamped in place.
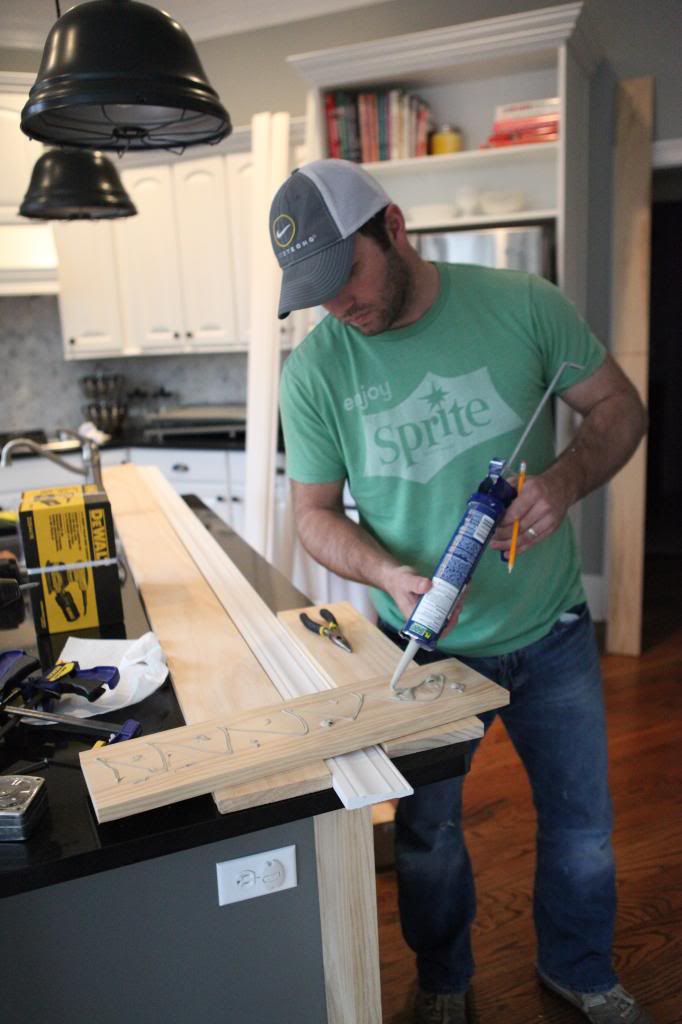
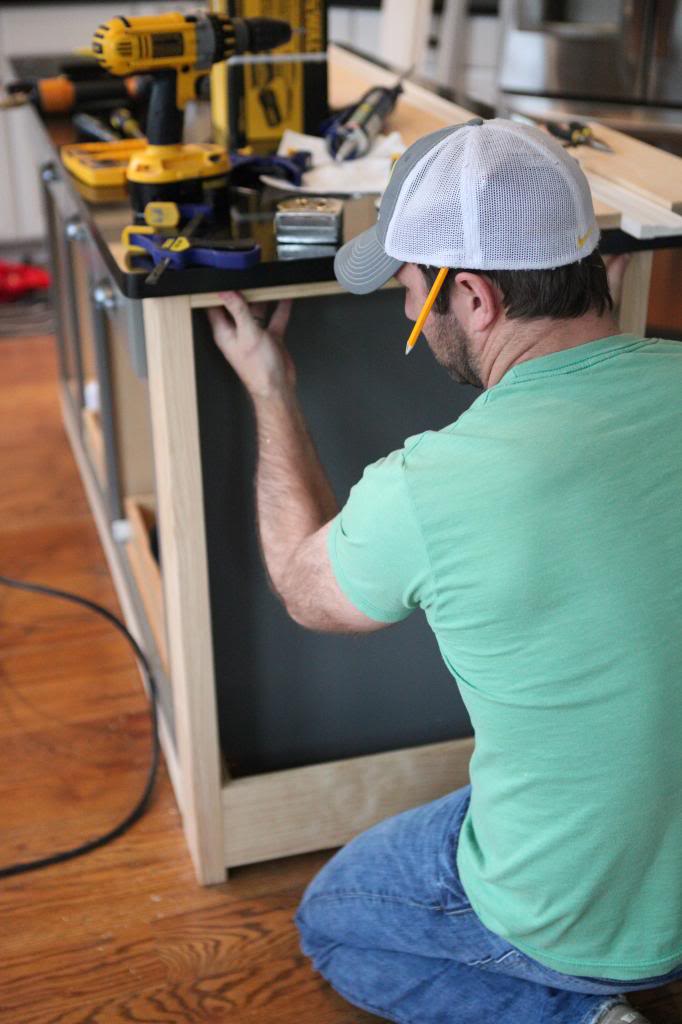
The right hand side of the shelving unit was then attached to the bottom and top with the nail gun.
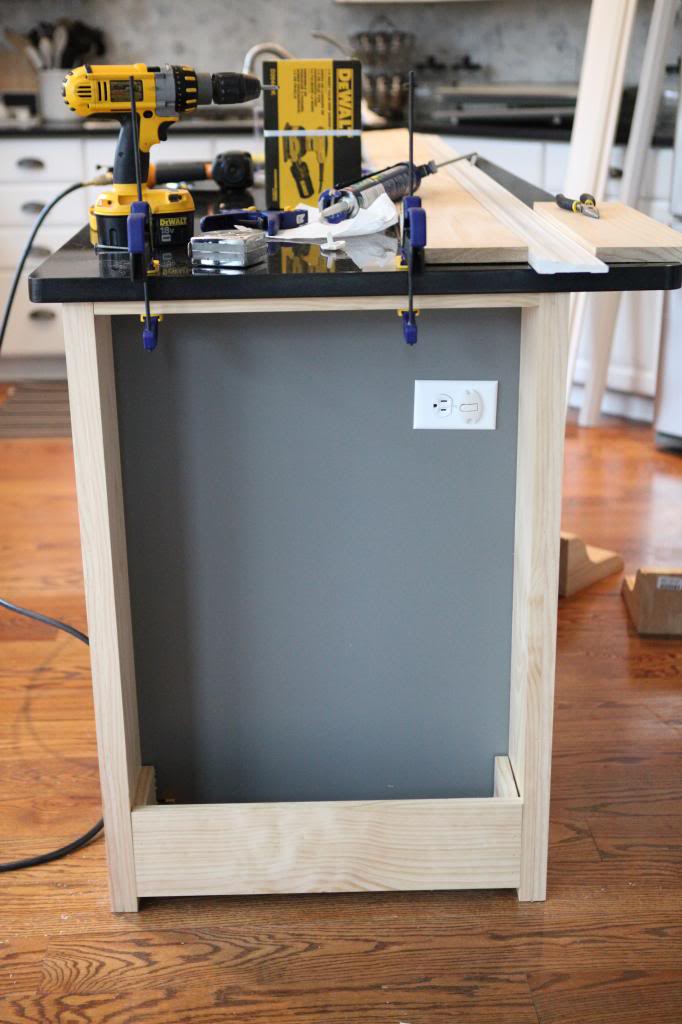
The bottom of the backside also needed to be built up…it’ll make sense later. We attached a 1×6 as a “build-up board”. See how the bottom board runs directly into the side of the shelf wood? Need that.
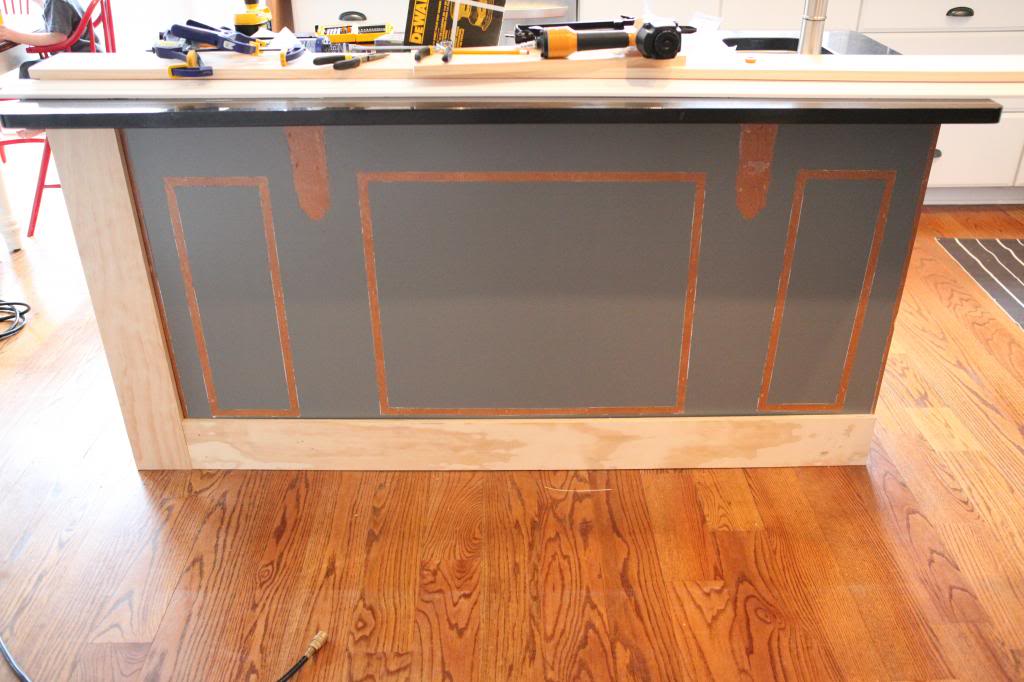
Then wanted to continue it along the other side (the one that is closest to the stove). In order to continue the “build-up board”, we had to remove a little piece of wood that extended along the toe kick. We used our Roto-Zip. It was done in like two seconds.
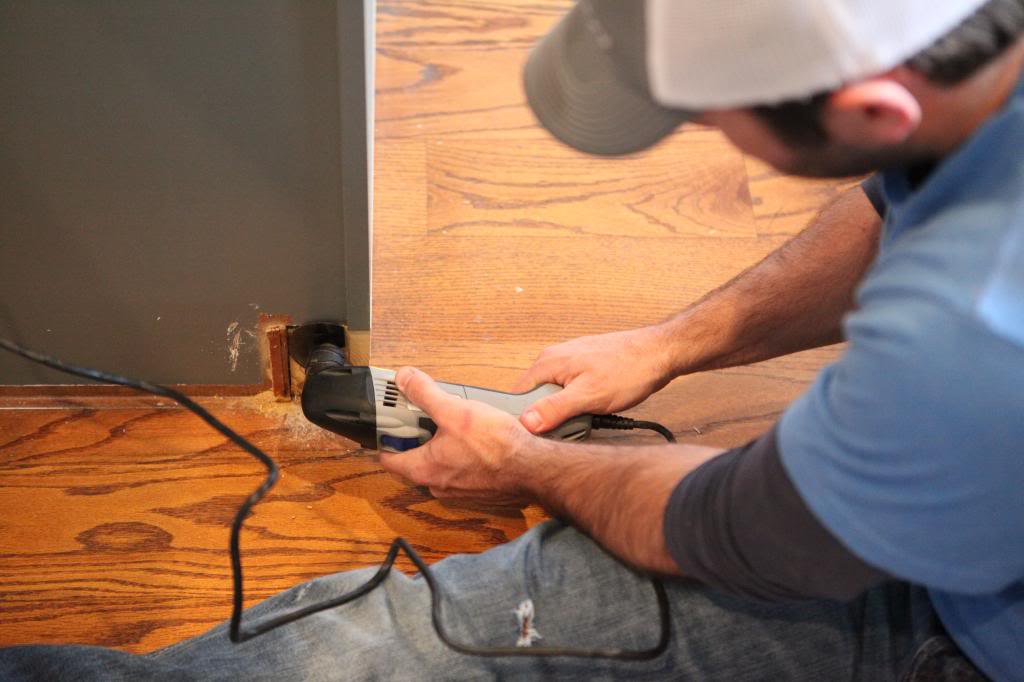
Jer did a little fancy wood working to make the build up board fit nicely around the facade of the cabinet.
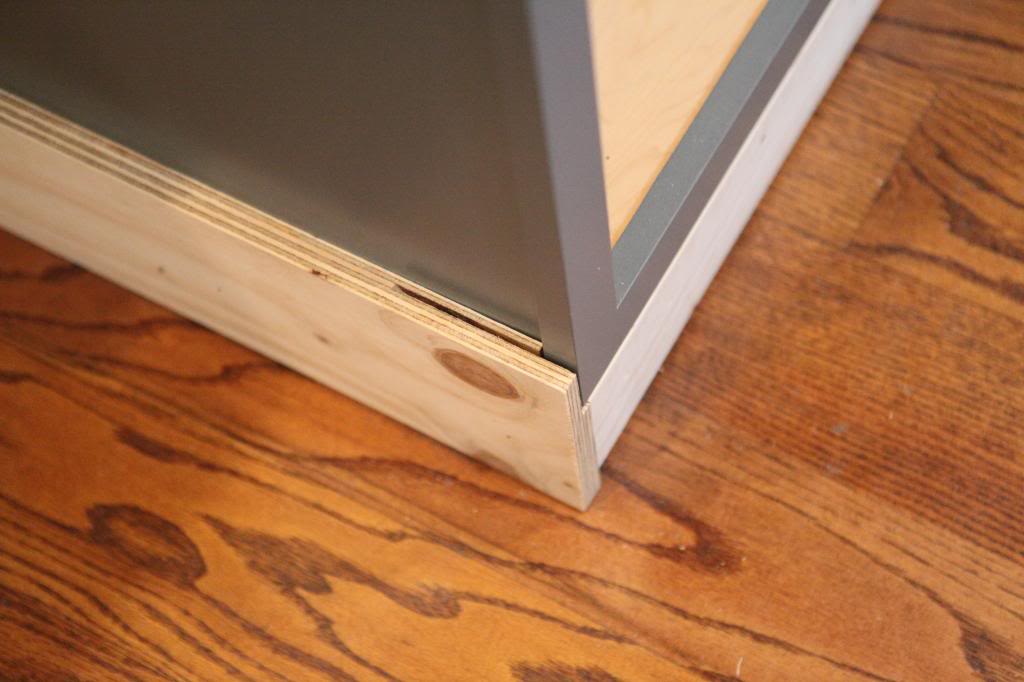
Here’s the whole shot…
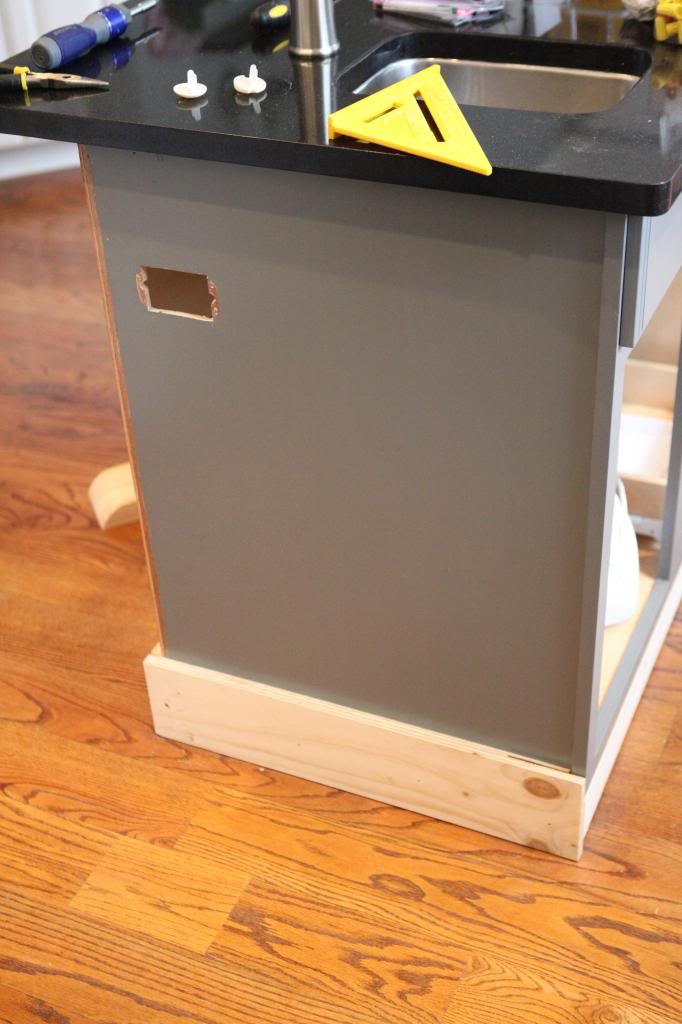
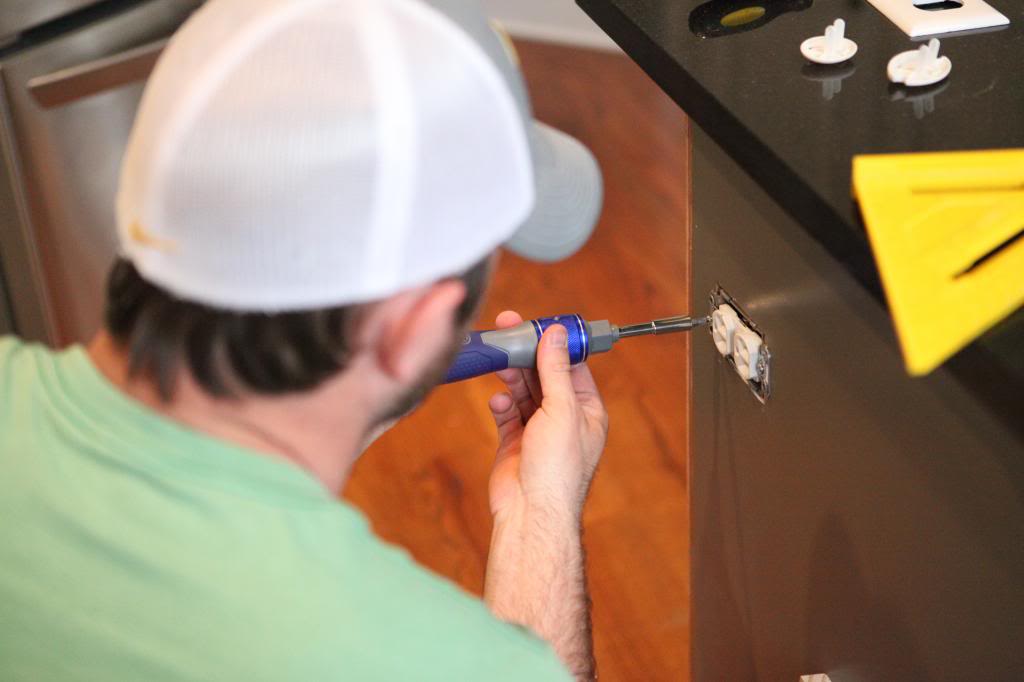
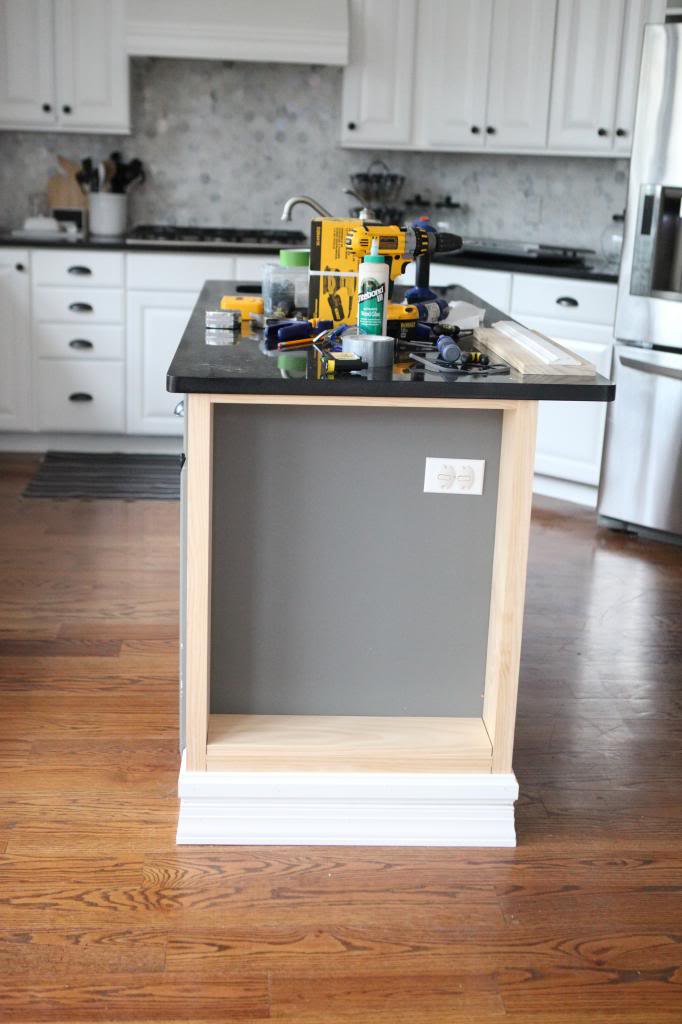
As you can see, we had to remove the outlet. It was too close to the edge of the island and doesn’t ever get used. Since we have an outlet on the other side, this one (closest to the mini sink) was overkill. So Jer switched off the electrical power and boxed the outlet to the inside of the island.
Then came time for vertical boards. Since the backside already had one vertical board (the side of the shelf area), we added another vertical board to balance out the trim.
Then we added a vertical board on the stove side (see how it covers the hole where the outlet was located?)
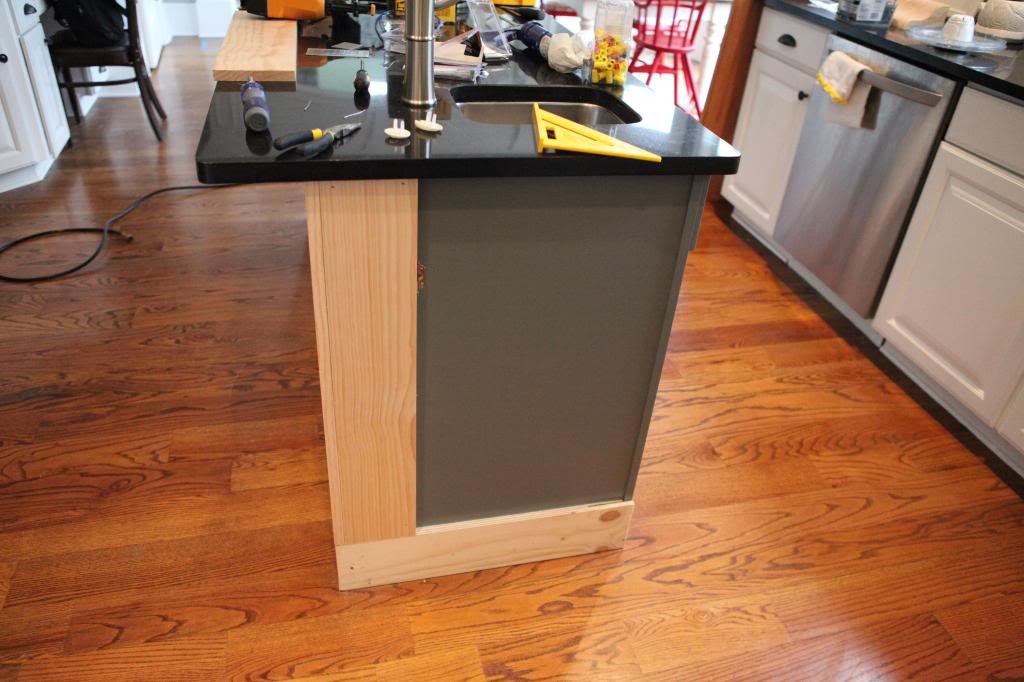
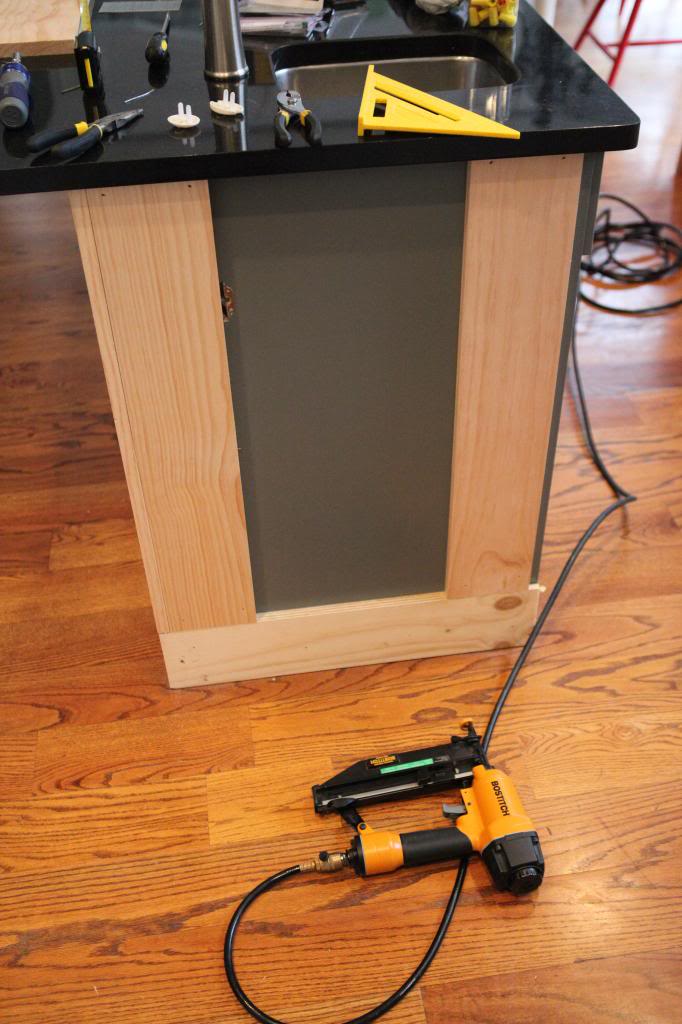
and another on the other side butting it right up to the facade. This meant that we would later come back and add a tiny strip of wood so that the width of the left vertical trim would match the width of the right vertical trim. (get all that?!)
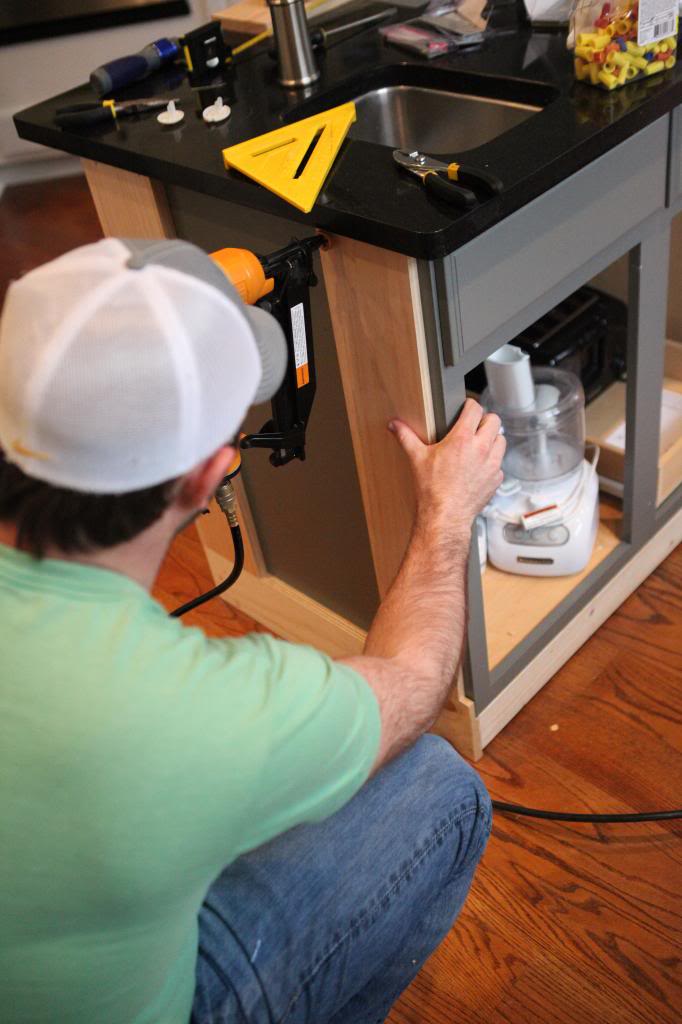
Here’s how it looks before we added that tiny piece…
Now back to the backside that looked like this…

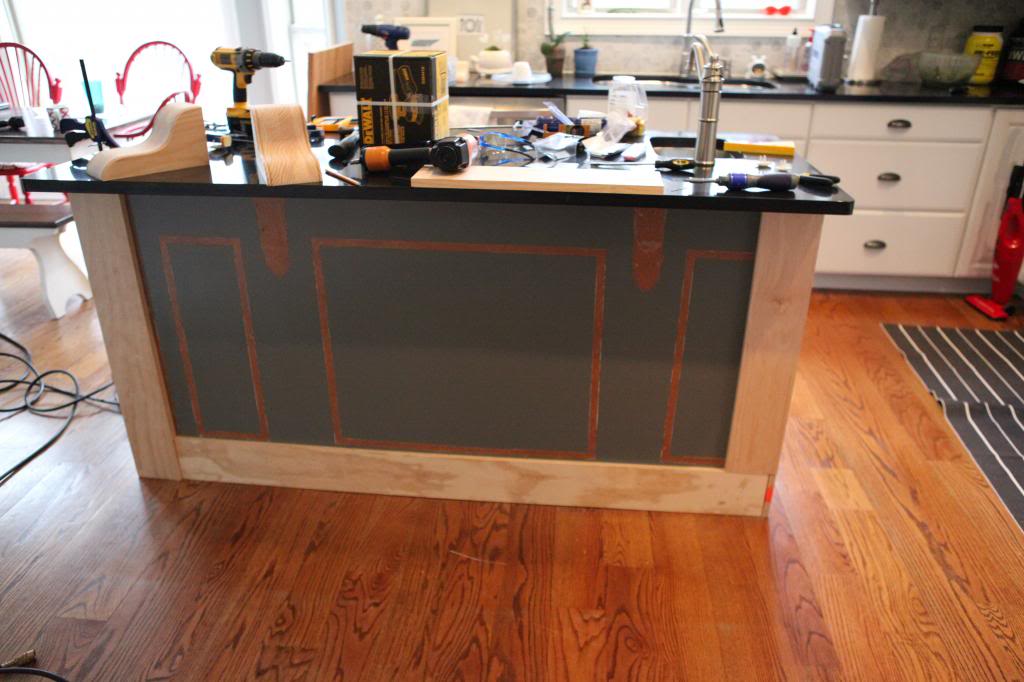
Then we added another vertical piece directly in the center and two lower trim pieces directly over our build-up boards. It looks cray-cray…trust me…it works out in the end.
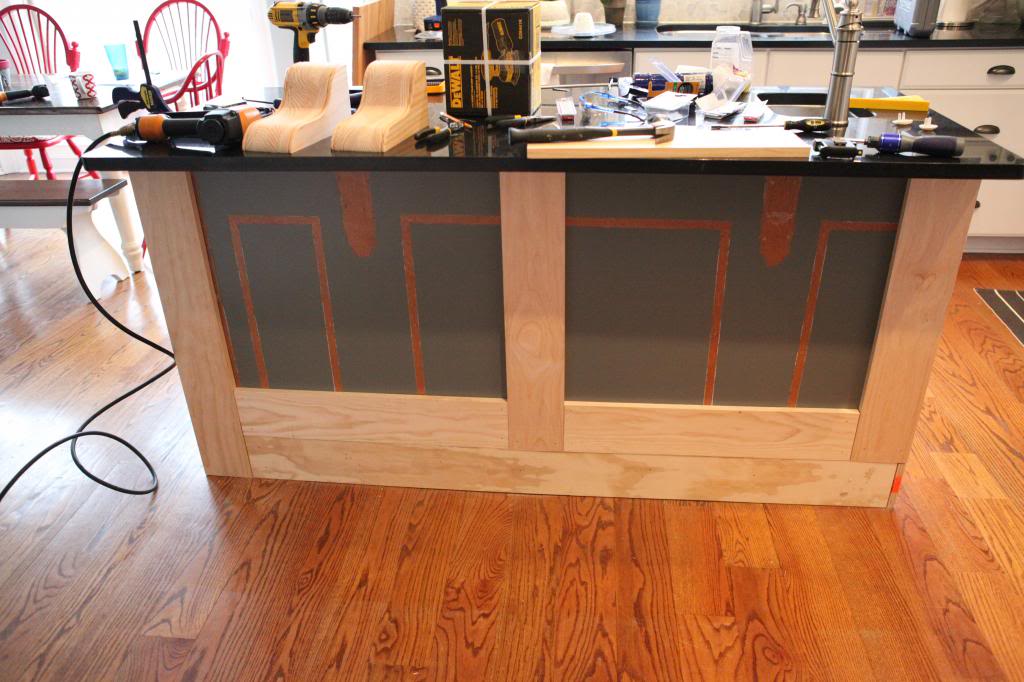
After marking the centers of both sections on the backside, it was time to attach the corbels. First we glued the corbels into place.
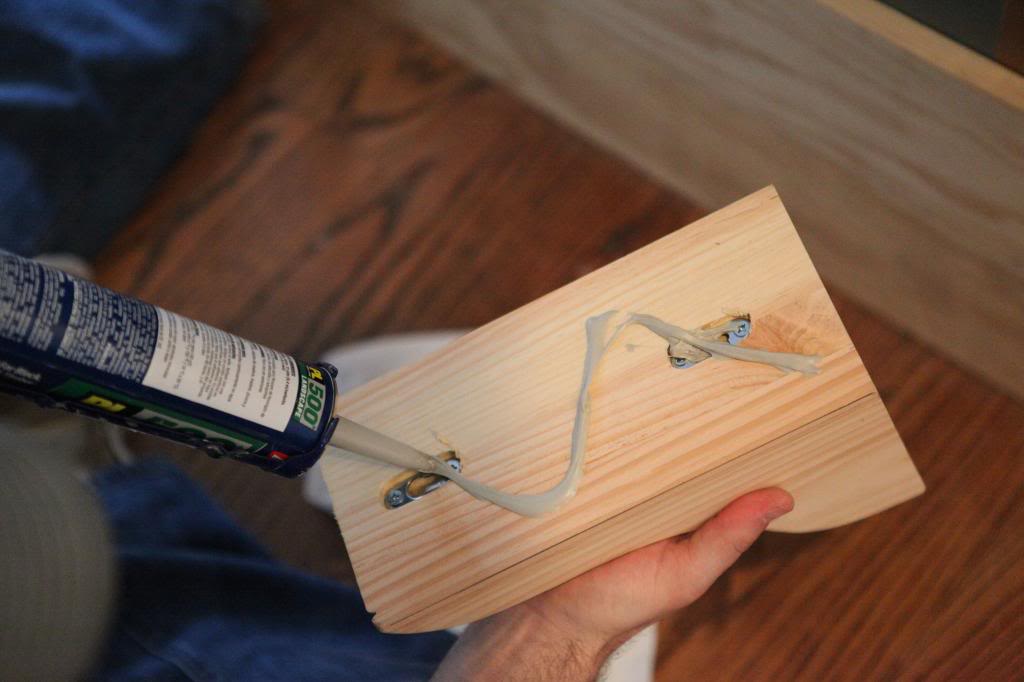
You have to hold them in…or be able to drill through the back of the cabinet. We added a few finishing nails too….you know…so that it can support an elephant and pass my boyfriends sturdy test 🙂
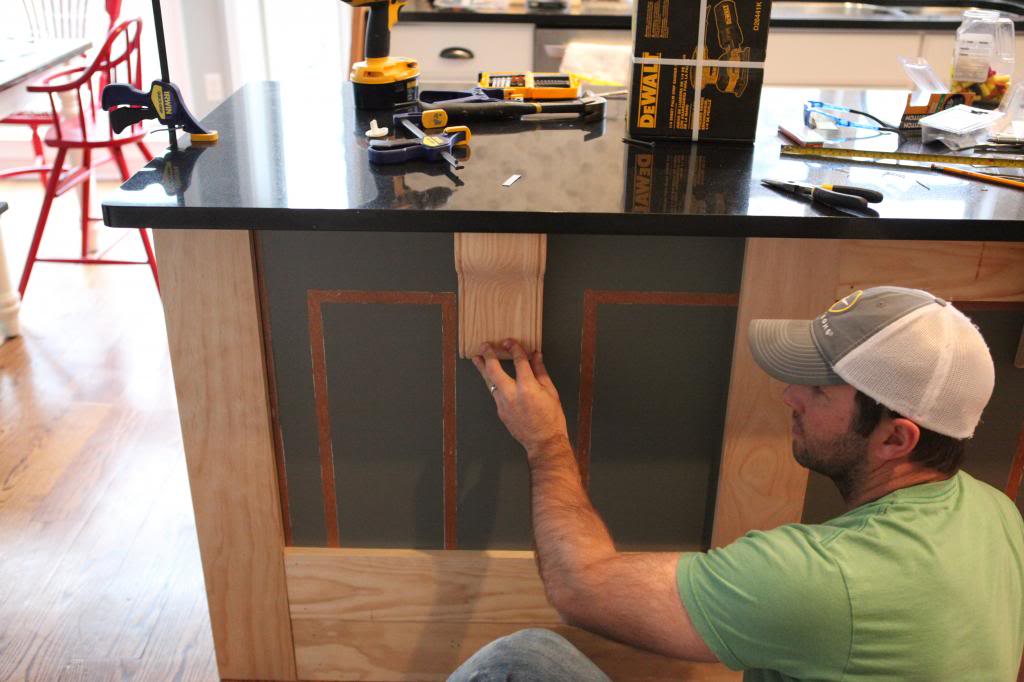
Then we added two horizontal pieces on either side.
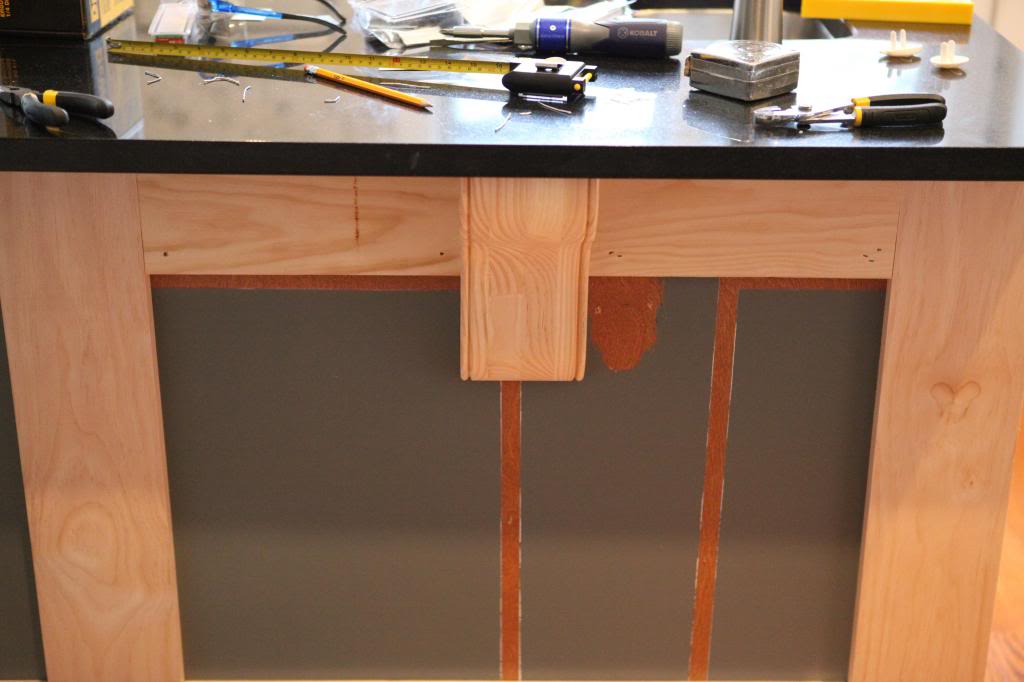
Then it came time to trim out the entire thing. I wanted the trim to wrap completely around the entire piece – giving it a really nice finished look. The only problem was that we had cabinet doors that were lower than six inches. So we formulated a plan to use two pieces of trim…and then just one on the front. What we ended up choosing was a flat chair rail and a door casing.
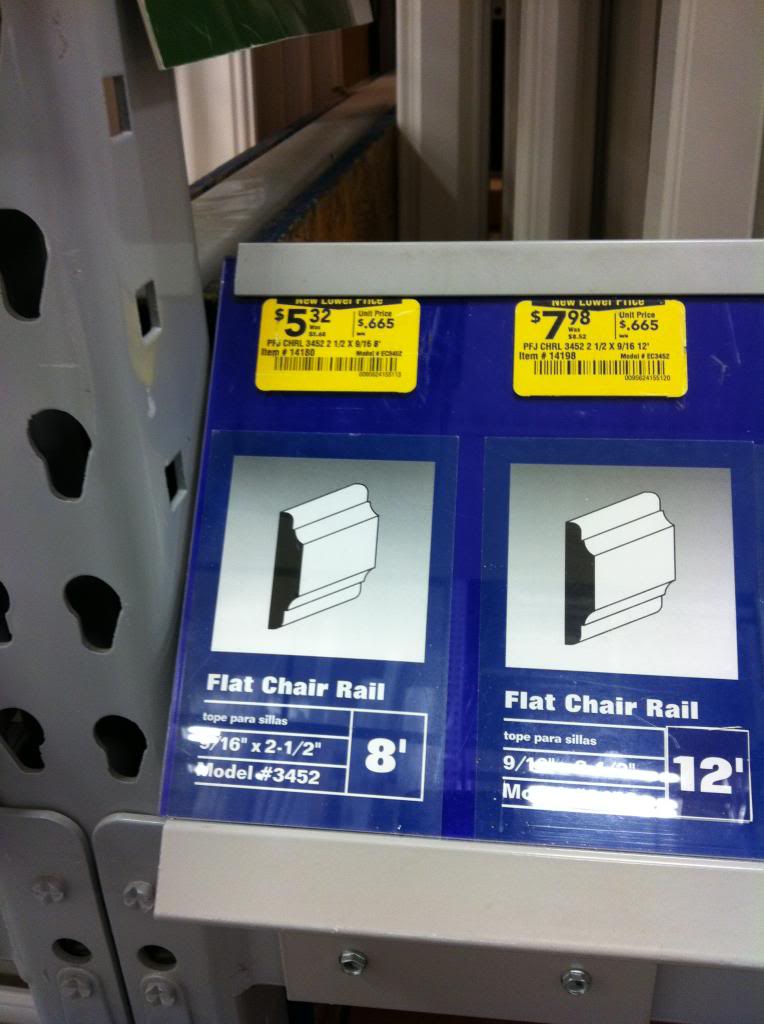
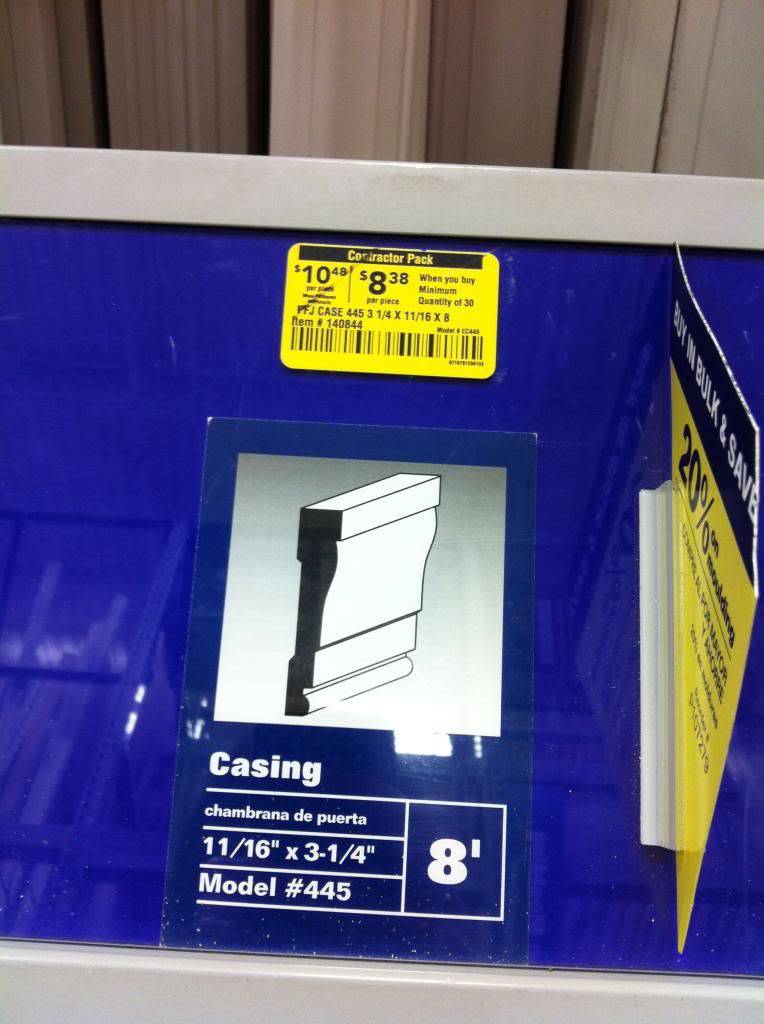
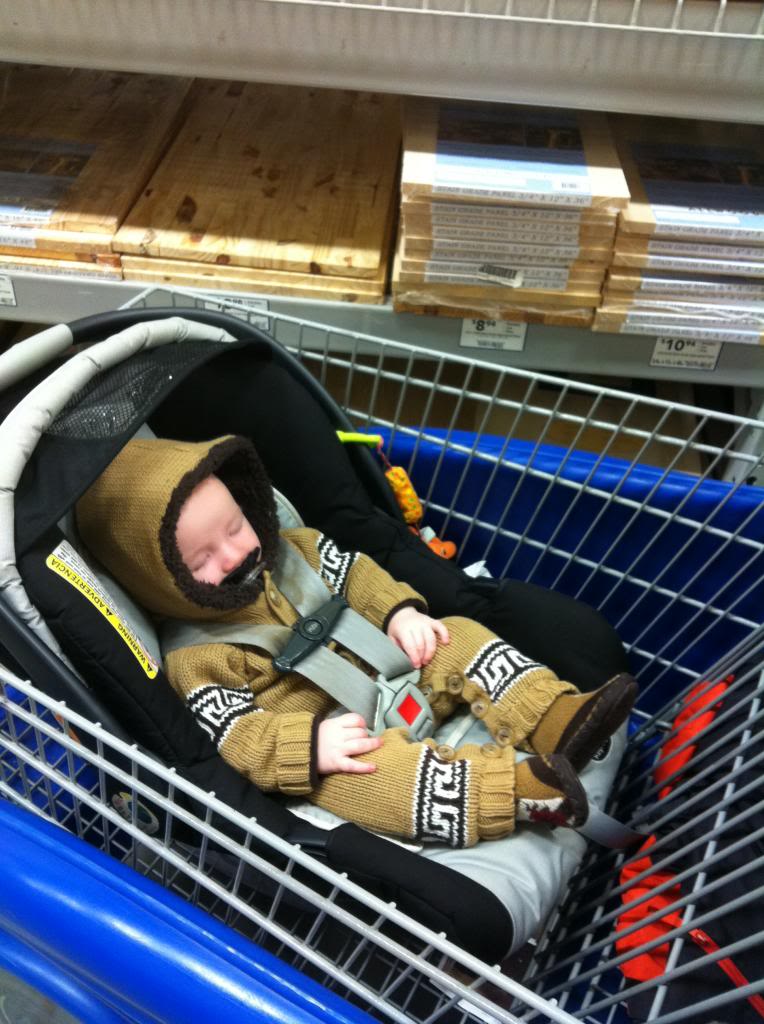
Eskimo baby (complete with facial hair) slept through the entire shopping experience.
So when we got home, it was time to attach the trim. First the casing. That went around the island completely.
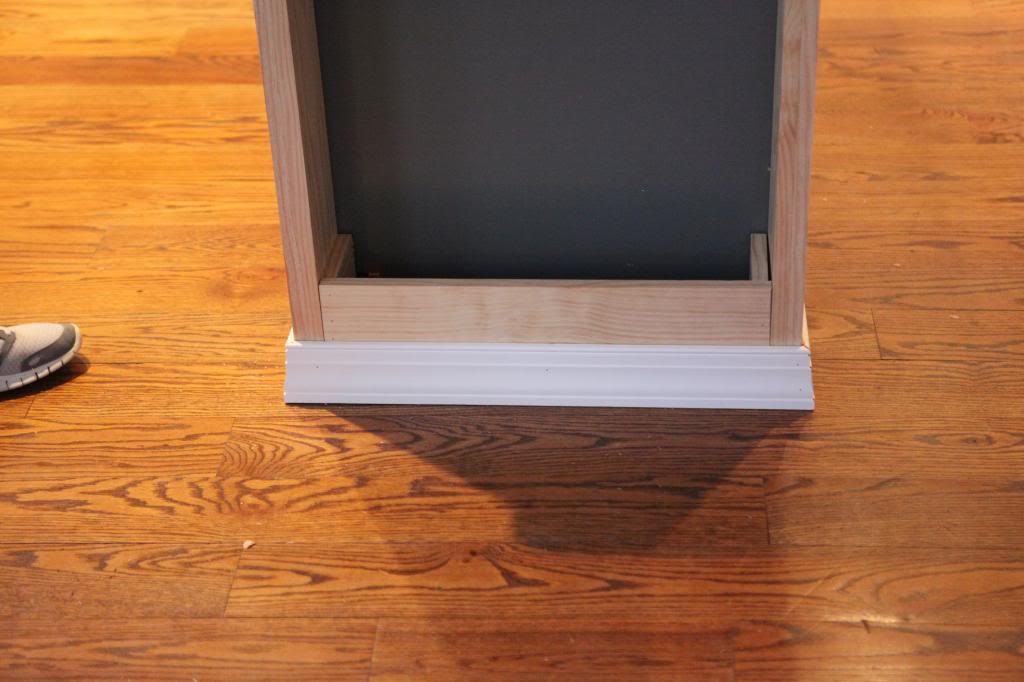
Now do you see why we had those build up boards? If we omitted them, then the trim would have gone under the horizontal pieces….looking wonky.
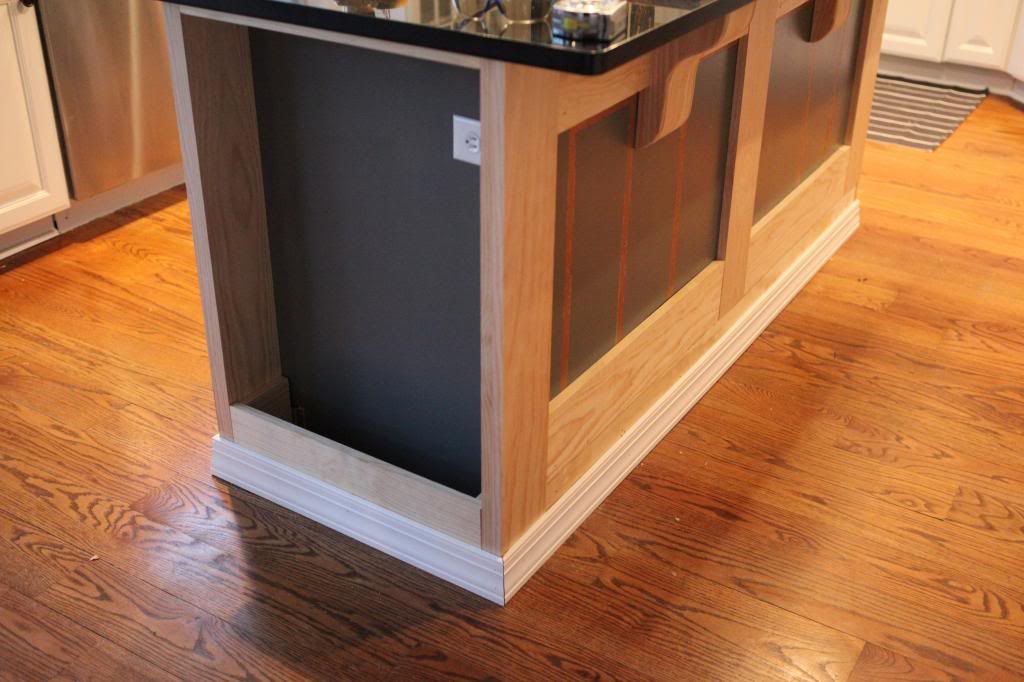
This is the opposite corner. The casing went completely around…and fits nicely under the cabinet doors.
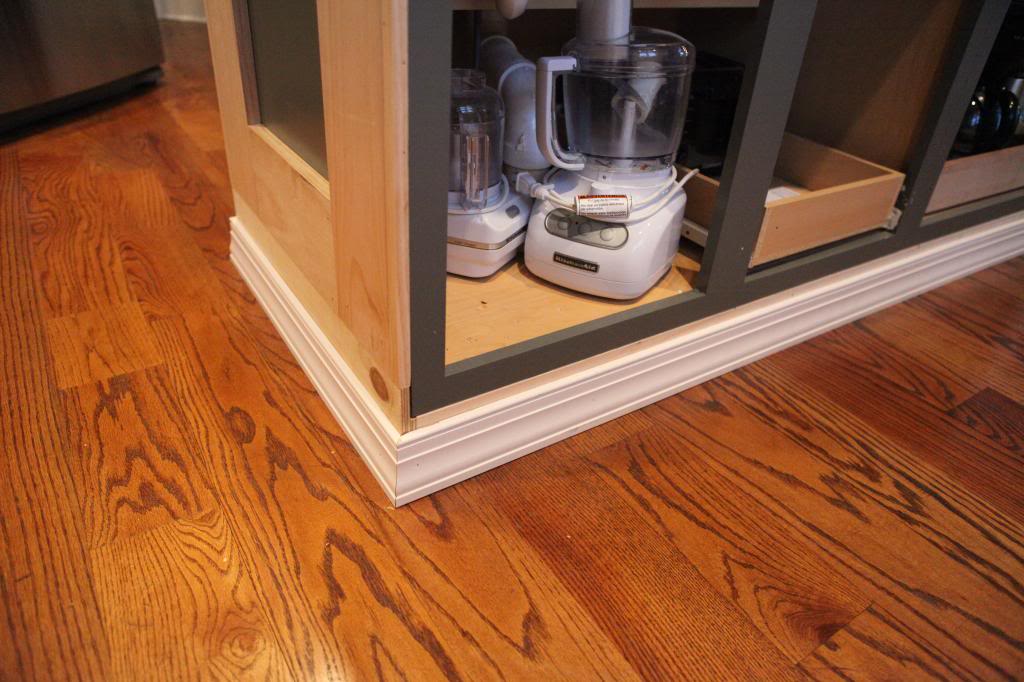
Oh and you can see, we added one tiny little strip of wood to balance out the widths on the stove side. Now those vertical pieces are nice and even.
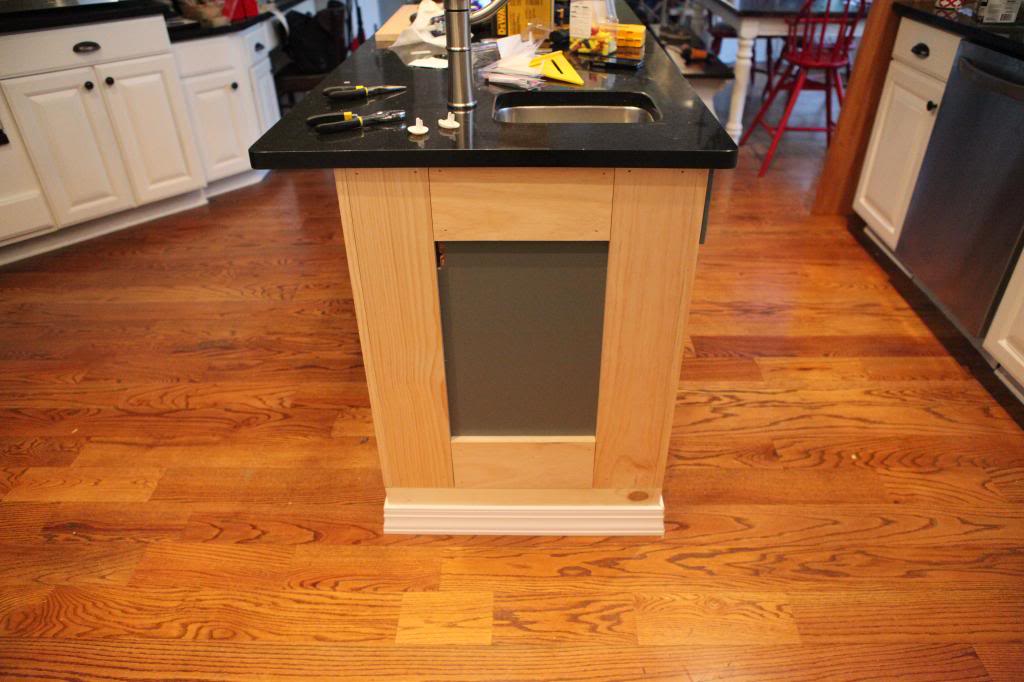
Right about then is when we decided to add a little letter. It’s cheesy. It’s done by everyone and their brother since 1950…but we figured that even if we were the ones to find it (which is very likely), it’ll be a funny way to remember where we were and what we were doing in 2013. I included just a handwritten note and a copy of our christmas card (it’s the only photo we have of all four of us).
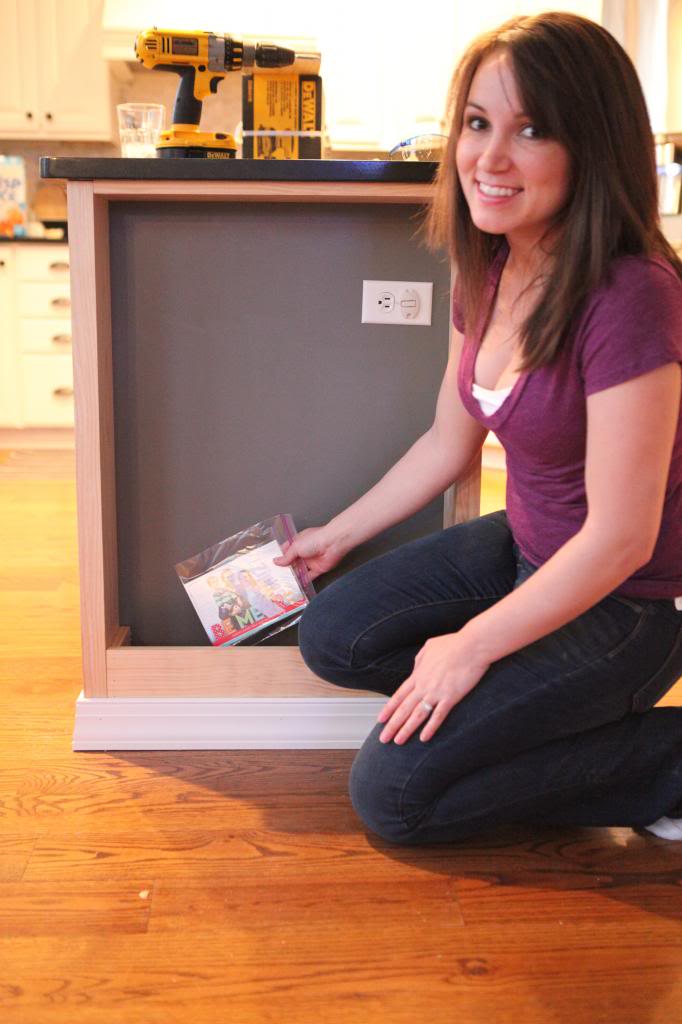
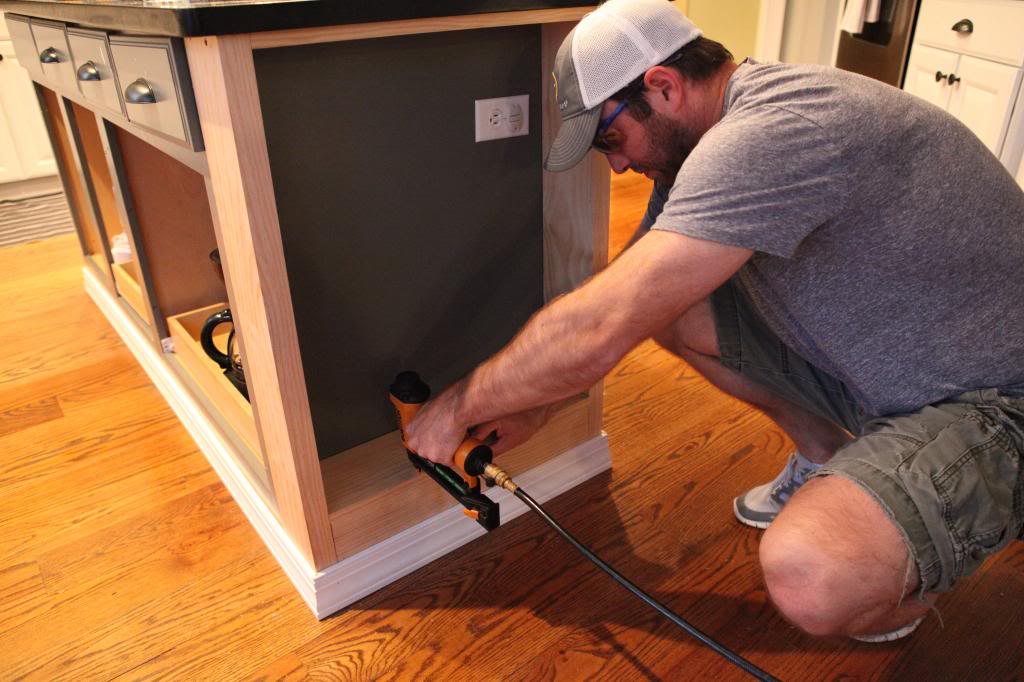
Jer secured the board on top…forever encapsulating our package.
This was also our first little shelf! Horray!
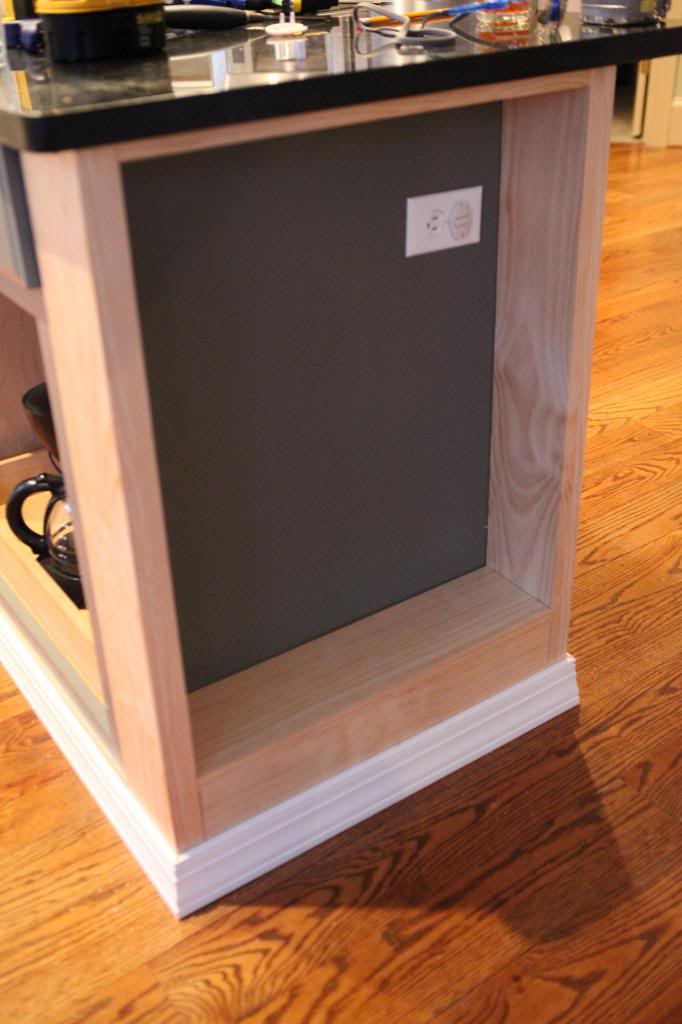
Now it came time for our other trim. This would sit directly on top of the casing.

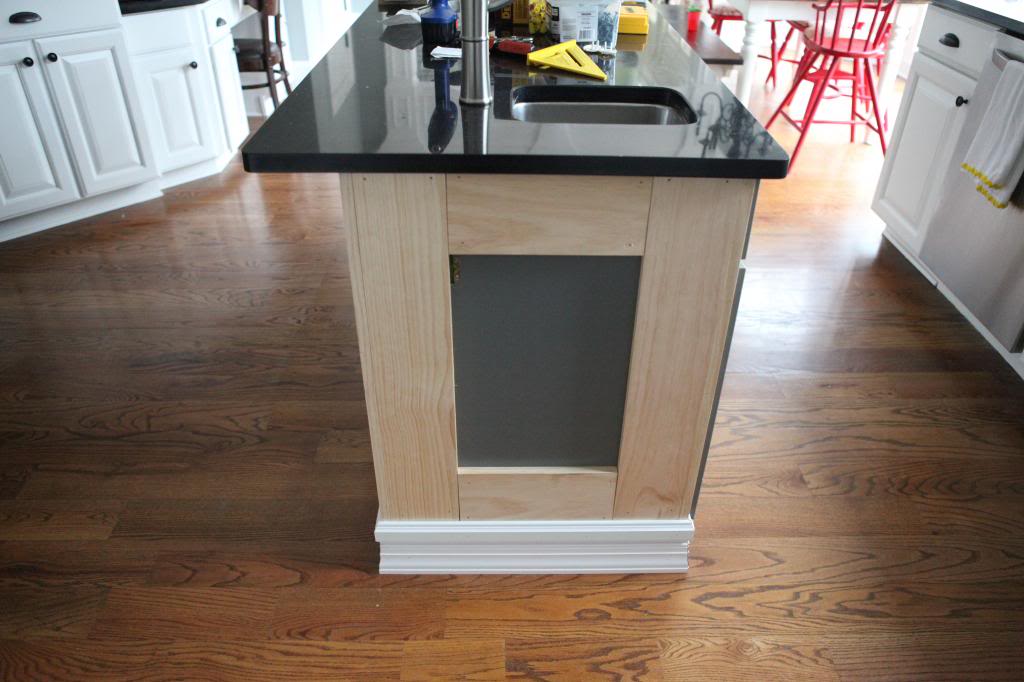
The trickiest part is the front of the island…because of the doors and you want a clean transition.
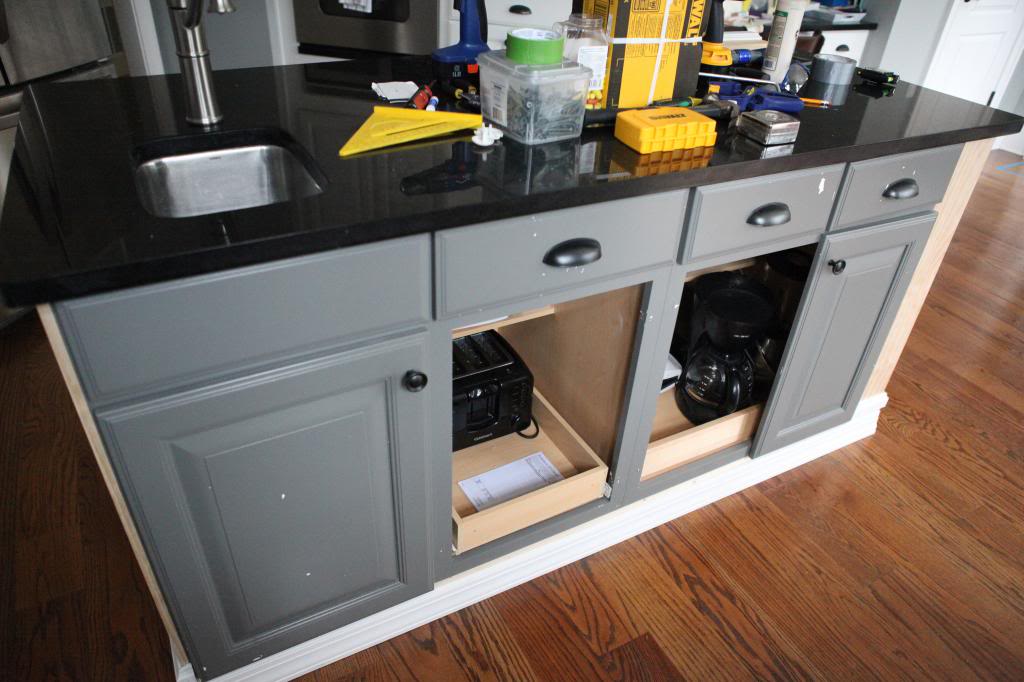
We went back and forth deciding whether to miter the little tiny corner pieces or not. In the end, we liked the clean cross cut look the best. And you can see how it looks when the door is open too…
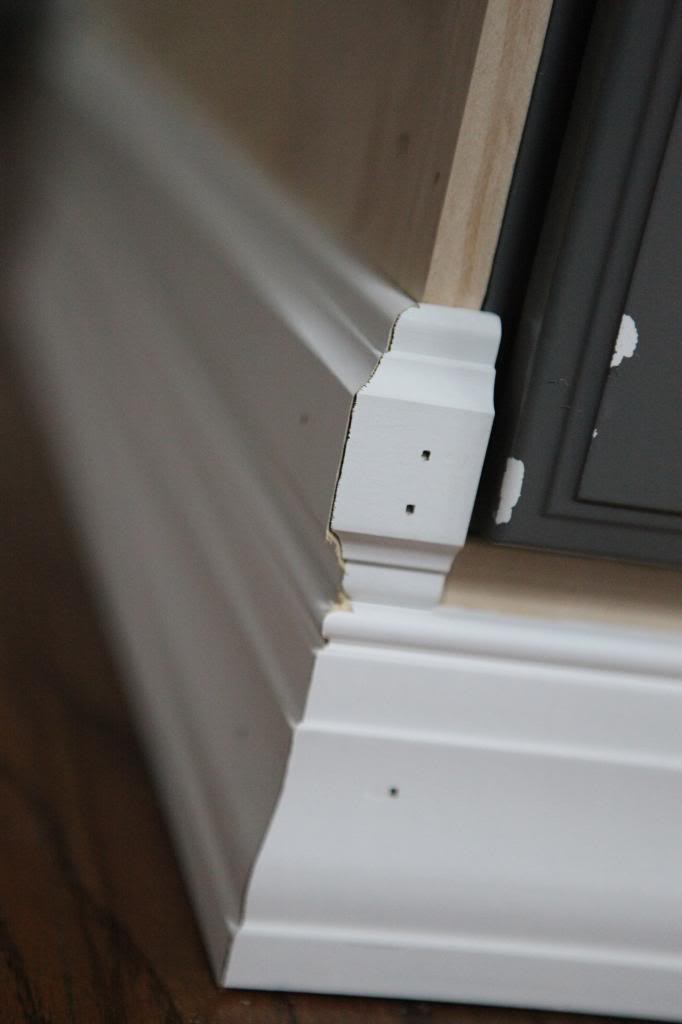
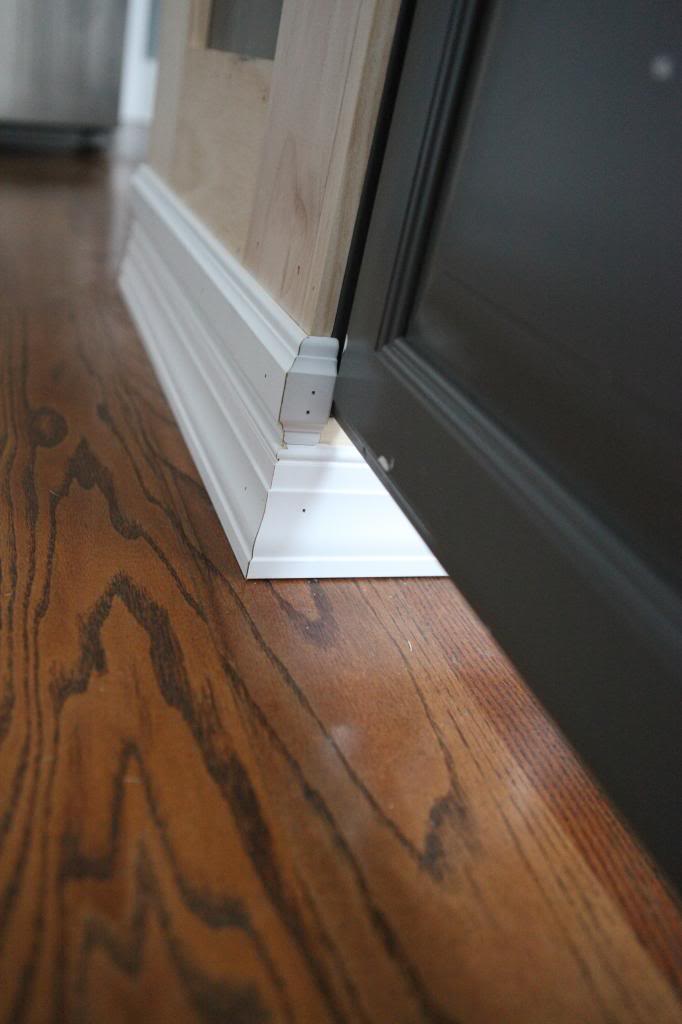
The other end had a little bit of a longer corner piece…but still the same effect.
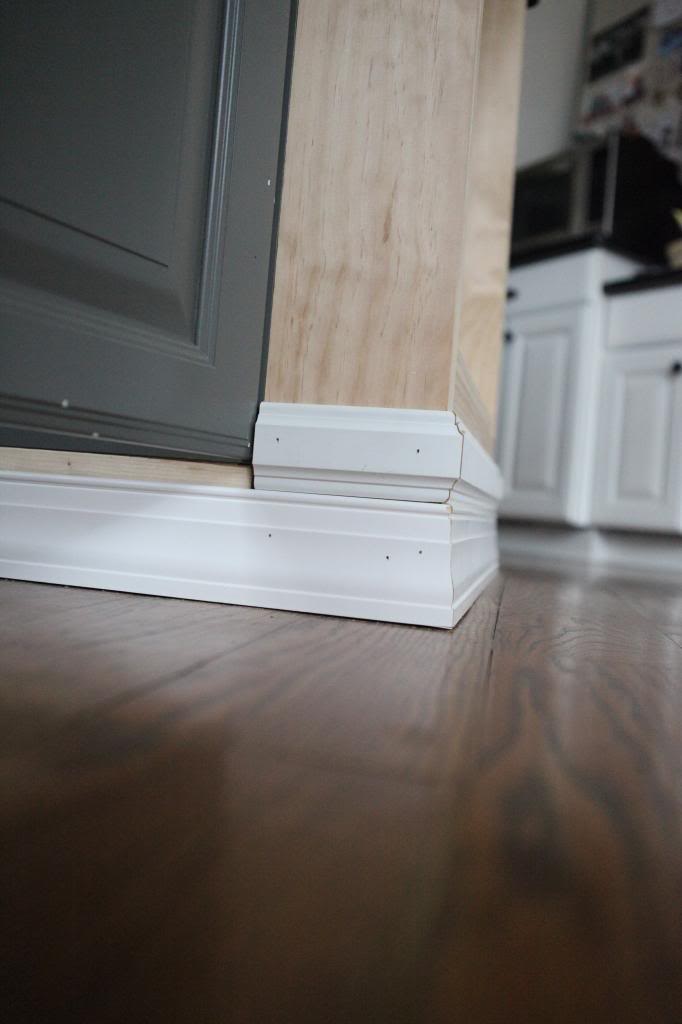
WHEW! Now it’s time for wood filler, sanding and painting! Sorry about the WAY too many photos but I know that a lot of you will want to build out your own island…and pictures speak a million words. Hey, it’s a lot better than me saying “attach the wood to the wood above the other wood”, right?!
Update : Looking for more info on something you see in our house? We have a Shop the Bower House page with paint colors and links to accessories, furniture and decor!

Looking forward to seeing the island finished. I’m taking notes as I am currently giving my kitchen a minor update and I’ve been back and forth about whether or not to paint the island (wait, peninsula?) a darker colour. I think for sure I’m going to put some panelling on it.
look at you, post-baby! you look amazing!
you realize every female will fall in love with a man wearing a baby doing construction?? Nice job… on the island I mean… 😉
Nice job! Can’t wait to see the finished product!
I just had to say I am amazed at all you get done with the kids. Also, you look amazing. I am 21 weeks with #3 and hope I can be looking half as good after my little one arrives. Oh, and on topic – I happen to like the “time capsule bag” – done often or not.
You look great!! Did you get layers in your hair or something? Super cute. 🙂 And I cannot wait to see how this island turns out, i’m so curious!! Also, how fun that Jer rocks his Sprite shirt and John has his Dr. Pepper shirt. Adorbs!
i love it already! and i agree lots of photos is the best way to explain 🙂
Wow, I love your attention to detail! The time capsule was a cute touch aswell. Can’t wait to see the finished product!
Your trim work always amazes me. Nice work! 🙂
You are one hot mama. Love your hair. Your boyfriend is lookin’ good too. Oh, & by the way , the island & the kitchen aren’t half bad either.(haha!)
Love a post with way too many photos. Looks pretty good for a napkin doodle. And I’m totally jealous of your boobs!
Love it! Can’t wait to see it finished and I’m sure the little shelf will be adorable!
I was thinking the same thing. I had my second baby in August and I certainly don’t look that good. Way to go, Katie!
My dream house HAS to have a kitchen island. Love yours!
I’m so excited to see the end result! It looks awesome so far!
This is so cool! My brain would never think to do all that…it would just be like, “Oh, an island, cool” and never see the awesome potential that this is going to turn into! Can’t wait to see your finished product!!!
~Abby =)
Love the new look of the island. So are you going to paint it the same color as the cabinets or a light accent color to keep things airy?
Two important things:
1. You look so amazing post baby that I could slap my mama.
2. I felt like this post needed more innuendos. Especially with the large amount of wood that was used for the project. Better luck next time.
Lots of wood and talk of the boyfriend #iseewhatyoudidthere
And you look great!!!!
a. You look AMAZING!
b. Can’t wait to see the finished product!
c. A baby-wearing daddy, while DIY’ing? You hit the jackpot.
Oh my gosh! Talk about fortuitous timing. I am in the process of adding shelves to the end of my lower cabinets. I have everything ripped out (our contractor added some when we had the kitchen redone and they were awful) but for some reason was totally stumped on how to proceed. Your Jeremy definitely came to the rescue. Thank you so much for the all the photos. I now know, step by step, how I should proceed. Yay! And I agree with Sara above, you look amazing, Skinny-Minny!
Can’t wait to see the finished results. I thought that after all those “how-to” photos there just may be an “after” photo but you just like to keep us on our toes begging for more!
You guys make such a great team!
Haha…I think between the two of them they have all the sodas covered!
xo – kb
The same color as the cabinets! I decided that down the line, I can always paint it again but for the shoot, I wanted the attention where it should be (on that gorgeous tile!)
xo – kb
Shoot. Wood fail.
xo – kb
Just wanted to say that I just got an email about the KeepShot app and was super excited to see your family and their smiling faces.
That’s all.
Thanks for letting us peek into your life through your blog!
Aww I am such a huge fan of MyPublisher! So excited about their app!
xo – kb
You joke about Will building you a chicken coop, but my youngest brother (10) just made my parents a chicken coop 🙂 And now we get the added bonus of growing baby chicks in our basement!
The island looks amazing!
I LOVE the little time capsule idea! So clever. You’re going to love those little shelves! Can’t wait to see the finished product!
Uh, boyfriend working hard with a baby hanging on him? Hottest thing every! You are one lucky lady!!! (Or he is one lucky man to have snatched you up!!)
I love what you’re doing to the island! Can’t wait to see the end!
Holy moly cow — your hot man, wearing your baby, and doing DIY work?
Awesome! I hope you properly thanked him that evening. 😉 * wink, wink*
Ha ha, I was just thinking how some people are going to get upset about the cleavage shot (wish mine looked like that!). The whole ‘wood’ thing totally passed me by. LOL.
Breastfeeding boobs. They go between being pancakes and melons 🙂
xo – kb
There are so many things to comment on…the promise of the island, Jemery wearing Weston doing construction and you looking hot in a construction zone, much less having just had a baby. All of my home projects feel like Taylor swifts love life, I can never make up my mind and then I just complain about it.
Ei! We’ve got the same babybjorn carrier! I love it, pretty pricie but worth every penny.
Anyway, i love the island. Really really really love it. Like I want it in my kitchen right away. Even do it’s not finish, i wouldn’t mind!
You know what would be fun? If you do some planking on it in the reveal post. I know planking it’s soooo last decade but still very funny.
You are blessed with a talented and very patient husband!!
This is so awesome. Our kitchen doesnt currently have an island so we have been looking at thrift shops to purchase one and then dress it up of course. I could have never thought of this but with all of these nice pictures it has become doable!
I was thinking the exact same thing! Katie you look AWESOME!!! So pretty!! That picture of Jeremy wearing Weston kills me!! Not to mention how adorable he looks in that pic of him in the shopping cart! You have a beautiful family!
YOU. LOOK. AMAZING.
Seriously, did you just have a baby?
That island is looking pretty sweet too.
I love the kitchen changes BUT I really love the instagram shot of Weston in the dump truck he is just too cute for words. Is he always so happy?
Can’t wait to see the finished product. I need to beef up my kitchen island too. Katie, you look amazing!
I’m liking where this is going! Can’t wait to see the end product! Quick question about your air compressor – is it loud? We just used ours for the first time over the weekend and it’s loud as all get out! BUT – holy hell, I’ll never do another project without it and my new favorite tool – my nail gun! 🙂
It’s going to look amazing! And I love that Jeremy was wearing the baby while working. I used to to that while my babies were small, although I did a back carry.
This post was a bit much for someone who hasn’t had their coffee yet [me]. My brain was all like “they did whaaa?”
But I was able to comprehend the fact that I LOVE that Jeremy was diy-ing with baby in tow. Women everywhere dropped what they were doing and stared… And that you look fantastic. Seriously. Take it down a notch so we don’t all feel bad, eh?
That looks really good – great idea with building it out and then adding that bulky trim to make it look like ‘furniture’!
Is the outlet cover on the end of the islad crooked (in the photo of you adding the hidden letter)? Or are my eyes just wonky from the beauty (you look great post baby#2).
Look at how fit you look!! Way to go Katie!
The island is going to look so much better. It would be awesome if I had a bookshelf in our kitchen. Your directions to Jeremy sound a lot like how I would instruct my husband. Nothing technical… Just tryin to describe the picture in my head.
Probably a little crooked…I never noticed it before. I’ll go check 🙂
xo – kb
Yes. Unless he’s tired, hungry or sporting a dirty diaper. He was CONSTANTLY happy but as of late, I think he’s gotten a smidge less easy going.
xo – kb
Oh yeah. They are all loud I think 🙂
xo – kb
Can’t wait to see the finished product…makes me want to do something with my peninsula as I hate the flat end but so not ready to tackle painting the cabinets (they are only 3 years old and I don’t hate the color of them…yet ;P ) and not sure if I could match the stain. You’ve got my wheels a turning though..
I’m not the biggest fan of the Bjorn – I’d rather have him in a wrap but Jer loves it! Maybe I should have Jer plank on it 🙂
xo – kb
Ditto the other commenters who said you look fantastic!
Can’t wait to see how the whole island thing comes together with paint and whatnot 🙂
…but you totally nailed it (grin) with the T-Swift comment. I snort laughed.
I thought your kitchen was gorgeous before all the remodeling … but now … uhmuhguh, it’s a gangsta’s paradise. Can’t wait to see the finished island!!!
I thought the same! You look great. And holy mommy boobies! haha! Ok, I might have crossed the line with that last part.
Ha! So glad someone else posted this! I’m totally jealous, too! Mine are so deflated after 2 babies! … Time to try for a 3rd! HA!
I cannot wait to see the finished product! And YES, i too was thinking the SAAAAME thing! You look DAMN good for a momma who just had a baby! kudos! I wish i do the same after my #3 comes 😉
I can’t wait to see this finished! Your kitchen is looking so fresh and beautiful. I have to admit- I totally kicked myself when I read this though. We recently built a wall for our new fireplace in the living room and enclosed it, (http://oneprojectatatime.blogspot.com/2013/03/now-thats-fire.html) and I completely forgot to put a note inside! (Hits self on head) There was this huge opening that totally makes sense for it, and I just missed the boat. And here I was feeling so good about our progress. 🙂
I was thinking the same thing! Katie you look AMAZING!
Wow, Katie, it’s really looking great in that kitchen! What a great idea for the island. I love the idea of making it look like furniture! Can’t wait to see the finished project!
Girl, you’re a hot mama! Literally. 🙂
Wow, the island is already looking SO much better! Great job! I always enjoy posts about the things you do together, and thanks to your recent post I know how your motivation techniques 😉
And that picture of DIYing man with baby strapped to his chest has to be the sexiest thing I’ve seen in ages. Now excuse me please while I go calm my ovaries down.
I have kitchen envy!! The island looks great!
Hiya, I know this is totally unrelated but where did your 3d star project go? Was about to try it but I can’t find it anymore! x
First of all, you look fabulous! Second, by the end of the post, I could really see where this is going and imagine what it will look like once it’s finished. I love it. It’s amazing to me how you can visualize these improvements to your house…I can’t do it! But following along with you helps. Thanks for sharing – and I definitely needed all of the pictures!
I have to ask, what do you plan to put on those shelves that will survive two toddler boys? Seems the low-down stuff in my house is attacked, thrown, rearranged, etc on a daily basis!
No wonder you can bribe/coerse Jeremy into doing jobs, look at that photo of you and the twins! ; ) You look great post baby and the island is gonna turn out amazing! looks great already
Omg you are the worst with the cliff hangers!!! And by “the worst” I mean “the best”! Of course, you did say ‘part 1’ in the title, suggesting there would be more parts to come. I can’t wait to see how this turns out.
Two thumbs up for the gorgeous island and looking great post baby! Congrats on the baby wearing, too. Your boyfriend should stick to the wrap, though. The Bjorn is not at all ergonomic for little ones because they are literally hanging by their genitals 🙁 Few people know this, though, so spread the word! Wraps, on the other hand, are a fantastic choice when properly tied, as is the Ergobaby (often more popular with men because of the easy backpack-style straps and snaps).
Amazing!! I am slooowwwwllllyyy learning to think my projects through to get more of the details ironed out- it really frustrates my husband when I’m wishy-washy in the middle of a project!
Anyways~I know lots of other will probably comment- but HOLY BOOBS BATMAN! You look amazing! I’m sure your husband was smirking the whole time he took that pic (if he did… maybe you’ve trained Will already?) “Katie- just bend this way- no, a little more to the left… now downa little… JUUUUSSSTT right!” hahahaha My hubby would 😉
Can’t wait to see the finished product- loving it!
So much better! We also have an overly ornate kitchen right now that is driving my batty. Love how this is looking – beautiful kitchen!
We asked our pediatrician about it and even though there is a lot of rumors about it being bad, she said that she has yet to find a valid study that proves the Bjorn is bad for the facing out baby. She did say that certain designs have been proven to be hard on mommy…that’s why I go with the wrap. If I could get Jer to go with the wrap I would but he actually really likes the Bjorn and is comfortable in it. Oh and just to be clear – he wears Weston for maybe ten to twenty minutes a couple times a week…so it’s very infrequent. He tried the Ergobaby but said that it was just too hot and complicated. I’m sure that different carriers are like different jeans…they are gonna fit different people differently.
xo – kb
Here you go!
https://www.bowerpowerblog.com/2013/02/object-of-affection-geometri-ball/
xo – kb
Yes he did take that photo…and yes, when I posted it, he said “man I am good!”
I guess I deserve to have the breastfeeding boobs hanging out there when his booty is all over the place 🙂
xo – kb
I haven’t looked at your blog in a couple of weeks (long-time reader, infrequent–if ever–commenter) but Katie, you do not look like you just had a baby. Go you!
I love the direction your island is headed. I can tell it’s going to be amazing. And, cheesy or not, I think it’s awesome that you left a little time capsule. 🙂
You are looking SO fabulous! Fill us in on your post baby weight loss secrets?!
Oh gosh – SPANX! And breastfeeding. I am not where I need to be yet (still 15 more to go till my prepregnancy weight and 30 till I’m my ideal weight!)
xo – kb
Wow – all around! I am seriously impressed and looking forward to seeing the finished project! Innocent question – are they island drawer crooked (or just the door fronts)? I might be seeing something not there, but if they are do you have plans to fix those or not too noticeable?
Haha..yup. They are. No worries, we fixed it!
xo – kb
Oh my gosh you guys, it looks SO good already!! I can’t wait to see it all done!! 🙂
I love this post 🙂 Seriously, through the whole thing I was like, what…the heck…are they doing?! And, of course, at the end I loved it! Great job you guys! I’m glad Will had a front row seat to the action, too!
the pictures are really helpful. this is a very useful post 🙂
What color are your blue kitchen walls (when the cabinets were Oak color)?
The original color is unknown but if you click on the house colors post listed in the sidebar, I tried to find matches.
xo – kb