In the words of the Hanson, mmmbopdopoohdoooop. That is what I had to sing during this project…the project known as THE SCARIEST THING EVER. For some reason, beatboxing usually calms me down during stressful times…but this was beyond stress…this was fear…black and raw and bottomless fear that can only come from risking true love. And instead of terrible beatboxing (which usually makes me seem way cooler than I actually am), my mouth produced sounds that are only found on the cd of the prepubescent boys with Farrah hair…and I’m not talking Jonas brothers. You understand the significance of my pain now.
It all started when we were planning to install the kitchen shelves. It meant drilling into my beautiful tile backsplash. In the words of Gollum…my precious. Even during the planning stage, I was sweating through my spanx. You already know how we finished the shelves (with that lovely subtle whitewash effect) but this post is about how we attached them to the wall.
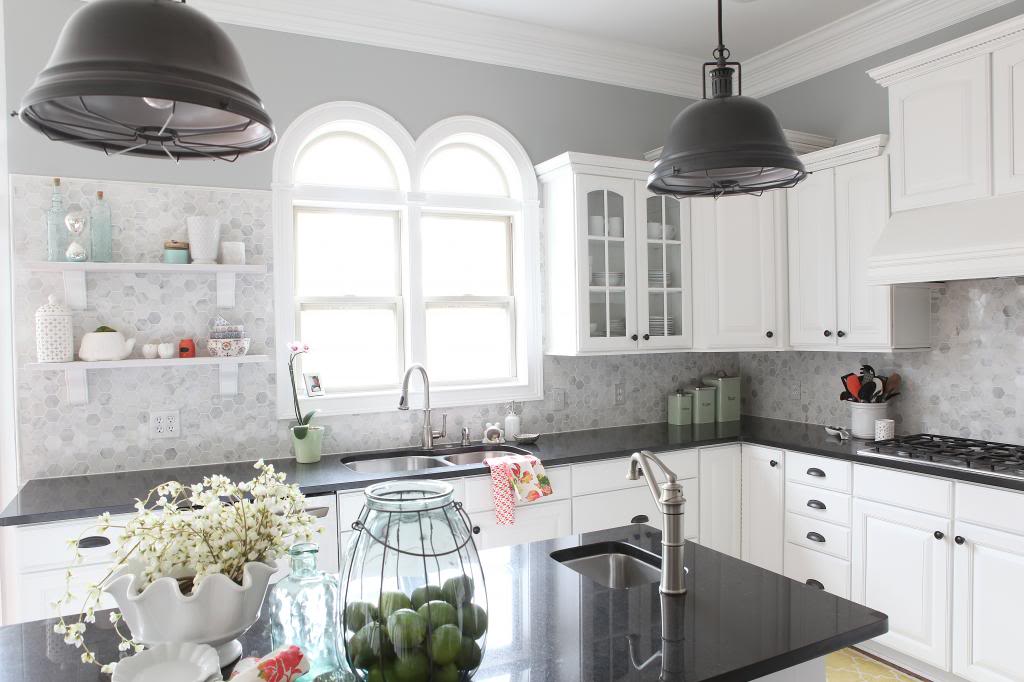
The first thing we did was locate where we wanted the shelves. I wanted the bottom of the bottom shelf to align with the bottom of the cabinet flanking the kitchen window…I just eyeballed it….so that made that easy. We also wanted the corbels center to be about five to six inches from the edge of the board. We marked both things with tape. We also marked the studs…just to be sure that we weren’t gonna hit something unexpectedly.
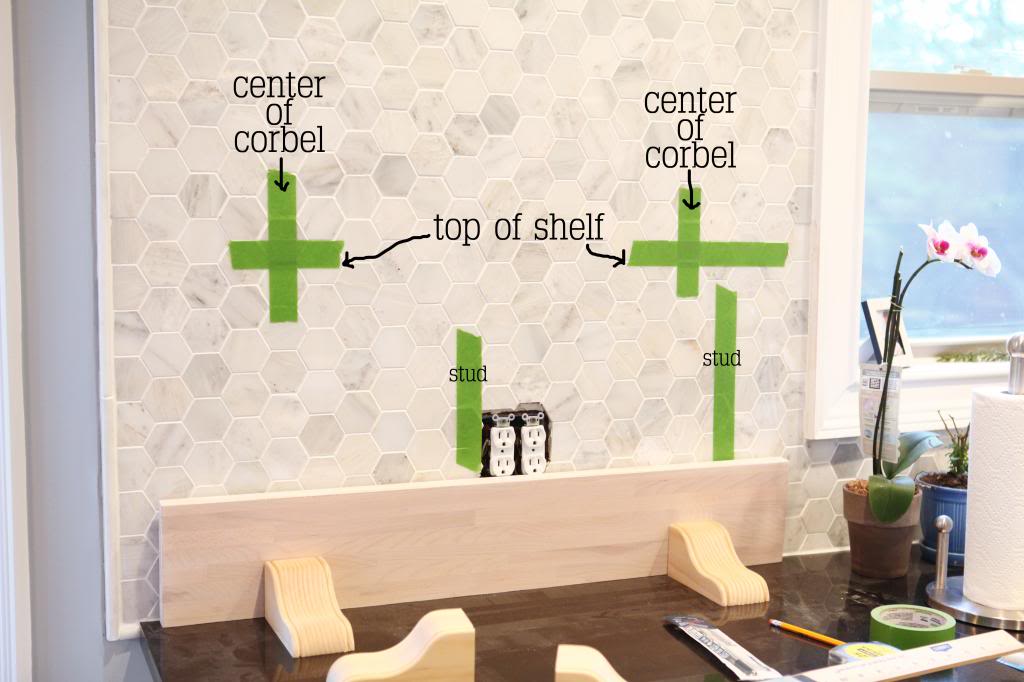
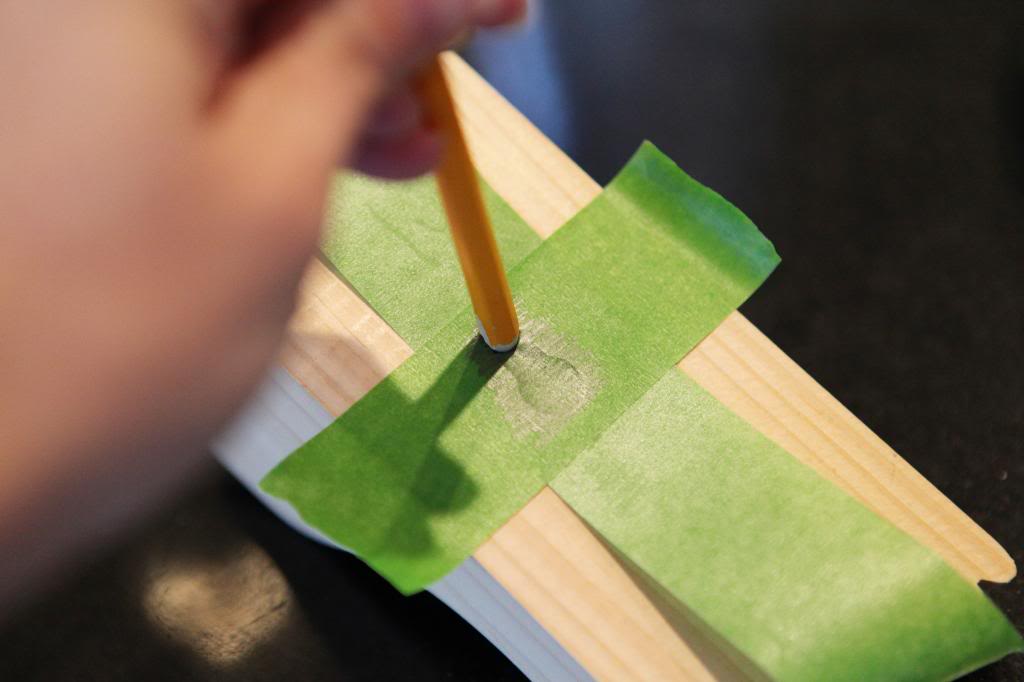
Here’s my method for sliding brackets (like the ones that are on the backs of the corbels. I put one long piece of tape directly down the center sticky side up. Then I put a piece of Frog Tape sticky side down right over the location of the sliding bracket.
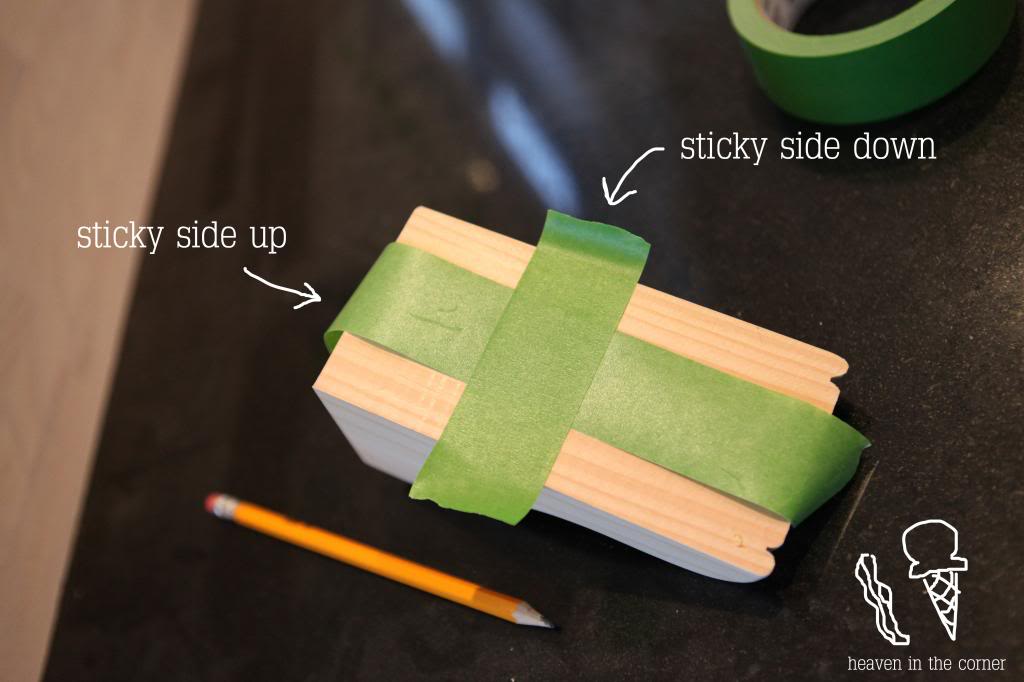
Using a pencil, just rub the tip over the bracket holes so that you can see the exact location of the bracket on the tape.
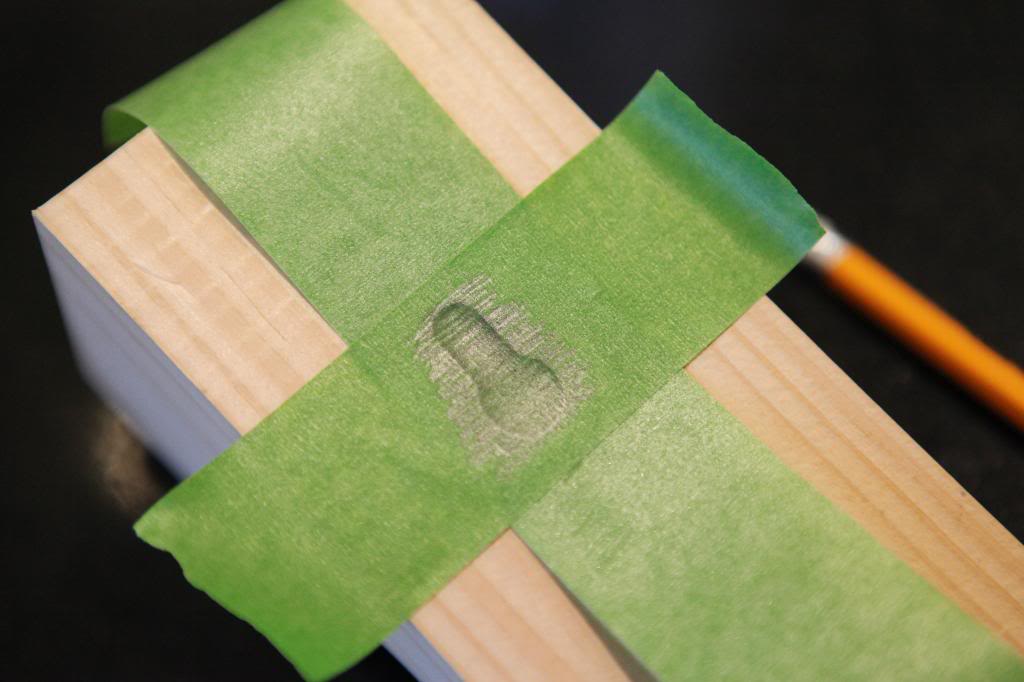
Then stuff that pencil in the hole like a…okay…that joke was too much for a public blog. nevermind. let’s just say the words ‘conjugal visit’ was included.
The next thing you are gonna do is line up the vertical tape on the wall with the vertical tape on your corbel and firmly press the wood into place.
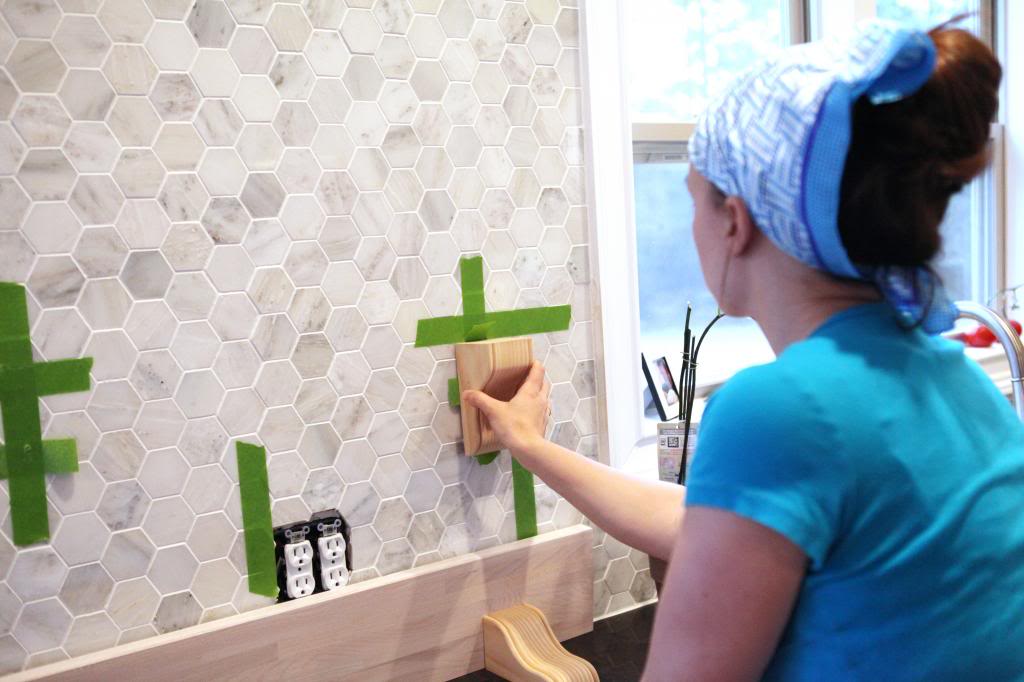
The tape of the corbel should stick to the wall…marking your future holes EXACTLY.
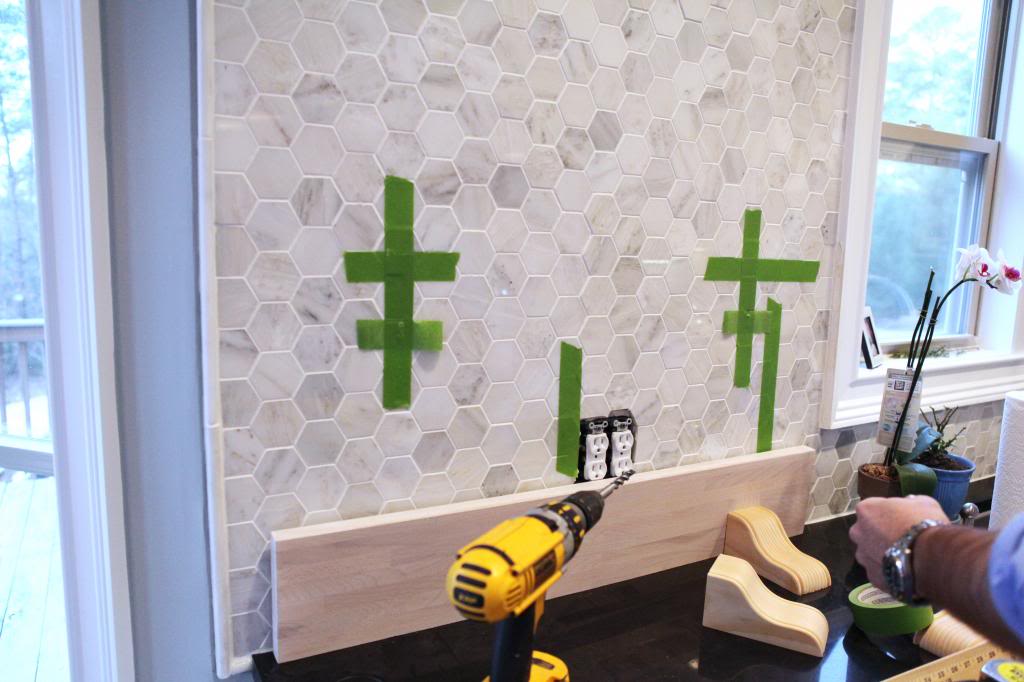
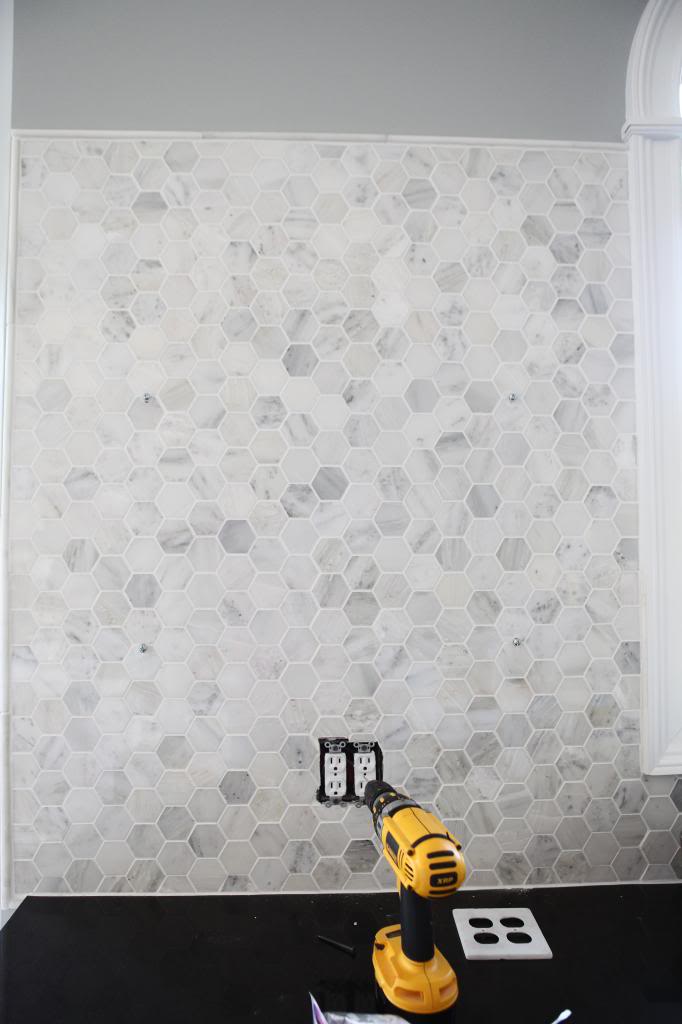
We double checked the levelness and then whipped out this scary dude. Yes, that is our drill equipped with a masonry bit. EEEK! MMMBOP!
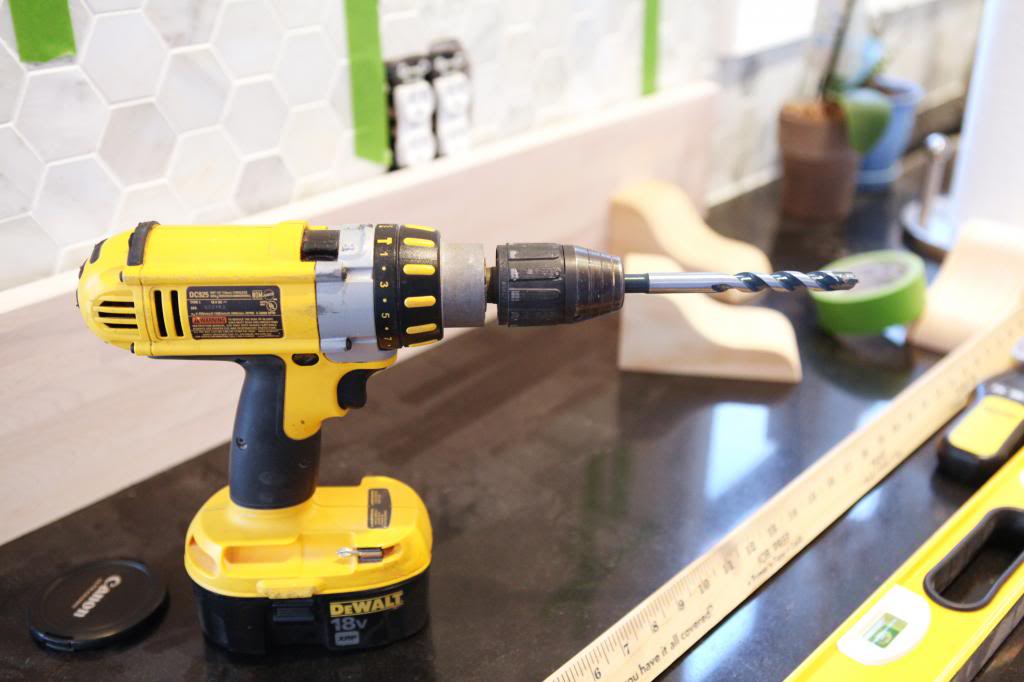
I barely could take this photo. Seriously.
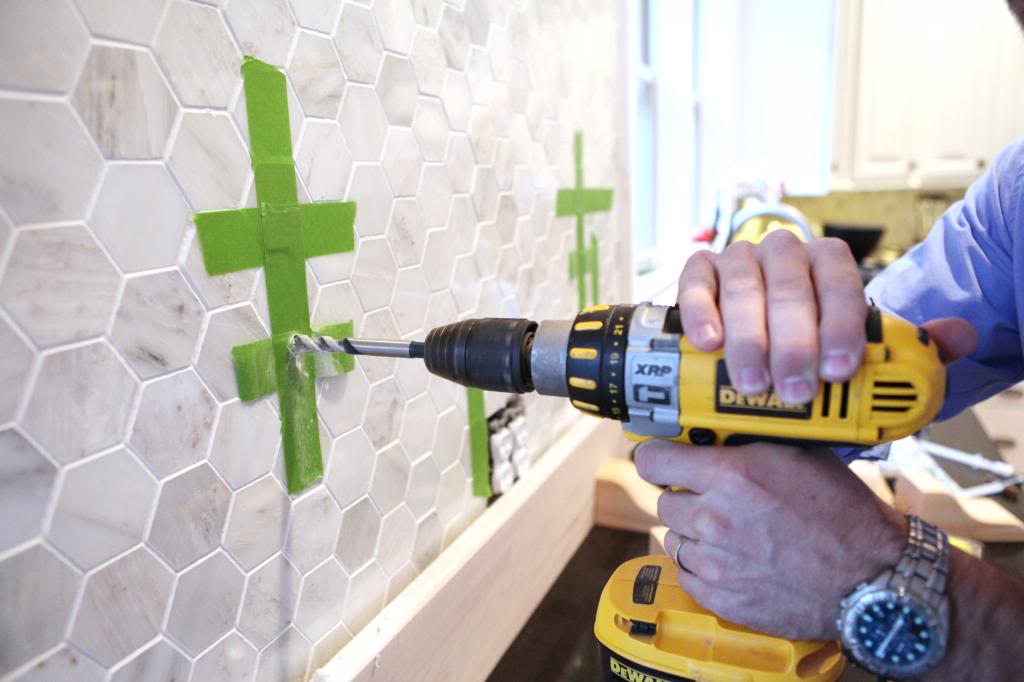
It was like a cervical exam…you are just thankful when it is over.
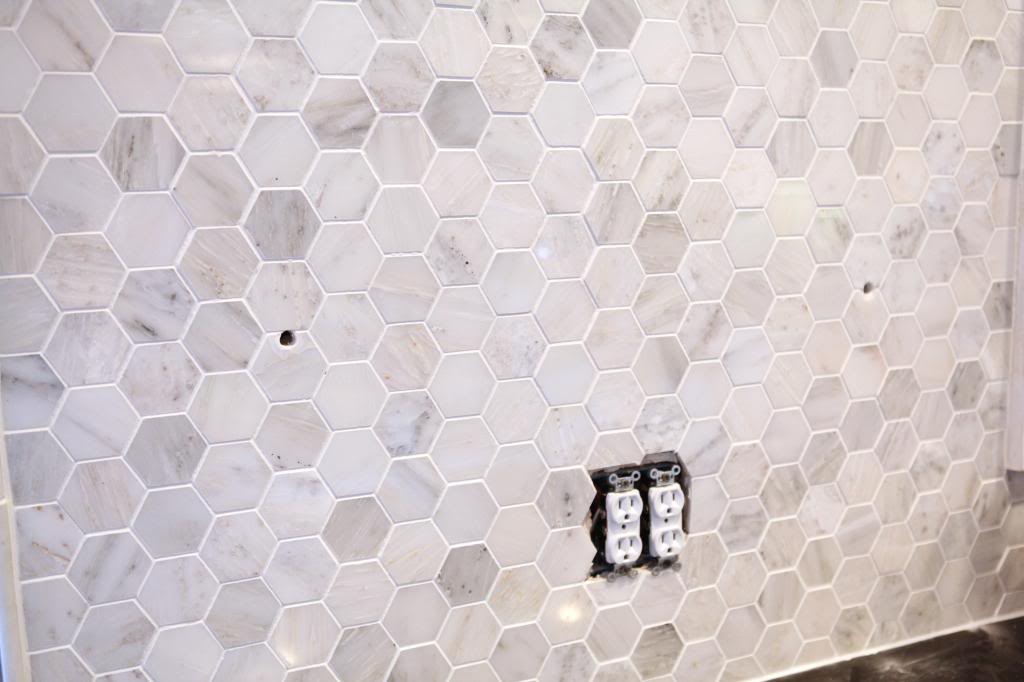
Okay. Now if you are a long time reader you know that my darling boyfriend is ridiculously obsessed with securing things to the wall. It’s a sickness. Corkboards bother him because all that paper is only secured with a thumbtack and everyone knows that is really not secure at all. He wants everything to hold his weight. I’m not kidding. One time I got reemed because I installed a toilet paper holder with those little plastic anchors in the wall (the ones THAT CAME WITH THE TOILET PAPER HOLDER!)…apparently that is a danger to mankind. So now we only use these heavy duty toggle bolts.
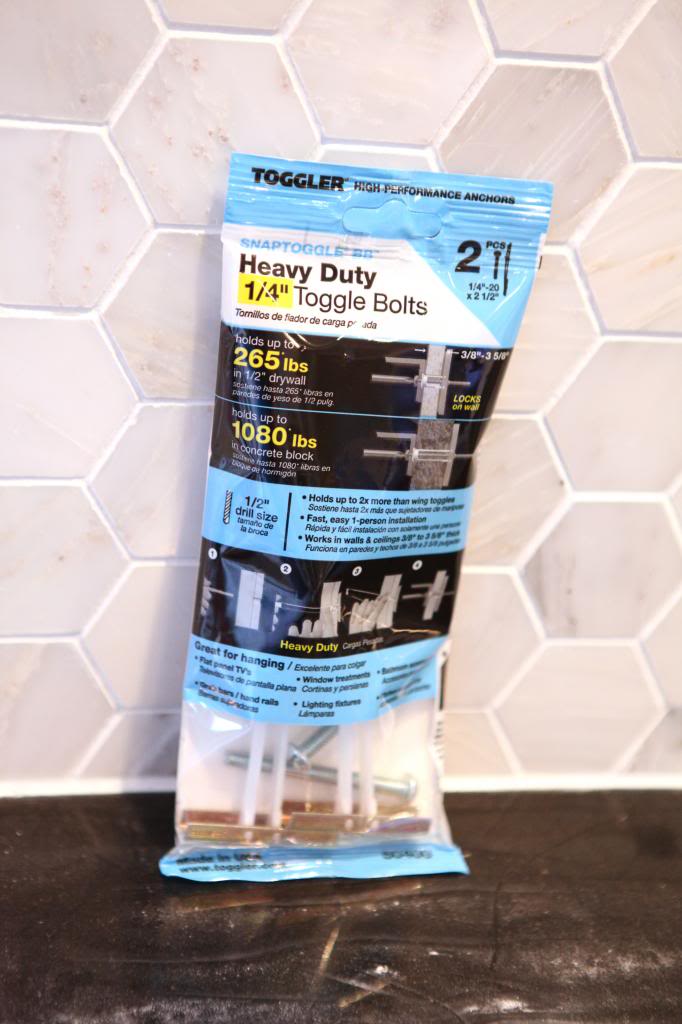
Basically you slide this contraption into the hole – metal side first. The metal thing is flat because those plastic sticks are uneven upon insertion.
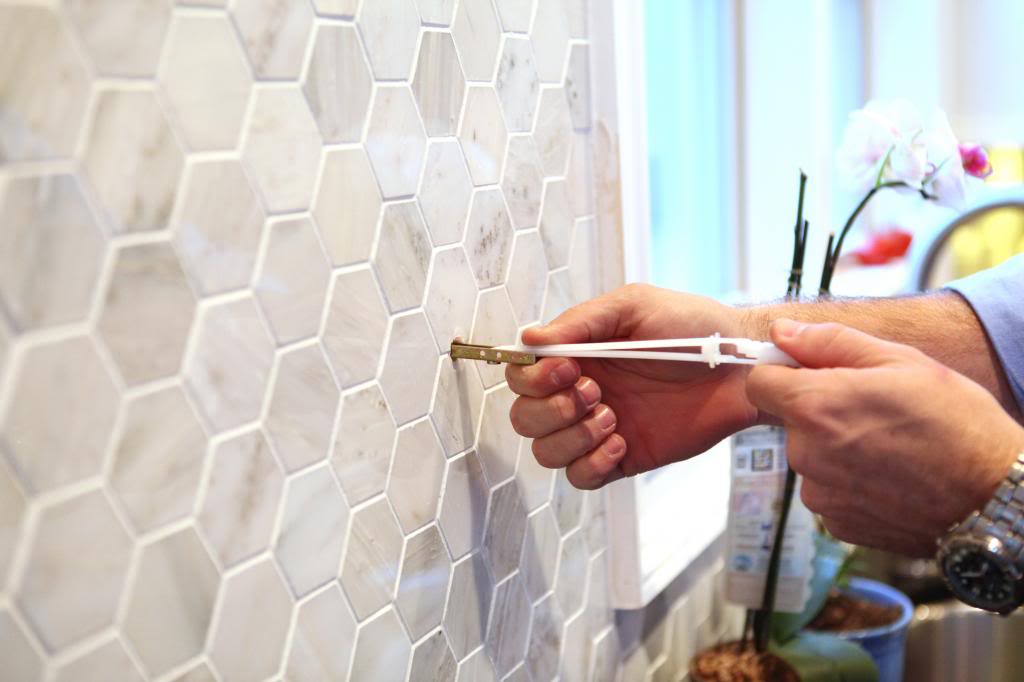
Then once the metal is all the way in the hole, you slide the plastic sticks till they are even and it makes the metal piece parallel with the wall. Then you slide the plastic ring all the way down to the hole.
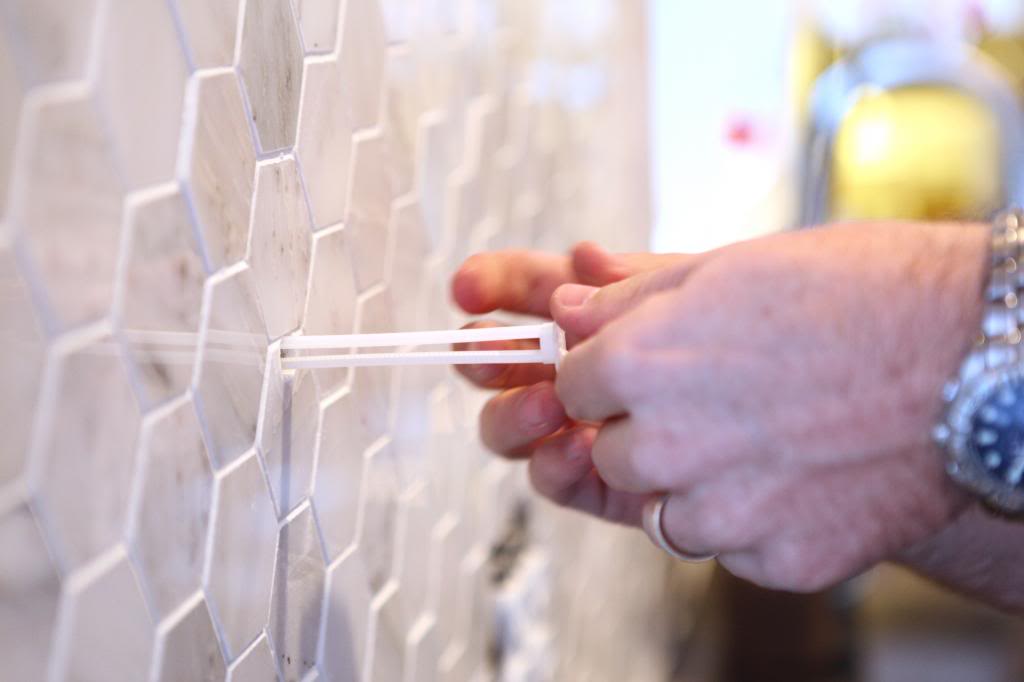
You push the ring into the hole and pull the plastic sticks firmly so that the wall is sandwiched between the metal piece and the plastic ring. This is the “locking” of the bolt.
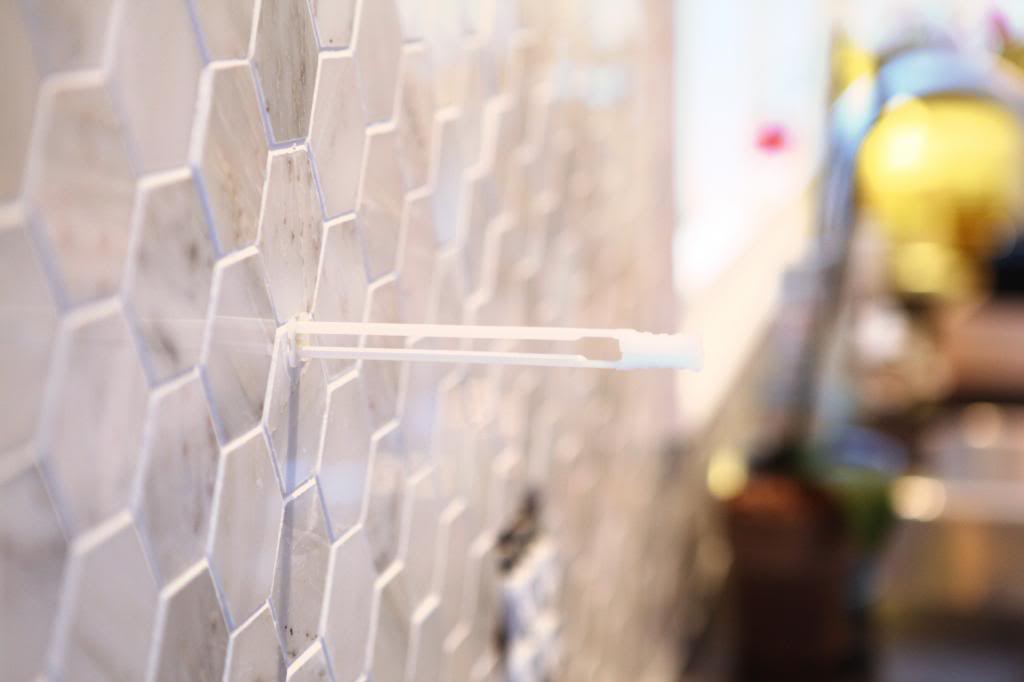
Then you bend the plastic sticks till they snap off…leaving you with one anchor that could hold a grown man.
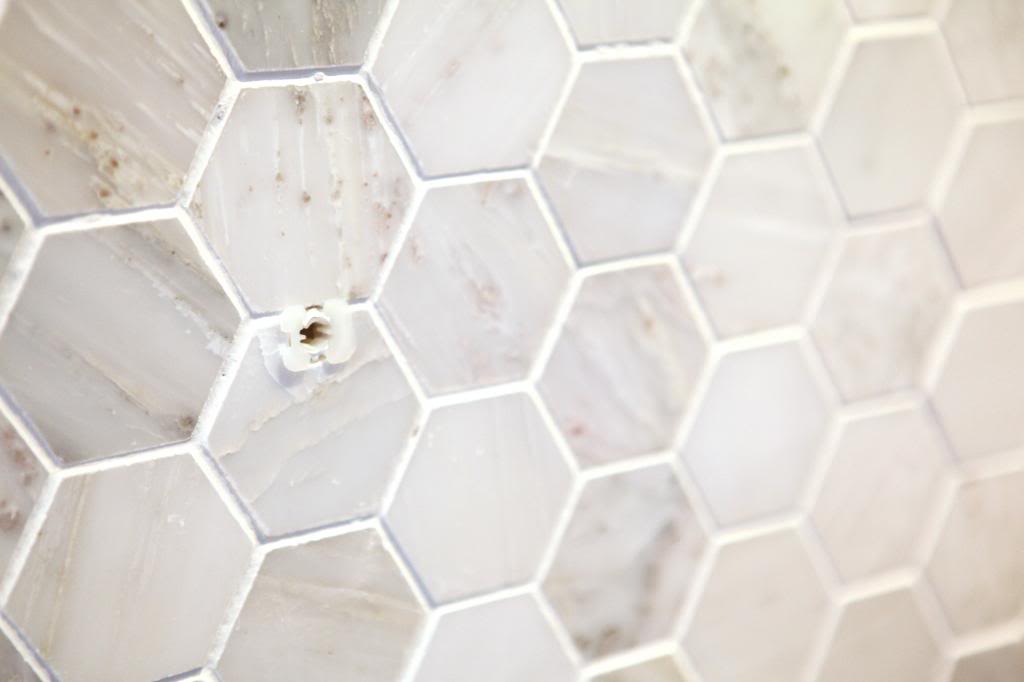
Screw like normal. (that’s what he said…never)
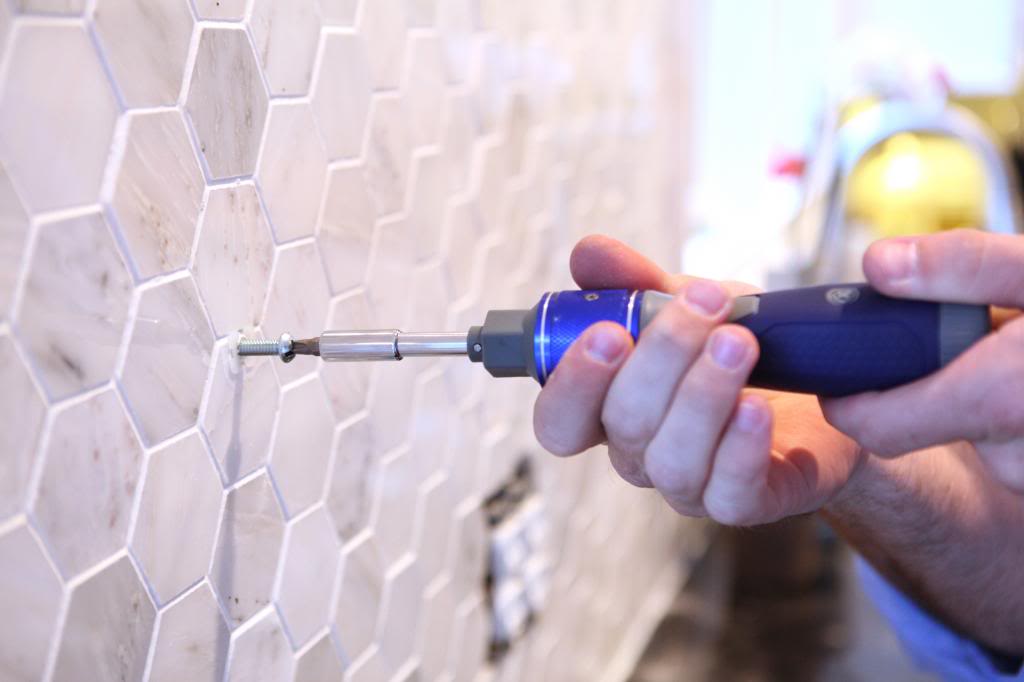
We slid our corbels on and badabingbadaboom…
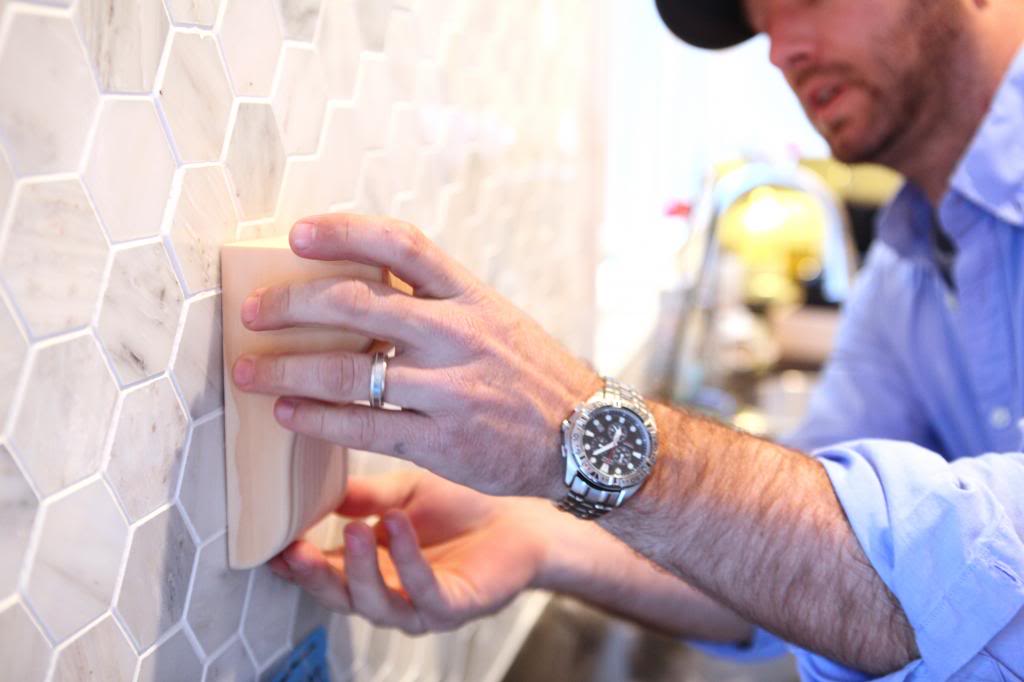
double check for levelness….SUCCESS!
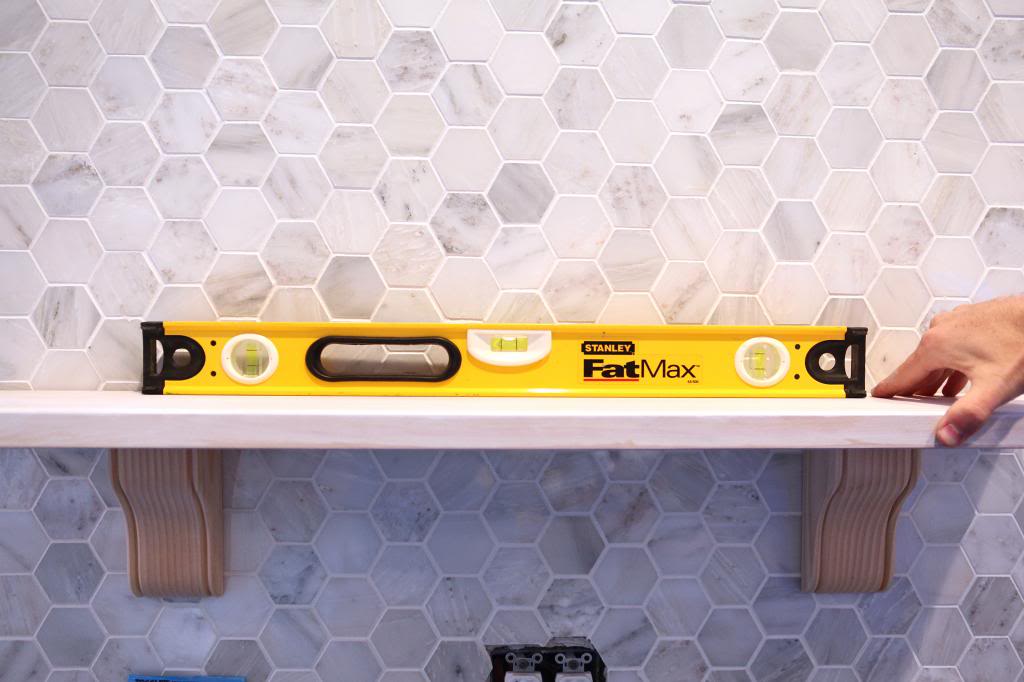
The upper shelves were decided upon so that the space above the lower and upper shelf would be the same.
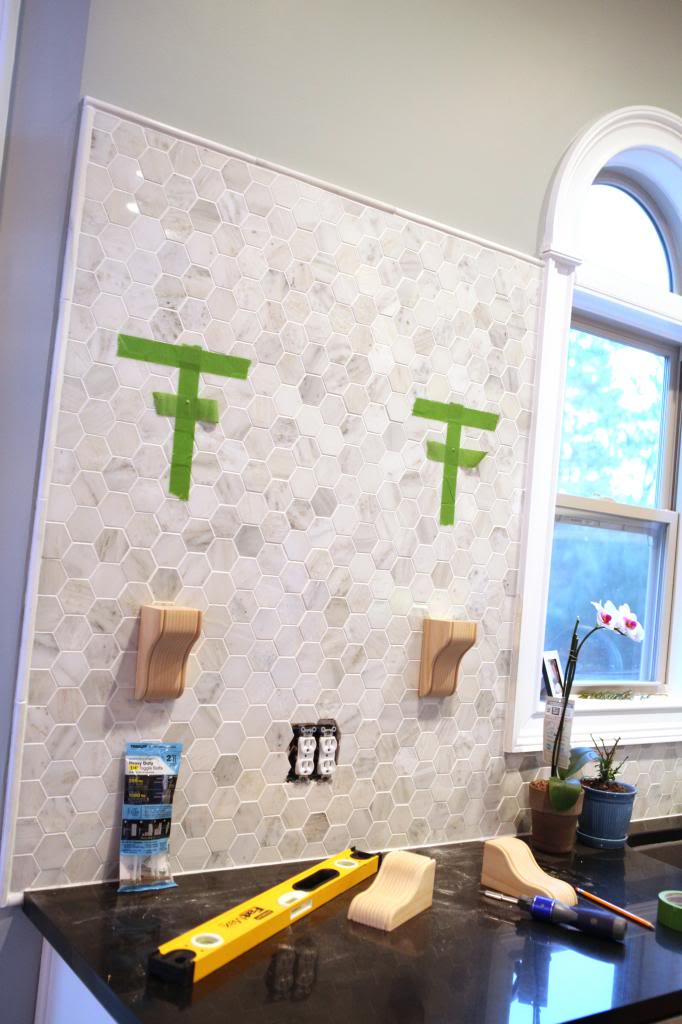
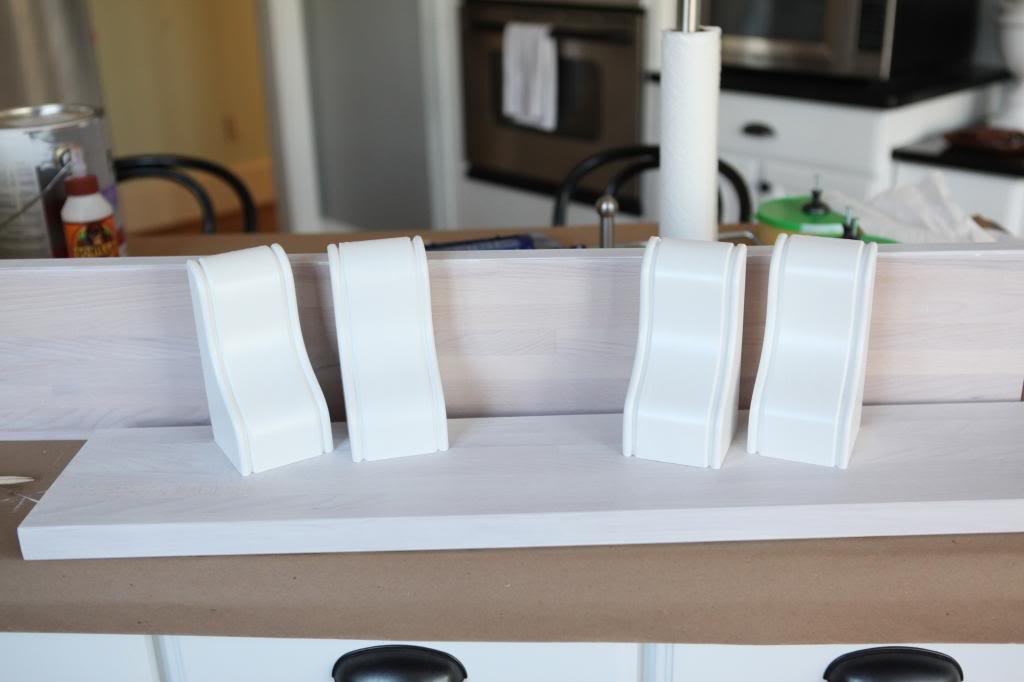
After we had the toggle bolts in place (and Jeremy tested them for sturdiness. This includes violently shaking them to see if they move. Not kidding.) we went to work painting the corbels and whitewashing the shelves. You can see the difference in finish here…
The wall was already clean and had the screws in place. It’s important that the screws be just long enough to hold the corbels sturdy without anything extra.
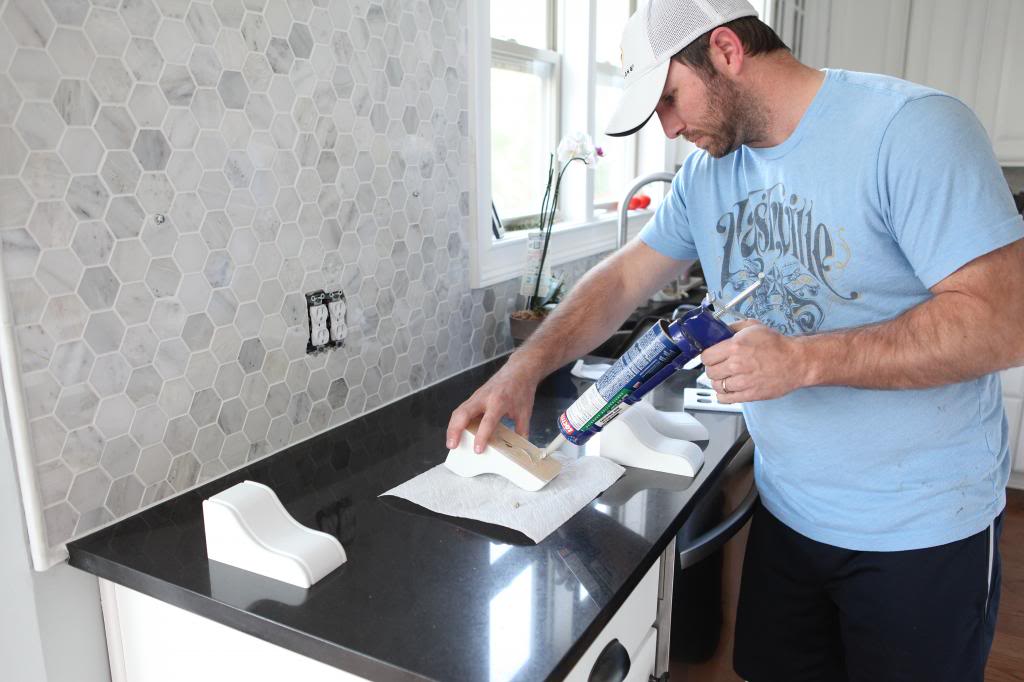
Of course, my sturdy-lovin’ husband could not just let those 265lb weight limit screws do all the work. He added ‘insurance’ by putting some construction adhesive on the backs of each corbel too.
To ensure that each shelf stayed in place, he then drove a screw through the top of the shelf and into the corbels. Sorry…don’t have a picture of this one. My Hanson days were over and I was probably nursing the baby or something important like that. I added a little white caulk over each screw head though…just to hide it if my plethora of shelf junk didn’t do the job.
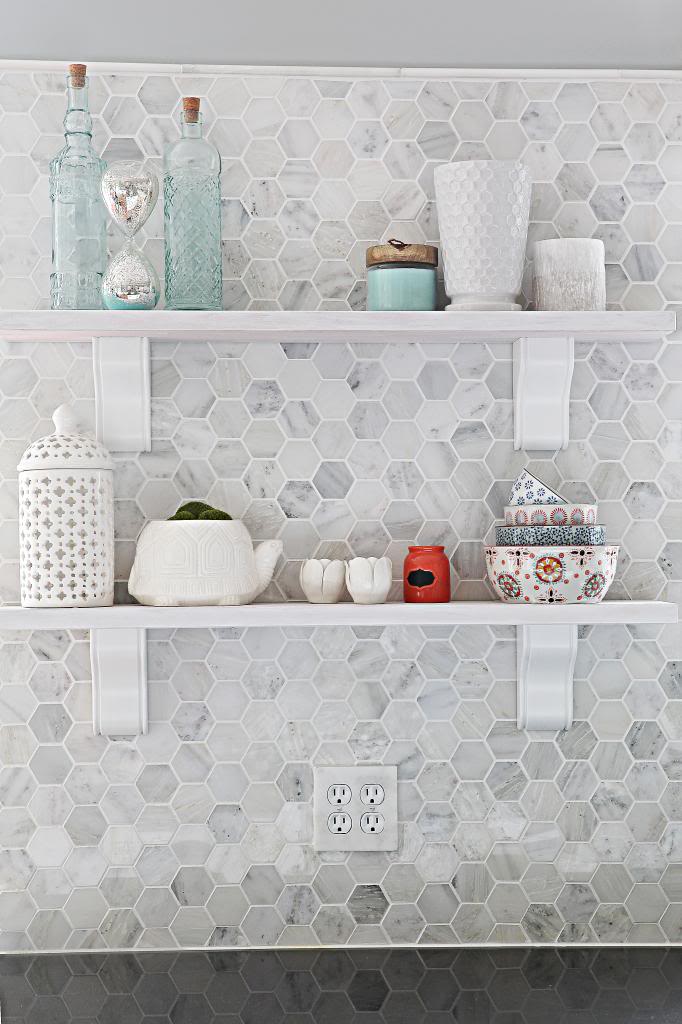
So there you have it…shelf installation…a minor breakdown about potentially screwing up the tile…and a song reference that lives in my secret hall of shame with my memorization of Vanilla Ice, Baby Got Back and Tiffany. Now it’s ready for this post to mmmstop. (sorry – had to!)
This is a sponsored post brought to you by FrogTape. The opinions are completely my own based on my experience.
BAAHAHAHAHAHAHAHA I AM PEEING!
EEK MMMBOP!
the whole time i was reading how the anchors were installed i kept thinking “cervical exam” HAHAHAHAHAH!
DANG! That is a nifty little trick for finding your holes!
and an even BIGGER DANG for that styling, wanna come over? My whole house needs the Bower touch 🙂
Heaven in the corner? 🙂 nice touch. Looks like someone is having a little fun with photoshop.
Alright – I must know. Is there a story behind the “heaven in the corner” in the first tape pic? Love the bacon and ice cream!
Secondly – still LOVE the shelves. And I totally get freaking out over drilling in the pretty tile. I have heart palpitations just thinking about it!
Came out looking so good! You pushed through your fear and it worked! Nice job…
I LOL’d at work when I saw the “heaven in the corner” drawing Awesome!
I LOVE the pendant lights over your island – where are they from?
Thanks for the tip! I hate hanging pictures/shleves, so this will be helpful in the future.
P.S. I love how you accessorized your shelves. 🙂
http://happinessiscreating.com/
The shelves look sooo great!
And now I have Hanson in my head haha
Jenny
http://www.simcoestreet.blogspot.ca
Terrifying (the drilling part) but so worth it! These shelves look gorgeous.
Sarah
The shelving looks awesome!!! LOVE, love, LOVE your revamped kitchen!!! It inspires me to do some work to our little kitchen. Thanks for sharing!!!
Love the “surprise” in the bottom corner of the 3rd pick. Makes for happy Friday!
I had a secret bit of panic when you showed that drill bit. Not the beautiful tile! Nooooo. Glad everything worked out! High drama in home improvement.
It looks really great! And how funny. I posted about attaching a flush mount cubby today. Love your method!
That is SUCH a great tip. You may have just changed my life. You don’t know how many times we’ve almost divorced in the process of hanging shelves from target that have two of those keyhole cutouts on the back. THANK YOU.
OMG! I just laughed so loud about the cervical exam comment. I’m currently 40 weeks and 3 days pregnant and good gravy those are so much more uncomfortable now!
The shelves look great! Don’t feel too bad about Hanson, Tiffany or Vanilla Ice, all of us fabulous 30-somethings jammed to them!
hahaha “sweating through my spanx” I LOVE it. You are the best, so funny!
The shelves are amazing, I love the way you styled them too. Basically, I just love your new kitchen.
The shelves look great, KB!
And my husband is (almost) exactly the same way about securing things to the wall. We once installed an entryway table, and he secured that bad boy to the wall with hurricane straps for mobile homes. I am not kidding. Now he tells everyone who admires it how sturdy it is. “You could sit on it!” Um, great?
That tape/hole measuring thingy you did…one word : genius!
I’m so going to use that every time I want to measure where I need a nail, hanger, screw, whatever! You’re totally fabulous, despite all those song references but not a mention of New Kids On The Block (you could’ve used You Got The Right Stuff for the finale!) 😉
Seriously love it! And those minty canisters wouldn’t be from Pier 1 would they? I saw some just like them yesterday & they spoke to me(!) but I need to get a clearer vision of my kitchen before I buy anything else for it!
Dude I LOVE your kitchen. Not only do you have great taste, you’re handy as all getup… you so impressive 🙂
I hope this isn’t obnoxious, but I would like to request a photo of the kitchen (like from the same angle as the first photo in this post) with the light balanced so it’s not blown out at the window, so we can get a better idea of how it looks in person 🙂 Thanks for considering, KB! xo
Beautiful, Katie!! I love the whitewashed shelves.
Totally, well almost, unrelated — WHERE DID YOU GET THOSE BOTTLES? I love the color of the glass… Like LUV. 🙂
Have a great weekend!
you made hanging shelves completely HYSTERICAL.
#yourpostsmakemepeemypants
Way too much fun 🙂
xo – kb
Heres the post all about them 🙂
xo – kb
Learned so much from this post! I need to get some of the toggler inserts. I’m also a freak about hanging stuff. Can’t wait to try these…off to find something to hang.
Ok, I was literally holding my breath during the drilling picture, lol. I’m so glad it all worked out perfectly, and the shelves look gorgeous! Have a wonderful weekend, Bowers!
~Abby =)
Man – that looks so great! I really like how bright, open and airy your kitchen is looking after all the work you have done. It’s definitely coming along!
I am so envious that I don’t have space in my tiny condo kitchen for shelves like yours. They turned out just fabulous. Oh, and I have the same hour glasss!
I love everything about your kitchen! You guys have done a great job!
Where did you get that glass container holding limes on your counter? I love that!
Congrats 0n having the courage to drill through the tile. Two years after we finished my bathroom, I still haven’t installed my beautiful Koehler soap dish because I’m scared of drilling through my marble…lol..
Maude
Well….now I know we were in fact separated at birth . Anyone who can describe a pencil going onto some painters tape as a congical “visit” …. Is my sister-from-anotha-motha…just sayin. I appalled you for remaining calm with the camera ….that would have been a challenge for sure.
Usually I save all my Bower Power/YHL blog reading for the true weekend (not Friday night), but the 2nd I saw this post I had to read it in it’s entirety because HANSON IS MY FAVORITE BAND OF ALL TIME (LOUD NOISES!).
Seriously Katie. I have seen them over 10 times, including a pilgrammage to their hometown. Tattoo number two will based off artwork from one of their albums. Me & my bff tried to get on MTV Fanatic (as $herdog did w/ Eminem) to meet them.
And as soon as I calmed down from seeing my boys mentioned, I got all nervous on behalf of you, drilling into that “pretty pretty tile”.
I laughed so hard this whole post. My hubby is watching basketball (ugh… March Madness) and he kept giving me weird looks for laughing. This looks amazing and I don’t know if I would have had the guts to drill in to the tile! Well done!
Those shelves/tiles are seriously gorgeous! I truly appreciate your pic by pic of those dang toggle screws. I always see the plastic things in the package and wonder how I can get away without using them all together.
I just found your blog- LOVE IT!
I chuckled when I saw that. Of course Heaven has bacon because it’s Heaven.
Love it!!
I wanted to do this in my kitchen, but dh was against it. His concern was that he couldn’t screw everything directly into a stud (just like you haven’t) and that it wouldn’t hold enough weight. How much weight do you think the shelf might hold?
I have a confession. When you were in the planning phase, I was like “team corbels!”. All the way! Now I think floating shelves would have been better! Gulp.
I loved this post. I have a Hanson tattoo as an ode to my bestie and our days of mmmboping. I should be ashamed of my grown groupie status. But I’m not.
To this day I still have a thing for guys with long blonde hair (don’t tell my husband 😉
God, that’s gorgeous. And I don’t just mean your boyfriend.
Oh, Hanson! Now that will be in my head all day. haha…. I have the same fears, when it comes to something so permanent, I get so scared I’m going to wreck it. Love those toggles!
Those whitewash shelves look stunning against the tile. I really LOVE the way your kitchen is coming along.
It holds a lot…I don’t know if it actually holds 265 lbs like the package says but it really is firm…much firmer than any other anchor we’ve used.
xo – kb
Where, for the Love of God, where did you find that dynomite glass jug holding those limes? I’m in love! And I’m an Atlanta girl, so imhoping I can snag one too! Lurve the kitchen. Lucre your blog. Duh.
How awesome are my typos? #fatfingersmeetiphone
Your corbels can call me. Seriously, your open shelves are my inspiration (meaning I’m totally copying them…like down to the white washing) when we redo our kitchen. Your kitchen is stunning.
Katie, just looking for instructions on the post where you made the geometric shape out of straws but I now cant find it.. server error? I was obsessed, and totally wanted to make my own!
Here you go Katie!
https://www.bowerpowerblog.com/2013/02/object-of-affection-geometri-ball/
xo – kb
Pier 1…It’s stunning, huh?!
xo – kb
That looks great! xo Kristin
So I hate to admit it but I’m with Jeremy on over-sturdifying things that hang from my walls. Blame it on the one too many times I had ginormous frames falling from the wall…esp. the one hanging above my headboard!! I’ve never heard of the toggles though…gonna have to look in to that one…to my husband’s dread! 🙂 Thanks!
I hate to ask this if the answer is somewhere super obvious; but I’ve looked and looked on your blog and can’t find it…What color is your kitchen paint? The gray?
Yummm….bacon and ice cream.
It’s called Metropolitan by Benjamin Moore. Heres the post about it.
xo – kb
Those bowls are to die for. Well all of it is but those bowls especially!!
and uhm….who doesn’t want to burst into a Hanson song everyonce in while?!
The shelves look great! I have slight OCD and need everything to be symmetrical, and the definitely balance out the cupboards on the other side. I just love your kitchen, Katie!
Wow, this is absolutely gorgeous! I’d be so afraid to drill into my backsplash, but you prove it can be done… and done well! Eek, love this!!
Hi Katie! Love reading your blog and stealing your ideas… Can’t wait to do the bedroom curtain wall in our new house in May! Just one thing (it’s possible that it’s my iPad’s fault)- it often seems that the pictures that you’re describing are not the pictures shown. For instance, there are pics of Will helping with a table in this one… Or the newest island one doesn’t show all the right pictures it seems… Just me? Is there an issue?? I just want to make sure I’m not missing out!!! Thanks for sharing with all of us!
Sometimes it is Photobucket. They host my photos and sometimes their servers are weird and deliver the wrong photo for the link. Sorry…I have checked with them and there isn’t anything I can do!
xo – kb
Gorgeous!!! My hubby and I basically have panic attacks at the thought of hanging frames on our walls, so I can’t imagine the fear of drilling into brand new tile backsplash, but it seems the risk was well worth the reward in this case! I love your shelf junk, too! 😉
Heeeeeello Miss Katie. So I have an embarrassing number of corbel + shelf questions.
well, first: love you, love your kitchen, love you blog and your two dollbaby boys, obvi. 🙂
ok, now on to the question-asking. 🙂
I’m looking to put a shelf under where we hand our TV (ala: http://pinterest.com/pin/88875792617855515/)
so i’m wondering, what are the dimensions of your corbels and shelves?
and how much corbel depth (or forward projection) does one need to support a shelf of, say 10″ (the thing has to hold our DVD player, and we need a bit of wiggle room for chords)
(I’m trying to tell from your pics what the depth of your shelves are compared with the depth of the corbels… are they maybe half as deep as the shelf?)
and with the toggle bolt, its seems like you dont drill into the studs, is that right? does mr. boyfriend man think i could do this with plaster? (i should probably just go to a store and read the packaging…but i’m LAZY.. and kind of scared- hanging things on plaster is always an adventure)
last question: the corbels from my inspiration pic are pretty chunky, so do you think i’d need large ones like that to balance out the TV above, or do you think it would it just depend on how i style the shelves? thoughts?
ok, that might be all my Qs for now. thank you so much for letting me bombard you! and tap the depth of your DIY goddessness. 🙂 🙂
I think that in order for it to be best, you’d definitely need to have the shelf at least half supported…so if your shelf is 10″ deep, then your corbel should be at least 5″ deep. Does that make any sense? And yes, with the toggle bolts you do not drill into the stud. If your placement would put your screw into a stud, you should do that! Studs are definitely preferable to any other support. And I definitely think styling can do a lot so the size could be nice but not completely necessary!
xo – kb
Hi Katie
Love your blog
I love the stack of bowls, where are they from?
TJMaxx!
xo – kb
Thanks xx
Love your kitchen! What is the beautiful gray color on your wall?
It’s called Metropolitan. Here is the post all about it.
xo – kb
What did you use to white-wash your shelves? They are lovely.
Here is the post about how I did it.
xo – kb
Hi, I love how you did this it is so awesome!! Can i ask where the hourglass if from?
thanks
It’s from Pier1 🙂
xo – kb
Hi Katie,
Thanks for that 🙂 i see they have them in stock but they won’t ship international and although i have myus.com for postage they will not take any of my credit cards 🙁 I guess i will just have to add it to my wishlist and hope someone sells one on Ebay one day 🙂
hi! we are using your kitchen as inspo on our upcoming remodel (demo starts tomorrow)! We love the idea of the shelves on backsplash – but wondering, did you attach the corbels to the tile first…then the shelf to the corbels? If so, why did you do it that way rather than assembling corbel/shelf and then attaching? Don’t want to screw this up…ha! Thanks!!!
I guess you could technically do it in either order. We did it because corbels with this sort of hanging hardware on the back are hard to push down simultaneously and get a super tight fit so if you get that screw at just the right length, you will want to remove it and doing so with an attached shelf could be tricky.
xo – kb
Gorgeous backsplash! Would you please share where it came from/style/#, anything so I can find it?
The backsplash is 1.5″ hex from The Tile Shop! It is a Carrara marble and a lot of different retailers carry it now 🙂
xo – kb