I know this is gonna burst your bubble.
But our front door:
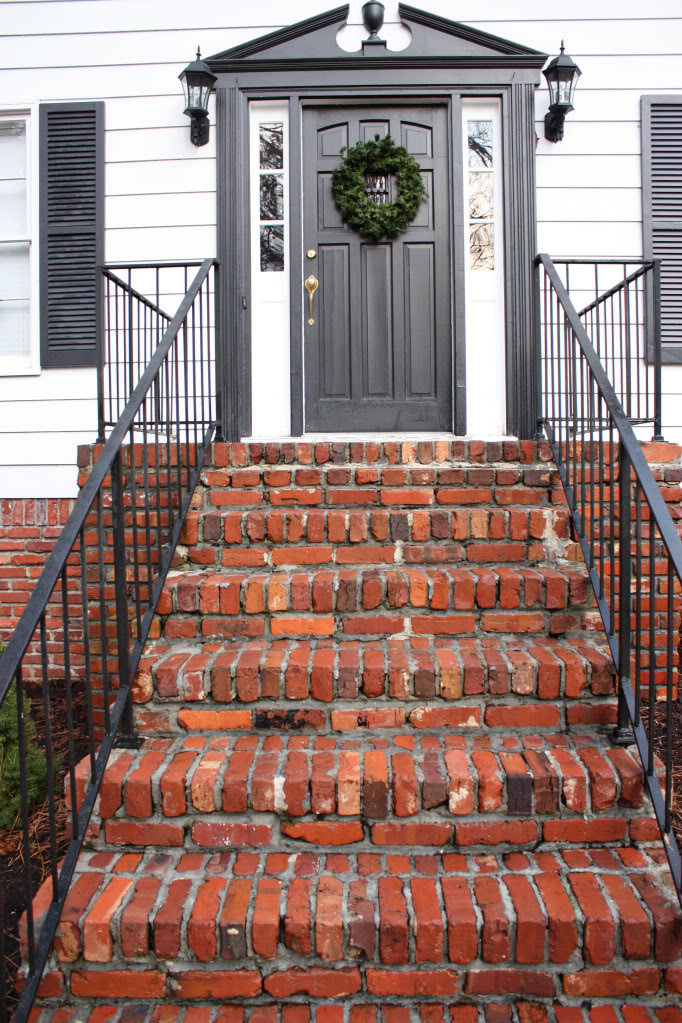
ya know, the one that I wanted to replace the hardware on:
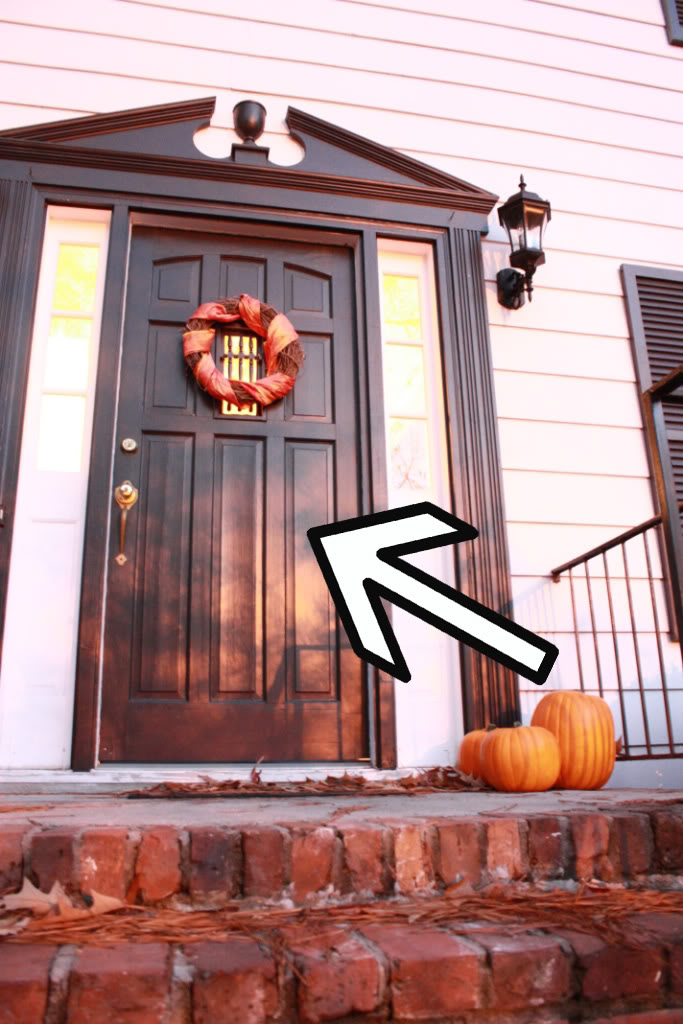
Yeah. That one. It’s gonna need a full-blown door replacement.
The inside panels are coming apart. Basically it is a crumbly mess and it’s leaking worse than pregnant girls when they sneeze. It has to be doing a number on our gas bill.
I assumed that if you put enough coats of paint on the sucker, it would act like a fusible bonding agent…but now the layers are starting to crack. And crack is whack. I just can’t say that enough 🙂
Anyhoo. So when it came to our DIY Blog Squad projects – team Bower was one project short. We no longer could replace the exterior hardware without a full-blown door reno which would be a little out of our 2009 budget. And just putting on new hardware would be like putting lipstick on Tiger Woods…enter scandalous and inappropriate jokes here.

But with that DIY moolah curtesy of those kissable folks over at True Value that would have gone towards a shmancy new doorhandle and deadbolt, we knew that we had a slot to fill on our TO-DO list and an allowance to help us get there. So we walked around the house jotting down all the projects that would fit the bill. And with hardware on the brain, both my boyfriend and I were 100% sure what to tackle when we saw this:
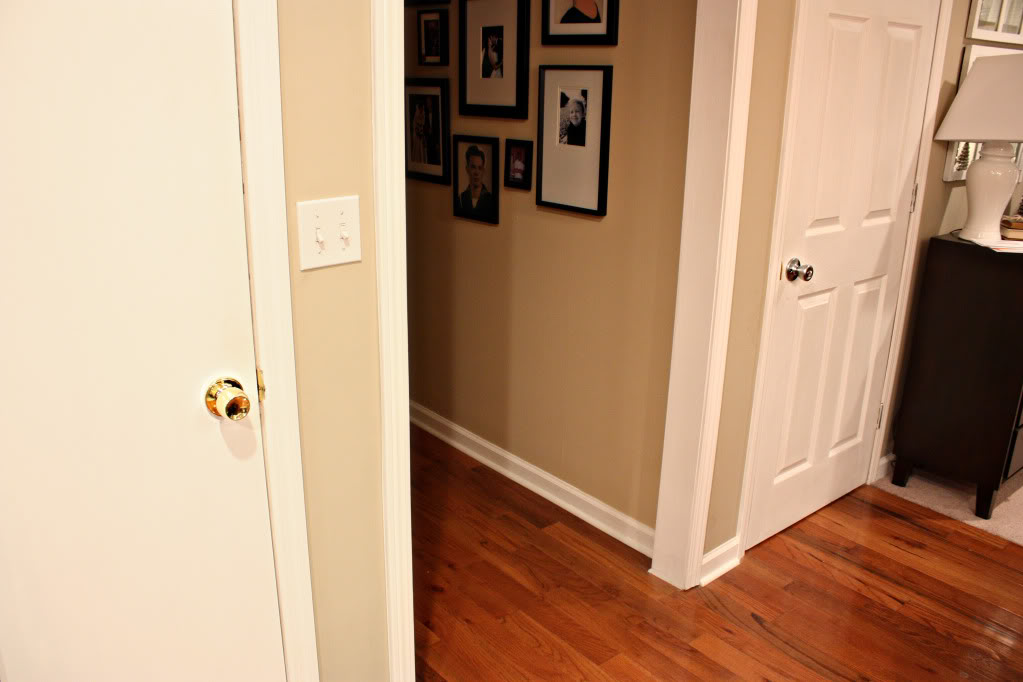
What is it? Well, it’s the hallway opening up to our kitchen. But the thing that got our attention was the complete and utter mismatchiness of the doorknobs. And when we payed a little closer attention, we noticed that on the first floor, we had only three doors….with three different types of doorknobs. And if you sit at the kitchen counter, you can see them all at the same time. It’s ghastly.
Especially this one:
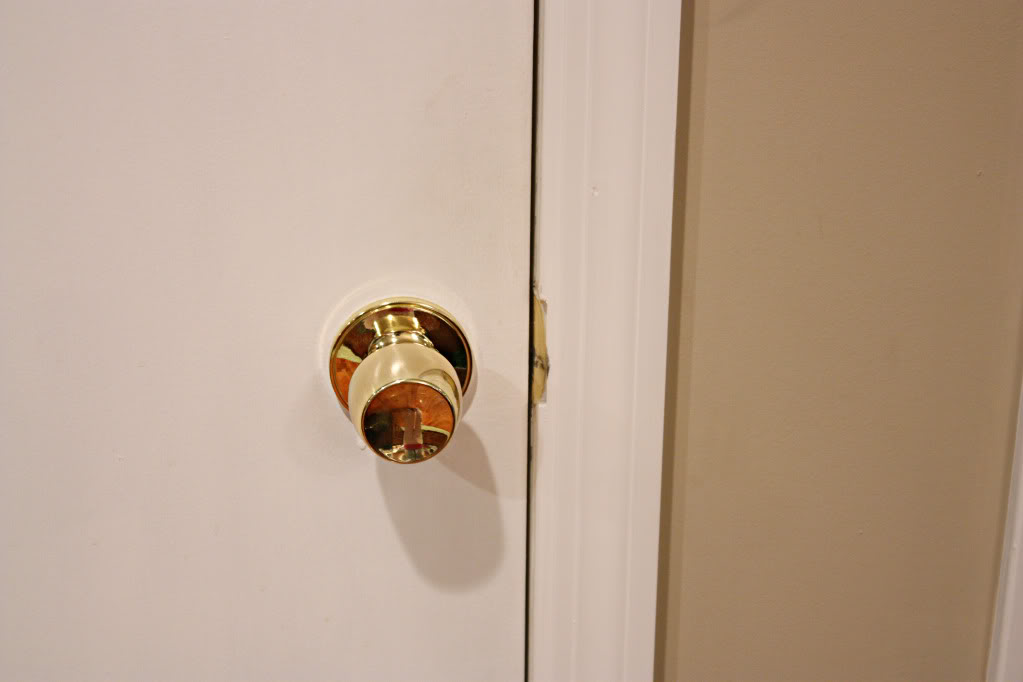
That’s the redheaded stepchild of the bunch. Or should I say goldheaded?
Either way – it needed to go away. and fast.
So we quickly hopped in the car and made our way to our local True Value store to pick up three packages of matching doorhandles.
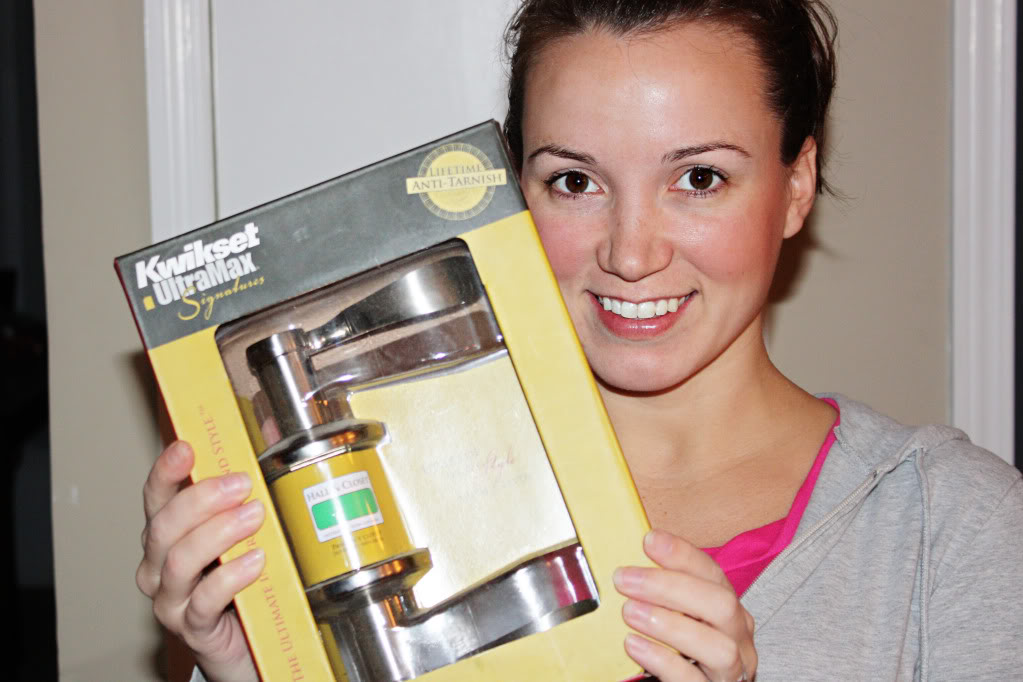
And now we are back with a little doorhandle switcheroo how-to.
1. REMOVE YOUR OLD DOORKNOB
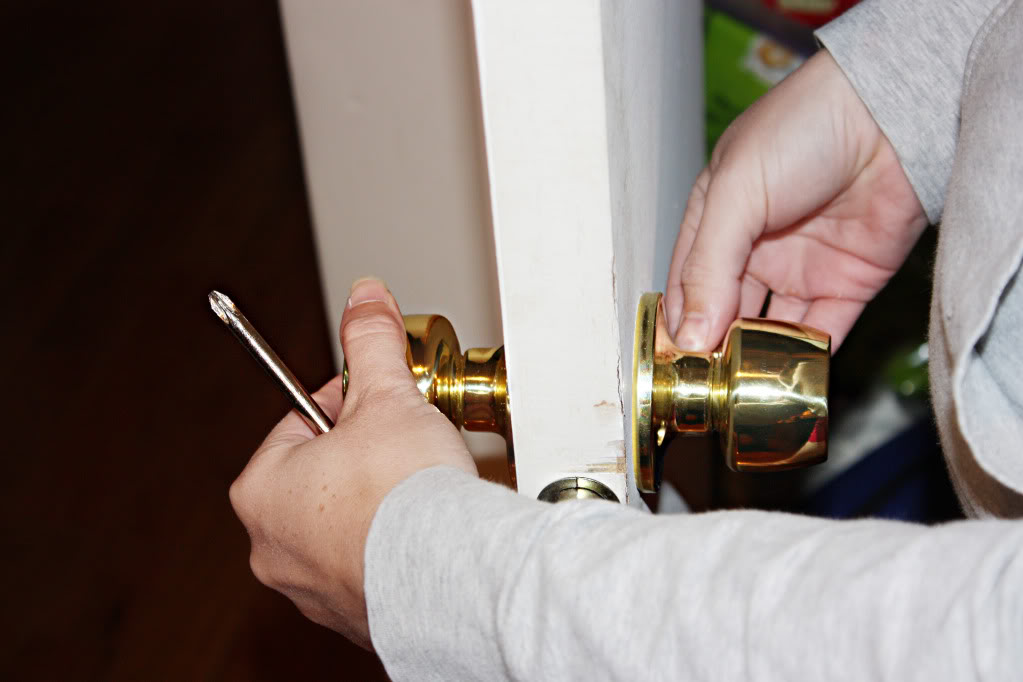
Most doorknobs are three different parts – two handles and an inner latch mechanism. There are two different types of handles – male & female. One has a couple prongs (male) and one has a couple holes (female). I know you all are expecting an anatomy joke now but seriously. I am way too mature for that. Now back to the unscrewing 🙂
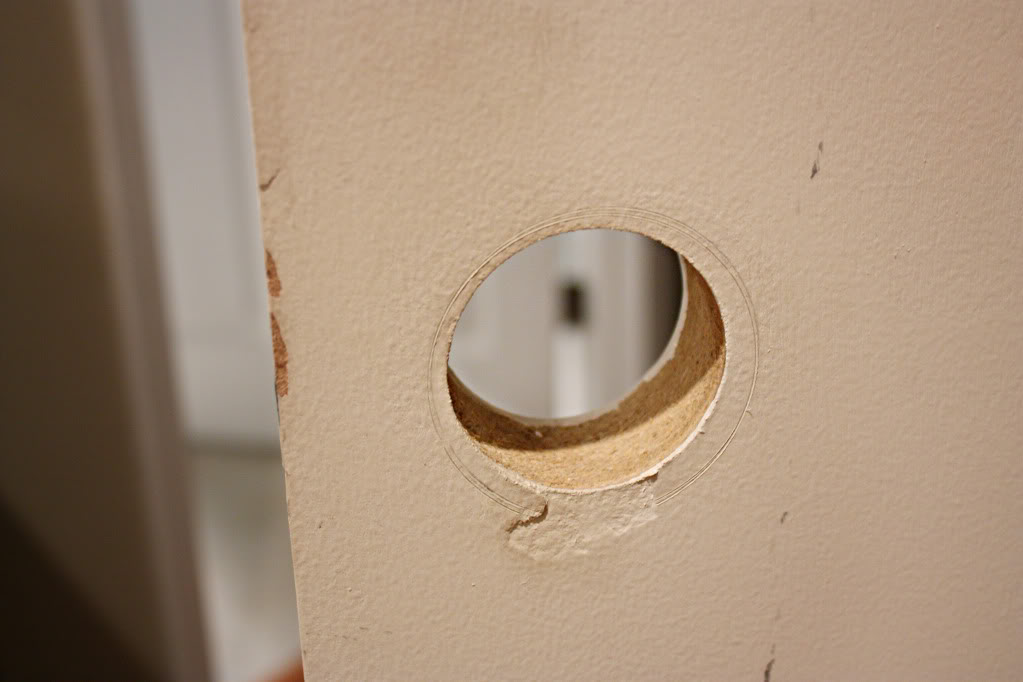
Using a screwdriver, remove all the pieces of the existing door handle and the inner latch. It should look a little somethin’ like this:
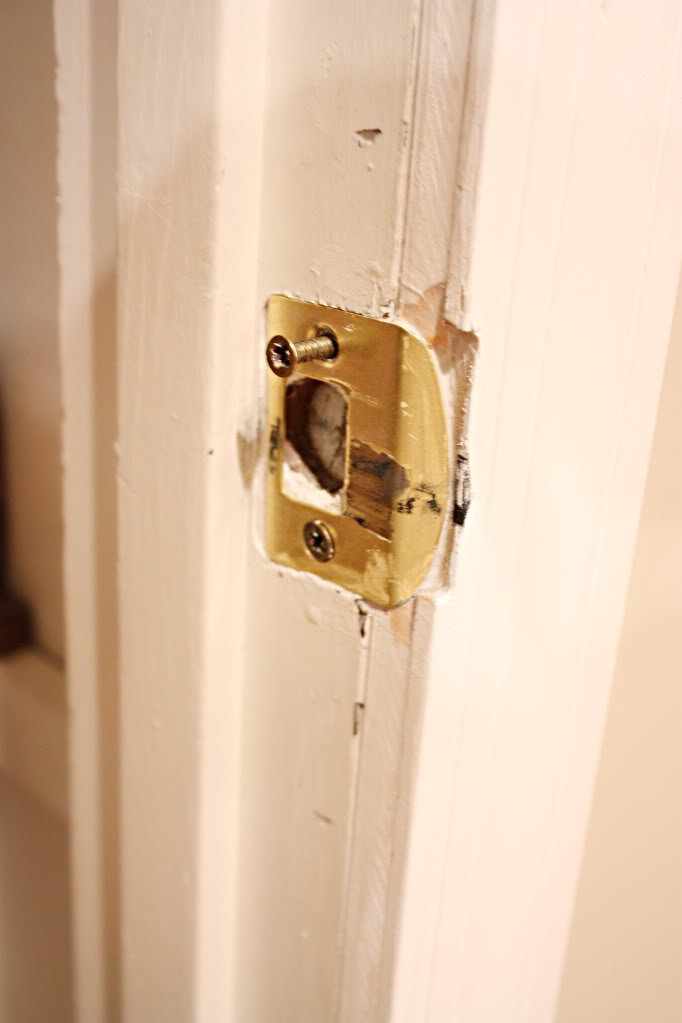
Don’t forget to remove the lock plate that is located on your doorjam. It usually comes right off after removing the two little screws.
2. SCREW IN THE NEW STUFF
In the package, the easist thing to recognize is the new latch plate. I went ahead and put mine on first. I had to make sure that it lined up correctly with where the old latch plate was because sometimes the new is slightly different in size or the hole is a little different. Just remember that if your new doorhandle doesn’t latch correctly, you might want to readjust this plate.
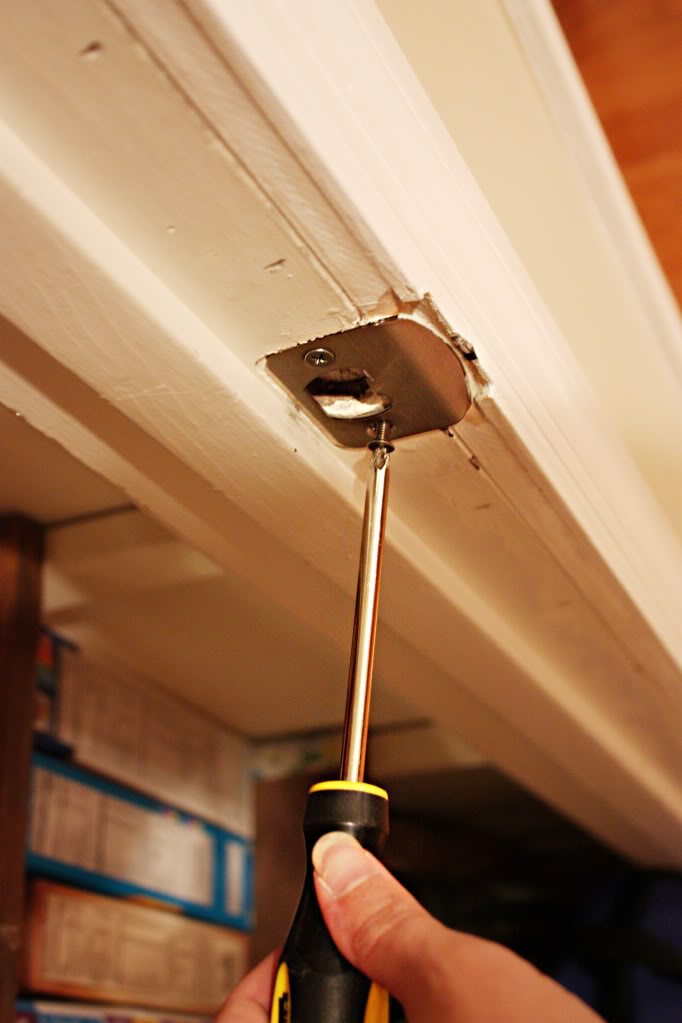
Secondly, you want to slide the latch mechanism into the door.
The latch can have a circular head:
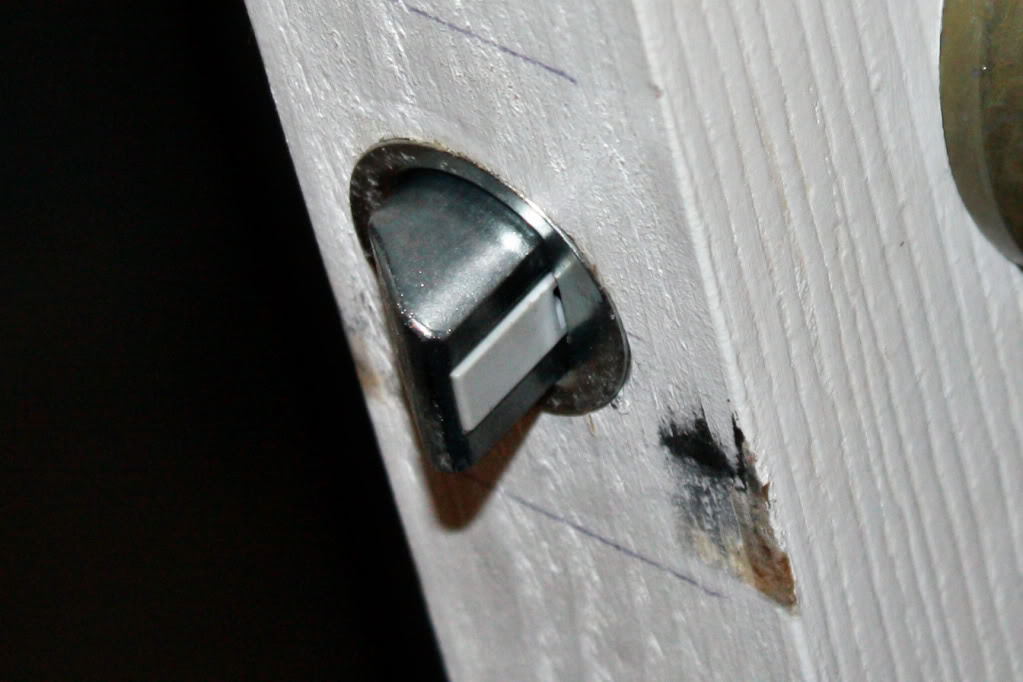
Or a square one:
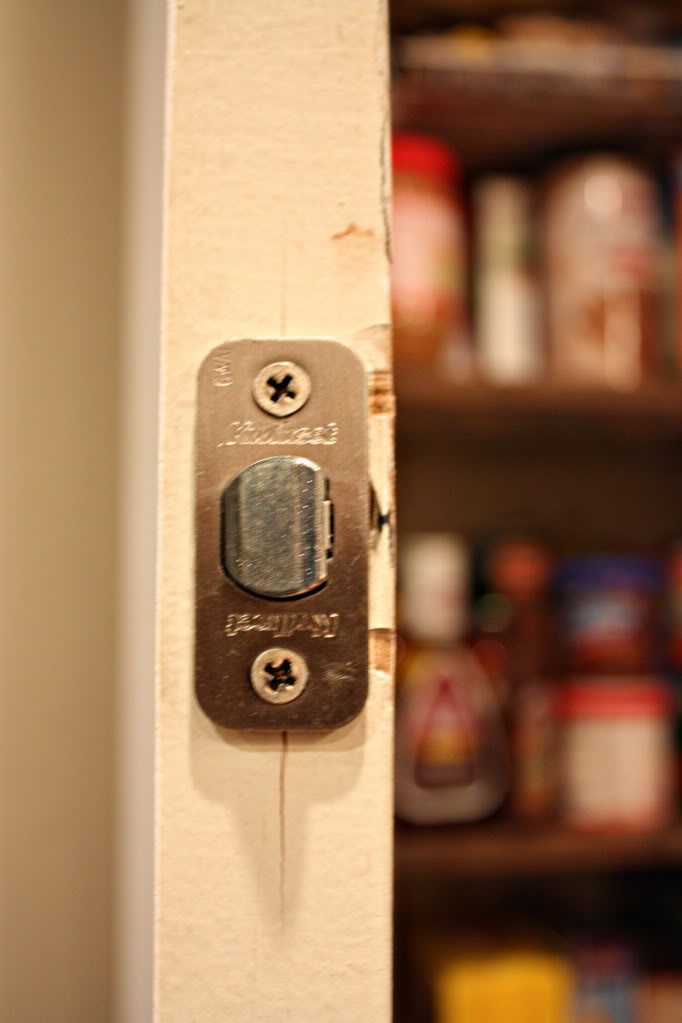
The package should contain both variations so be sure to snag the replacement one that is like the existing version.
Then you are gonna slide the ‘male’ handle through the latch mechanism. The prongs should easily slide through and be visible on the other side. Then holding the male handle in place, slide the female handle so that the holes line up with the prongs. Insert the provided screws through the face of the female plate and into the male prongs. You can snicker if you want 🙂
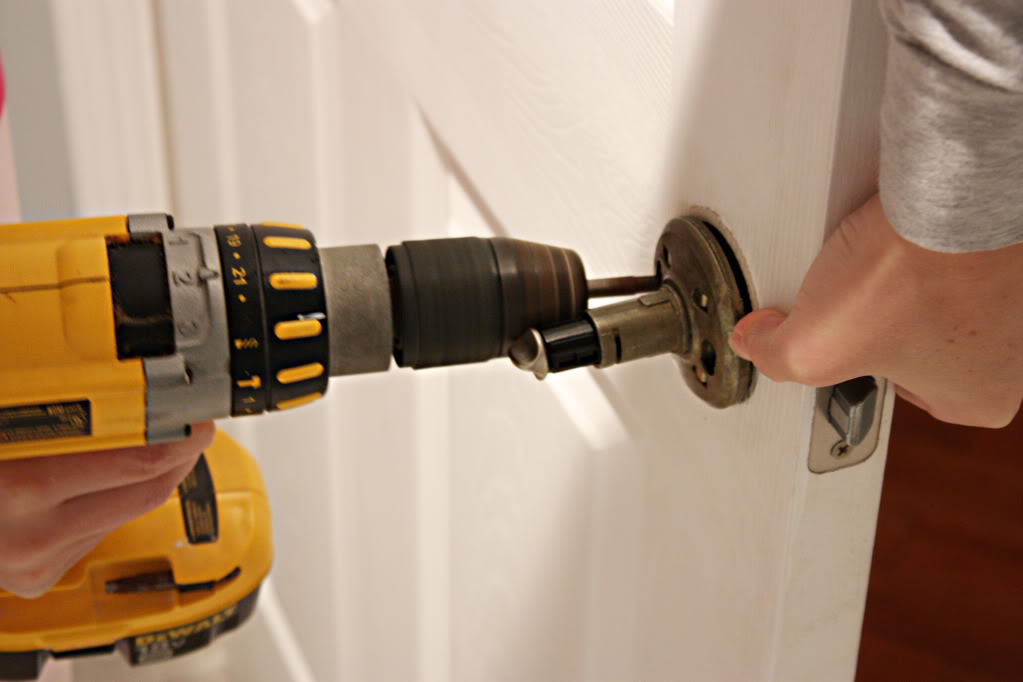
I also used a screw driver to make sure that the screws were nice and tight.
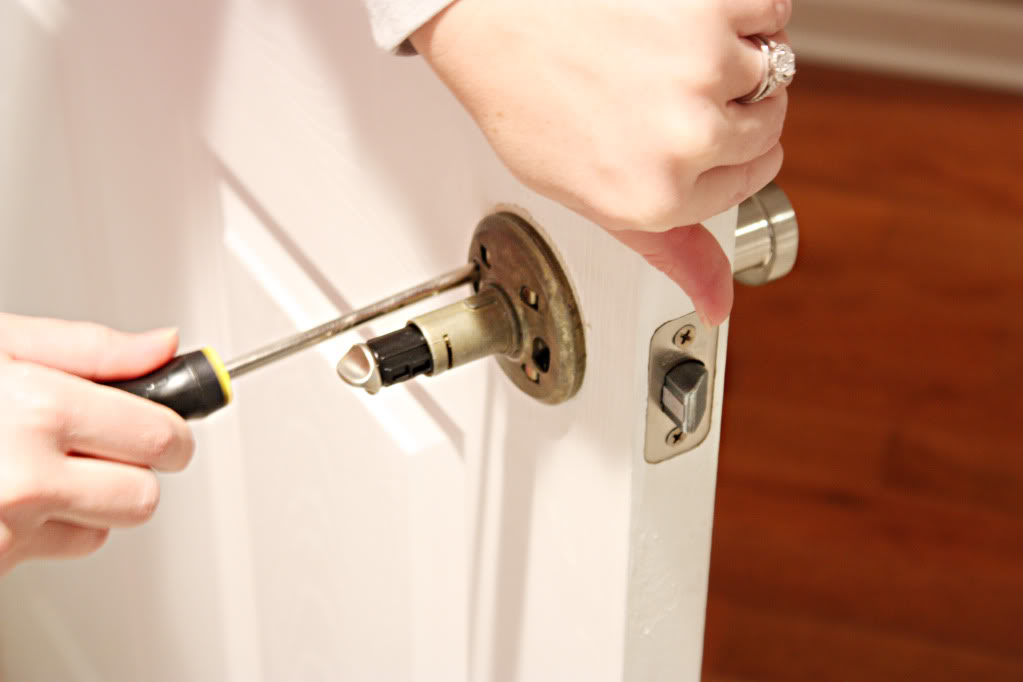
3. SLIDE ON THE DECORATIVE PLATE
Every doorknob kit is different. So yours might not have a decorative plate. But ours did. It covers up the screwheads. And it just popped into place.
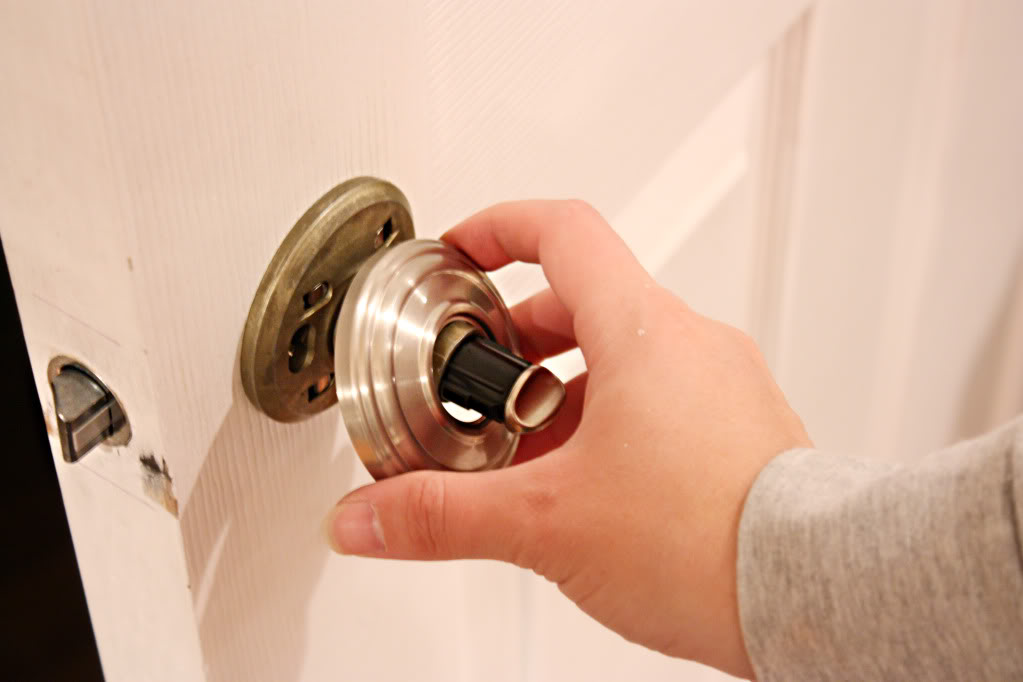
4. FASTEN THE DECORATIVE DOORHANDLE
The kits that have decorative plates can also have decorative handles. They slide over the basic lock ‘stem’ of the female lever and have a small little twisty tool to fasten it into place.
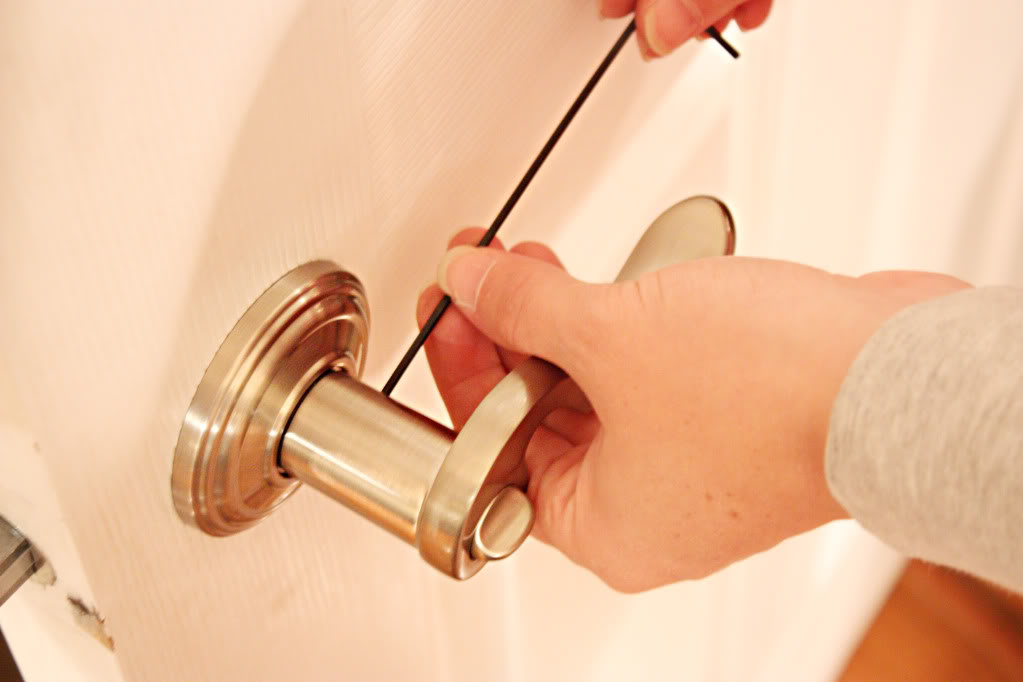
5. CELEBRATE YOUR SUCCESS
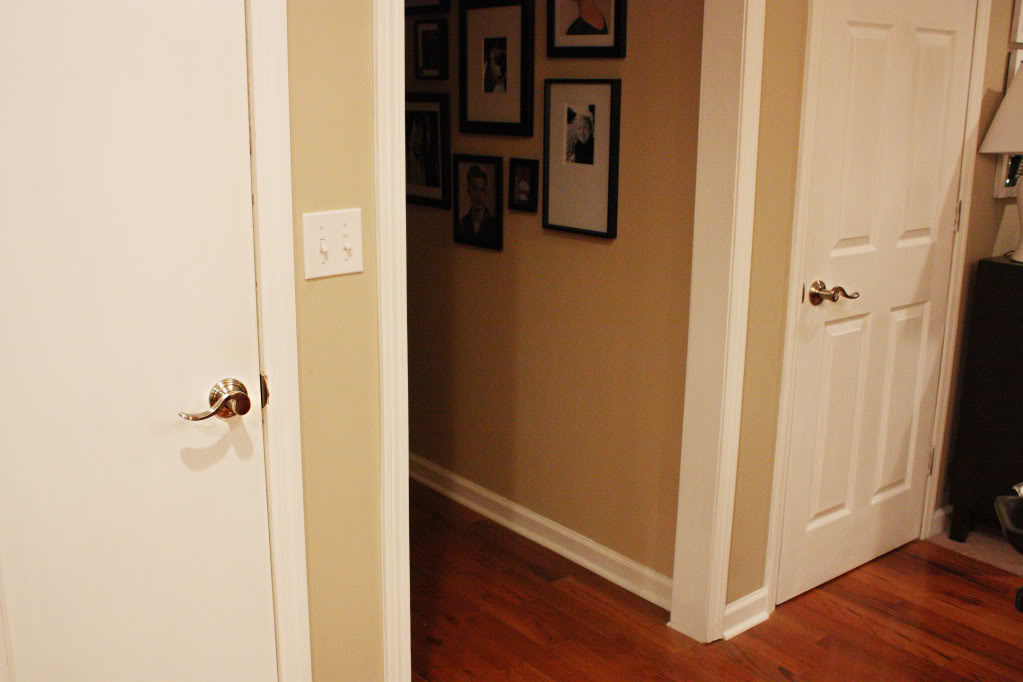
Time to celebrate your fancy new doorhandles (or just giggle at all the innuendos). Either way, changing hardware is one ridiculously easy project and oh-so-effective at making any door look a heck of a lot better as well as getting that cohesive appearance (even if your doors are totally different). Plus, it is a switcheroo that anyone can do with the help of a screwdriver. One hundred points for easy to-do projects!
So now it’s your turn to talk for a bit – tell me….have you switched hardware lately? Wasn’t it the easiest fix ever? Did you go for the curvy lever style like me or the traditional round knob style? Or how bout color? We installed the brushed nickel version but I drooled all over the oil-rubbed bronze finish. Or maybe you like the goldheaded stepchild….they need love too 🙂 Go ahead and tell me your door hardware story…just remember to end it with ‘happily ever after’!
“I was one of five bloggers selected by True Value to work on the DIY Squad. I have been compensated for my time commitment to the program and my DIY project as well as my posts about my experience. I have also been compensated for the materials needed for my DIY project. However, my opinions are entirely my own and I have not been paid to publish positive comments.”
I’m back with another random question (btw, thanks for indulging me on your maternity plans in a previous post!). You seem to tackle a bunch of projects with ease because your boyfriend has a handy arsenal of tools to use to knock it out. My boyfriend/husband is not so handy. What would you say are the top 5/10/15 tools that you use most often and would recommend any DIY-er to invest in for their home?
We have a whole bunch of “goldheaded stepchilds” in our house and they drive me crazy! Maybe somebody will get me a True Value gift card for Christmas. Then we can get pretty brushed nickel doorknobs and live happily ever after! 🙂
THANK YOU THANK YOU! Our front door handle is
in need of a change. The brass has gotten all icky and no way I can just sand and paint. It needs a new one all together! But my wonderful DH isn’t really in the mood to change it so with these instructions, I may actually be able to do it myself! I wonder if a front door with a separate deadbolt lock atop it would be different? Looks much like your front door one…
Gosh Karen – I would have to look at his workbench to take inventory. Maybe that one can be a whole post for after Christmas. But for now – I would definitely say these are some of our favorites:
1. cordless DeWalt drill with different bits (and an extra battery)
2. basic painting tools such as Purdy brushes, rollers and drop cloths
3. basic woodworking tools such as a level, clamps, chisel and hammer
4. air compressor with attachments such as paint sprayer, nail gun, and staple gun
5. DeWalt miter saw
And it is really funny that you ask – because this Christmas will be the two year anniversary of our first TOOL in our arsenal. In only a couple years we have accumulated a full blown workshop of man-toys 🙂 So it really is never too late to start your collection.
XO – Katie
Hi Dana J,
Actually switching out your front door handle will be very similar. You will definitely need that screwdriver – and your new deadbolt & handle will come with easy instructions – so I totally think this will be an easy project for you to tackle all by yourself. In fact, it’ll probably make your DH proud 🙂
XO – Katie
Not to rain on your new-doorknob-parade, but the level kind of doorknobs can be opened by very little kids. My friends’ 15 month old figured out how to open them last week. If one of those leads to a basement, you might want to check on baby-proofing options. Or switch back to regular knobs, which are more child-proof.
THanks Kayduh for mentioning this – actually the knob we installed does feature a little lock. So the door to the basement will be constantly kept locked and we figure that any child of ours is gonna have a difficult time manipulating the little turn knob to unlock it – but we also plan on future baby-proofing…so this will definitely be a priority prior to welcoming our little boy home. I love the recommendation in your comment though so THANK YOU!!!!
XO – kb
We have goldheaded stepchildren all through the house but it was my brilliant idea that when we redo a room, we include the doorknob so we don’t have to bite the bullet of all the doorknobs being changed at once (we have 6 doors in one little hallway!)
However, this backfired. Now I have to look at the nauseating goldies mixed in with my pretty brushed nickel knobs. *sigh* Some day they’ll all match, some day.
-E
I had a gold headed stepchild. Took it off spray painted it with rubbed bronze spray paint. Looks like I got new hardware. My hubs said it would never last. It’s been 3 years and hasn’t rubbed off yet. Yeah, I’m cheap, but it looks great.
Just curious, are your levers upside down? I have similar ones and installed them the way you did. Then I saw them the other way on their website so I changed mine too. http://www.kwikset.com/Products/Categories/Levers/Default.aspx
I guess if it works, there is no wrong way!
Beautiful! We chose levers for our new home and love them. But, like Kayduh, our 17 month old easily figured out how to open them. We found a child safety device made by Safety First that keeps him out, but they are pretty huge and ugly, so we just put them on doors that really, really need them – like the pantry. Whenever I need to keep him for escaping from a room (ie, when I am getting him dressed in the am) I simply lock the door. However – he is pretty observant and has started trying to unlock them. We will see how long it will take him to figure out!
We changed over all the hardware in our house not that long ago as well. We had a house full of “goldheaded” children and they were ugly! So we went on Ebay and found a guy that sold interior knobs and such – for cheap! We redid the whole house in oil rubbed bronze knobs and love it! Replacing our front door is on the list too but probably not for a little while. 🙁
Did you know how inexpensive those hollow core paneled doors are? If you want your house to look cohesive door wise, check them out. They are only about $22 a door! My daughter and her husband are replacing all the old, hollow, flat doors in their 1970’s brick rancher for a rather modest sum, and it sure improves the look of their home to have paneled doors instead of flat surfaced ones.
I’m in the process of switching out all the “stepchild” door handles in our house also, but given that we have 22 (yeesh!) doors total in our house I’m doing it gradually. We also had to go with door knobs rather than handles because our dog can open the handle kind and we’ve found that houseguests don’t appreciate being busted in on while they’re using the bathroom. We don’t have kids yet but have to dog-proof already instead, go figure…
Oooh, doorknobs–they really do make such a difference, don’t they? The first house that I bought only had *three* doors in the whole house (well, okay, so that was after I widened one and took out a tiny weird closet–so it started with 5) which meant I could splurge on doorknobs and went with vintage glass ones that really suited the place. Now that I’m in a bigger house, I have oil rubbed (they came with the house), and though I like them, I think they’ll probably look as dated as the gold ones in a few years.
Not about this post at all, but I thought of you today… http://www.thinkgeek.com/caffeine/wacky-edibles/ce85/
Enjoy the bacon-goodness!
Wow, I didn’t know door hardware could make such a big difference, but it totally does! Your doors look dramatically better with the new door hardware. I went over to Kwikset’s site (www.kwikset.com) right away to check out all their styles. I’m really digging the Tustin satin nickel finish, so pretty! Time for a DIY project!
Hi,
I know this comment is about a year late–I’m trying to search and find out what kind of paint sprayer you use to attach to your compressor, did a search and this post came up–I wanted to add that I also spray painted my doorknobs. Infarrantly Creative has a great post about spray painting those ugly brassy doorknobs. Just make sure to sand, metal prime, and paint your knobs. Towards the end I also realized you could clear coat them too, but didn’t do that on all of them since I had already reinstalled them. Here’s the link in case anyone is interested: http://www.infarrantlycreative.net/2010/03/spray-painting-door-knobs.html
p.s. What kind of spray paint attachment do you recommend getting for an air compressor and what brand & model of air compressor do you have? Thanks!
Hi Evelania,
We have a Bostich air compressor…and we have a paint sprayer but it stinks. We keep on trying to use it but it never works. We just keep saying…one of these days, it’ll work…but not today. I really want the sprayer that is on my wishlist (on the sidebar)…I’ve heard it’s dreamy 🙂
xo – kb
Thanks for the tips. I noticed the paint sprayer on your sidebar but surprisingly there are no amazon reviews on it. I’ve looked at the Graco airless paint sprayers but they are over $300. We need to do our fence and so I’m wondering if those pneumatic ones will do the trick or to get a Graco (they have refurbished ones on ebay w/free shipping). Thanks for taking the time to answer. I’m loving all the house tips on your blog.
Evelania, actually I know a couple bloggers that redo furniture and they swear by that thing. I will say this though…furniture sprayers are quite a bit different than large surface area sprayers (like one used to do a fence)….so I would take a long hard look at the differences….I would hate for you to take a furniture sprayer to your fence to discover that you just committed yourself to 438 hours of spraying because you have the wrong one.
Good luck and happy painting!
xo – kb