Ever have a project that just camps out on the ole to-do list? Something not necessarily hard or that overly time consuming…just a squatter? This is mine. The front porch lights.
About a year ago, I decided that I would tackle these…they even made it onto the official Bower 2011 to-do list…only to sit there…untouched…no attention…no action…like the fabulous stilettos in a pregnant girls closet.
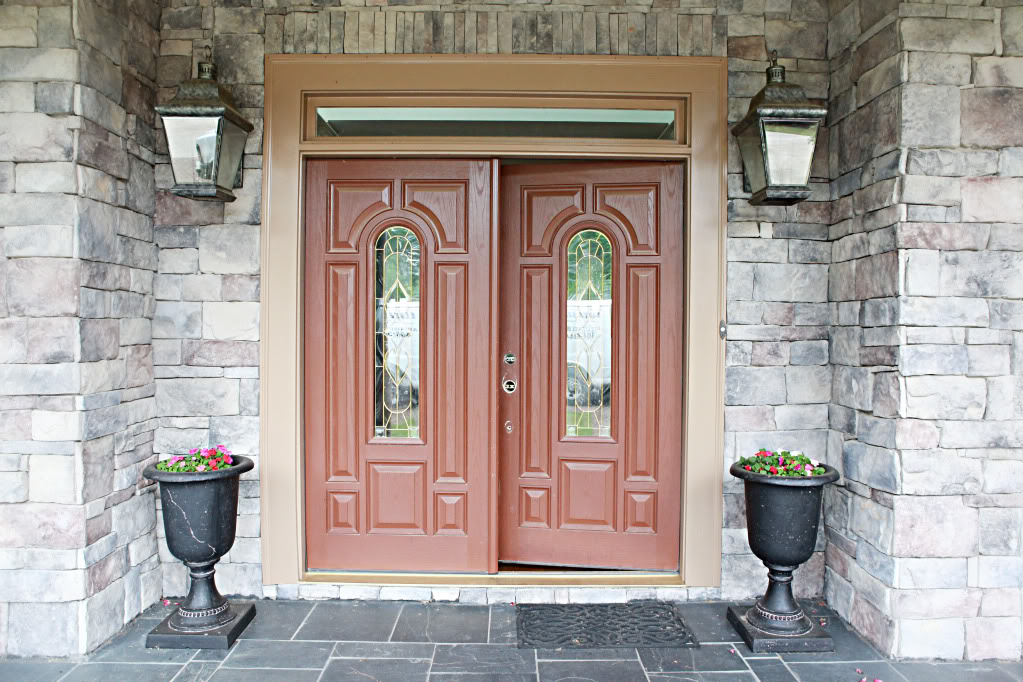
I painted the front doors and that seemed to distract me just enough.
It’s like that movie Up. When Dug the talking dog is distracted with a rodent shoutout. That’s me. I’m a dog. talking. talking. talking. SQUIRREL! and not painting my ugly front lights.
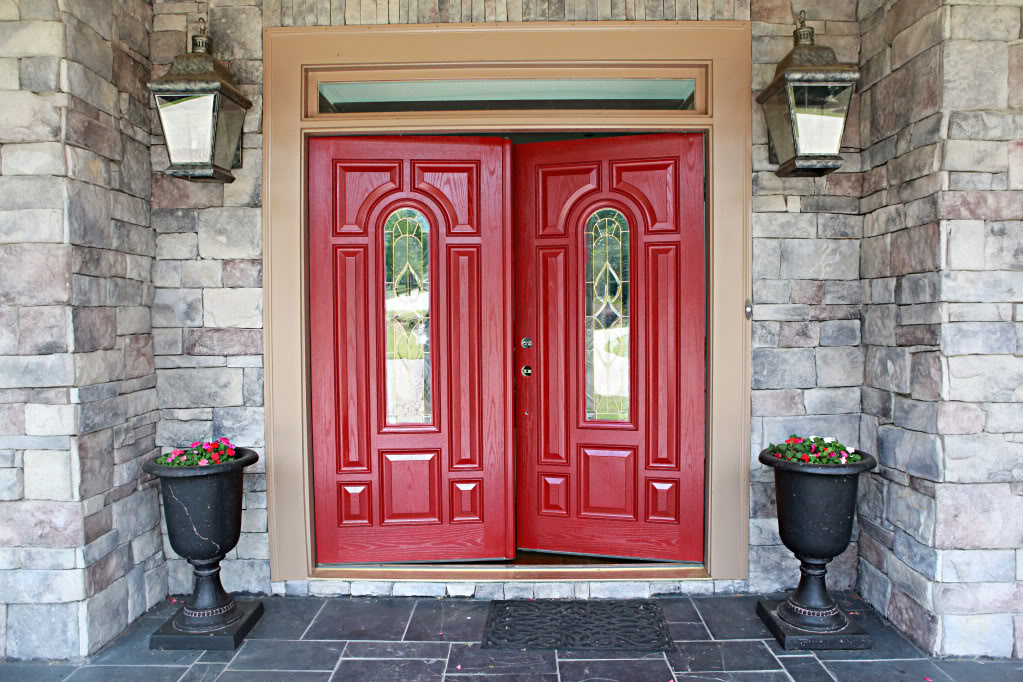
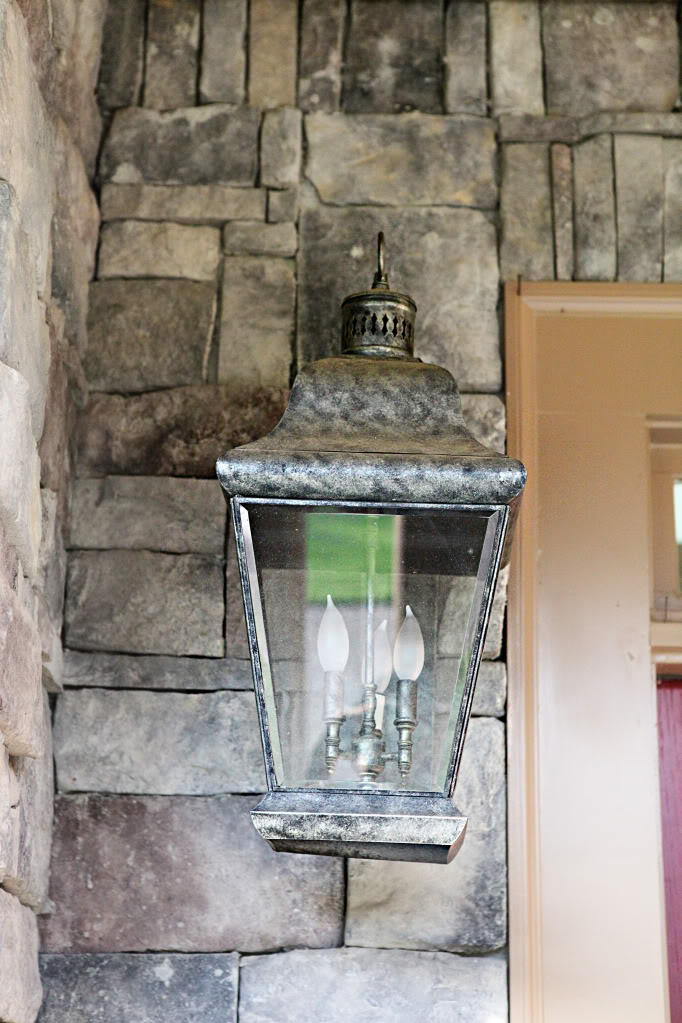
What’s up with all the sponge painted finishes in this house?!
The worst part about having a squatter is when you actually have all the supplies on hand. I was ready. Prepared. And that never happens. And then just didn’t do it. I’m sure my ancestors are hanging their heads in DIY shame.
You guys know I have a partnership with Frog Tape. I love this green stuff. I would have a pretend partnership in my head if I didn’t have a blog…that’s true love people. Soooo little announcement…I’m trying to get organized and will be attempting to post a Frog Tape project each Friday. I’ll need a schedule since my brain will be eaten by a very small newborn. Not literally of course.
Since today is Friday – today is gonna be the first official one. Obviously if you are anti-sponsored-post-people (totally understand!), just feel free to skip it but in general, I’m thrilled that I get to work with such a fine company and since half my projects require painters tape…it works to make it a regular thing. Not only to keep me accountable but to keep me moving when I’m sure the future days will involve a whole lotta wanting to do absolutely nothing except stare into the eyes of my new little guy. Welcome to a very Froggy Friday 🙂
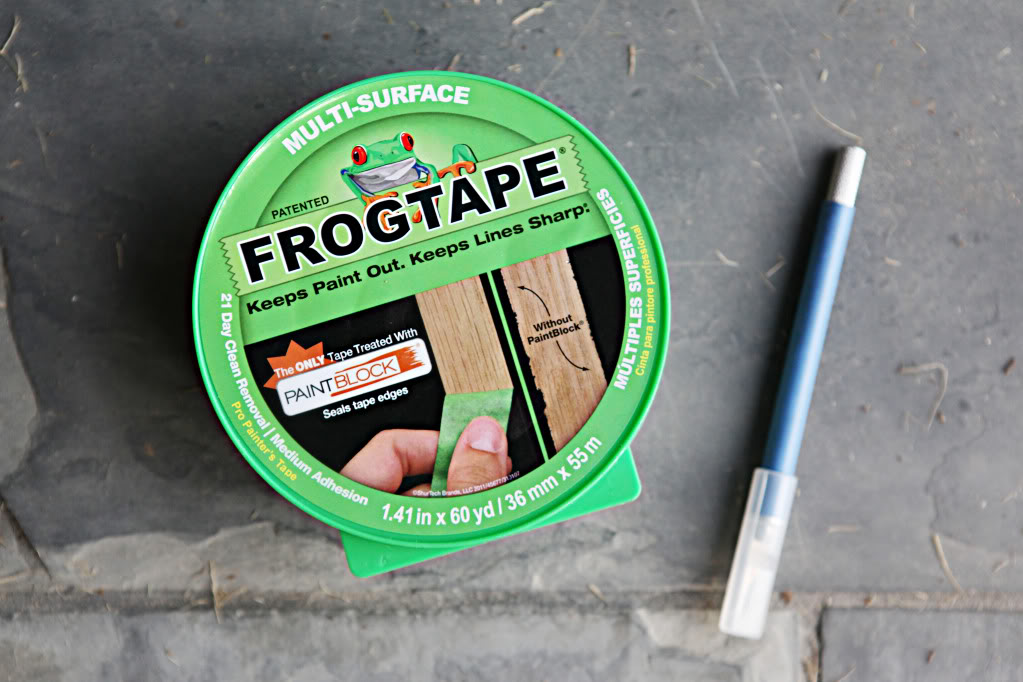
Basically how I tackled the lights is that I first taped the inside of the panes of glass and then used an X-acto knife to trim the edges X-actly. (nice katie) After the inside was all taped, I moved on to the outside of the glass and then around the stones.
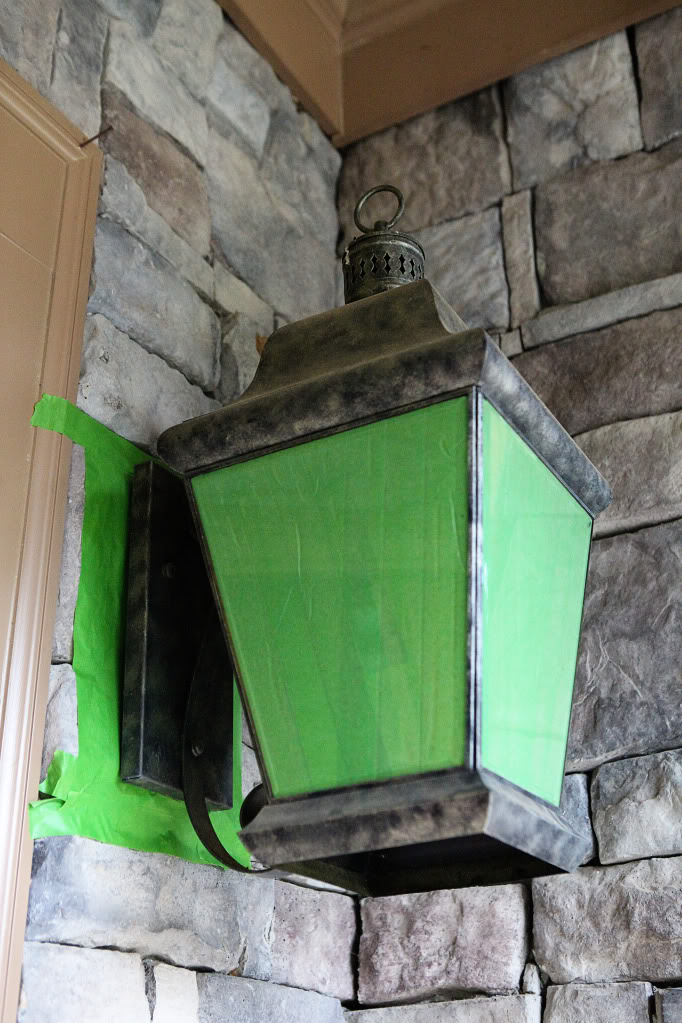
Once both were taped I made sure to wipe down the entire exposed surface. See how dark the one on the right is compared to the left? Yeah. dirt. and dust. and bird poo. It’s never a good idea to paint over droppings…that should be a general spraypainting rule of thumb.
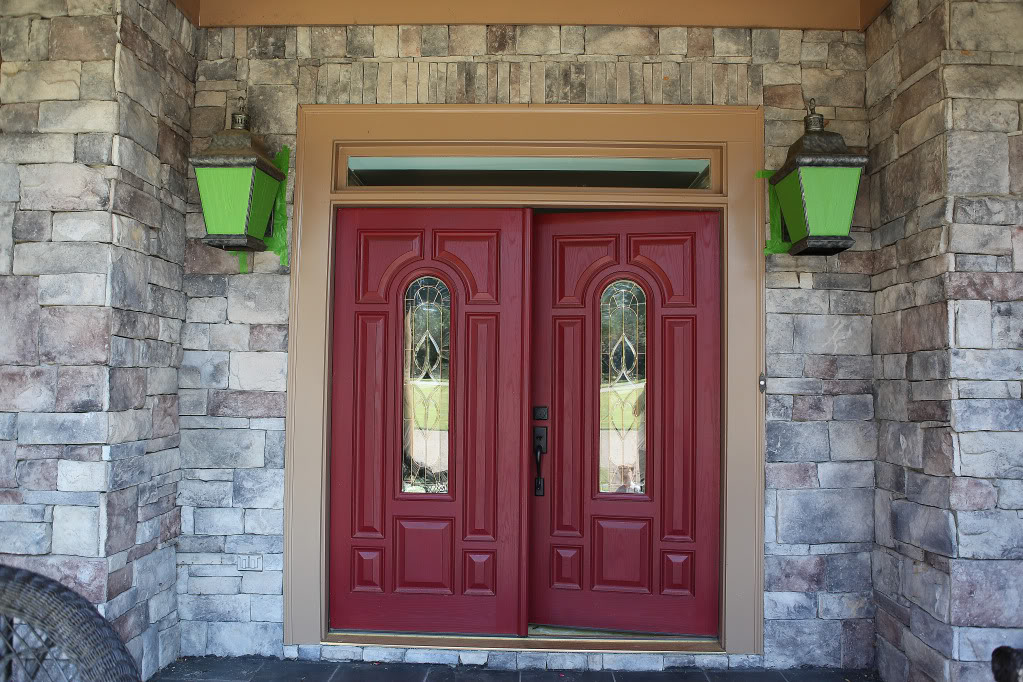
We really didn’t want to remove the lights (we have experienced removing lights before and reattaching them can cause stability problems especially with uneven surfaces like stone)…so instead we used some cardboard to block the surroundings from any overspray.
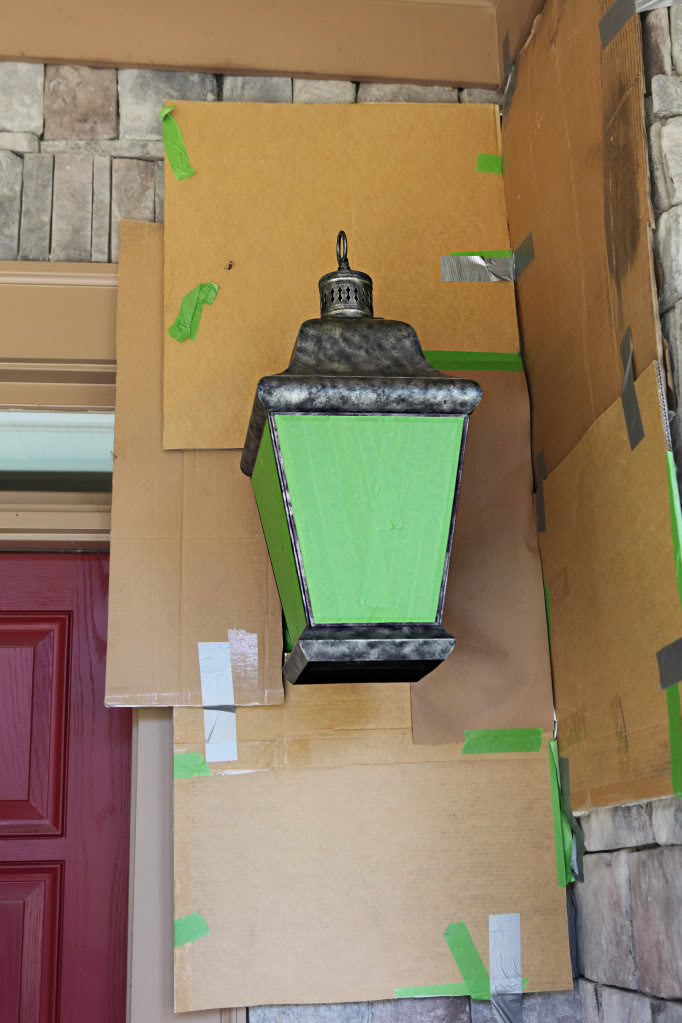
The bottom was left open since this was a two man (err….one man…one girl with one little man in utero) job. Jer held another piece of cardboard below the light so that’s how we blocked the overspray there…
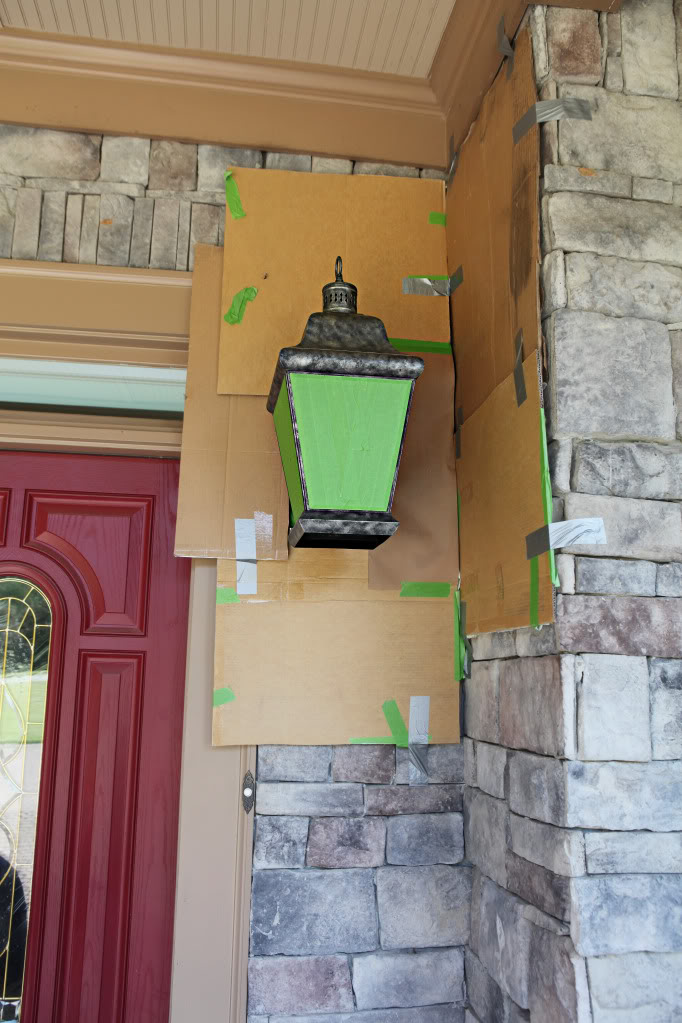
It took half a can of Rustoleum’s Oil Rubbed Bronze to do each light.
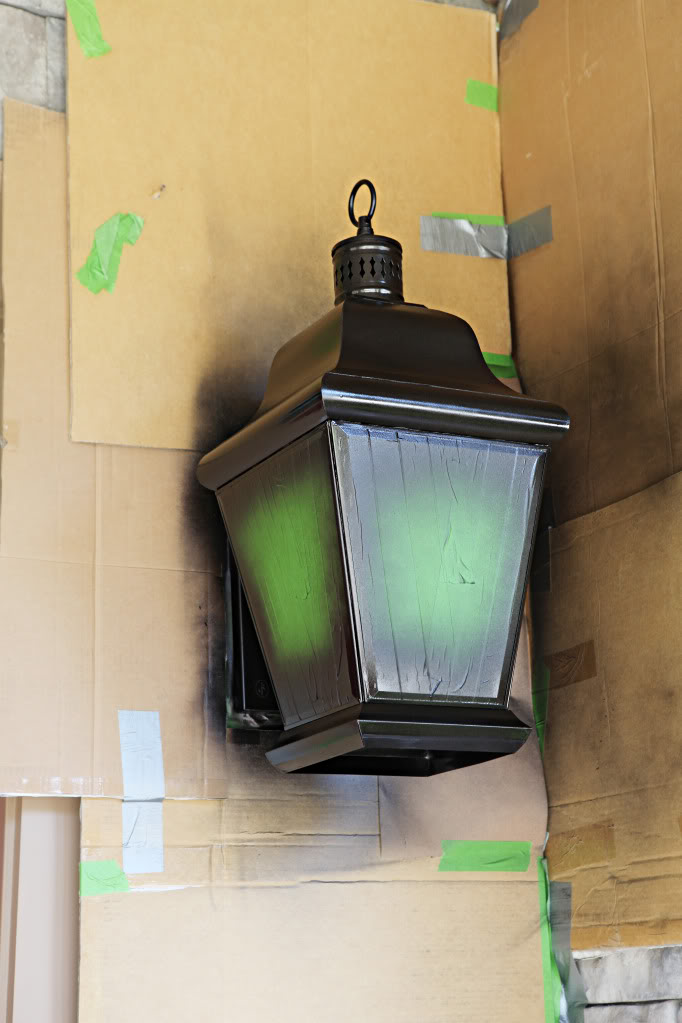
One down, one to go…
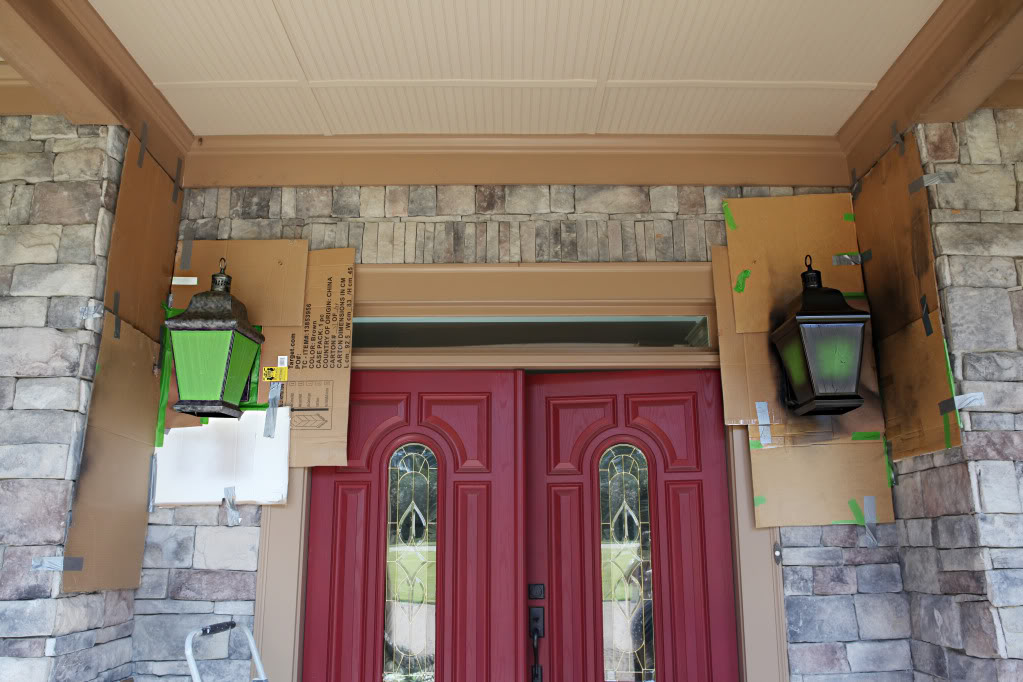
Yay! Both done!
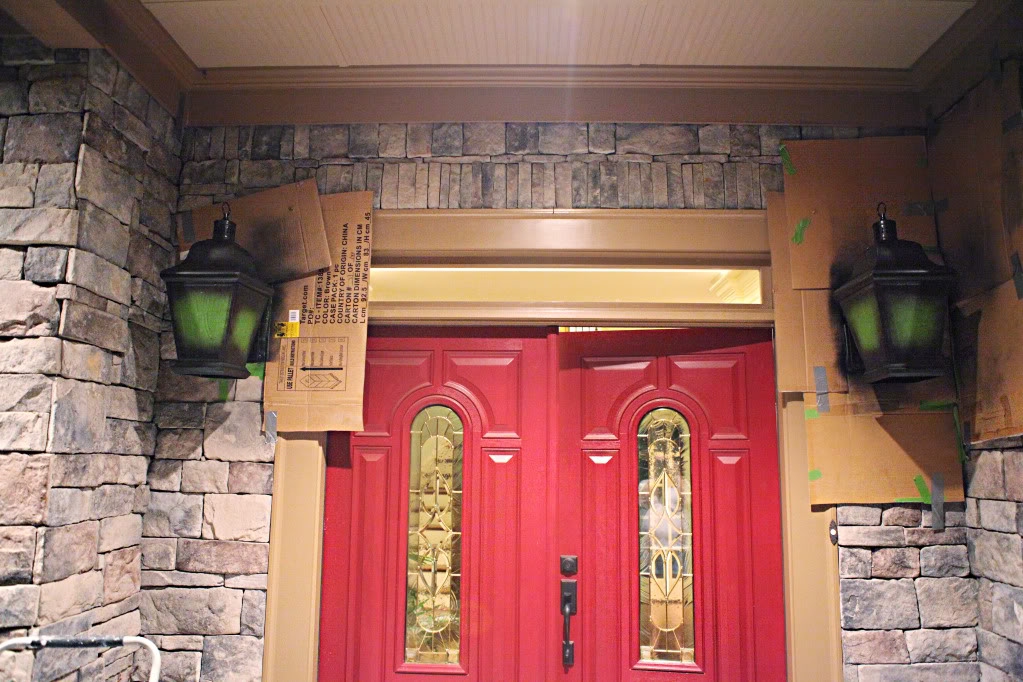
All I had to do was rip off the tape after they dried and then waited about 2 days for them to fully cure before cleaning up the panes with some window spray. (I waited the two days because I wanted to make sure the paint had time to harden up before I potentially man-handled them with a papertowel).
Now these beauties no longer sport the 1980’s sponge painted look…
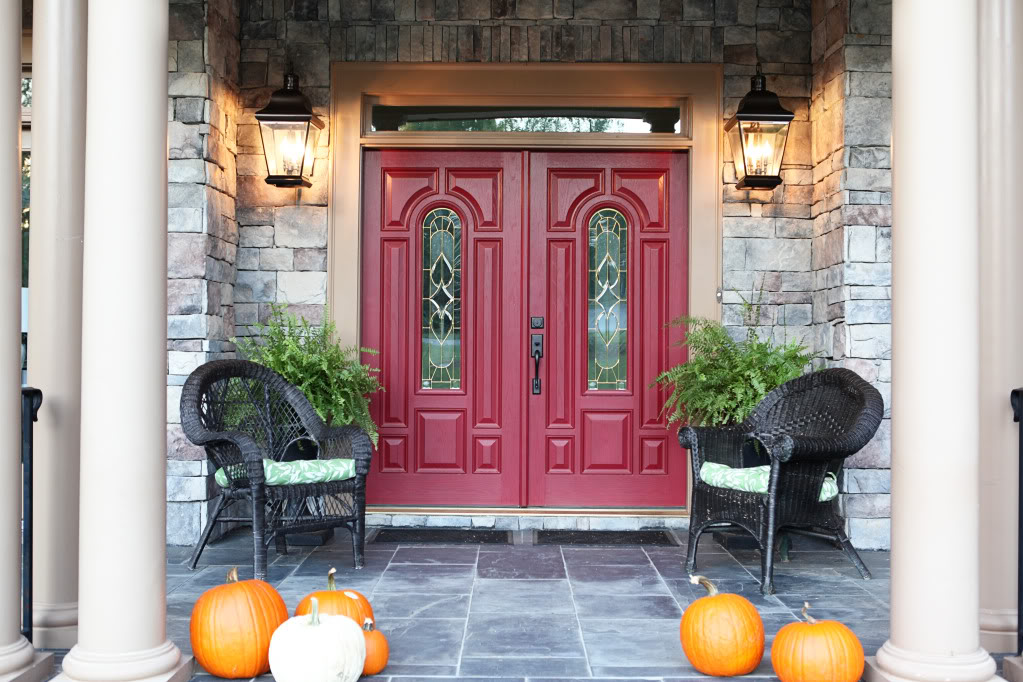
Slap bracelets maybe…but not sponge painted finish 🙂
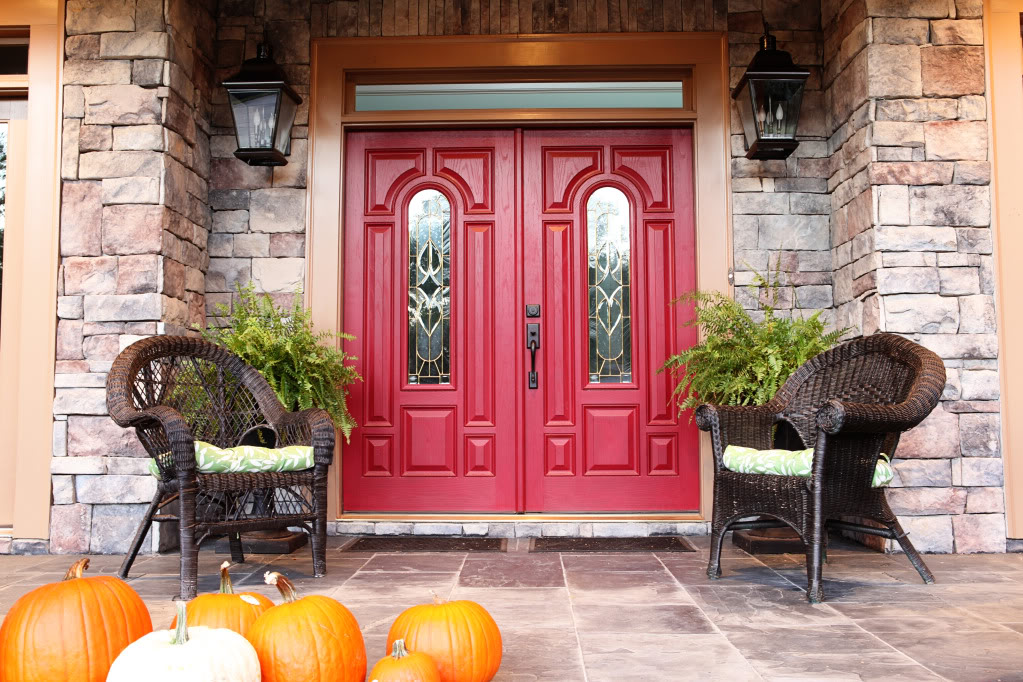
I also like how they now match the front door hardware and tie in the urns.
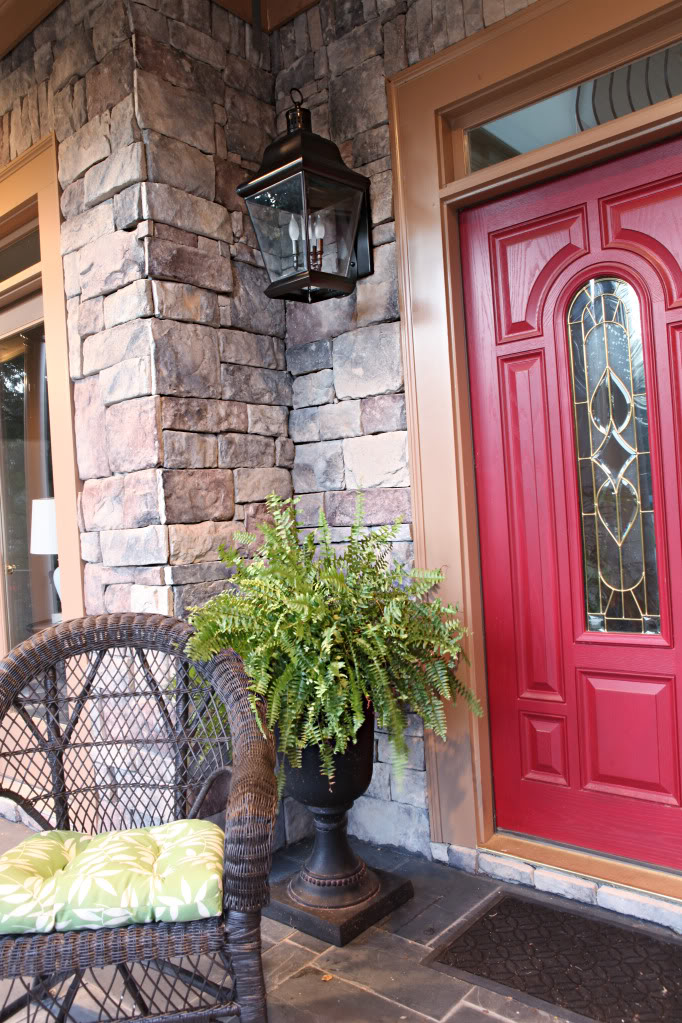
Not bad for one can of spraypaint and maybe a quarter roll of Frog Tape, right?!
Of course, we have two more of these to do – one is above our garage and one is next to the back door…but having the most prominent ones done feels oh-so-good. Like a footrub. Hint hint Jeremy.
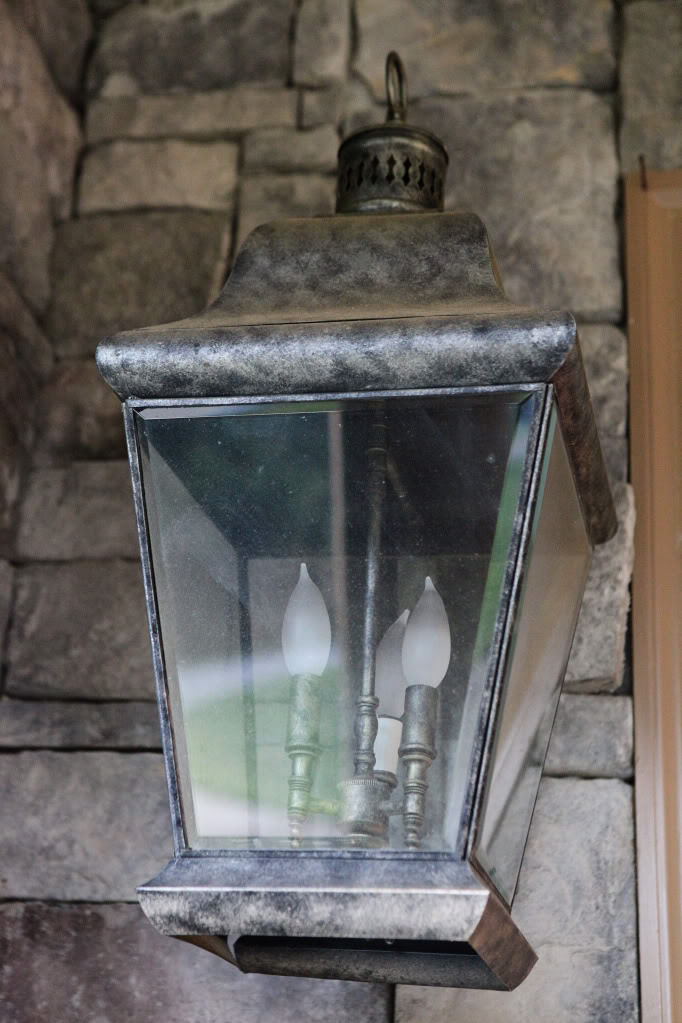
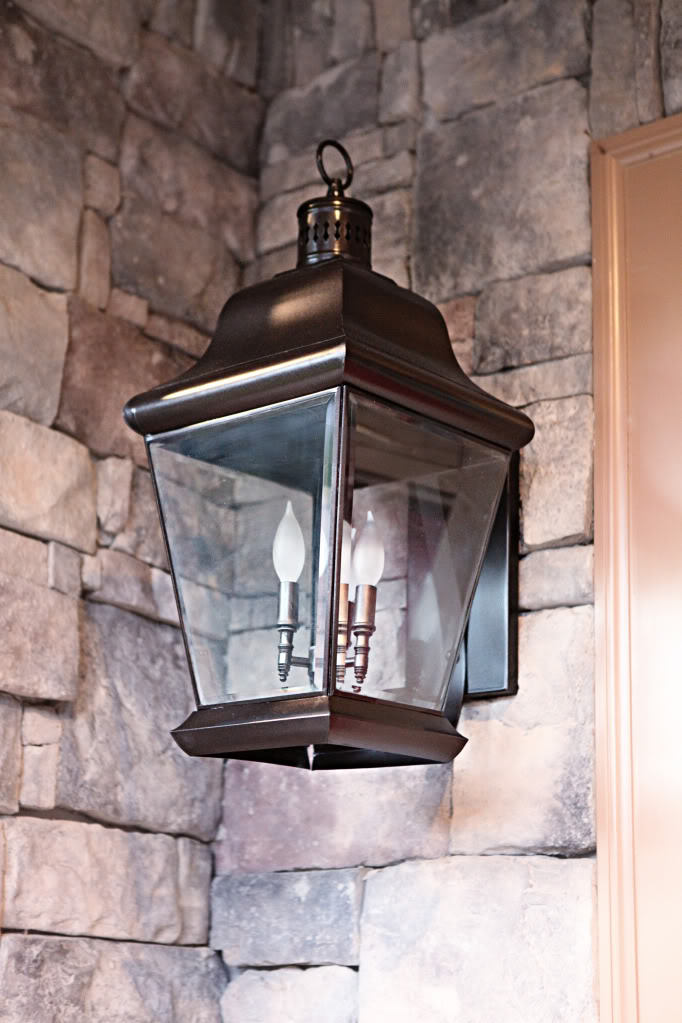
So have you guys been tackling any squatters on your own to-do list lately? Anybody finally picking up that spraypaint can? Or have as much disdane for spongepainting as I do? In sponges defense…they do marvelous things for coral reefs. And for making Seinfield episodes very funny.
This is a sponsored post brought to you by FrogTape. The opinions are completely my own based on my experience.
That makes such a difference- sooo much better! They look brand new. We really need to tackle ours- they are tacky gold…and we’ve ignored them for almost 5 years. Oy.
Two things:
1. You have turned me onto Frog Tape. Not kidding. I about went bananas after I used it the first time.
2. You posted this one at just the right time! I have been eyeballing my incredibly ugly outdoor lights for a few months now. The bones of the lights are good, but the pink-ish/mauve-ish/gray-ish color is driving me nuts. I kept thinking I should paint them, but didn’t want to take them down. Who knew I didn’t have to!
LOOKS AWESOME!!!! Such little things make such HUGE differences!
Love it 🙂
On the light front: AWESOME. They totally blended into the wall before! Now they are gorgeous. Also, I find myself using FrogTape ALL THE TIME lately. I’m gonna go ahead and blame all of your subtle bloggy marketing. 😉
On the baby front: would it help if we all started chanting? “Baby! Baby! Baby!” Praying for you uuu!!!!
They look awesome! I’m glad you hung on to those lights and just updated them with paint, they are beautiful! And yes, frog tape rocks!!
I have been trying to get motivated to paint our own front lights. They’re just “faded black”/old. I wondered about the logistics of taking them down vs. taping and painting in place. You have convinced me – paint in place it is! Now, I still need a bit more motivation, but at least I have a general plan. Thanks!
Nice change! It’s good to celebrate the little things. Not everything can be a blockbuster kind of change — this is really a good upgrade for your space.
Speaking of squatters on the list, I have the paint to do our dining room chandelier…..still haven’t done it…and we live in Minnesota so you can’t really spray outside in this cold, and the basement is getting a new bathroom so the contractors don’t need me down there so it will probably still be on my To Do list in 2013. Sigh. I want it off my list!
Good for you for tackling yours, though.
I guess I didn’t realize the finish on those… *whew* much better. 🙂
Squatters. What a perfect word. I have numerous but I blame it on my superb list making skills. I can go onto the next page. It turns out, I’m lucky to get a quarter of it done but I like that it’s there. It’s better than not having something on your list [like your car’s due inspection]. oops…
We have a new front door. Hardware [that I searched for at the right price for about a year], and paint. All I need is to paint it and have some guy hang it because I have no interest in that. Maybe 2013…
😉
cant believe you’re super preggo and still doing things like that. You’re like a magical pregnant elf. And I mean that in the best-non-offensive way.
Wow, what a difference! The lights look gorgeous after and, I agree, they make all the finishes tie in beautifully. An added bonus – I think the darker, and more prominent look of the lights help distract from the poop brown trim. 😉
I did the same EXACT thing to my outdoor lights! It was such a huge improvement and they still look fabulous 6 months later!
It looks great! Don’t you love a no fuss project that has a great result?!
I love your blog and can’t wait for you to have your baby! Keep us posted!
They look great! I may need to do this to my front door light—it is beautiful but sort of dull in color.
Those are great lights! They look a million times better without the sponge paint!
Looks great! They’re like the eyelashes and the doors are like the luscious red lips. Hmmm … still hanging huh? Kept looking for your post and figured you may have had the bambino. Guess not. Hang in there
They look great now! I loooooove ORB spray paint. It covers so well and looks fab-o. I used it on some little filligree tacky gold candle holders and they turned out awesome. I have about a million (no exaggeration at all!) squatter projects right now…. sigh.
Are you planning to paint that trim? I had no idea tan could be so…aggressively tan? I don’t know.
I can’t believe what a difference that makes. Wow!
Huge improvement!!!!! Looks great!
Love it! Looks great, as always. I’ve yet to tackle a project that requires Frog Tape but I’m so excited to use it after I discovered it on your blog. There’s plenty on my to-do list that’s just sitting there, so I feel ya. One project at a time, though! 🙂
Spray paint is such a miracle! 🙂 My husband tells his friends that I spray paint everything 🙂 Great job on your lights! Good luck with your labor and delivery! Praying that you get some pregnancy relief soon!
Love finishing an easier project in the midst of a crazy one like a kitchen reno! Feels good to cross something off the list.
they look fantastic! why would anyone sponge paint a light?? so weird.
What a difference a little spray paint and frog tape can make. 🙂
Crazy how a can of spraypaint and a little time can make such a difference! 🙂
OK, could this post have been timed any more perfectly for me? I have a can of ORB spraypaint and 3 outdoor light fixtures (2 flanking the front door and one hanging in the entryway) waiting to be converted from what can be best described as antiqued brushed nickel (flaking silver?) to ORB beautifulness. I was planning to take them down and paint them detached. Not anymore! Just have to convince the husband who hates DIY and would rather buy new pretty light fixtures to hold that piece of cardboard for me! Any suggestions for the inconsistent surface (i.e. flakiness)? I would assume sanding but not I’m sure what to sand metal with.
Oh my gosh, I’ve been dying to do this to my hideous gold front porch, back porch, and over the garage lights too! How long did it take you to tape and x-acto the inside b/c that seems like it’ll be a pain to do. Did you paint the base and rod where the lights are attached? I was just confused as to why you taped the inside if Jeremy covered the bottom anyway to prevent overspray. Sorry for the 20 questions!
They look amazing! They are so nice and chunky and the ORB makes a great statement. I have these small, weak looking baby lanterns and I want some big guys like you have badly! Quick question, did you use Rustoleum Metallic ORB (with the primer) or did you use the regular can?
OMG!!!!!!!!!!!!!!!
We so have the same door hardware, and the lights look great. good job
http://weallneedalilcreation.blogspot.com/2012/10/one-way-door-no-more.html
Spray painting the lights is a great idea! I’m going to do that, too!
It amazes me again and again how much difference a coat of paint can make!
Looks lovely!!
Ok, you’ve finally convinced me on the ORB front. You and Sherry (and every other DIYer ever it seems) are obsessed, but I think I’m starting to get it! I have some outdoor pots needing some attention and it’s probably time I bit the bullet and joined you all in your ORB lovin’!
Asten x
Great upgrade!
Btw, saw this bacon scarf and thought of you.
http://www.swiss-miss.com/2012/11/fou-lard-bacon-scarf.html
Hey, Katie! A couple of weeks ago I purchased 4 new outside lights at a cost of $200. and also a can of ORB paint with the thought of maybe painting my lights. I painted the ones on the front porch beside the door. They were 21 years old and looked like corroded brass. When I finished painting them, they looked beautiful, and now I still need to do the ones at the driveway entrance. We did take the ones down off of the porch and took the glass panes off etc., because I needed to paint the brass color on the inside. When we do the ones on the driveway entrance, I am hoping we can do them without removing them, so I will definitely use the frog tape for that. I have read how you love ORB paint, and now you have me loving it too! Just waiting to have a perfect day to paint the other ones. So happy to be saving $200. on new lights! Yours look great too! I can’t wait to open up your blog and read that you’ve had your little one! So excited for you!
This is completely unrelated to this post (although the lamps look great) but look what I just found: http://www.swiss-miss.com/2012/11/fou-lard-bacon-scarf.html
Katie! A bacon scarf…I assume it’s like a dream come true for you;-), so I had to share! Check out the link. Too funny!
http://www.swiss-miss.com/2012/11/fou-lard-bacon-scarf.html
Katie~ I came across this and just wanted to share because I thought it might bring a smile to your face (and some drool to your chin? ha, ha)…
http://www.swiss-miss.com/2012/11/fou-lard-bacon-scarf.html
Looking forward to “meeting” your sweet little one soon!
Wow..that’s impressive! I have to say the old lights looked all sort of chameleon-like with the stones, but now they stand right out! Love them!
I love how sometimes the simpliest tasks don’t get done because things get in the way. I have a lot of them. Three light bulbs burnt out in my house this week… all in areas that need light (hallway, basement stairwell, basement) but we just haven’t dealt with it. I’ll do it tomorrow (probably) and it’ll take all of 5 minutes. And then there’s the light switch cover for our basement stair well that I took off and spray painted months ago but never put back on. Yeah, that’d take 30 seconds to put back on…. after I find the stupid thing. Maybe I should go splurge 50 cents on a new one and then spend the 30 seconds to put it up… Yep, those are all on my to do list (and a lot of other major things… you know how it goes).
haha…sounds like us 🙂
xo – kb
haha…hilarious 🙂
xo – kb
I wonder if it’s scented 🙂
xo – kb
Now the bacon can be close to your heart 🙂
xo – kb
Yay! I can’t believe how expensive things can be…and how great lights can look by simply changing the color 🙂
xo – kb
DO IT DO IT!
xo – kb
I used the Rustoleum Universal Metallic Spray Paint. It says ANY SURFACE ANY ANGLE. And it does have the primer in it.
xo – kb
It takes about 45 min per light (cut that in half if you have someone who can tear the tape and hand you the pieces…and no toddler creating chaos!)…and yes, I did paint the inside bits – Jeremy held the cardboard lower and I got overspray all over my gloved hand but it came out fine!
xo – kb
I would first use a wire brush to get off big chunks of paint (be careful not to scratch the glass!) and then use a sanding block or a sand paper. It should come off pretty easily 🙂
xo – kb
haha…I love that term. I’m totally stealing it. And hopefully one day we’ll paint it because yeah…it’s ugly.
xo – kb
Let me join you…BABY! BABY! BABY!
xo – kb
Looks great KB. HUGE difference. You and YHL turned me on to ORB and for about a week after I started using it I walked around the house LOOKING for things to ORB-ify. 🙂
PS Im ckng the blog about every 30 minutes for..you know… 🙂 THinking of you… is it 10 days late now? 🙁
Your lights look great! I want to do the same to ours, which are currently white. How did you get the tape on the inside of the light? Do you think it is necessary to also paint the inside? Thank you!
Nothing has impressed me like your taping job Katie. I am serious. It is beautiful. No joke! I stink at it!
I did because this is a very prominent area…lights that are farther away probably wouldn’t need it but if you can imagine coming to someone’s front door and ringing the doorbell and then as you wait, looking around, seeing the inside unfinished parts of the light…well, then you might wanna go ahead since you are already doing the other work. And I just tore a piece off…and then squeezed my hand up inside and did it while looking through the glass on the opposite side.
xo – kb
What an awesome makeover, Katie! So glad you decided to lose the sponge look and bring out the beauty of those lanterns. Lurvely! When’s the bub making his appearance, btw? I’m sure he’s going to approve of all the DIY-ing the two of you have done together! 😉 Keep us posted, pleeeze. mwah Hx
Did you have problems with the pain looking chipped when you pulled the tape off after it dried? I’ve always heard to peel it off right away for a cleaner edge, and I’ve run into that problem myself. Anyway, they pop in such a fantastic way right now! I never get tired of little upgrades that make a big pop. Praying for you and baby every time I think of you!
Nope. I didn’t at all. I sprayed these in the afternoon and pulled the tape off that evening…so maybe I waited four hours? I hope this helps a little.
xo – kb
First off, I adore your front door — beautiful color! Secondly, your light fixtures look amazing!
Wow! That looks fabulous. I have a brass light fixture above our kitchen table that drives me bonkers, but I am afraid of the work that would be required to take it down and then put it back up after I sprayed it (I spray painted my brass knobs on my cabinets and LOVE them). Have you spray painted inside before. Is it foolish to even think about spray painting inside?
Good luck with the labor and delivery. I know you are very anxious. And here’s something that someone told me before my second that has proved to be very much true: The first 3 months are sooooo hard, but then you get into a routine and things become fabulous. I kept telling myself during the first 3 months, and it was true–after the first 3 months, things got much better.
Your front porch is gorgeous!!! I never even thought of spray painting the lights (and adding a coat of paint to our door!). I wish I knew what colors would work, I am very indecisive 😉
haha…yeah…I don’t know that I would attempt that 🙂 I really don’t think it would be that much work to take it down – especially since you are planning on putting the same one back up and hopefully your ceilings are too wonky 🙂
xo – kb
Don’t know if anyone else let you know yet…
You can buy new window inserts instead of whole new doors if you don’t like the ones there now.
i am so glad you posted this project because i have the exact same one on my to do list! i already bought my frog tape and was planning on ORB, so it is nice to see how great yours turned out. we only have one light to do, but ours has a (not-so) lovely brass finish. figured this would be a cheaper fix until we can replace it with something less ugly!
Oh my God! These look great! I have been agonizing about how to paint my bathroom light fixture without removing it, and now I know!!!! Something so easy, yet genius, with the tape and cardboard.
And congrats on the baby! He is absolutely beautiful!
There is definitely something to be said for a gathering of mini pumpkins on a front porch. It just screams, “come on in, there’s a toasty little fire burning inside. Pull on a chunky knit sweater and a cup of hot cocoa and make yourself at home!” Or is it just me?
Frogger tape rocks! I used it for the first time to make super straight (no jagged-painting-seeping-through) painted lines. The outdoor lighting looks BRAND new and gorgeous!!! Just like your beautiful new bundle of joy! Congrats!
I love this! Would you say your stone has a peachy or fleshy tone to it? Ours does a tiny bit (but mostly gray) and I have always wanted a gorgeous red door. I am just not sure if I can pull it off. I painted it black last year. Our previous Napoleon owners painted it a crazy purple (as well as the shutters and garage door, ugh). So I temporarily painted it all but I don’t love it like I should. But I am terrified to go ahead and paint the door red! help!!!
It’s a gray undertone I think…maybe with very very little flesh in it.
xo – kb
Night and day transformation as usual! simple as that, a totally new look without the cost. great job!
Fantastic, I could not have done it better myself, great tips for the DIYer.
Amazing tips and advices on painting, besides, congrats for having a high vote among DIY blogs.
Is there a reason you didn’t remove the outside lights from the wall to make painting easier? We just did this at our house and they are usually really easy to pop on / off and re connect the wires. And to prevent overspray we used a large empty cardboard box as a makeshift “spray booth”
Because we have a stone façade and honestly, there are times when you remove things and can’t get them to sit level or flush like they were before and I didn’t want these front lights to be one of those times. I am planning on disconnecting the garage and back door light (they are the exact ones as this) but since they sit on flat brick and siding, it should be a lot easier to reattach.
xo – kb