AHHH! I have been waiting and waiting and slacking and indecisive and hemming and hawing and then back to waiting…
And finally it’s here! THE FLOOR IS HERE PEOPLE! Rejoice in the streets! Drink something bubbly! Take off your clothes and dance! Ok…don’t do that last one. And never click on a nakedselfie hashtag. Seriously. bad idea. Learned that the hard way. No pun intended.
Let’s go back a little…as in back to May 2013…and take a seat in my piles of dirty laundry…
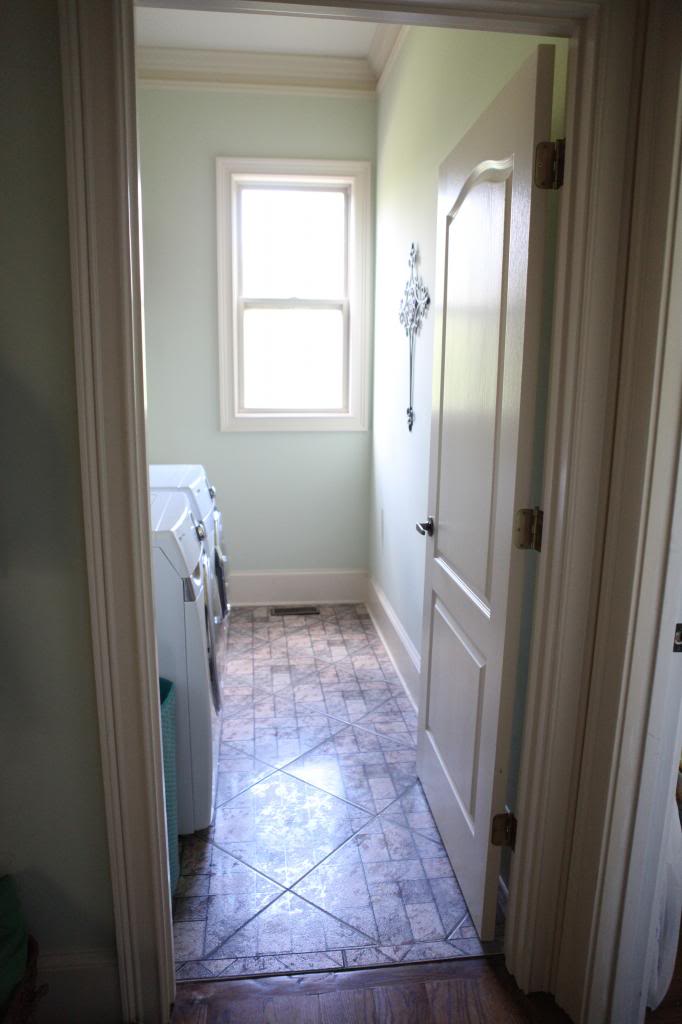
I hated the laundry room. It had zero appeal to me. Don’t get me wrong…I’m glad we have one. It would stink to have to trek to the basement (like we did in our last house) or wash with a board outside. (#firstworldproblems) But if I designed a house, this laundry room would not be my first pick. First of all…all the finishes were terrible…the cabinets were orange-ish brown, the tile was pink and gray and weird, the space is really narrow (like if you open the washer door, it has maybe four more inches till the wall). I would much rather have a smaller foyer and a bigger laundry space. It’s one of those spaces that I spend a lot of time in so I get to pick it apart on a daily basis.
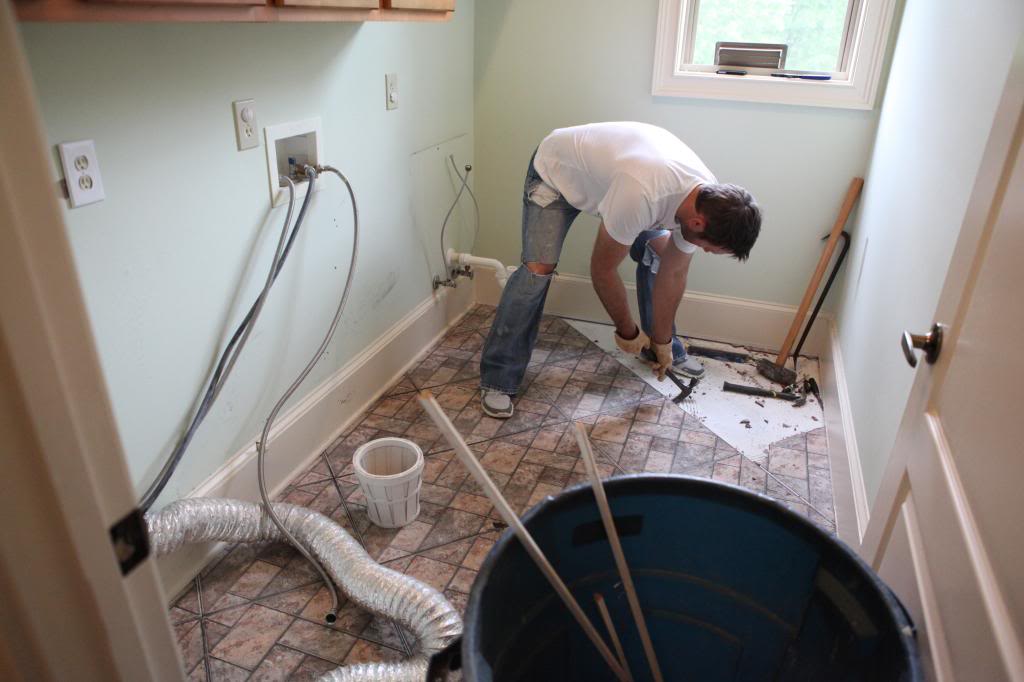
After we ripped out the floor, we did accomplish a whole lot. We figured that we could make this lemon into our lemon bars with cream cheese…because dude…anything with cream cheese is better than lemonade. You know you geek out in the cream cheese section.
So we painted the cabinets, the trim, the walls, and even did a fun accent wall…but the floor remained the same plywood boards. They had some pretty awesome holes. Fun fact: Weston loved to stick his fingers in those holes. It was his thing. Babies are weird.
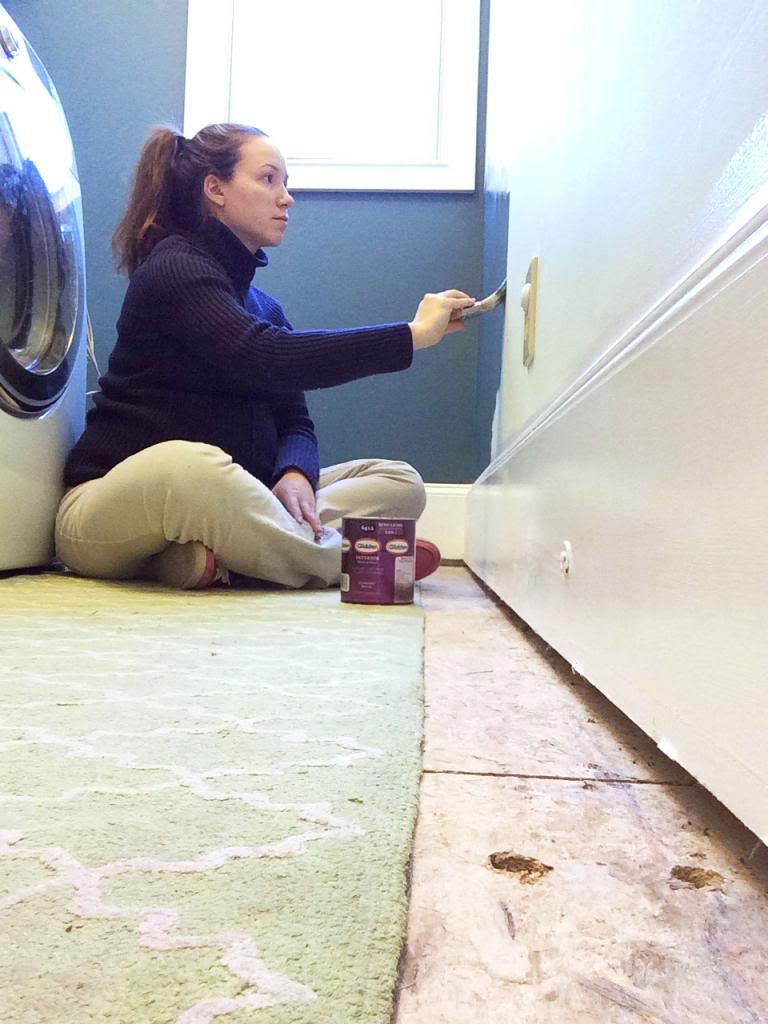
Finally, I got so sick of it that I told Jeremy that we absolutely needed to do the floor or I was gonna stop doing laundry. I drew the line. My empty threat must have worked because he took out the washer and dryer for me that night.
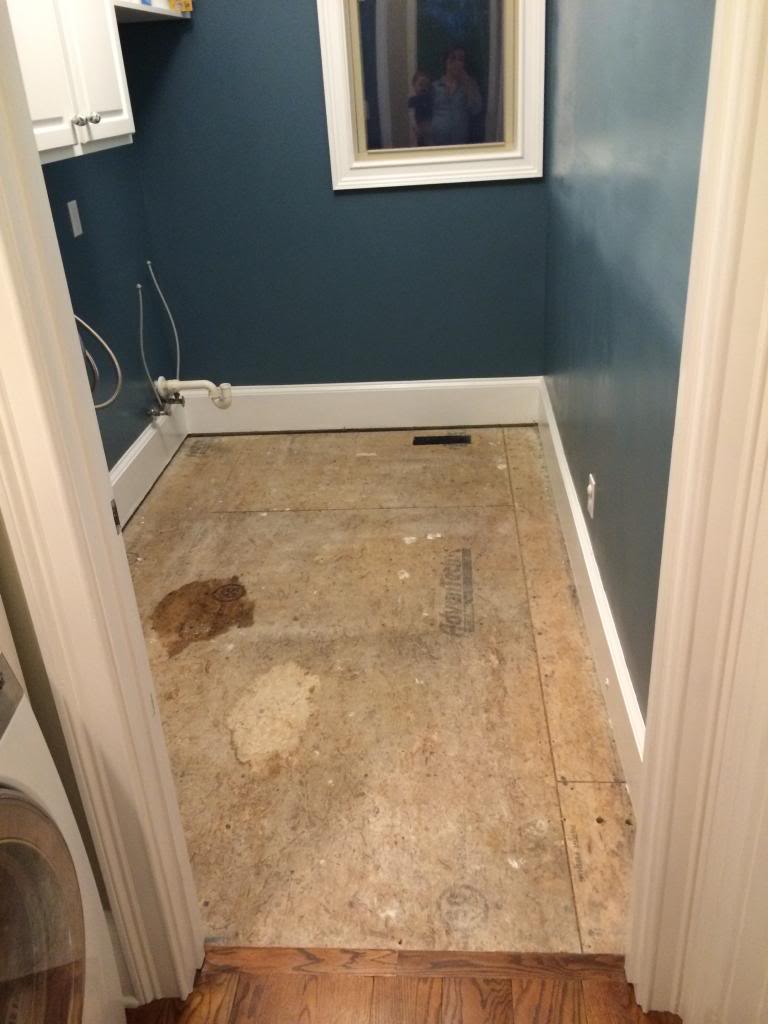
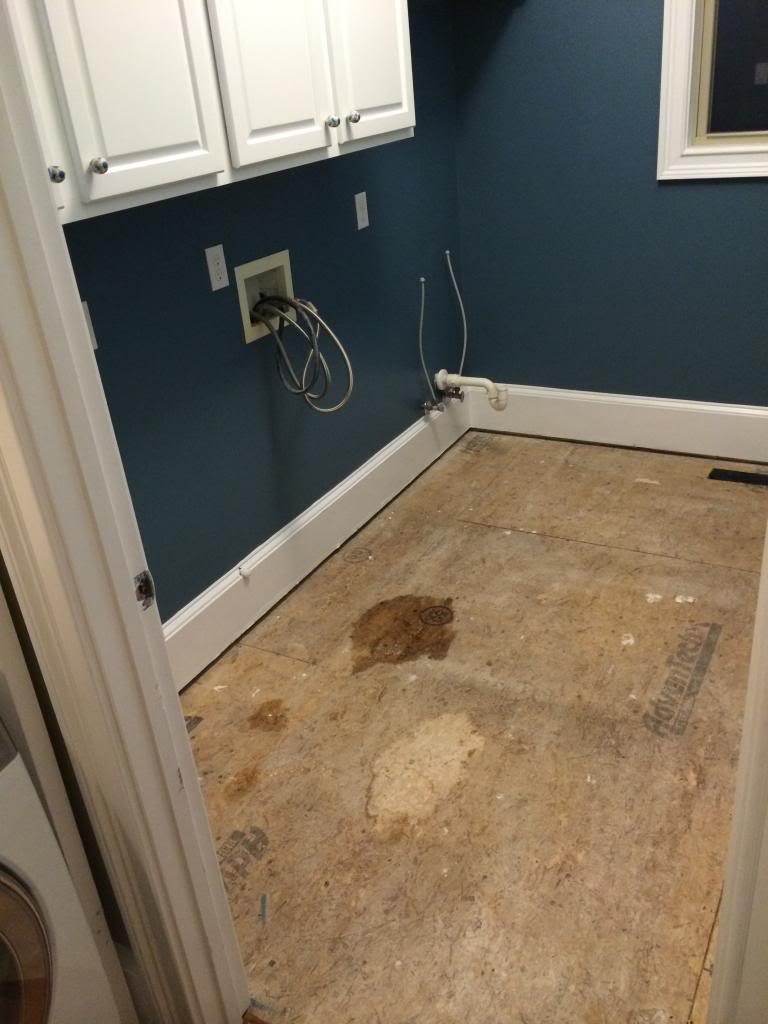
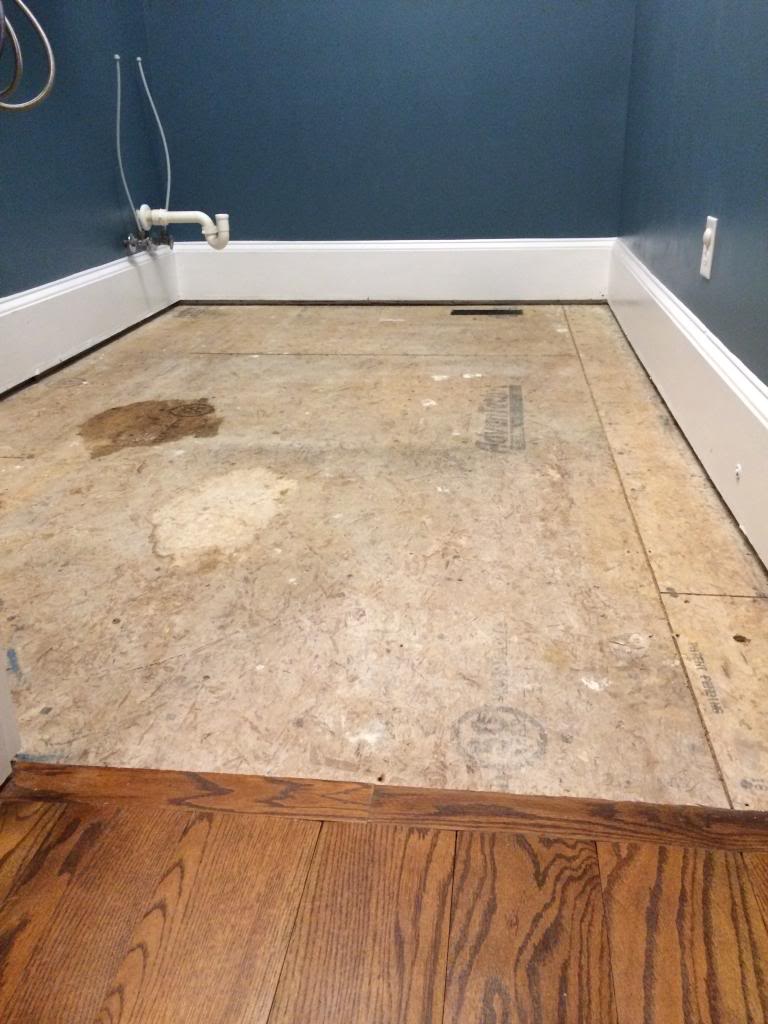
The water spots are where I spilled stuff. The washer and dryer are still fine and we don’t have leaks. Just a pregnant girl with bad aim.
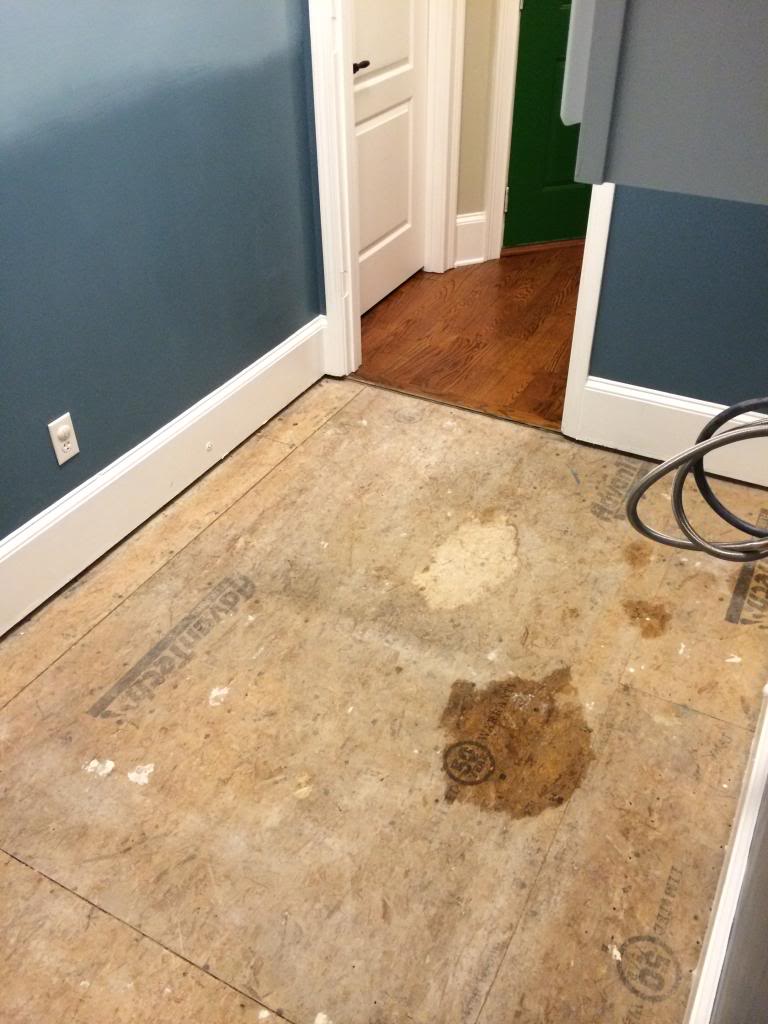
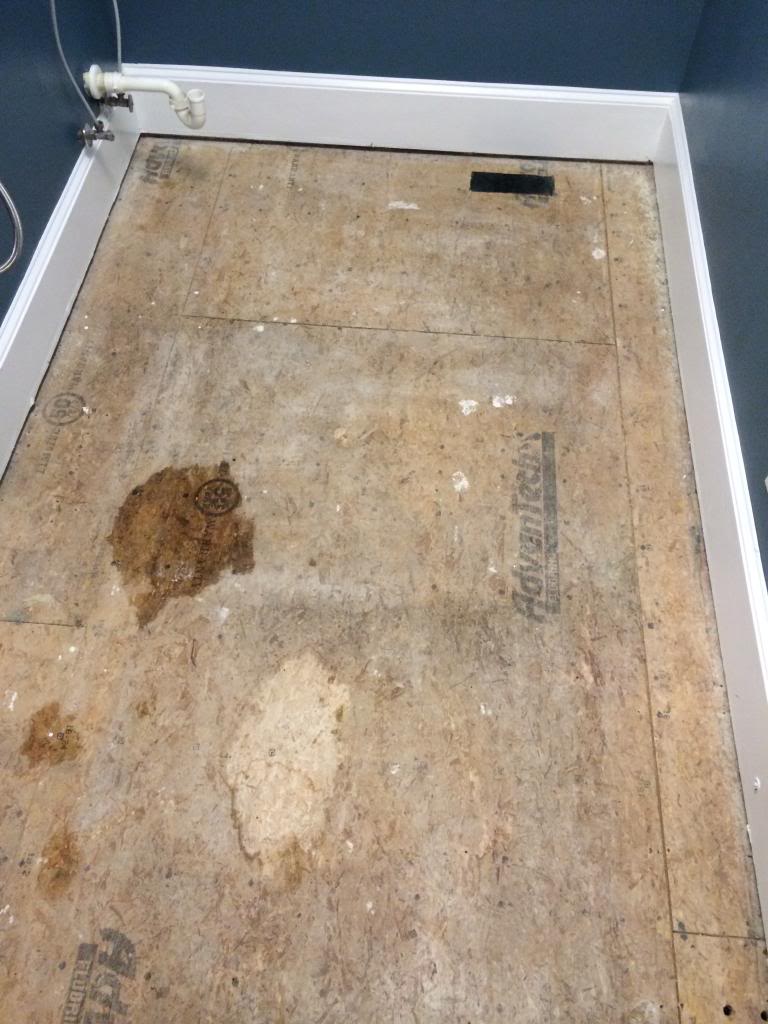
So basically the first step in tiling is all the prep. We cleaned the floor and made sure that we had removed all the pieces of debri or dirt that could hide under the floor trim. Then we went through and made sure all this subfloor was even. We wanted to be sure there wasn’t any obvious high spots which could make the concrete board bump.
Speaking of concrete board, it was super easy. First thing we did was dry fit it all. Girls…this is not hard. You can do this. The hardest part is picking up the heavy board. But when you cut it, you just bend at the slice mark and then it pops off.
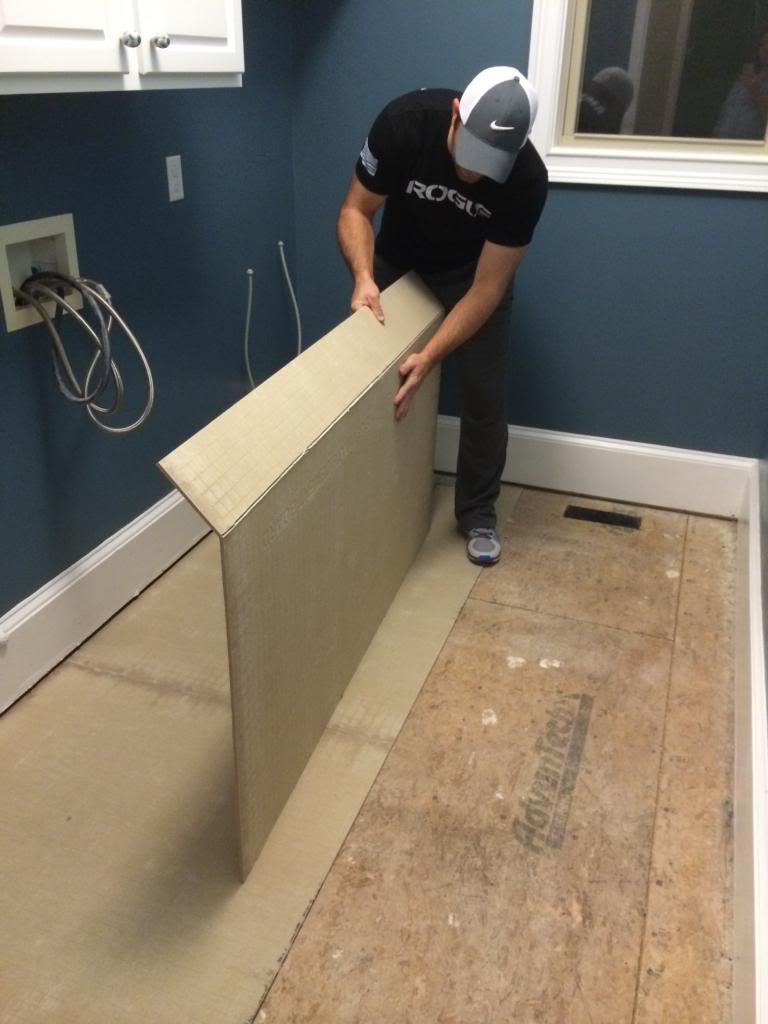
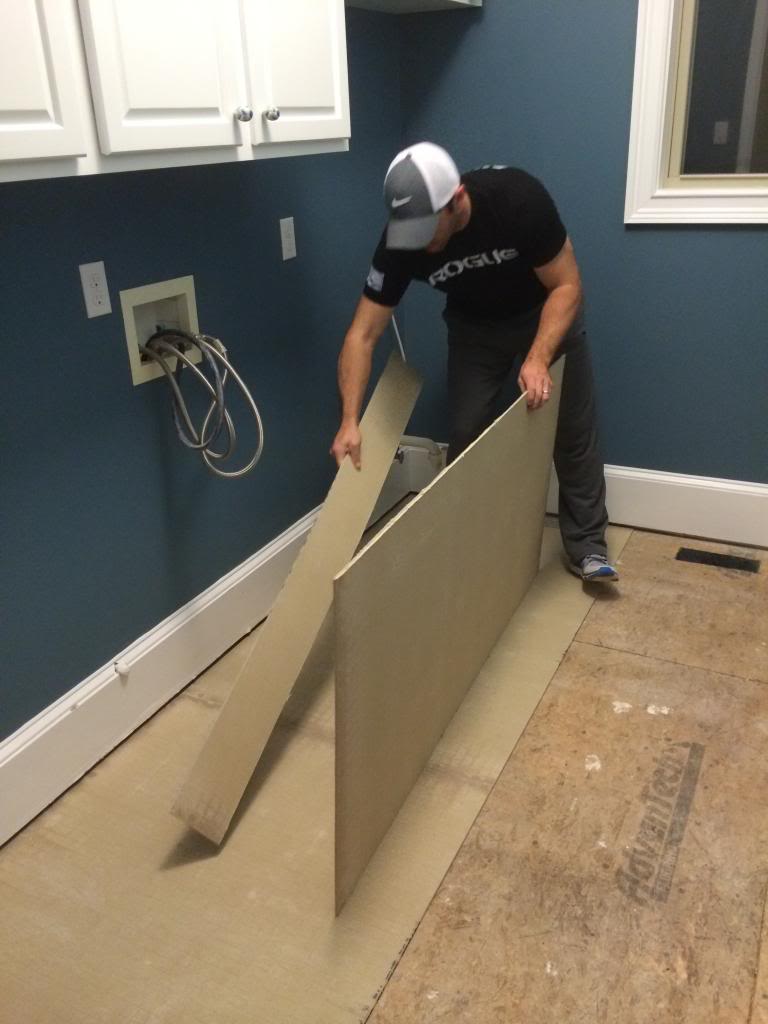
After it was cut, we just slid it into place and started on the next piece. You wanna make sure the seams of the concrete board don’t line up with the lines of the subfloor.
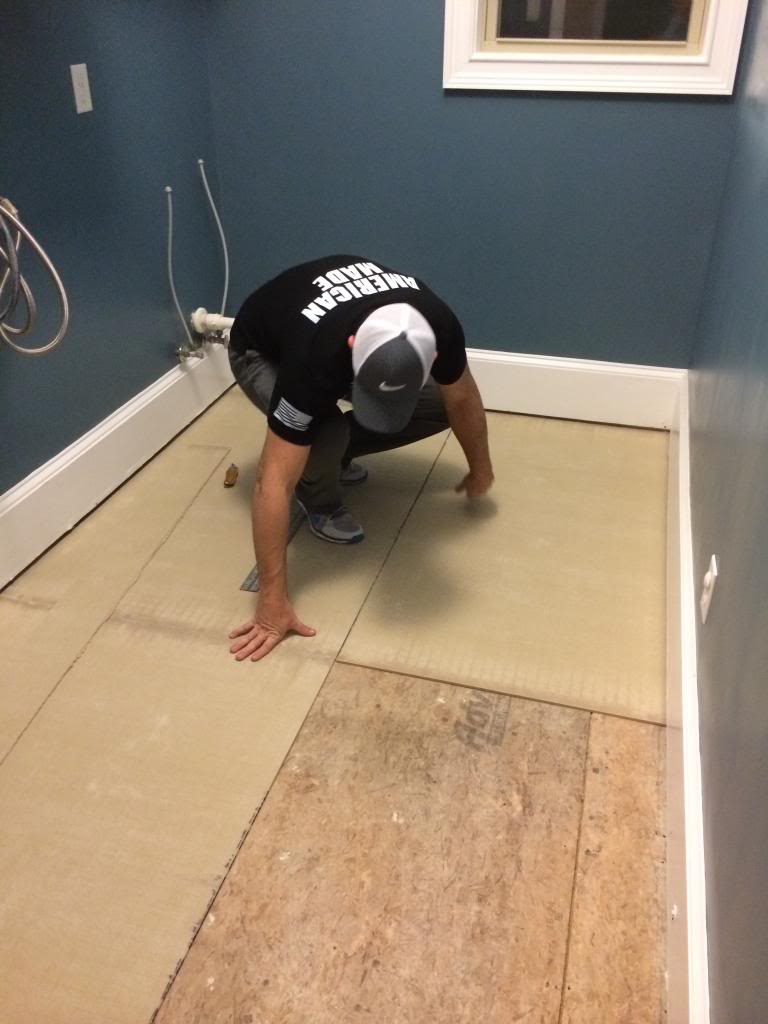
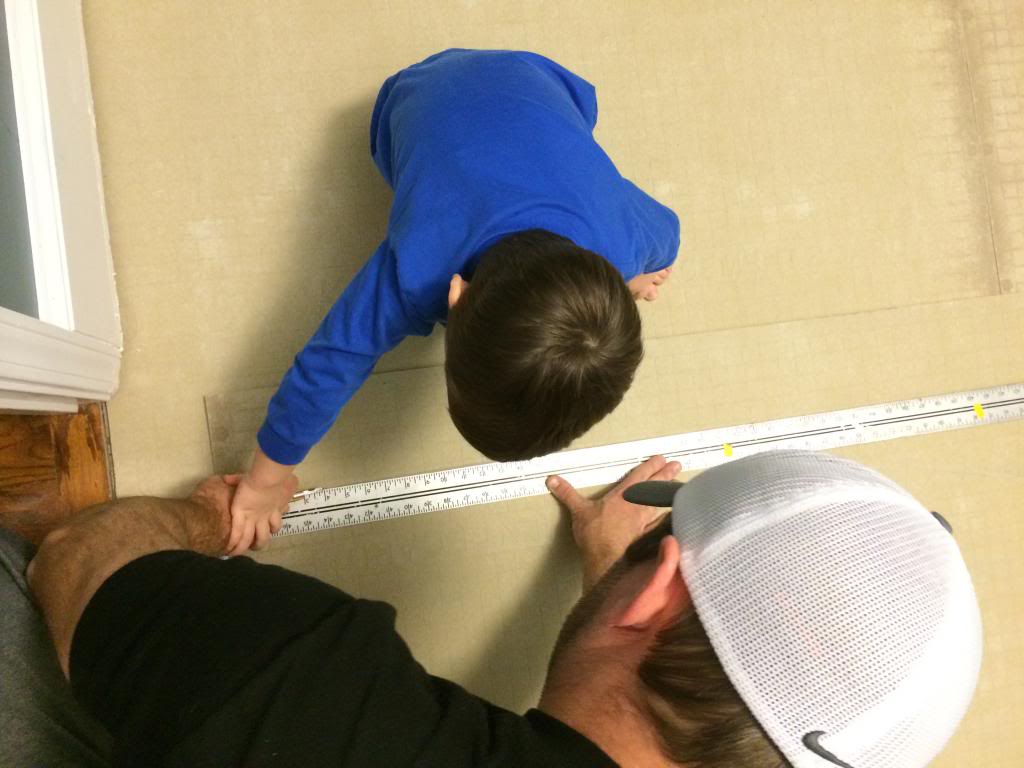
The way we figured out how to cut the boards is by laying them down and marking the lines where to cut. The most helpful tool is that long metal one on the floor. It’s called a drywall t square.
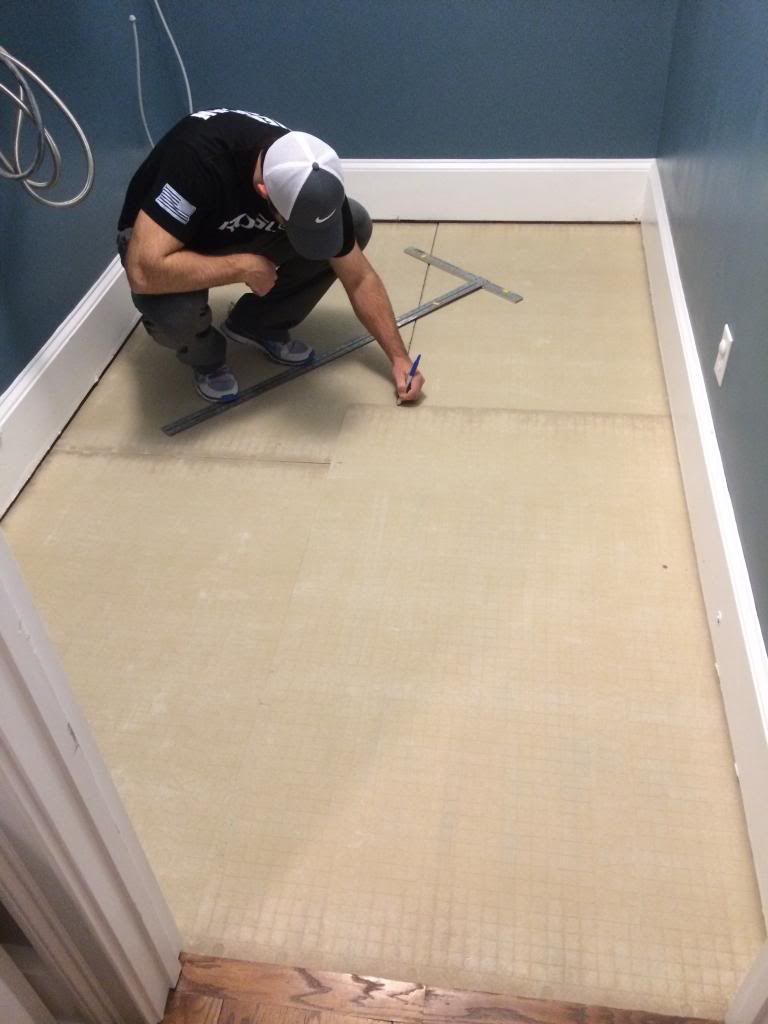
Jeremy would just line it up with his marks and it would make a perfect guide line for his box cutter blade.
Will is taking notes so that he can tile our bathroom. He’s gonna be four soon…it’s time for him to step it up.
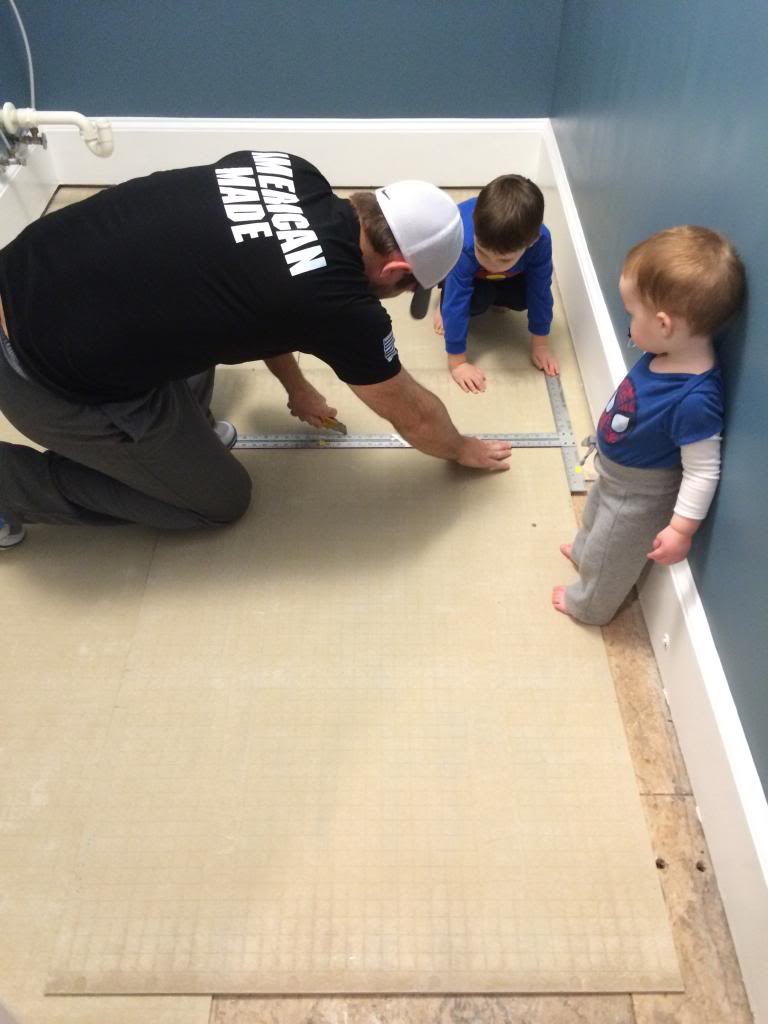
A lot of people ask about him participating in DIY projects. It comes as second nature to us now. He actually is contagiously excited about getting in on projects and it makes it a little more thrilling to do small things (even though it takes longer and it may be frustrating at times because we have to say no to things like him using ‘big boy tools’). Will has always taken an interest in the tools and helping. Weston has yet to show that same interest but I will let you know how that works with two.
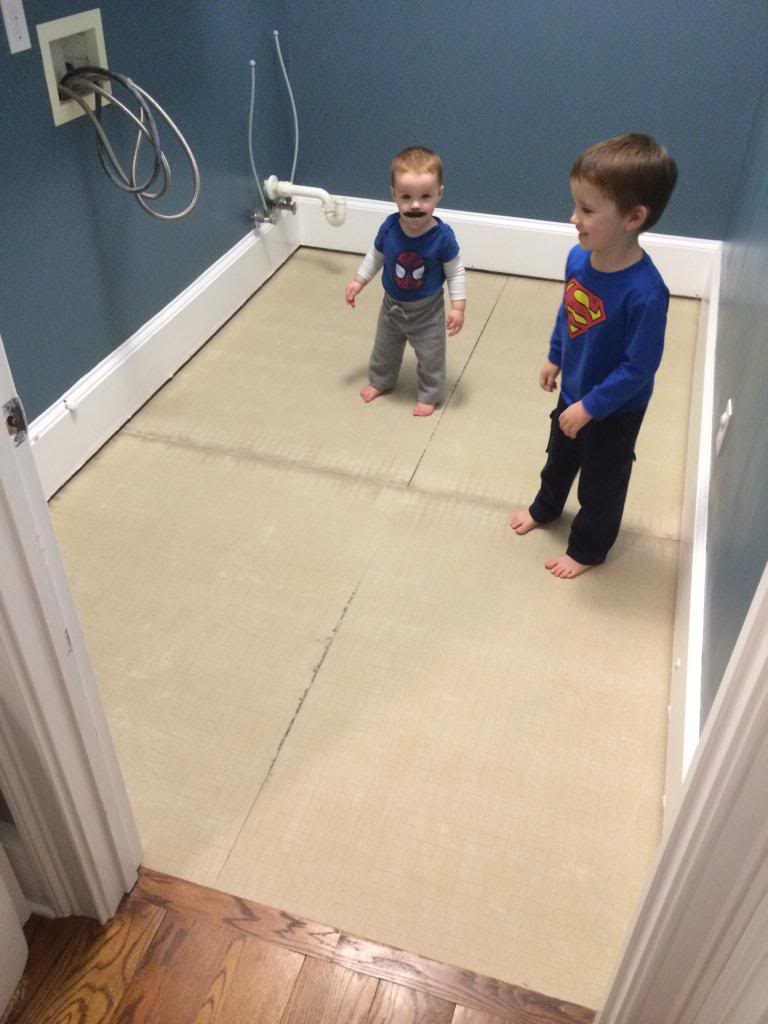
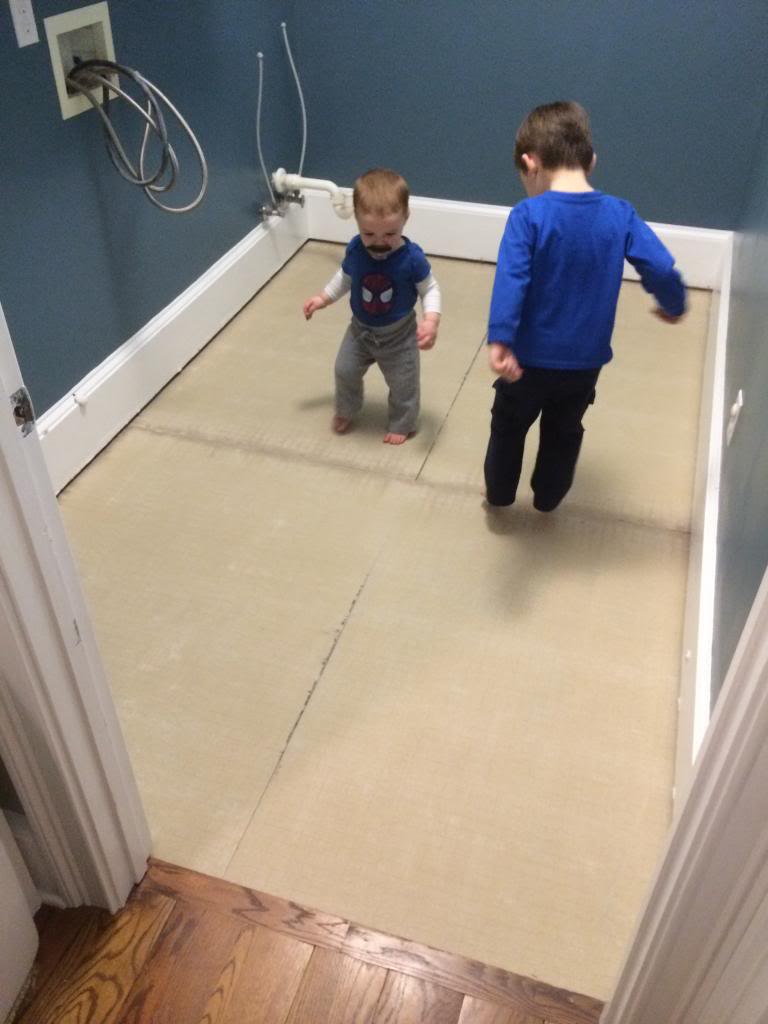
I think both boys…I mean, I think both Spiderman and Superman were excited to see the new smooth and flat floor. There was a lot of jumping.
After everything was retrofitted, it was time to pull it all up and start with the thinset. Thinset is basically just adhesive.
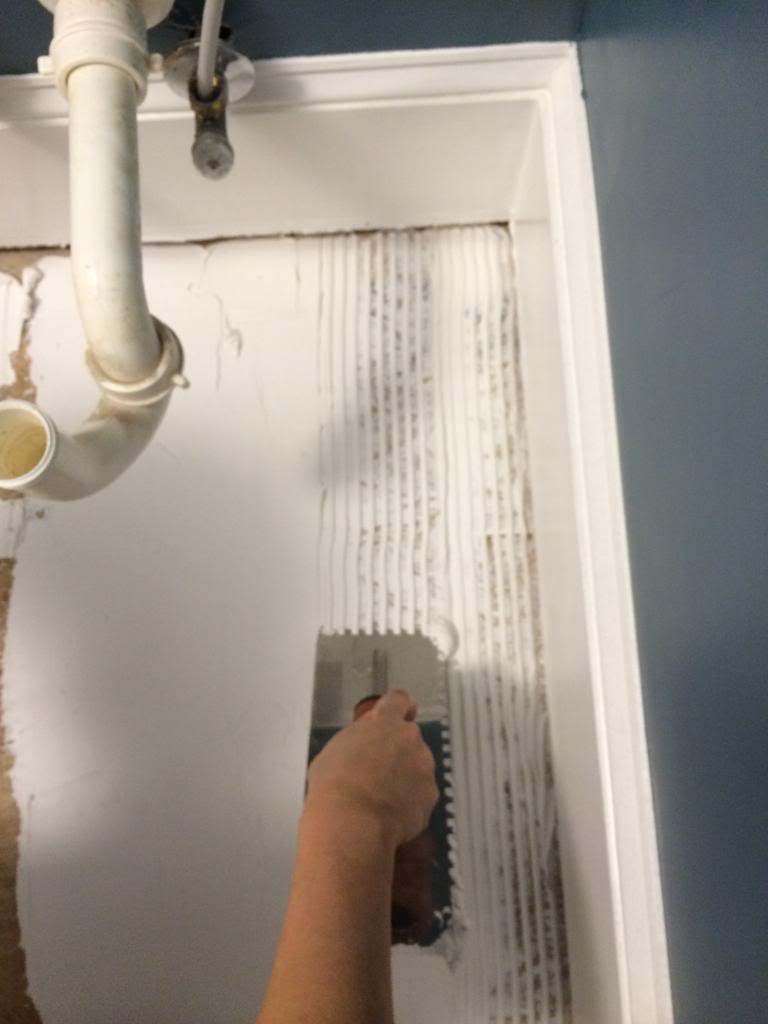
I started in the far corner and did a thin layer for the entire area under where the first board would be laid.
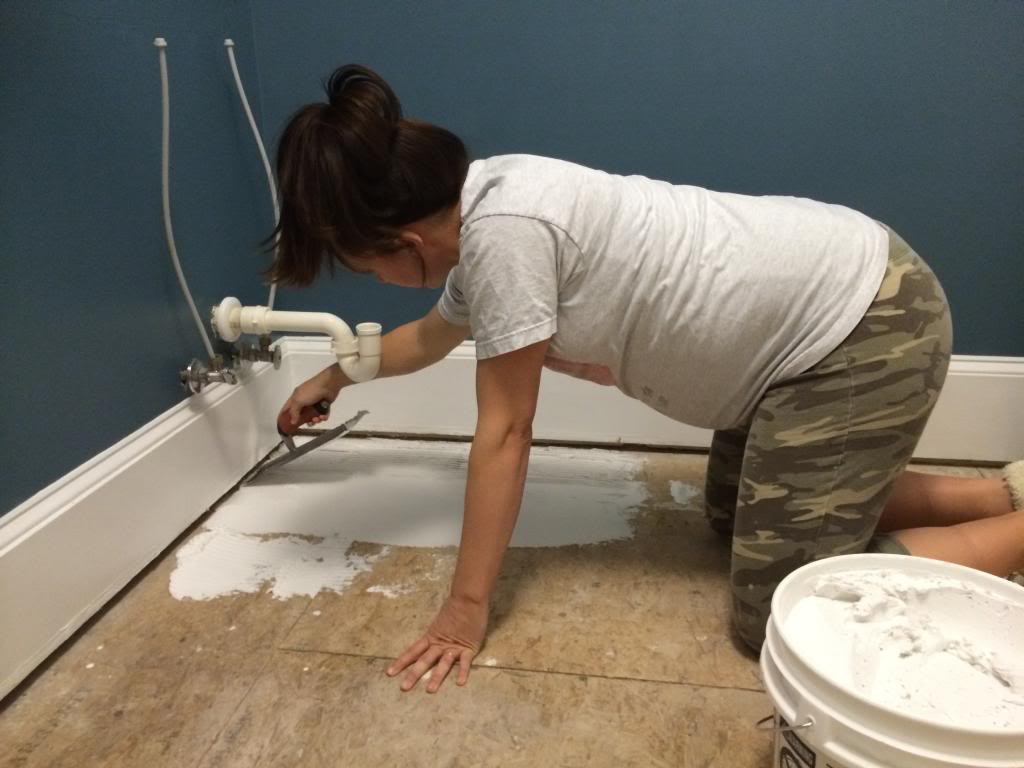
We buy premixed thinset because it’s cost difference is worth it to us. We know that if the thinset is too thin or too thick, it can really screw up your concrete board adhesion, leveling and your tile.
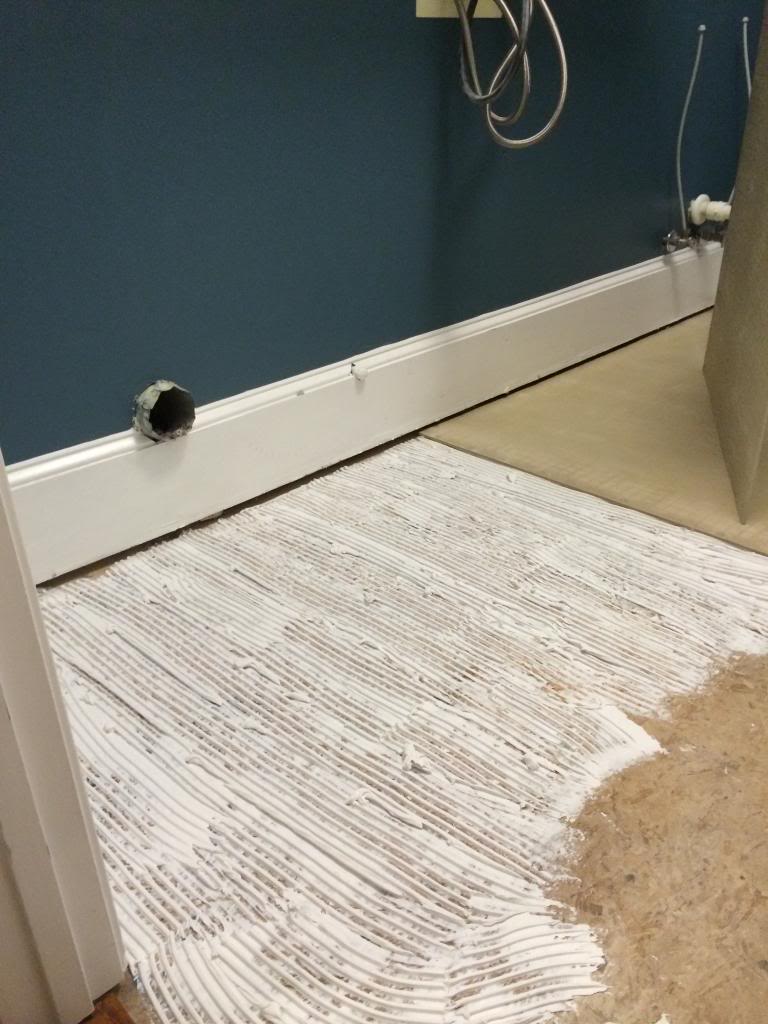
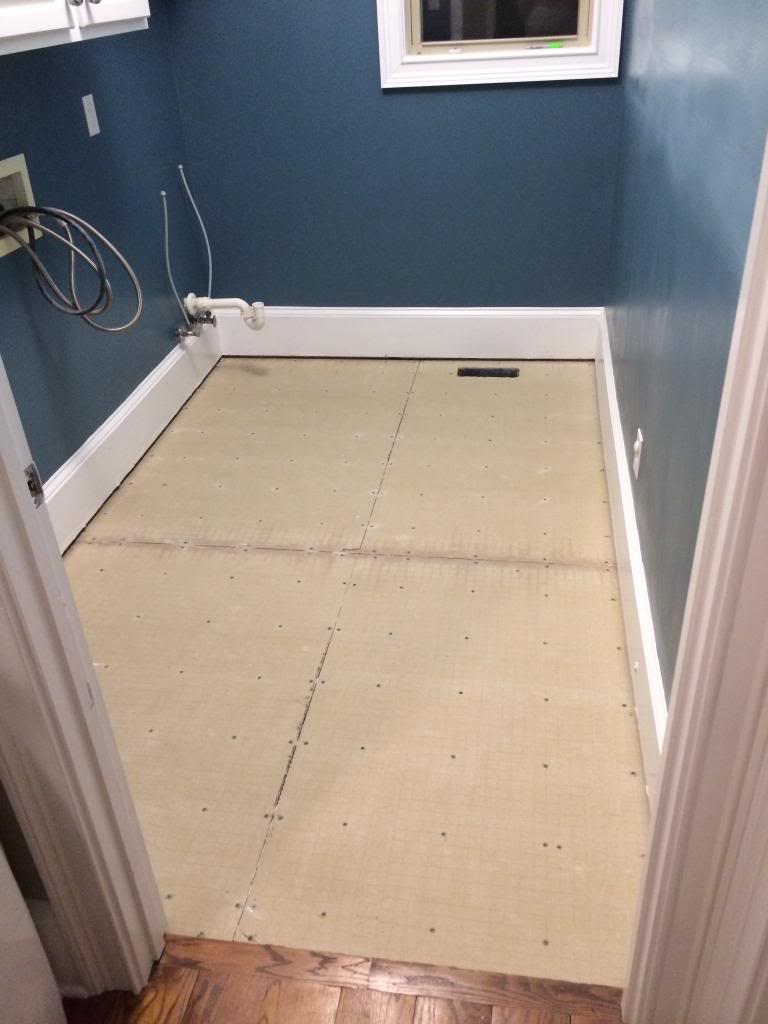
After it is troweled on, the board is just slipped under the floor trim and laid flatly in place. Then after all the pieces are in place, you screw them down. The screws we got were the ones that were recommended on the little pamphlet at the home improvement store. Those little education pamphlets are helpful.
The boards we bought we called 1/4″ HardieBacker EZ Grid…they actually mark where you should put the screws in…it’s pretty much made for sleep-deprived (aka brain dead) folks like us.
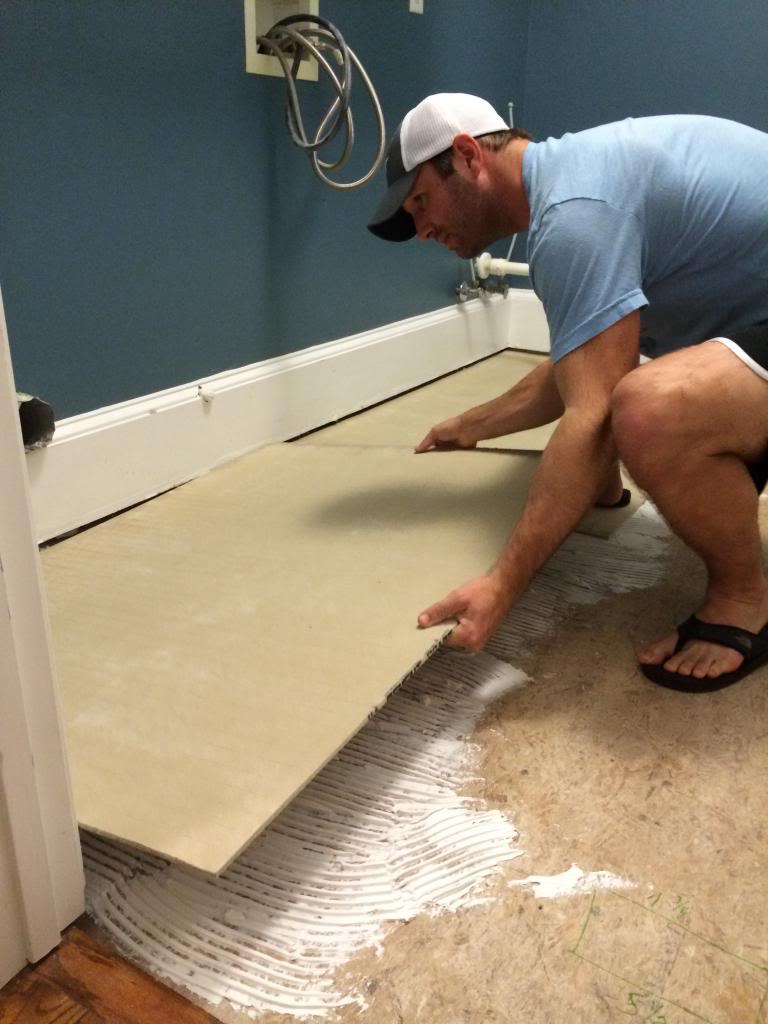
You have to make sure you sink it low enough where the screw head is not sticking up. Otherwise it will cause a problem with your tile.

Jeremy cut out the vent area while I was putting in the screws. First he drilled a little hole in the corners and then used a jigsaw to cut out the rest of the rectangle.
(you can see where we jammed a towel down into the vent so that all the dust and debri wouldn’t fall into our heating ducts…we just used a big towel and then removed the junk later with a shopvac)
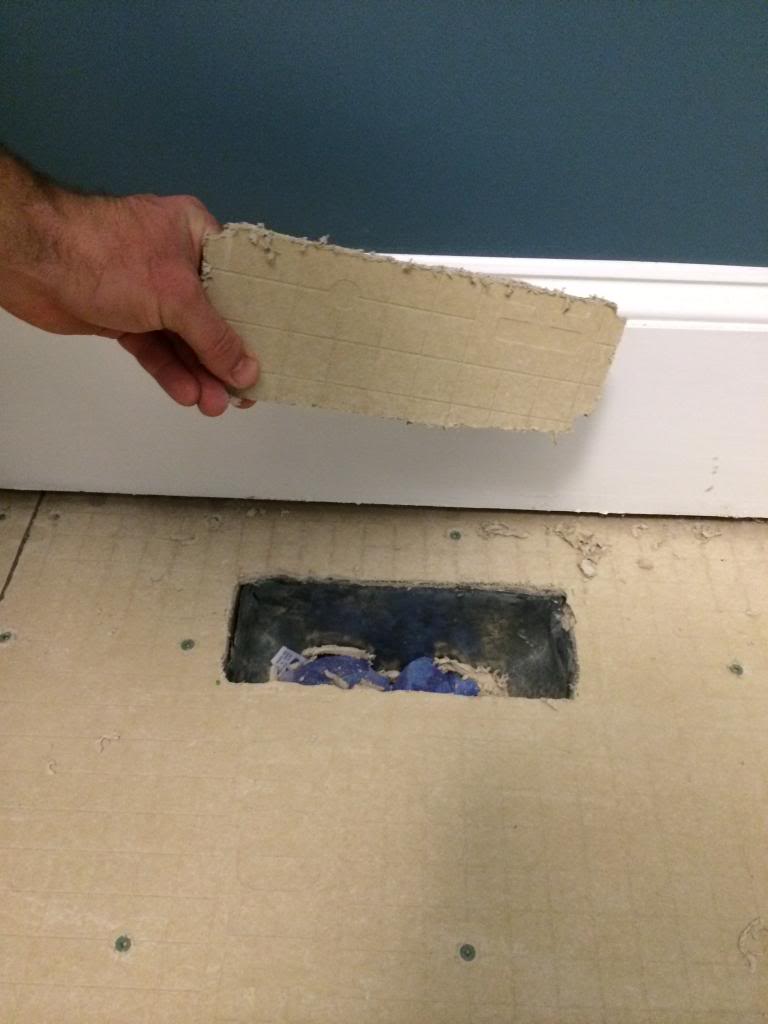
Day two of floor installation…complete 🙂 Already it looked way better than the subfloor!
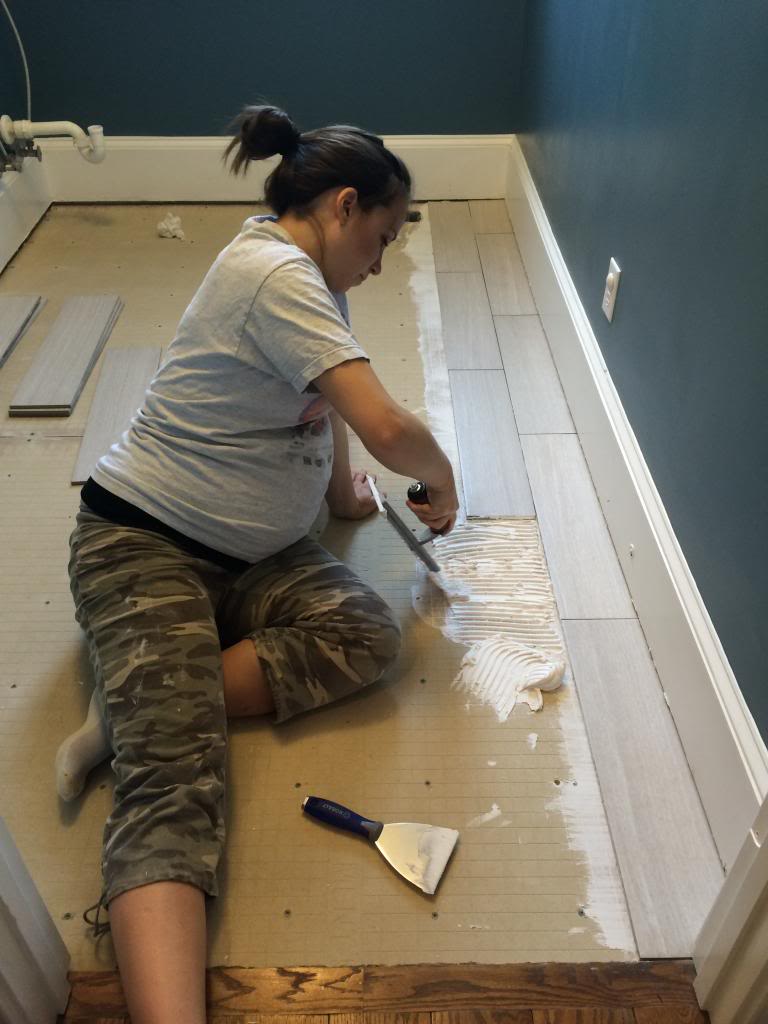
Next came tile. We found some really gorgeous plank tile at Lowe’s and since I was in a rush to get this done (remember, we have two boys and lots of dirt…we NEED a working washer at all times)…we just went for it. I laid it out first to see what design I liked best…
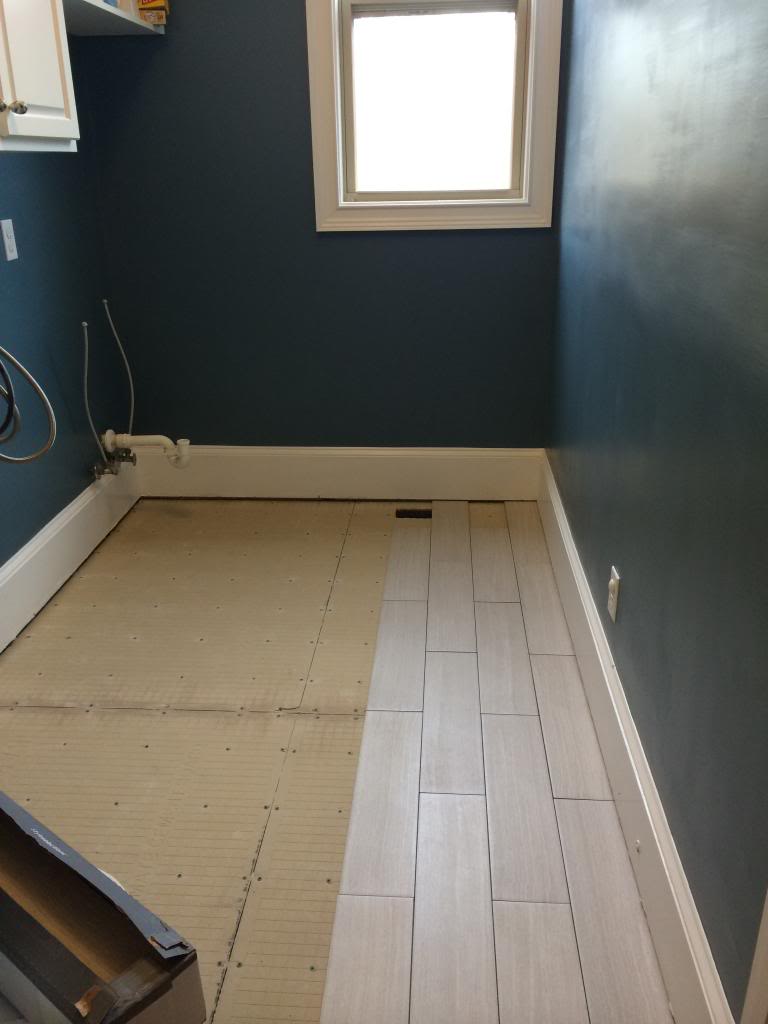
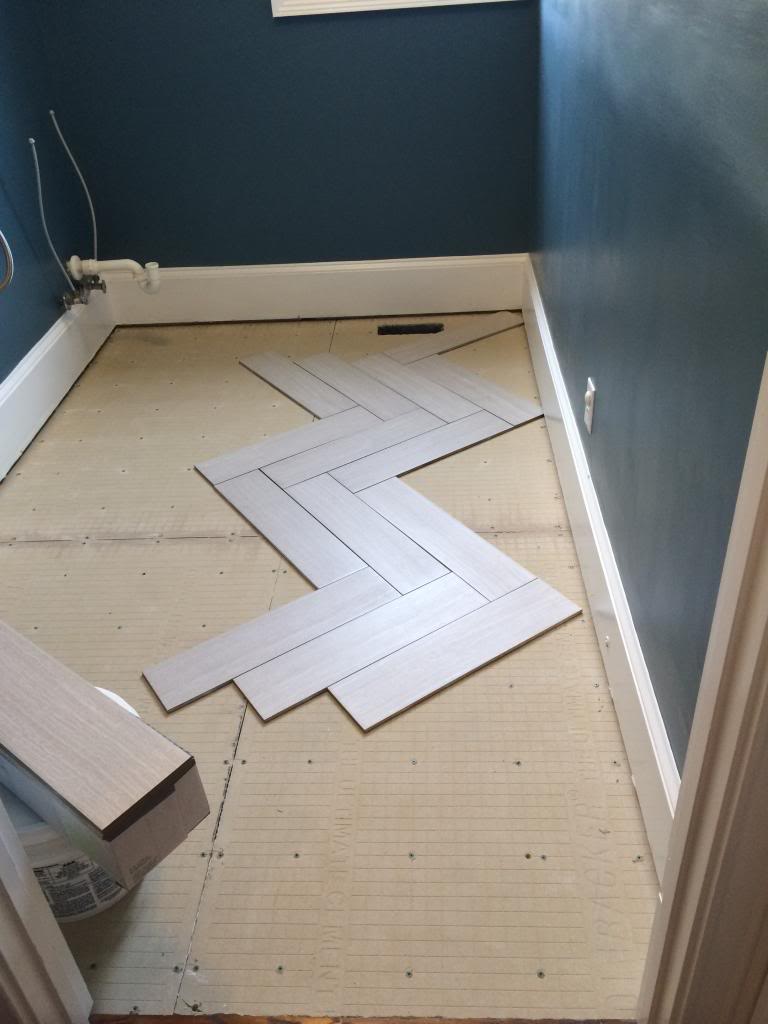
I love love love the herringbone but this space just wasn’t big enough to support it. I think it works better in rooms where half of it isn’t covered up with appliances. I think a kitchen or a bigger bathroom would be OUTSTANDING with this though.
Okay so here is where I start tiling. And where I leave you.
Twenty five pictures is quite enough for now.
I will try to do the rest of this post later…it’s the fun stuff…seeing that floor done is like music to my eyes. or chocolate to my ears. or whatever…you know what I mean.
Katie – where to start! Absolutely LOVE seeing all the men in your house working together. Jeremy was made to be a Dad!
In my opinion the herringbone pattern widens the room. Having said that, you seldom make a mistake so will wait to see the reveal.
Lastly, keep on doing what you are doing. Absolutely loved the selfie. In fact, it was breathtaking. There are always going to be the nay sayers but your gut instinct is spot on!
I love the tile you picked out! And the boys are too cute helping out
We have almost that exact tile in our bathroom but got ours from The Tile Shop so a little different. I love it! It was super fast to install and we get lots of compliments. We went with a light gray grout, can’t wait to see how you finish it!
Katie, you look beautiful! And good for you to get this done before another little boy takes up even more of your time.
Yay for flooring! I love love that tile and your wall color. I’m thinking of a similar shade in our powder bath… Can’t wait to see the finished room! Now in off to stretch. Looking at your preggo self down on the floor, working, has made this preggo gal flare up with phantom sciatica pain. 😉
Love the floor! Also, you are looking fantastic! Pregnancy suits you well. : )
OMG – that first photo of Smiley Spyrus in sweat pants! Too cute!
That blue wall colour is gorgeous btw.
Stop it! We laid the exact same tile in our basement this weekend!!! We had a flood last year and had to gut the space, so my hubby has built a new inlaw suite/office (10’x12′) with a huge closet, french doors, and relaxing fireplace area! I’m blessed (and a little proud!) 😉 Love the tile!!!
We just put the same tile in our bathroom. Beautiful!
I think you could have done the herringbone!! The tile looks great both ways though!! Can’t wait to see your finished space. : )
Great Job Katie! Can’t wait to see the final reveal.
Love the floor! Your helps are cute. Especially the one with the mustache. 😉
http://happinessiscreating.com/
Hi Katie, I like the tile you picked out! I have some similar tile that’s been sitting in my garage for my bathroom project for I dunno maybe 6 months or so, you’re not alone! Can’t wait to see how it turns out – Aimee
So impressed- hoping you share which tile that is from Lowes. Love it!
Girl you are a machine. A b.a. pregnant machine. Kudos to you!
Love, love, love the flooring! I can’t wait to see how it all comes together!
KATE!!! look at the cute belly and you bad a self rock’n the prago DIY. <3 just had to say you make me smile 🙂
I can totally relate to the photo with the boys watching over daddy. I have two little girls who love to watch daddy do work. I also love the tile you chose so pretty. Can’t wait to see the finished photos!
I thought the first picture was the after shot and was a little worried because that floor was hideous! But I love the tile you picked for the new floor!
Looking great!
Ok, I love the herringbone. I have a few rooms that could pull that off. So does this tile have a wood feel to it? I like that product and think it’s a good idea but worry that it will be so “early 2010s” in a few years. If it doesn’t, ignore me and carry on. 🙂 I love the shape regardless.
TIN FOR THE WIN!!! These are awesome! I love the antique feel of these prints. My daughters recently had awesome photos taken by a fantastic photographer so I would definitely use one of those shots.
We used that exact tile in my kids’ bathroom…I LOVE it, and think it looks great in your laundry room! 🙂
I think if I were to move again I’d love a bigger kitchen and a bigger laundry room, there’s just something about nice big laundry rooms with a sink in it or extra storage space that makes my heart melt. Also, I think people fussing at you so much about things really just have too much time on their hands. Glad you’re trekking on and keeping up all the good work.
It looks better already, and I agree about the herringbone. DIY has been around a lot longer than it was called DIY so start those boys young. Their future wives will thank you for it!
It doesn’t feel like wood but it doesn’t feel like tile either. It’s a weird mix. I like the fact that these are not quite as ‘wood’ looking as real wood or even other wood tile that I have seen. It doesn’t have knots and the grain is a little more uniform on each tile so it is definitely more of a nod to wood tile vs an actual wood knockoff.
xo – kb
Sorry! I forgot to put in the link! Here it is 🙂
xo – kb
Haha! I love that so many folks say that their projects get left unfinished (or unstarted) for months at a time. It makes me feel better 🙂
xo – kb
Oh yeah…that week was horrible. Every night after I finished a phase, it was like paralyzing pain. BUT I will be so glad when the bambino comes along and this room is finished!
xo – kb
That’s what we did too! Light gray grout!
xo – kb
Love how it’s all coming together so far! I envy you your laundry room. We have our machines in our unfinished basement, so it’s a little bit of a trek for me.
Looking forward to seeing the finished floor!
LOVE that tile! We have the same thing in our bathroom and then did a tile shower with the darker faux wood tiles.
Deja-voo! Think I remember seeing a Katie with brown hair…in the same super pregnant state tiling about a year ago! Glad the comments are back on 🙂
I’m excited to see the tile in! And for you to have a floor in your laundry room! 🙂
That sounds adorable!
xo – kb
I joked with Jeremy that the only time I ever tile is when I am knocked up. The old house basement laundry room…pregnant with Will. The kitchen…pregnant with Weston. This laundry room…LJ. It’s weird, right?! Maybe nesting?!
xo – kb
I love that I can see others doing DIY in flip flops. That is how we do it at our house too 🙂
I love reading your blog and your funny quips and seeing how projects sometimes do take months to finish. And those adorable boys!!!
Can’t wait to see the finish product!
Lookin’ good- both the room and your hot DIY self!!!! Can’t wait to see the finished room. Annnnnnnnnd… we have 1 and 1/2 bathrooms… RIGHT NEXT TO EACH OTHER. As in, you can be on one toilet, open the bathroom door, and have a nice chat with your roommate on their own toilet. But don’t. We have yet to scare guests this way. 🙂 ANYWHO. We don’t have laundry hookups, so we are either trekking to my buddy’s house to mooch off of her washer and dryer or use coin laundry service for our other stuff (cloth dipes.) However…. GUESS WHAT! We are turning out 2nd dumb useless bathroom into a laundry/storage closet…. with one of these tiny washing machines! It’s very European of us. When we lived in Paris we had a microscopic clothes washer in our kitchen, and no one uses driers (dryers?) over there, so we are very much used to it. It’s going to be a completely temporary thing, so we’re going with full confidence into this project- even though it’s literally making a laundry room in our apartment. (Here’s that Easy Bake Oven- I mean tiny washing machine that we’ve picked: http://www.amazon.com/Panda-Compact-Portable-Washing-Capacity/dp/B00AW04ZMM/ref=sr_1_1?s=appliances&ie=UTF8&qid=1392144175&sr=1-1) So…. wish us luck! I wish we could replace the tile. It’s terrible. Have any suggestions for temporary and cheap floor updates?!?!
You make me feel like a weak lady. I won’t even tile NOT pregnant. Look at you go! 🙂
Tin for the Win! My wedding photo!
I know this post is about the flooring but I love the wall color! So pretty
The boys helping = heart melting. #bestillmybeatinguterus. Love how this room is coming together, and you look great!! Must feel great to finish before LJ comes along!
Love this tile! We are going to put it in our laundry room too (and kids bath since it’s sealed and super low maintenance!). Question – did you have to lay the tile in an off-center brick pattern? I’ve heard that they have to be laid in a 1/3 pattern…
PS you look great!
Thanks!!
Plank tile is my new favorite! I think it looks awesome with the paint color too 🙂
Katie— First of all… you are a preggo rockstar! Look at you go!! I really like the straight style… herringbone is beautiful but too small of a space!! I really hope when I finally get pregnant that I can keep up our house progress like you!!
XOXO
Looking good! Can’t wait to see the finished result. I light tiles look great with the blue walls (still totally in love with that blue)
HEY! We JUUUUST layed those same exact tiles in our bathroom! I love how long and skinny they are, makes for a nice clean look. We did them just the same as you, half tiles the long way to make the room look a little bigger and longer since its a pretty darn small bathroom. Great minds I tell ya 😉
Wow I love it! I so wish you would have done the herringbone but it looks gorgeous just the same, can’t wait to see it finished.
I love it!! Can’t wait to see it all finished.
Beautiful and can’t wait for the final result. I still think you are my hero tiling for being highly pregnant. I already though about that when you did the kitchen with Weston and yet again. I always wonder how you find the energy.
So excited to see the finished room! Also, I laughed at your “Babies are weird” comment. That is my explanation for basically everything my daughter does.
What about taping the seams with the fibatape? We were told that it was important to do that and mud over them before actually tiling… or did you do that while you were tiling and not as an individual step? Hmmm maybe I should just be patient and wait for the next post!
I love the tile that you picked and the gray looks great against the dark blue walls. I can’t wait to see the finished room. I’m sure it’s going to look awesome!
That was the plan but our local store didn’t have any in stock and I rushed through it. ::sadface:: I think that it definitely is a step that everyone should do…but I’m just crossing my fingers it doesn’t come back to bite me!
xo – kb
You mean for elimination of bowing? I know that sometimes manufacturers recommend this with certain tiles and technically speaking…you should always try to follow their recommendations. I however walked on the wild side and did my own thing. Here is some great info I got from one of my favorite tiling forums about testing the warpage of tiles:
1- Place one tile face up on a counter
2- Place another tile directly over the first, face down
3- poke at the corners, see if the top tile rocks
4- Look at the plane where both tiles meet. How much air gap is there?
5- Spin the top tile 180º and repeat the test, specifically to find if the warpage is off center.
xo – kb
That is HILARIOUS! I double dog dare ya to do that to a guest one day 🙂
And actually there is some really great and very inexpensive linoleum tiles that are great! They look just like tile and they need grouting but they actually hold up really well and are a great knockoff of real tile!
xo – kb
When I saw the first picture, I thought that was an after picture and I was not impressed. haha, thankfully I kept reading and realized it was the before. I love the new tile and can’t wait to see the finished room. I also love how your boys are interested in your DIY projects.
oh my goodness…weston’s britches all pulled up in that first pic just plastered a stupid smile all over my face. too cute!
Looks great.So impressed with how much you do.Such a cute family.You seem like such a fun person. And if I might say ,no offense,your hubby is a real looker!
So pretty!! Prayers for you all during this ice storm coming!!
Looking good so far… I can’t wait to see the finished product! I like that it looks a little bit like hardwood flooring. I can’t get over how cute that first picture of Jeremy & the boys working on the floor is. Weston is awesome; he’s just standing there with his little belly poking out making sure the work is being done right 😉
maybe this is a dumb question.. did you have a hard time getting out of the room since you started on the door side? or did you start on the backside after pictures were taken? i’m always painting myself in a corner, never fails.
I actually started in the far right hand corner and did some rows before switching the approach. I wanted to make sure the part that was seen (the two feet of the galley on the right hand side) were absolutely perfect and knew that the left hand side would be hidden under the washer and dryer so making sure the tiles were just right before moving myself out the door was the approach. It’ll make more sense in the photos in the next post.
xo – kb
I recently saw the plank tile at Lowe’s and fell in love! That stuff if awesome! I’m thinking we’ll use it when we remodel our kitchen. Love the color you picked! That laundry room is going to look so nice!
I love this tile so much I think I am going to put it in my laundry room…and guest bath…and master bath… Seriously, looking good!
Question. I see a sledge hammer and two regular claw hammers for tile removal. I really would like to re-do tile in three places in our house, however the current tiles are in perfect shape and the hubby is reluctant. How hard is it to remove tile? Is it something you would tackle if you weren’t pregnant or is it something you leave to Jeremy automatically? I’m asking because I’m thinking if I wanted to have it re-done, I’d have to tackle it myself, preferably when the hubby is out of town on a business trip. 😉
It’s not that bad if you are aggressive enough. Some tile is much easier than others to remove. I would say that it is really important to have good leverage and I would have totally done it myself but Jeremy gets a high off demo 🙂
xo – kb
That looks like the exact tile I’m looking for for my laundry room redo. I see a trip to Lowes in my future!
My laundry room could do with a makeover so you have motivated me to get stuck in. Thank you so much and loving the tiles by the way…
What paint color did you use?
The laundry room is Kerry Blue Terrier (it’s a Martha Stewart color).
xo – kb
In case anyone reads this, just two tips:
1. NEVER align all 4 corner together- this creates a weak point eventually causing cracks- this applies to cement boards and drywall.
2. Wear a mask when cutting cement boards- the silica dust can be inhaled causing lung problems.
First time visitor, loving your blog. One question. How did you get new the floor to level with the old wood floor outside the laundry room? I see no transition trim. Did the height of the backer board+tile = height of the wood floor?
Thanks,
Yes exactly. The tile was easy to make transition because the height. If it didn’t match naturally, I could have always made it back buttered up a little…or added a transition or a threshold tile.
xo – kb