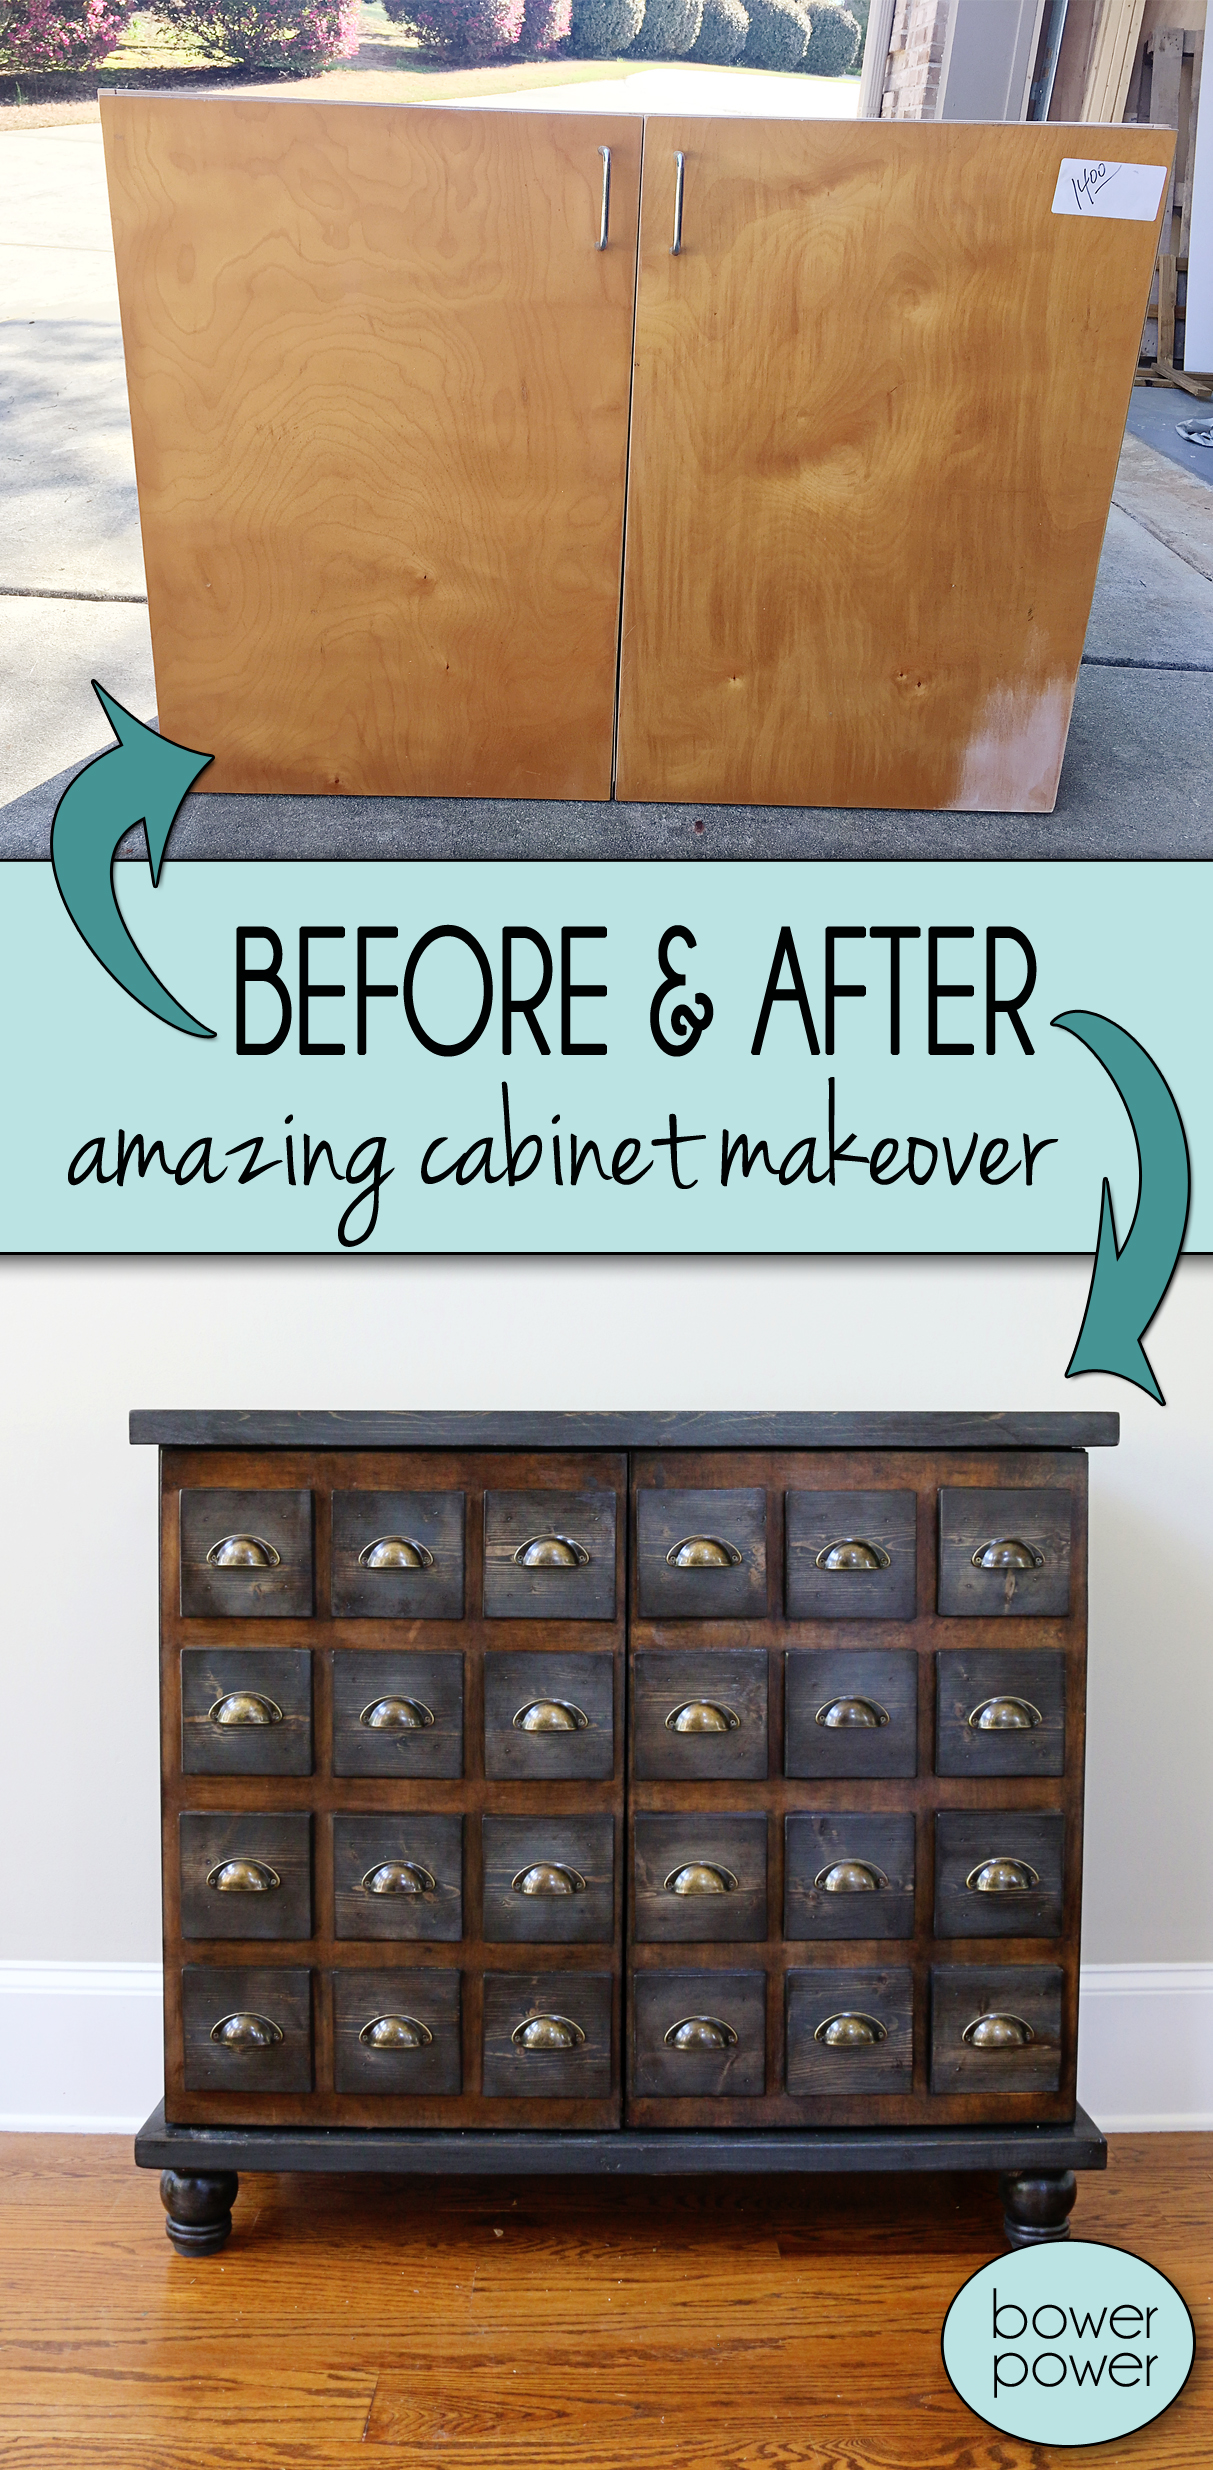
Last Friday was Earth Day! And what better way to celebrate but by recycling a thrift store cabinet into an amazing piece of furniture with loads of storage! We live crazy far away from the city (like they don’t even check car emissions out here!) and sometimes we all need a reminder that we should be very purposeful about the idea of reusing, repurposing and recycling. This planet is full of items that would otherwise end up in a landfill and I truly believe that we make small changes to make big differences! So in honor of Earth Day – I wanted to share with you a little goodie that I found and gave a really fun makeover.
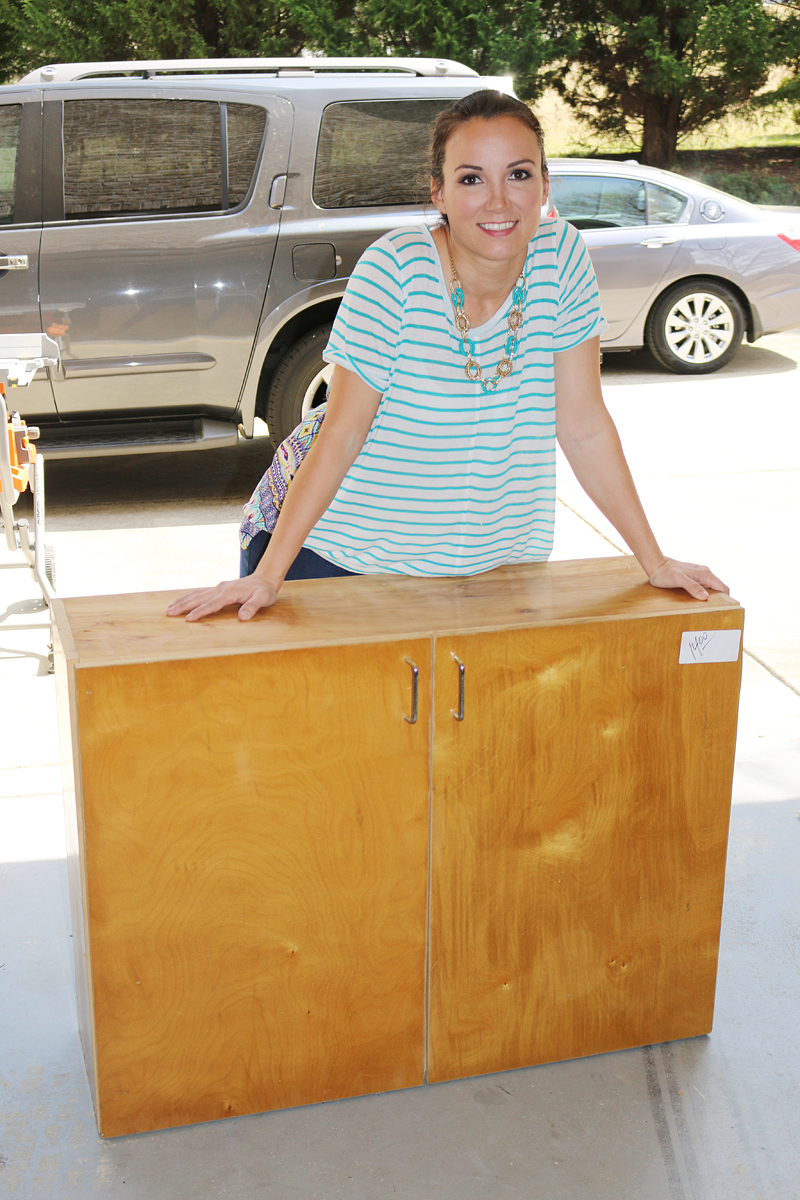
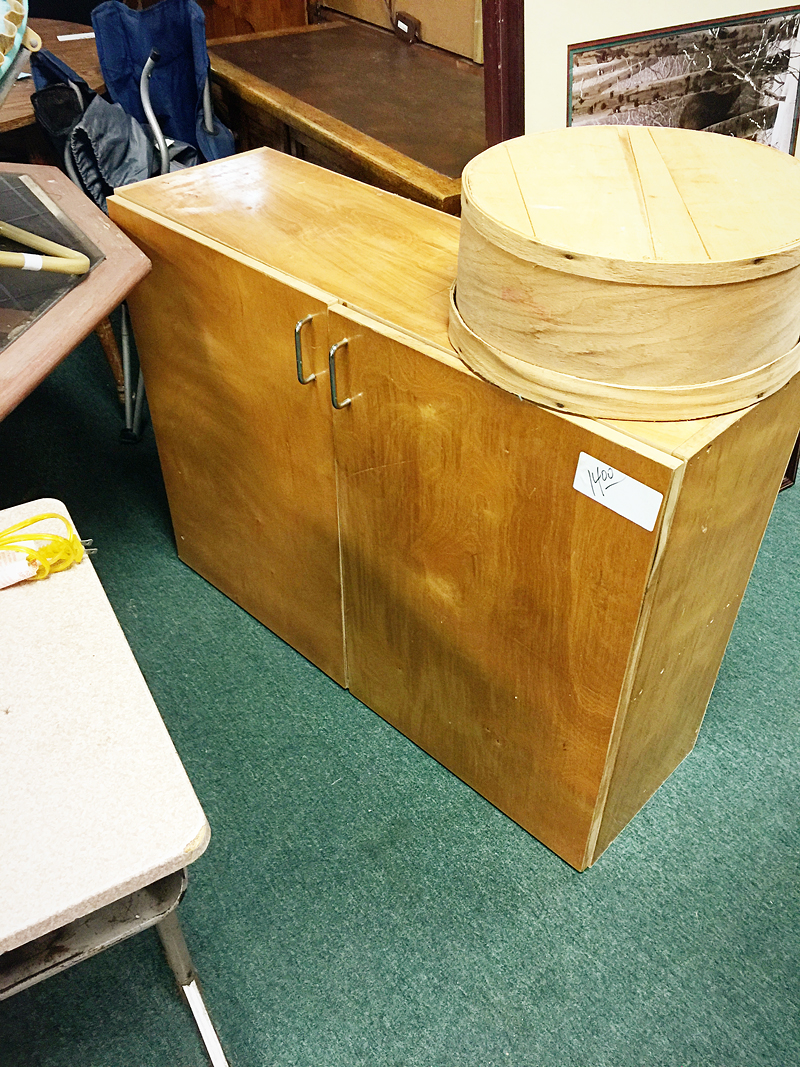
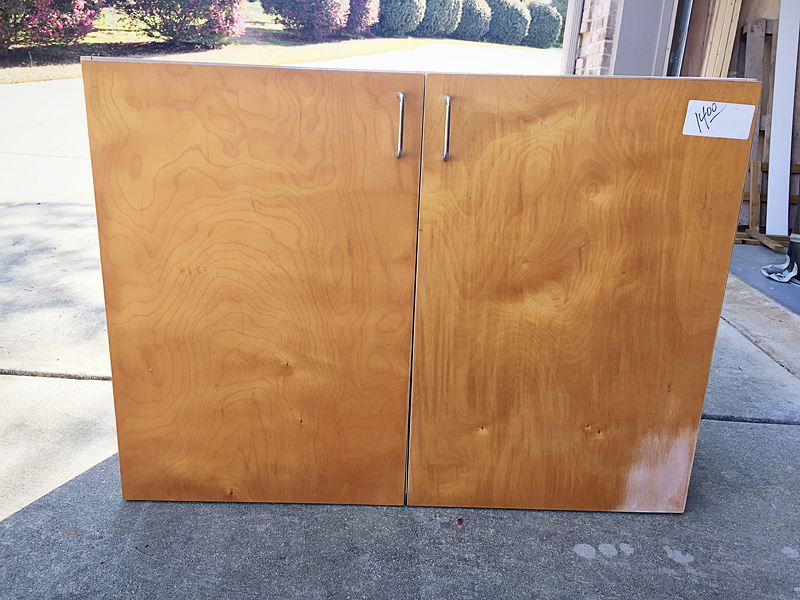
It all started with this cabinet that I found at my local favorite thrift store (it’s called the Fish Thrift and the proceeds feed kids all summer long!). I couldn’t believe my eyes when it was marked $14 and it was in fairly good condition!
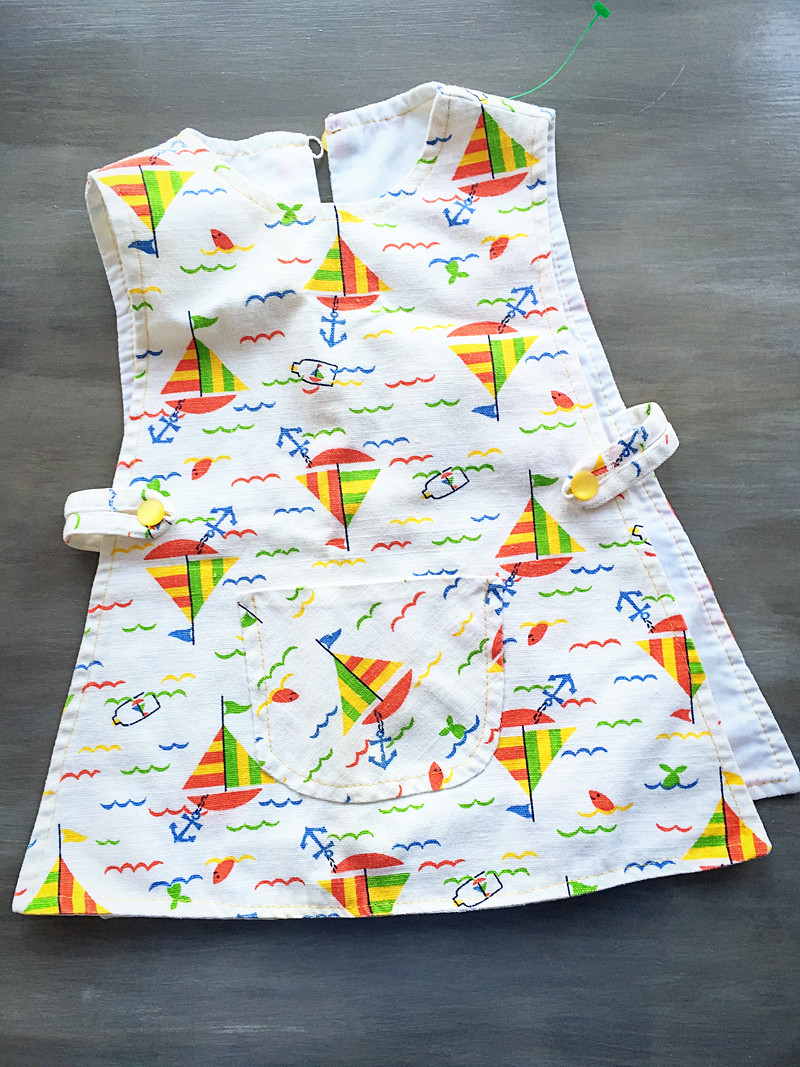
I also got my niece this adorable vintage sailboat apron dress thing. Tell me it’s not the cutest thing. I dare you and I will smack your mouth. JustkiddingIcan’tdothat…manI’mfeelingspicy…whatscomeoverme?!
Let’s get back on track. This beauty was fourteen bucks and for that cost, I couldn’t buy the materials! I knew exactly what I wanted to do with it. Since the piece was entirely made out of plywood and had a wood veneer edge, I knew I would keep it the same structurally and just add some pieces to make it look like a vintage card catalog.
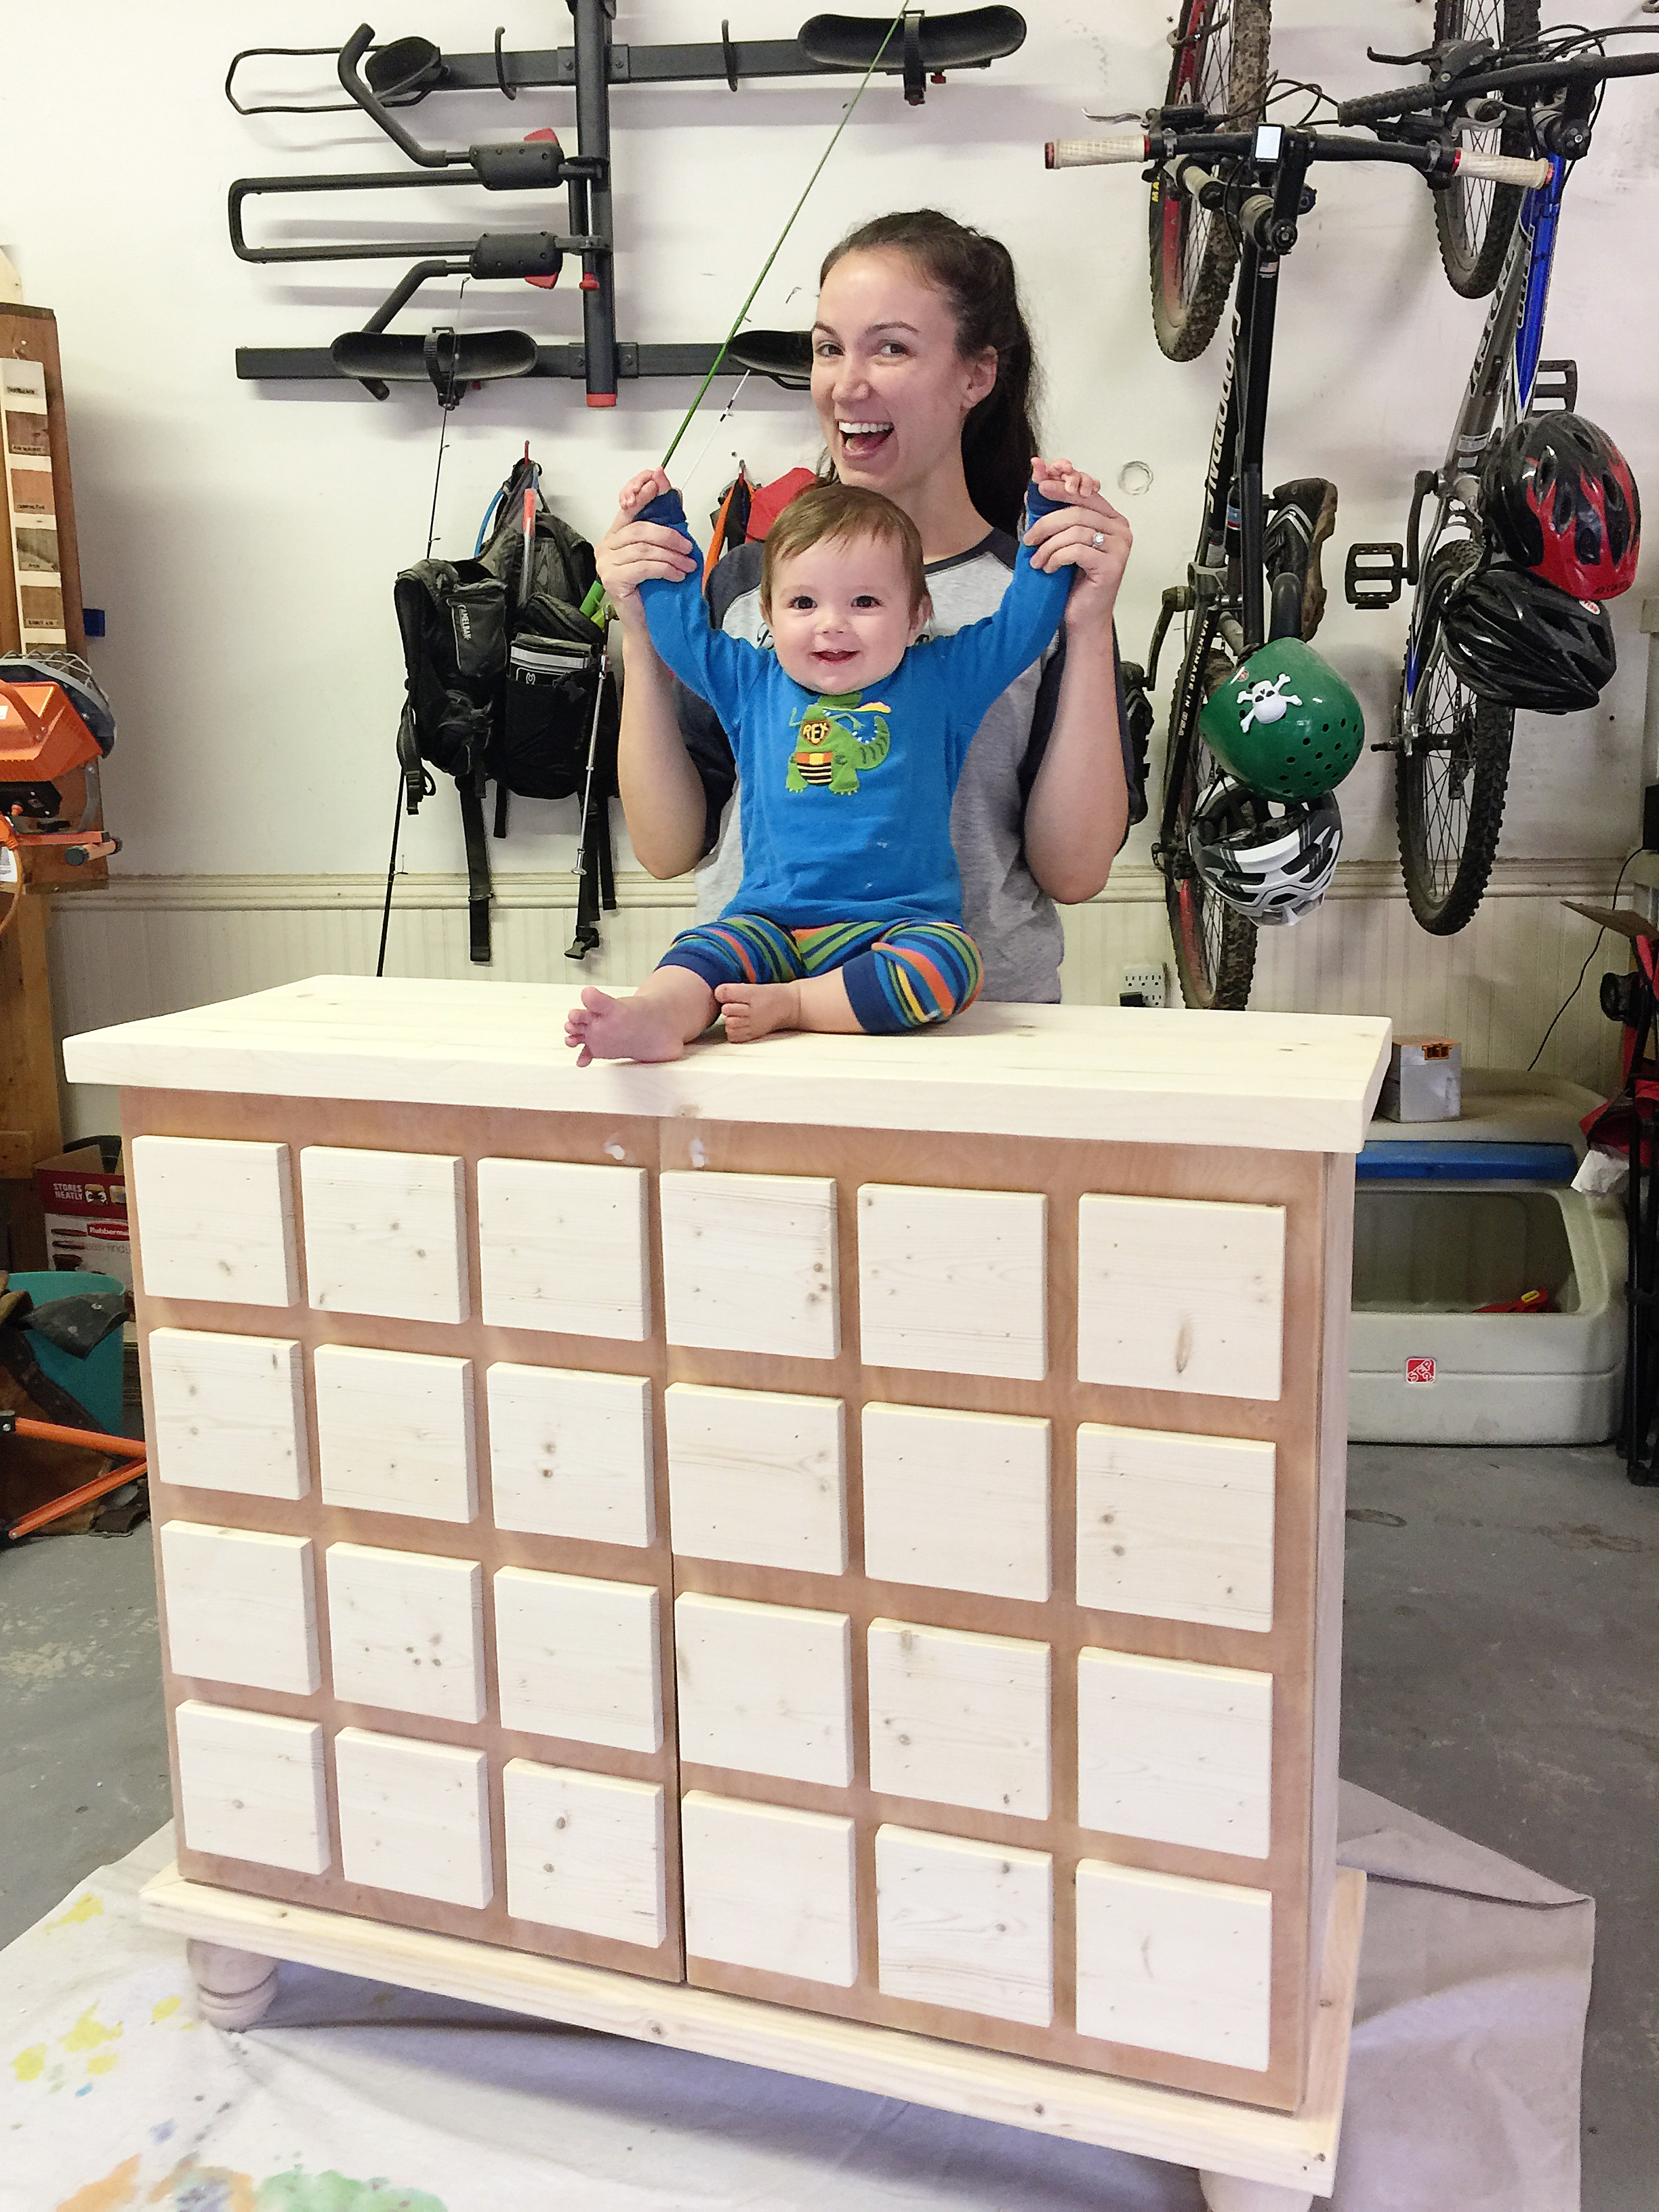
First I sanded down the front. And when I said I did it….I mean Jeremy did it while I cheered from the nose bleed kitchen…aka made dinner.

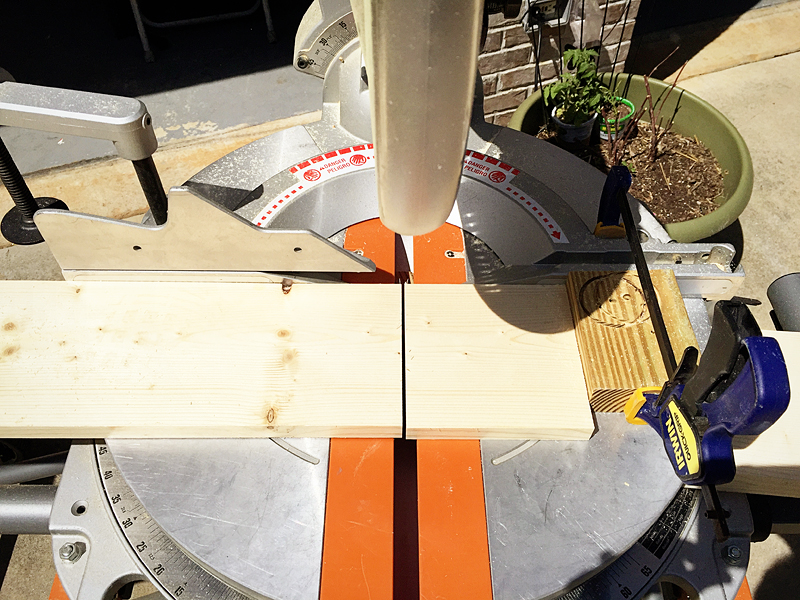
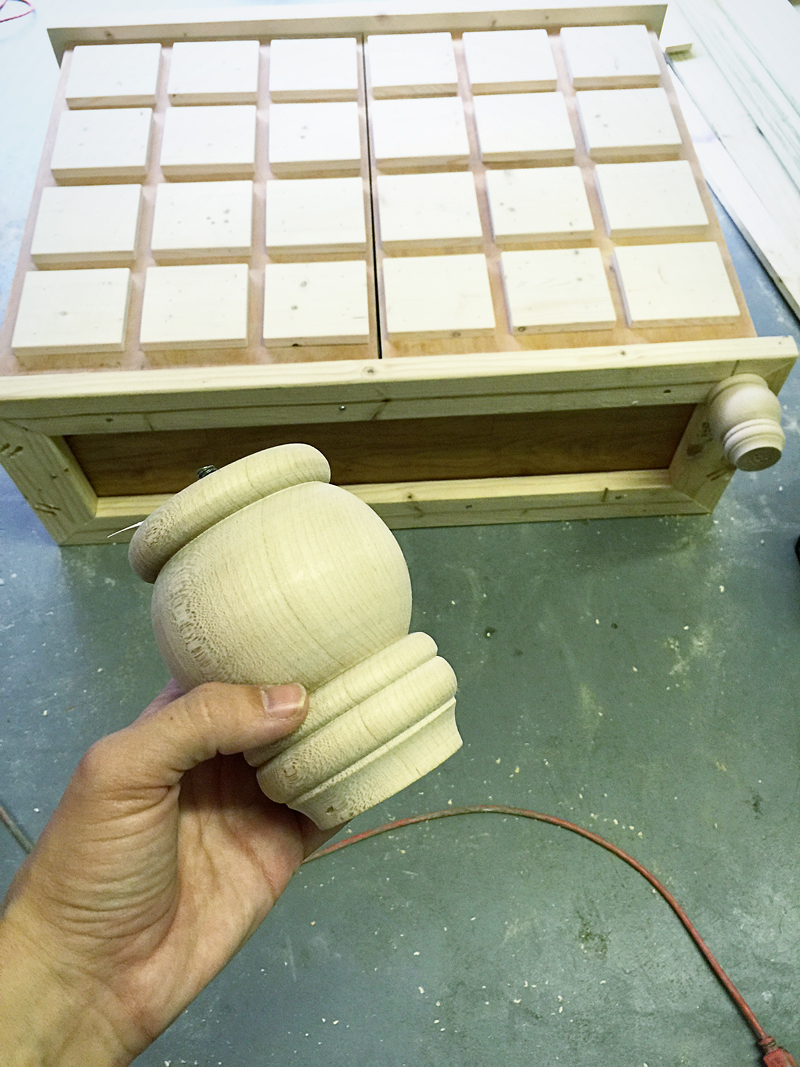
After Jeremy did his part, I got to work cutting the squares for the faux drawers. I clamped a stop block to the saw so that all my squares would be cut the same length. The board I used was a 1×6 so in order to make all the boards square I attached the stop at 5 1/2″ from the blade.
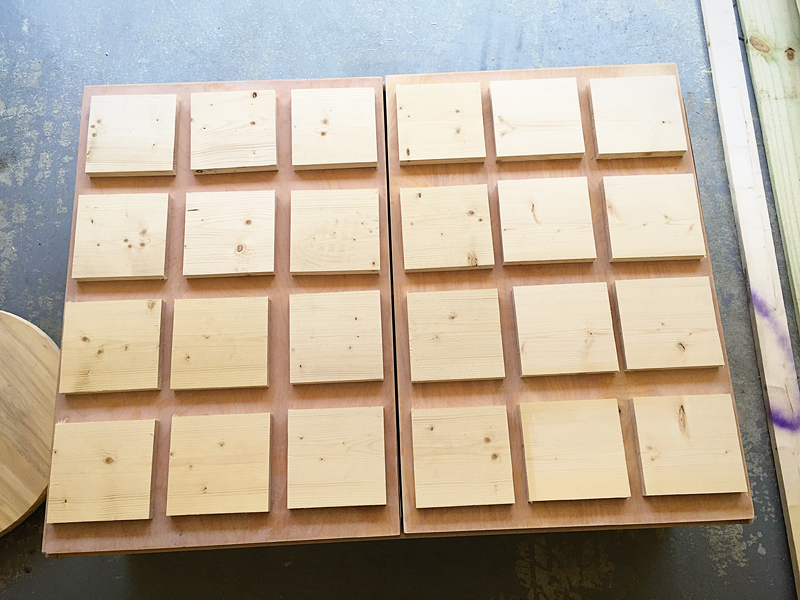
After that was done, I sanded all the fronts and edges of the squares….aka Jeremy sanded all the squares while I cheered him on from the nosebleed couch…aka nursed the baby.
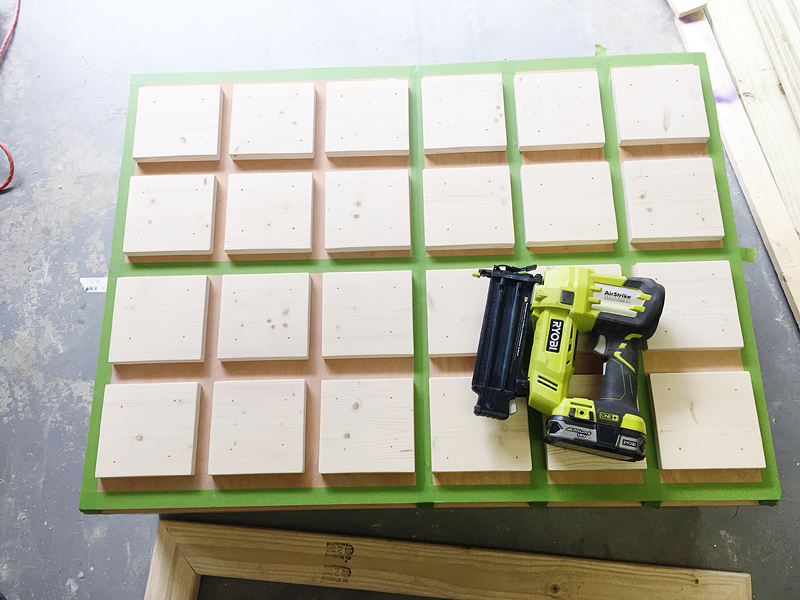
Then came time for attaching. I was nervous that the lines would get all crazy so I used tape to put down some guides for myself. Each block was about 1.5″ from each other width wise and 2″ from each other vertically. I attached all the squares with wood glue and brad nails. I love my AirStrike – if you don’t have this tool, you really need to consider what you are doing with your life in general. #again #spicy
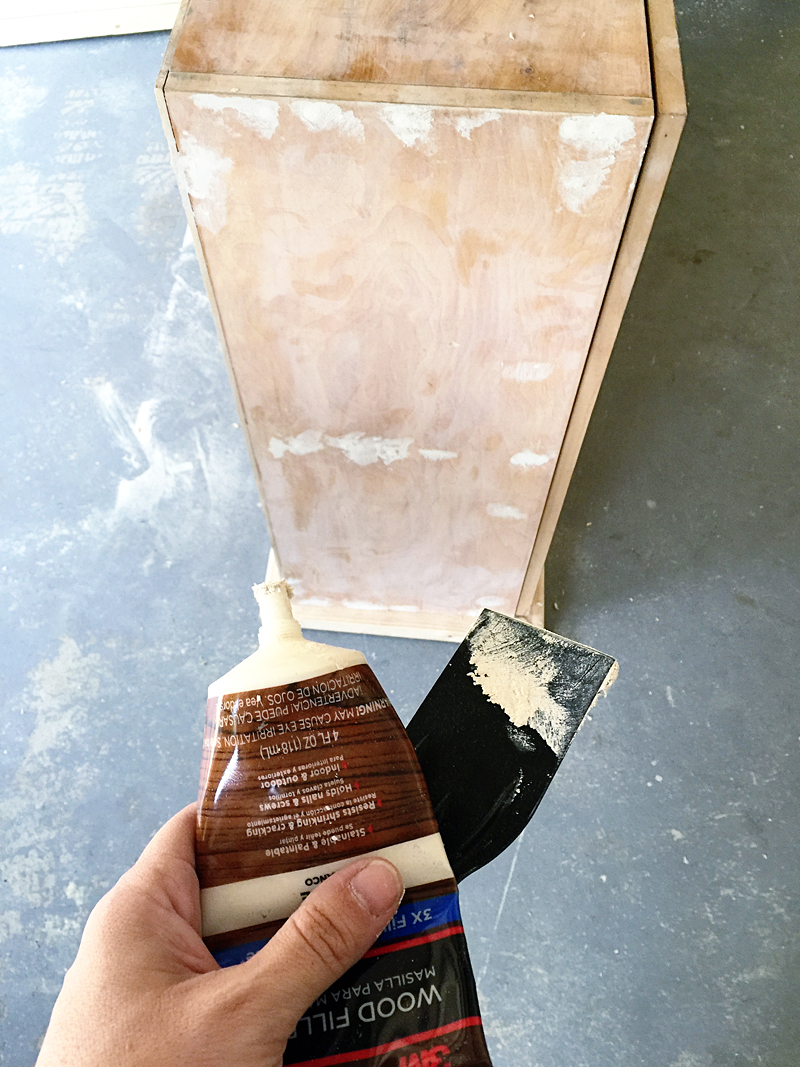
The original cabinet had quite a few holes in the sides from where the original construction. This wasn’t made with pocket holes (it should have!) and this would have been avoided….but I guess for $14 I will fill them happily 🙂
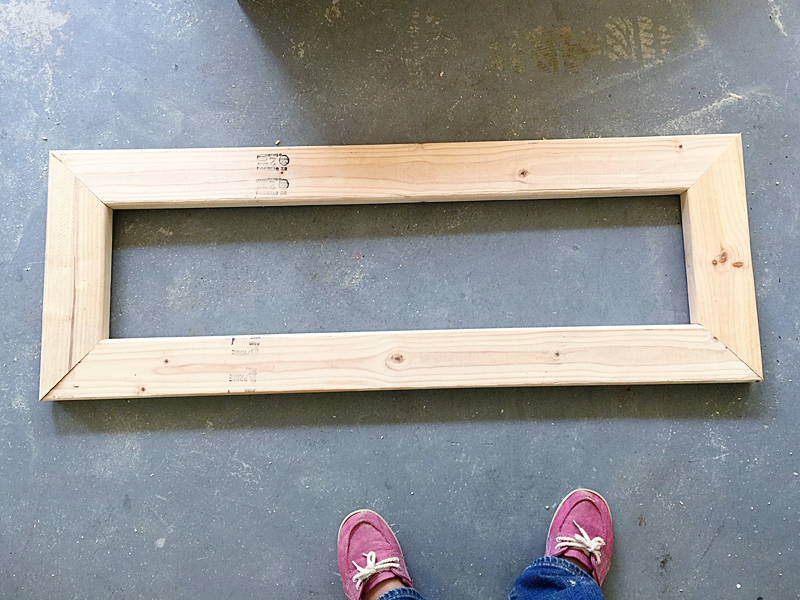
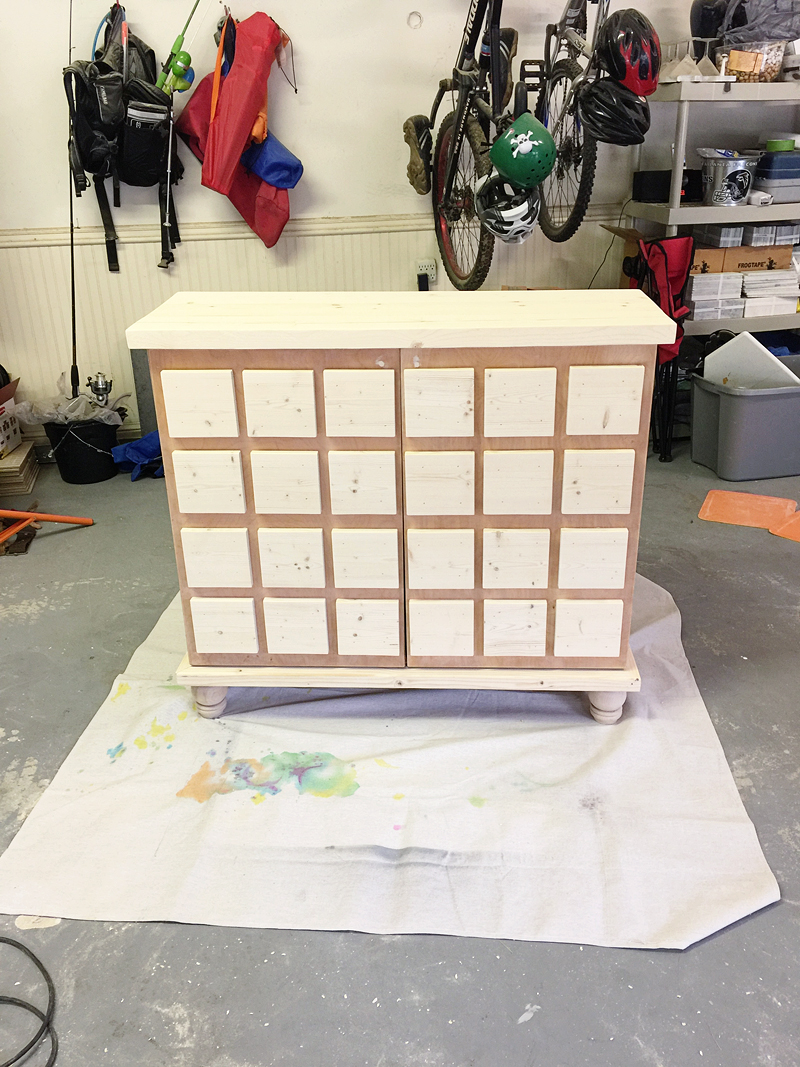
Then came time to construct the bottom piece and the top. For the bottom piece I cut some 2×4’s and pocket holed the corners so that the miters would fit together nicely.

I realized that I need better clamps. See that bottom corner? Yeah. No good. So I sanded it down to fix it. Thanks a lot warped cheap lumber. Oh well….just a little time with the sander never hurt 🙂
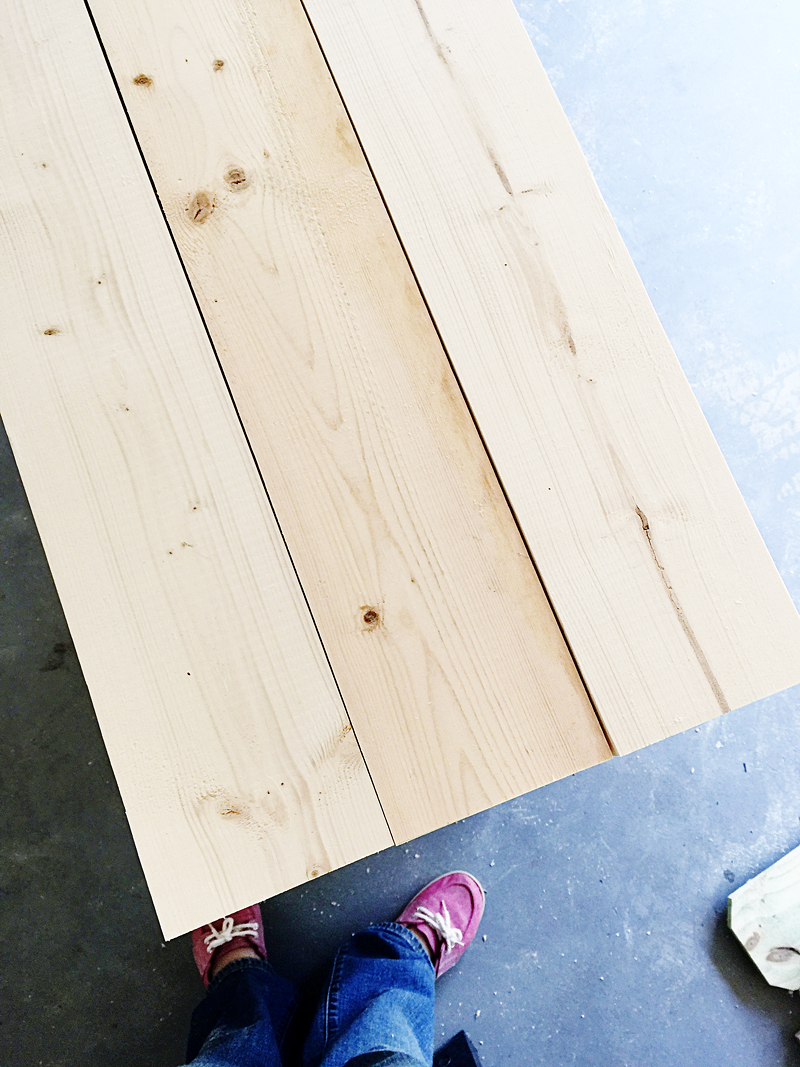
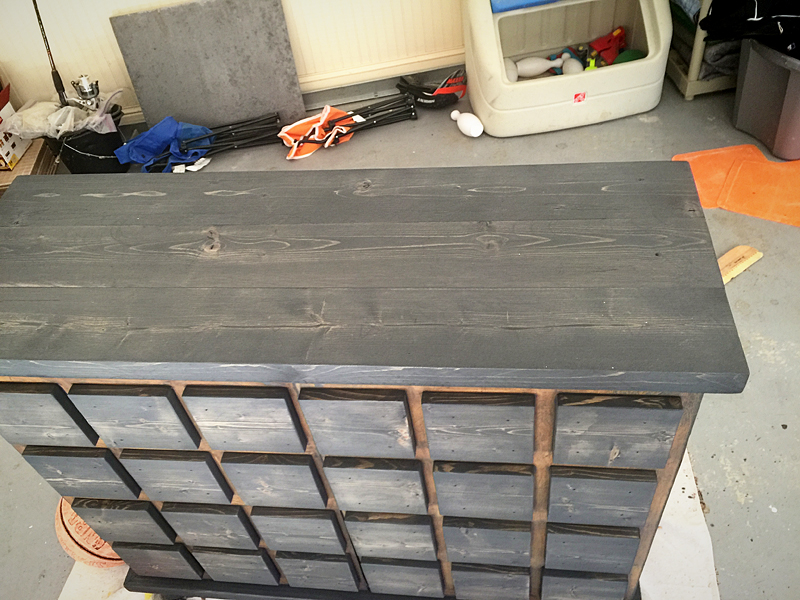
For the top I wanted a smooth planked surface….no crevices or grooves so I ran the 2×6’s through the table saw and cut off 1/8″ of each side before cutting them to length. The square edges really made a huge difference in how the top looks! I also got a new Ryobi planer but I am still working on the courage to use it….maybe the next project! ha! So this one wasn’t planed which required a lot of sanding get those planks really looking like a single piece.
I also knew that I needed some feet for under the piece. Home Depot really only had three options. WHY!? I realize that there is probably more options online but DUDE. Only 3? None of them screamed PICK ME! So I made an extra drive out to see if Lowe’s had any other options.
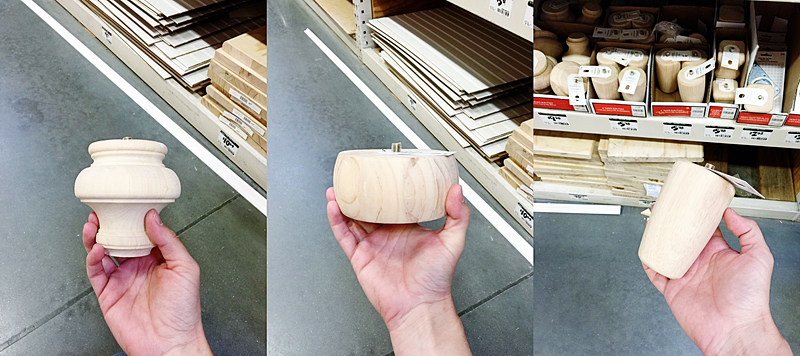
In the end, Lowe’s actually had the better buns 🙂
Yay for buns jokes!! And for this piece being really close to being done!
Now that the woodworking part was done, it was time for the finish. Truly this is my favorite part. I love seeing the piece transform from regular ole wood into something that looks like a furniture piece you would spend loads of money on.
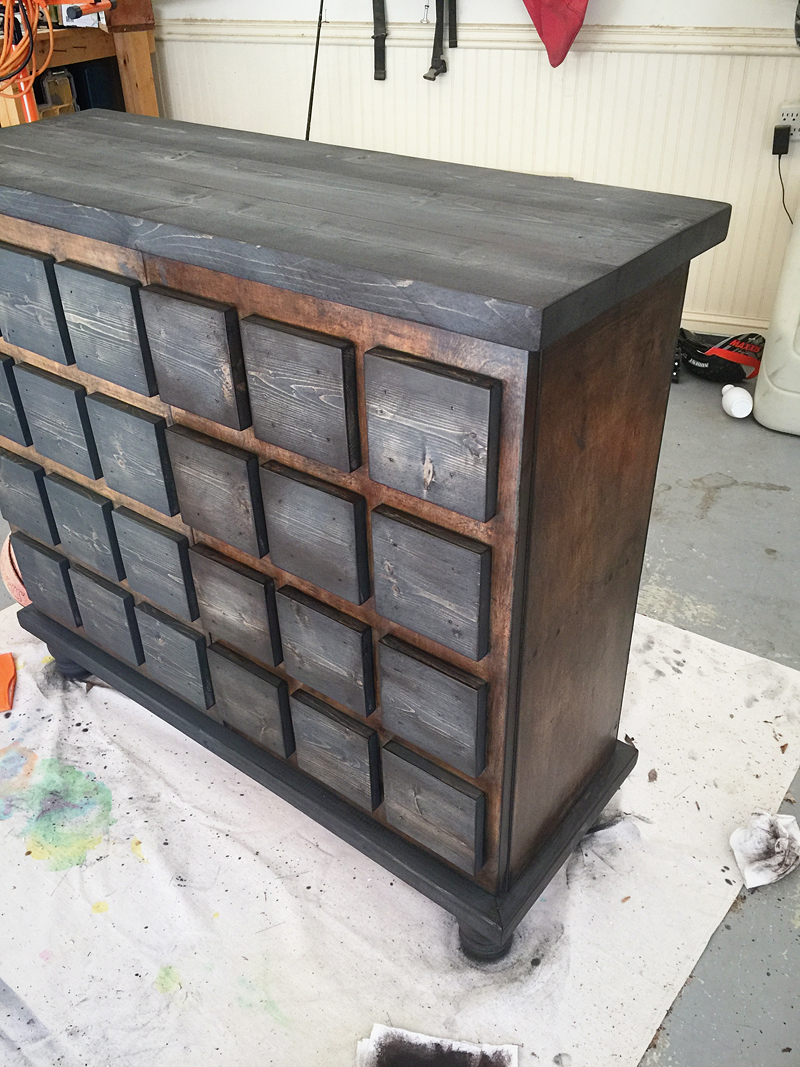
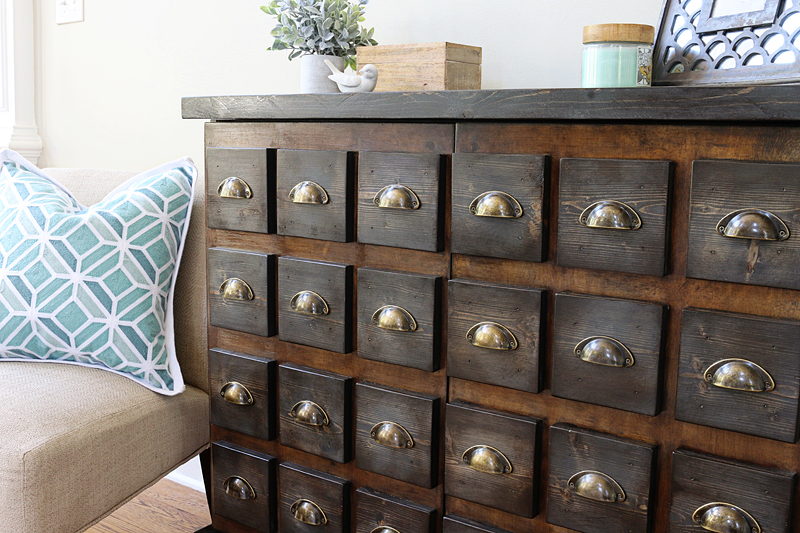
I went with Rust-Oleum’s Briarsmoke on the entire piece. I love this color stain because it is a dark gray-brown. On the plywood parts it actually showed up more red. The wood variety does make a difference but I loved the fact that it looked like two toned.
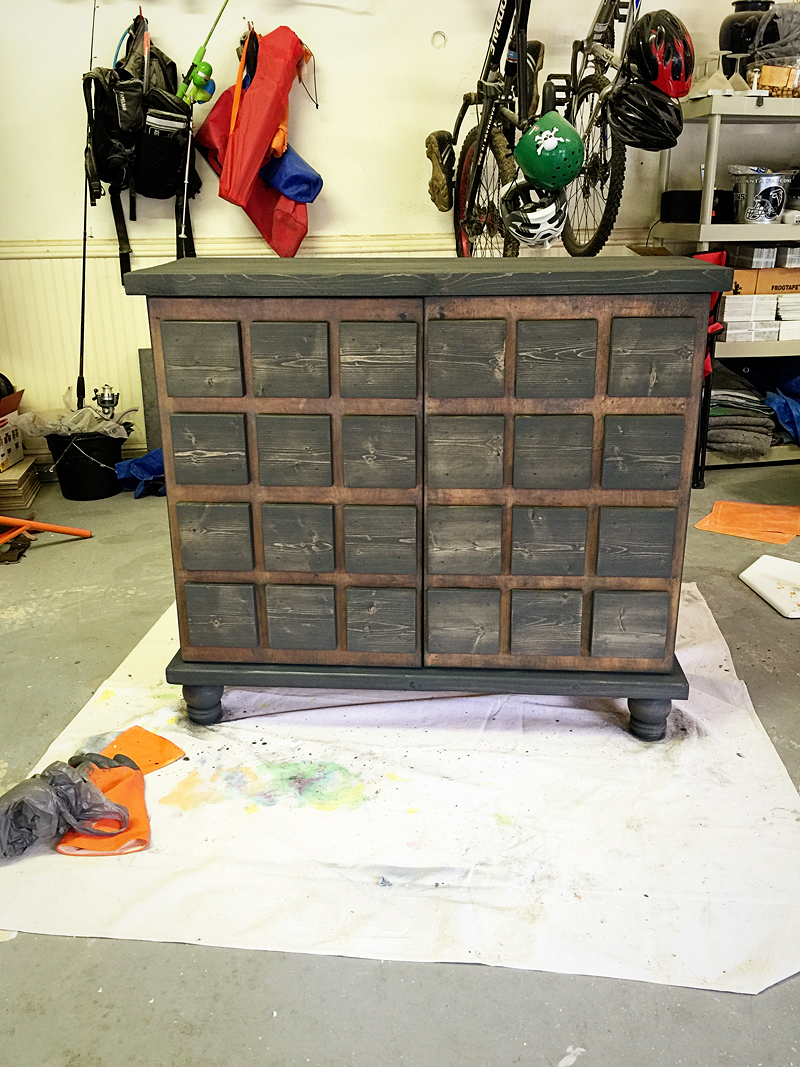
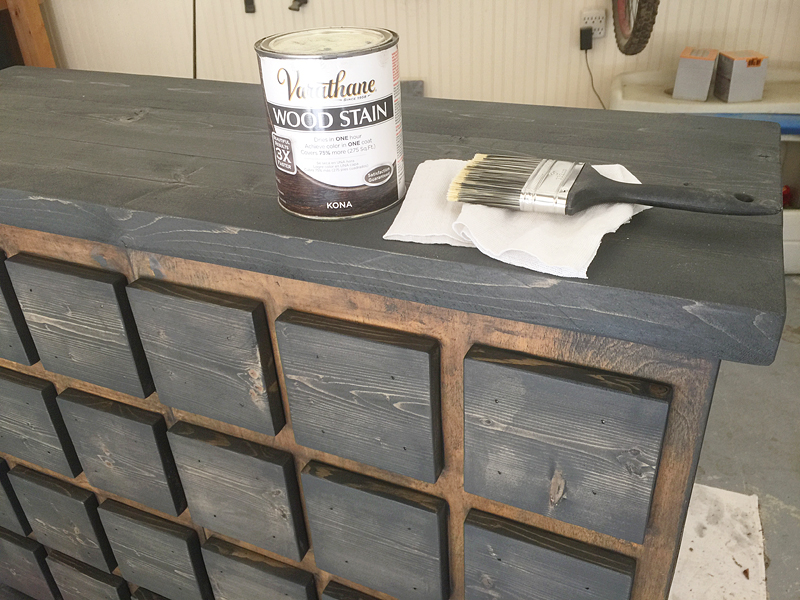
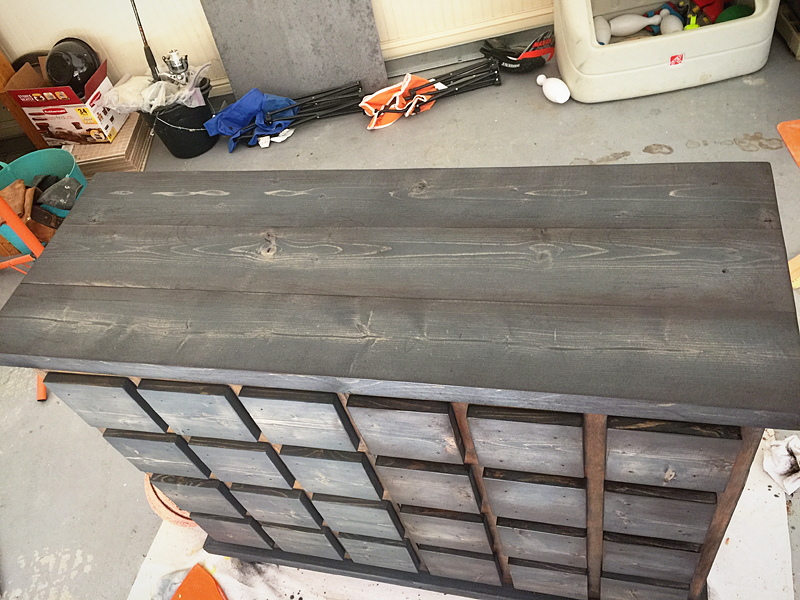
I wanted to add more detail and interest so I decided to use the Kona stain to dry brush this piece. You can see learn more about dry brushing from this old post. I didn’t have a chip brush on hand so I used this cheap synthetic brush….big mistake. I will never do that again. It splattered and didn’t ‘dry’ on the towel like it should and it was just a big mess. Lesson learned.
Okay so here is the top with those squared off edges and no dry brushing detail…
And here it is with the dry brushed detail….I love how it accentuates the individual planked top but being smooth, I won’t have any issues dusting it or whatever…that sucker feels like a single plank of wood.
Here is the difference that Kona makes on the front too…..see how warm it looks? GORGEOUS.
When it came to knobs, I decided to go with a very inexpensive cup pull that I could attach from the front. I ordered this multi-pack on Amazon and it worked great. Seeing as how pulls are usually $3-$5 a pop….getting them for seventy three cents each was a great deal!
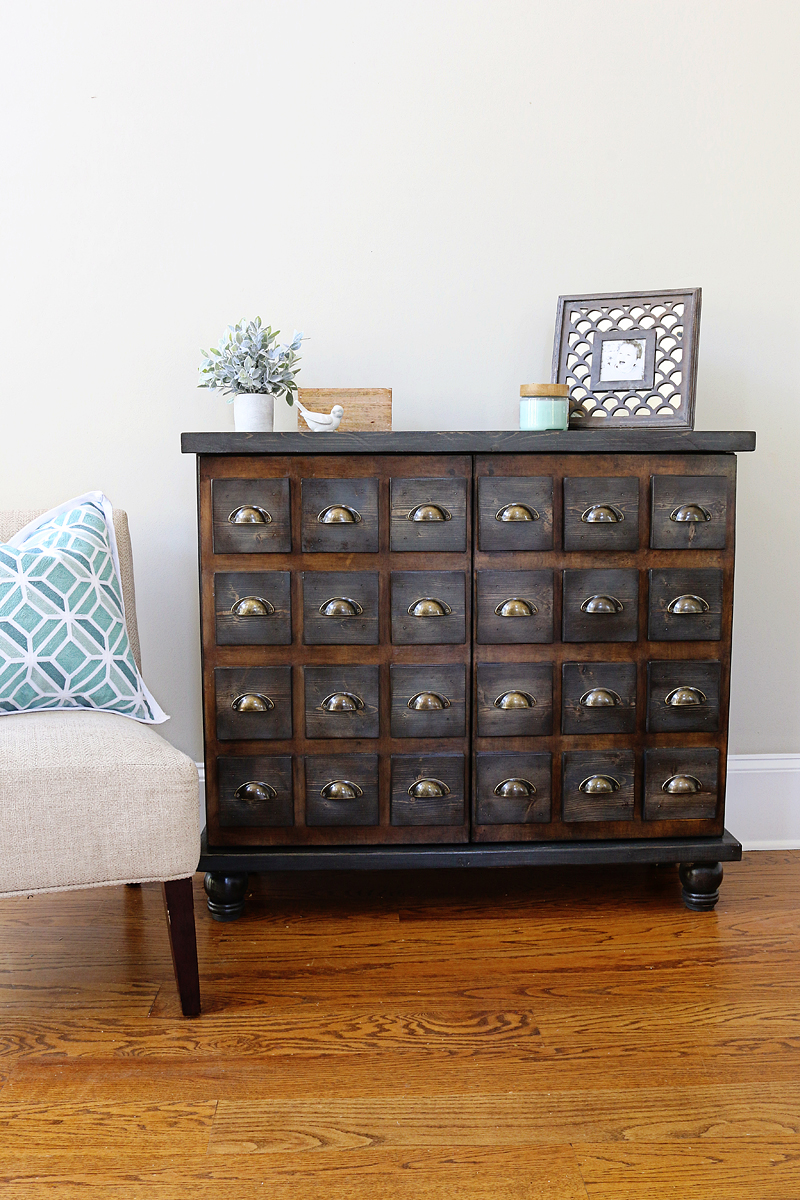
This puppy is just as gorgeous as it is functional! The doors still open to reveal two shelves inside where we store stuff and it gives off a very industrial vintage vibe.
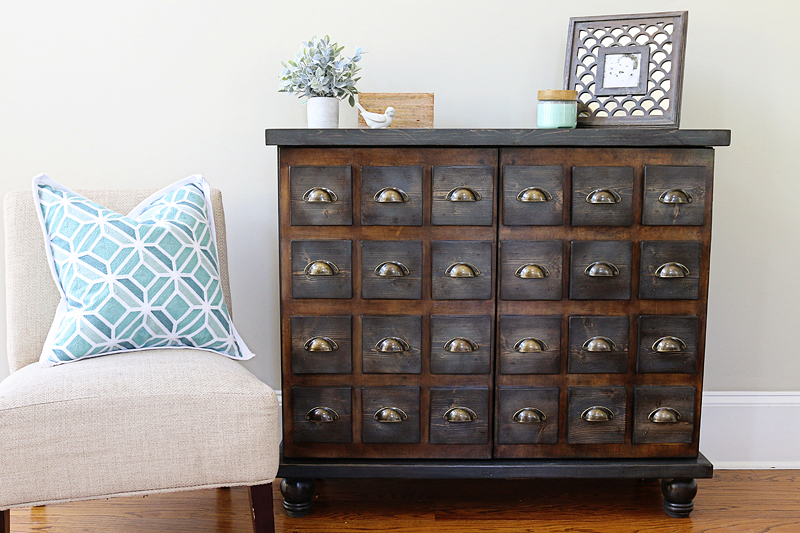
We actually moved it upstairs into the baby’s nursery so stay tuned on that room – it’s the next one on our list to complete and so far it is really coming together! I can’t wait till it’s finished!
So the total cost of this makeover –
(2) 1×6 – $16
(1) 2×4 – $2.69
(2) 2×6 – $8.24
Feet – $27.92
Pulls – $16.61
Cabinet – $14
All other supplies were in my stash 🙂
So total cost of (drumroll please!) $85.46
Not too shabby for a really nice storage unit that upcycles a cast off cabinet and is great for hiding LOADS of little boy socks and shoes – I know. I checked 🙂
Hope this inspires you to go buy some thrift store wares and make them over into something STUPENDOUS. I am trying to make that word more mainstream. You never hear it anymore and that just makes me sad.
Vocab dreams aside…I’d love to see any up cycled thrift store finds you have tackled lately! Tag me on Instagram or put the link in the comments below! Happy Tuesday!
Wow! You guys are so creative! I don’t think I ever would have seen that vision on that piece.
Aghhh… amazing! You are too talented.
Where did you find the watercolor pillow?
I love this idea!!! Thank you for sharing your creativity! Last summer I finished up a piece for our family room using an old buffet I found on Craigslist. https://schoolhouseshakeup.wordpress.com/2015/06/29/chalk-it-up-to-the-media/
One of my favorite projects I completed for our family room space!
Bazinga! This one is amazing. I love looking at “junque” in a new way but your vision for this one takes the whole cake lady!
I KNEW Kona would be making an appearance! Stupendous job Katie! My latest thrift shop find was a very cheap but cute and comfortable chair for the guest room. Our visiting kitty from across the alley managed to put a honking big tear in the chair previously in the room. One of a pair, they had both been in perfect condition. Since I found this chair, rumpled and somewhat soiled for 50% off of $14.99 , I scored the chair for only $7.50! After cleaning it up and re-stuffing the back cushion, it looks great!
And at that price, I don’t care if it’s shredded to ribbons.
Amazing transformation. Love it! You are so talented!
Super cute! I REALLY want to find a drawer unit for DVDs and give it a card catalog makeover, but I can’t find any wood drawers for DVDs (or CDs because I could do envelope storage in a pinch). Sad face. The faux drawer faces is an idea I may have to place around with though…
Also, those really are some nice looking buns.
I love it ! You are so creative. I also love seeing your camping pictures. We’re a camping family too.
AMAZING!
Wow, amazing. The drawer pulls really, really make the piece. I need to start looking at old pieces like this in a different way…..
WOW!!!! This is one of my favorite pieces you have ever done! The transformation is amazing and such a bargain. Well done!
What is the difference between a brad nailer and a nail gun? My 25 year old son is starting to really enjoy creating and building projects and I would like to get him a nice tool as encouragement and to make the jobs even more enjoyable. Thanks for all you do by the way. I really enjoy your blog. You make me feel that I can do anything as long as I try.
And yes! This makeover IS truly amazing!
Wow! This is amazing! Also, is that a gold Nissan Armada? Are we car twins?! 😀
I love what you did with that cabinet! Katie-this post reminded me of an amazing piece that I didn’t have space for in my house (and man, it was crazy expensive too!) I still think about it sometimes and regret not buying it. At least I have a picture with it!? #notthesamething
https://www.instagram.com/p/16zMl9q9MgH1hibWJh9ESwt47y2umisBxOdGs0/?taken-by=theprimarypatch&hl=en
Fantastic! I love what you did with that cabinet, well done!
Your vision and creativity in design never cease to amaze me! Looks awesome!
Say what?!? That is gorgeous and oh-so-creative of you! Love it!
Love, love, love! Now I am on the lookout for a similar cabinet so I can totally copy. No shame 🙂
Looks awesome, Katie! And I can’t believe the price of those pulls. I have similar pulls on my dresser that I bought from Home Depot (Martha Stewart’s line) and they were $5+ each. Woof, I only got ten and spent $50!
Couldn’t that be used as a vanity base? I really do love this look.
Sure the possibilities are endless!
xo – kb
It’s crazy how much they cost right?! I will admit that these are a little on the cheaper side when you hold them but you would never be able to tell just by looking!~
xo- kb
It’s an Armada but it’s dark gray. We are like car cousins 🙂
xo – kb
Well nail guns are a variety of different things…it could be a framing nailer, a brad nailer or a finish nailer. This brad nailer is especially helpful because it doesn’t require a separate air compressor!
xo – kb
This is an all-time favorite piece of any you’ve created. Love the staining and that it is also a storage cabinet. Kudos to you and Jeremy for such an amazing transformation!!
Absolutely LOVE this!!! Any chance you can shoot me the link to dry brushing that you were talking about? I couldn’t find a hyperlink 🙁
Very creative and visionary! Way to go – looks great!
WOW ~ Katie Lou ~ that’s the best makeover I’ve ever seen. I never would have thought of that. Great job ~ I love it. 🙂
Sorry I will relink it in the post! Here it is…DRYBRUSHING.
xo – kb
You are, quite simply, the most awesome.
Love how this turned out, can’t believe where it started!
From “trash bin” to “high end.” WOW. What a fantastic job! My heart yearns!!!
HELLO, i´m a Chilean woman and I love it !!!
WOW! that is beyond cool! thanks for sharing.
Did you use a clear product to protect the service. Just beautiful!!
Yup – a poly always is what we love for projects like this!
xo – kb
Phenomenal!!! You are extremely talented, creative, and Imaginative!! I would never imagine that is the same piece of furniture! Thank you for sharing with us!!
Well shucks, I never comment, nor am I easily impressed by furniture flips cuz there are just so many out there but this stopped me in my tracks. AWESOME!!!! Pinning for inspiration. 🙂
http://www.kammyskorner.com