There were so many requests on how to boost eyes in photoshop that I couldn’t refuse. Here’s the how-to:
First you need a photo with some eyes in it. A-duh.
You also need photoshop. Not Photoshop Elements because we are going to be using actions…specifically the free actions provided by The Pioneer Woman. You can go to her site and pick em up.
As an example, I will be using the photo of this little smarty-pants squirt…Cole. Here is the straight-outta-the-camera shot.

First I open up the photo in photoshop. I use the CS4 version for those who are wondering. As you can see, the actions are saved and open in the right hand column under ‘Actions’. The first thing I do is apply the ‘SLIGHT LIGHTEN’ action so that the photo is lifted a bit. Note that if you shoot in JPEG, it is better to underexpose than overexpose….I can never seem to get it right when I am outdoors (something about the sun makes me shoot all crazy)…so if I underexpose, I can salvage a shot in photoshop rather than losing a great photo.
Anyhoo…here is me lightening the photo:
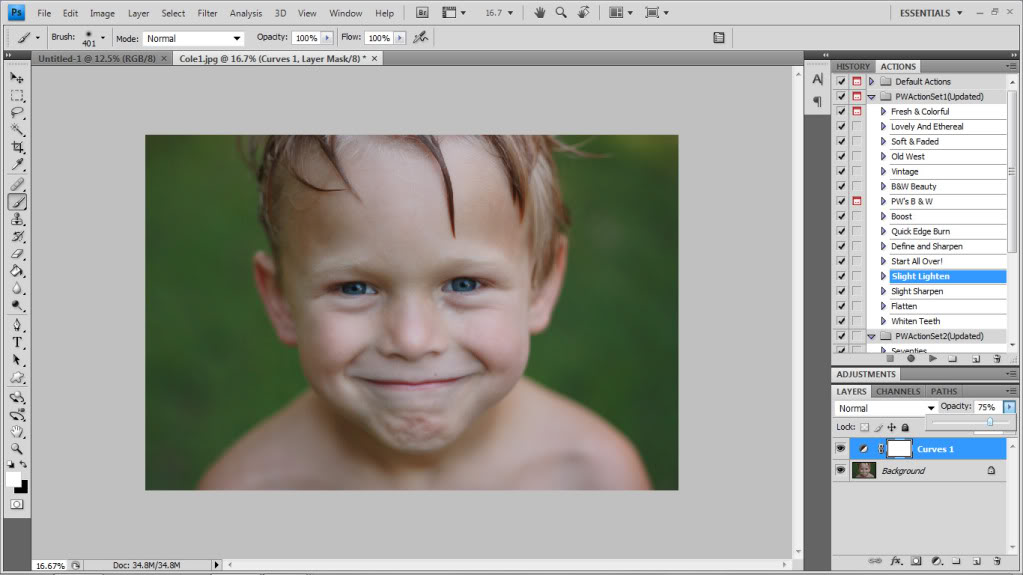
See the difference?

Ok…ok…I’ll make this easy on ya. See the difference now?


After lightening the photo slightly, I wanted it to look a little more contrasty and a little more saturated. The ‘Boost’ action is perfect for that. I applied that one directly over my last action and kept it at 100% opacity for the maximum contrastyness (yes that is a word) and saturatedness.
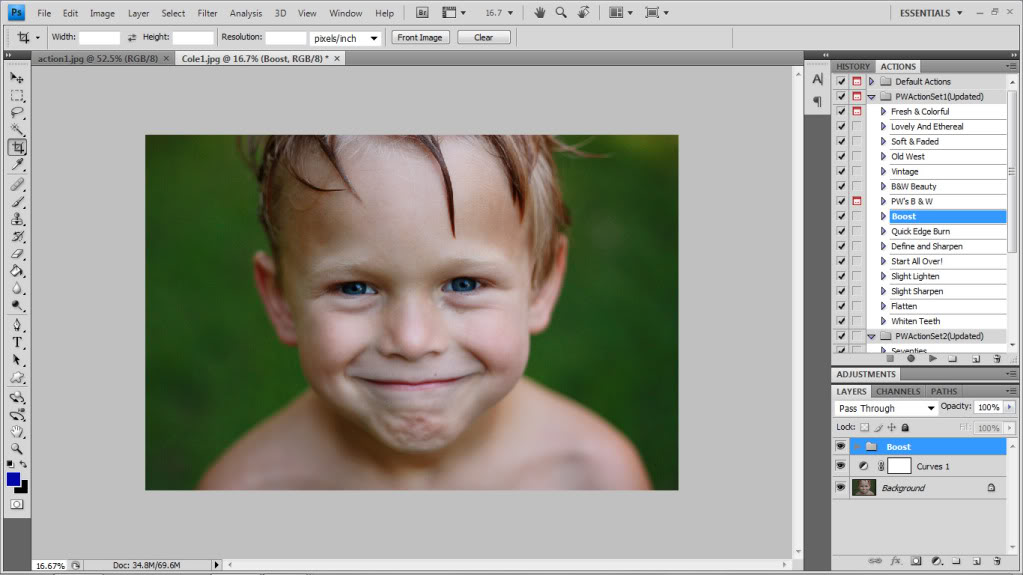
Here’s Cole baby after the boost:

See how the background looks even greener and the little pink in his lips puckered right up? Even his little tan and his blue eyes became richer. In the words of the Mad Hatter – he’s muchier…he’s got more muchness.


Ok. Now we are to the point where we can really bring out those baby blues. Pay attention. This is the part you were asking about. In Pioneer Woman’s action set 2, there is one of my favorite actions called “BRING ON THE EYES!”. And boy, does it.
First you have to apply the action.
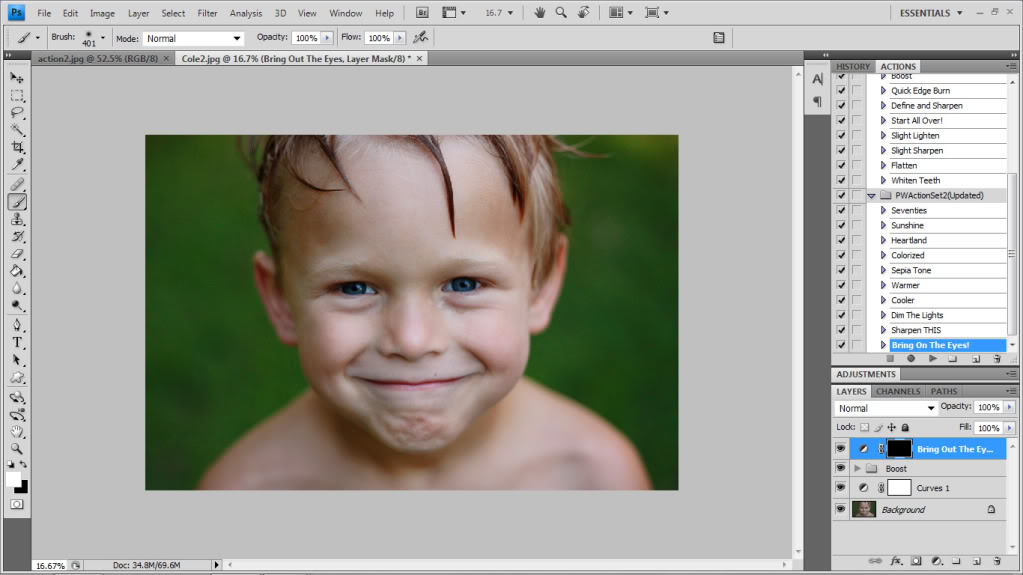
Then, you have to get your little brush ready. I like to use a little brush with 0% hardness (so that if I go into the little fleshy part of the eyes, it won’t be too apparent). And then lastly, you must make sure your color is white.
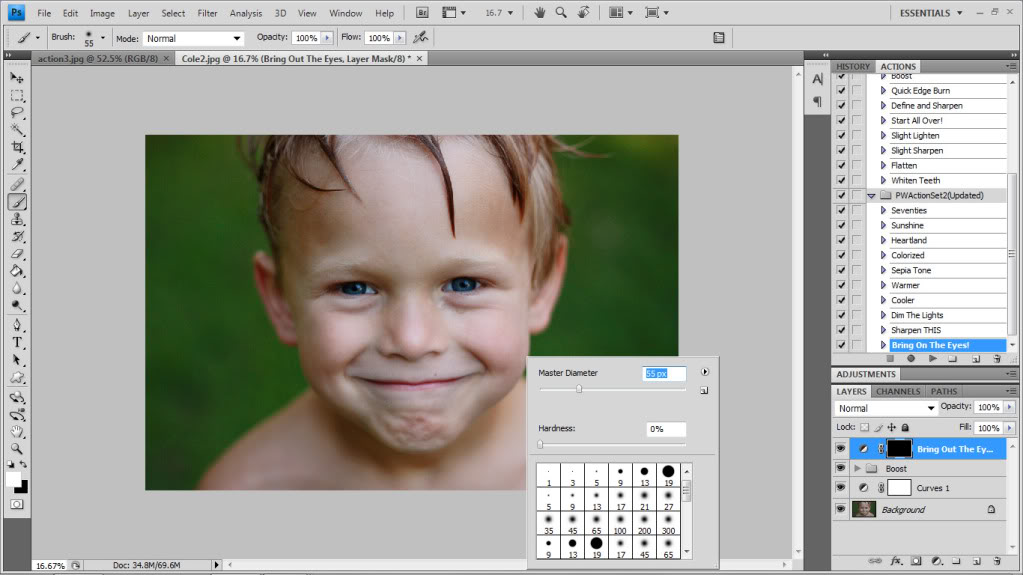
Then, I zoom in and color in the eyes with the white paintbrush. Everywhere that you color will become more light and more saturated so try to color in the lines.
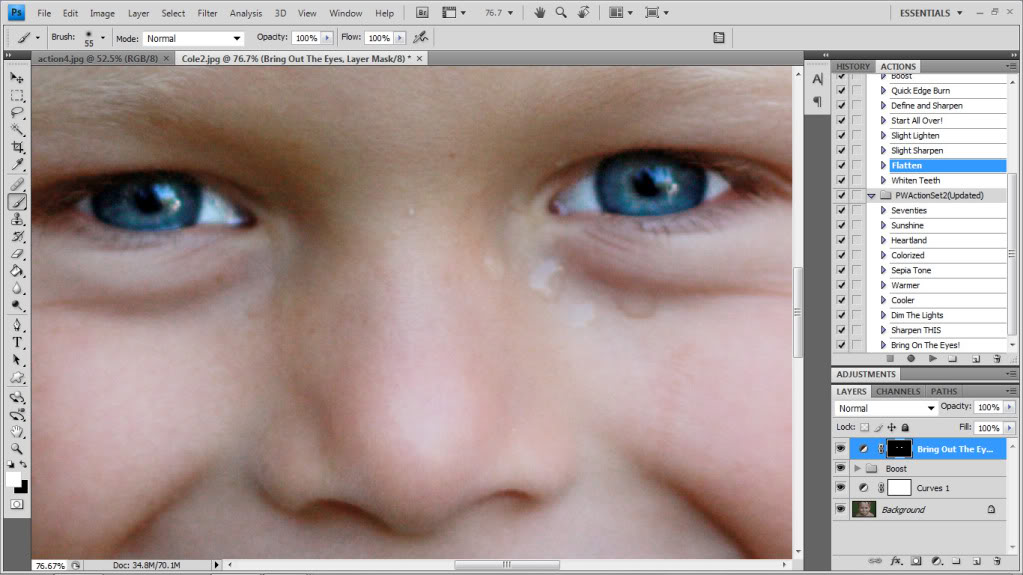
There’s those sparkly little suckers 🙂

Not really noticable unless you see the before’s & after’s…but alas, the little editing really draws you into see his bright blue eyes instead of focusing elsewhere. Plus, it whitens the whites and makes the iris of the eye way more saturated…like in real life 🙂


Now the last thing that I always do is sharpen things up. I apply the “SHARPEN THIS” action. The same thing applies here…you have to get your little brush and “color” with white the areas that you want to sharpen up. I like to go on the features and on the outline of the face…so I brush with white over the eyes, the nostrils, the mouth, the jawline and the hair. I don’t sharpen the skin because then the flaws of the face (like dirt, wrinkles, and eye bags look more apparent).
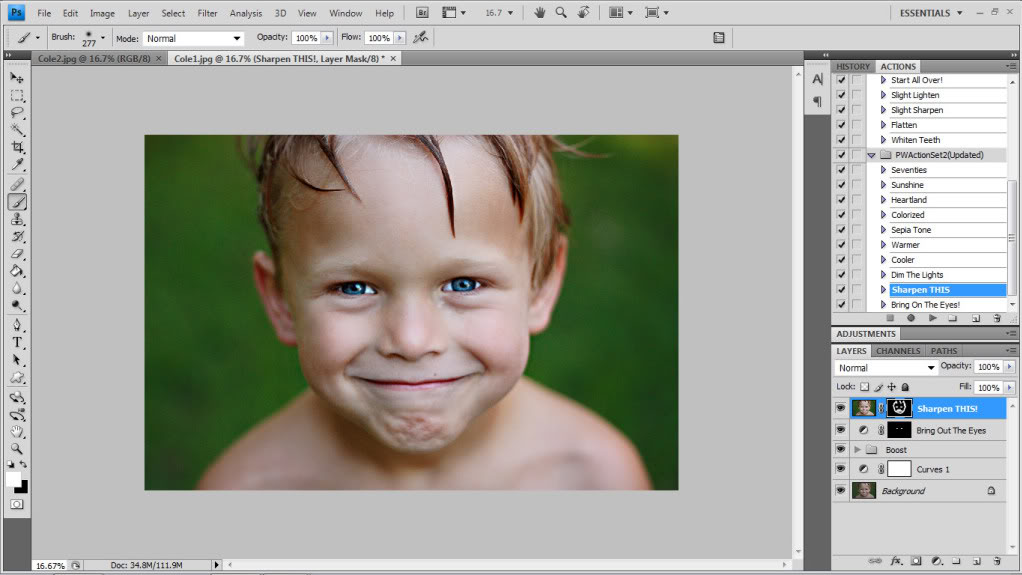
There he is in all his lightened, boosted, saturated, sharpened glory.

And just so you can see what the sharpen tool really does – here is the difference:


Now that you have followed along, I know you are dying to see the comparison. Well, I just want you to realize that this means that the charade of me being a good photographer is coming to an end. I’m a giant falsehood. With this little tutorial I hope that you realize that I can no longer pretend to be this fabulous shutterbug…it’s all editing. Judge me if you want. I can take it.
No…that’s a lie. I can’t take it. I want your adoration. I want you to love my skills so much it makes you green with envy. In the words of Michael Scott – I want you to love me so much it hurts.
Seriously though. I can take it.
That’s a lie.
Not really.
Almost.
Ok. Back to the photos. Here is the SOOC shot next to the fully edited version:


See the difference? No? Mom – go get your glasses. You have like eight pairs in the office. Pretty cool huh? It really ought to be called PhotoMAGIC instead of Photoshop. It seriously has to be magical to take one of my photos from drab to fab. And now that you know one of my little tricks, I hope that you can take your lift the eyes of your subjects…afterall, they are the windows into the soul. Basically you are making other people’s souls better when applying this action. That’s what the Bible says anyway. Pretty much 🙂
It took my wedding photographer explaining it for me to realize that all good photographers edit their photos, even if it’s just upping the contrast a bit. No judging here – while I don’t get all fancy with Photoshop, I definitely mess with the brightness, contrast, saturation, hue, and tint in my pictures, too. Do what you have to do to get great pictures! After all, a crappy picture won’t look much better with editing, but a good picture can look fantastic!
What version of photoshop do you have? I want it, but hyperventilate when I look at the price! Maybe that is also because I want an $1,100 lens too. Eek.
Nice, but I don’t think “alas” is the word you want.
I am really jealous of your photoshop knowledge. I know absolutely zero about it and think I’m too dumb to learn…so I’ll just look at your awesome photos instead and come to terms with the fact mine will not be good!
That’s really a great improvement! I need to get photoshop and get busy!
I’ve been using this technique since the 1st time you mentioned it a few months back. Everyone keeps asking what kind of camera I use. Our camera is about 5 years old & totally craptastic…BUT the photoshop takes a craptastic ‘before’ picture & turns it into a pretty awesome ‘after’.
Gorgeous! 🙂
I am seriously getting all of these fancified tools right now! Wow! The befores and afters are AMAZING! Can’t wait to get started. Thanks for the tutorial 🙂
Don’t you just love the PW actions? One thing I’ve noticed is that the “sharpen this” action can sometimes make things look grainy or noisy if the photo isn’t high resolution. Just a warning for others.
Love it!
I know absolutely nothing about Photoshop, so please don’t think I’m a complete idiot when I ask you this, but…I tried to download Actions from Pioneer Woman and nothing happened, and then I realized that maybe I should go out and purchase Photoshop first? You mentioned something about not using Elements, so what kind do I buy? I have a Mac, if that makes a difference. Sorry, I am totally lost! Thanks for sharing, and I love your blog!
I love the Photoshop tips! Thanks! 🙂
For people who can’t afford Photoshop or just find it intimidating, check out http://www.Picnik.com! Before I found picnik, I was an avid photoshop user, but now I hardly ever use photoshop
You can use actions in PSE–you just have to use ones that are created specifically for it. Pioneer Woman has them, as does Coffee Shop Rita (also for free), and a few of the “bigger” names in photography, like Florabella, though you have to pay for those.
Help Katie – I have photoshop elements, an older version, but how do I pick up the actions and such on the pioneer woman’s blog? Do I need a different version, and if so, how and where do I get it?? Love baby Will and your whole bacon lovin life, you are too cute!! Thanks for the photography lessons 🙂
In all honesty, I love everything you did up until the eyes. The retouched eyes remind me a bit of the uncanny valley — http://en.wikipedia.org/wiki/Uncanny_valley.
He’s completely adorable!
Thank you! I’ve tried her “bring on the eyes” and nothing ever happened. Could have been because I had no idea about the brushing and NOTHING was happening! What a rookie. 🙂
I second picnik for those without photoshop though. SO easy to use and free or cheap if you choose to subscribe.
If you only have PSE (like me!) you can also download The Pioneer Woman’s actions for Elements! They came out after her actions for CS 🙂
http://thepioneerwoman.com/photography/2010/03/pioneer-woman-actions-for-photoshop-elements/
WOW! Thats awesome! Don’t get me wrong, I still think you’re a brilliant photographer, but now I also think you’re a brilliant editor too. How brown is my nose? 😉
Yay! THANK YOU!! I am one of the people who requested this tutorial and I can’t wait to try these actions myself. Thanks for the step-by-step and the comparison shots. Love it!
just FYI, PW does have actions for photoshop elements. might not be the exact same, but she does have some of her favorites available for PSE
Wow…That is amazing!
THANK YOU THANK YOU THANK YOU! My PhotoShop skillz are limited to cut and paste. I just downloaded the actions and edited a photo of my kiddo…WOW her eyes are blue! 😉 Thanks for the tutorial!!
Niiiicccceeee! I really really want photoshop, you make it look so easy peasy.
WOW, what a difference! I finally got my hands on a shiny, fancy, new camera, now I need to get my grubby little paws on Photoshop! Thanks for the tutorial!
I requested more posts about photography through your survey and you delivered! Thank you! I’ll have to try this sometime!
Thanks for sharing! And I think you are even more awesome!!!! Great original pic-then you made it even better with your mad photoshop skills! 🙂
Ok I am having a big problem with bring on the eyes… Every time I click it an added layer menu shows up. I am not sure what to do with it and then I can’t adjust anything after I close it. Help! I am lost!
Hmm. Interesting problem Fawn.
Are you using CS4?
When mt adjustment layer shows up it is a custom levels adjustment that has the darkest output at 5, the midrange at 1.23 and the lightest at 197. Hope this helps!
XO – katie
IF you see this almost 2 months later, I have a Q. I’m just getting around to trying this out on my brown eyed beauty. It looks terrible! Have you done it on people with dark eyes and had success? It always seems it’s for people with much lighter eyes.
Thanks!
Hi Julie,
Actually I just watched a video about lightening brown eyes and performed it on a photo I took of Will. Here is the link. Hope it helps!
XO- Katie
Thanks, I’ll check it out!
I love it – it does make a huge difference! One of these days I will pull the trigger and treat myself to a nice, professional type camera but until then, my Canon 12mp will have to do. Enter…photoshop!
I have a questions regarding the camera flash. I can turn mine off, but with my squirmy 7 month old, when I try to take a picture without the flash, it’s nothing but a blur. How do I avoid that? Any suggestions are greatly appreciated!
Hi Barb,
Try going outside…the camera is probably on auto settings even with the flash off…so you have to increase the amount of light so that the shutter speed can increase automatically.
xo – kb
Hey katie!
Thanks for all the tips! I recently bought the canon rebel (on your recommendation). Just wondering how you get cole’s face in focus and his shoulders out of focus? What lens, fstop, etc did you use?
Thanks!
Use the lowest f-stop you can…and adjust your ISO and shutterspeed accordingly. This particular photo was shot probably with my 50mm…it’s the cheapest lens on the market…and does some pretty photos if you can get the focus right 🙂
xo – kb
Hi,
Gotta admit your are simply great. Its so easily explained and all. One thing I got stuck is how do you get flatten,slight lighten, boost etc on actions column.
Please help me out with this. I will very much appreciate that.
Search for Pioneer Woman’s actions. They are free for download and the instructions will walk you through getting them to be in your actions column 🙂
xo – kb
Hi, thankyou so much for the tips to make a photo magical, I am a portrait and nature photographer and do use Photoshop elements 7 and 11, I know a lot more about them and how to use them now than when I first started, but was challenged with how to make the backdrop like a studio shot. I tried different things but hadn’t quite got it yet so I ironed the backdrop each time for inside shots, often it still showed some creases, so went on the path to find wrinkle free material to make my own which can be quite expensive to get exactly what you want, I will try all the things you have suggested and watch the image come alive, again thankyou. Krista