Ever go onto a photo-hosting website and see those photos that are black & white but with the baby booties that are in color? I think that is what they call Color Splash photos.

And I figured out how to do it.
No..no…you don’t have to pat me on the back. No applause is needed. I do accept gifts though.
Specifically items such as monogrammed napkins…or photography lenses…and I will take cash.
So while you are thinking about what fabulousness you want to gift me (gosh I just had a Neicy Nash moment!)…I will review with you how I conquered Color Splash. First – I used Photoshop CS4…so if you only have Photoshop Elements…this is not the educational instructions for you. Maybe if I have time, I’ll do that one day…but for now…tough cookies & keep brainstorming about my pressie.
First select your photo. I chose this one of my nephew Braden. Isn’t he just a doll?

Nothing fancy about the photo. It was straight-out-of-the-camera. So I opened it in CS4.

Now this is kinda optional…I really wanted his little eyes to pop…so I did the step of “bringing out the eyes”. This is a photoshop action curtesy of The Pioneer Woman. You can go to her blog & download them for free.
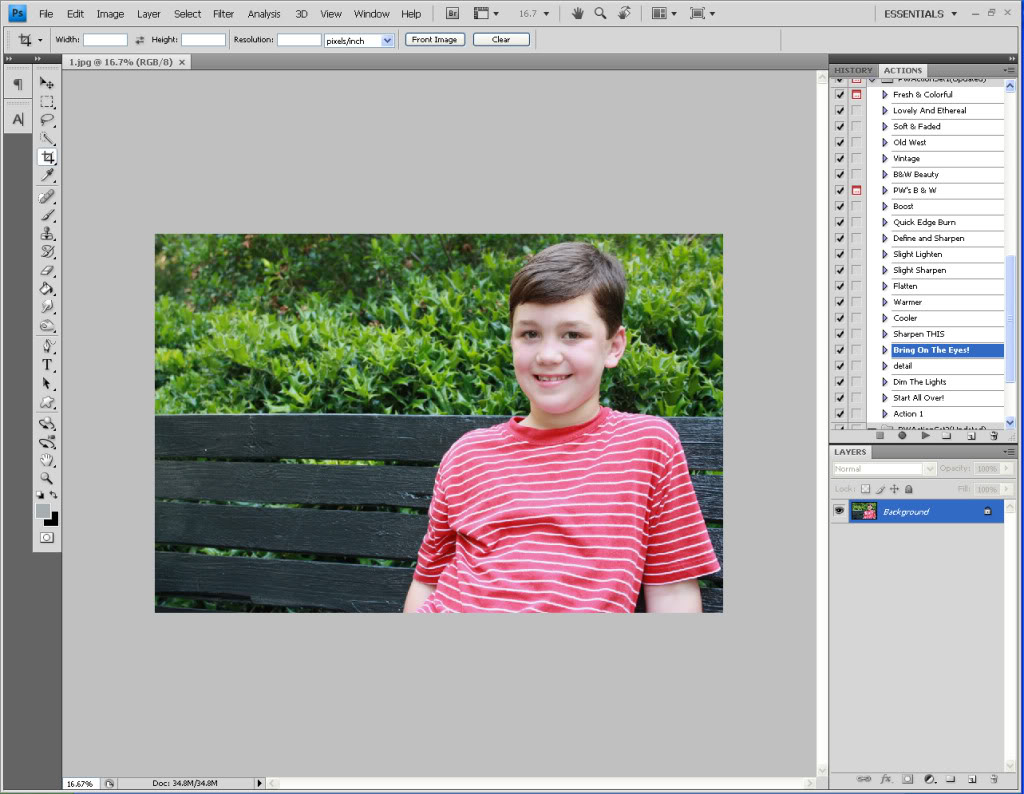
After applying the action, I just zoomed in on Braden’s baby hazels and colored in the eye.
Bam. lighter eyes.

I had to bring the opacity down a bit so that my favorite 7 year old didn’t look like he had swallowed a glowstick.

Pretty Braden. oh. Wait. I mean HANDSOME. Handsome Braden. Handsome is for boys. Pretty is for girls. Boxers for boys. Panties for girls. Jeremy always corrects me on that. Apparently, boyfriends don’t like it when you say, “I folded your panties.” I mean, seriously. It’s like I cut something off.

So now, I wanted to be sure that the colors on Braden’s shirt & his new glowing eyes & his sweet pink cheeks would really pop when I change the background to B&W so I applied the Boost action.
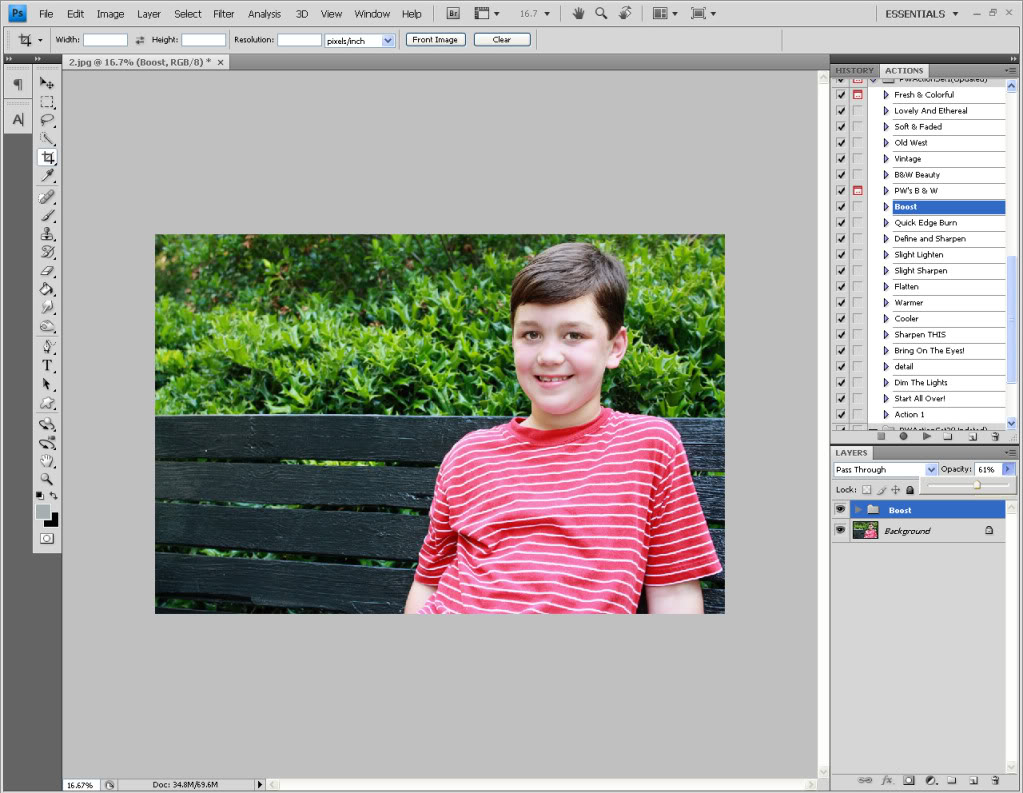
Much boostier.

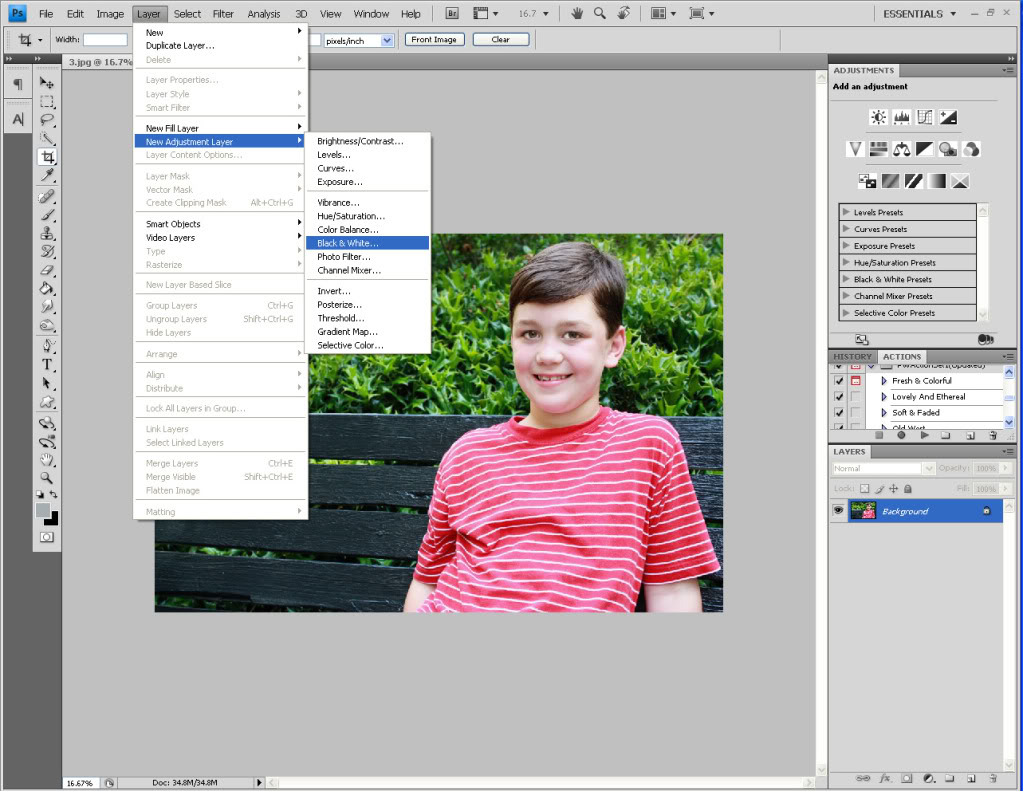
Now here is where the action takes place. You are going to apply an adjustment layer called “Black & White”. Just go ahead and select that from your menu.
The whole photo will become black & white. But don’t fret.
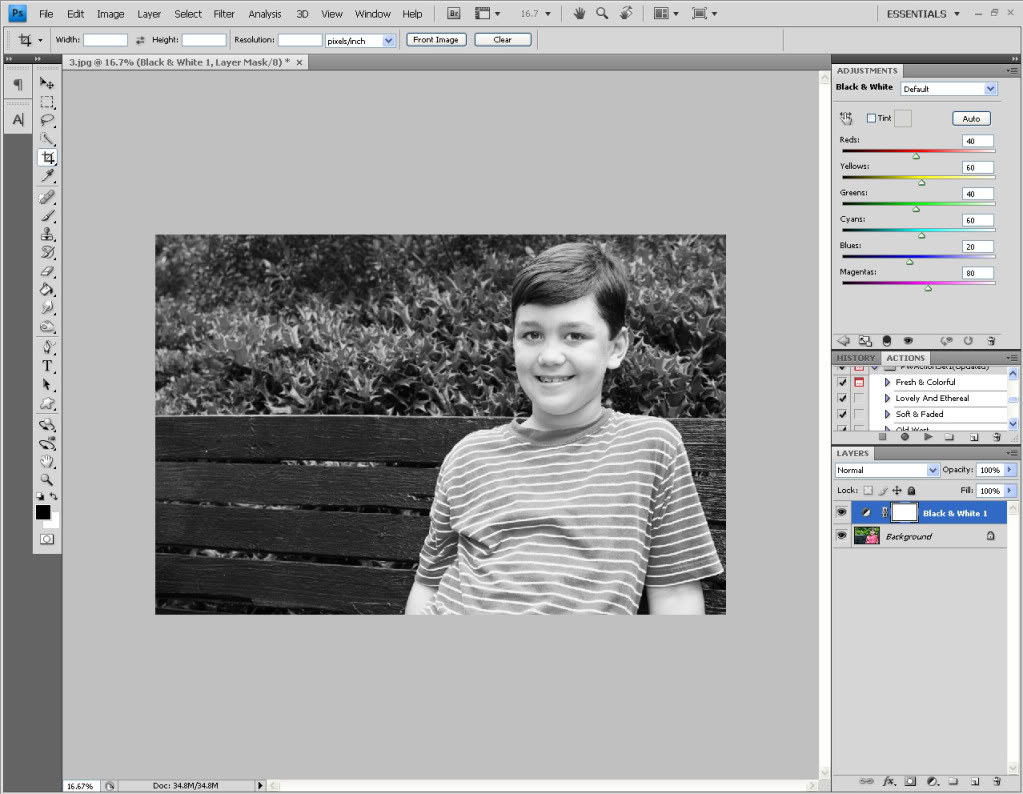
On the left hand side – in your tool bar, you are gonna select your paint brush tool. And then go to the bottom where it has the white box over the black box. Switch em so that black is on top. Now paint your photo wherever you want color to appear.

I even zoom in and get my edges done really well. Sometimes that means adjusting your brush to a finer sharper point.
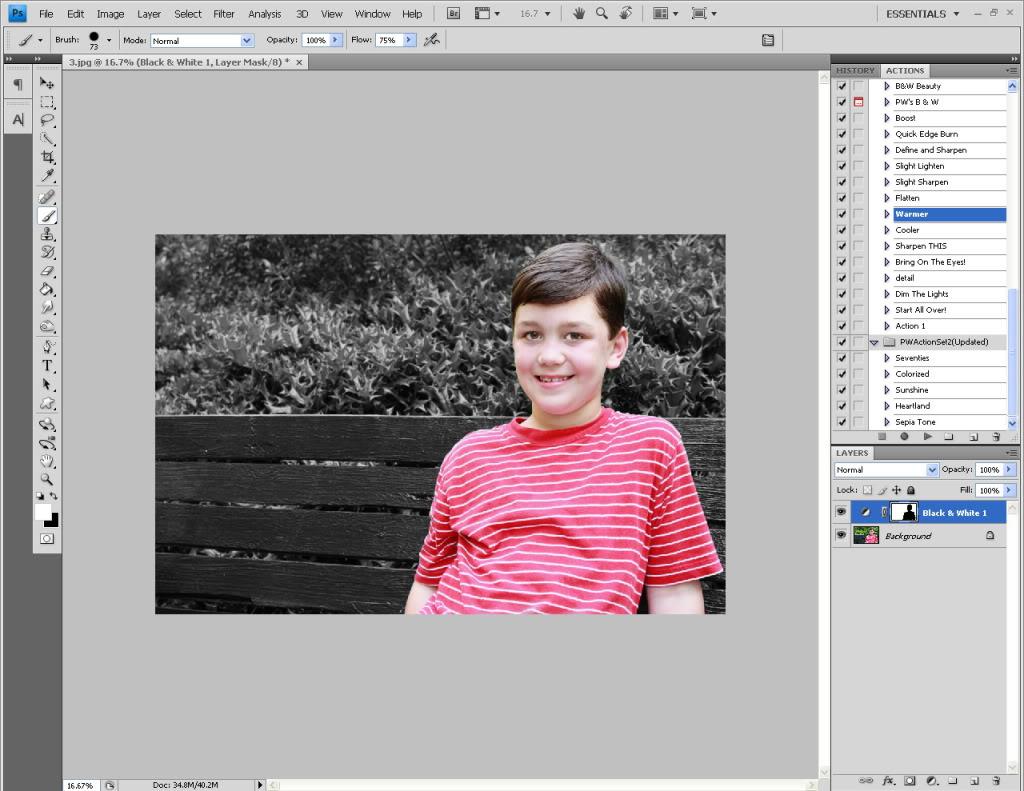
If you make a mistake and color outside of the lines – just switch your black&white boxes back and color in with white.
Now I have Bray-bray in color but those bushes are totally grayscale and so is the bench.

But I am not done. You can be done. But for this photo, I wanted him to look a little warmer. So I applied the ‘warmer’ action and got a nice sepia tone effect.
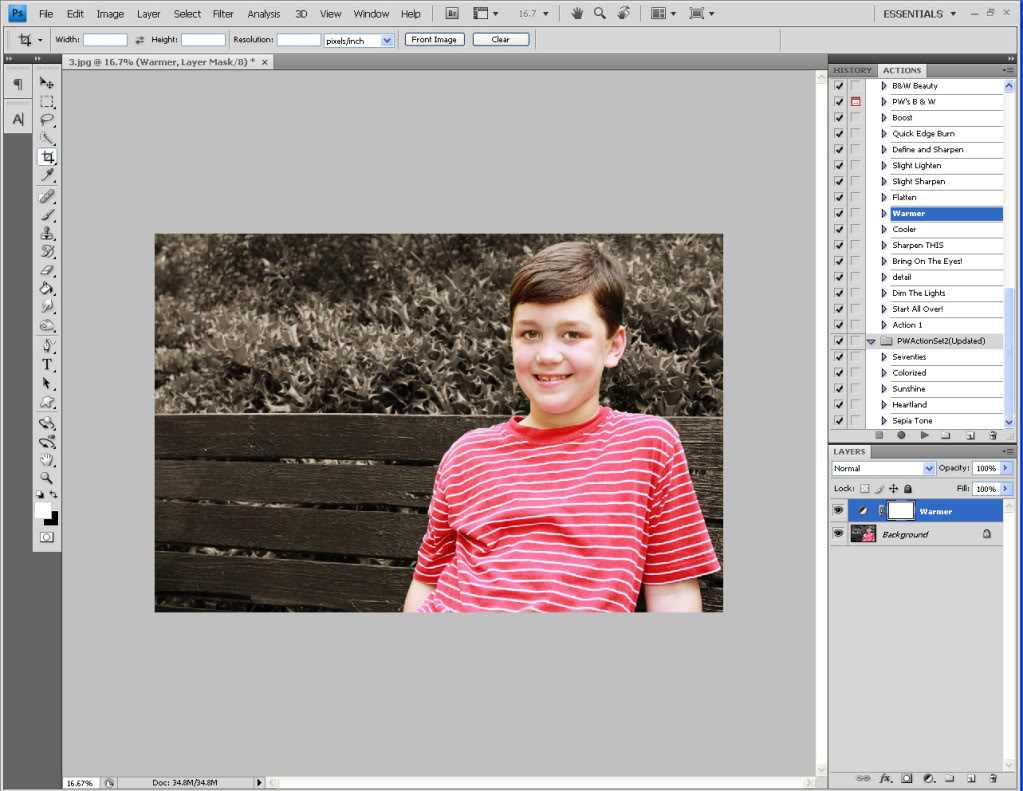
Plus it gave the kid a bit of a tan. And photoshop tans don’t hurt. or require sunscreen.

Lastly I did a little sharpening…with the “SHARPEN THIS” action. All I did was paint all over my nephew…skipping the rest…so that he would look a little more defined.

So there you have it. One Color Splashed nephew o mine.

Wanna see em side by side? Ok. But don’t stop thinking about my present.


I even had a lot of fun Color Splashing other photos I had in my files.
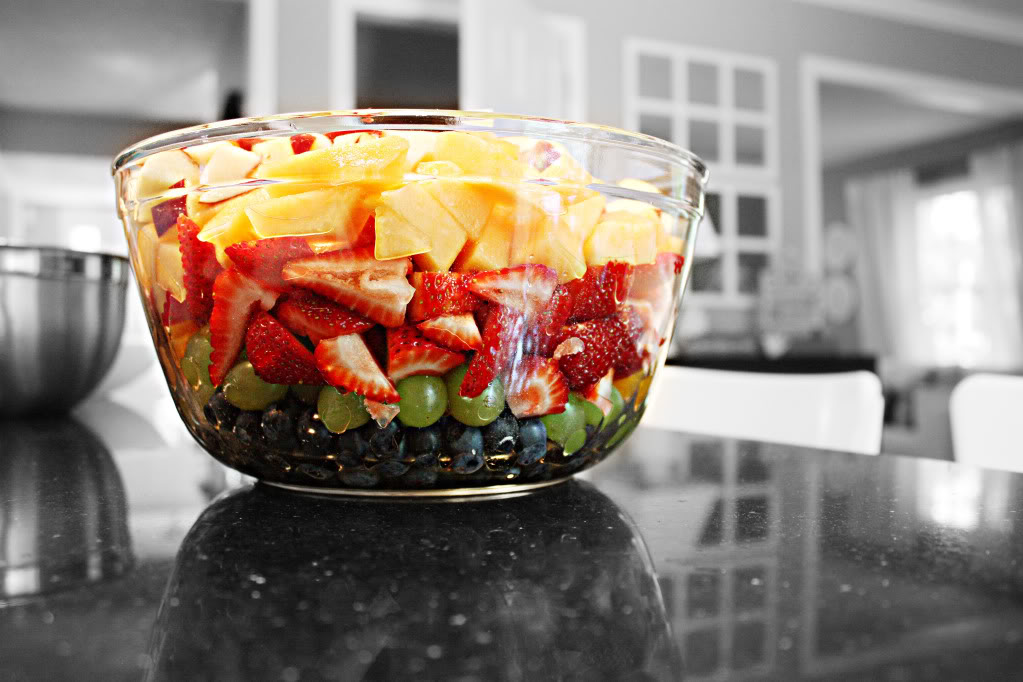
This bowl of fruit looks pretty scrumptious with a black & white background.
And you’ve seen this photo of Lilley with a gray backdrop.

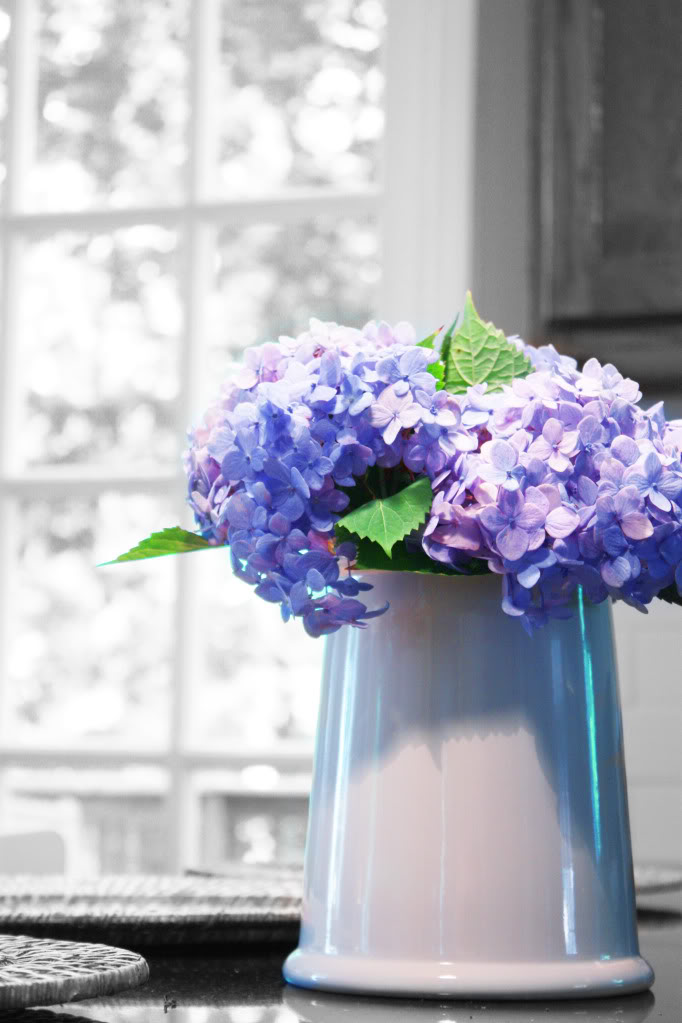
And doesn’t this vase of hydrangeas’ pop when it only has vivid color?
So there you have it. Now what’s my gift? Seriously. And if you say David Bromstad in honor of Color Splash….well, he’s just not my type…and I’m definitely not his. I have an idea…if you have a favorite color splashed photo…email it to me at [email protected] – that will be the best gift you could give. Have a happy (& colorful) weekend!
If I were to download photoshop, which version should I get? Is there a free one vs. one you pay for that is much better?
Kim –
I don’t know of any free photoshop that you can simply download. Photoshop Elements is a program you can purchase at any local office supply store or electronics place. Photoshop CS4 is a program that is available for more professional use..and can be quite pricey.
XO – Kb
I love this effect. For those that don’t want to put out the cash for this feature, it is available free at picnik.com for free, under create, choose black and white and then play around with a photo. It’s pretty cool
interesting to read how you do this. i follow a different method, but same results! i just duplicate my photo and desaturate the new layer and then use my eraser tool to reveal the color layer beneath. etc. with all the enhancement stuff.
fun!
That is one of my favorite ways to change a picture. It turned out great. Now you should go back and do some of your wedding photos. Have a great weekend.
Those look awesome, especially the one of Lilley with her colorful sweater!
This is one of my favorite effects. I have Photoshop, but I admit that I never really learned to use it properly. Instead, I rely on picnik (www.picnik.com). There’s a free version and it’s really easy to achieve this same effect (and others). I’m nowhere near a pro, so I don’t need the fancy Photoshop stuff.
My fiance always gets upset every time I tell him that he has clean panties in the dryer. I really think that these boys need to cope with the fact that panties is just so much more fun to say than boxers.
you know what I love about photoshop? that you and i can do the exact same things completely different ways! all depends on what you prefer I guess.
Fun! I just beg you not to do this to wedding pictures, which screams “10 years ago” to me and makes me cringe. Though for some reason I still like your examples? I think you just know some cute kids. 😉
Thanks so much for this tutorial. I have CS3 so I’m hoping I’ll be able to do the same thing, I imagine I should. Oh, and in regards to the panties portion of the tutorial, I live in a house with men (husband & 3 sons) and I am always referring to their undergarments as panties, they just have to deal with it. They are finally starting to find it funny. 🙂
This is amazing! Thank You. I am a cxompletely self-taught photoshoper and have always wondered how to do this. Very useful tip thanks again
England
Really, you could just call it hand tinting in reverse, like they used to do before they used the old daguerrotype printing process for photographs. Only you start with color and turn it to black and white. You should look at some of the old hand tinted photographs for ideas. They were very selective in their application, and the photographs take on a sort of graphic quality in color use and composition when applied well. I love your kitchen btw. Very nice. 🙂 -MM
Gorgeous! I especially love the one of the flowers. 🙂
Thank you Thank you Thank you Thank you THANK YOU!!!!! I have literally had photoshop (Adobe master collection) cs4 for a year and have tried to figure it out but just couldn’t!! I’m taking a class about it for my major (public relationsbut at my school its required to take journalism classes so its just to learn how to make a newpaper and such) and I have wanted to learn to make my photos as beautiful for yours! Thank you so much for this great tutorial and even more for taking the time to really break it down for you!! I’ll send my photos soon!
ok, I made it all the way to the part where I’m suppose to paint where I want color to show through, the only problem is, the only color showing through is a saturated red tone, do you know how to fix this?
This was good, too bad i have elements. I liked your joke, boxers for boys. In my house I call them “manties”. LOL
great photos – it’s also called selective coloring – i’m a big fan of it – there are lots of other ways to do it (some being easier than others depending on the photo) – but you have definitely given me the urge to go manipulate some photos especially since there’s like a foot of snow outside and i’m suffering from cabin fever
Katie–
Thank you SOOO much! I’ve always wanted to know how to do this and your tutorial was simple and very easy to follow! THANK YOU!!
Thank you for an easy tutorial Katie that a camera-moron person like myself can follow 😉 I am so interested in capturing & enhancing pictures of my curly-headed little man but sometimes I get overwhelmed, so step-by-step instructions like this truly help. Oh, and I think my tough soldier hubby would freak if I called his boxers panties…maybe I’ll try it today when I’m folding laundry just to see his face 😉
How about Carter Oosterhouse?? Now he IS my type!!! And the check is in the mail!!
Thank you for the tutorial- I love it!
interesting info, thanks
So, did you get the West Elm drum pendant??? I’m dying to find out! 🙂
Thanks for the tutorial! I like the fruit photo the best – makes my mouth water!
That is really great! I love it!
I loved this tutorial, you’re quite witty 😀 Thanks, worked perfectly, & it was so easy a 5 year old could probably do it.
Thanks for the tutorial – I love your photos and how you use photoshop. I have no idea how to use the program, i’d love to see more tutorials from you!
I am LOVING reading your archives! I just needed to comment on the boxers vs. panties debate. I ALWAYS call my hubby’s underclothes panties and he gets so upset! What’s wrong with boys?! Panties – boxers – underwear – what’s the difference!?
Seriously…they need to stop getting their panties in a twist about it 🙂
xo – kb