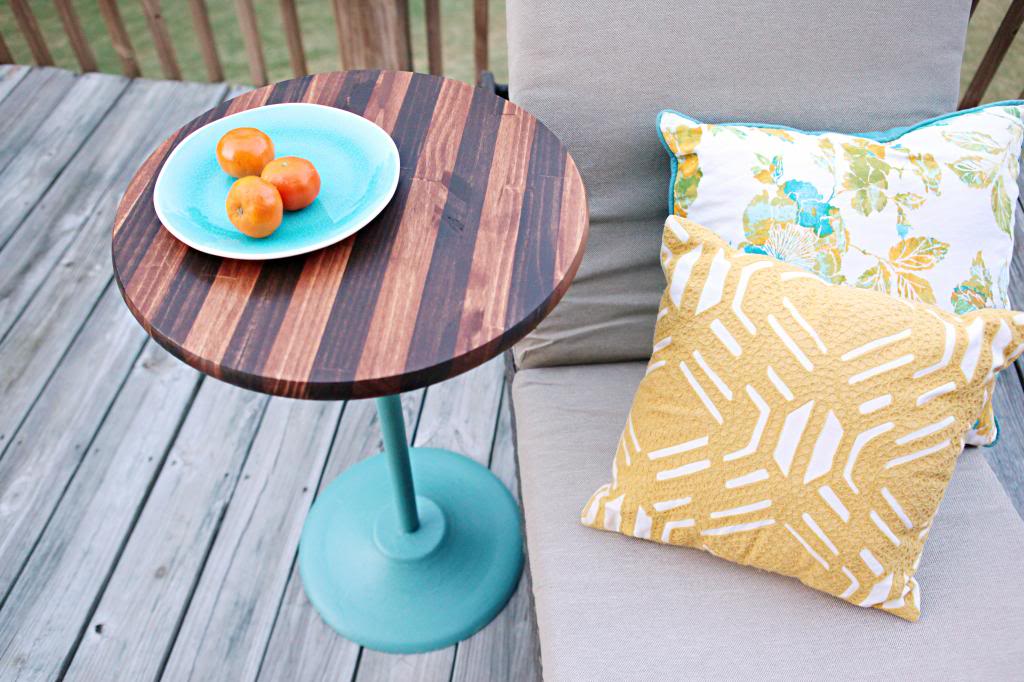
I made the cutest little side table! And it has stain on stain stripes…which, let me tell ya, was hard for my tired little brain to figure out…but now that I have…I’m seriously gonna stripe everything. If you see a kid with a striped face….it’s Weston and he didn’t move fast enough. His name will be Striped Delight and he’ll be the new member of KISS. He doesn’t sing…but man is he good at banging on those drums 🙂
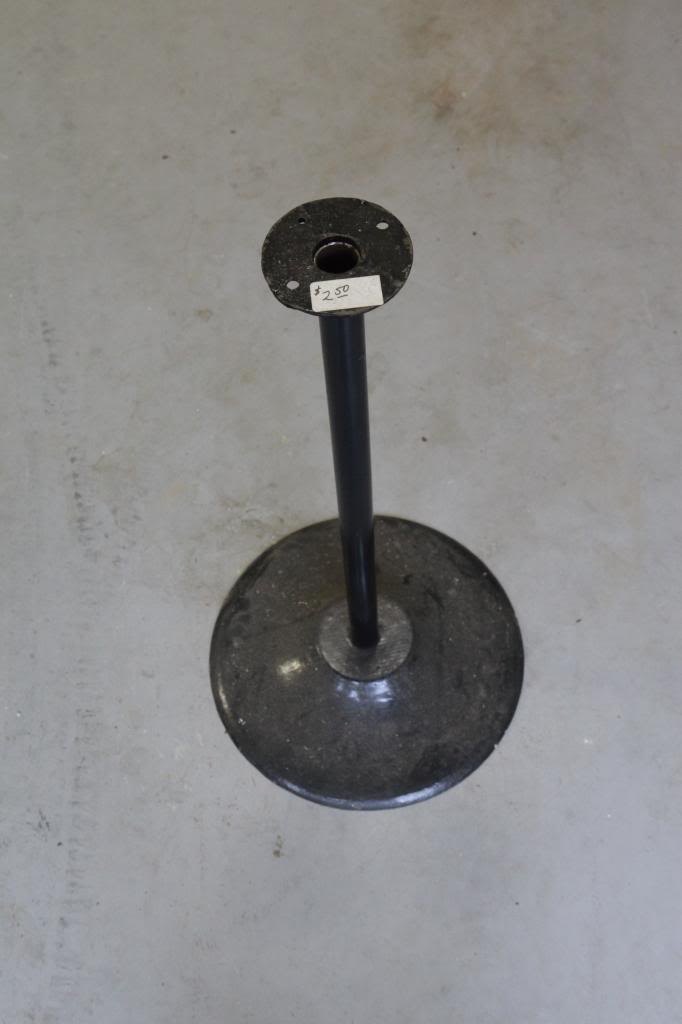
So the story of this little table began at the thrift store. I saw the metal base for sale marked at $2.50. That’s a great price in my book. Jeremy looked at me like I was crazy.
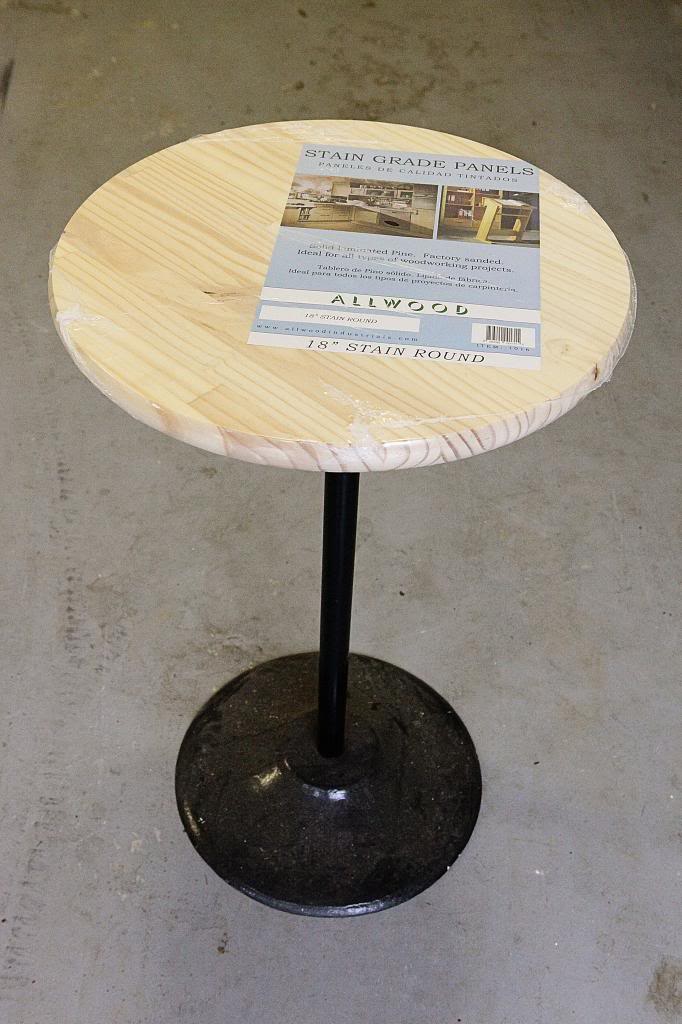
He understood what I was going for after I showed him these stain grade round tops at Lowe’s. This was about $11.
I decided that I would make the base more colorful and then the top would be striped. At first, I figured I would do the same thing that I did with the striped boxes I put in our reading room. But then I thought it might be better to do stain on stain….but I’ve never done that. I’ve never really done any kind of staining other than just normal one-color-solid-everywhere staining. So this was definitely going to be an experiment.
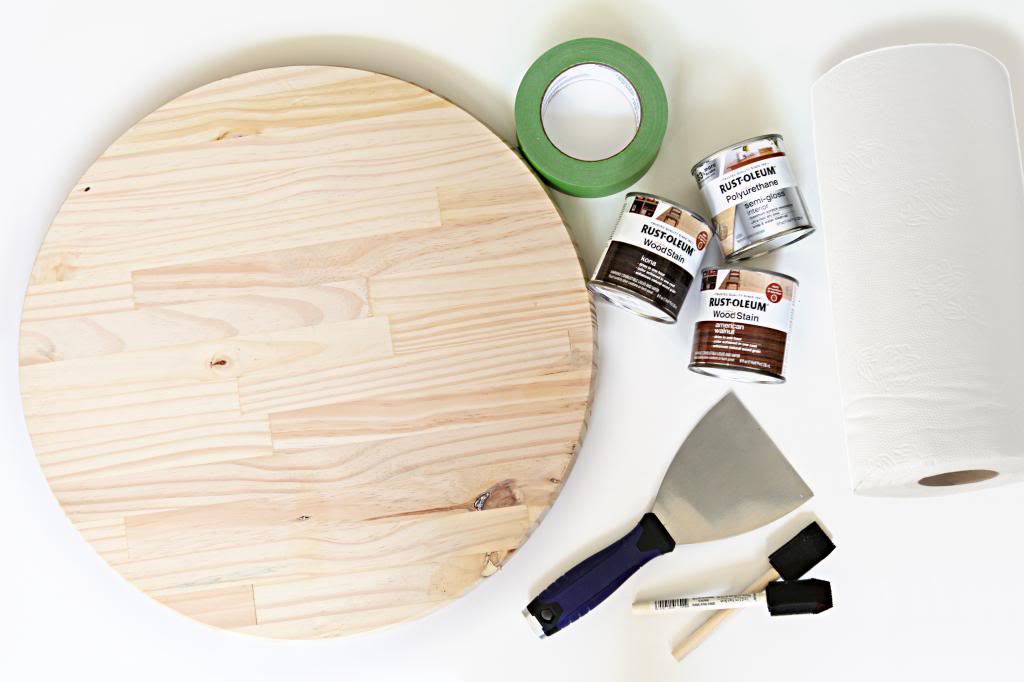
First I gathered my supplies….painters tape, a couple colors of stain, some foam brushes, poly, paper towels and a drywall knife.
Then I tried to figure out how to do the stripes without any messy lines. I tried ten different combinations before I found the right approach.
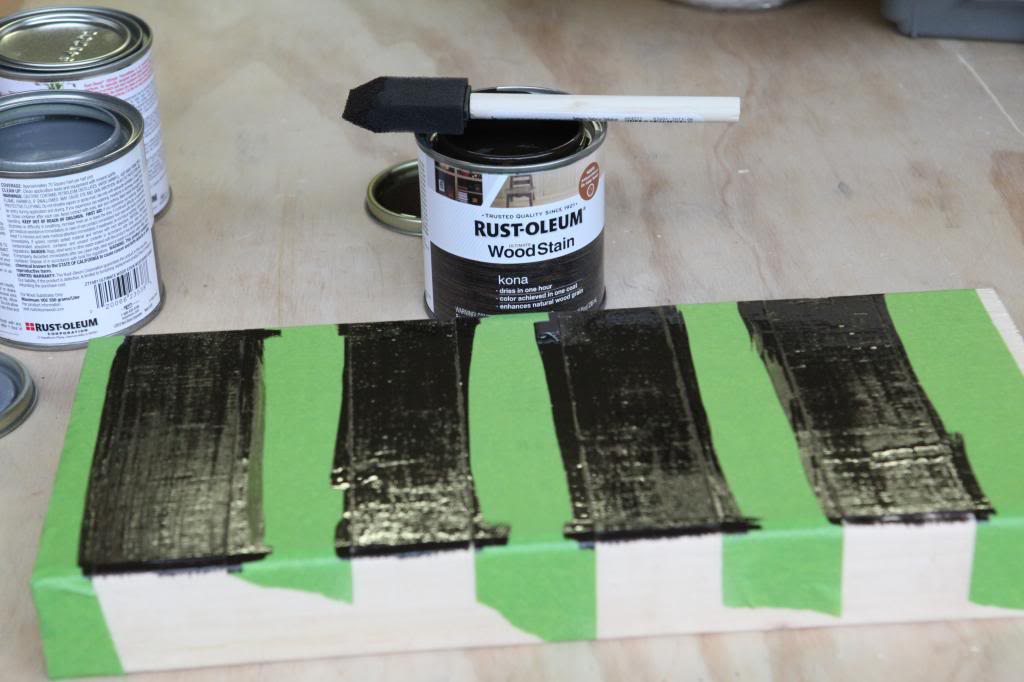
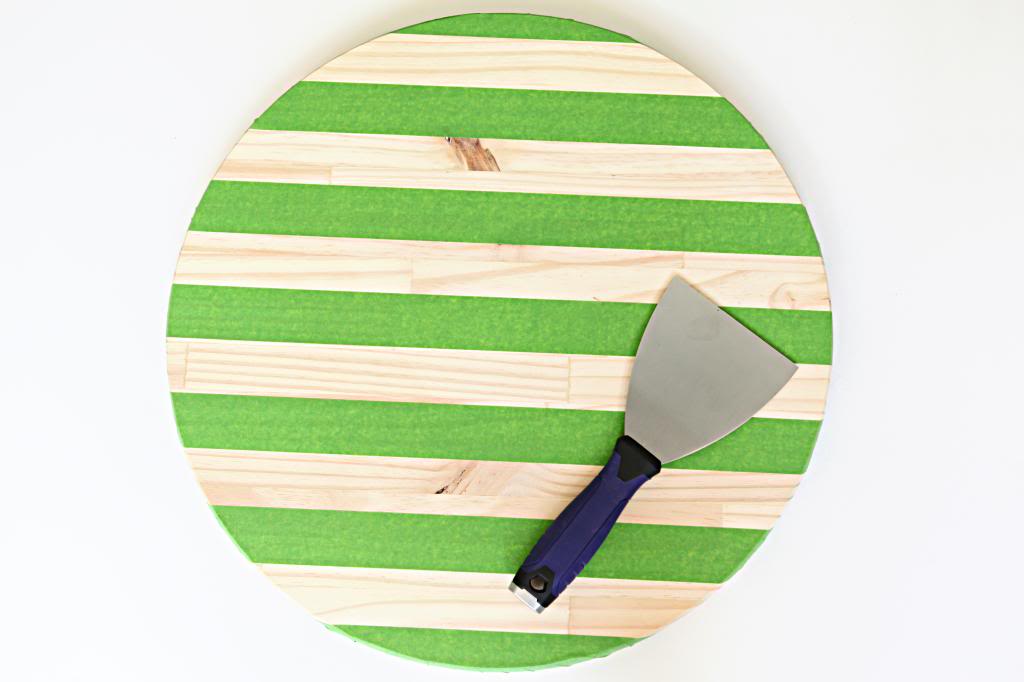
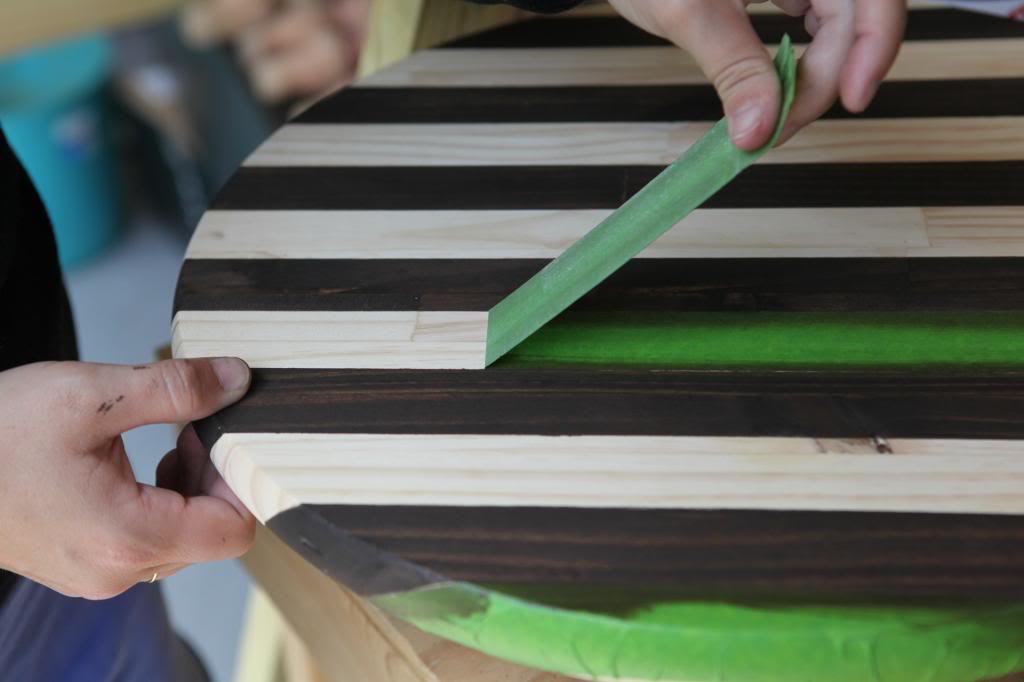
Here’s how it works the best. First, tape your wood up. If you want to use a pre-conditioner, apply that to the entire piece of wood first, let dry and then apply tape. Then you will want to rub the entire tape with your drywall knife, paying extra special attention to the edges and the rounded parts. When I say rub….RUB and go over each area for a few seconds.
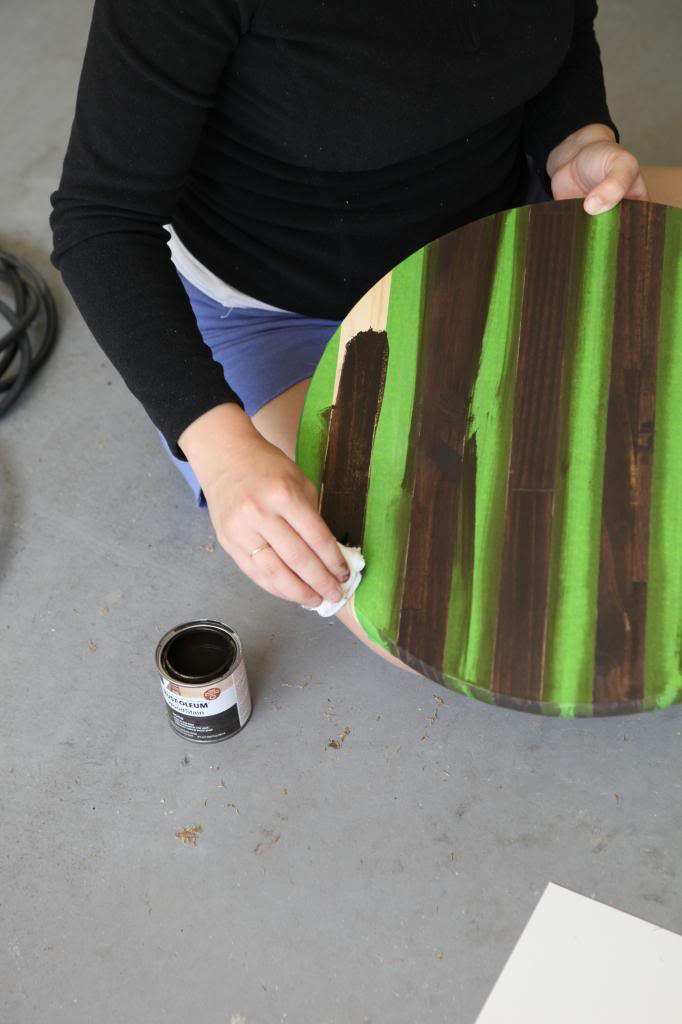
Using a paper towel, dip into the stain and rub it on the exposed areas. Wipe the excess off immediately. If you want it to be darker, wait about twenty minutes and then repeat.
I used the Rustoleum Kona stain color (it’s my new favorite!) and it is dark and rich and very hard to mess up. I have an affection for these tiny little test pots of stain Rustoleum sells because I like the idea of switching stains or mixing my own custom color without spending a fortune. I wanna try some artistry staining down the line…like watercolor painting but with stains…wouldn’t that be fun?!
Ok…so I did the flat part first on the table top and then did the edges.
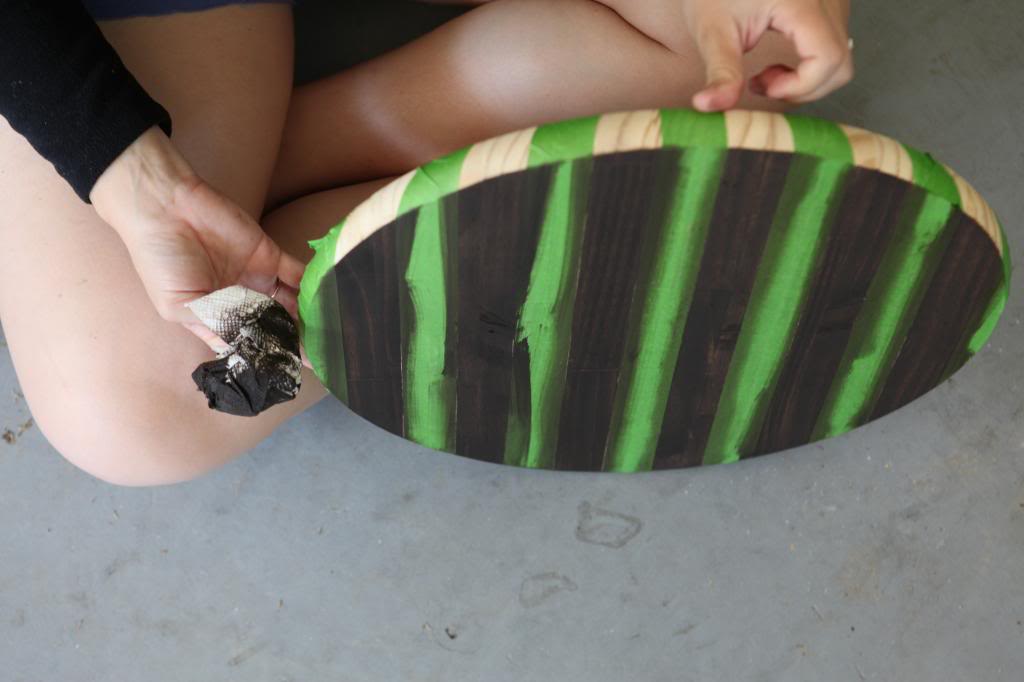
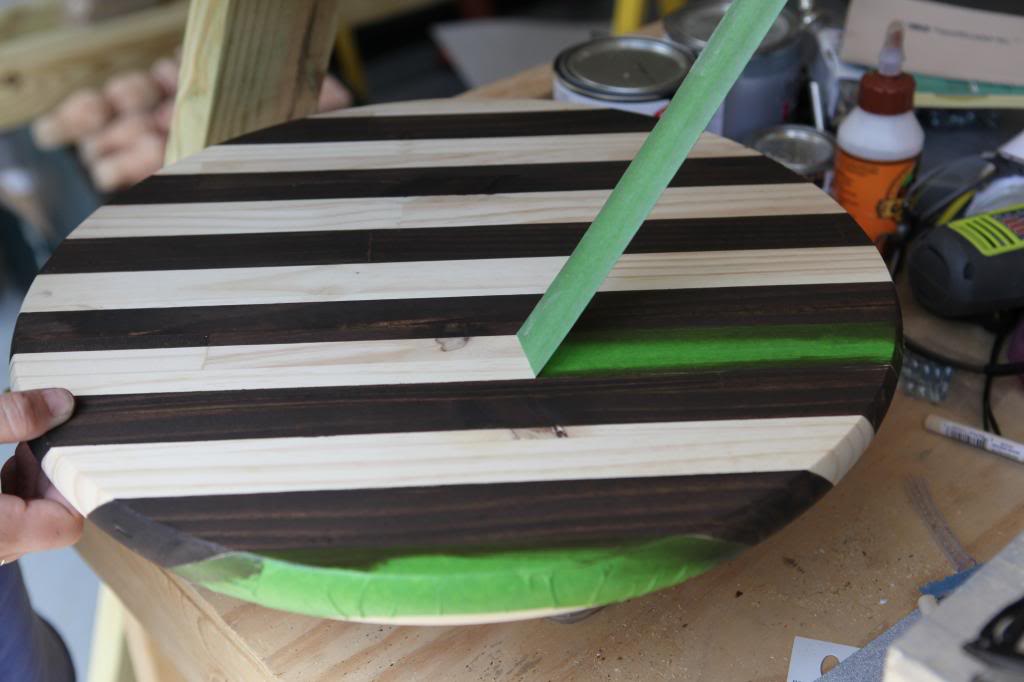
After I rubbed the excess stain off, I didn’t waste any time to remove the tape. You want to pull it at an angle so that it comes off in one big piece. As you can see, I had super crisp lines.
At this point, you want it to dry completely. You can get blurry lines again if you don’t practice patience (um…happened to me on a few practice attempts) so wait till it’s completely dried. After that, you want to apply your other color stain with a paper towel making sure not to have a lot of excess and wiping extra stain off within a few seconds. I then applied two coats of satin poly with a foam brush (sanding with 440 grit sandpaper in between coats).
We used a couple short screws to fasten the top to the newly painted base (it’s a sample pot from Lowe’s that I got for free).
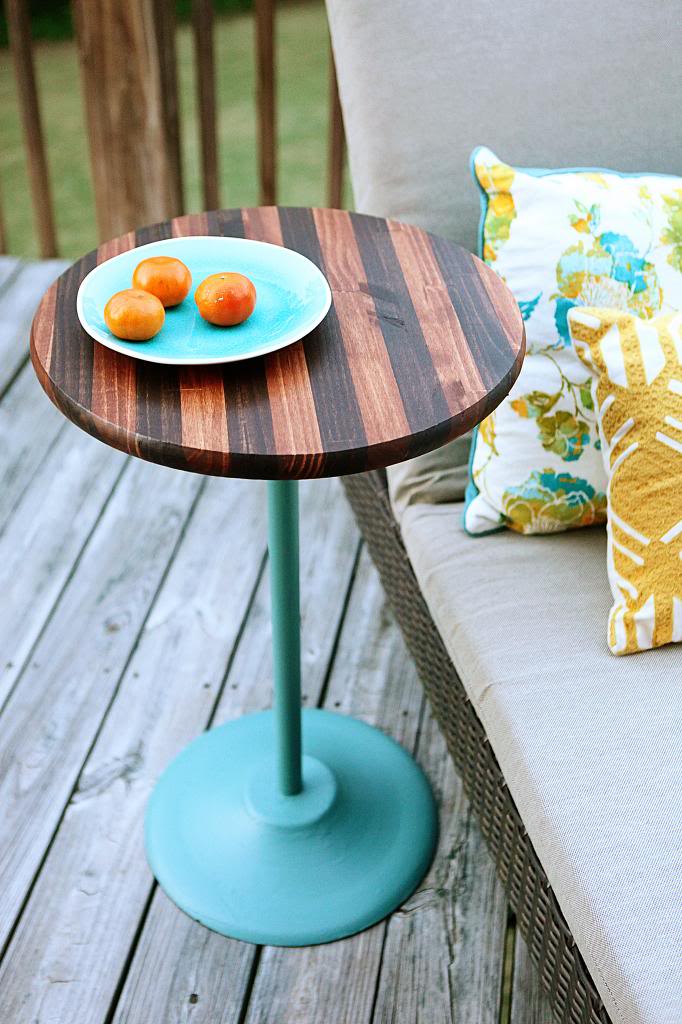
Not bad for about $15! If I had to buy all the supplies, it probably would have cost me $40 total but still – that’s not a terrible price for a custom piece. Right now it is acting like a plant stand in my living room because apparently Weston thinks toy dump trucks need to actually move the dirt to my pantry. I like the idea of growing my own food…but that’s taking it too far 🙂
That looks adorable!
Oh, Katie, these little projects are why I love Bower Power! You have such great ideas. And I know everyone says this but, where do you find the time? I have one baby and I feel so overwhelmed some days, just trying to get supper made and laundry put away… it gets easier right? Keep up the great work!
I love it! And what about your endurance and determination? Impressive!
Love the striped stain! It looks amazing!
I don’t know much about staining at all, so maybe this is a really stupid question. Could you have used the same color, and the color difference would be from one area getting one coat worth and the other area getting 2 coats? Or would that be too subtle to be worth it?
Super cute idea!
They are really different colors and I tried a lot of different ways…one being a full coat of the lighter stain on the entire piece then apply the tape and apply the darker stain on the exposed areas…which was a huge blob mess. It was much harder to get the tape to stick to the stained areas successfully and then the stain changed undertones when applied to another colored area.
xo – kb
Another great fun idea.
This is the raised deck area isn’t it? (not sure what to call it). I don’t think you’ve ever shown us what you’ve done with this area – the ground floor outside area yes, but I don’t remember seeing the upstairs deck area?
This is just the cutest little table ever! I love the stripes and the base is glorious! Good find!
Love the stripes! You always find the best pieces at thrift stores. I never seem to have good luck in those places, but I know that’s because I don’t go often enough or give myself enough time to pick through everything.
http://jax-and-jewels.blogspot.com
I’m really digging this piece. I love wood/paint combo furniture. Awesome job!
OMG Katie I love this project! One of my favourites yet!
Wow – great project Katie! Love the way it turned out!!
You mentioned wood pre-conditioner. I’m a newbie at staining and I’m about to tackle a big project with staining involved. When should you pre-condition your wood before staining and when is this step ok to skip?
This is such a great idea! My wife and I really love to create stuff and we really like to read your blog to find inspiration! Thank you 🙂
Very cute! I love this! 🙂
Nice one Katie! It looks really good!
I love this method, it would be a super fun on a big table too. When you put the lighter color on did you just do the unstained stripes or did you cover the entire thing with the lighter color? Thank you!
Love it! I’m pretty much obsessed with stripes at the moment. I striped my entry table with paint (actually I think I already showed you this on your Facebook page) 🙂 Never tried it with stain though…. now my little brain is running rampant.
http://www.lifeonagravelroad.blogspot.com/2014/03/mirror-re-do-spring-happenings.html
Love the table – but I have an irrelevant question…how do you get your vertical photos to fill the entire space? My vertical photos don’t go all the way to the edges of the blog post like the horizontal photos do. Can you explain to me how you do that?
Thanks!
It’s adorable! Great job Katie!
I love how your mind works. I’m a pretty frugal person but I have a hard time seeing something and seeing what I can turn it into. I’ve given up on wondering the home section of Goodwill because I just can’t figure out how to change something without an idea already in mind…usually from something I saw here or on Pinterest.
I also love the color of the base! I’ve been very in to aqua and teal this summer. 🙂
I rubbed just the unstained areas with a paper towel of the lighter stain.
xo kb
This is so cool! This idea would work on a lot of pieces of furniture. I’m bookmarking it for sure. Great job! And I like the pillows in the background too.
Love this table- the colors are perfect together! And I LOVE your pillows! Any chance you can share the info on where you got them, please?
Love your blog- read it daily 🙂
Karen
Love it! What a great find to start the project with. I really like the look of the two-toned stain, and that base color sets it all of perfectly, great job!
Very cute! Have you seen the team at “Sawdust and Ebryos” work their stain magic? It’s truly amazing!
http://www.sawdustandembryos.com/2012/07/burn-pile-buffetpart-2-using-stain-to.html
love this project! not sure if I have the patience or hand-eye coordination for it though 🙂
Ooooh, okay, so you didn’t put tape over the darker parts when you applied the lighter color?
I already commented but you inspired me to try this on 6 beautiful wooded magazine “banker box” style holders that a friend passes along to me. I think horizontal stripes would look nice. Much classier than my white IKEA cardboard ones.
Nope. Just tried to wipe on quickly and wipe off quickly.
xo – kb
Both pillows are originally from Target. The flowery one I got at Goodwill in Florida but it was originally Threshold at Target 🙂
xo – kb
I have seen that but haven’t tried my own hand at it!
xo – kb
I adjust the coding for each photo. In the html, you can make the width a certain amount. I make mine 100% so that it adjusts to the width of the column.
xo – kb
It’s especially useful for soft woods and can help make the stain look more even and less blotchy. I didn’t use it because I figured it might promote the stain bleed so I skipped it. I probably would have still done it if the pieces were cheap wood like a 2×4.
xo – kb
It is and it is awful. We rarely go up there. I am trying to figure out a way that we can get it redone because it is so terrible that we don’t let the boys up there.
xo – kb
Katie, I love those stripes! Did you mention what shade the lighter stain was? Thanks. =>
It’s Rustoleum’s American Walnut.
xo – kb
I love the stripes! Now I will think all day if I have anything that needs a makeover! 🙂
Love love love it! Between this project and the chair makeover you posted last week, I’m getting the itch to find myself a thrift store DIY project!
Delurking to say that looks awesome!
love the two tone wood with the bright pop of colour on the base.
I’m slways afraid of bleed when pulling away the frog tape but yours is perfect! !
Thank you!!!
I LOVE this! Que the thrifty table base search obsession NOW!