Hey you.
Hey you treasures from the antique store and homemade crochet bowties and monogrammed decorative pillow.
Hey you wedding signs and feather headbands and vintage necklaces.
Hey you hand crafted goodies that make the sweet tooth on eye candy ache…I know you want to be sold on etsy or featured on your favorite blog or displayed proudly as an art print but it’s not gonna happen without your owner-with-the-great-taste knowing how to take your closeup. And so I recommend you wiggle your little hipster booty over there and whisper in your owners ear to grab their camera to take your photo pronto. Here’s one easy way to achieve that all white background that will show off your humps and bumps like a Baywatch reunion at a trampoline park.

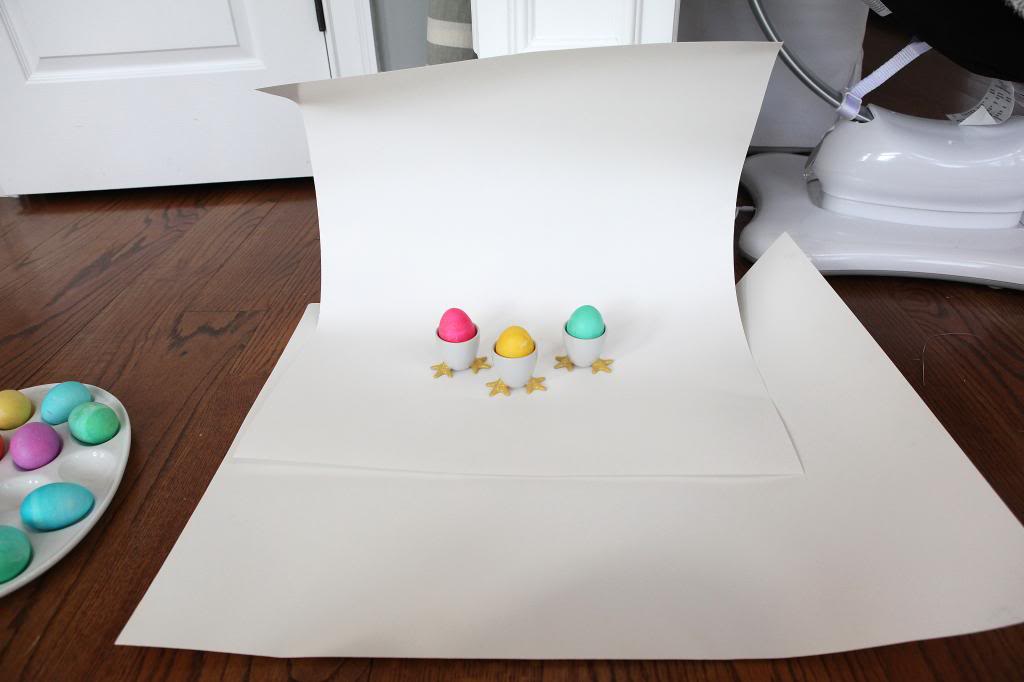
Those three chicks are showing off their goods 🙂 And showing off that all seamless white background. Here’s how it’s done for cheep. bwahaha.
First you are gonna need two all white poster boards and your super-fine product.

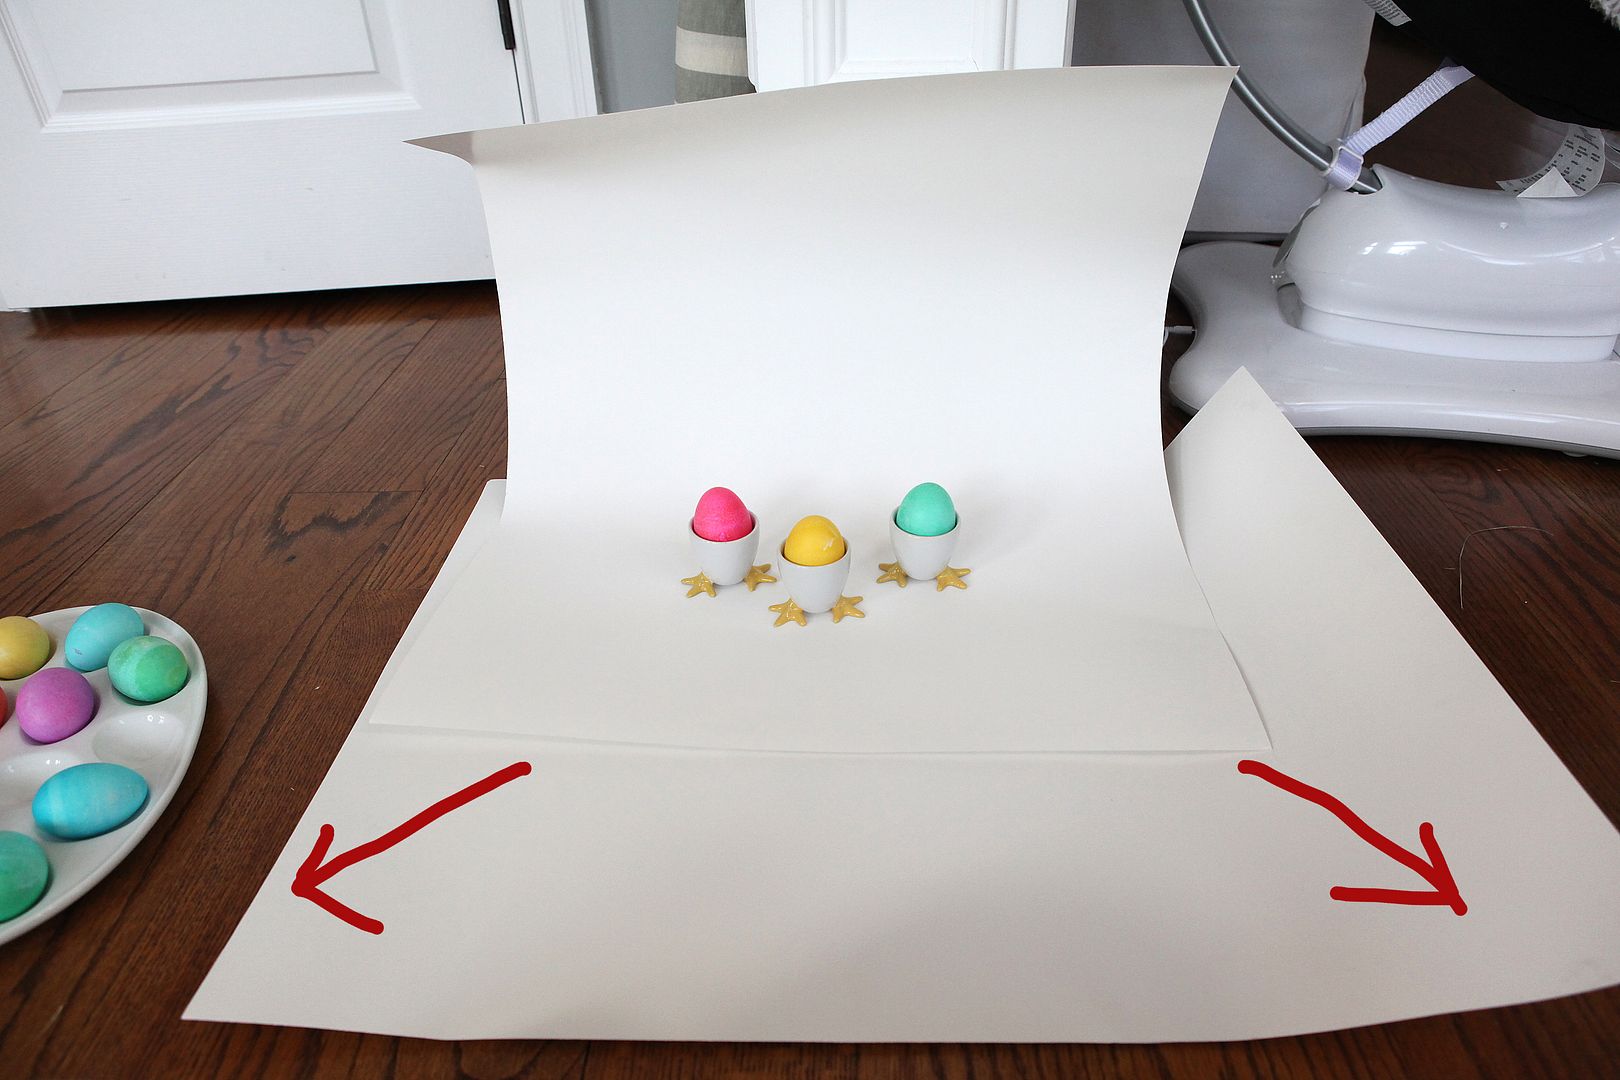
I like to set mine up so that one is slightly curved and the other sits in front (just in case my product needs more light reflection). I also make sure to set up so that the light source is behind me on both sides.

Then you want to consider your angle. Sometimes it is best to take a photo straight down…

Or you may want to have it have a slanted angle. Either way, I recommend taking numerous pictures on both planes.

Also, take vertical and horizontal photos. It’s best to show several different options especially on etsy because folks want to see all different looks.


You may also want to consider taking photos of your product in it’s packaging.

Here’s another trick…layer foam board on the poster board and it slides really easily…so if you set something up and need a little twist or bump this way or that, you can just move the entire board instead of resetting everything.

Here’s how I edited these photos…
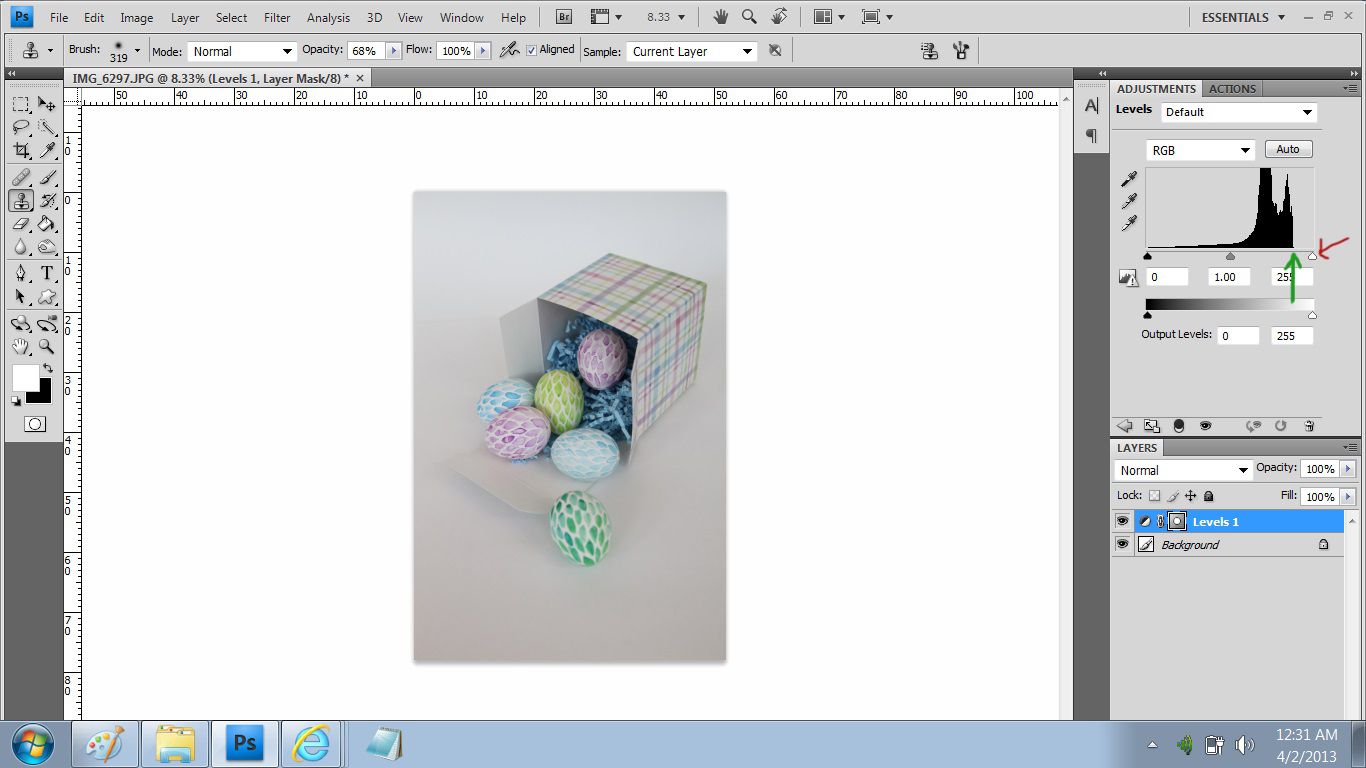
first take a photo with a notch over 0+ exposure. The poster boards should still be slightly gray in the straight outta the camera original photo. Select a new levels adjustment layer (circled in red below).

Since there is so much white in the photo, the histogram will appear a little cray-cray. So you want to take the far right slider (red arrow) and move it to the beginning of the histogram curve (green arrow).

If you move it farther over, it will become overexposed and you can lose some detail so be careful to eyeball it correctly.

Boom…flatten and you are done.
Here are some other tips for small product photography….


You may also want to consider having a prop only in the photo if it shows off your product better…like if you sell headbands and have a plain mannequin head modeling it. Of course, there are a great many ways to show off your product…this is just a quick and easy and cheap (two posterboards are $1 at the Dollar Store) way to do it. I like this technique when I want to make an insurance list…I just take photos of my valuables on posterboard and throw them into a file folder for future reference. That must have been my past job in the insurance industry nagging me 🙂 Wanna share your favorite ways to show off your littles?
This is great!
I always love when you do a photo post! Thanks for all the great suggestions on staging and editing 🙂 Seriously love the painted eggs with the petal like pattern, so pretty!
Excellent. Thanks for this. I was definitely loving your Easter “printables”.
Thank you SO much! I’m such a dunce with stuff like this. I really appreciate it, Katie.
Fab tutorial and advice lady!! Thanks for sharing 😉
I’ve really been wanting to photograph some of my graphic design projects lately (they just look so much better printed out!) So thanks for the tips! If I have somethings that are a bit larger what would you recommend for a background?
These were awesome tips! Thanks for sharing!! 🙂
I love your tutorials! Keep them coming!
Awesome. Thanks for the tutorial, Katie. I wondered how I could get that perfect, smooth and white background.
What a great post! I was just talking to my husband about how I would love to get into photographing handmade products for local and etsy shops. Thanks 🙂
So simple. So helpful. Thank you for sharing your brain!!!
I have a crush on your eggs.
Wait what?
The diamondy ones.
This is great! I’ve recently strted a small business and have really struggled with capturing great pictures. Thank you!
I’m always on the lookout for photography tips. These are very helpful. Thanks!!!!
this is really helpful! I can’t believe it’s so simple!
Depends on what they are! If it’s something clean, you can always set the projects up against a simple brick building for stunning results or you could use a large sheet if you want a plain background.
xo – kb
You really will weep quarts of tears. Trust me. :'(
Thanks Katie, that’s really useful!
Can I ask one question? Which lens were you using (what focal length) for these? My hubs wants me to take some pictures of miniatures he’s painted but I’m not sure which lens would be best suited to this sort of close-up work…
Loving the photoshop tips – keep em coming! xx
THANK YOU!!! I have been trying to get this ironed out for a couple of weeks now. :0 perfect timing for this tute!!!
Thanks for this! I always love your advise. It’s easy to understand and you make me feel like I can do it too 🙂
Love your photography tips!
AWESOME! I love your tutorials 🙂
Great Tutorial! I’m marking for future reference.
An even cheaper option for Poster Board is Walmart- $0.30 each (at least in my area). I know its a few pennies less but save where you can right?!
I love this post! It is so simple yet so genius! I need some white paper to dress up my blog photos. Thanks for putting this together!
Totally needed this today!! Planning to re-photograph all of my jewelry and accessories soon.
As usual, thanks for the great photo tips! I am excited to use these!
http://happinessiscreating.com/
Great tips! I have a hard time buying something on etsy that isn’t photographed well. Better photos sell!
This is the most straightforward product photography advice I’ve seen yet. Thank you 🙂
Thank you so much- this is so helpful! And your timing couldn’t have been better! I just started selling cute little taggie animals on Etsy, and I took a few pictures of them but they weren’t great. I did some adjusting in Photoshop, but I just haven’t had the time to figure out how to make them look better. POSTERBOARD! What a great idea- and so cheap! 🙂
One question you didn’t answer that I’m not sure about- what lighting did you use? I have an external flash (SB-600 for Nikon) for my camera, but I don’t have any other lighting. I’ve been using the brightest lamps I have, which I realize is totally ineffective, but I’m broke! I’d like to get some good pictures of my cute little taggies.
How many talents do you actually have?!?
For tiny items in my Etsy shop, I have also used scrapbook paper as backgrounds. But I love the crispness of white. Having a light source all around is super important too! I sometimes will take pictures in my foyer in front of the open door, and my husband just shakes his head as he walks by. 🙂
I’m LOVING this photography series that you’re doing. Thanks so much for sharing all of these tips and tricks!
I’m with Bri. Have been wanting to photography my jewelry and collections. This will totally work. Thanks!
Thank you, Katie! I sell vintage housewares on etsy and think I have a pretty good technique, but you’ve given me some ideas to improve it!
Just natural light 🙂
xo – kb
I was using my 24-70mm but even a 50mm would be great. The key I think is get the aperature right to get the product completely in focus.
xo – kb
Hmmm I’m going to use these tips for some of my bookish posts. I always showcase my books received for review on my blog and this would look much less distracting.
Bookmarking this in my TIPS folder. 🙂
WHat a beautiful transformation. I love the look of the kitchen!
I wish I had that much natural light in my house! Maybe I’ll move my product photography into the kitchen! 🙂
Thank you for responding to me, Katie! I appreciate it!
Erica
Thank you, thank you, thank you for this post! I’ve just started trying to take more pictures of the things I sew, and stuggled knowing how to get a white background! You make it so clear, and do it on a pricepoint I can afford. Thank you Katie.
This is cool, its one way of doing it. To save you a lot of hassles, check out StandScan Pro. It has inbuilt lighting and takes really great pictures. Its over on our site http://www.standscan.com and is only 30 bucks.
I had fun trying out this method yesterday after work, and your tips were great! This post has the photos I took, and I had to link to you and say thanks for the awesome tutorial: http://paintingsunny.com/2013/05/24/operation-preoccupy-the-preschooler-diy-travel-activities/
If the camera setup is good enough then much post processing task may not be needed. Those who wants to skip the basic editing in taken photos, just need to take the shots in white or plain background.
This is the most clear item photography guidance I’ve seen yet. Much obliged to you ?
I can say is that you deserve this and much more! thank you for sharing your art and be an inspiration!
excellent post for a photographer. I love these.