Urkel had short pants. It was a defining wardrobe characteristic. Much like his glasses and suspenders. Much like Weston’s curtains…a little too short for ‘cool’.
Side note – isn’t it funny how just twenty-some years ago that there was a show about how a lovable nerd was generally annoying and outcast from the heart of a popular girl’s heart but now self-proclaimed nerds are celebrated and desirable? It’s one of those things that gets ya thinking…
Anyhoo. Back to the life-changing social issues at hand….Weston’s curtains.
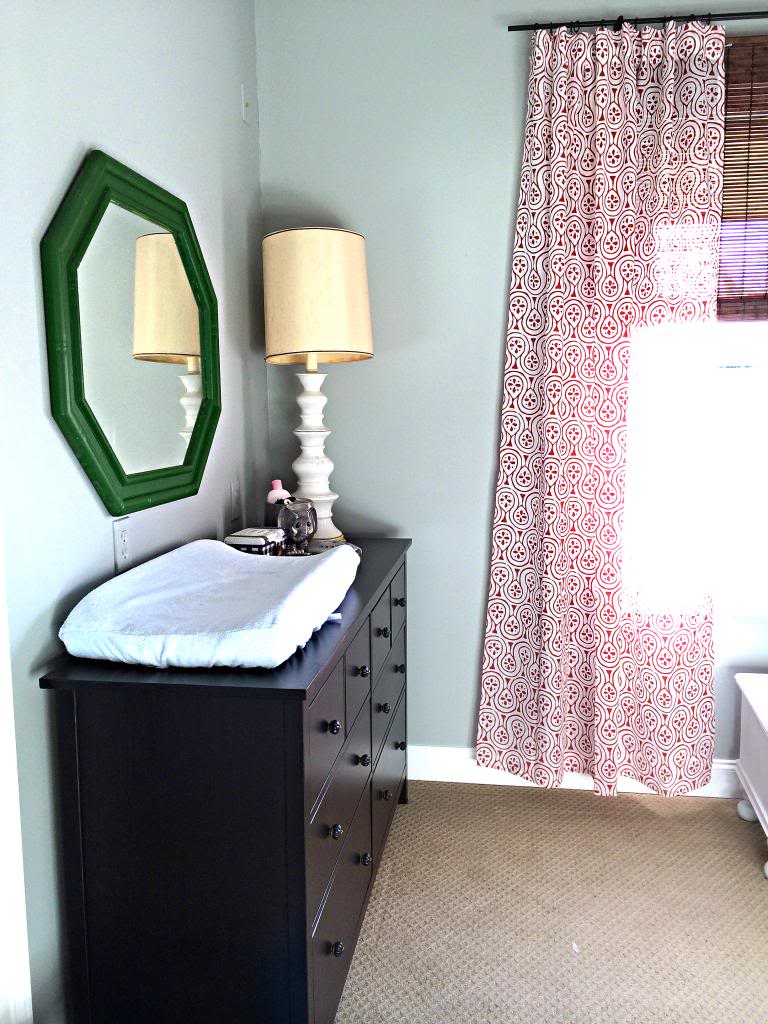
They were about three inches short of grazing the floor. I wanted them to just kiss the floor and unfortunately they didn’t sell them at different lengths at Ikea. These are the LAPPJUNG curtains (sold in a pair for $15) at 98″ long. Great price, huh?!
At first I thought that maybe what I could do was to rip the stitch at the bottom to lengthen them but unfortunately I saw that it would only give me another inch and a half…tops. And then I would be left with hemless bottoms that may or may not be uneven and still not reach the floor.
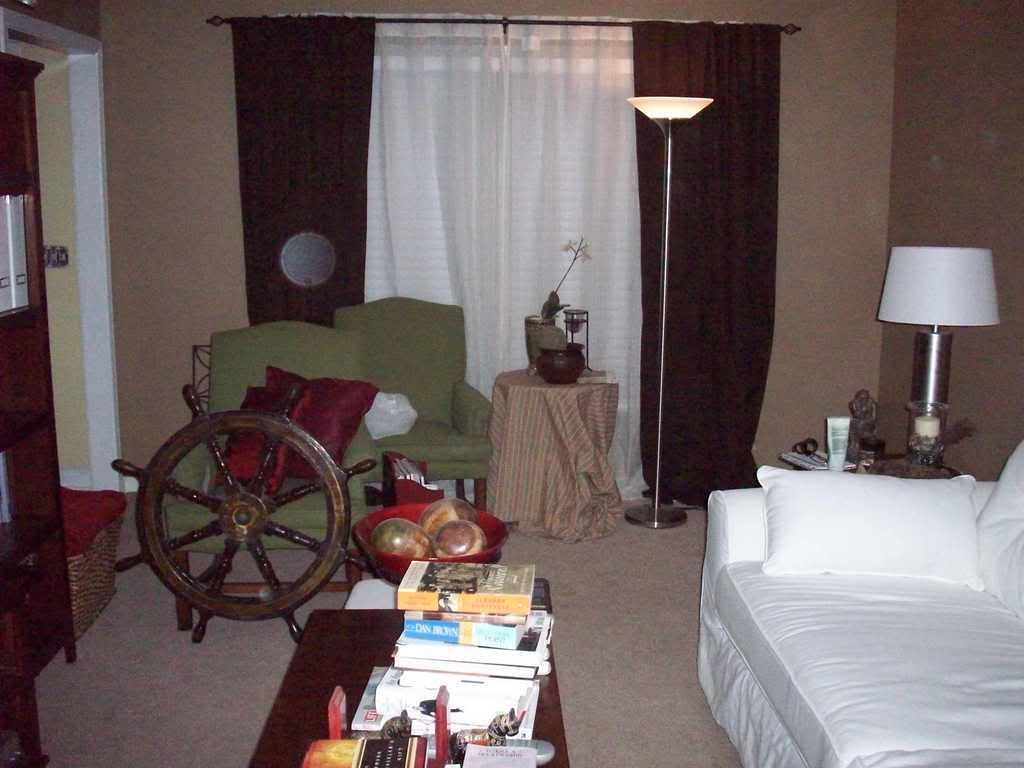
Sooo then I decided I should just add a dash of red at the bottom…to ground the curtains a little more and add length. After sorting through my stash of old fabrics, I found the perfect one. Funny thing is…I have been sitting on this fabric for years. See the basket on the far left side of the picture below? It has this very red fabric folded and laid on top….the very fabric perfect for Weston’s curtains.
Note that this photo was taken in 2007. This was our old living room. Yes. I am a hoarder for specific instances like this one.
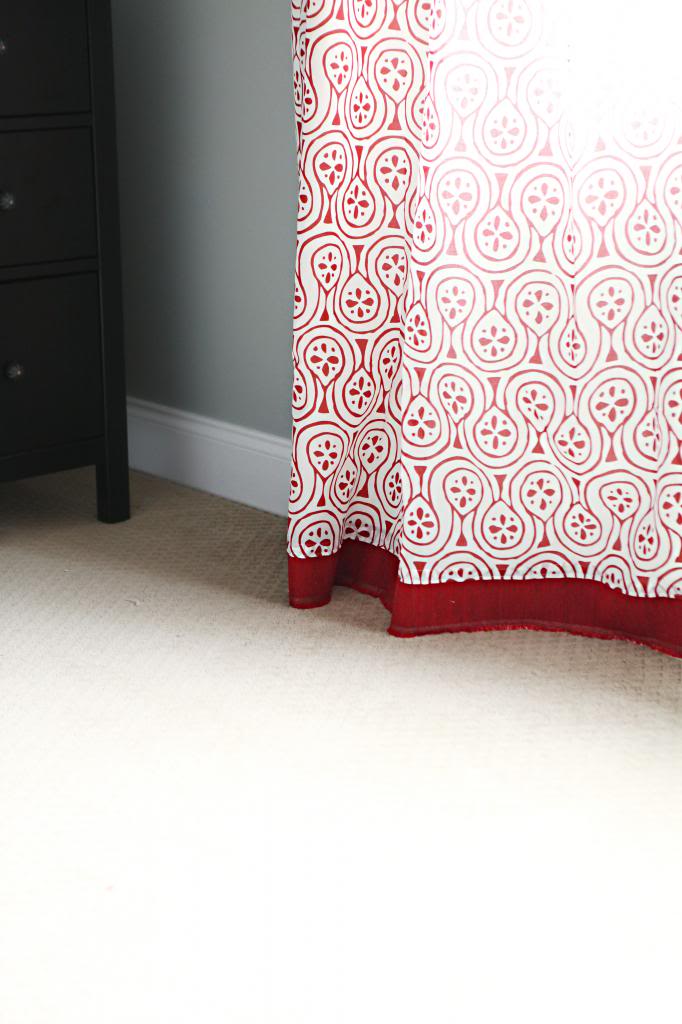
After I added that red fabric, I LOVE these curtains. I am so glad I didn’t add a pleat or a ruffle or any other ‘designy’ fringe. I think the red does exactly what I need…create a little stripe of saturated color exactly where it is needed. And it’s not too feminine or masculine…it’s just ‘good’.
So how did I do it? Glad you asked 🙂
First I laid my red fabric face down on the kitchen island (it’s getting harder to get on the floor as you can imagine with this large fetus) and then laid the curtain face down on top of it. I wanted to use the unhemmed edge of the red fabric as the bottom part of the curtain because I loved the little stitching and fringe (you can see that later in detail). I also am lazy and one less hem to stitch is pretty much like a victory-with-an-end-zone-dance in this house. After measuring how much length I needed, I decided to cut the red fabric a couple inches wider than I needed and about one inch longer than I needed.
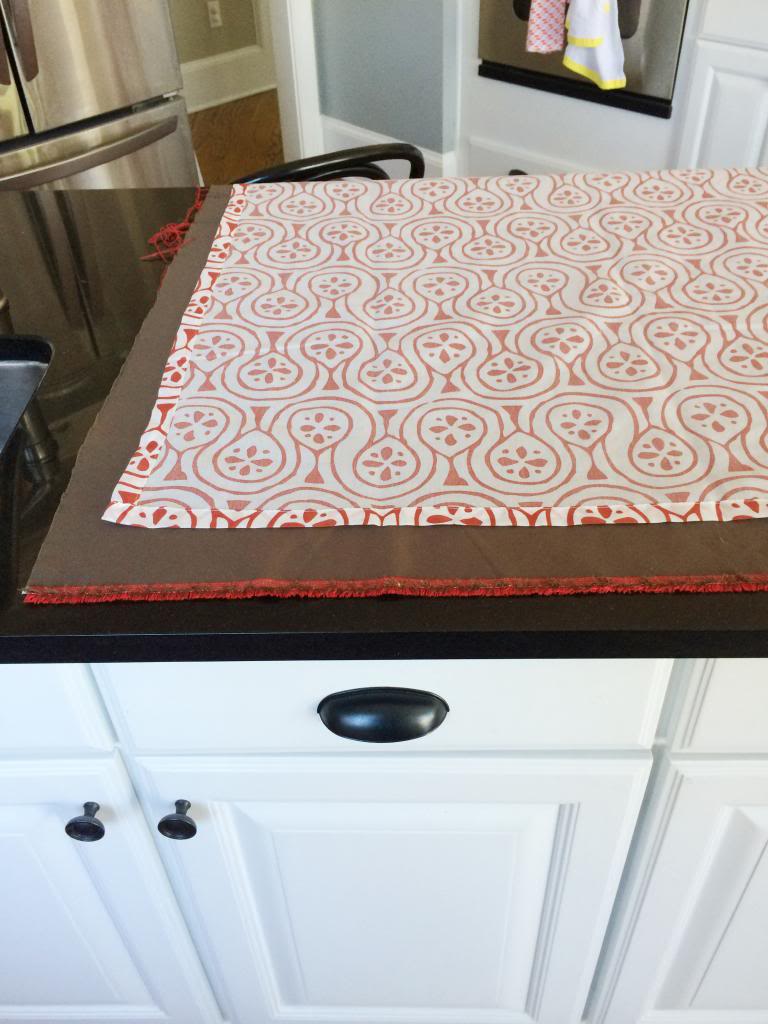
So the red fabric was the length of the hem of the ikea curtain plus three inches. The red fabric lined up with the existing hem (black arrow) and added exactly what I needed to have the curtains hit the floor. Now came the pinning and sewing part. All I did was pin the ikea curtains and the red fabric together and sew about a quarter inch above the bottom of the ikea curtains (red arrow).
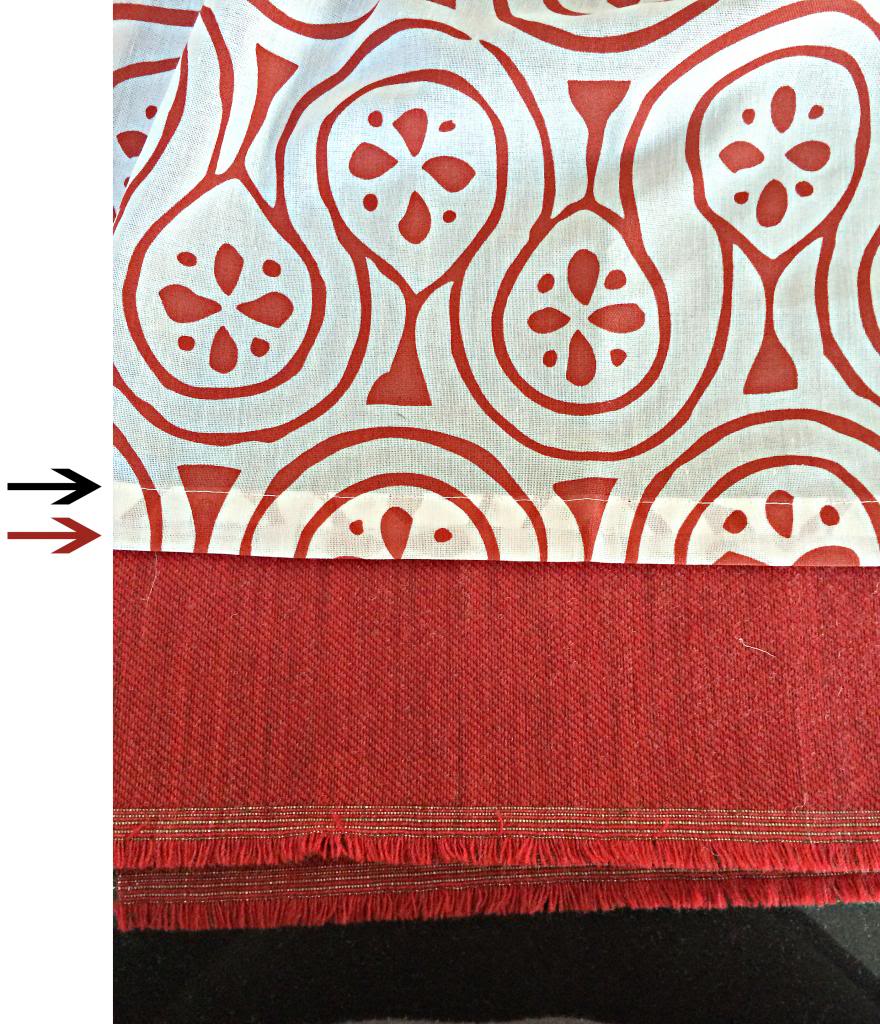
I should state that I did fold the edges under first and sew those (the part that will be vertical and line up with the sides of the curtain) and then did the bottom stitching. My end result is two stitched lines at the bottom of the curtain (as you can see below).
Also, wash both the curtains and the fabric first and iron…it helps with shrinkage if you ever plan on washing them again. And I did have one other issue with Weston’s curtains that is a really good thing to discuss. The ikea curtains are cheap poly/cotton blend. The red fabric I had was upholstery weight which basically means it was like seventeen times heavier than the ikea fabric. Some people will tell you that this is a no-no. Well…smack those people in the face and run away.
This is your dang house with your dang curtains and you get to do whatever the heck you want. I would just suggest that you line the curtains so that it isn’t obvious….I mean, you don’t want to assault everyone who notices the difference…or maybe you do….that’s up to you.
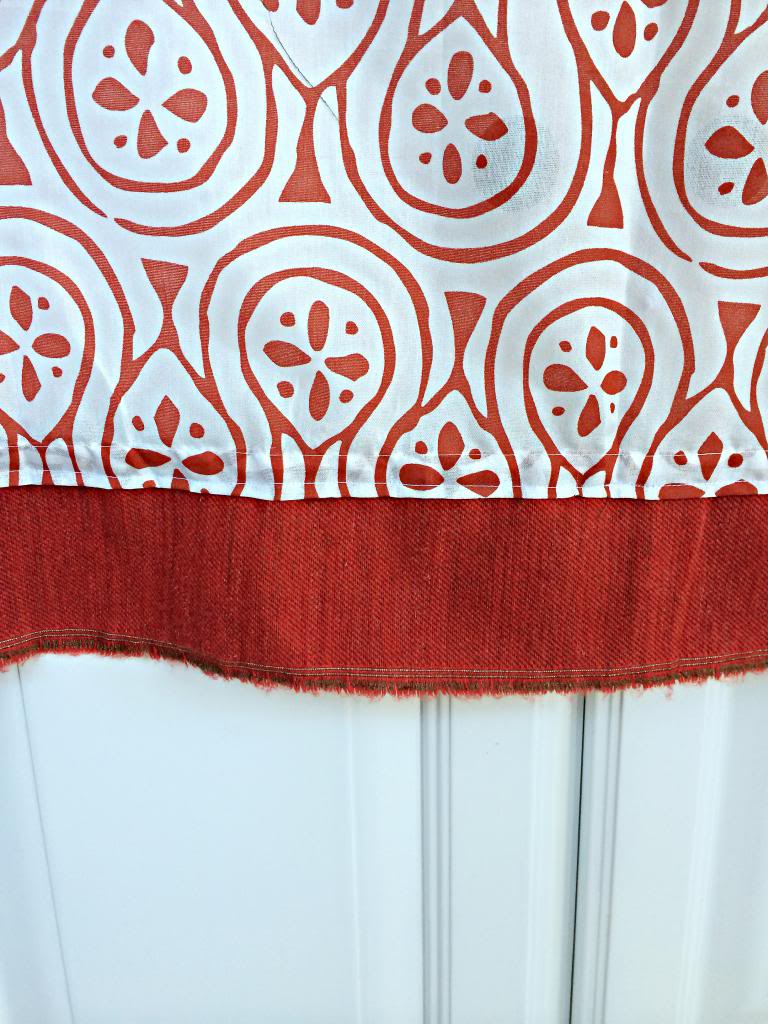
I decided to line mine with some regular old white cotton fabric (again, wash and iron before using). It’s really cheap. I got mine for a buck a yard…and it makes these more like black-out-curtains (even though we don’t ever close them it does help with light and the see-through factor).
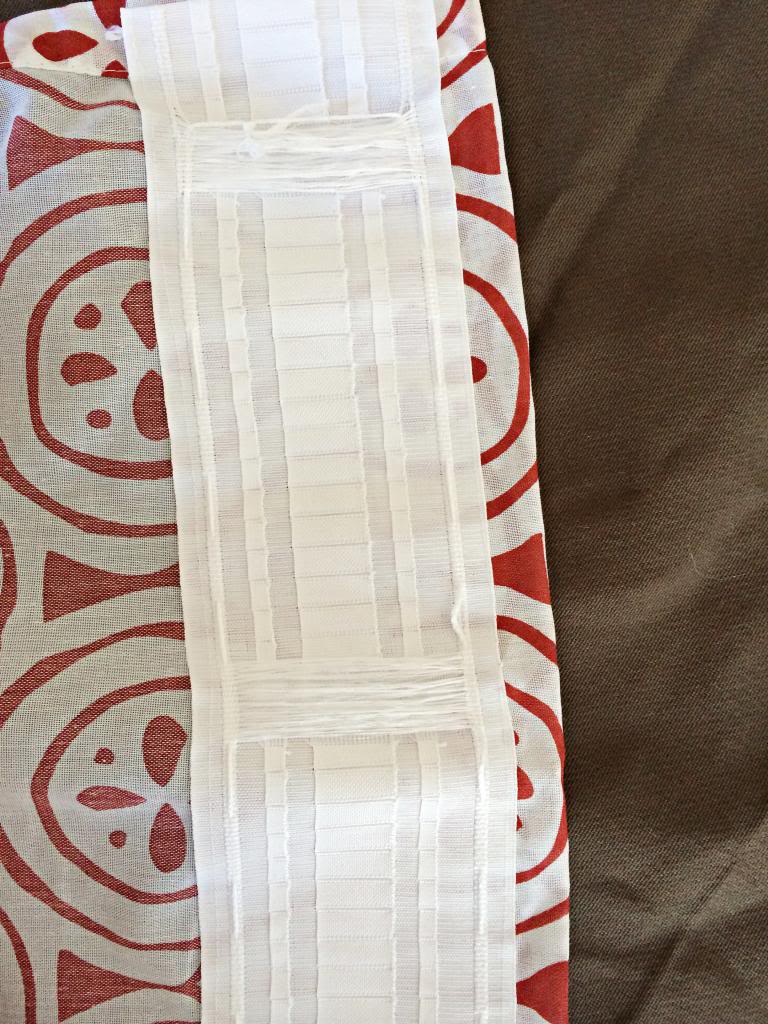
Since the ikea curtains are equipped with this band at the top for the rod or for a track, I chose to make the white fabric line up directly with the bottom of the band.
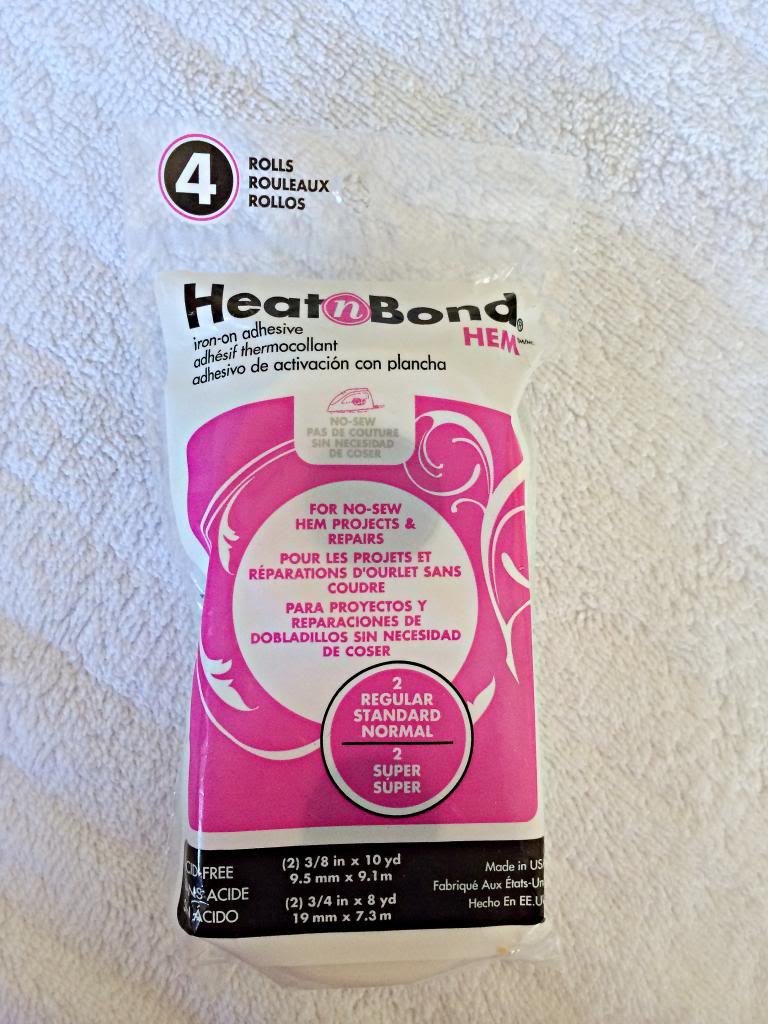
Also…this is sortof my first time with Heat N Bond. My girl Sherry uses it all the time but I just never have jumped on that wagon (I think it was because my mom always sewed and I grew up sitting on her lap, watching her meticulously sew our clothing on her old Singer). Well…don’t knock it till you try it, right?!
This was really really easy and since my cheap little sewing machine is notorious for tension issues, I am so glad I went this route. I don’t think I would be able to use it all the time for projects (my mother would totally give me the side eye), but for lining curtains?! HECK TO THE YEAH.
So all I did was line up my white fabric with the edge of the curtains and the bottom of that ‘hanging band’ and made sure it was the right size. I had to lay it all down on the floor so this actually took me a long time because I had to wait till both boys were down for naps. I didn’t turn under the edge of the white fabric or hem it because it would add weight to that edge and I was afraid that it would affect the way the lightweight curtain fabric would hang. Besides…these are $7.50 a panel curtains…going to that length of quality of lining is a little overkill.
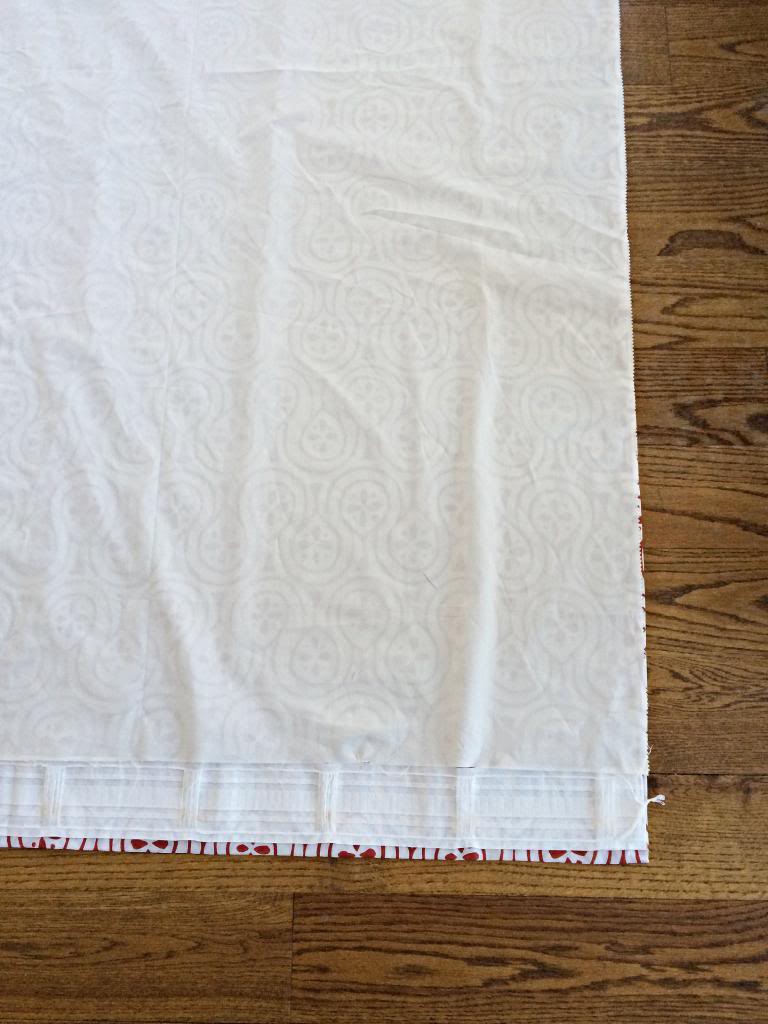
Then after everything was cut, I pulled it all up and put it on the island again to iron. Yes…I iron on my countertop sometimes. It’s granite and is able to handle the heat just dandy…I just have to make sure the iron doesn’t use the steam setting. Putting in the hem tape was really easy and it finished rather quickly.
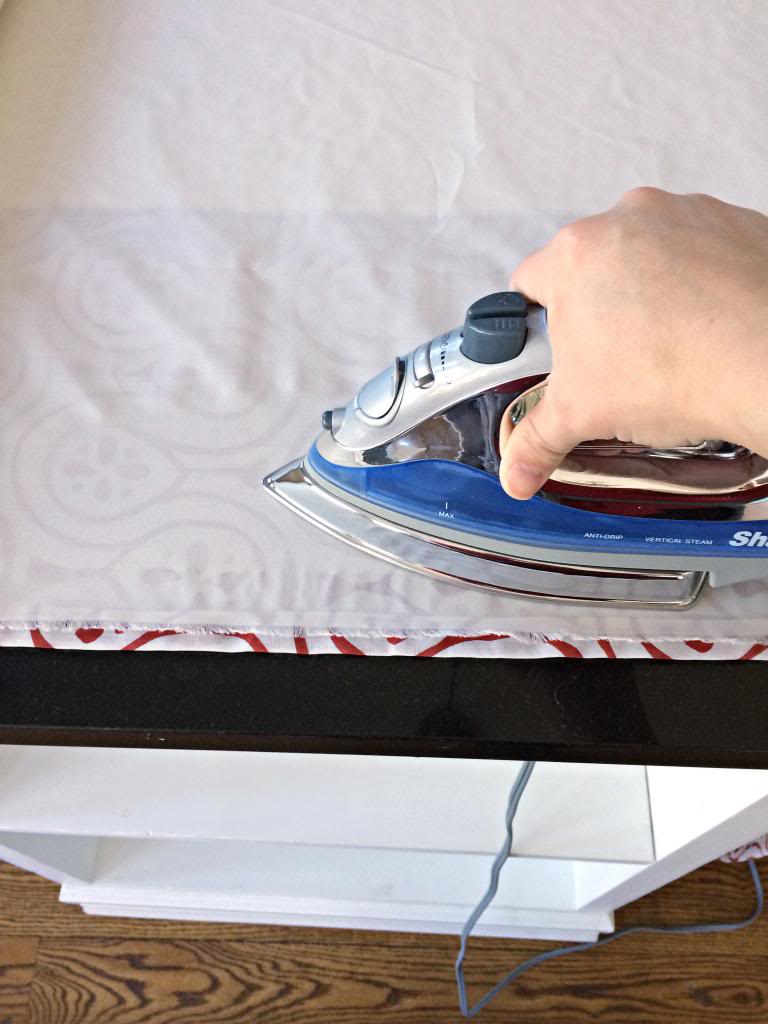
Well, low and behold…the Heat N Bond worked great and the lining was exactly what the curtains needed for making it a nicer weight and better ‘coverage’.
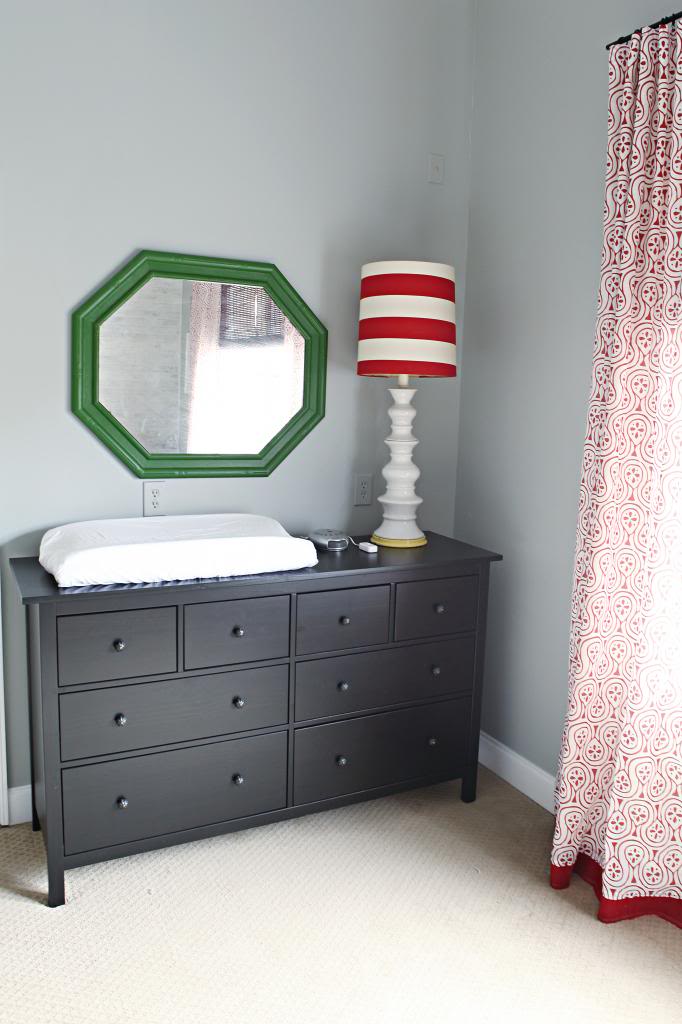
Okay…now onto other curtain issues. When some of y’all saw this picture, you asked about our woven blinds hanging from the curtain rod.
I must admit that this jury-rigged method is not something I thought anyone would be interested in…but since I get so many questions, I thought it was time to just spill the beans.
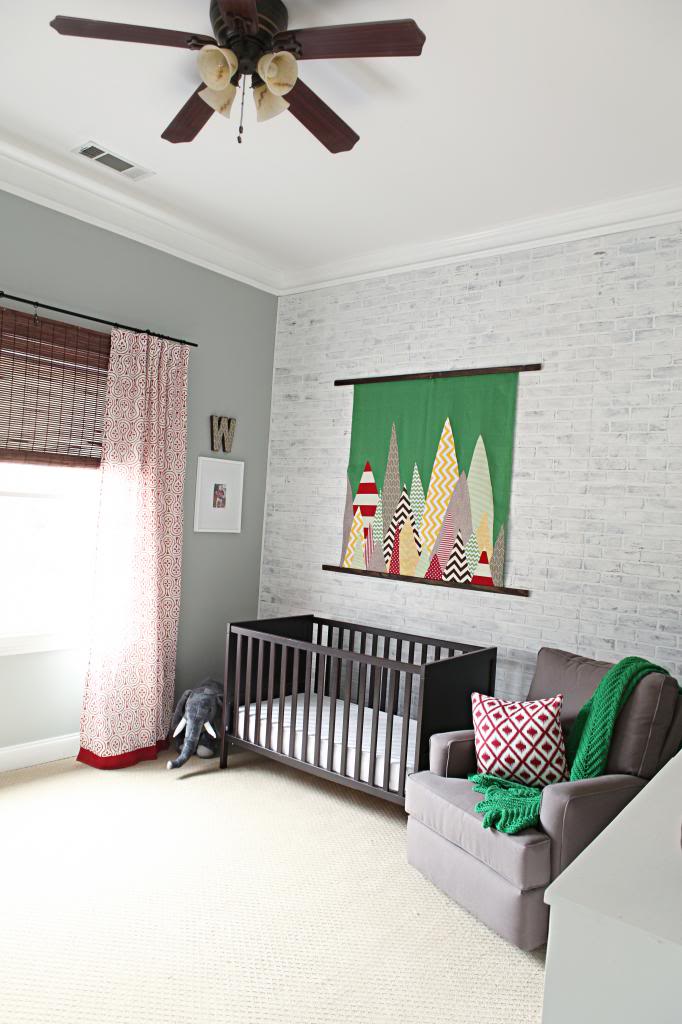
So our store bought blinds (they are like the cheapest ones you can order at Lowes) have this little bracket at the top that has a little triangle. We simply took apart a ring clip (the circle part attaches to the two sided hook that attaches to the clip part – we removed the clip part and just used the other bits) and hooked the blinds ‘triangle’ directly to the circle part.
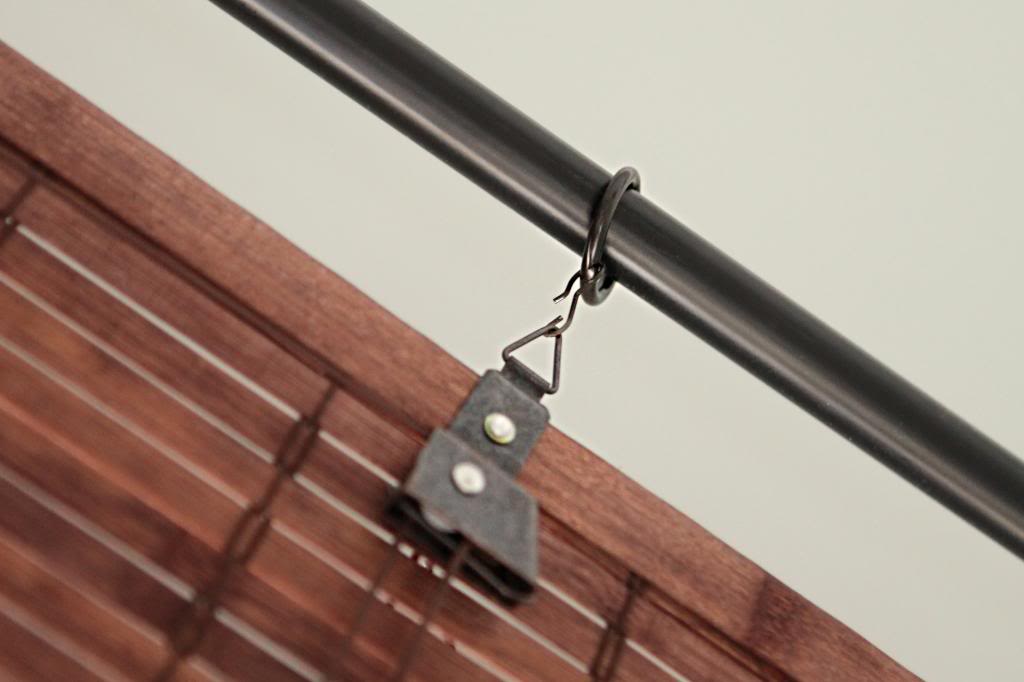
Then it was just the idea of making sure the curtain hung properly over the shades.
Our method was to hang the first woven shade circle clip, then slide on two of the first curtain circle clips, then the second shade clip, then two more curtain clips, then slide it through the curtain rod holder, then do the rest of the curtain clips. Follow that? It’s confusing but the point is, you want the shade to hide behind the curtain like it was ‘properly’ installed.
I think this is a really good solution though for those of you that have vinyl windows (like us) and don’t want to drill holes into them or that are renting and have curtain rods but can’t attach traditional woven shades. It’s also a good solution to make your windows look taller. If you install the shades below the trim, it can make the overall window appear smaller – even if you hang the curtains high and wide. Long story short…it’s not the traditional way to do things, but like I said before – smack and run 🙂
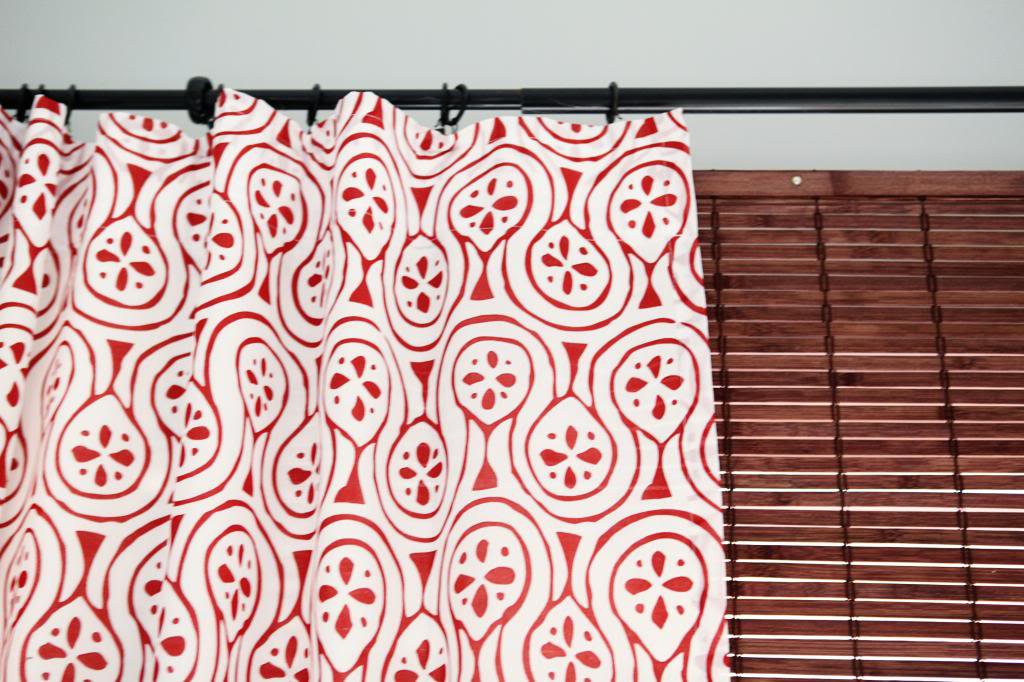
So that my friends is how we took our too short curtains from Urkel to Urquelle (that’s Urkel’s rico suave version by the way for all of you who weren’t alive in the 90’s. You missed out my friends.)
Okay…so off to try to walk this baby out again…wish me and my cervix luck 🙂
How are these blinds at blocking out the sun? We just moved into a rental full of mini blinds (ugh) and I am trying to find an inexpensive solution for my boys room to keep the sun out during nap time. Thanks! Hope walking does the trick!!
Walk that baby out girlfriend!! MARCH! MARCH!
xoxo
D
Urkel’s “cool” alter ego was Stephon (since his real name was Steve Urkel, Stephon was his “sophisticated” version)
“Boyfriend time” will get that baby out! lol… My Grandma always said, “You get out of the situation the same way you got into it.”
Yup! Stephon Urquelle 🙂
xo kb
LOVE Weston’s room, I know you have mentioned in the past the plan for the boys rooms but I can’t remember, is Weston and Will going to share a room and LJ go in here once he leaves your room? Such a gorgeous space
Good luck with the baby expulsion! Um..is that an okay term??
I love love white IKEA curtains! Can’t find a better deal for that much fabric!
Haha! I remember Stephon Urquelle! Great memories…
Totally unrelated, but I finally (after several failed attempts) conquered the fabric flowers you showed in your tutorial. Mine required much more slowness and hot glue, but I did it! Baby girl headbands galore!
Come on out baby LJ, the world wants to meet you!
Oh, my mercy…I thought the title meant that your had had the baby and he turned out to be a “she”! I had to take a deep breath and relax before I could finish reading.
Tell your cute boyfriend to do the husbandly thing- it works every time.
Praying for you in Metter.
Those curtains look so cute! I think the little pop of red is perfect.
I managed to lengthen some for my master bedroom by buying one extra curtain and cutting it up . It worked because the pattern was really busy so you can’t really see the seam. Check it out: http://sueathome.com/2012/08/01/diy-lengthening-our-master-bedroom-curtains/
Good luck with the new baby!
Love that- it’s the perfect red.
Now… let’s talk about that captains wheel ;p
Happy, thin, and dilating cervix vibes your way!
I almost died of laughter when I read this post’s title. My husband totally pulled out a Carl Winslow reference on me the other day. hahaha
I was confused by the Urquelle name too – only remembered Stephon. As a self proclaimed 90s tv fanatic, I’m ashamed I didn’t remember that was his last name! Thanks for the flashback to better tv times with this post 🙂 Got any Boy Meets World gems for the next post?
I just got back from a “baby walk” of my own. Girl is getting big, and I’m a little concerned about the birthing process. God’s blessings with your delivery- You’re my overdue inspiration!
I love the curtains! And thank you for the tutorial! I am new to sewing and never would have thought about altering store bought curtains and altering them to fit the length I need.
I had our 3rd baby on Friday, a surprise boy (we have twin girls, and although we did not find out the sex we really thought it was a girl)! We are so in love with him. I can’t wait to meet your little LJ. Sending labor vibes your way!
This is so random, but when I saw the title to your blog post I got really excited and thought maybe your OB/GYN got the sex of your baby wrong and you had a girl! As a mama to two boys I know how much fun (read: crazy) boys are, im sure your third will add to the fun! Good luck in the next coming days!!
Haha! That actually happened to Michelle at the blog, Ten June! Crazy!
xo – kb
YAY!
xo – kb
Haha! It doesn’t work every time…at least not for me…actually I think Jeremy is ready for a break :/
xo – kb
Maybe! I think that will probably be our first plan but who knows if that will change!
xo – kb
Remember when Tapanga straightened her hair?! YOLO!
xo – kb
I wouldn’t buy them for that. They aren’t really light blockers.
xo – kb
^^love ten June blog! Awesome story.
Did you just do the heat and bond around the edges? Or did you also add some to the center too?
Just around the edges. I didn’t do the bottom either – just the top and sides.
xo – kb
clever clever 🙂
I have to agree here!!
Genius! I have vinyl windows and in the same predicament. Thanks much…
I’ve got to comment just to let you know that Weston’s room is wonderful! I love how you have made a statement with the brick wall and added in several other textures and patterns with accessories and such. Lots of people go wrong when adding in those elements and you certainly have an eye for doing it right. Wish you could help me redecorate my in-progress kitchen.
Katie I literally just did this TWO DAYS AGO to my dining room curtains! LOL
http://hystericallyeverafter.com/2014/03/17/so-you-shrunk-your-curtains/
Yours look wonderful… Great job!
I LOVE LOVE LOVE these curtains but it’s saying they aren’t going to carry them anymore on Ikea’s website?!? How long ago did you purchase them out of curiosity?
P.S. I love your DIY change also…
Props to you for this update! I find little things like this make so much of a difference but they are so hard to get around to.
Good luck with the baby delivery! I keep checking your Instgram for updates 🙂
Hey Katie! I have a question. Would you ever consider doing a post on how your kitchen has held up after the big remodel?…..which looked AH-MAZE-ZINGGGGG! I have just been curious how the spray paint application has held up over time. You were so honest and put it all out there during the process, now I am curious about how things are doing up after daily use. I have spray painted so many pieces and had a heck of a time, but really wanted that even, brushless cover. And for some reason it has been hit and miss in how each has held up, bizarre, I know!
Anyhow, big fan of you and your adorable fam-bam.
xoxo
Jolie
Love Weston’s room and great tutorial for lengthing curtains. I’m constantly wondering if today will be the day for you! A spring baby! I’m sure you will let us know as soon as anything happens!!!
Ha! It didn’t work for me either. LJ will be a relaxed little dude..he likes to do things in his own time:) Although, that isn’t much consolation for a mama who’s past her due date! Hang in there!
I was just going to post essentially the same thing. This is one of the best nurseries I’ve ever seen. Of the various DIY blogs I read, your eye for what works is one of the sharpest.
You’ve turned Urkel into Stefan. Enjoy reading the blog. Best of luck with #3!
Love the trick about the blinds. Do you have any trouble opening and closing them? Does it cause a lot of stress on the rod?
Love the curtains. They look great! Question about the blinds: I’m looking for these exact blinds so it was nice to see your link to them. However, your blinds look flat (not matchstick) but the link goes to matchsticks. Are yours flat like they look? That’s what I prefer! Thanks for any info. Hope baby LJ is here soon!! I was just telling my husband yesterday “You know Katie, the girl in ATL who’s blog I follow (we’re in AL)? She still hasn’t had her baby and she was due almost 10 days ago!” Like I know you 😉 Good luck, Katie!
We don’t have any trouble but someone in our house (ahemJeremy) is paranoid about curtain rods (and every hanging thing in general) so they did get anchored into studs or with heavy duty wall anchors.
xo – kb
I don’t know if they sell them anymore (I haven’t been down that aisle in a while because we tend to use what we have already on hand before buying new), but I know they were either at Home Depot or Lowe’s (those are the only two home improvement stores we have in these parts) and they were in stock when we bought them (we hardly ever order stuff online)…so I hope that your store has them!
xo – kb
I purchased them in the Atlanta store this past year…maybe ten months ago? They were new then…but who knows…those crazy Ikea people change things constantly!
xo – kb
I’ll put it on the list! It’s been a year so it’s a good time to do that, huh?!
xo – kb
Katie, that looks great! The nursery has come together quite nicely. I wouldn’t worry too much about the weight difference between the two fabrics. The upholstery fabric is only a couple of inches long so I don’t think it will cause a problem.