DISCLAIMER: This is a sponsored post brought to you by 3MDIY.com. All opinions are my own.
I must show you something shameful.
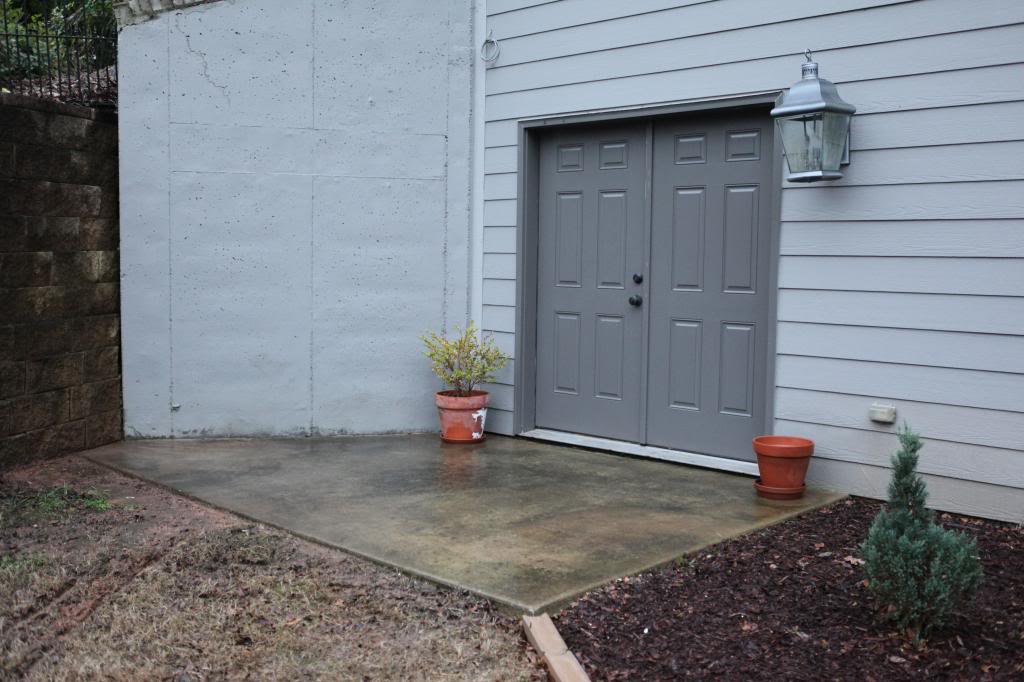
It’s this random corner of our outdoor area. It’s right outside the workroom (can’t show you the workroom because that would be like shoving your eyeballs into a bowl full of mashed sweet potatoes…aka pretty gross and very messy) and it has been sorely neglected.
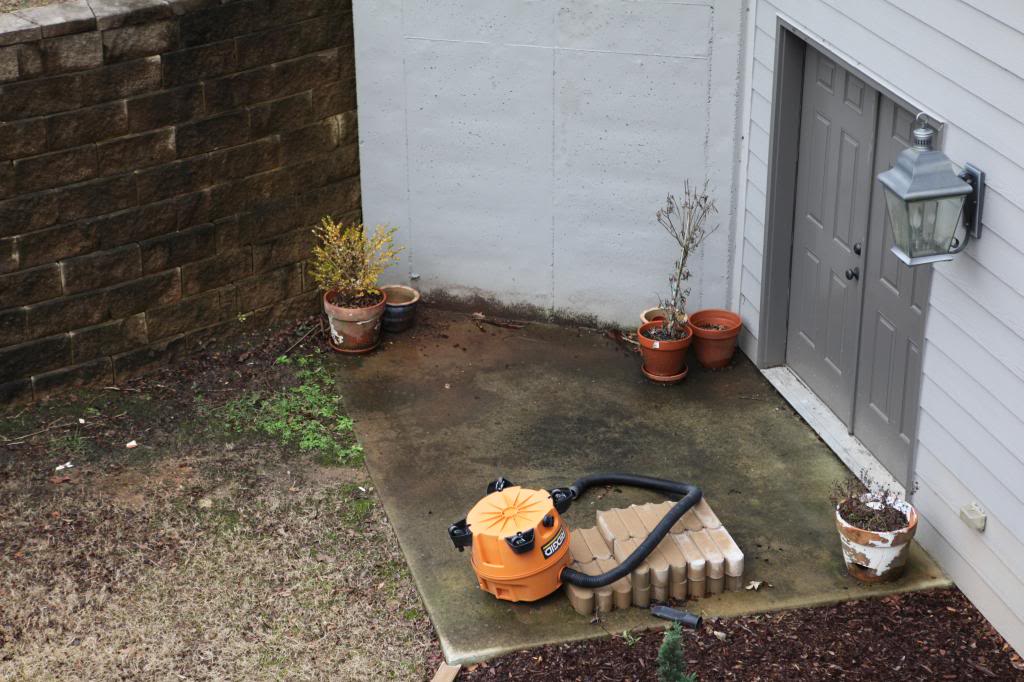
Here is the view from the top of the deck so you get some perspective on the situation. We added some plantings and mulch this year to this back part of the yard and added pavers to the edge (just like we did in the front) but the back patio got zero attention. Less than zero actually. It was like negative seventeen on the attention scale. It actually became the spot we threw stuff that we didn’t want to put anywhere else…like the shop vac that needed draining after it got bleach-washed from being in our main drain, and some of the extra pavers that will eventually finish off the garden beds, and some old cracked pots. (not to be confused with crack pots…totally different thing).
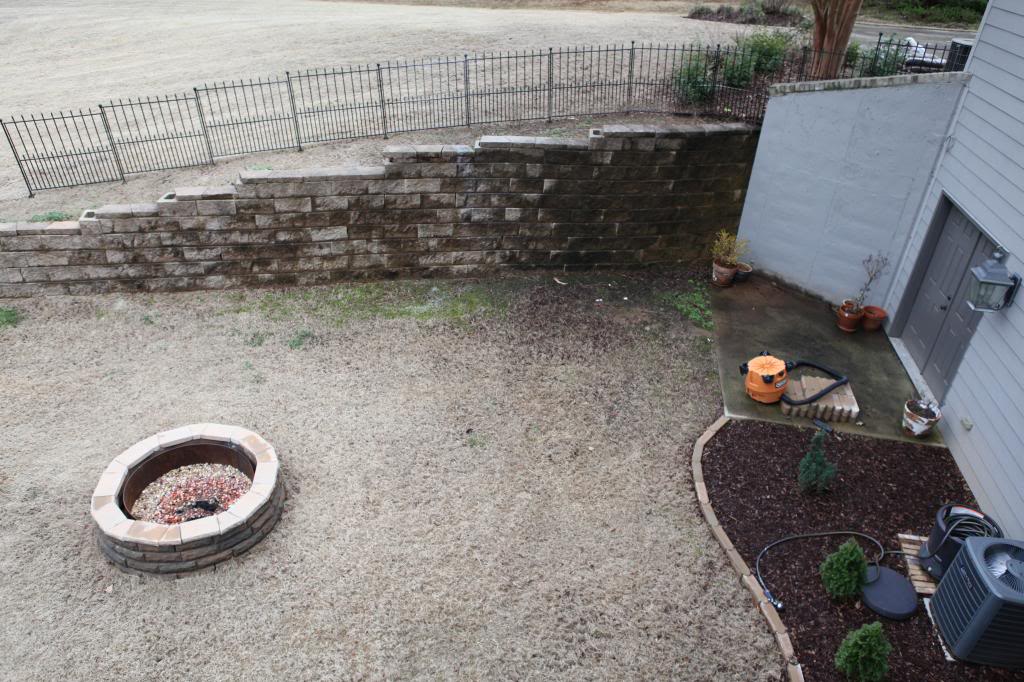
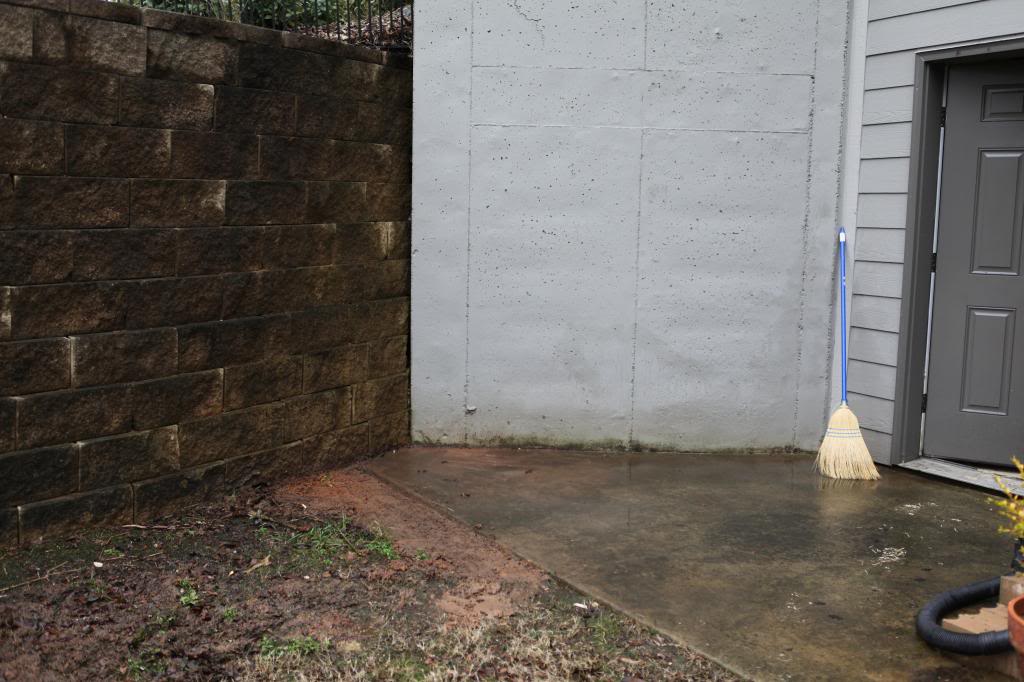
The thing that was driving me the most nuts was this area right here…
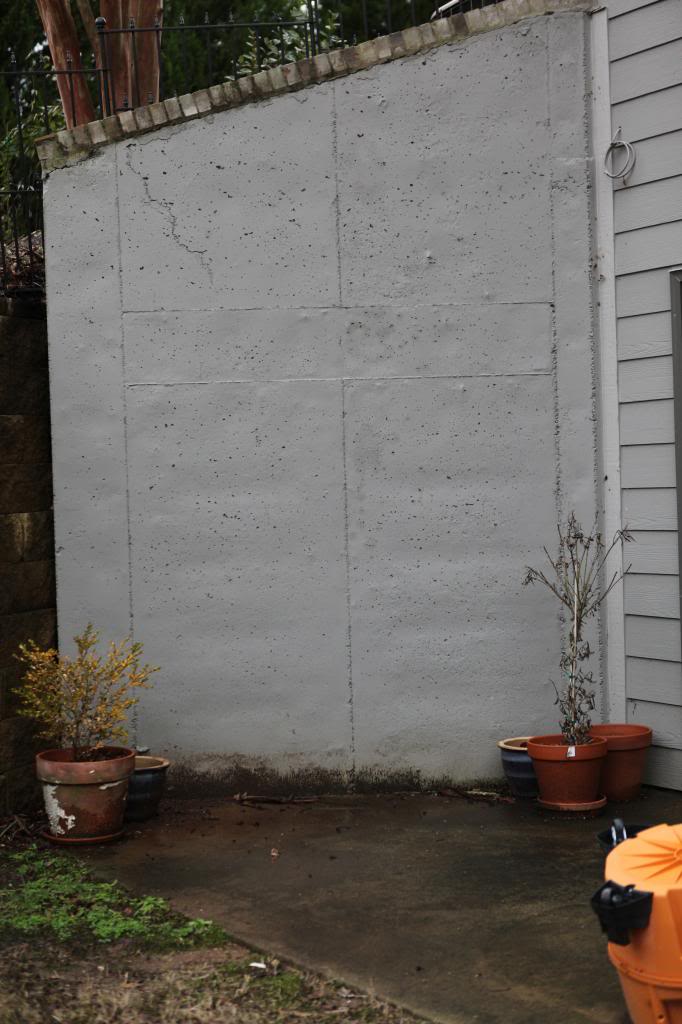
I mean…didn’t we just spend a small fortune to have this house painted?! And then to see the mildew growing on the wall was just too much for this hormonal pregnant girl to handle. #nesting
Something had to be done.
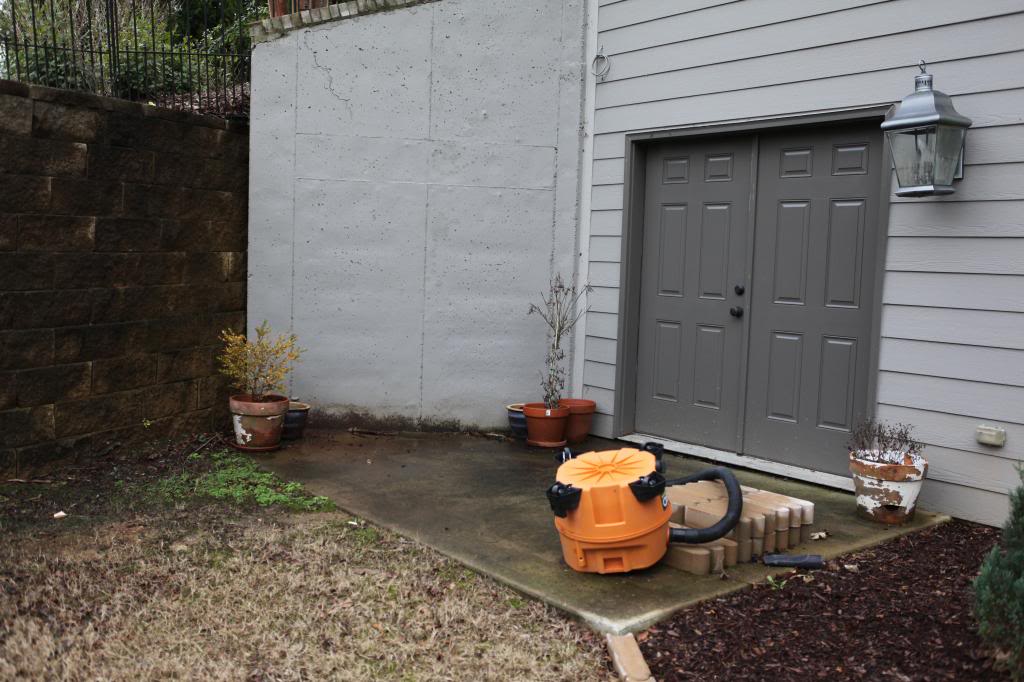
Honestly when I went outside, I figured I would be back inside in a matter of minutes…hence the pajama pants.
But then when I got to working, I hollered up to Jeremy that he would be on kid duty the rest of the day…mommy was busy making the house beautiful with a shovel. Not the first time I ever said that line.
First came the clearing out of the mud. I used a flat edge shovel to scrape the mud off the concrete pad.
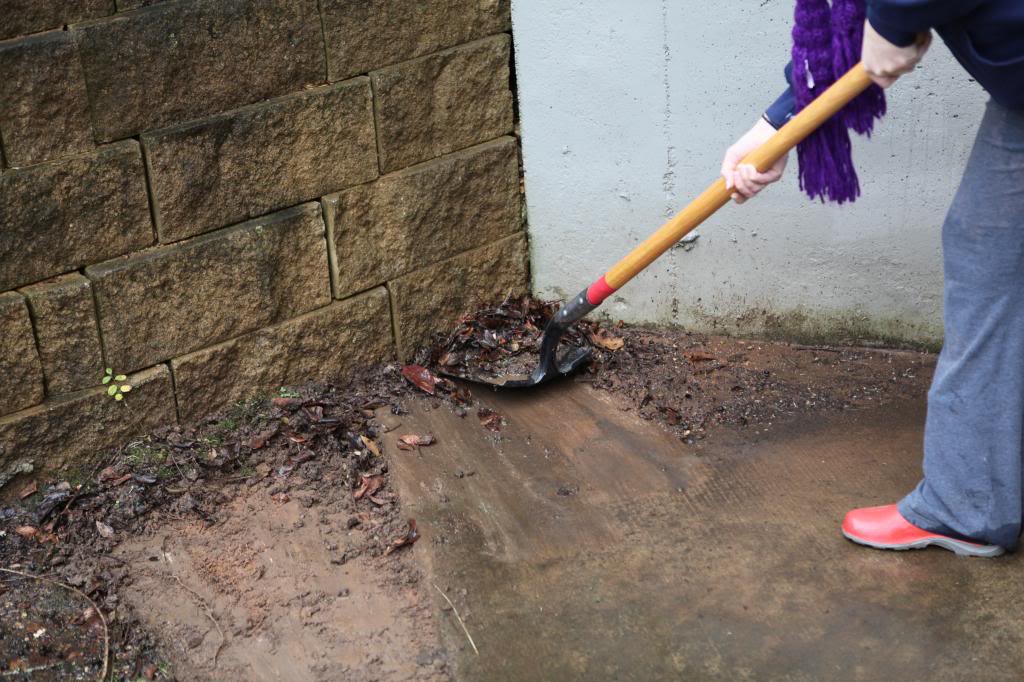
I also used it to remove about five inches of the soil that was right next to the patio because the water was just flowing from the highest point (the dirt) to the lowest point (the patio) while bringing the mud with it. This area is very moist (we need to do a french drain over here eventually) and ideally the water should stay as far away from the house as possible. If I could keep it dry…well, that would help with the mildew/mold issue that makes me wanna croak a wad. (that’s a thing by the way…not something I just totally made up).
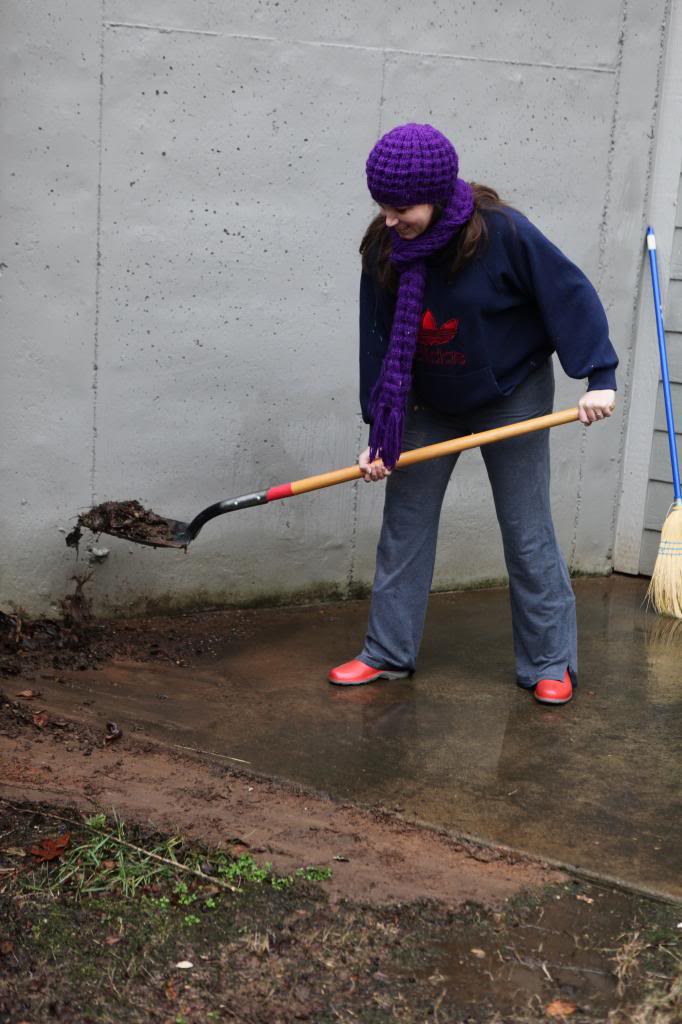
After it was finally cleared, I sprayed it all down with the hose and broomed any stray debris. But there was still the issue with the mold/mildew.
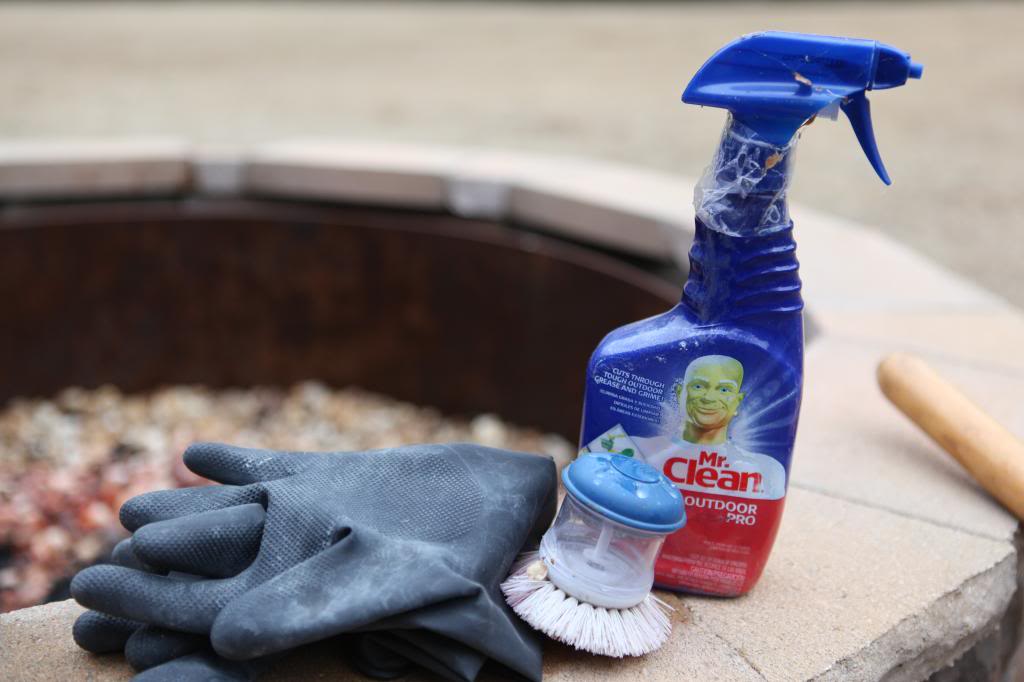
Mr. Clean to the rescue. And yes, I save my old, used dish brushes so that I can use them for gross projects like these.
After a quick scrubbing it looks so much better. I wish it was spring already so that I could pressure wash the floor but I know that would be a total waste of time at this rainy point in the year. I also have to make a mental note to touch up the base of the concrete wall with the house paint. Not in a month because I will probably be too huge to bend over and touch my knees. Will you remember to tell me to do that in late May, early June? Put that on your calendar.
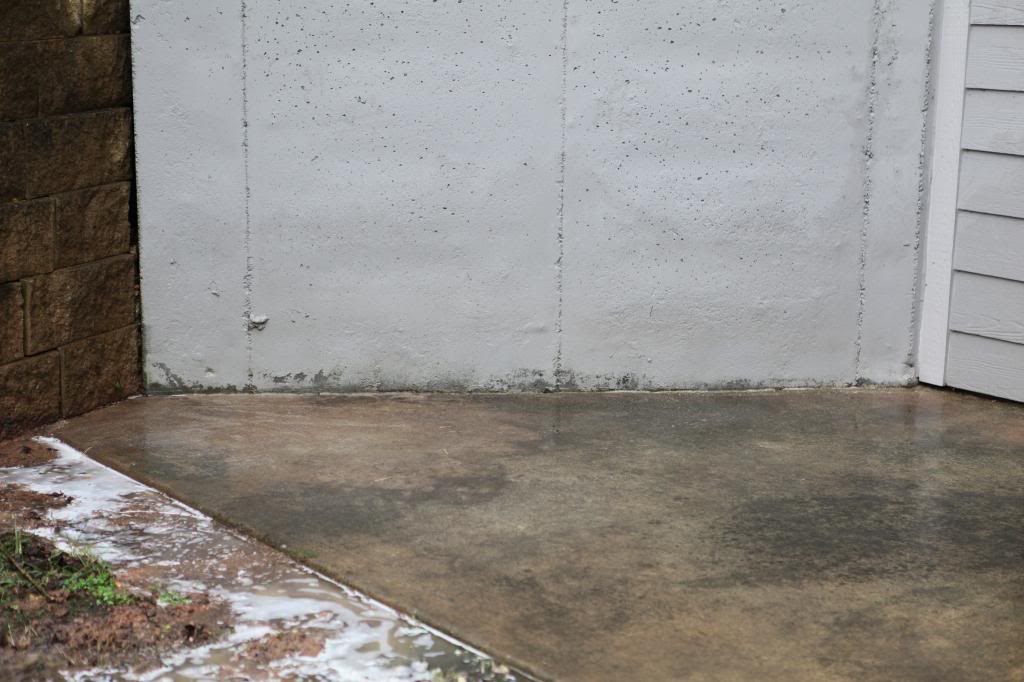
At this point, I was feeling rather pleased with my progress. I had cleaned up the majority of the mess, created a little water escape route for the patio runoff, moved all the pavers, cleaned up the pots that I wanted to keep down in this area, chucked all the old root-filled dirt and dead plants that were in the rest of the pots, broke up the rest of the cracked pots to use as drainage elements for future potting projects and put everything back in it’s place.
Then came the time where I got to decide what to do next. That’s when I remembered a favorite project of mine…the fire pit.
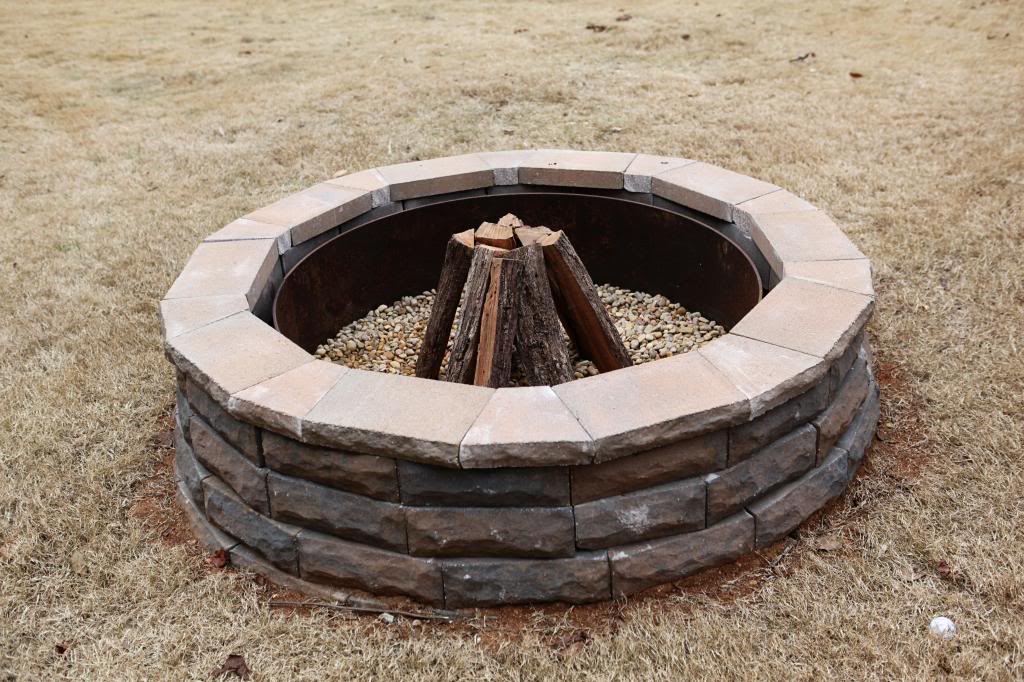
The fire pit was something we actually tackled right about a year ago. Weston was overdue…I dug…Weston was born…Jeremy built the pit. It was pretty epic for us to tackle and finish a project with a newborn. But we did it. I should pat myself on the back for that one. Again.
But one of the problems with the fire pit was that we didn’t have a spot for the firewood.

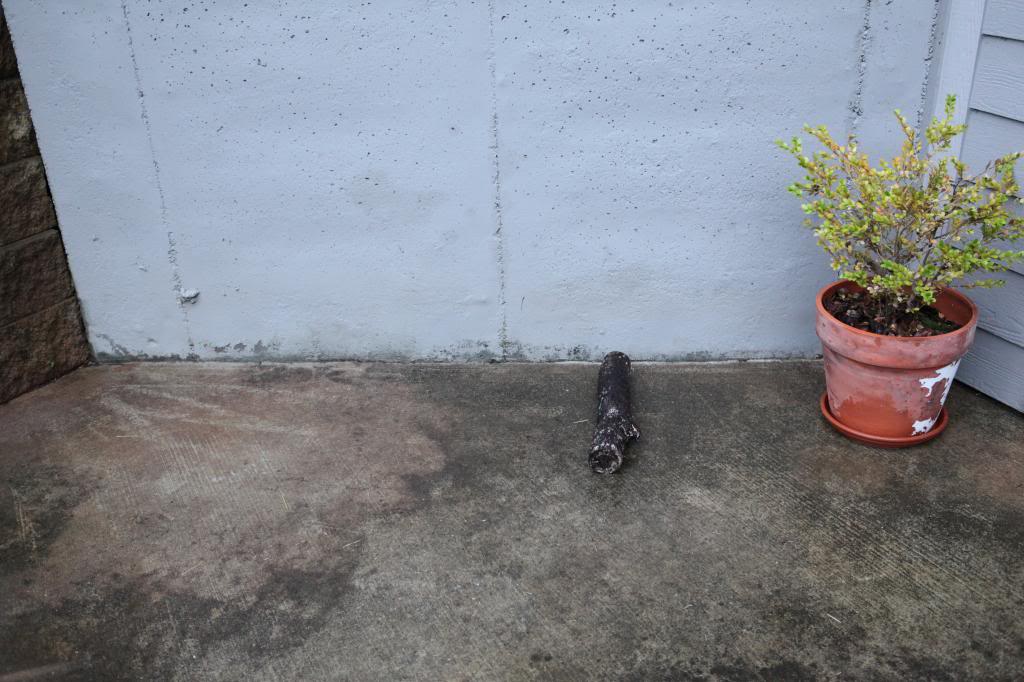
That’s my thought process when I thought of this little space next to the concrete wall….what a perfect spot for our firewood.
It would be ideal because it would have a concrete base, no wood trim nearby (for termites to jump ship and try to attack our house), it’s well protected, and with the right cover…it could keep the wood high and dry.
The only issue is…it would have to be custom made because the inexpensive ones I found online were all either too big or too small or had reviews that included info like “could bend outward if too much wood was on it” or it wouldn’t support our grate.
What grate you say? This one…
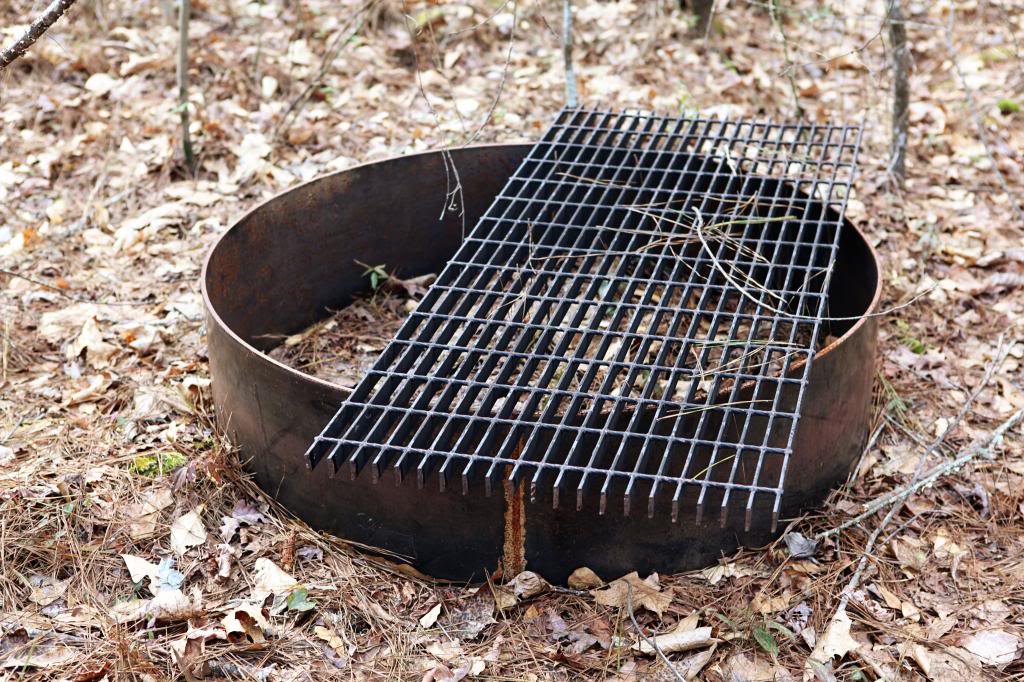
The grate is something that we got from Jeremy’s dad. He also gave us the fire pit metal thingie. We use the grate on top of the pit for special events…like when we have a fire roast and everyone throws a foil wrapped potato on there…or a can of ‘dumpster soup’. It’s come in handy. What isn’t handy is storing it. So my plan was to build a firewood rack and allow the grate to be placed on top…to create a table-top of sorts. Thank goodness I had this 3M post because it was just the kick in the pants I needed. And because I am on a build-it kick and would love to show some wood who is boss.
The first thing I did was map out how big I wanted the actual rack to be. I used Outdoor ScotchBlue tape to mark my lines.
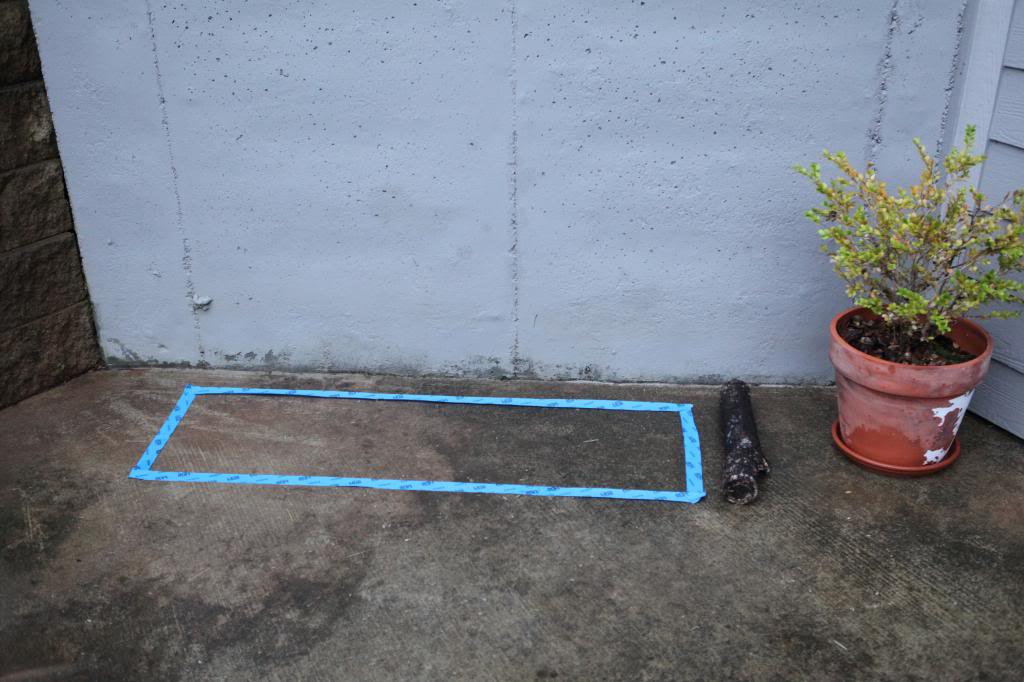
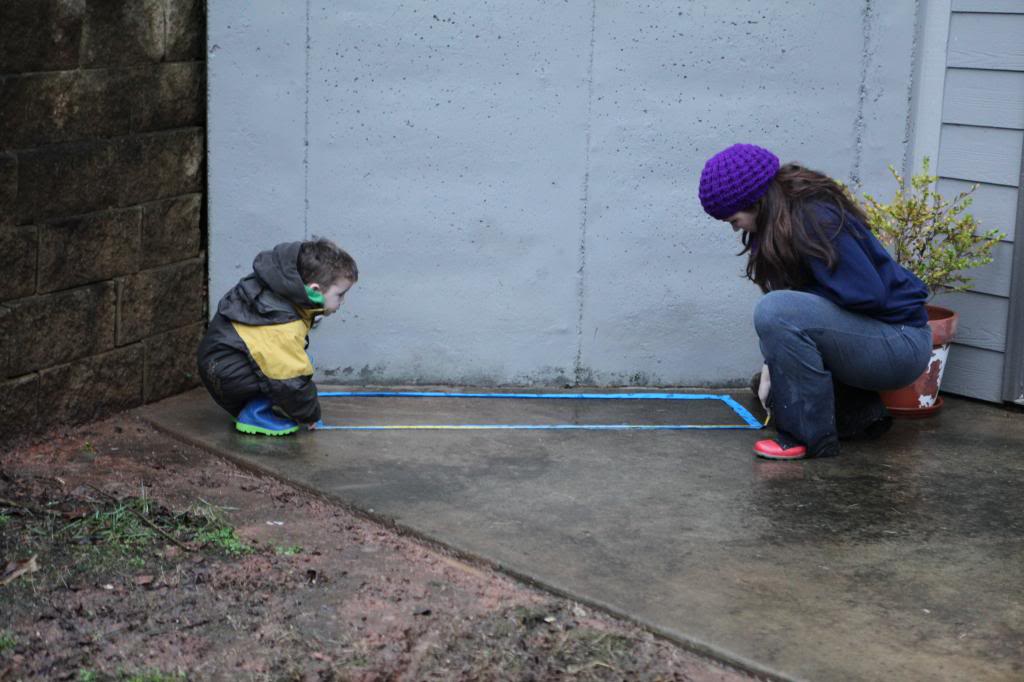
It helped give me a nice visual of how big I really wanted this bad boy. Then my little helper and I measured the tape…it was just at 56″ x 19″. Perfect size to support the grate which is about 60″ x 24″.
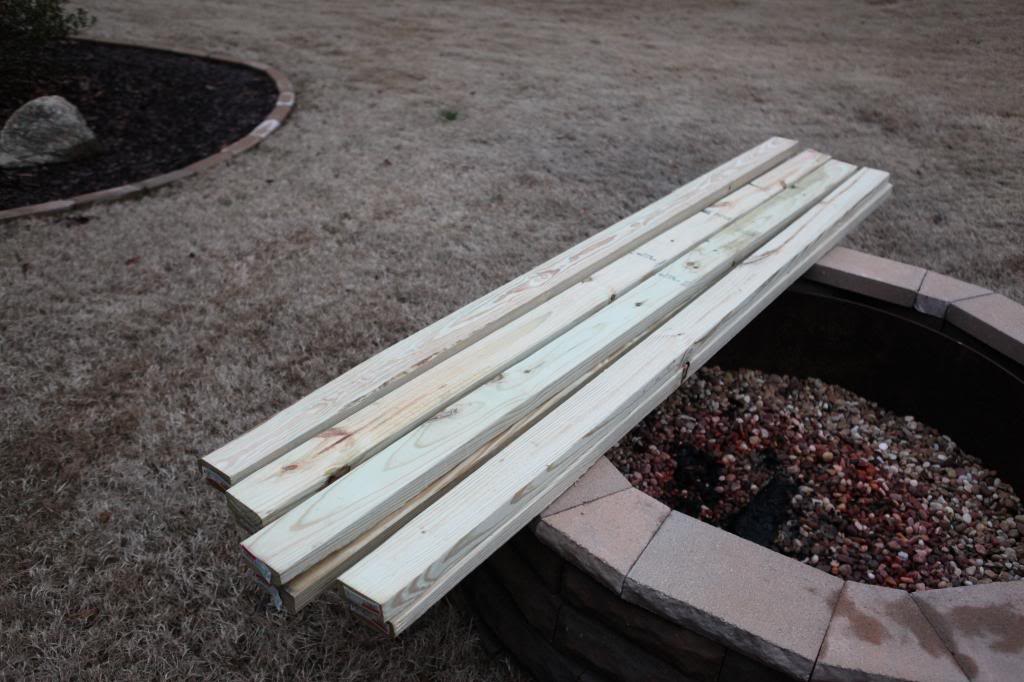
Jer ran to the store and got my supplies…I ended up needing only five 2x4x8’s of pressure treated lumber…which at $3.58 a piece came in just under $18.
Shameless copy of the last photo of me using the miter saw…
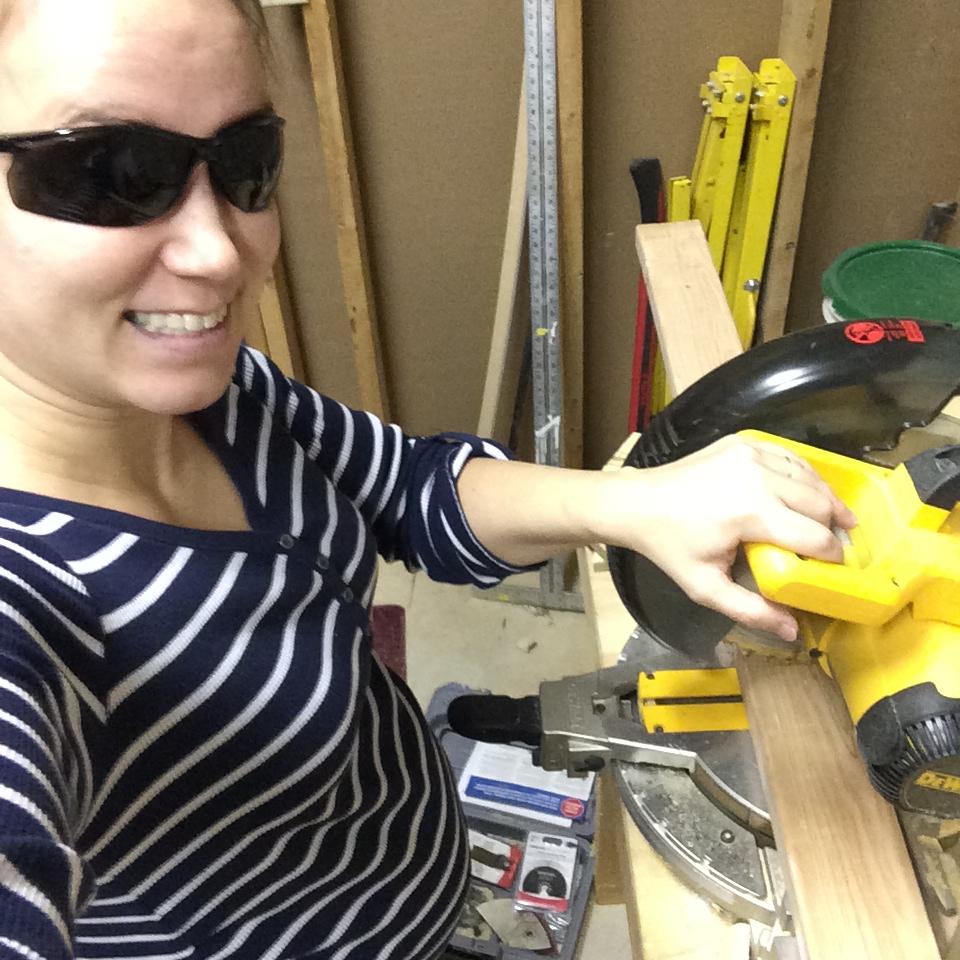
Let’s pretend that didn’t happen 🙂 But it did…I miter sawed the heck outta that wood. In pajama pants.
So after I cut all my pieces, I went inside the garage to assemble everything.
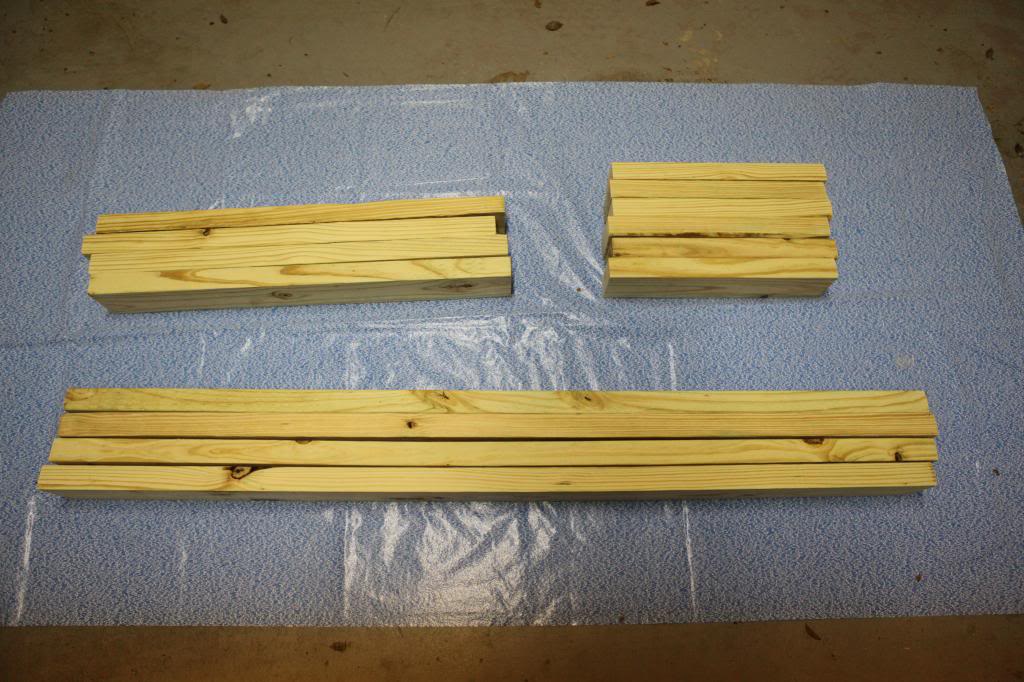
Here is my cut list for those of you trying to recreate my eighteen dollah firewood rack…
- 4 – 2×4’s @ 56″
- 6 – 2×4’s @ 16″ (remember that 19″ minus the depth of two 2×4’s is 16″ – crazy math)
- 4 – 2×4’s @ 29″ (I wanted the height to be just at 3 feet, so these four pieces are the upright supports)
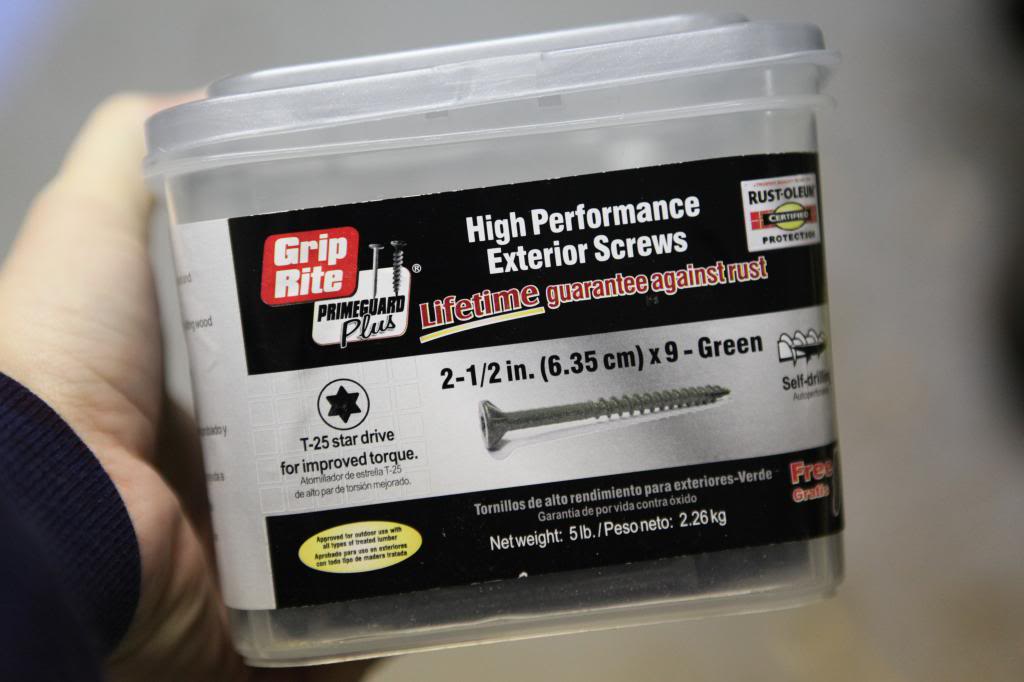
I also used other supplies…a drill, some exterior 2.5″ screws, a non slip drop cloth, safety glasses and some clamps. I later used stain and a foam brush so if you didn’t have any screws or the stain, this project could run ya about $12-$15 more depending on your area’s pricing.
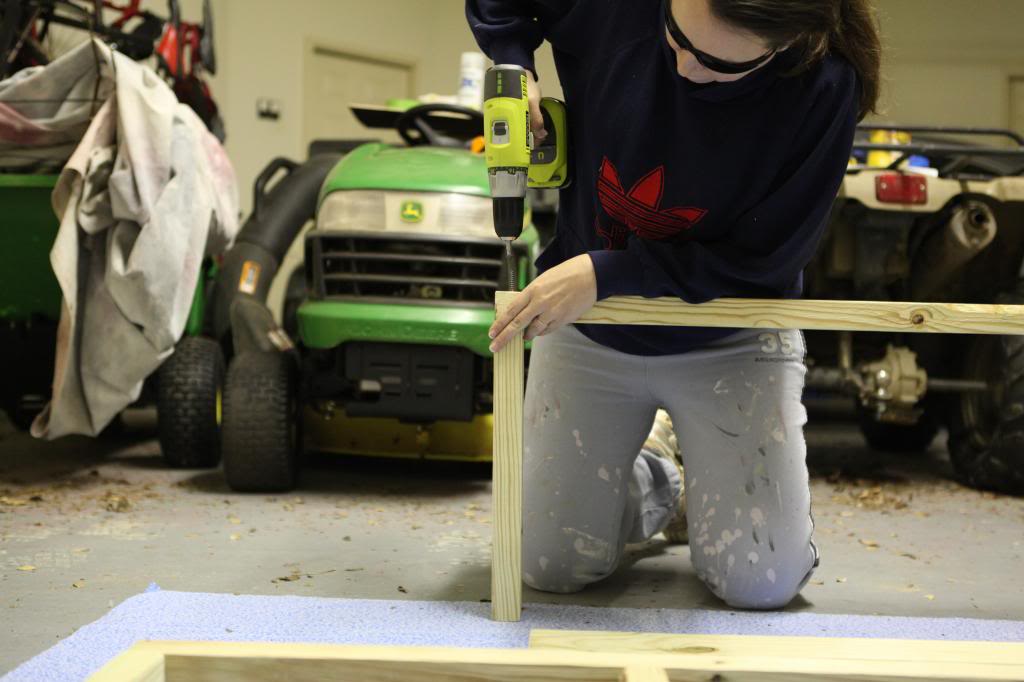
(Please excuse the crazy selfie…I have come to realize that it’s incredibly difficult to pull off a good self-focused shot of oneself doing a DIY project.)
Basically at this point, you just screw it all together. In your old work pants. Because the pajama pants are gonna be soaked to the knee.
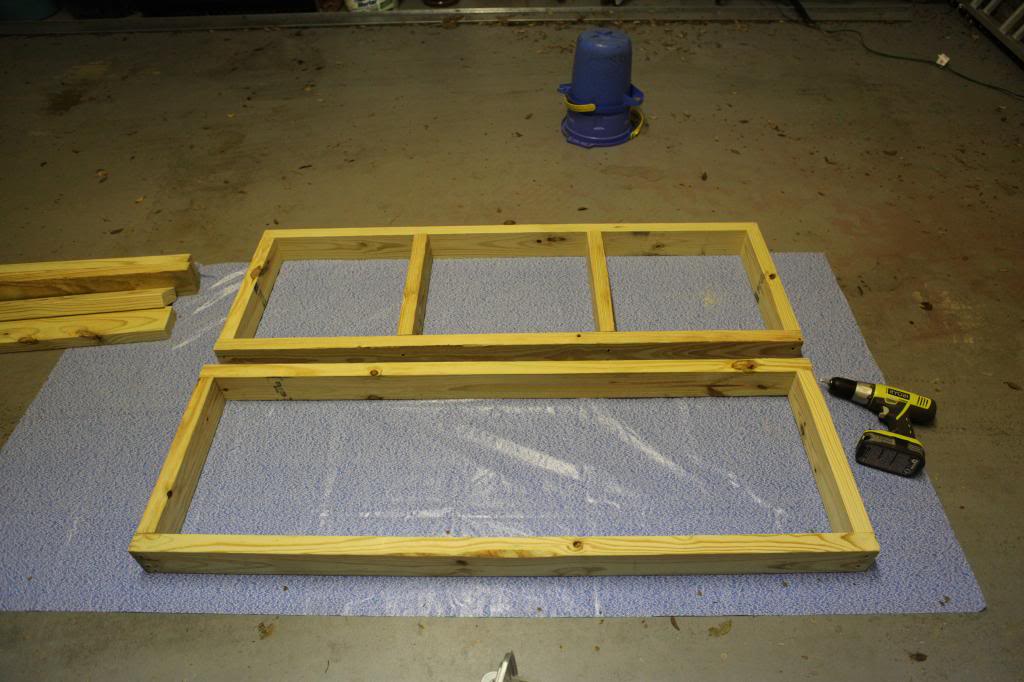
The top piece is on the bottom in this photo. Basically it’s just two squares with the short pieces on the inside of the long ones. Really simple.
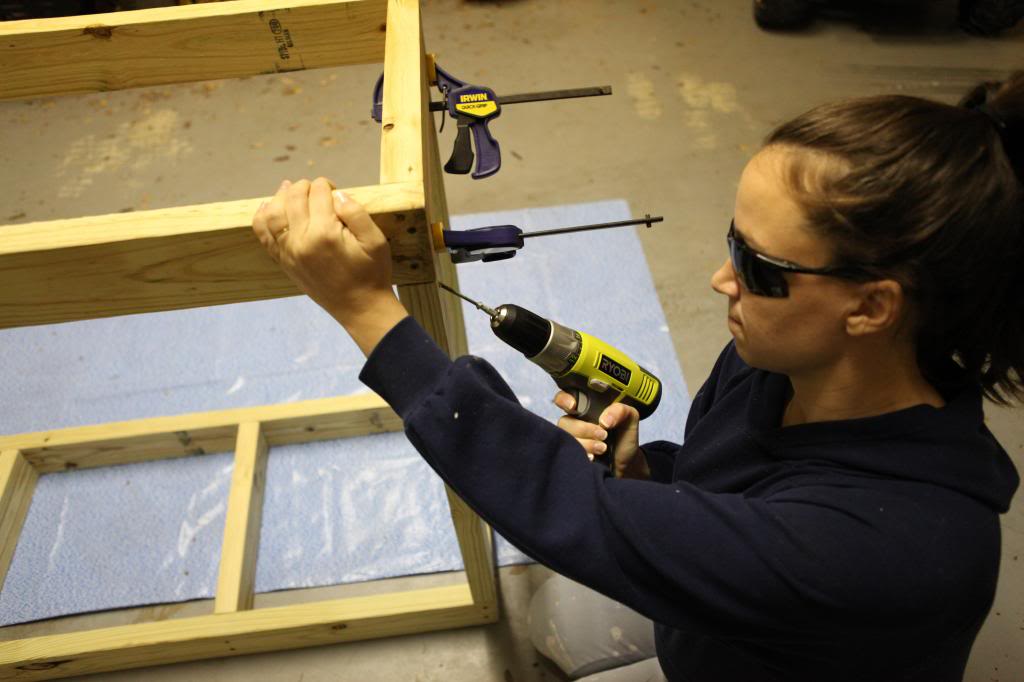
The hardest part is doing these angled screws. I called in Jeremy for this photo because I figured another selfie would be too difficult. After seeing this photo, I may have to reconsider that decision….because dude…really? the bald spot?
After it is all attached together, it should look something like this…
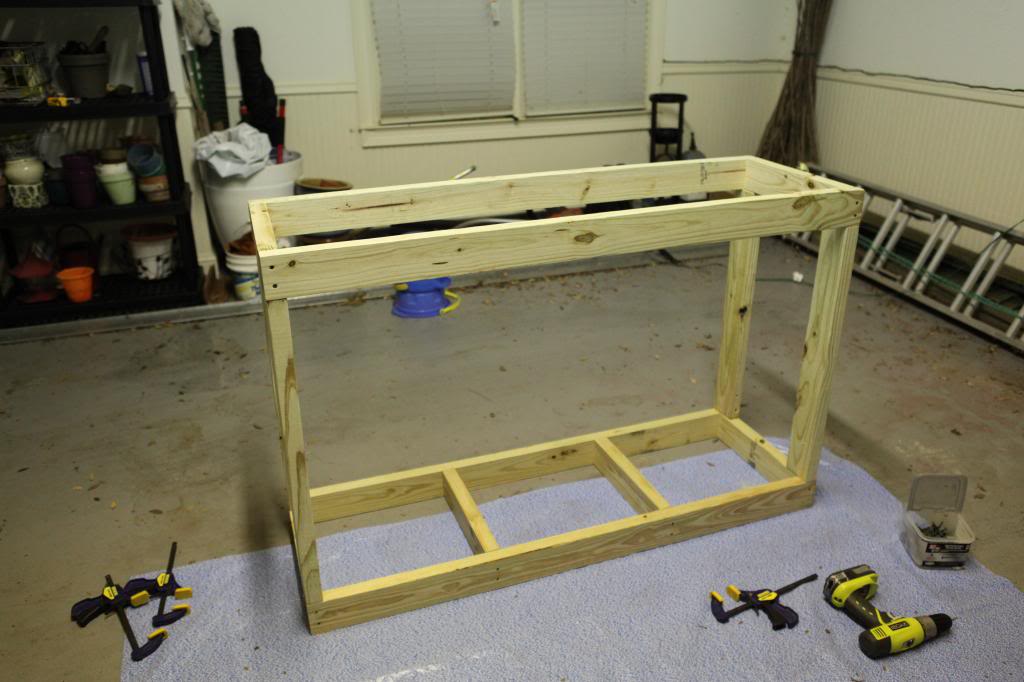
It looks to me like a really sturdy spot for firewood to sit (it will rest on the bottom) and then also a great resting area for the grate to be stored.
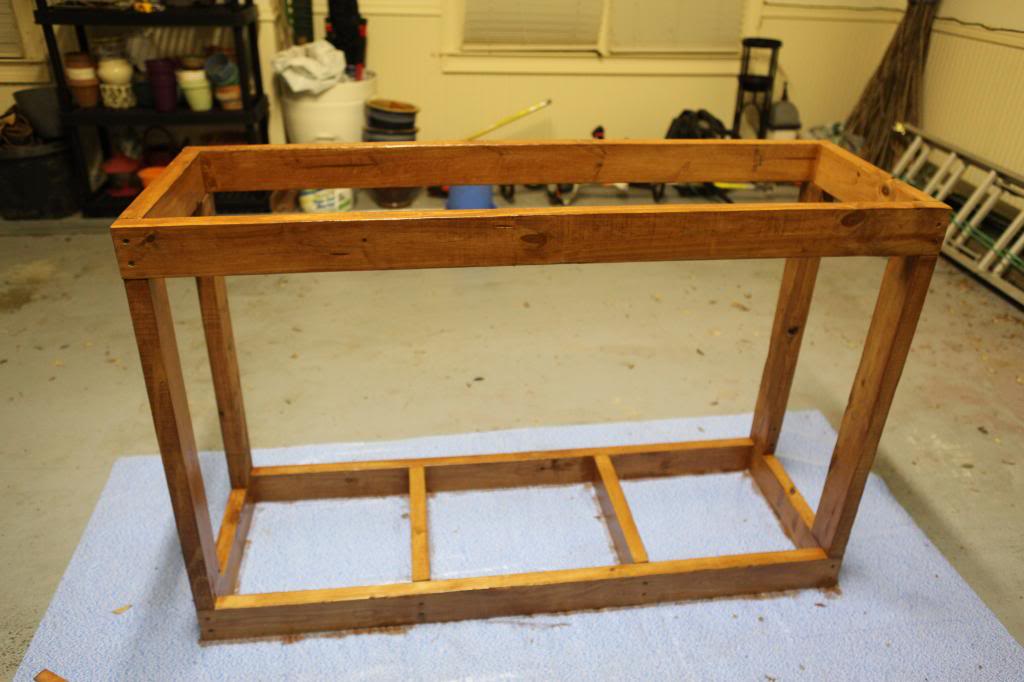
I went back and forth on the finish…do we make it match the exterior furniture or match the deck? In the end, I went with the deck because it was less work. The wood required a couple coats of this preservative wood finish (we had it color matched to red oak for an old deck project when we added some decorative supports).
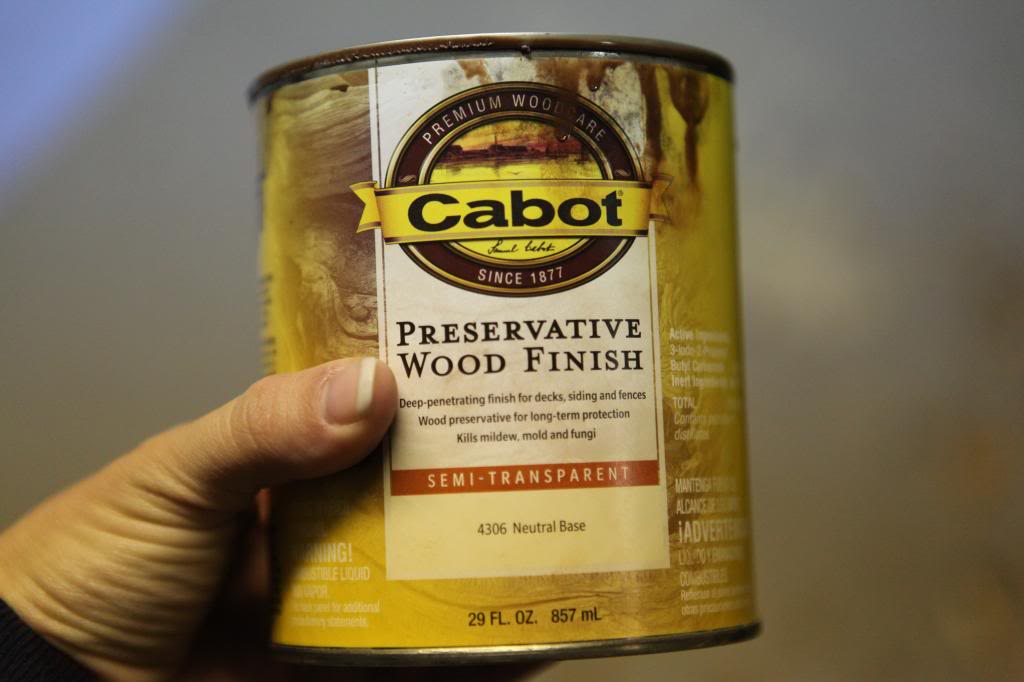
So I whipped out a new R-95 mask (thanks Abby for the mask info!) and opened the garage door to get some more ventilation before covering the entire thing with stain.
After it dried and we filled it with firewood, it is looking just dandy in it’s new home. I love how it’s multi-functional…it holds wood and the grate and creates another spot for me to put things out of the boys reach. Jeremy likes it because it means that he is no longer hauling wood in from the forest, splitting it, and letting it dry inside every time we want to have a bonfire. I think I will order a cheap premade cover that I can sew tighter…or maybe I’ll make one from a tarp and some velcro strips…who knows. The entire thing is SO much better than a pile of broken pots and mud, right?!
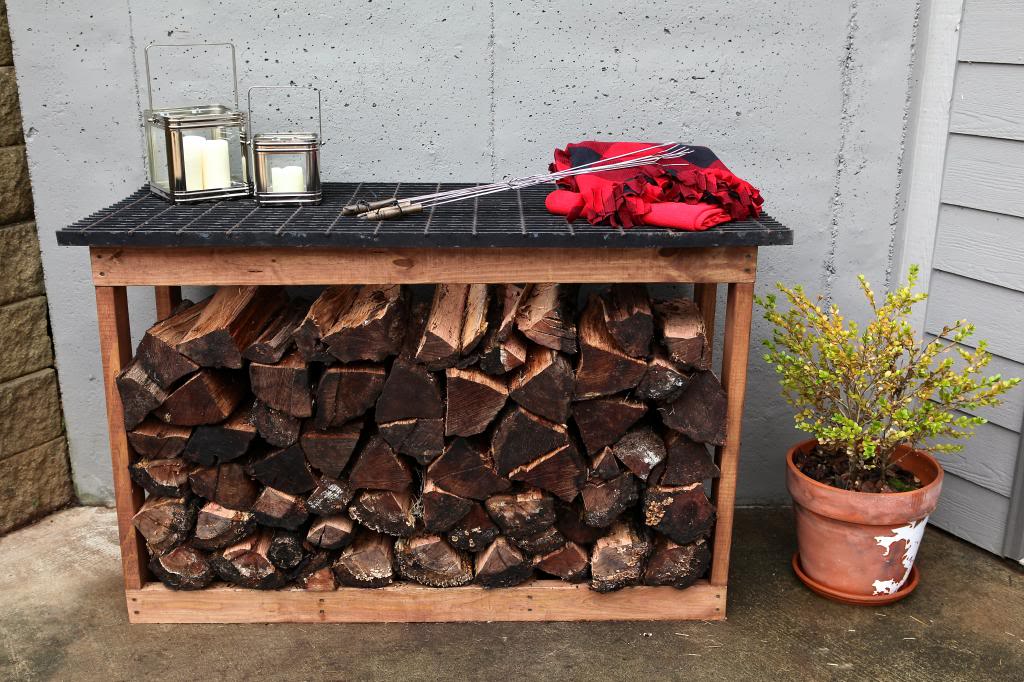
And the best part is the fact that I think I kinda impressed Jeremy. My boyfriend usually doesn’t act wowed by any of my projects…in fact, if I get a second glance at anything, it is like I tooted money while flying in a tornado of rainbows (try to imagine that one). But this time, he was definitely a fan of…probably because it involved two of my weaknesses…cleaning and organization.
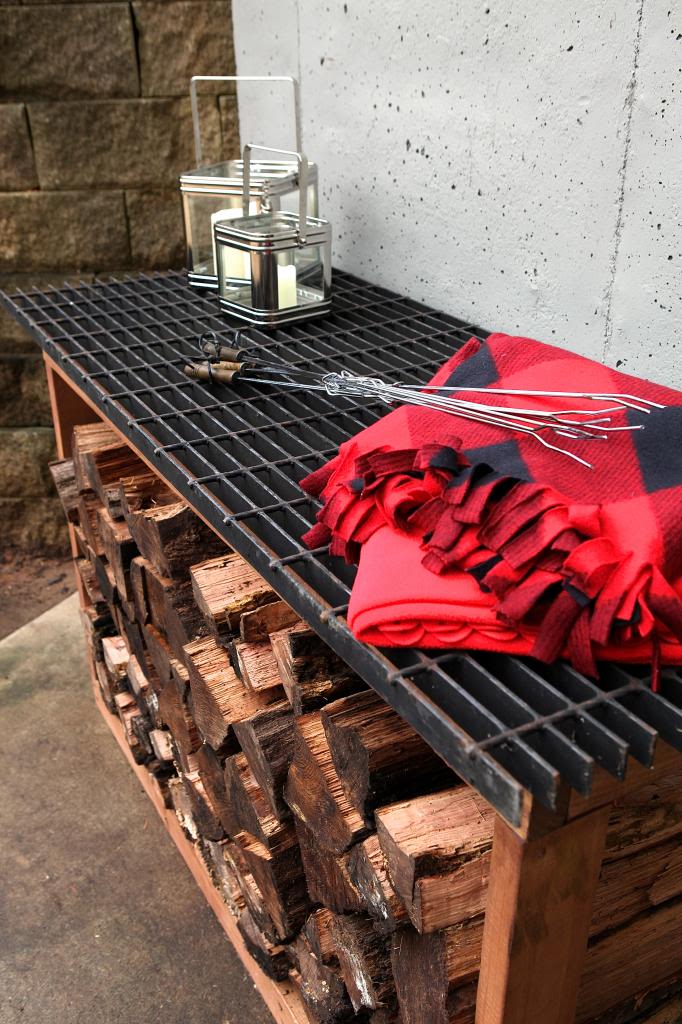
In fact, he even said “Maybe we could make some cool outdoor art or a giant clock for over it.”
Jaw on the muddy ground.
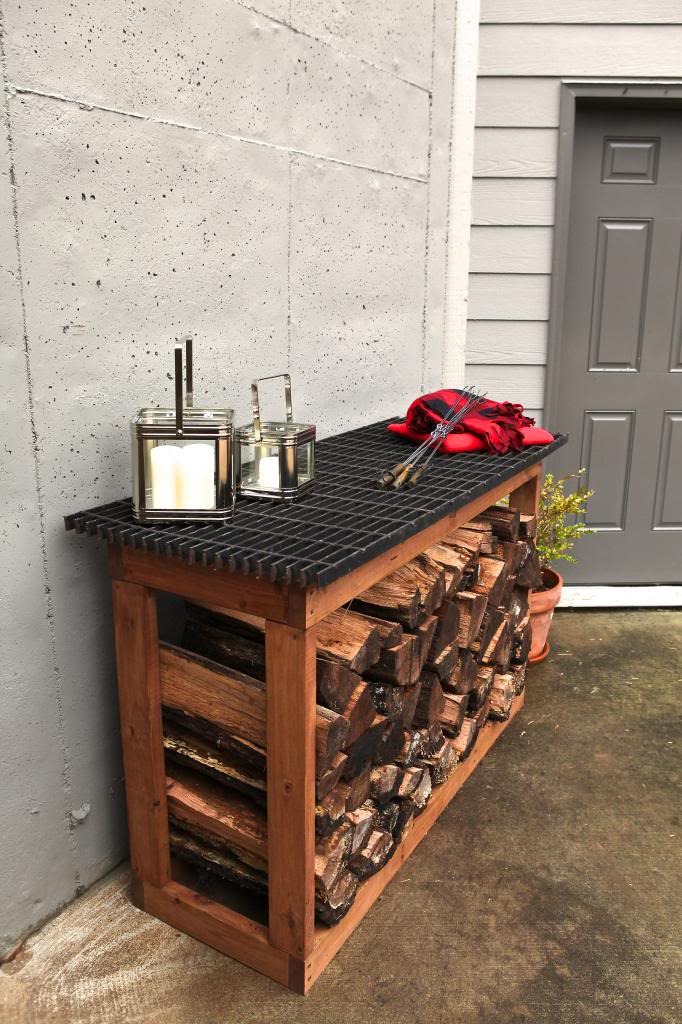
And then he suggested that tonight that we have a bonfire and roast hotdogs and marshmallows. Seriously. All it took to loosen him up was some time with the boys and a little cleaning/building/firewood storage. Note to self 🙂
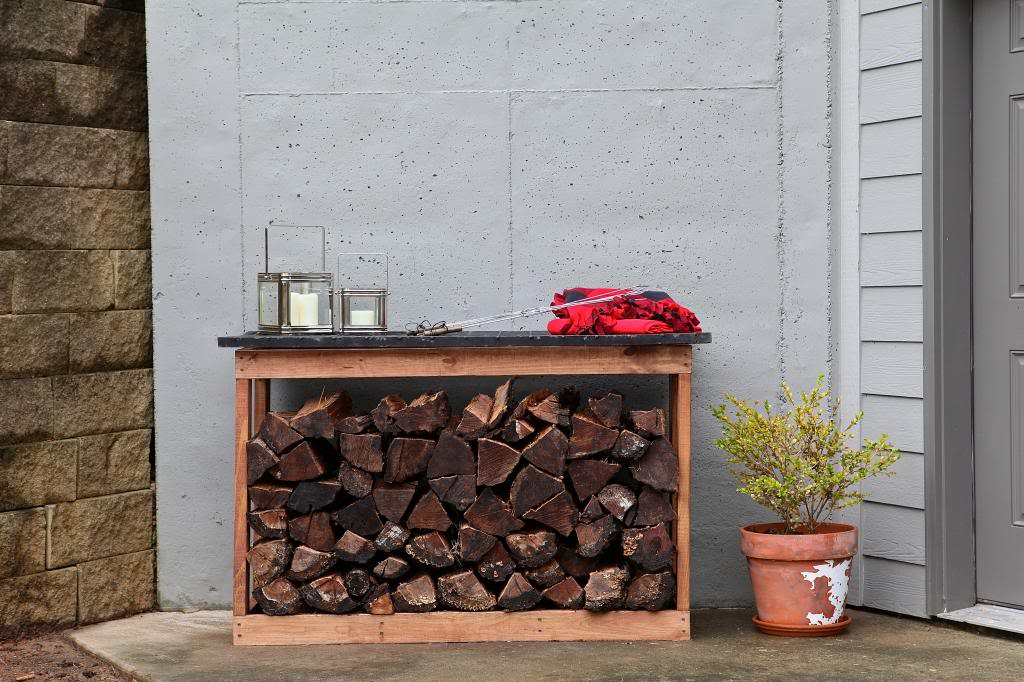
There are definitely things on the to-do list in this area…namely pressure washing and paint touchup (which you promised to remind me of after LJ arrives) and then also I want to paint that light fixture just like I did with the ones in the front.
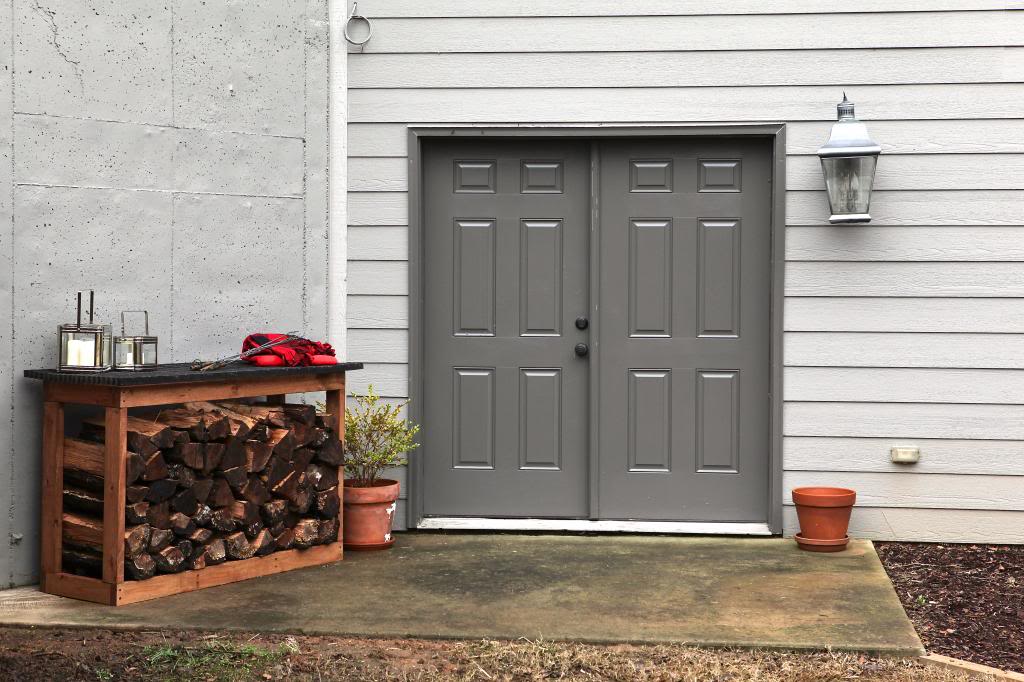
Instead of thinking about that right now, let’s just relish in the fact that this little corner of the yard isn’t driving me crazy anymore. It’s just so darn charming. And if I do say so myself, it really finishes off this spot. Like Tom and Renee, you complete me rack. You complete me. Now for the before and afters…

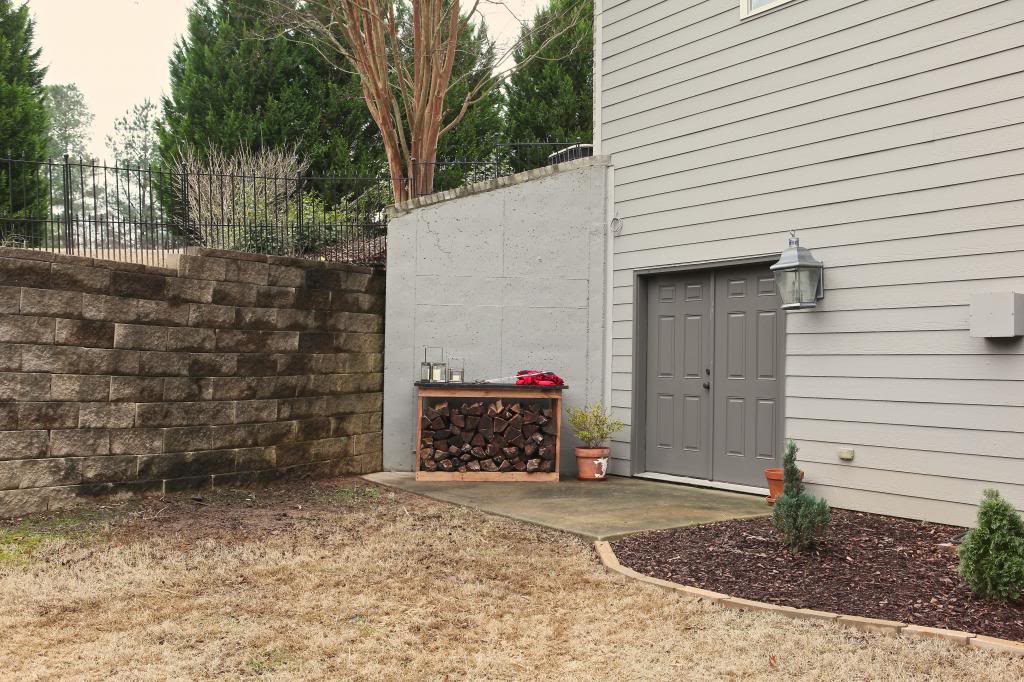

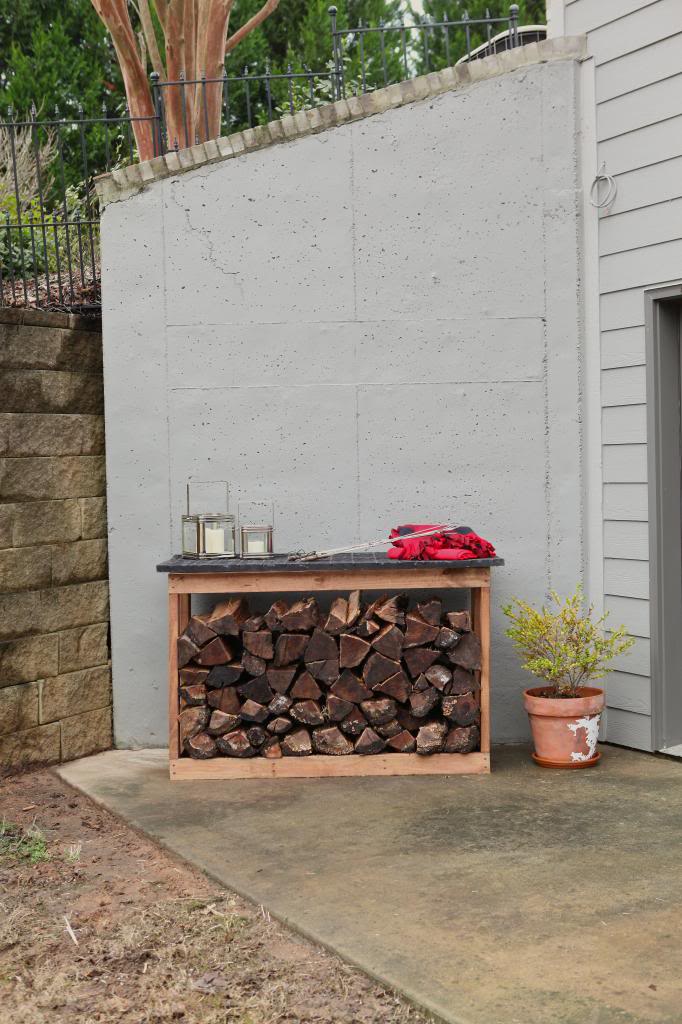
Oh yes. It was worth every penny. And I’m sure that if you didn’t have the grate, then a few 2×4’s cut to length and attached directly on top would be a great way to finish it off too. Either way, it is such a treat knowing that we can have a roaring fire without having Jeremy go on a hike into the woods…never to be seen again…or at least for the next thirty minutes 🙂
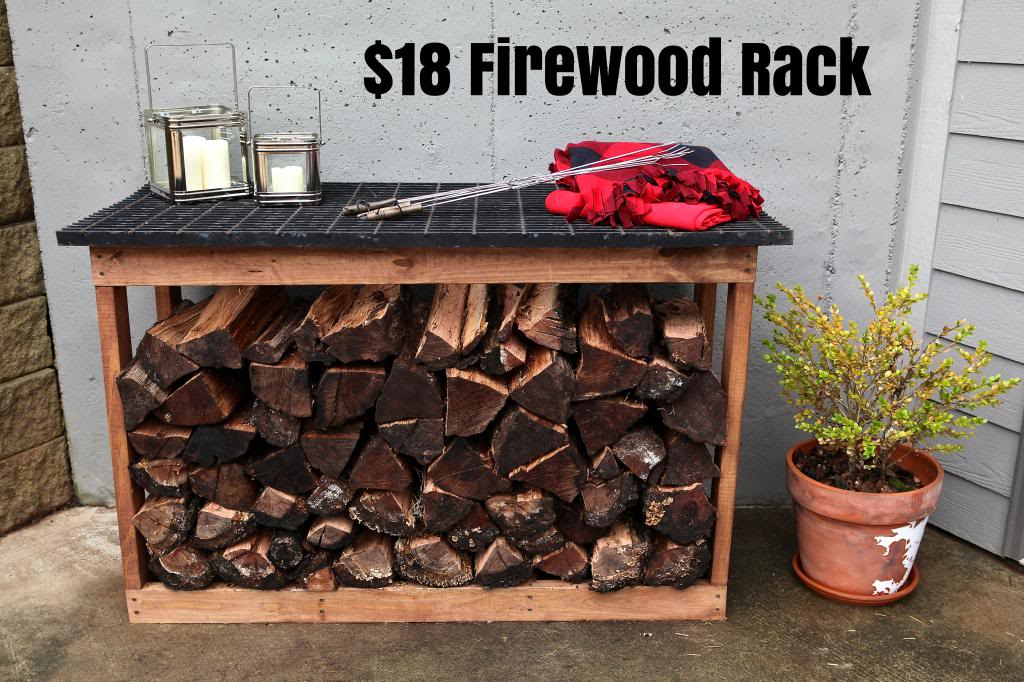
Thanks 3M for sponsoring this post. It always helps to have someone else give me a deadline on projects…and this one was probably something that I would have pushed to the back burner but I am really thankful to have you crack the whip and help me get this done. My boyfriend and kids thank you too…ya know…cause there are marshmallows involved now.
This post is a collaboration with 3M DIY. To keep up-to-date on projects, products and sampling visit 3MDIY.com. Here they are on Facebook and Twitter.


Good work, girl!! I’m pretty impressed with your little weekend project! We’re in dire need of better firewood storage so I’m pinning this baby for future reference. 🙂 Hope your fam has a very happy new year!
I am so impressed! Katie, it looks beautiful. I can’t wait to see if you add art or something above the rack.
Your a trooper for doing these projects while pregnant and taking care of two boys! I have a two year old son and I’m expecting another little guy at the end of the month and I have a hard time just vacuuming!!
Love this!!!
It looks so good!!! Question on those angled screws – did you use a kreg to pre-drill or just mash them in there? 🙂
Great job! I love that Jeremy was impressed (it is hard sometimes to get men as excited about things as we are) — I know we’re all impressed by you all the time! But seriously, this looks incredible and I’d bet you couldn’t buy one this nice!
I swoon!!!! It looks amazing as always! And I’m glad to have helped! I really do love your wood posts. Happy New Year!
I love how rustic it is! Looks so cabin cozy 🙂
I am pinning this for later. What we have now was inherited from our former house owners. It is pathetic and ugly.
Wow, it is so darn charming!
What about a trellis with ivy?
Great job, looks good! I agree with Jeremy, something on the wall over it would be nice, too.
Love it! It looks awesome! love the grate and color of stain. Nicely done!
Love this! Is the wall above the new rack large enough to project movies upon? In the summer, of course.
Nice job, I really need to learn how to use the miter saw. We have one that has a guard missing…need to get a new one. Any ways, I am home so much more than my hubby and I need to finish a lot of baseboard etc. Need a tutorial!
This looks great! It’s getting my creative juices flowing now for some outdoor projects.
In all inappropriate honesty, my first thought after I finished reading this post was, “OH MAN! I LOVE her rack!” Then, I realized how ridiculous that sounded and obviously typed it anyway. Haha. This is a really fabulous thing because a) it does change the look of that area, b) we don’t buy/cut firewood because we have nowhere to store it and this is customizable to our little patio/porch area, and c) I have been wanting to try some wood projects on my own and haven’t found one that wasn’t going to go inside my house (aka I really don’t want to screw it up if it has to live INSIDE). This is super motivating. So, thanks! And it really does look great- excited to see if you try a clock/art!
p.s. Will helping you?! gahhhhhhh my hormones just skyrocketed with the overload of his little DIY self!
Just mash them in there. I have a Kreg Jig mini but I don’t have the big one that allows for other attachments so I am stuck only using shorter screws (which the Kreg Jig requires certain types – none of which that I have found are for exterior use…at least at my local home improvement store).
xo – kb
Great job! By the way, your link to Outdoor Scotch Blue Tape doesn’t work.
Happy New Year!
Hmm…that’s a good idea but I don’t know if it’s quite wide enough. I’ll have to measure because my dad does have a projector!
xo – kb
I think this project may just be the definition of DIY. Ugly space that needs a refresh? Check. Using stuff you have on hand? Check. Creativity and ingenuity? Check. Amazing finished product? Check.
Fantastic job:)
You are seriously a super mom!!!
Soooo impressed!
http://happinessiscreating.com/
I am SO impressed. I love your projects. I have not used a saw before and I am always so impressed with what projects you complete. I will have to try a few of my own! It looks great by the way!
Great post! I think you have some of the only sponsored posts I read beginning to end. I love how they are so funny and interesting. Oh and the movie projector idea would be fabulous, everyone huddled around a fire watching a movie sounds perfect. Can I come?
I love stuff that looks good AND organizes your life! This is awesome. And I vote for the giant outdoor clock (unless you can make the projector idea happen – good thinking, Abilu!)
Love it!
I’m impressed too…. looks great. 🙂
Super impressive! I love how you start with just a little cleaning and then BAM, whole new project must be done. That’s how things usually start for me.
That’s a very cosmetically nice thing you made, and kudos for doing it with a bun in the oven on a rainy day, very ambitions.
But, how are you going to keep your wood from getting wet? That corner has a moisture problem to begin with, and you put your wood in something that has no effective top. Isn’t your wood pile just going to turn into a soppy moldy-impossible to burn mess?
Like I mentioned in the post, I think we will definitely keep it covered like most firewood racks. Actually Jeremy has already put an old lawnmower cover on top of it (I’ve yet to check it out) but he swears that it will get the job done 🙂
xo – kb
That is crazy awesome! I love how the pregnancy hormones are kicking in full steam and what a great place to stack wood, it is so cool and I love that it was less than 20 bucks!
very nice…oh how i wish i could build things on a whim like that!! and pregnant…wow!!
I’m impressed! And jealous. But your timing is impeccable. I need a wood rack and was just thinking I should look up how to make one because the ones you buy are really expensive!
Awesome. I am pinning. For when we finally build a house where we will need firewood! Totally impressed!
This is great! Pregnant too…now I want to see that patio power washed!
You, my dear woman, are my HERO. This is glorious, it totally rocks my socks, and now I really feel I need to brave the use of the saw, myself. Really, it is my fear of that particular power-tool that derails many of my home-improvement ideas or hinders current ones while I wait for, plead, beg, and cajole my husband to make the cuts for me. What a beautiful and useful patio piece – exactly what I was looking for. Awesome. Almost makes me want to ditch my 4th of July travel plans so I can work on THIS. I love it (and the fact that you did it pregnant and in pajamas…did I mention that you are my hero?)
I cannot see the images on this post. Can you refresh them, I would love to follow along and make this wood rack. Thanks! -Kevin
If you can’t view the images, then the problem is usually that your security settings don’t allow photobucket.com – that is my photo host. Try adding them to your allowed sites and clearing your cookies! If that doesn’t do it, let me know!
xo – kb
Very cool! Has anyone else done this and used something else to top it? I don’t have an awesome grate like that one…
Nice wood rack. You do know good ole bleachwill clean up that concrete and take all mold off is house side. Just ppour it out on cement use a broom to swoosh it around and let it sit you can rinse off later or not. But concrete will be completely clean. I do my basement walls all the time.