“I was one of the bloggers selected by True Value to work on the DIY Squad. I have been compensated for my time commitment to the program as well as my writing about my experience. I have also been compensated for the materials needed for my DIY project. However, my opinions are entirely my own and I have not been paid to publish positive comments.”
Let the chaos begin!
I am ready to let loose some of the top-secret highly classified projects that I’ve been placing finishing touches on…three cheers for me! Actually we should be cheering for you…because you guys are the ones that told me you come here for the ‘house stuff’ in my blogiversary survey (which by the way, if you are in a bad mood…just read other’s people’s quirks…it’s like botox for the soul).

Okay…so you know that I have partnered with True Value (aka the ugly home dragon slayer – that’s their ABP official slogan by the way). And those Master Hardwarians are helping us out with DIY supplies…while we bring the brawn and the brains…or in my case, the Brawny (for when DIY gets messy) and the brain-engine-called-Google. I created my To-Do list and on said list is this bad boy:
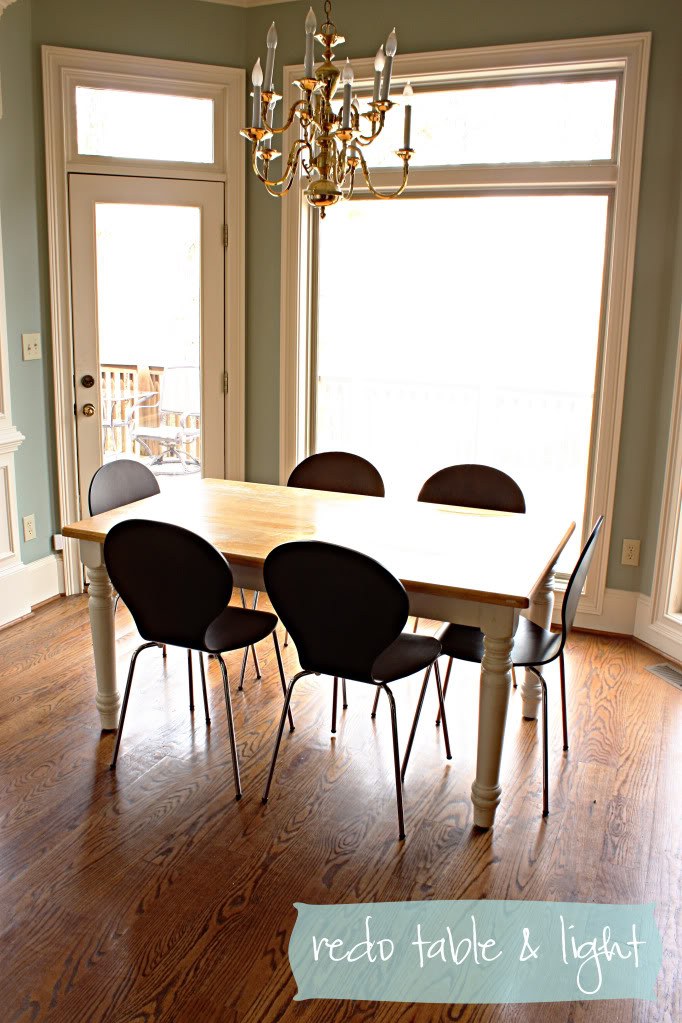
That my friends is called a mish-mash.
One yard sale table scored for $18 last summer. And one golden light fixture with several modern stacking chairs. Not exactly what I’m going for in this space. I don’t think any body goes for this look. anywhere. in any decade.
So I decided to start with the table. I love the two toned look of it…I’m just not loving the tones…or the shape that it is in.
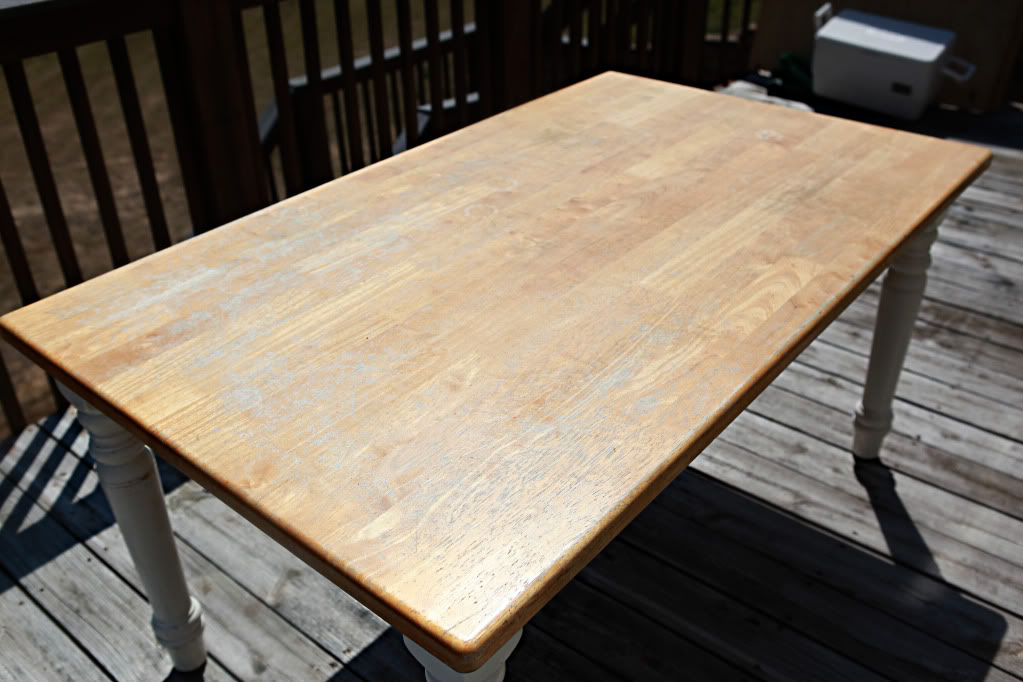
The top is birchy.
Birchy like yellowy…not like what I call that woman who cut me off on Highway 78 the other day. Totally different kinda birch.
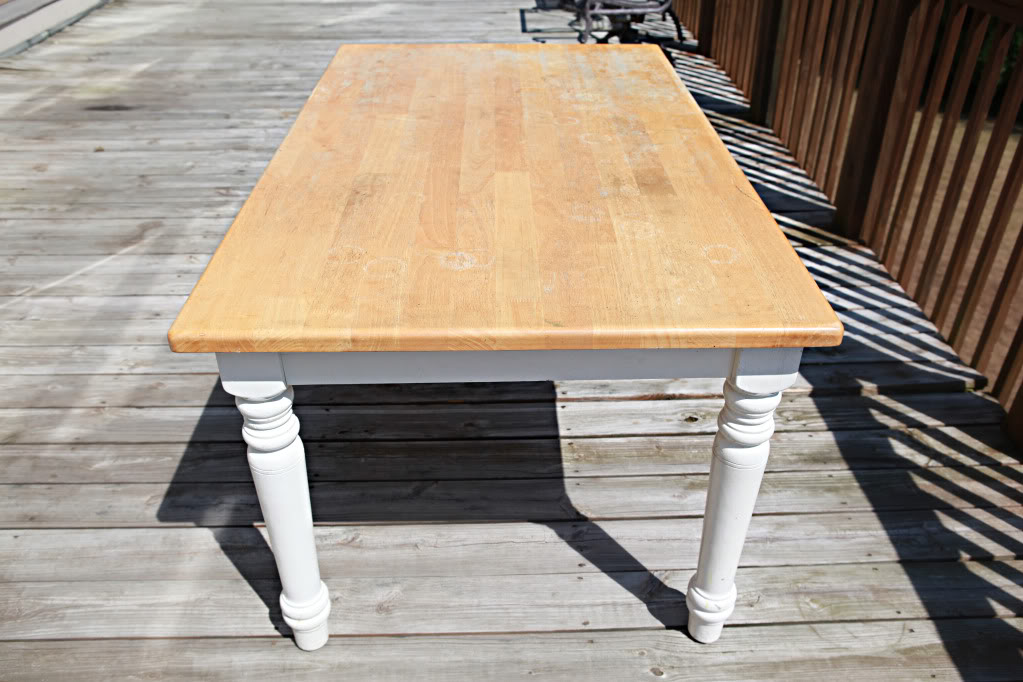
As you can plainly see…this table is a little rough around the edges…the previous owner used it as a craft table….and it shows…
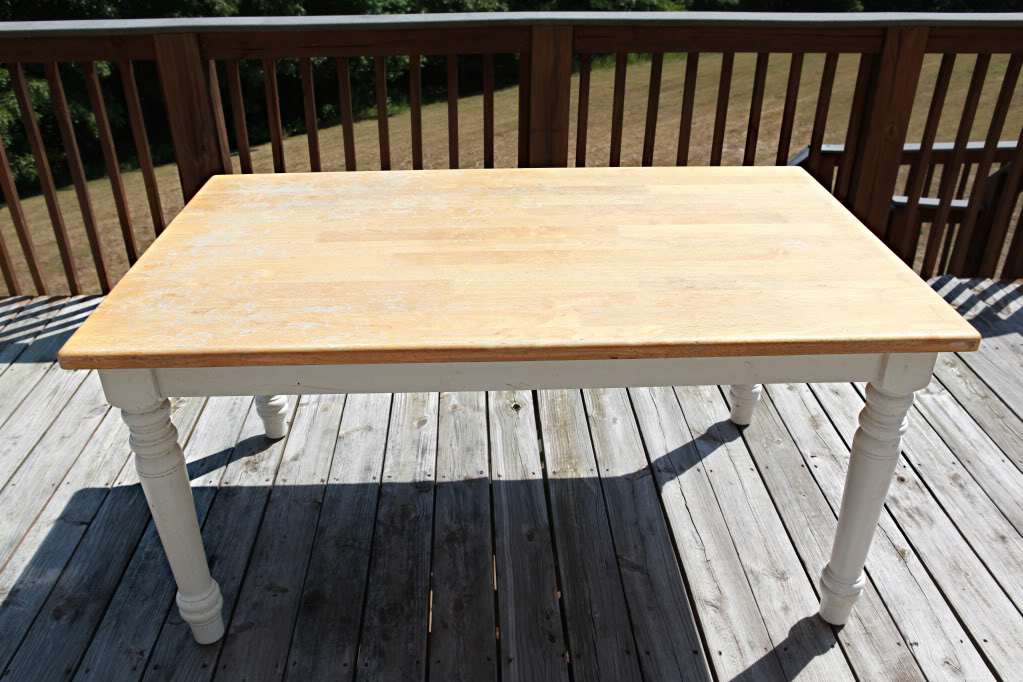
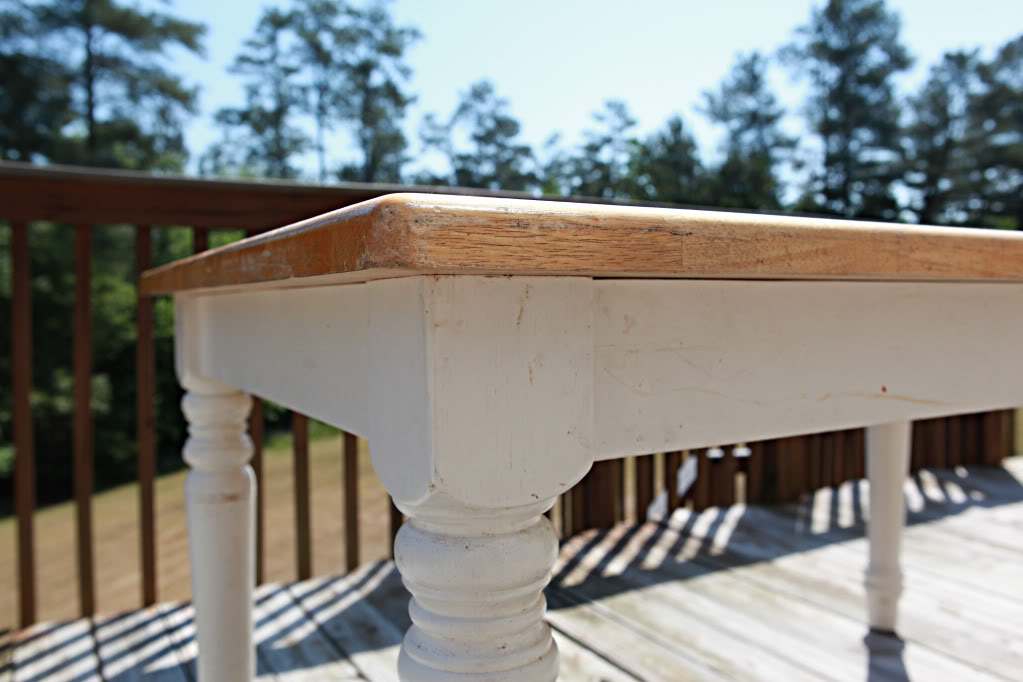
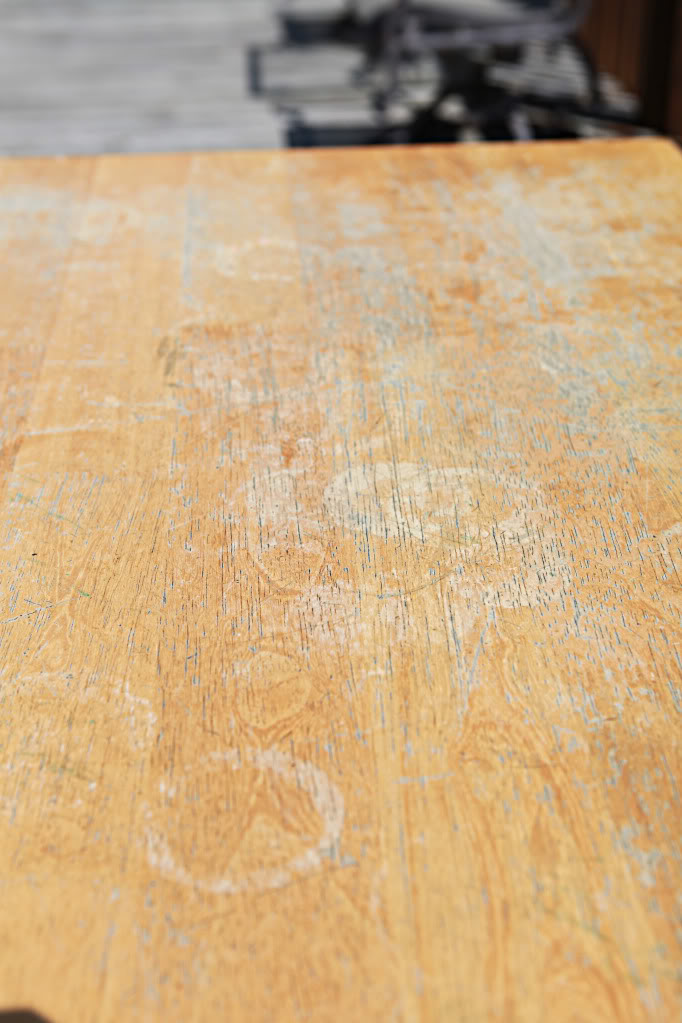
The top is especially bad. Water rings…stains…divots….
So I whipped out our sander and some gritty sandpaper (60grit to start) and went at it.
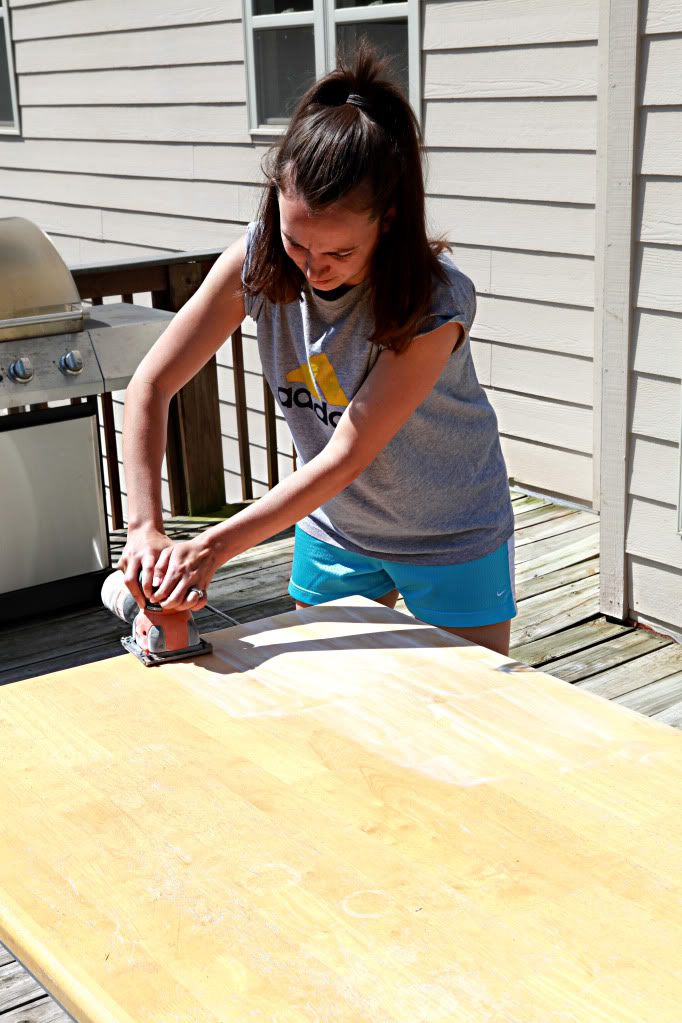
Since there was only a few coats of well-worn poly on it, the entire top wasn’t difficult to strip down.
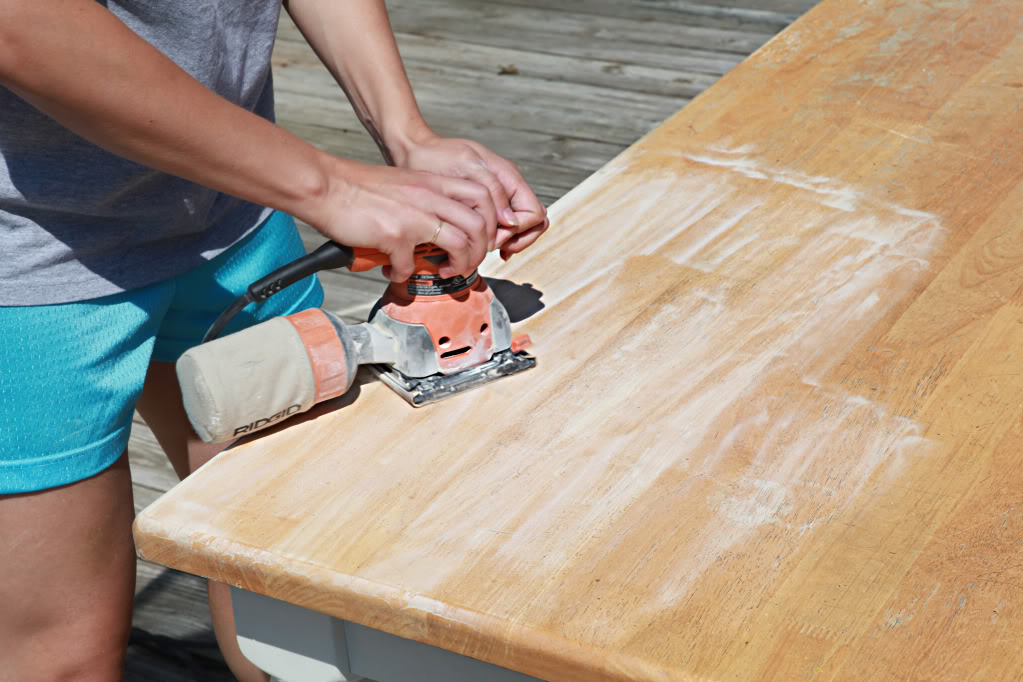
Time consuming…but not hard.
If you are planning on doing this at home…make sure you go with the grain. That is my number one tip.
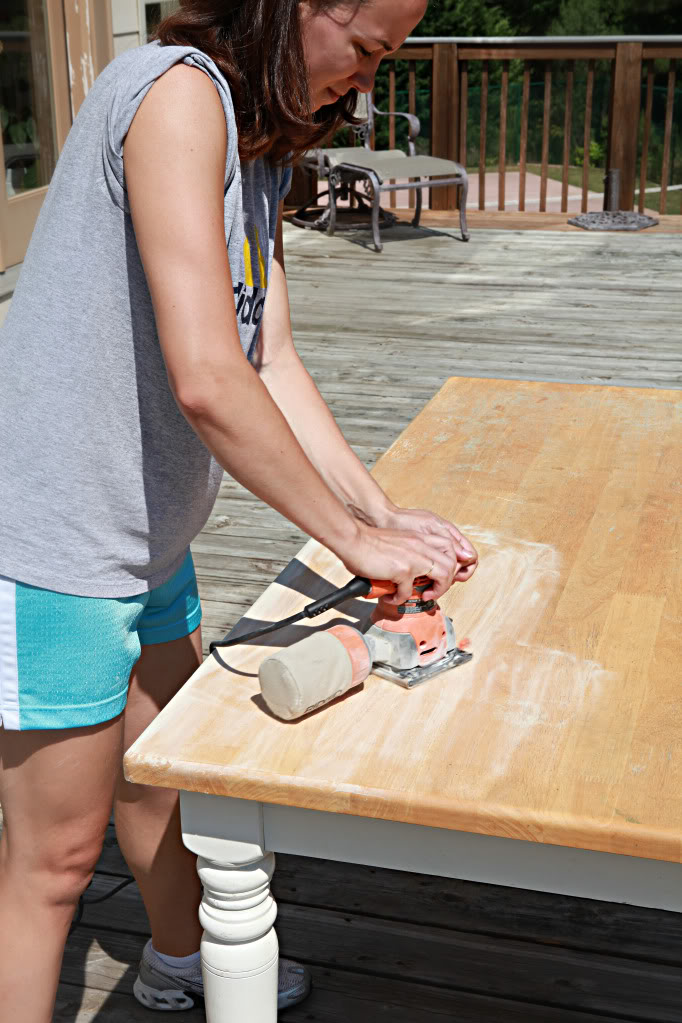
After you sand down the entire surface, wipe it down of dust and see what you got.
Here’s mine after sanding with the high-grit sandpaper followed with a medium grit.
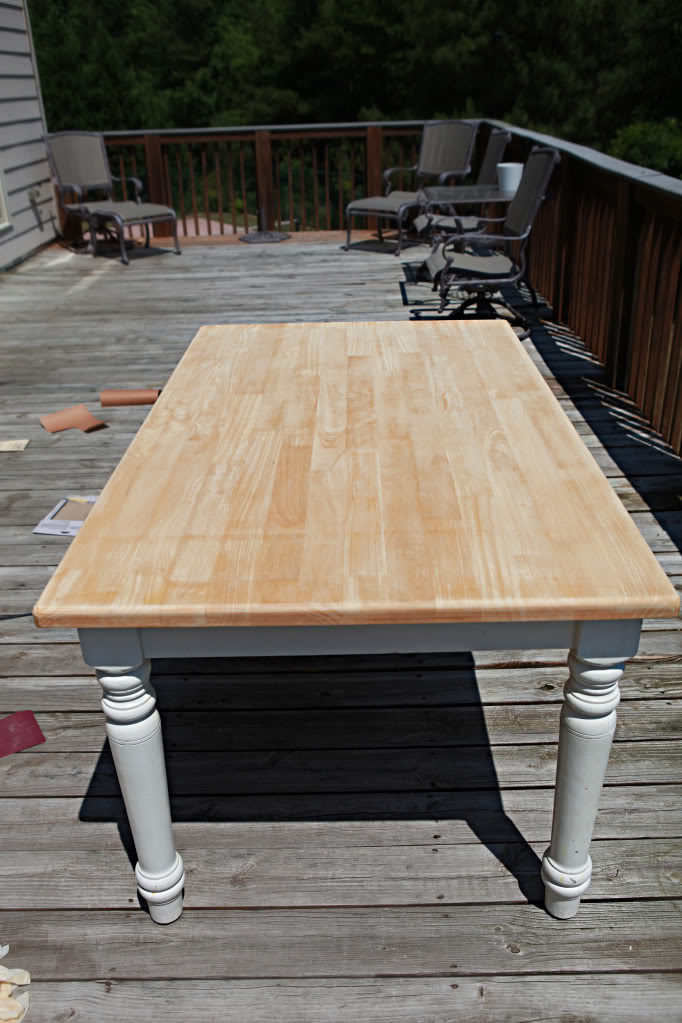
Pretty nice, huh? Big difference from that hot mess up there.
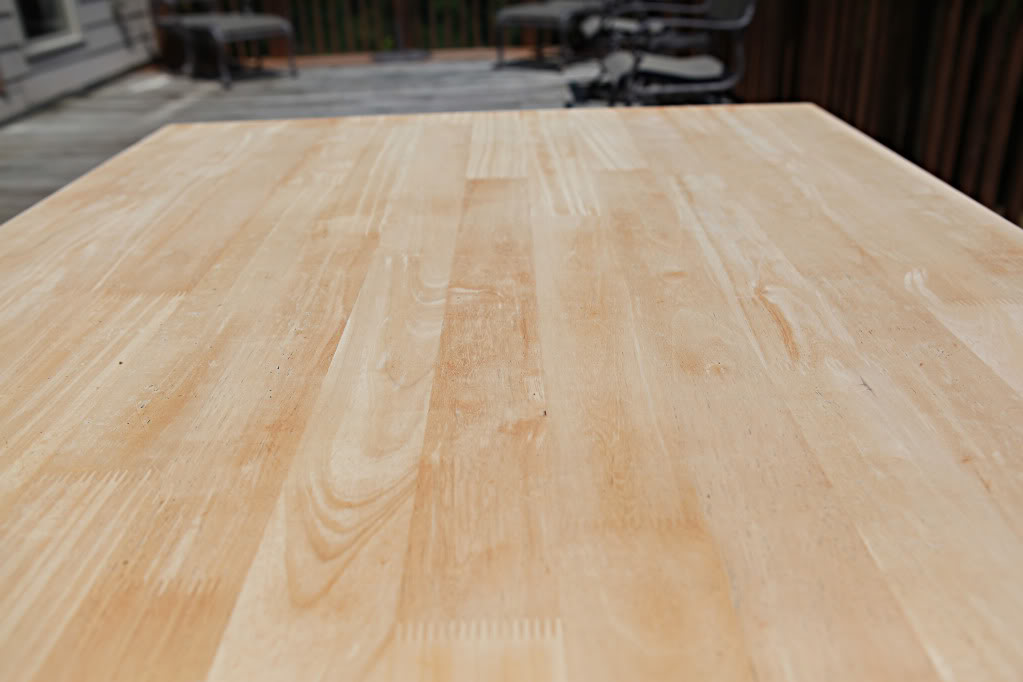
After my sanding with gritty, medium then fine grit sandpaper…clean the sucker REALLY well. I wiped down the entire table top with water and then followed up with a tack cloth.
Next came stain. I chose MinWax in Dark Walnut.
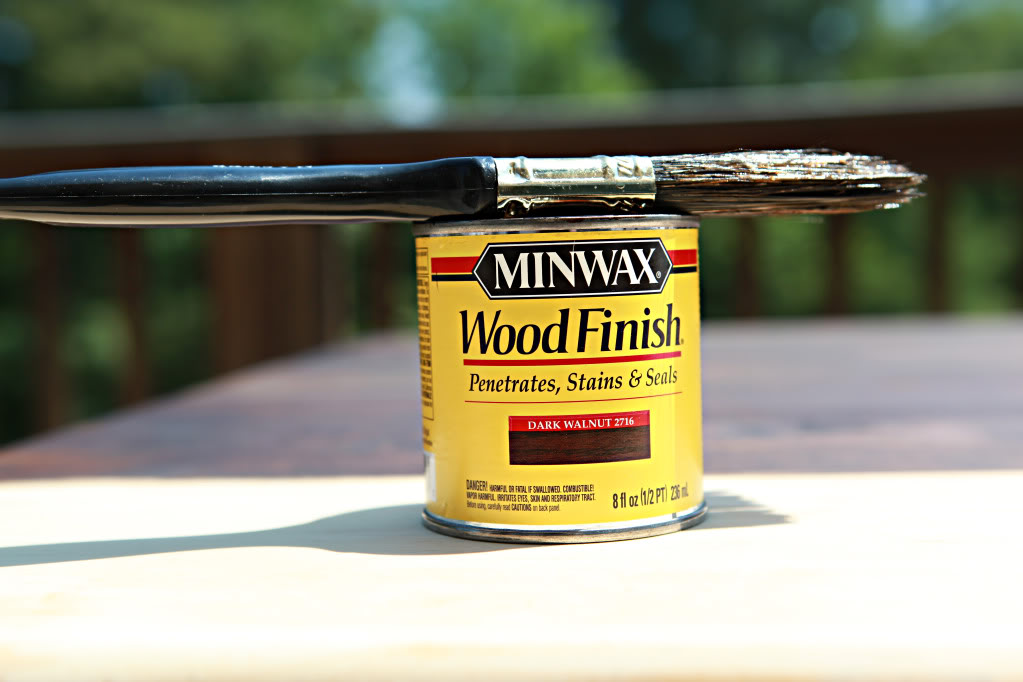
I would apply then let it sit for one minute then wipe it up with a paper towel.
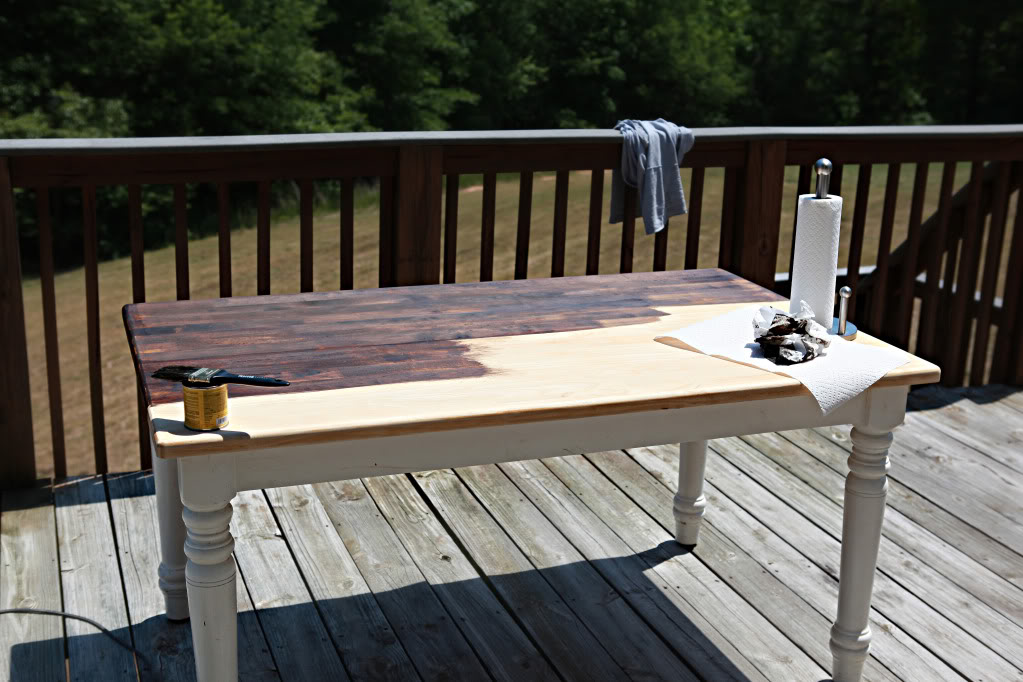
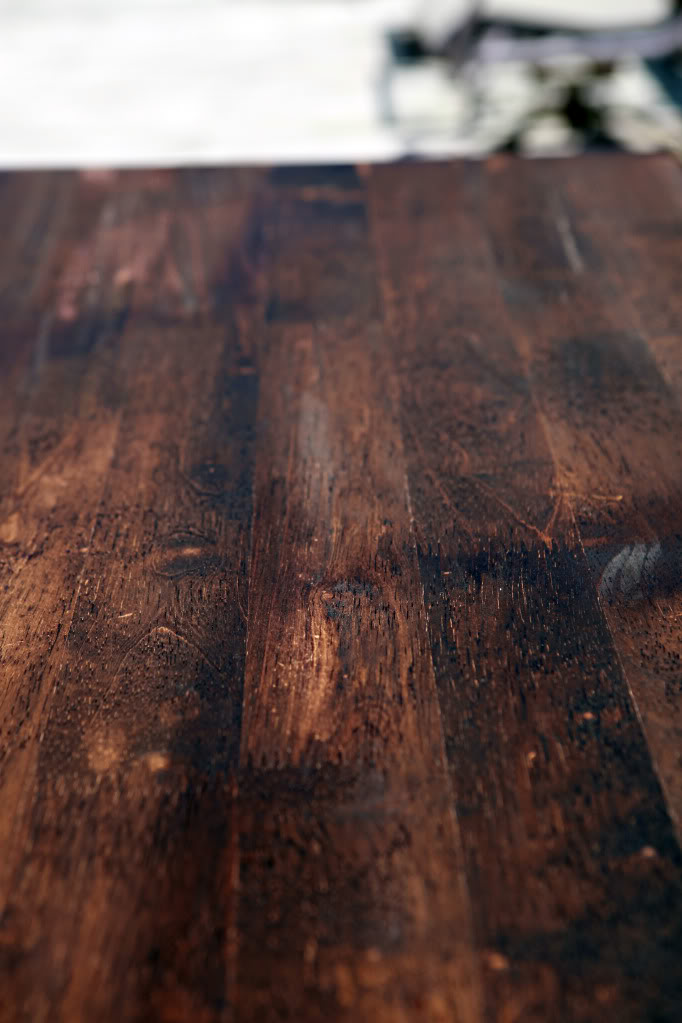
The bits of yellow that are peaking through is where the poly wasn’t removed good enough with my sanding. I love it though. I figured that if this happy little accident hadn’t happened, then I would WANT to try my hand at recreating it.
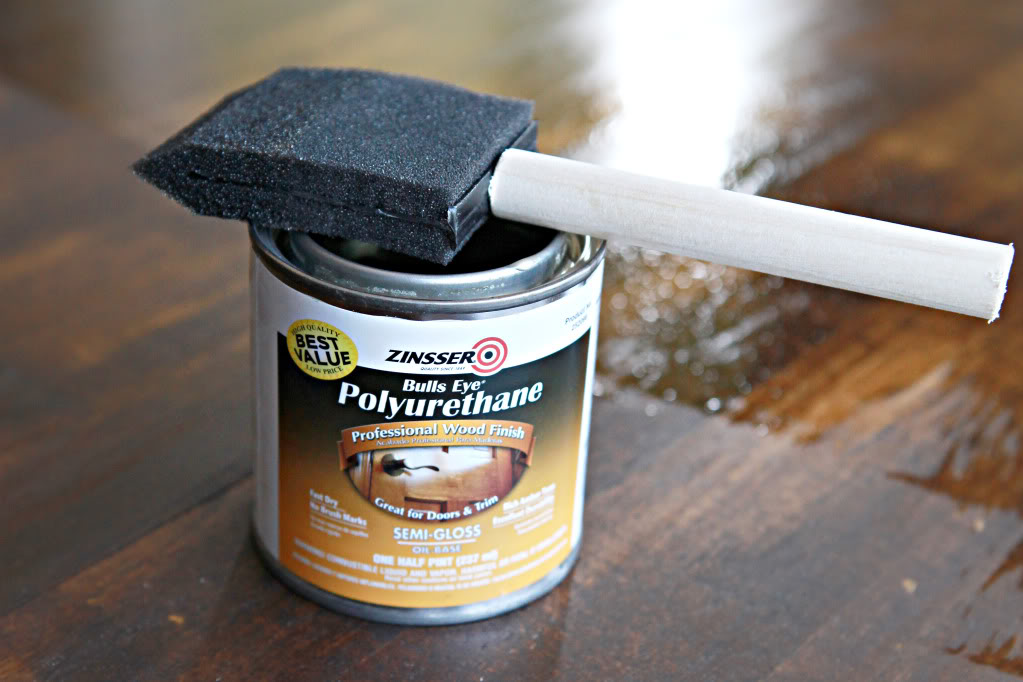
Next came Poly. I must admit, My name is Katie and I love oil based polyurethane. Yes, it is annoying that your foam brush dries before you can do two coats…but it is well worth it. I love this Zinsser type that boasts that it will warm up your wood.
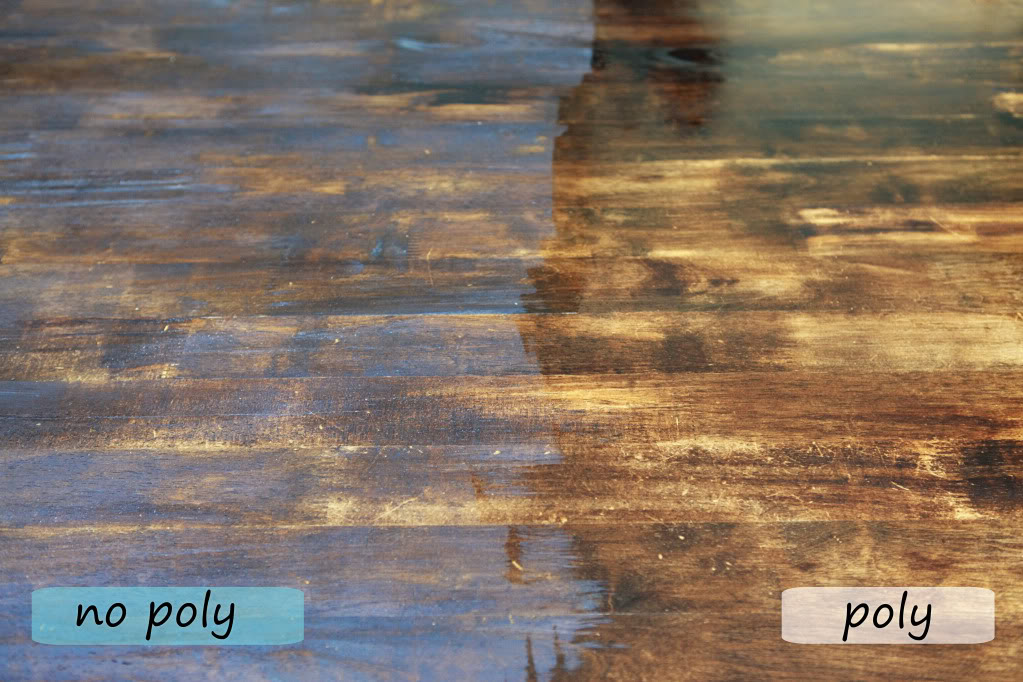
Oh boy did it?! See my side by side comparison. Crazy huh? The polyed side really does make the wood look richer and more finished…and it got rid of that blue hazy look…
And my finished little table top in tip-top shape. Please note that the eliptical and baby usually aren’t there for photos.
I must say this…here’s my secret for awesome finishes….sanding in between coats. If it is a painted piece of furniture – SAND between the coats of paint. It makes a difference. If it is a stained piece of furniture (like this one), SAND between the coats of poly. Use, and watch yourself here because this is hard to remember, use…BETWEEN-COAT SANDPAPER. So uber clever…those sandpaper-naming-people.
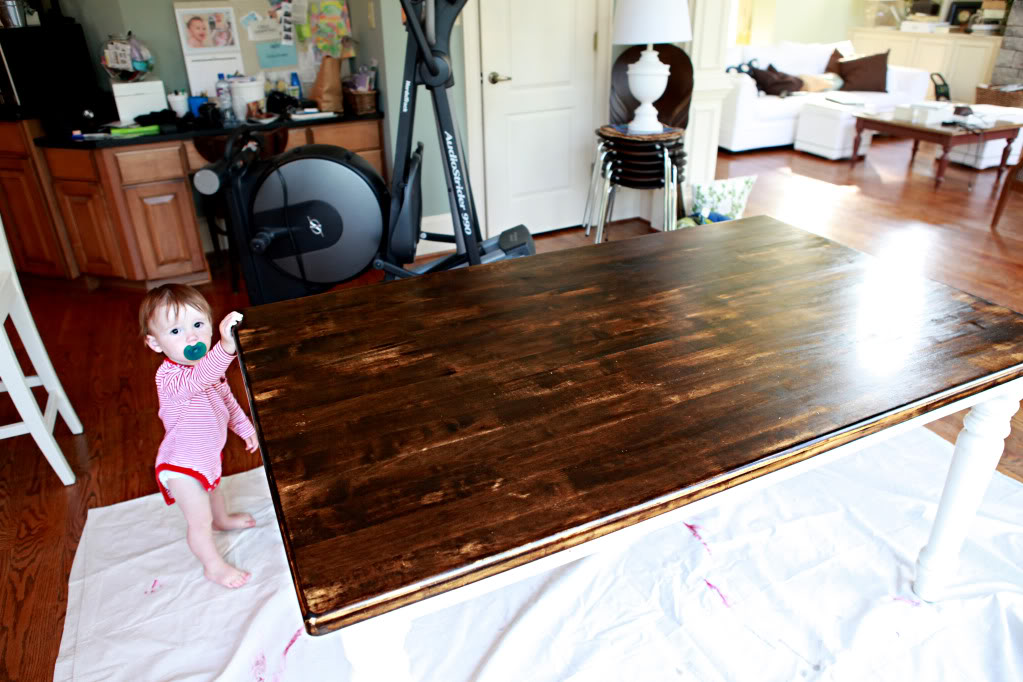
Another gratuitous table shot…this is after three coats of poly as they dry…
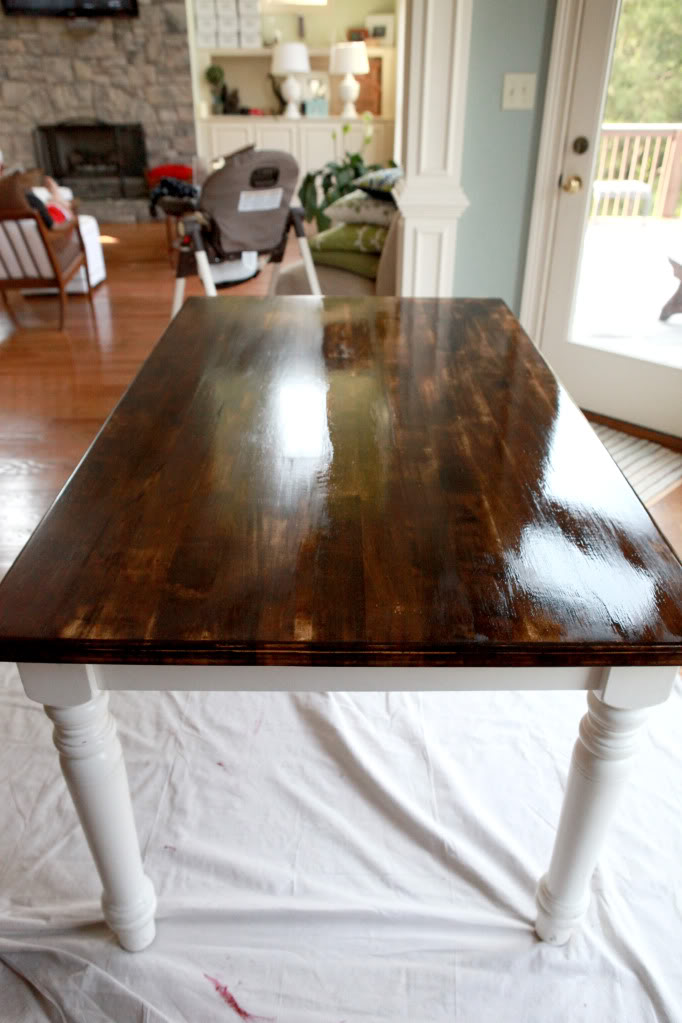
So there you have it folks – one little bit of True Value supplies to create an amazing new table.
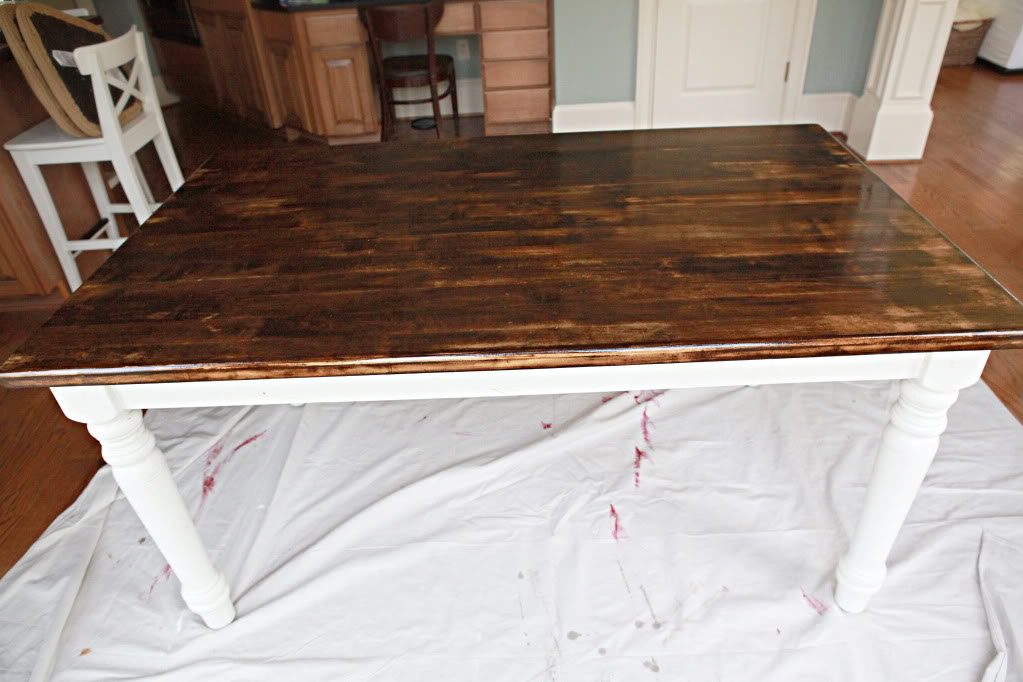
Obviously this space isn’t finished though….
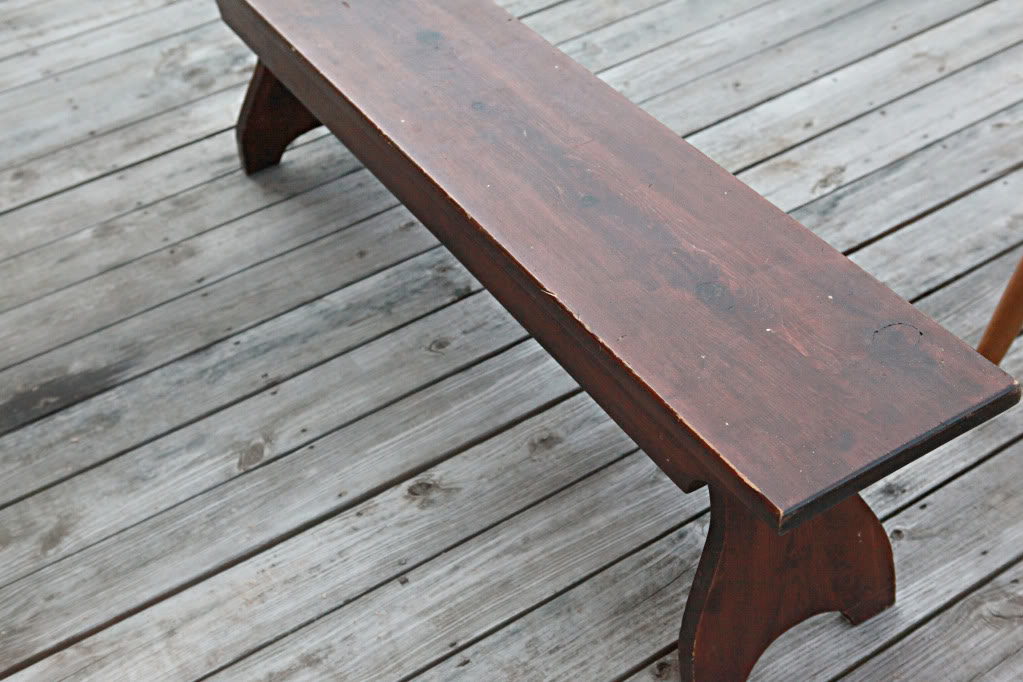
I still have the GoodWill bench that I made over:
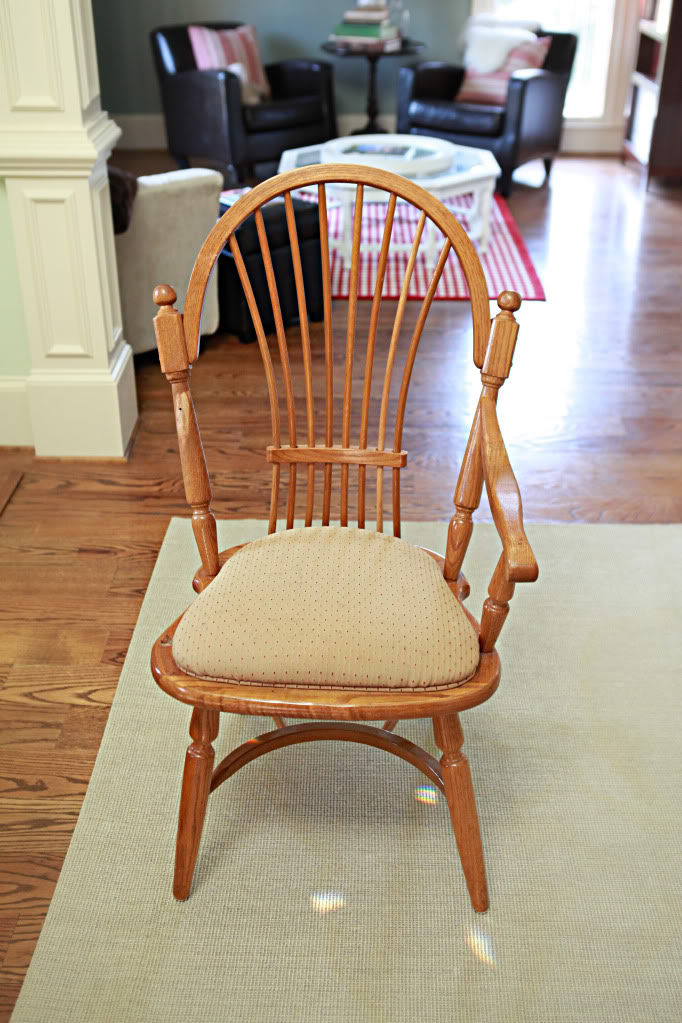
Oh and my chairs that were handmedowns from Mom….
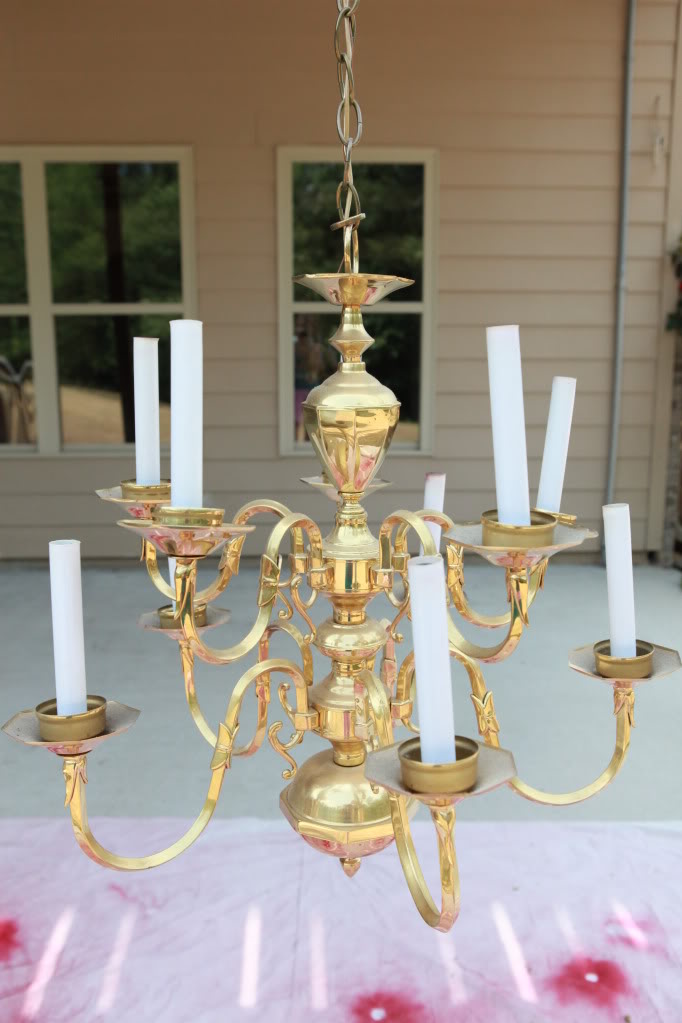
oh and the crowning glory of our eat-in area…the golden chandelier…Lumiere. Yeah, I watched too many Disney movies. (note how I used past tense…when really I should use present tense).
So there you have it – me striking TABLE off my To-Do list….and moving right along. Have you ever redone a table? Did you love it after…did you two-tone it? Any happy accidents? Spill…(PUNNY!)
Update : Looking for more info on something you see in our house? We have a Shop the Bower House page with paint colors and links to accessories, furniture and decor!

Oh, Katie, I am in table refinishing hell. I have on that looks alarmingly similar to yours (plus a leaf) that appeared to be solid wood as well. I checked the bottom of the table top for grain, just to be sure! Alas, sanding revealed it to be veneer. And I’d sanded straight on through it. Right now I’m building a new table top a la Anna White to attach to my awesome base. It went from a weekend warrior project to a never-ending nightmare. She better be pretty when I finish with her!
(Oh, and I am doing a walnut top with a greenish-grey base sprayed using the Montana spray paint line. I’ve painted and glazed the base and I LOVE how that turned out.)
Love that stain! We’ve used an Olympic Gel Stain for all the rooms we have gutted, and now its unavailable in our area (huge alligator tears)… =( And I haven’t stained any of the trim because I’m terrified of using a non gel stain. Majorly backed up in the trim department becuase I’m a pansy when it comes to new stuff. And it doesn’t help that 3.5″ red oak trim and 6 panel doors are a little expensive.
I just did one —
http://thetwoodsfamily.blogspot.com/2011/06/big-green-lantern.html
Yours looks great!
Looks great!! I am loving how “easy” and the minimal cost it takes to change a table.
Katie this looks awesome!! Have you ever tried to sand and stain IKEA furniture? We love our Ikea kitchen table (that we got for half price on Craigslist) and I would love it if it was darker. I pinned a few pictures from this post on Pinterest! Thnx for sharing!
OMGOSH that is super gorgeous!
I need to redo my kitchen table but it’s too darn hot here to schlep it outside (or in the garage for that matter) to work on it. I’ll have to wait for fall. I want to know what you’re going to do with the chandelier. I bought a brass chandelier at a thrift store for $10 and spray painted it aqua to go with my 50’s kitchen. I love how it turned out and it was really easy.
thank you for making me laugh every time I read one of your posts! seriously, it makes my day! and the table looks beautiful. 😉
LOVE that refinish! I’ve got a table I need to try this with!
I have the exact same tired ol’ table! You’ve officially inspired me to refinish the top, but I’d also like to paint the legs. Any pointers?
Wow, it looks amazing! The darker wood looks so good with the white base – I can’t wait to see the rest of the room once you get it done!
Hi! I know you were asking Katie, but I have sanded down and re-painted an Ikea table before and it worked just fine! Ours was a pine table, so it might be a different story if it’s not real wood, but it definitely can be done!
Wow – it turned out great! I have a $10 bench I think i’m going to do this weekend. Hope it turns out as nice as your table!
Katie – love how the dark stain turned out – especially with the white legs. And thanks for the tip of sanding between poly or painting – I never knew that! Can’t wait to see how the chairs and chandelier turn out!!
The table turned out beautiful! I have a vanity & chair that I wanted to stain but the wood isn’t nice enough. We’re going to finish stripping the paint and then paint them a nice new color. I’m thinking robin’s egg blue… but who knows.
Oh, and I got a real kick out of your birch joke.
Sure have! We were bought a table at a yard sale… without being asked if we wanted it. It was that orangey color from the 70’s/80’s. The table itself was rectangular, but it has oblong wings screwed onto it. First we took off those oblong wings and it looked better already! Then we sanded and stained it Minwax Dark Walnut. We love the way it looks! Now we just need to do the chairs…
I’m working on repainting the base of an IKEA island, too. Taking it from white to turquoise. So far I’ve sanded and primed. Wish me luck on the next steps! 🙂
“Birchy.” haha Good job! and you even look super cute in your sanding photos. Not fair. xo
I actually just redid a table that is pretty much the mini (coffee table) version of yours, and did the same dark walnut/white legs finish that you did! I love it and i love your table too, i bet it will look awesome when the chairs are all done : )
I just redid a round table in our apartment. Our small space on the third floor (and no balcony) made completely sanding the finish off impractical. I used a gel stain by Minwax for the table top, and painted, distressed, and glazed the pedestal base (also with the gel stain). I have to say, I was SO IMPRESSED with the gel stain. I also used it on my two-tone china cabinet, hoping to get the yellowy pine to match the now dark walnut table top, and after two coats the two are playing very nicely together! Woohoo! I thought that I couldn’t refinish furniture inside my apartment, but besides getting a little high from stain & paint fumes, I happily discovered that it is possible… Take heart, renters 🙂
Love the table – it looks great. I want to tackle painting and staining projects, but I’m a newbie and totally intimidated by it. I’ve heard the tip about sanding between coats a lot though, and that’s a new one to me, so I’m glad I keep reading about other people’s experiences. 🙂
Also, I have to ask, did you cut your hair? It looks shorter compared to your picture from Memorial Day, but I wasn’t sure.
The dark looks great. I can’t resist though…the perfectly stacked books on the table in the background of that chair picture. HOW do you do it? Our toddler would have those books scattered all over the floor in less than a minute. 🙂
Looks amazing. We have that exact table, and I’ve been waiting to see how yours turned out before I attempted redoing mine. Guess I’ll get started tomorrow!
Love the table… and saw you on the Nate Burkus show again today 🙂
Wow the table looks great!!! How do you find the time to do all this stuff?!
Did you go a little shorter with the do?? If so I like it!! Umm yeah I kinda love your blog 🙂
Love the new look of the table!
I recently redid a coffee table in a poly/stain from Minwax – Bombay, I think. I love the look and I love that it still allows the grain to show through.
Oh, and I sanded between coats and completely agree with you – it is a crucial step.
Love the table!! The dark stain is just beautiful. I want to re-do our dining room table but it’ll require us to build a new top I think so it’s a bit of a larger project.
Your birch joke made me and my hubby giggle.
Why’s it important to sand between coats of polyurethane? I’ve never stripped and re-stained anything before.
Does this type of poly hold up to heat, cleaning chemicals etc.? About a year ago I redid our table and the poly is slowing peeling off due to cleaning iwth antibacterial spray and whenever I set something hot on the table (even with a hot pad) it gets all tacky and starts to rub away. It’s a hot mess now and I need to redo it but afraid of having the same problem again. Any thoughts/ideas?
The table is perfect! I am so ready to see the bench, the chairs and the chandalier!
Well, there are microparticles that get on top of each coat or between each coat…after you sand, after you stain, basically the entire time you are refinishing a piece. Those particles are what cause a slightly bumpy finish…when it’s all said and done each particle is multiplied by like ten with all the buildup of stain/paint/poly. So sanding in between helps diminish those particles and creates a smoother more finished surface. Hope this helps!
xo – kb
Katie,
The table looks BEAUTIFUL!! I am dying to try something like that now!! Way to Go!:) Can’t wait to see how the rest turns out!!
yaaa….I have a dresser I ‘refinished’ with little bumps and nubs to prove that you really needs to sand between coats. Too lazy to re-refinish it. 🙁
LOVE the new table KB. I DO love your house posts…but you are my photography guru. I KNOW you call yourself an amatuer….but now that you own your own business, you may have to upgrade your own status. 🙂
How about another photography ‘assignment’? I always feel like I learn alot about my own camera when youve given us assignements. You know…in all your ‘free time’ with a toddler 🙂 haha
One of the very first pieces of furniture I bought was a table and chair off Craigslist. It was crazy cheap (I wanna say $15). It was two tone but I decided I wanted to paint ALL of it chocolate brown. At the time I didn’t realize that the white portion was the factory paint and that it would be ridiculously hard to sand off. My mom, husband and I all poured hours and hours into sanding that table and chairs. We got it down to the bare wood and then repainted the whole thing. I think we figured somewhere around 70 hours went into that table. RIDICULOUS! That table is officially always moving with us no matter where we go.
I LOVE the new look of the table. I adore darker finishes. I feel that they make things look more classic and expensive. I am about to start refinishing a dresser I bought off Craigslist. I was planning on using Polyshades. After reading this post I remembered you had used it before as well. Which method do you prefer, Polyshade or stain and poly? Why? Thanks!
hey katie! i just wanted to say that i love your blog and find your sense of humor HILARIOUS!!! also, i have had a table and chairs i picked up at a garage sale about 3 months ago sitting in my garage, having NO idea what to do with it. i really appreciate your post (and for making it seem like a totally doable project!)
Helpful and inspiring. I have two tables I am eager to make over, but as my husband reminds me, we have bigger house issues to take care of first, like selecting a contractor so we can move ahead with our renovations.
Love the way the table turned out! I have a few chairs that I want to redo but haven’t gotten the courage!
Hi,
Great job!
What happened to the newly purchased blue and white rug in your family room?
Thanks for sharing,
-Kathy
We have the same project on our list! Thanks so much for the great tutorial. Your table looks AMAZING! Can’t wait for the reveal of all of the pieces working together, I know it will be truly fab!
Have a happy holiday weekend!!
xoxo,
Jen
It wasn’t there?!?
Just kidding.
It just so happened that these posts aren’t revealed as they immediately happen…so through the magic of the internet, this old post finally went live to share my table with the world (the rug was bought after I did this table)….
my rug is safe and sound in the living room!
xo – kb
The table looks reall great. You did a good job sanding it down. I always find that the hardest, to get any surface perfctly smooth.
I have no idea…
I have had no issues with it in the past…but I hear that poly has to have plenty of time to seal & dry. So I would recommend between coats that you give it ample time to really firm up. I use Clorox wipes on mine without any trouble…and hot stuff (sometimes even without a hot pad…) and had no tacky rubbing issues…so I would definitely recommend starting over and removing all the old poly.
Wish I could be more help!
xo – kb
Hi KB! Great job on your table. I so need to do this, but I am afraid I will lose my table for a week. How long from start to being able to use your table again did this take??
Thanks for making me laugh “birchy” ~ha!
I actually just refinished two two-toned pieces last week: a small side table and a night stand. I haven’t posted pics yet, but will within the next few days 🙂
Your table looks great! I think it’s the same table we have our dining room 🙂
Looks great- I am in the middle of refinishing my coffee table- have all the same stuff too!
Only problem is that mine has some sort of rediculous coating that has taken me ages to sand off 🙁
I gave up after a half hour of solid sanding…Ill try again this weekend
PS; Im soooo jealous its summer time for you guys- I want shorts and t-shit weather again!
xx
Elle
*Shirt* haha
Well, it took me about 35 minutes to sand…15 to stain and rub…then I had to wait till it was fully dry to put the first coat of poly…I had it outside in the GA sun…so I waited till that night…then I put the first coat of poly. I waited about 24 hours till doing the next coat…then another 24 till the final…so all in all, I was table-less for about 90 hours from start till finish…I think…but I’m not good at math.
xo – kb
Your table redo is great! I never knew that you could sand between coats of poly.
My husband recently re-did (?) our kitchen table and used tongue oil instead of poly. We’ll have to see how it holds up. I’m a little scared.
Hi Katie,
I bought a table and 6 x-back chairs on craigslist several months ago for $175. I had been coveting a very similar table and chairs from PB for 10x the price! It was a light oak color and I wanted an espresso finish. A newbie to all things DIY, I began sanding…..and sanding…and sanding. The table and chairs now sit abandoned and unfinished (and my dining room is empty!). I gave up after trying to sand those x-back chairs–the nooks and crannies seem impossible to sand. Do you have any tips for sanding those hard to reach places??
Wow – I am continually amazed with your furniture transformations! You really make it look so easy!
I have some old Ikea pieces laying around and I’m inspired to save them 🙂 Do you have any advice for painting Ikea furniture that is not quite “real” wood? Wondering if I could skip sanding and just go straight to oil-based primer, do I even need the primer?
Can’t wait to see the after shots of the other pieces from this post!
You definitely need a primer – especially if you are painting a slick surface. The primer will help the paint adhere to the surface…and give you a little bit of a clean slate for your top coats!
xo – kb
Sometimes I fold the paper around the wood and hold each side of the sandpaper with a hand – then I go back and forth kinda like a pair of hands milking a cow. Does that make any sense?
xo – kb
Kaite, di you repain the table base too or just refinish the top?
I’ve been inspired to finally redo the table we were given almost 2 years ago 🙂
Hi Katie,
So, for your table top – did you do 1 or 2 coats of stain? How many coats of the polyurthane did you do? By your comment, it appears that you did 3? Is this for the best seal? I am starting my table makeover this weekend. I am so excited to get started that I can barely stand it! 🙂 I think I am going to start my sanding tonight.
Finally, did you do just one coat of spray paint on your chairs? Or two?
Thanks again..
Love your projects, thanks for sharing!
I think I did three…can’t rightly remember right now…but I think three thin coats. And I did it because this is a highly used area – so it would require more poly for a better wear and tear. And I did two coats on the chairs 🙂
xo – kb
Wow, this turned out great!! I love the two tone. I’m getting ready to sand and stain a kitchen island, so these were great tips! Can’t wait to see what you do with Lumiere! I’ve had the itch to take an old brass chandelier and shabby chic it up.
Thank you for your inspiration. I’m going to tackle my table this summer!!
After the final coat of poly, did you sand or buff? Just finished my table and the poly (semi gloss) looks a little dull
No I didn’t. I’ve heard that you can take a brown paper bag and use that to get rid of any grit but we didn’t need to.
xo – kb
I just had a question. I’ve never refinished a piece like that. So do u apply the first coat of stain, let dry, then sand and stain again. Keep repeating with several coats then varnish? I would love to know all the extra details so I can plan a refinishing project on our kitchen table. Thanks
Yes. You got it. It’s stain, wipe, dry, sand, clean, repeat until poly.
xo – kb
Hi Katie! I love what you did with this table and I’m attempting to try my hand at doing this to an identical table I got off Craigslist. Can you email me step by step instructions on everything you did as this is uncharted territory for me and I want to make sure I don’t skip a step. Thanks and looking forward to hearing from you!
This post has all the instructions! Feel free to forward or pin it!
xo – kb
This post is exactly what I need! I am going to attempt this with a hand-me-down table I got from my grandma that has seen better years. 🙂 Thanks for this!
I just bought the exact table at a yard sale. I am going to attempt what you have done. Before i begin I want to make sure I get information right… did you apply a coat of Poly then sand and then apply another poly coat on top?
Yes. Sometimes you can Poly and then use a SUPER fine sandpaper (even just a brown paper bag will work) to smooth out the little raised dust bumps 🙂
xo – kb
One last question… Did you use the sander or sand by hand? I am at that point int he project and not sure :/…….. Corina
I have the same table that I’m refinishing right now. Going with Dark Walnut also. Did you use a wood conditioner before staining? Every website that I’ve found says to use one for more uniform look but I LOVE the look of your table!! If not, have you ever used a wood conditioner before? Your thoughts? And I know you used several coats of poly but how many coats of stain did you use? Thanks!!
So you didn’t use a wood conditioner before staining? Almost every website that I’ve seen says to use one for a uniform look but I LOVE the look of your table! Have you ever used one? Your thoughts? And how many coats of stain did you use? Thx!!
I sand the poly by hand…
xo – kb
Nope. I know that wood conditioner makes it have a much more uniform look…so that is definitely not something I was going for. Hope this helps. And the coats of stain was like two solid coats but three would have been fine too.
xo – kb
Could you tell me what paint brand/ color (blue) you used on the walls?
-Thanks!
That color was here when we bought the house so I don’t know!
xo – kb
Hi Katie, I bought the same table but way worse shape and I spent more for mine 🙁 I just sanded today with 80 grit first because my sander didn’t come with 60 grit. Then I went over with 120 but I did not get the same results as yours? There is blue pen and rings from what looks like hot pots were left on table and they didn’t really come out? Any suggestions?
Thanks so much,
Nicole
Keep sanding. Eventually you will get to a point where all the marks will come out. If you need to get more up, you can always sand by hand too 🙂
xo – kb
Thanks I think a lot of it has to do with the sander I have not a belt sander! I am now onto staining and only one coat so far. I decided to use wood filler so now I am just hoping with a few more coats I will not see my wood filler! My Dad says I just need to be patient and take my time…crossing my fingers it will all work out!
Thanks Katie 🙂
Love the table!
I’m seriously contemplating striping the top of my ($75 on Craigslist a few years back, woo!) black table and staining it. I actually like it black, but the factory finish is a bit beaten up (from my previous owners plus a few more years from us) plus the black finish turns white when it gets wet – and it stays permanently white if the wetness is left too long! Not good for two clumsy adults plus a toddler who will be out of her highchair in not too long!
My only hesitation is that I don’t know for sure if it’s solid wood on top. However, it’s from World Market originally and it seems like all of their tables say they’re solid wood. I guess if the worst happens and it’s not solid, I can always paint it again!
How has your poly held up on the table?
Ours has held up well…we do have a few marks where Jeremy bears down on the table really hard to write a check or something like that…but those minor indentions aside, it still looks pretty new and cleans up well.
xo – kb
I cannot find that exact polyurethane. Where did you purchase it?
I think Lowe’s. Maybe Home Depot. Those are the only two stores around me so I figure it’s probably one of those.
xo – kb
OK….I love what you did..and think I might try on our dinning/kids craft table….
But first can you tell me what brand/type of sander you are using….I am compiling a list of supplies needed.
Ours is just a regular palm sander and since this post aired, the sander died. So now we have a new DeWalt sander 🙂
xo – kb
Hi Katie!
I have this exact table (pretty sure anyways) and I’m looking to refinish it as my very first DIY project! I’m wondering if you have any idea what’s underneath the white paint? Thinking of refinishing the entire table that beautiful dark walnut color if it’s all the same wood underneath – otherwise I’ll most likely reprint the white since it’s very old and chipped.
Thanks!!
I have no idea. I would recommend just looking under the table for an area to sand to see if it is different 🙂
xo – kb
Hi there,
You say you sanded in between poly coats, did u wait for it to dry? Did it take a while for the poly to dry? Thanks super excited to do this. Also is your table 60in. Long?
Thanks,
Steph
Yes. You wait for the poly coat to dry (usually about 24 hours) and then you take a 400 grit sand paper to it, wipe clean, tack cloth it, then you can recoat.
And yes…I think it is.
xo – kb
We have the same table and are copying your look. Love it. Two questions: 1) did you spray paint or paint the legs? 2.) we have the chairs that match and the seats are the same light wood would you recommend sanding those down as well and staining dark? Thank you
I just painted the table legs with a regular brush. The chairs might be harder to refinish dark…so yes, if you have a ton of time on your hands, go for it but if you don’t, I would just paint to match the bottom of the table or mix it up with a bright color.
xo – kb
I’m a newbie at this so I apologize for all the questions. Would you sand the legs of the table first before painting them? Also I do not have a lot of time so a color on the chairs would be a wonderful idea. Would you sand the chairs first then spray paint them or use a brush? The seats are exactly like the table top and the back and legs of the chairs are white! Thanks again!
I would rough up the legs a little bit with sandpaper and definitely make sure they are clean. And I would probably use a brush on the legs.
xo – kb
I am going to attempt this project this weekend. I have a very similar table and chairs to match. Wondering your opinion on staining chair seats to match top of table? Or leave all white? Thank you so much for the step by step directions by the way!!
Could look great!
xo – kb
Hi Katie,
I’ve come across several of your posts (initially from Pinterest I think) as I try my hand at my first refinishing project (a 70’s dining room table, chairs, and hutch (solid wood that I originally thought was laminate before my first trip to Home Depot, dang it) that was my husband’s grandmother’s. Anyways, in prep, I kept reading several of your posts for instructions, all the while thinking you look really familiar, but I really don’t think I know you. And then I came across a post where your family was helping (paint your basement I think) and I knew them! From way back…I was the same year at Heritage (was only there for two yrs) as your brother Tim and played basketball with your sister Lori, and your dad was our coach. Ha, small world it is! Anyways, this has been really helpful – thanks! Here goes… 🙂
Small world! I’ll tell them ya said hi!
xo – kb
Hi! This is a great post and thank your for the between coats sanding tip! I was going to refinish my table two toned as well.. but the bottom of mine is not already painted… should I sand everything then paint the under side or can I just paint over the remaining finish on the table? Thanks!
I would sand because it makes everything stick better. If you are planning on painting, then it just needs to have a grit to it to help the paint stick. If you are planning on painting, sand to make it feel like you want it after it’s all said and done (more work).
xo – kb
Did you sand the round sides of the table with the electric sander as well? Or did you do it by hand? I have the exact same table and I love what you did with it! I’m in the middle of sanding mine and will take your advice. My table is scratched and stained as well so looks like I need to go get 60 grit sand paper.
Hi! Do you remember what color you painted the legs? Was it an all white Or an off white? Thank you 🙂
It was bright white.
xo – kb
Yes! I sand all the visible parts.
xo – kb
GREAT tutorial!!!! I have the exact same table but I also have the matching chairs!!! I’m so doing this to my table and the chairs as well!!!
I have this EXACT same table and I was hoping to do a similar dark stain finish. I bought it from Craigslist and it was in pretty decent shape so I ended up just steel wool-ing it and giving it another coat of Poly. Good to know it will be beautiful if I ever get around to tackling it the way I want it. Very impressive!!
How long did sanding take for this project? Beautiful work!
About an hour!
xo – kb
There are different polyurethane’s and all, some are water based with lower smells. My mother loves her kitchen table. However, it has seen its day. Everything from me and my art doing on top of it, to my daughter’s nail polish spills to a lot of chips and looks almost like carved streaks. I was thinking of redoing it for her. I have never done it before- restoration of furniture. I have done things involving wood such as wood burning and painting. For the table to be able to be used for food, is there anything that should be used, or a type of varnish or polyurethane, like is a water based one all right? It’s one of those tables with the bench. We had it for years, but it’s a nice size. When you’re finishing the woods, does the polyurethane matter? Which sanding papers would you say to get before the project is started as well?
A water based poly is considered by the FDA to be food safe as long as it has no scratches or peeling up of the poly. I would recommend that you just sand it all the way back down to the raw wood and then stain and use a few (5 usually is my magic number for table tops) thin coats of water based poly – Rust-Oleum is my favorite brand. Try sanding with 60 grit to start and then double the number (do 120 next, 220, then use 440 between coats). Hope this helps! Happy refinishing!
xo – kb
How did you make it look so good with no brush strokes? That’s the problem I’m having.
Which part Michelle? The white washing part? Make sure you sand the paint till smooth and then you are rubbing after the stain (so no brush strokes there) and then when you put on the white wash, you can rub off any excess with a clean towel. Does that help?
xo – kb
Hello.
Can I use a 220 grit in between poly?
NO!!! That will definitely leave marks in your poly! You will want to use 440 or higher. You can even use a paper bag (no ink printing) to knock down any raised bits in the poly and make that finish super smooth!
xo – kb
Hi that table looks great! I’m wanting to do something similar to my kitchen table and have a question… How long do you have to wait in between coats of poly? thanks! Julia
You just have to wait for it to dry. Usually that takes a couple hours depending on your humidity and how thick you painted it on. Good luck!
xo – kb
Do you know if a table purchase from a big box store like Rooms to Go can be sanded?
It depends on the material. Most of the time those are a laminated or veneered wood, particle board or plywood….so a light sanding is possible. You don’t want to sand all the way through the veneer or you will just see the particle board.
xo – kb
Followed your step by step instructions and it turned out exactly like yours and I love it! Thank you!
Hello Katie!
I wanted to ask you something about the “Tip Top Table” project featured above in this post. By the way, I think your table project came out great!! I have the same exact “Farmhouse” style table, minus the chairs that were falling apart. I got the table & chairs from my son years ago, but over the years that this table has been used…it’s also showing some wear & tear to the top, some of which includes stuff that won’t come off. However, I do like the lighter look [as is now], but have been thinking of refinishing it a slightly darker color & later adding high back chairs. The original chairs were a “Captain” style chair. Not sure of the color stain yet. I do know it has some kind of clear finish on the table top as it’s shiny. I’m also not sure of the wood material. I’m hoping it’s real wood and not that crappy particle board stuff!
Recently, I noticed that some of the table legs towards top of the table top have cracked. Would you suggest trying to repair the legs when I decide to refinish it or just buy new legs to replace them? Thanks for taking time to read my question and I look forward to your reply when time permits. 🙂
Did you end up painting the legs of your table? I want to do the same. But I didn’t see any response from your question.