The laundry room got lost in the mix. Think milk cup under the couch. You may want to save that ten dollar no-spill sippy cup but then you have to deal with the pungent mess inside first. That’s our laundry room. It. is. pungent.
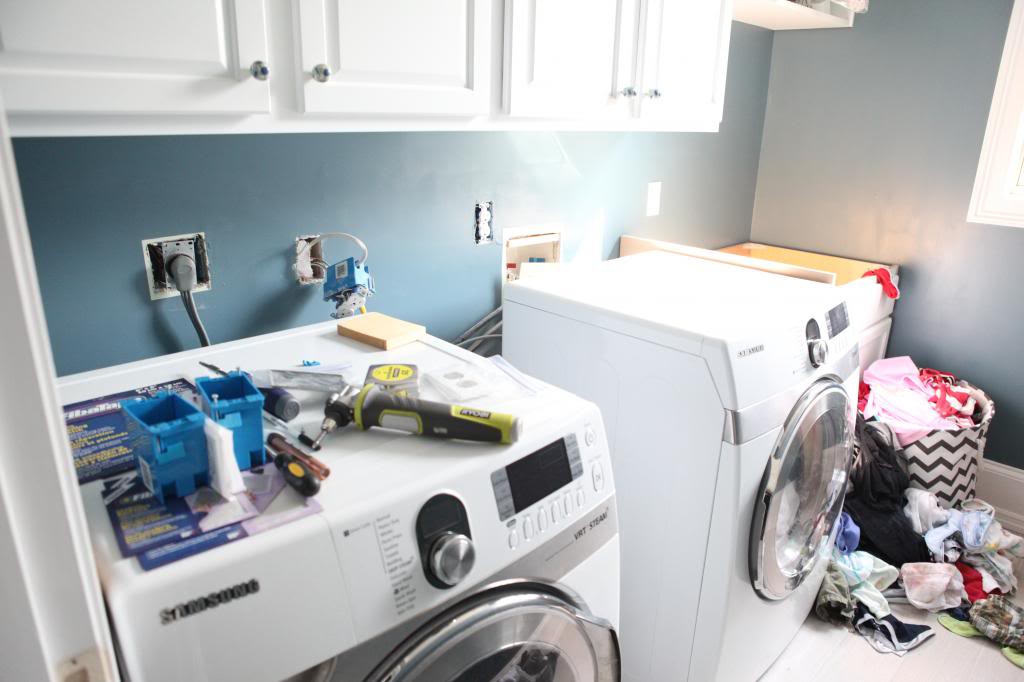
Last time we were in here I swore up and down that I needed a countertop and I was gonna have it before LJ was born. But then I actually gave birth and the countertop fell on the priority list right below cuddling baby and smelling newbornness all day long. This is real life and this is why there are shows called Over Your Head on HGTV. So recently we opened that sippy cup and decided to finish what we started…one gulp at a time.
First we had to move everything out of the way so that we could figure out how to tackle the too-high electrical outlets and the water access.
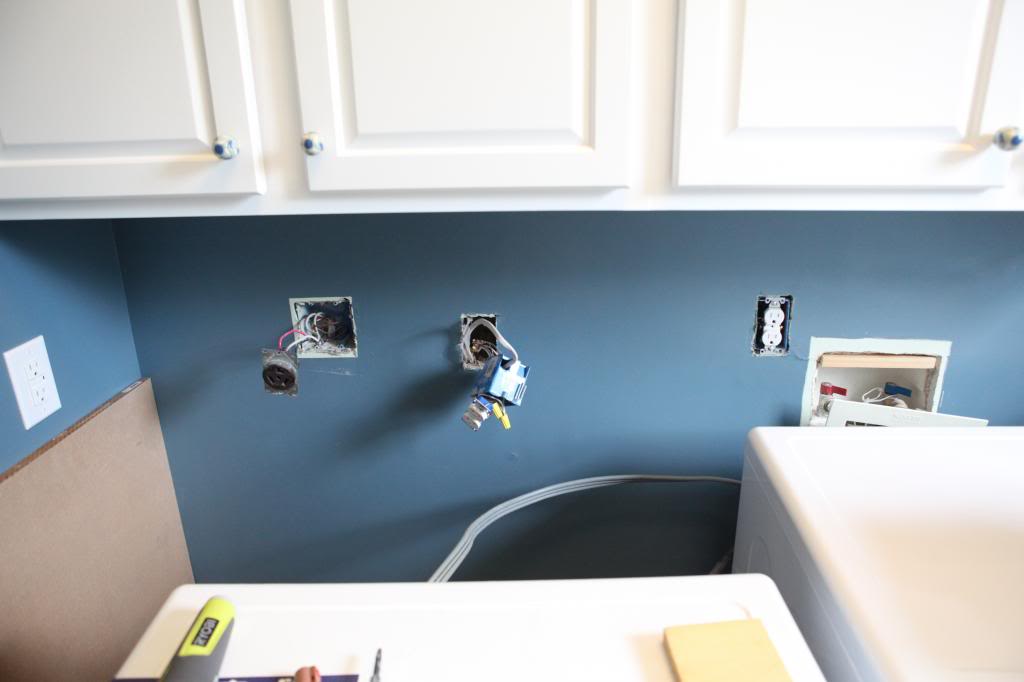
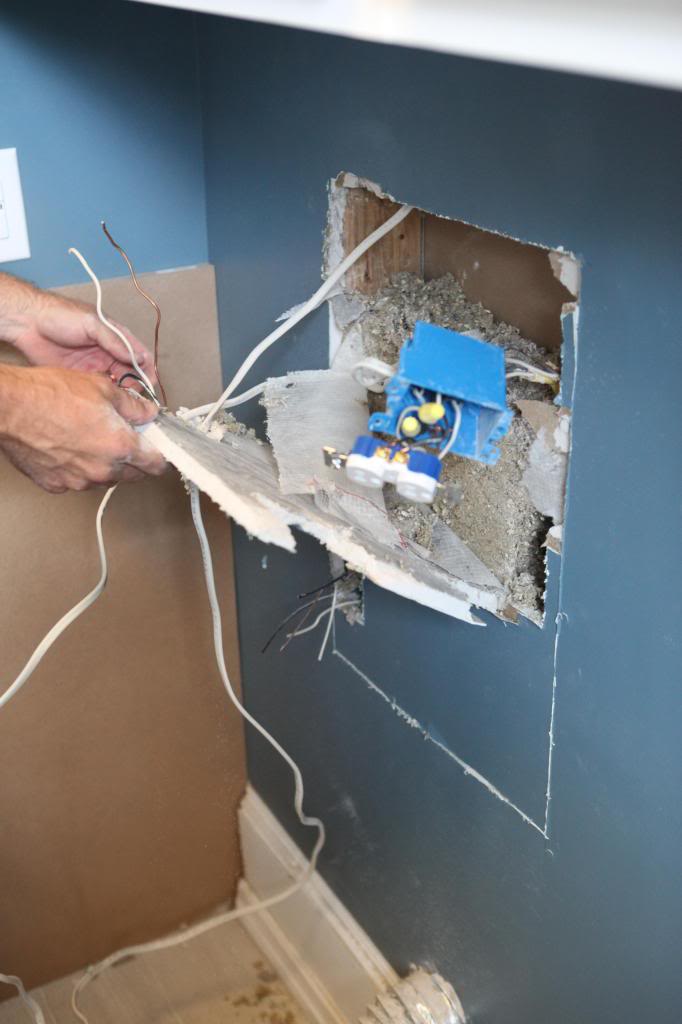
Jeremy did a little wire checking and decided to move the dryer outlet (it’s that big black and metal outlet on the far left) down about twelve inches. So he started cutting a new hole below it and ended up finding a blue electrical box in his path.
A BLUE ELECTRICAL BOX WITH WIRES CAPPED TOGETHER IN IT! COVERED WITH DRYWALL.
Fire hazard. Against code. Big time no-no.
(For those of you that are wondering…the long white wire below is the excess that we pushed down in there from when we wired our hood and we knew then that we would be working on this electrical stuff in the laundry room soon. The orange wire is the one that is for the dryer plug hookups that Jer was running to the lower box. The lowest hole with stuff coming out is the mystery hidden box. And the one on the right is the new box for the outlet that was above the countertop on the right)
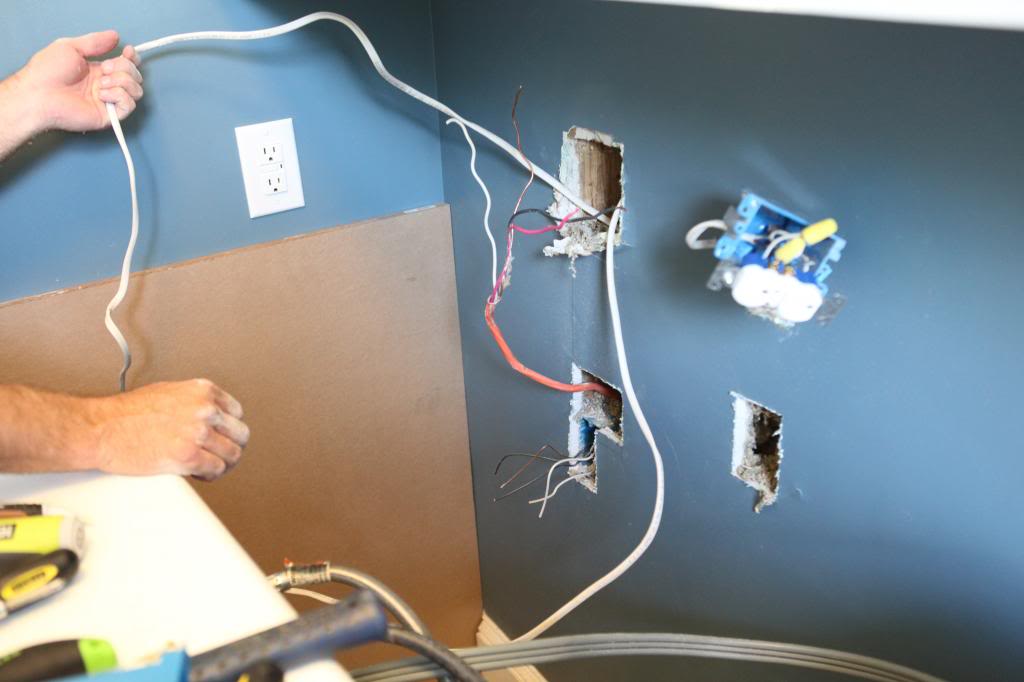
I kinda freaked out for a moment after Jer showed me the hidden box (what other fire hazards do we have in this house?! What kinda electrician does this?! We are all gonna die!). Wouldn’t you?! So instead of trying to cut more holes I just told Jer that we needed to cut an access panel and just dothethang. He agreed.
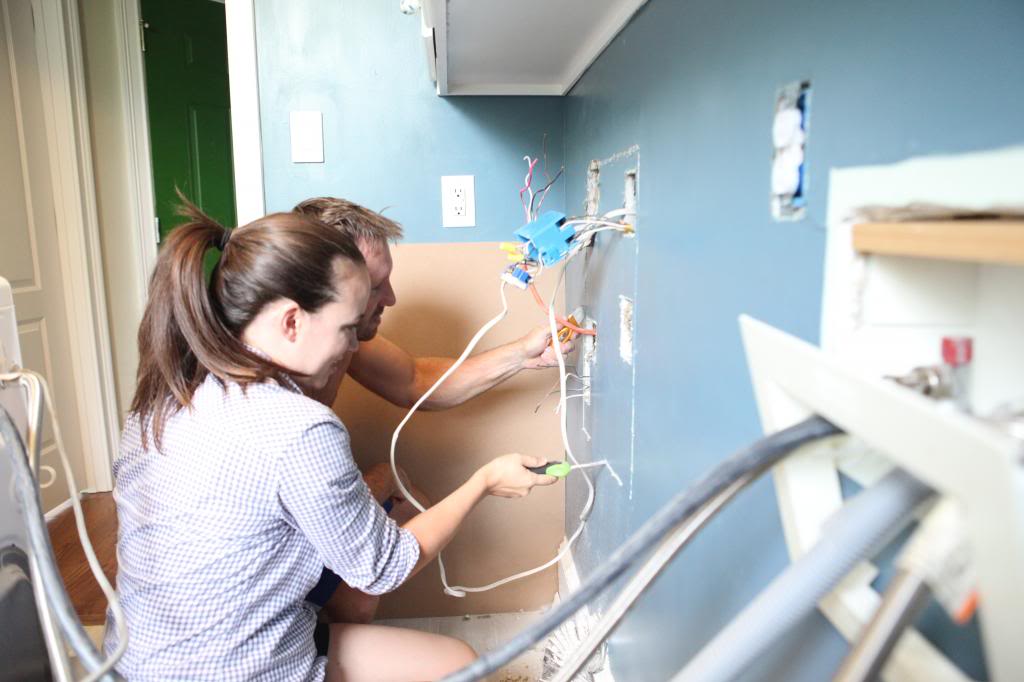
I love that picture above. It’s so us. Jeremy shirtless (because 62 degrees in the house is way too hot for him), me with my bald spot that will just not stop can’t stop, and us joking around about “cuddling with knives”. There may or may not have been rubbing the drywall knife on a face a la Monica Gellar style. It’s no carrot but Jeremy pulled it off 🙂
After the access panel was taken out and the insulation removed, Jeremy removed the rogue box and then put in the electrical box for the dryer and for the outlet. All the excess wire was removed too.
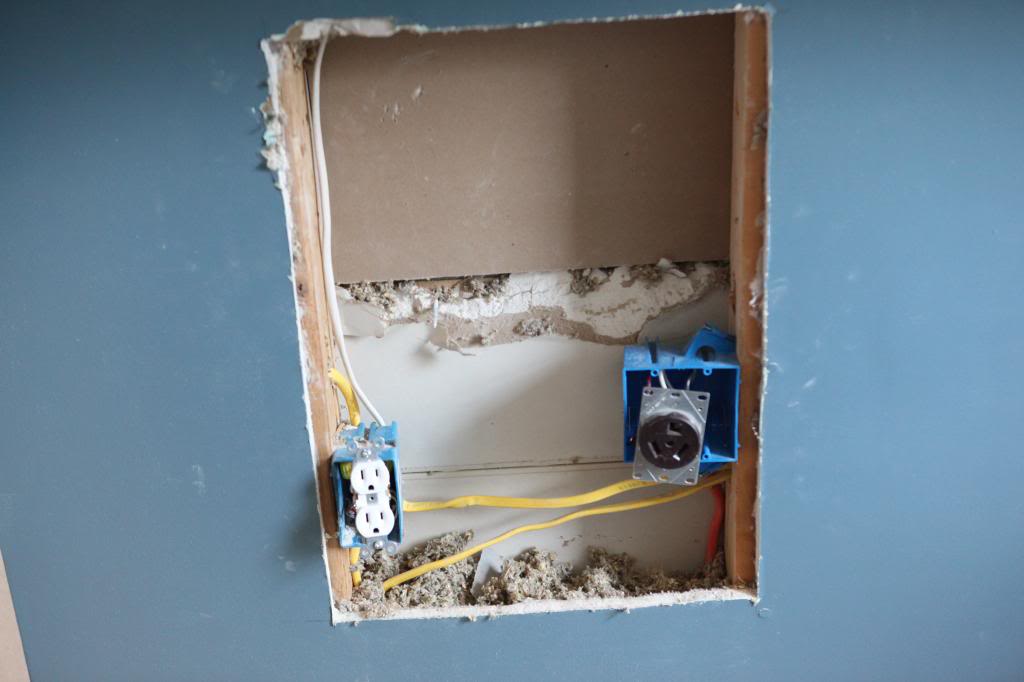
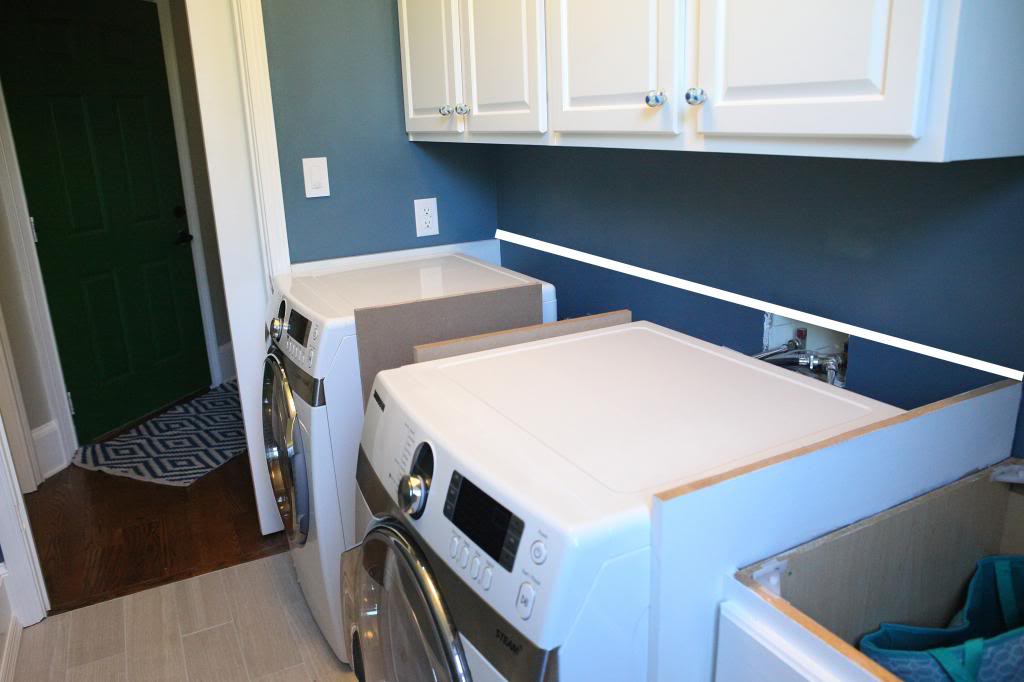
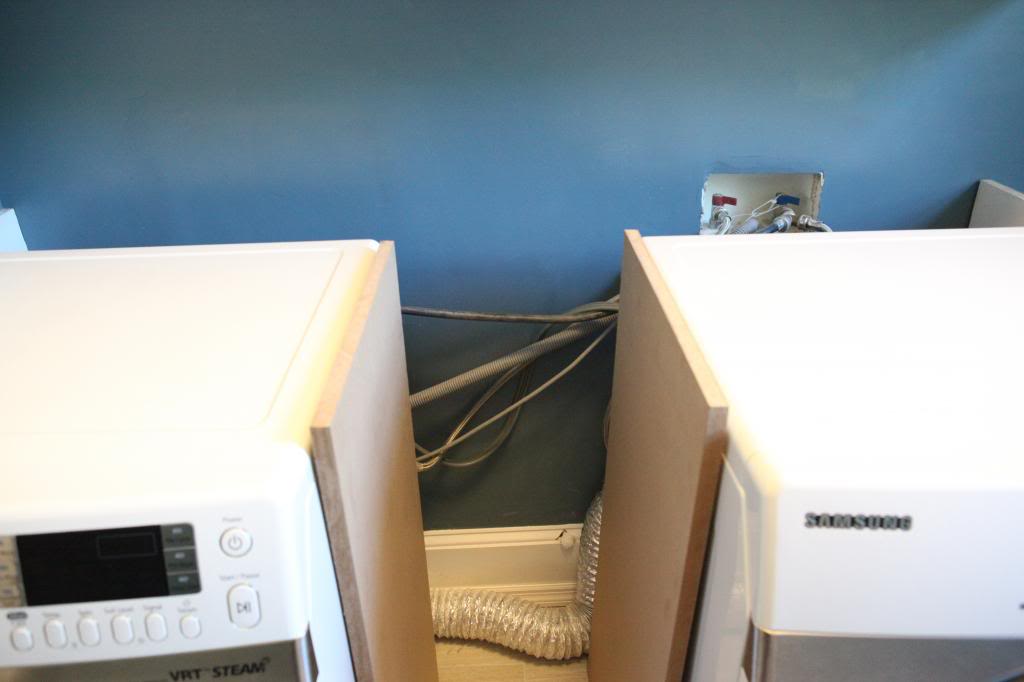
He also moved the box on the far right to be lower. Then it was time to reinstall a piece of drywall with some drywall screws. It’s a hot mess under there with the crazy outlets at every height but it all gets hidden behind washers and dryers anyway. If you have OCD, don’t look. Oh and we figured out how to make sure the water hookups don’t interfere with our countertop…we wedged a piece of 1×3 in the top of the hook ups box and decided that it would be easier to eliminate extra space at the top so that we could have a clean countertop area. This will make sense later.
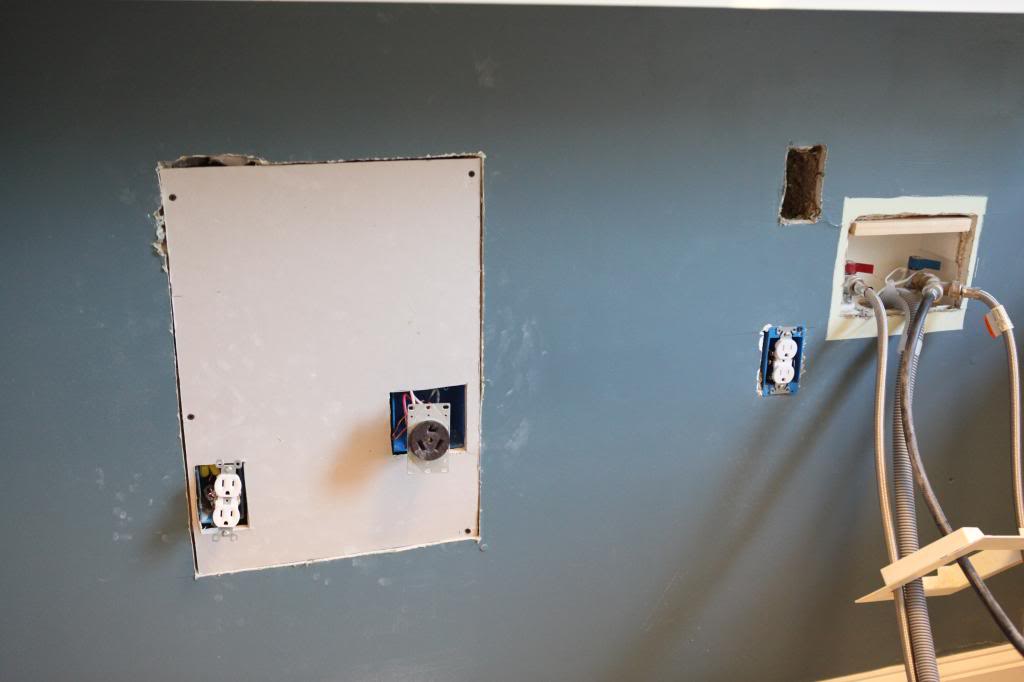
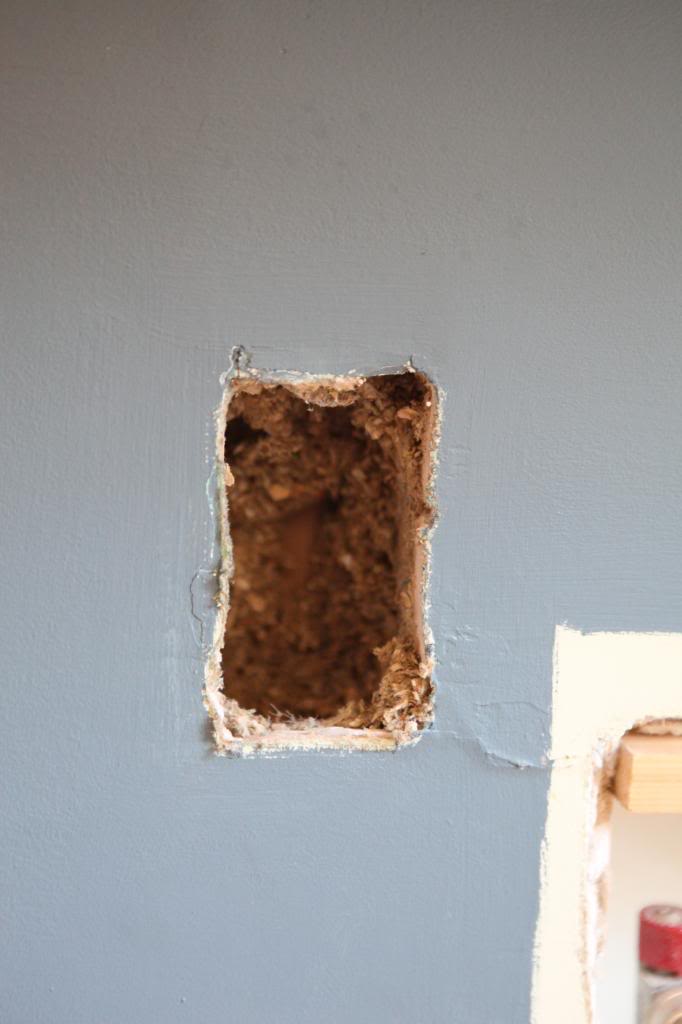
Ok – so after we cuddled our knives, reran everything and reinstalled the outlets – it was time to patch the drywall. This is not the funnest process in the world but we have lots of drywall experience. We did the kitchen and living room in our last house as well as the basement and have had to do our share of punch-holes and random toy through the wall holes….so we feel like we have this process pretty well down. For little cracks like the one below you don’t really need a lot of prep…just scrape anything sticking out off….like a bit of paper or drywall chunks.
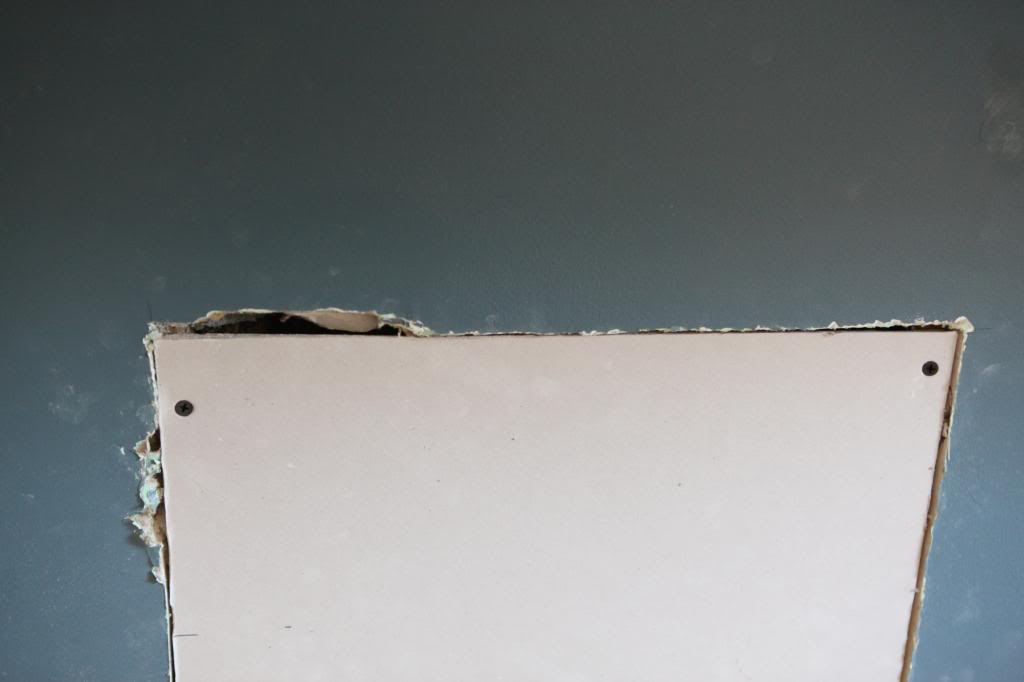
Holes that are bigger, like the outlet box hole, will need a bit more assistance.
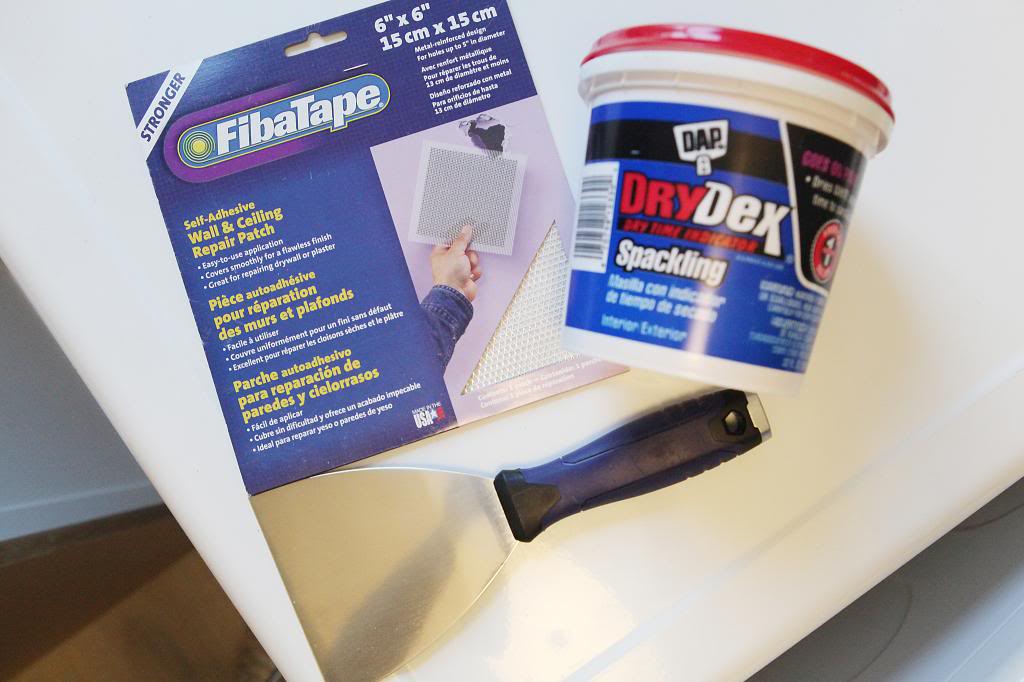
 We like to use FibaTape repair patches and DryDex spackling for jobs like this. The patch is basically a big fiberglass bandaid that you put over the hole and then spackle. The DryDex is like drywall mud but it dries faster and is a little easier to work with. OH and it’s pink 🙂
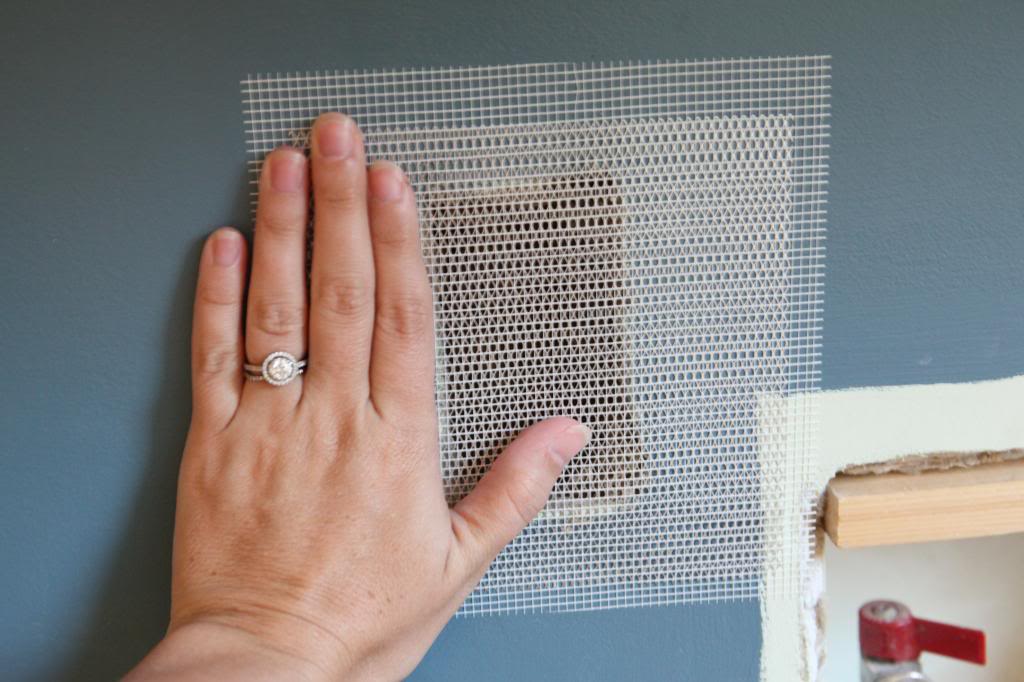
First you put the patch over the hole. It’s really that simple. You just peel it with your gross-fingernails and rub it on smooth.
Then you take your spackle and smear it on.
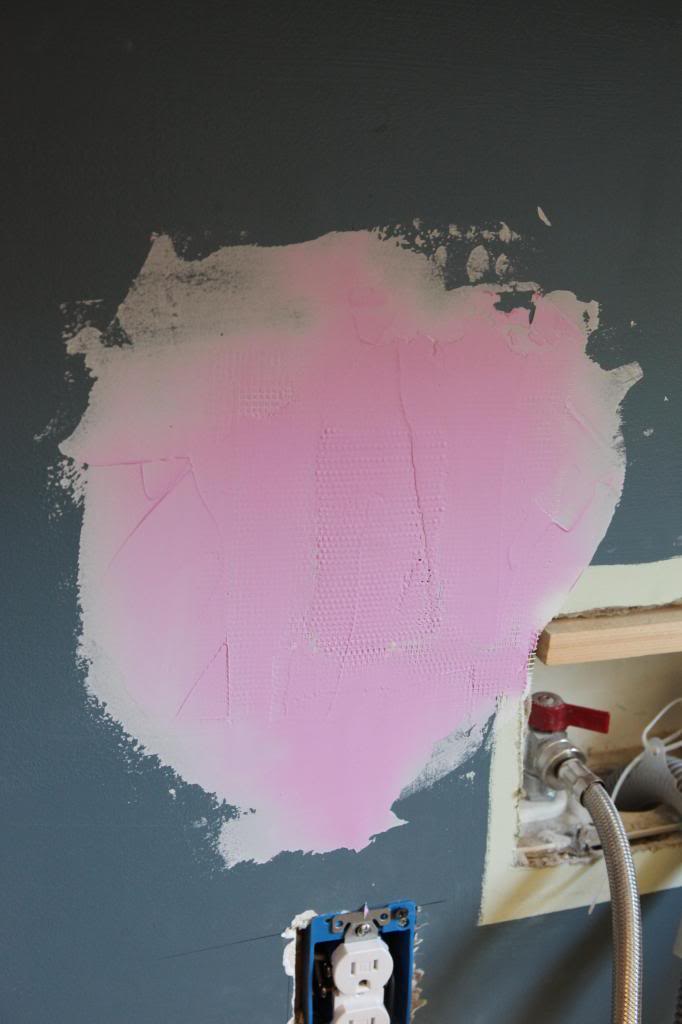
Told ya it was pink 🙂
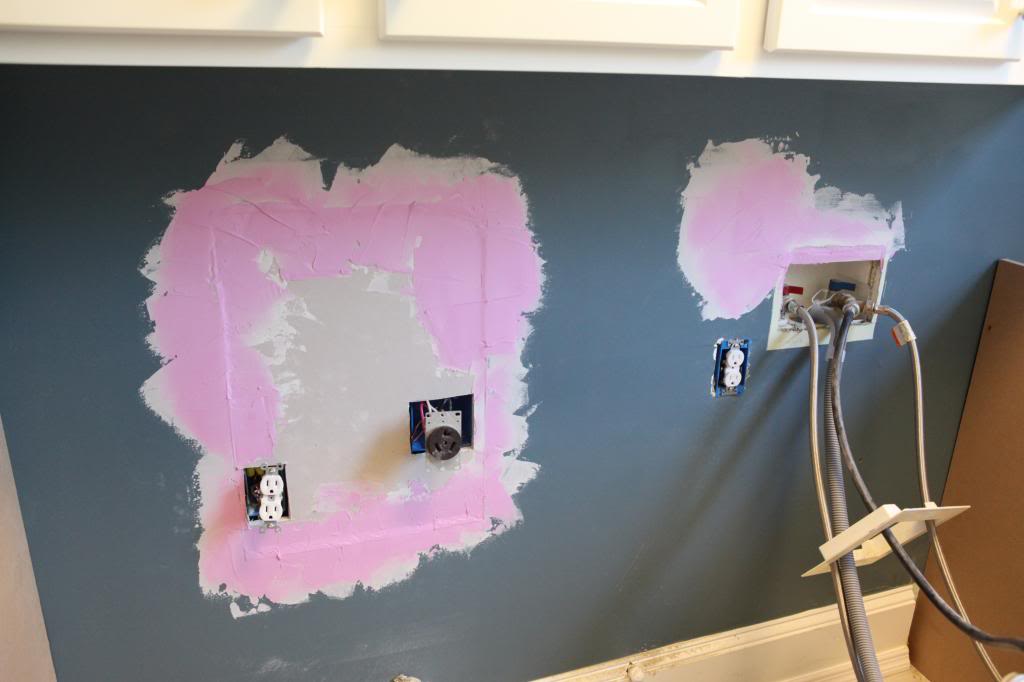
It dries white so you know when to reapply or wet sand.
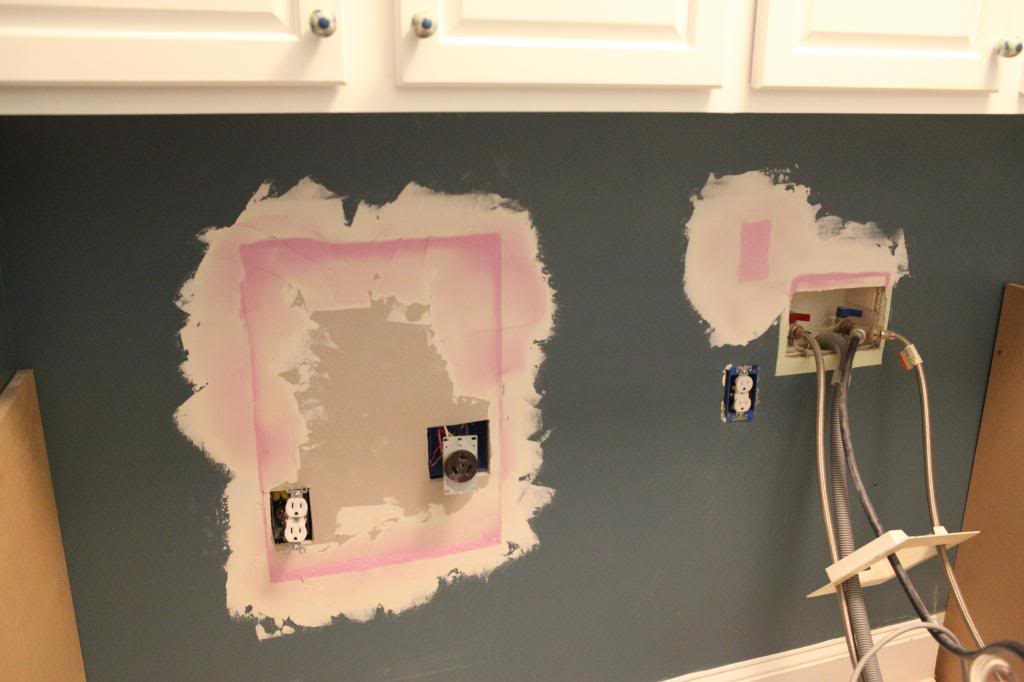
Overnight it really dried out and I was ready for a little wet sanding and more spackle. I used the 6″ drywall knife first and then the 12″ for the second smearing.
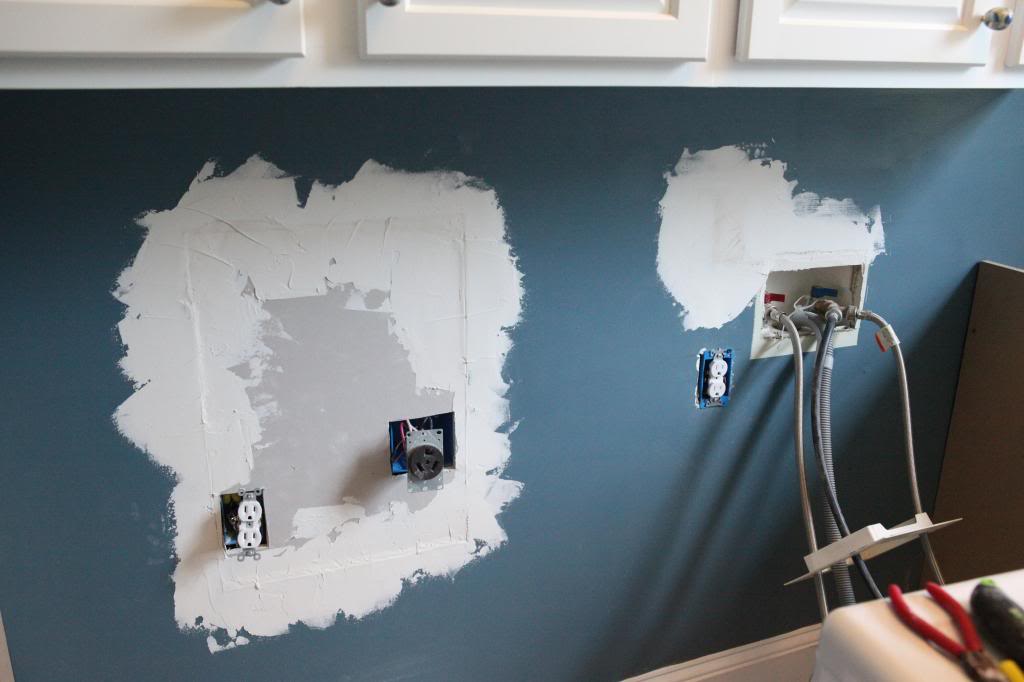
Then we did a little scraping and wet sanding. Finally it was smooth and ready for paint.
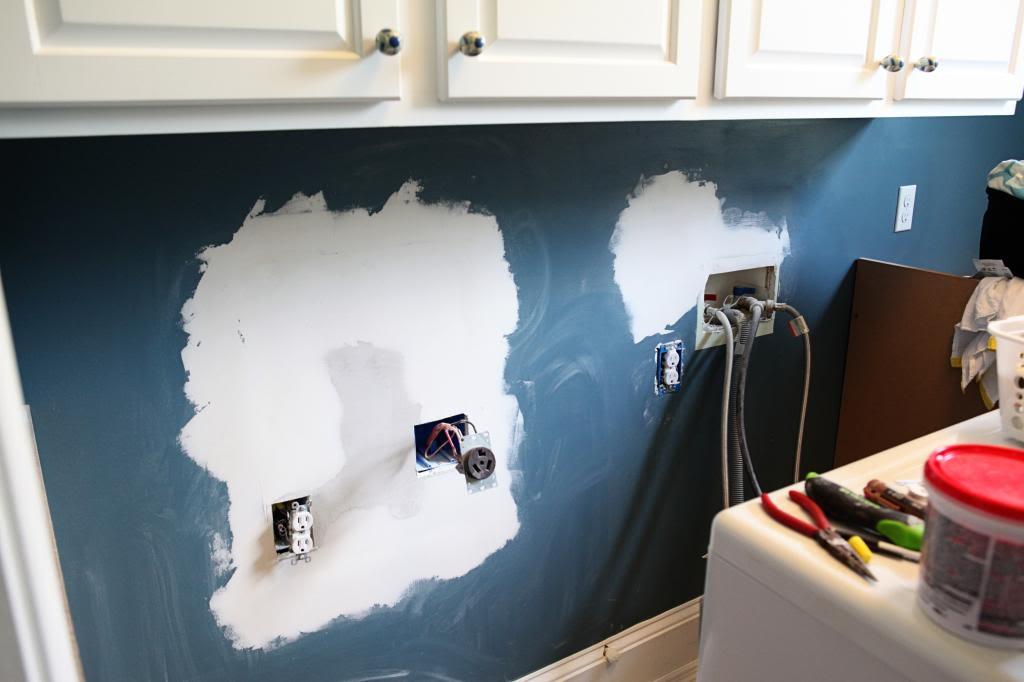
I just did one coat back there because I am lazy.
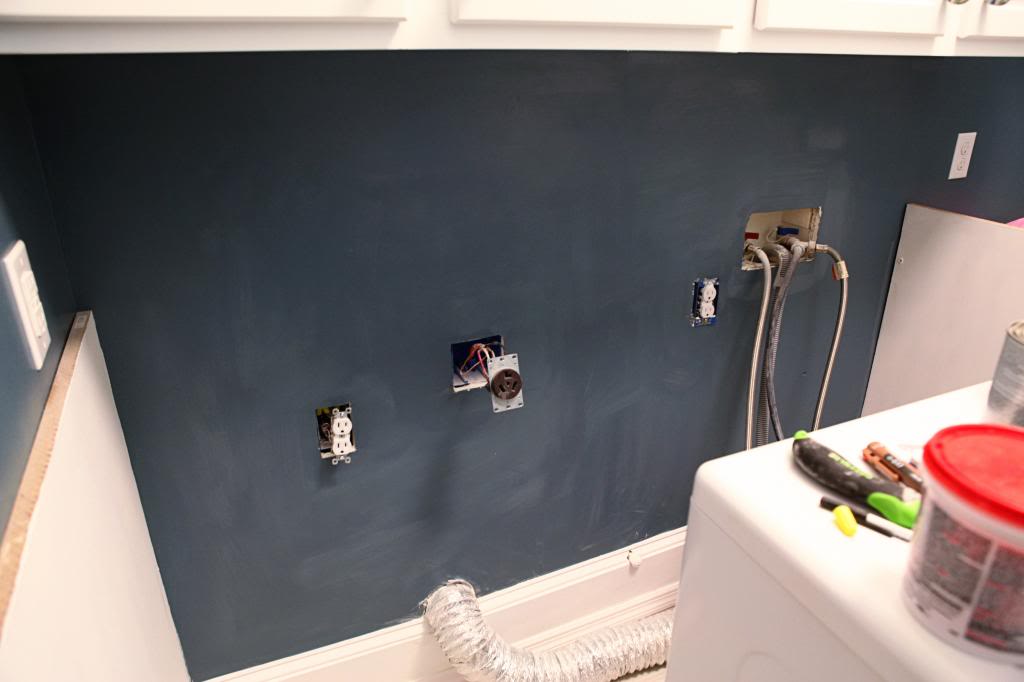
This area is gonna get a backsplash after the countertops go in and once the sink is installed so I wasn’t worried about it being perfect.
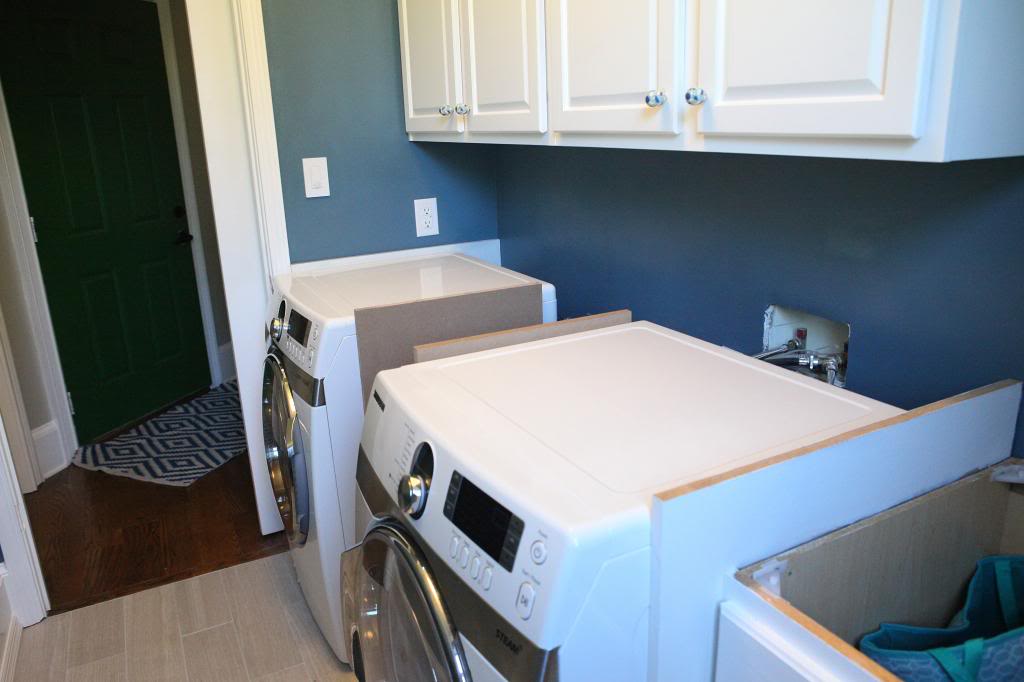
But already it looks better with the fewer outlets.
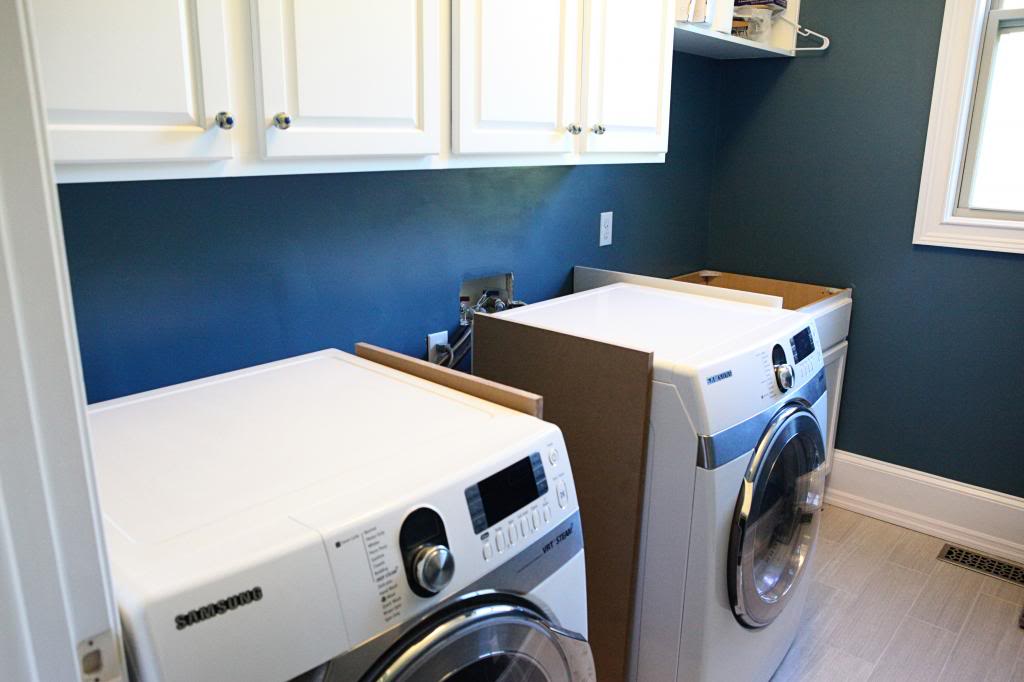
Oh and that piece of wood we put in the top of the hookups? It got spackled in place and the countertop should cover it completely making it disappear from sight. I photoshopped a white line so you can see my point. This was definitely the easiest solution although we talked to my plumber-brother and he said that moving hookups lower takes about twenty minutes if you know what to do. We don’t like messing with water so we decided this hack was the best fit for us but if you care about stuff like that, it can cost about $100 for a plumber to do it as long as you do the drywall work.
I know that some of you will ask if we can still access our hot and cold valves and the answer is yes. Our hands fit perfectly fine in the shortened box. And we have decided to make this center section of cabinetry removable so that we can quickly access the hookups if we need to.
Next up – countertops!!!! Can you hear my excitement?! It’s like I am on Naked and Afraid and found some wood grubs for breakfast! Except a whole lot less naked…nobody wants to see that….especially not me 🙂
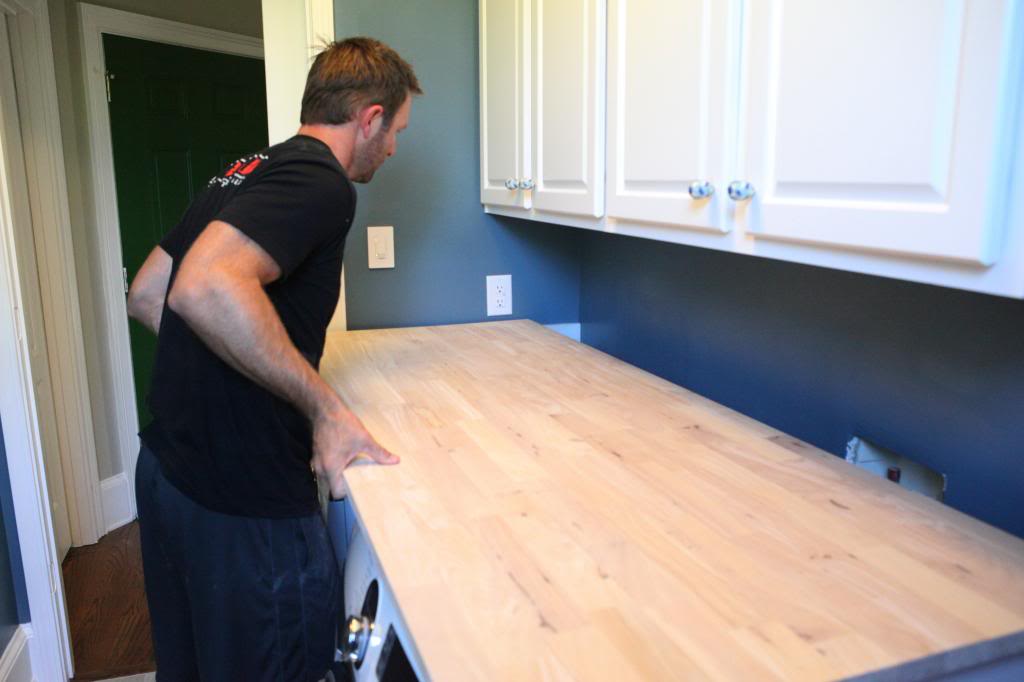
Yay countertops!
p.s. last 2 times you posted, it actually posts twice on the blog… ? didn’t know if you knew that..
This turned out really nicely. I can’t wait to see the counter tops and source with what you went with. I’m still trying to figure out 100% what do do with our laundry room. You mentioned (in response to one of my comments on a previous post) that if you didn’t move the outlets, you had another plan? I’d be interested to hear your brainstorming thoughts? We have the same issue with needing to move our hookups down but my hubby thinks it’s too much work for laundry room. He clearly doesn’t do laundry. Thanks Katie B!
This post is really timely for me because we just hired a handyman to patch a hole in our wall. I was intimated by the prospects of using joint compound, but it seems like this worked fine for you with just spackle? I was also worried about my skills in installing wood behind the drywall in order to secure it. Did you skip this step because this is behind the washer/dryer, so less likely to experience wear and tear? Not trying to poke holes in your process, but interested in your thoughts.
I would love to hear how you installed those countertops! I’d love to do the same in my laundry room but am not quite sure how. :o)
Wow, what a difference, it looks great. The counter is beautiful. I am in the same boat, half finished laundry room to boot. Now that summer is winding down I hope to get caught up on some our “to do” projects.
http://palsywalsyblog.blogspot.ca/
Not a project for the faint of heart. It always amazes me how much hidden stuff you find as a homeowner and how sloppy contractors can be. The amount of ‘crap’ we find buried in our flower beds and yard from when the house was constructed amazes me. I wish the home building industry was a more honest business.
Love seeing your projects. Keep em coming!
V
Life+1
Dyson!! I would love to win. Completely clean….that would be my dream room. I love all the extra attachments and the super long warranty!
Fun! Looking good! 🙂
Looks so much better already!
Is anyone else having trouble with the site, though? I’m on Firefox and it’s like the Groundhog’s day movie – the post starts again right after it ends, then again, then again…
I love your blog, but the funky post issues are making me a little batty!
Hey there. So interested to see the countertops. That was on my to-do list in the spring but a party-pooper employee at Lowes shot down every counter top idea I had (butcher block, quartz, laminate). He was seated the entire time, so I think he just didn’t feel like working that day.
BTW- your new format causes your posts to repeat one after the other. This one is on my page twice.
1st time I have been to your actual blog since you changed it(I am a feedly reader)! It is very pretty and clean looking. I like it! I love how you describe things 🙂 Eating grubs on naked and afraid…you always make me smile.
Love the laundry progress! I’m a first-time commenter, so I should throw in that I am a big fan of your blog, your family, and all things Bower in general. Also wanted to let you know that lately your blog posts have each been posting twice. Not sure if this is just me and my lame browser (IE 11), but just wanted you to know!
Can’t wait to see the finished laundry room!
Tease!!! 🙂 So excited to see the finished product!
Hi Katie! Just wanted to let you know that this post is appearing 4 times on your home page (I’m on Safari). So I see the “Cuddling with Knives” post, then I scroll down and see it again…and again (etc.) Just thought I’d let you know 🙂
Can’t wait to see the final product! (Love the new site design btw! Looks so bright and clean!)
Looking good Bowers! FYI, not sure if it’s my computer or the new site design, but the posts since you did the redesign have been showing up 3 times in a row.
Can’t wait!!! I love that blue.
Coder Katie: for some reason each of your posts duplicate, a few back for me, ever since the big ole’ switcheroo.
Thanks for the tip about patching up the drywall!! Perfect timing. 🙂
Hi Katie, just to let you know that I can see your blog posts now several times on the page repeated… it happens on Firefox and on Safari…
can you send a link to the post about the boys big boy beds that you painted navy? I can’t find it! I also pinned it on Pinterest but when I click on it, it doesn’t go to the post anymore. Thanks!! I need a refresher. You inspired me to paint my sons bed navy too 🙂 I got him a twin headboard/footboard at a garage sale for $5!!! Real wood…score!! 🙂 thanks again; love your blog!
I don’t know why, but this post shows up five times with your mood board thrown in the mix a couple of times as well.
Good luck with the laundry room reno!
That picture of you & Jeremy is priceless! Now that we have 3 children, I feel like our ‘quality time’ is during projects. There’s nothing like hanging out as a couple, and then remembering those good times when you look at your finished project each day 🙂 Thank you for sharing!
Now imagine how you’d feel if you found a legit extension cord spliced and used as wiring! Yup! That’s what my husband and father-in-law (the electirican) found when they were re-wiring our attic. My father-in-law has reminded me many a time in this house that I can put all the “pretty” into this home, but it won’t be “safe” until the electrical is done. #gladitisover #somanyissuss #oldhouseprobs
It really makes a difference. It takes a lot of time to get the outlets moved around and repair the drywall but the end result is so clean and professional. The room will really look great when you are finished. I’m impressed!
Looking great already, Katie! Can’t wait to see the final product. 🙂 Keep on keepin’ on!
Your laundry room is looking great!
Question – Why do your posts show up twice? This has only started happening since you redesigned your page.
That must be an issue with Photobucket. Try clearing your cookies and making sure that Photobucket is on your cleared list for security.
xo – kb
Something got mixed up with my widgets…I don’t know why but I think I have it fixed now. Let me know if that happens again.
xo – kb
Thanks. It was a widget error.
xo – kb
Thanks. I don’t know how but all my widgets got duplicated! ERG!
xo – kb
Me too! I am soo batty over that! I’m trying to fix it now 🙂
xo – kb
Sure! Here you go!
xo – kb
That’s hilarious. He just decided for you that the countertop wasn’t necessary, huh!? Love it
xo – kb
We cut the existing drywall so that wood was exposed on both sides (I think you can see it in the sixth picture from the top)…and then we just secured to the studs on either side. We could have installed a 2×4 piece running horizontally on the top and bottom but this would have created an issue because the wires wouldn’t be long enough to run through it. To us, we decided that since this area is never accessed, it would be better to mud over a eversoslightly less secure but still flush piece of drywall than to have to rewire.
xo – kb
Yay! I can comment! I’m soo excited about the bench tops…I feel like that’ll be the start of the easy run to the home stretch in terms of your laundry…then we will see work in…the playroom?! Yay! 😉
Love your work, KB!
xo, JH
Hi Katie, I am trying to paint 2 old wardrobes for the first time tomorrow and hope you can provide some guidance! 😀
One wardrobe has been painted with at least 5 coats dark grey and another one has been shellac-ed.
I plan to paint it WHITE but am worried they will turn yellow overtime. I read that water-based primer and water-based paint will be the best at staying white, is that true?
Can I apply water based primer on both painted & shellac-ed surfaces?
Do you have any prepping tips? Other than scrapping off old paint, washing down with TSP and sanding? 🙂 🙂
this is probably a silly question, but how do you get the patched area to be smooth and flush with the original wall?
i recently attempted to patch a hole in my powder room wall with a similar patch to the one you used. after sanding, the fiberglass patch was still raised, so i kept sanding, but now i can see the grid outline peeking through the dried spackle and the whole area is visibly raised above the regular wall surface.
any tips?
Build up the middle where the patch is and then feather it out. You will have to get wide with the feathering – think 2-3x as big as your original hole before smoothing starts.
xo – kb
The old toy area needs help first but once that is done…yes! PLAY ROOM!
xo – kb
They say that about the water based primer but I don’t believe it. I mean…knots come through every time. Jenna Sue just went through this on her blog and she used something called a PVA primer on stuff that bled through…so that would be my ultimate-nothing-bleeds-through-this recommendation. As far as other prepping tips – I would still sand and wipe clean and then make sure not to use poly after.
xo – kb
And there’s no “precious posts” to click at the bottom either that I can see.
Previous I meant although they are all precious which is why I want to read them!
Will you provide details on the countertops? Where did you find a countertop deep enough for your washer and dryer?
Thanks Katie!!
Does any of your white furniture or white trims turn yellow overtime? I’ve all my door frames, window frames and staircase rails painted white but after 2 years, they all turned yellow. 🙁 Any idea how to prevent this? I would like to slowly repaint them! 😀
Part of that is sun exposure, part can be a bad primer, part can be air exposure…there can be a lot of reasons behind the yellowing! My best suggestion is to use a primer and a high quality paint (like an alkyd that would harden for your door frames like an oil based paint would).
xo – kb
We found it at Southeastern Salvage in Chattanooga. It has tons of clearance supplies like butcherblock!
xo – kb
Thanks Katie!! Will try that! 😀
Can you let me know your secret to making the most of the weekends and getting things done? We just moved and have 2 under 2 and we can’t even seem to get some paint on the walls! What’s your secret? Do all 3 boys sleep for a crazy amount of time leaving you with time? Do you get up super early? Help babysitting? I’m in awe. Please give me some insight! 🙂 Love the color in this room btw.
I get help in the babysitting department and Will is at preK four days a week. I stay up late every single night and since my boys wake up early, Jer feeds them and gets them dressed. I think no matter what it’s not how much help you get…there is never enough time!
xo kb