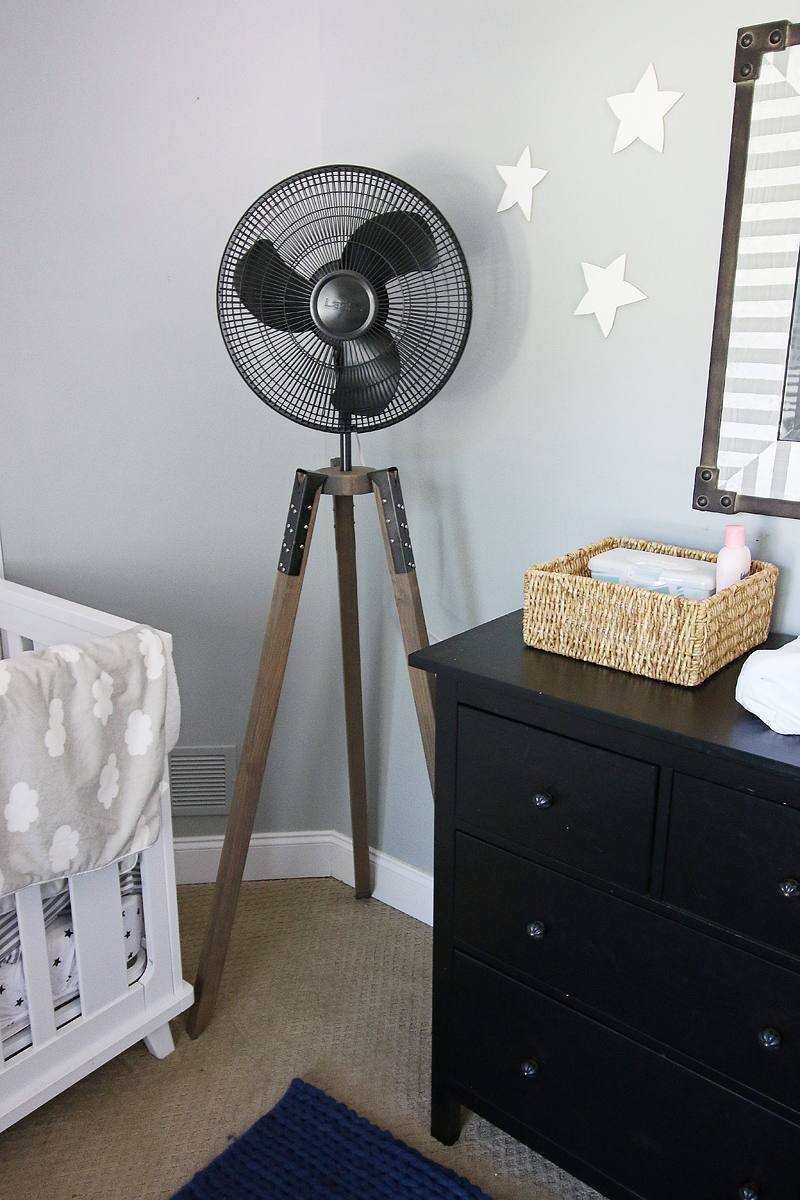
I had this hair brained idea for an industrial tripod fan years ago and I just could never figure out how I was gonna do it until two weeks ago and NOW IT IS AMAZING AND BEAUTIFUL AND I WANT ONE IN EVERY ROOM IN MY HOUSE. Sorry for popping a caps lock on y’all….I’m just really really excited.
Okay so this all started when we were hunting down fans for our little guys rooms. We live in Georgia and it is hot. Not like a 104 degree dry heat. That would be nice. practically balmy. I’m talking about humidity and heat. It’s like the middle of the jungle here and you don’t breathe air, you drink it. Fans are an absolute necessity.
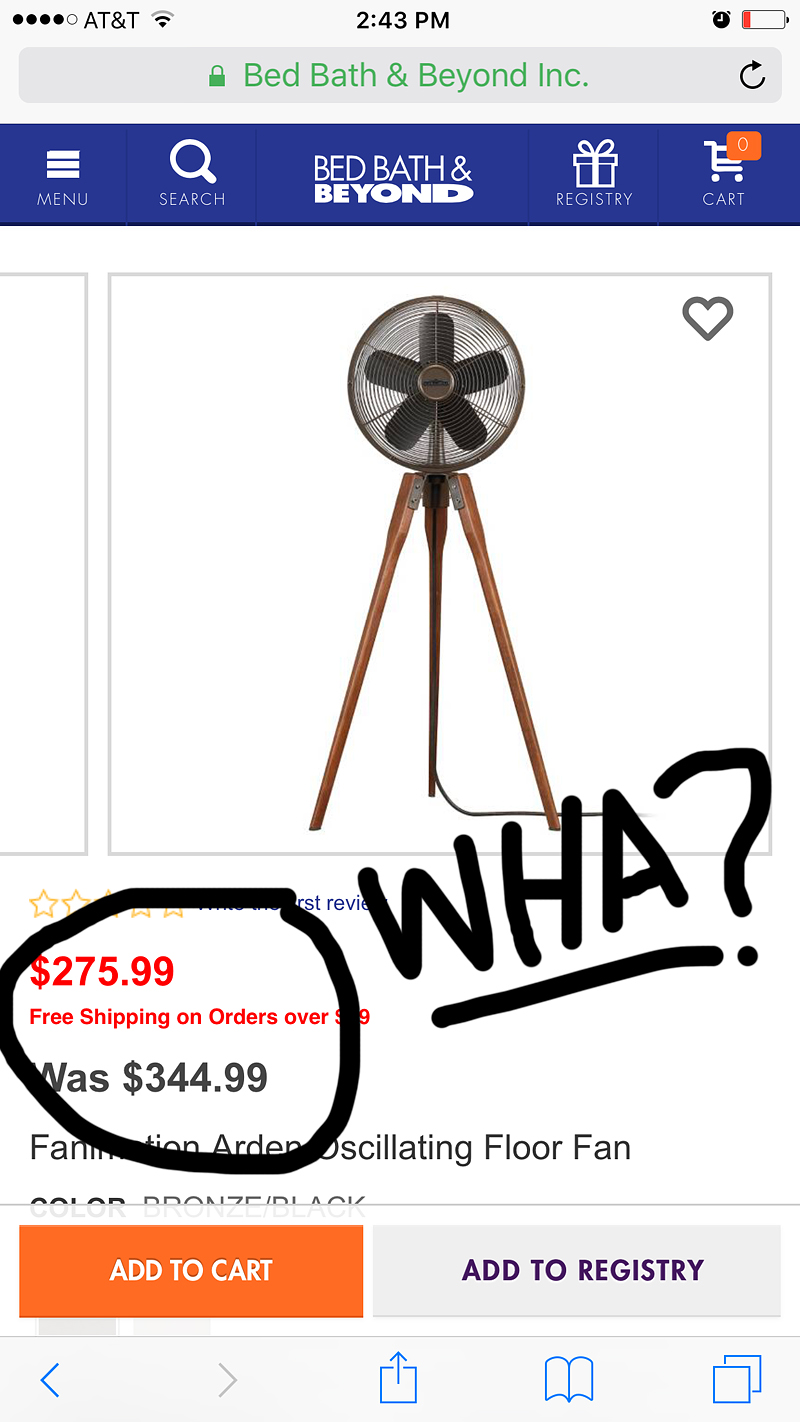
But here’s the prob….
FOR A FAN?!
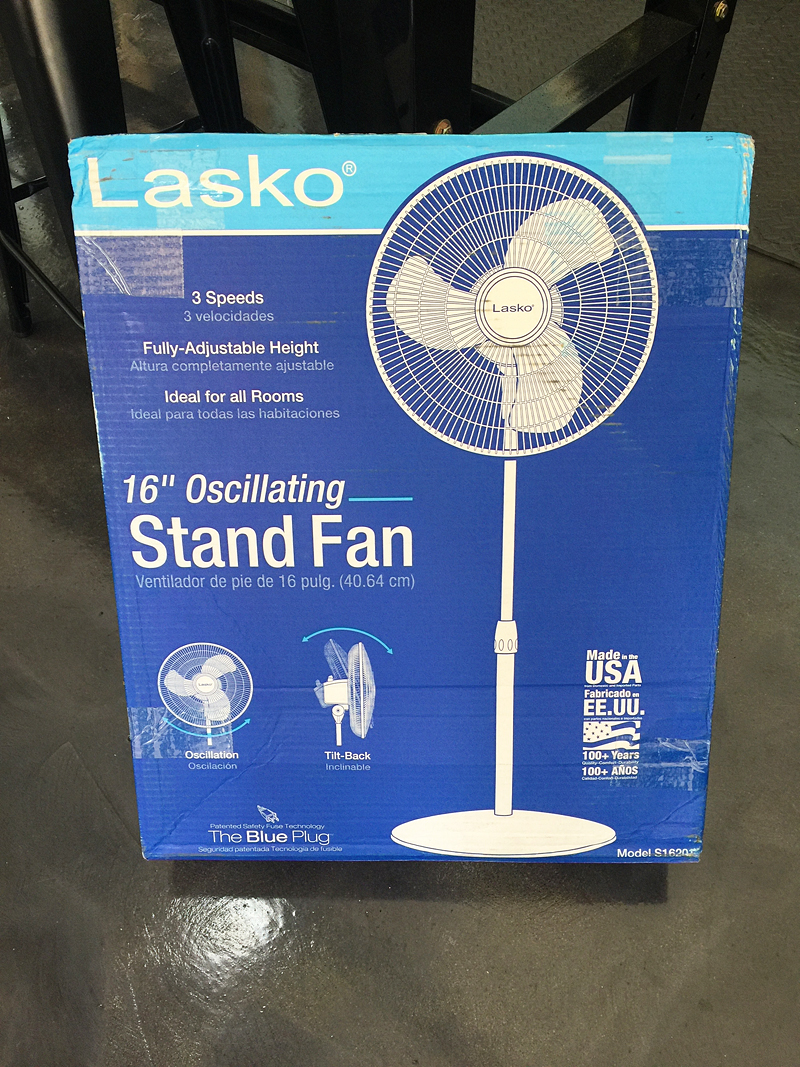
So I had Jeremy order this bad boy off Amazon. Here is the link to the exact one we bought. You can probably do this with other fans – just make sure that the fan controls aren’t part of the stem – they need to be part of the fan head.
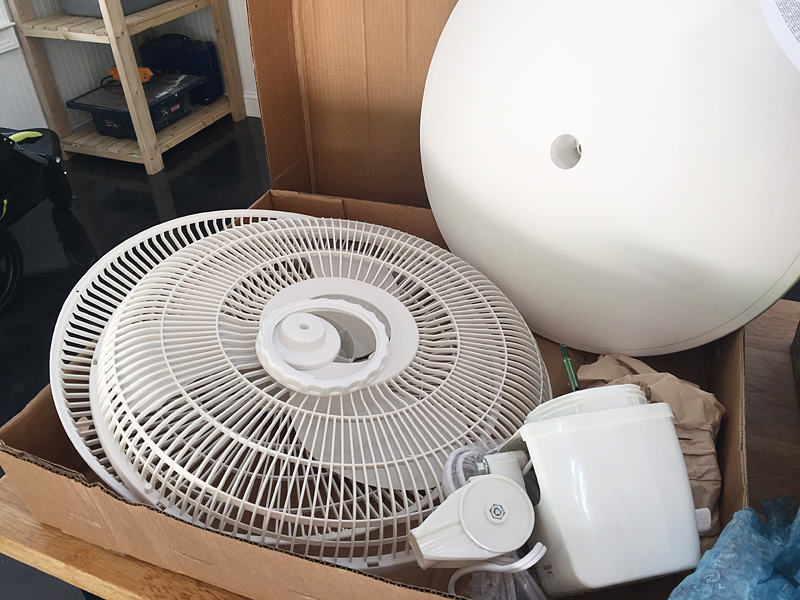
So the first step that I did was just take everything out of the box and assess what I needed to do to spray paint.
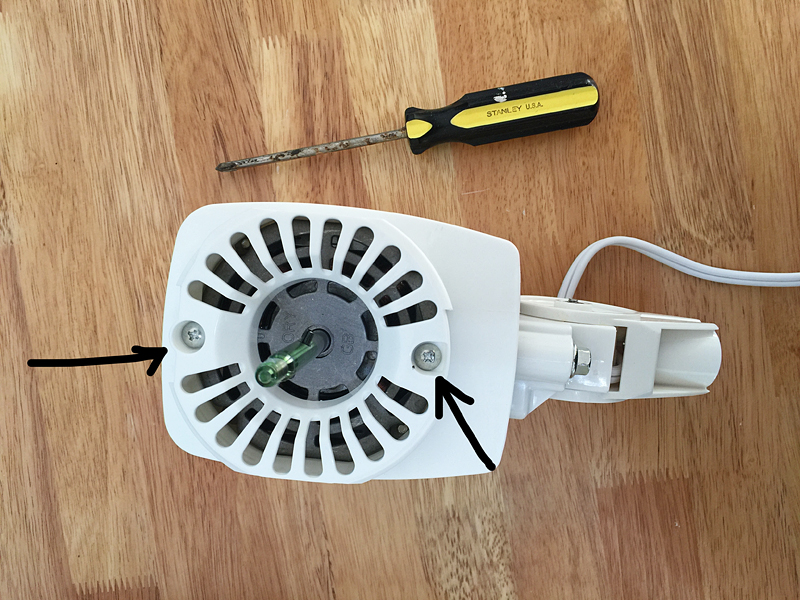
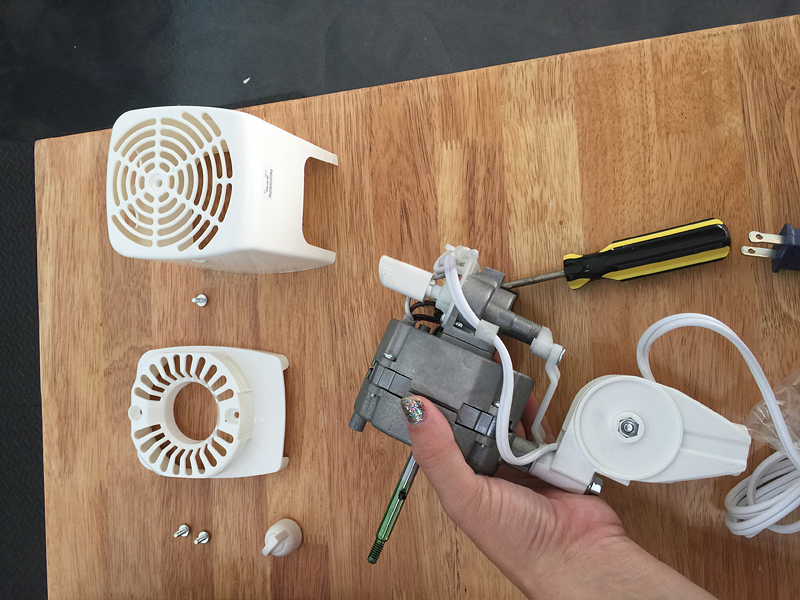
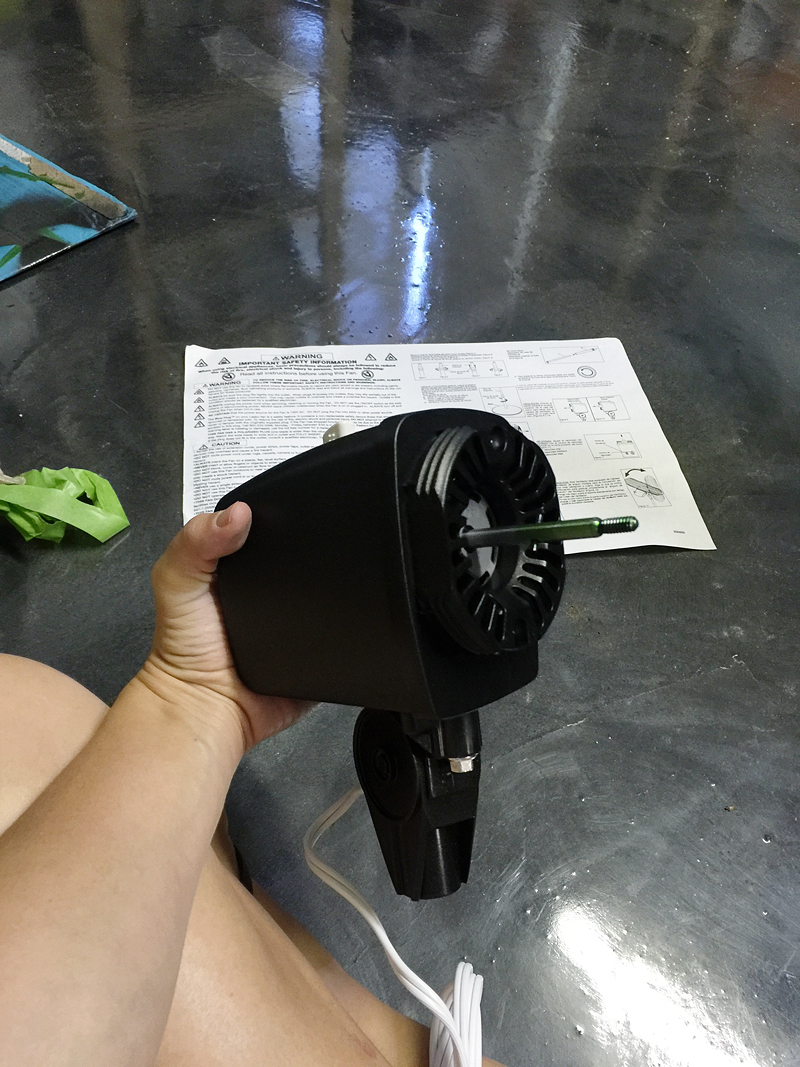
This is the fan head and you don’t want to spray the mechanical parts – just the plastic housing. You will take the screws out of the front….
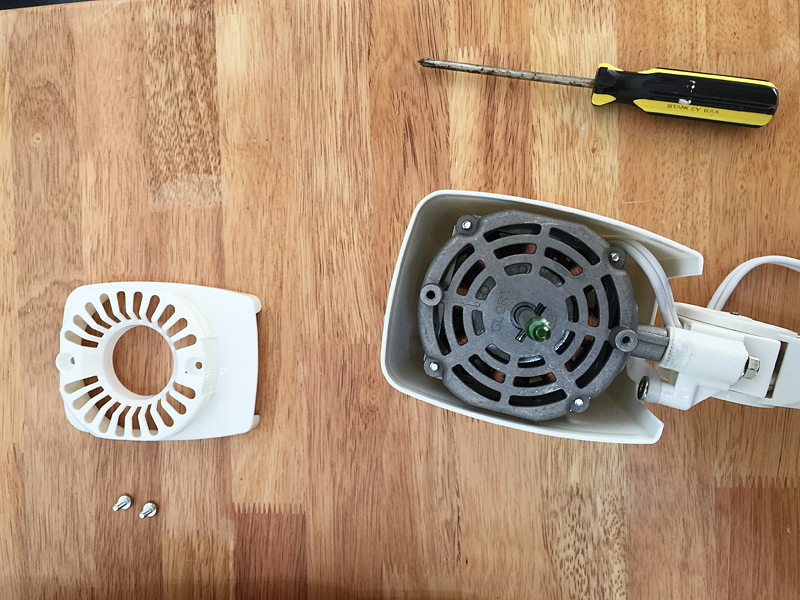
remove the front cover and then don’t lose your screws 🙂
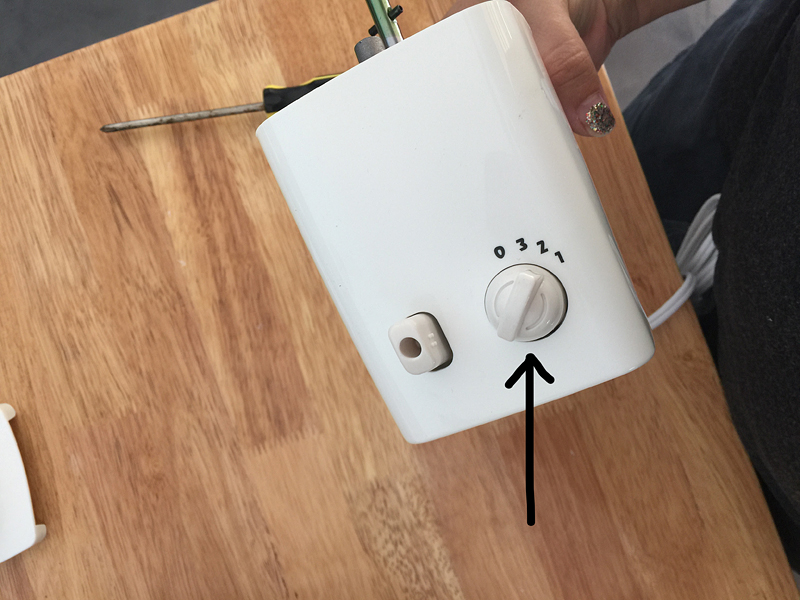
You can also remove the speed knob on the back.
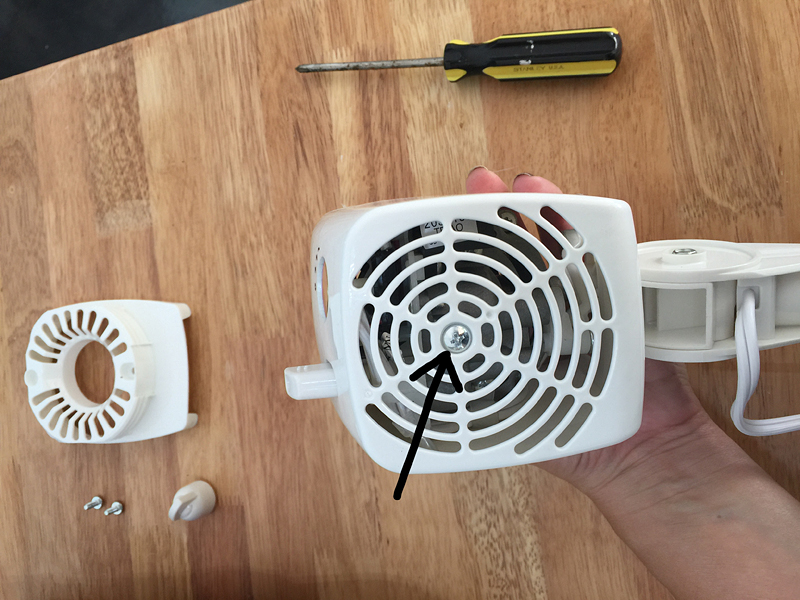
Remove the other screw on the backside of the cover…
And you are almost ready….
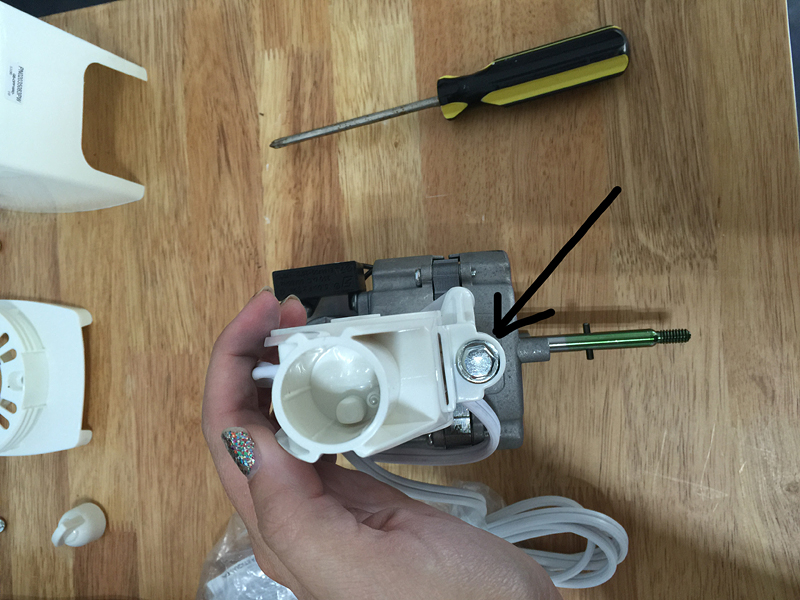
Then you will want to remove this bolt so that you can spray the support bracket easily.
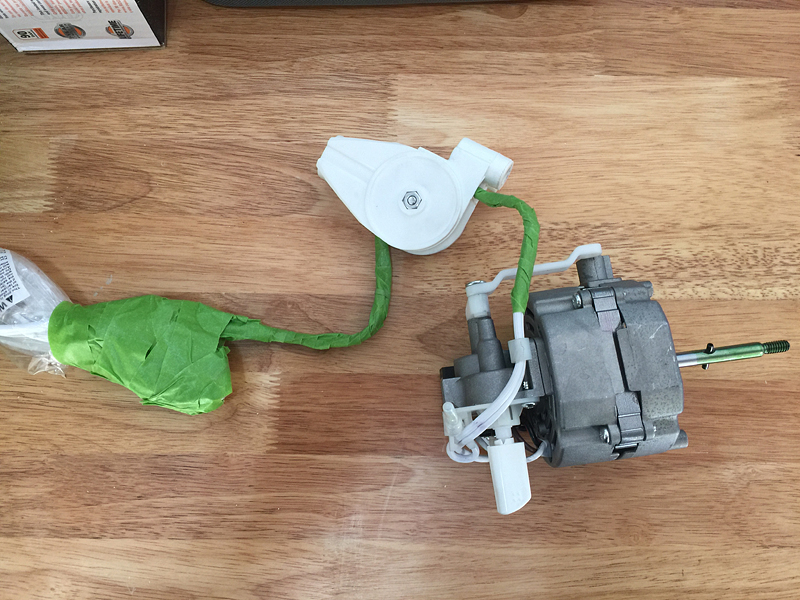
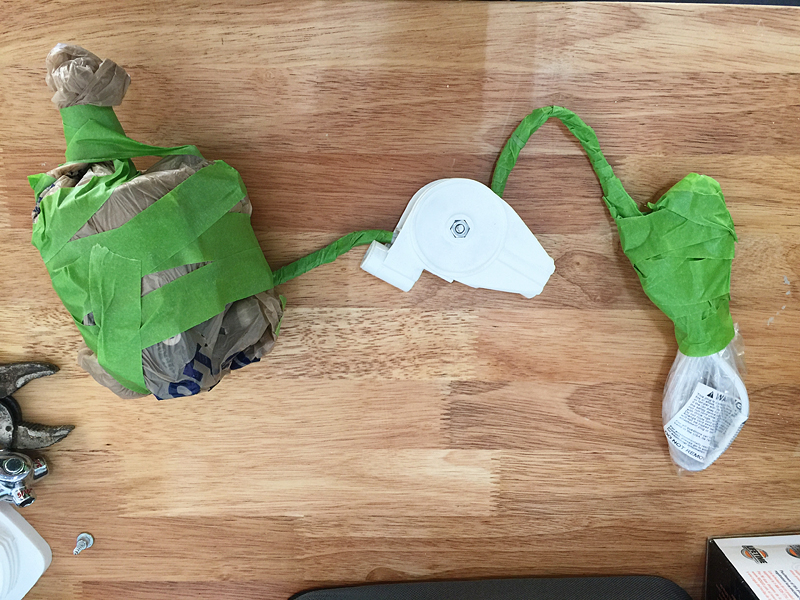
Now tape the cords and place your metal parts in a plastic baggie….
When you are done protecting everything except the support bracket – it will look like this….
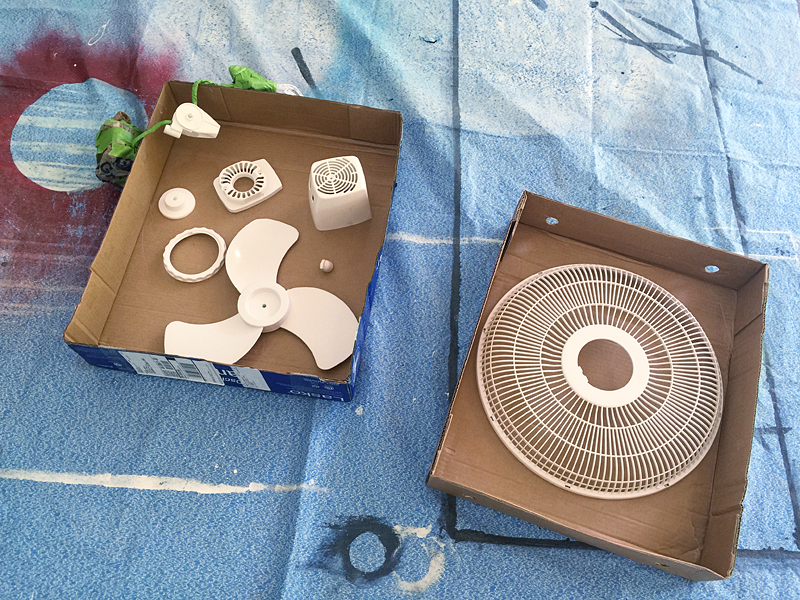
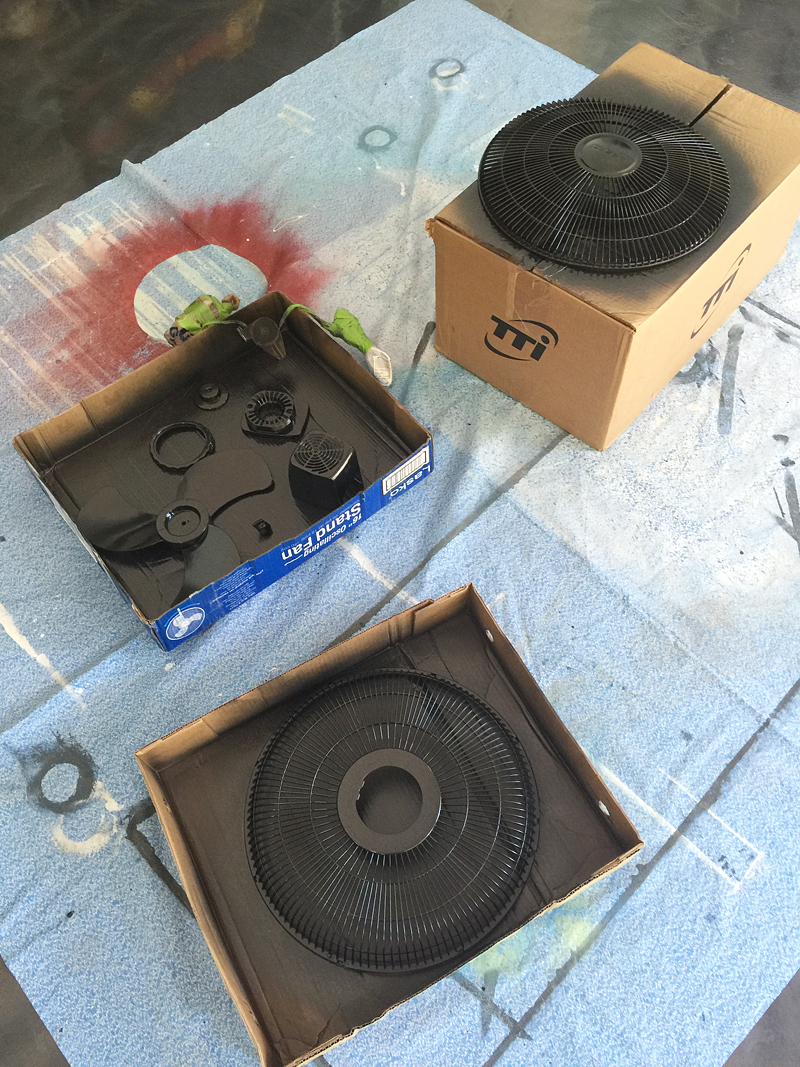
Here is everything I sprayed in phase one….I did have to spray some other things later so make sure you save some of your paint 🙂
I sprayed both sides in Rust-Oleum’s Oil Rubbed Bronze and made sure it was all nice and covered.
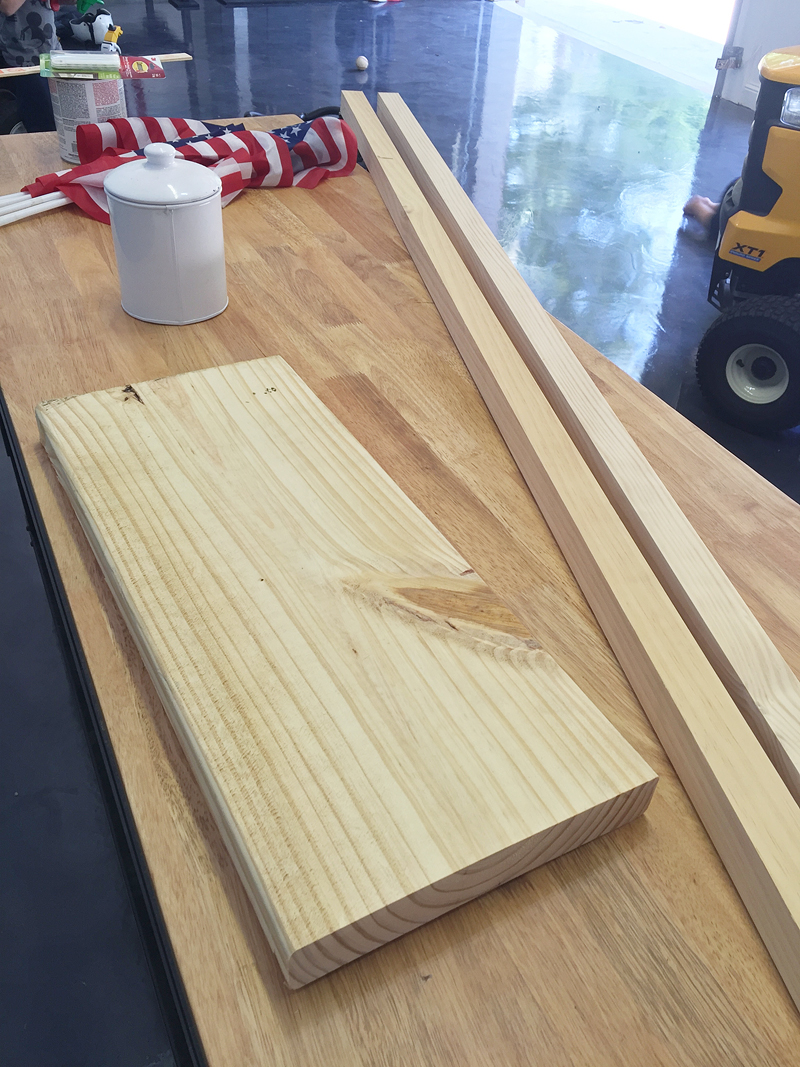
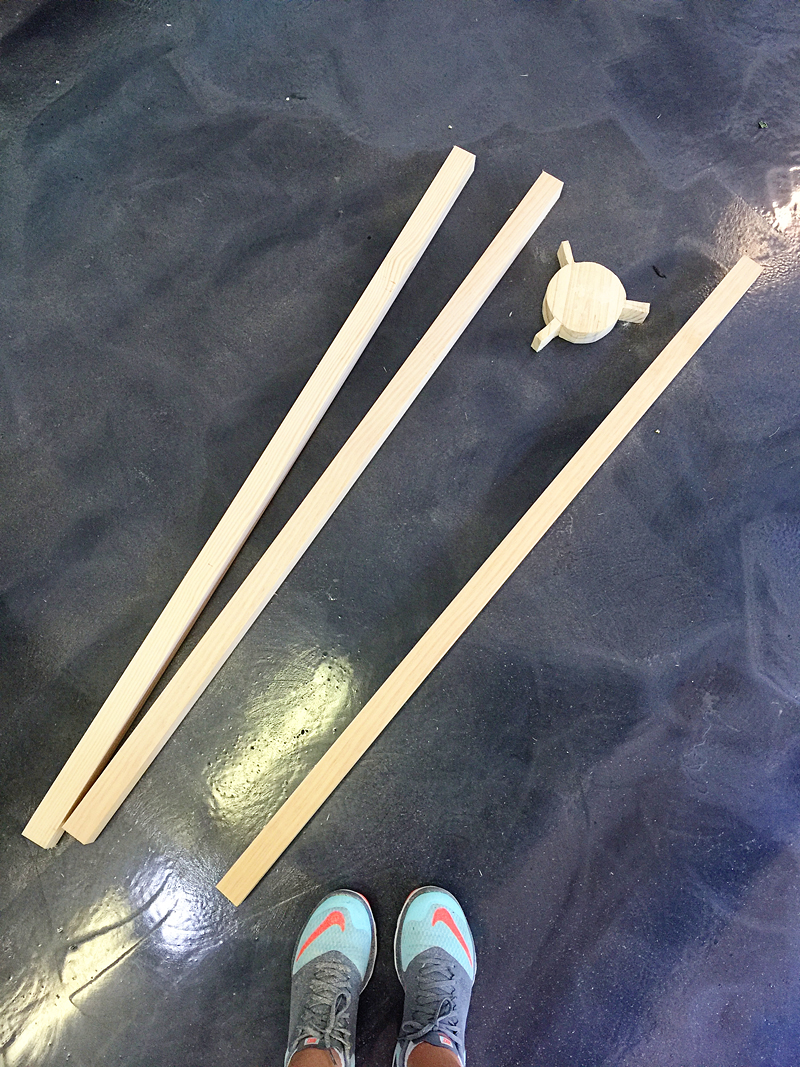
Then comes the tricky part…the tripod base…I used a scrap piece of 2×10 (a 2×8 scrap would also work) and some 2×2’s (2- 8 ft lengths) for the legs. Go ahead and chop the 8 foot legs into three 4 foot sections.
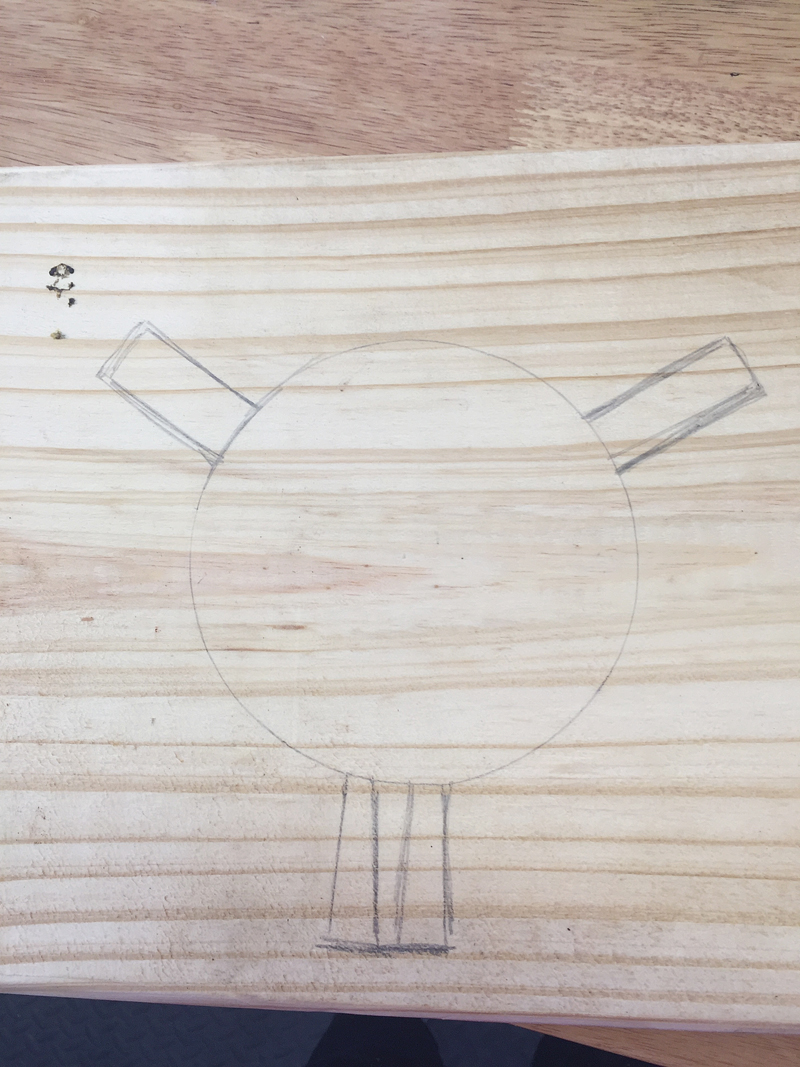
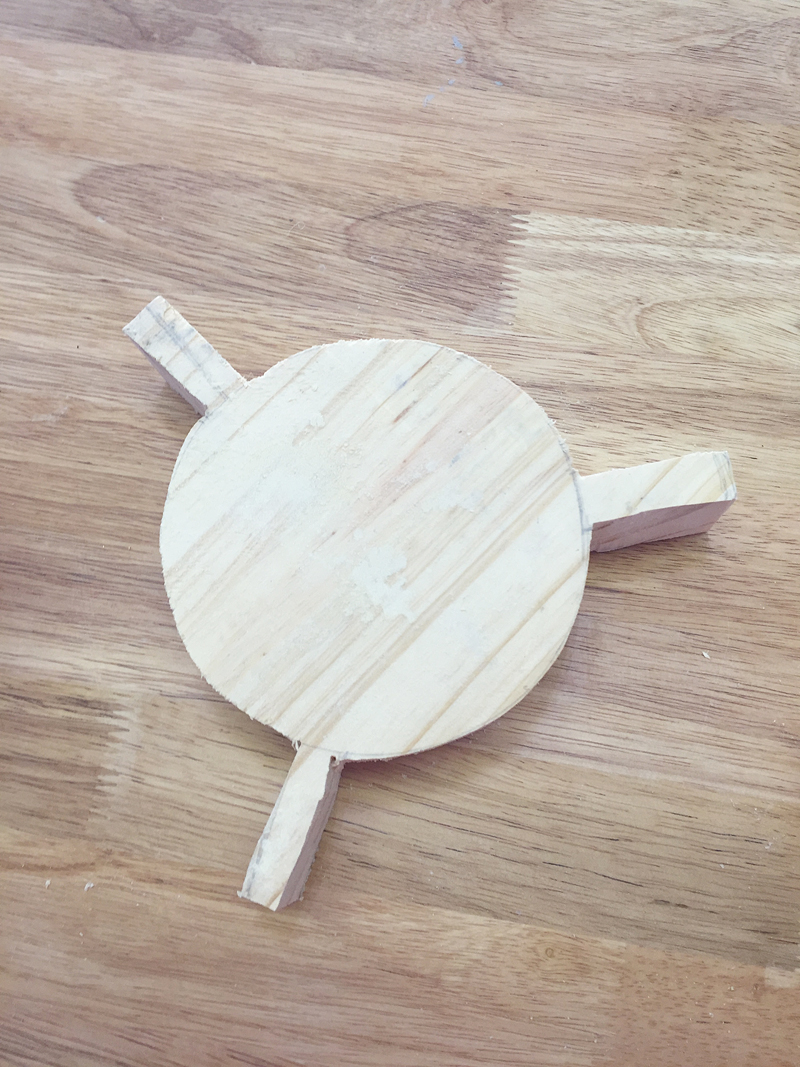
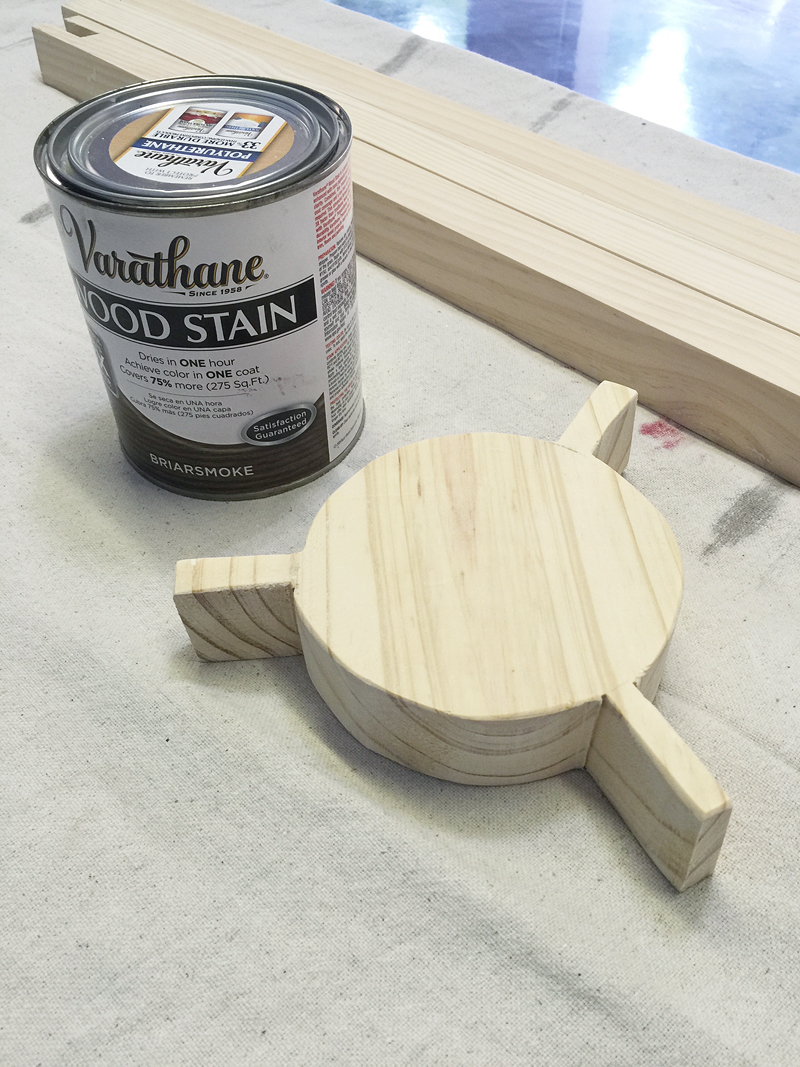
Then let’s make the tripod centerpiece. Basically what I did was trace a bowl that was roughly larger than a quart paint can. Then I made three little arms that come out about 1.5 inches. These are roughly the width of a carpenters pencil (1/2″).
I used a jigsaw to cut it out. It wasn’t perfect. It didn’t really need to be exactly perfect – just close enough.
So now you have a centerpiece and three legs.
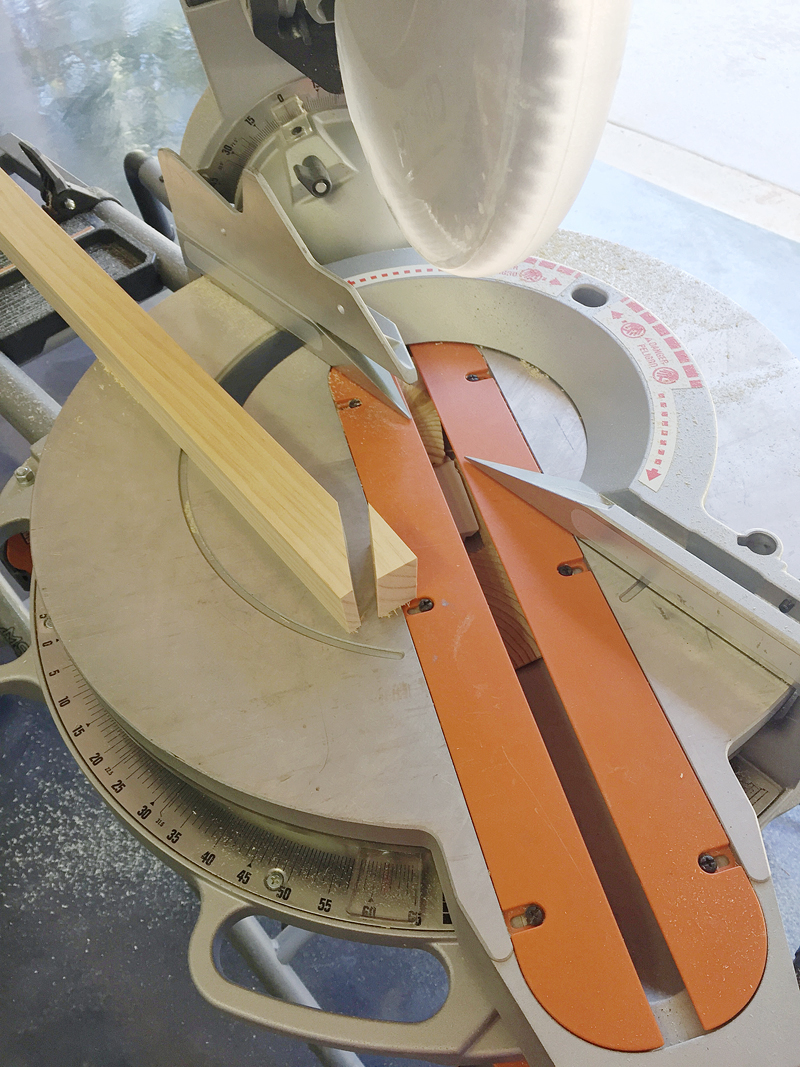
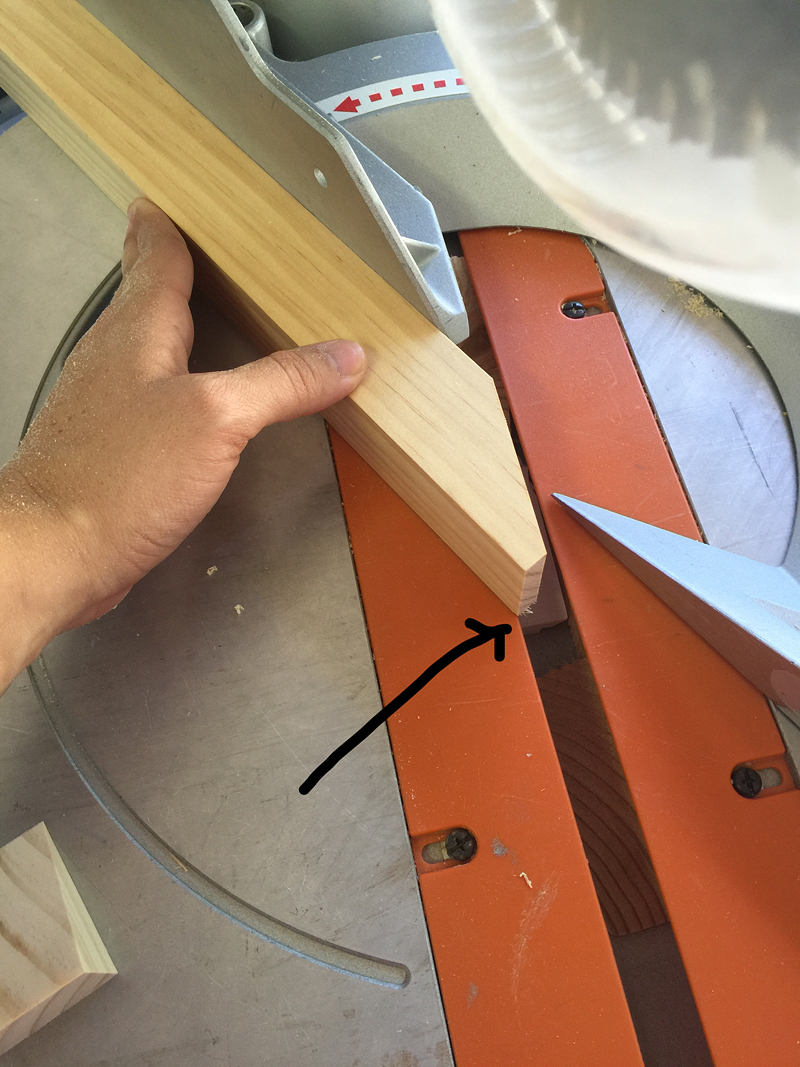
Notch the bottom of the legs so that you give it a more polished look. I used my miter saw for this.
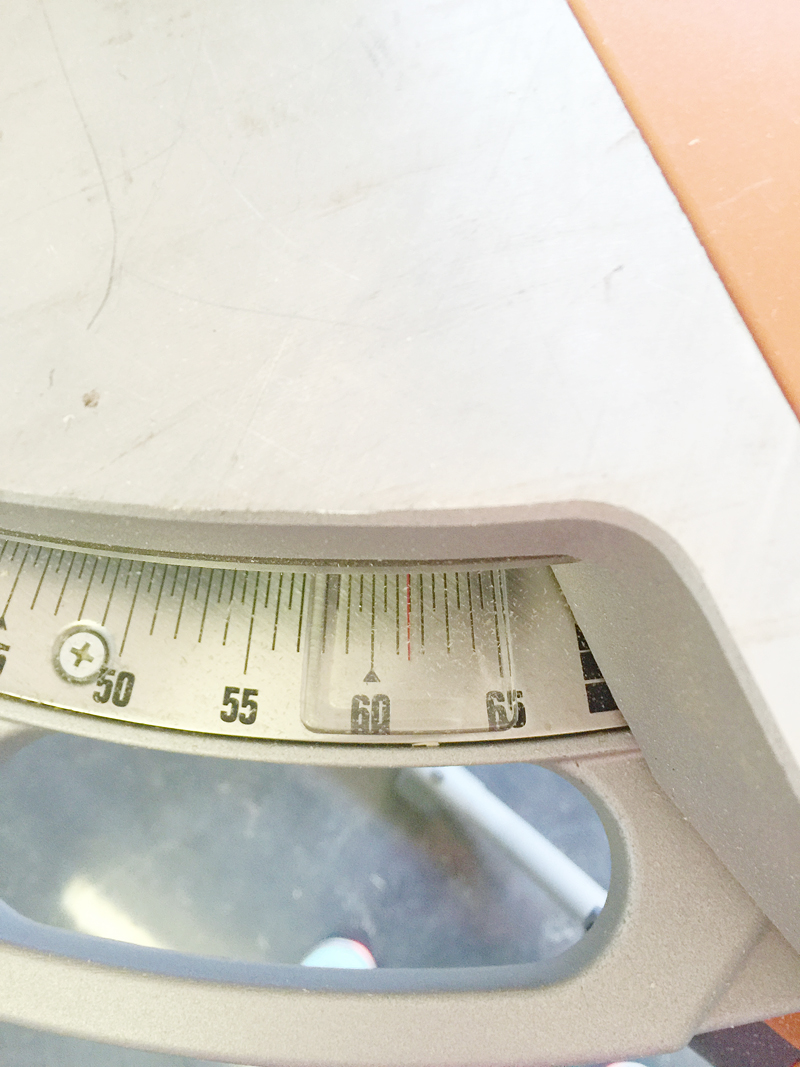
It was set to the furthest it would go – 61.5 degrees….
And I lined up the bottom corner of my leg with the guide on the saw. You can do whatever angle you like – just be consistent.
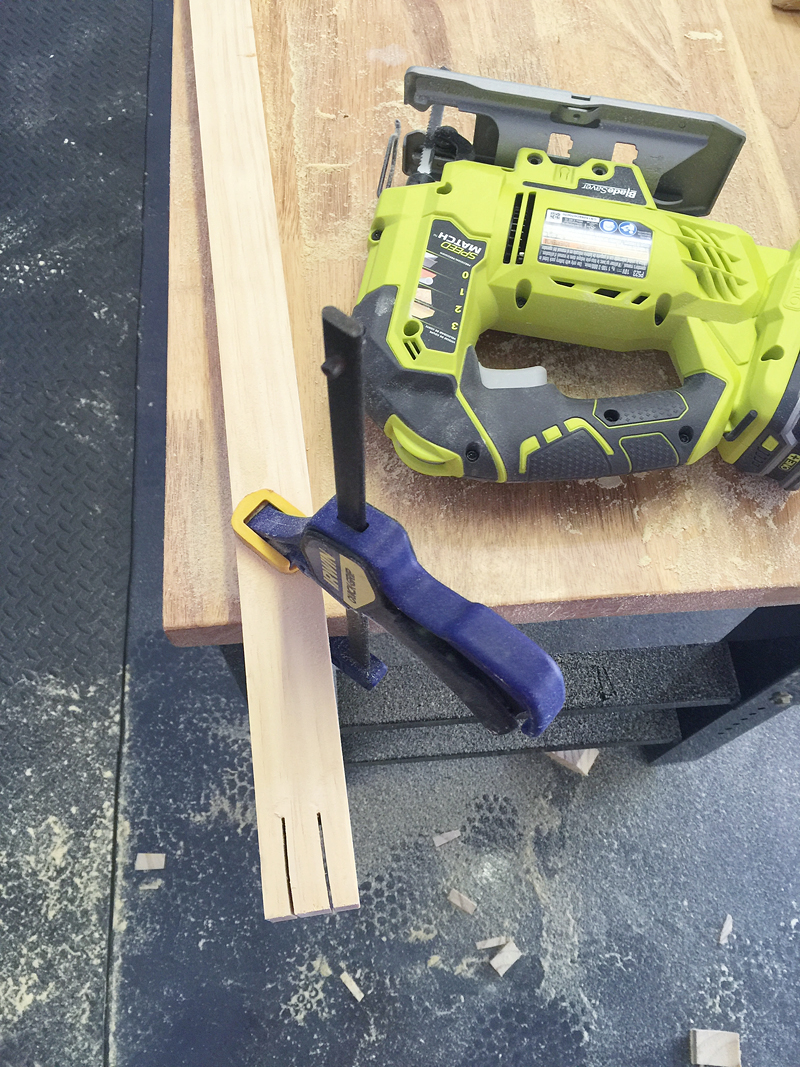
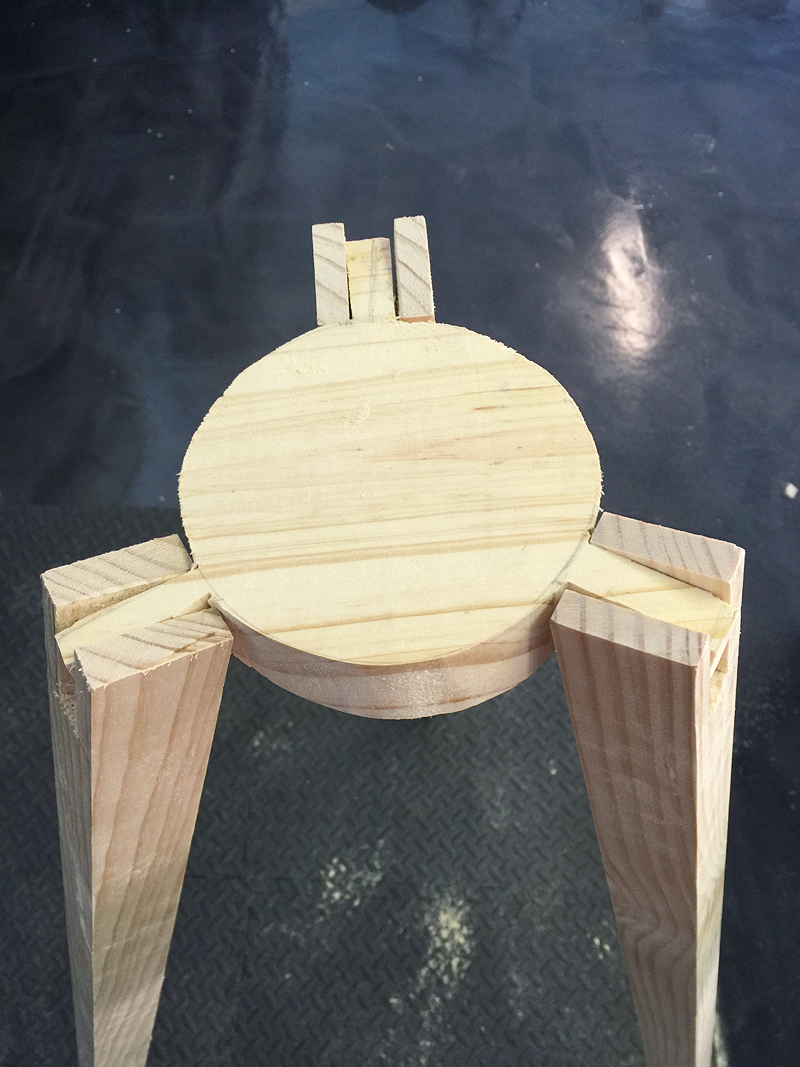
Then you will want to cut out the center notch of the TOP of the leg. So the bottom of the leg has the angle facing DOWN and then you notch out a 2″ center of the leg.
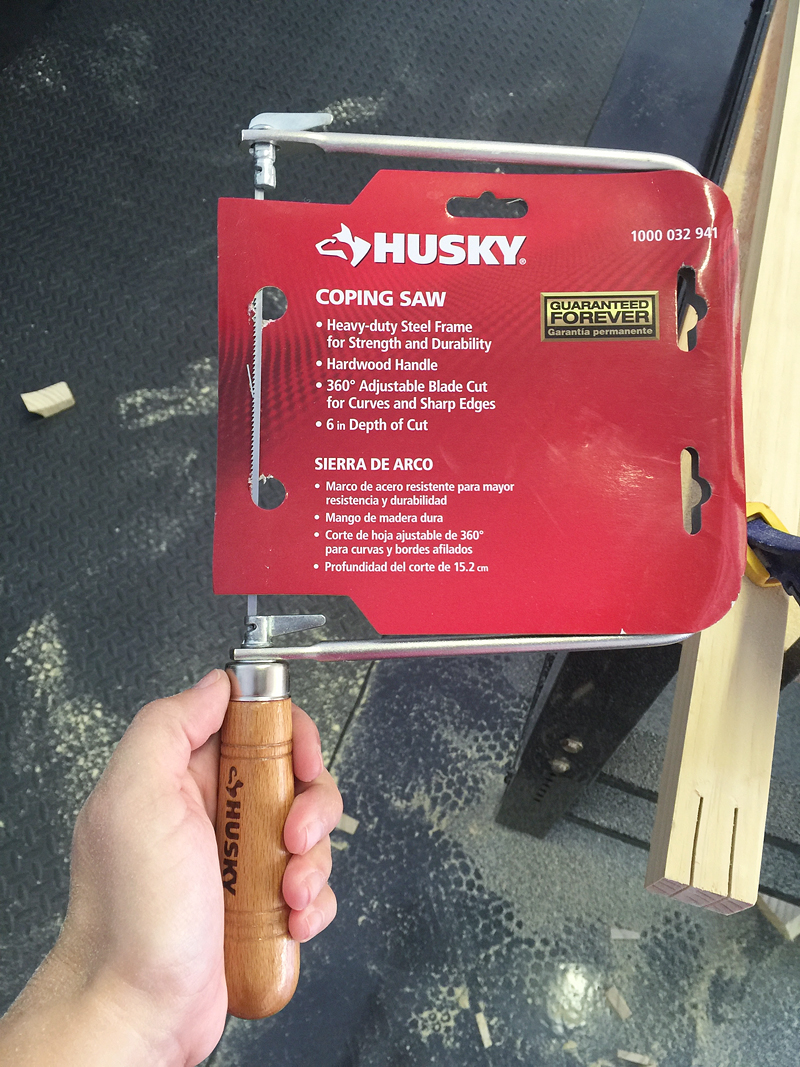
I used a coping saw to get it clean.
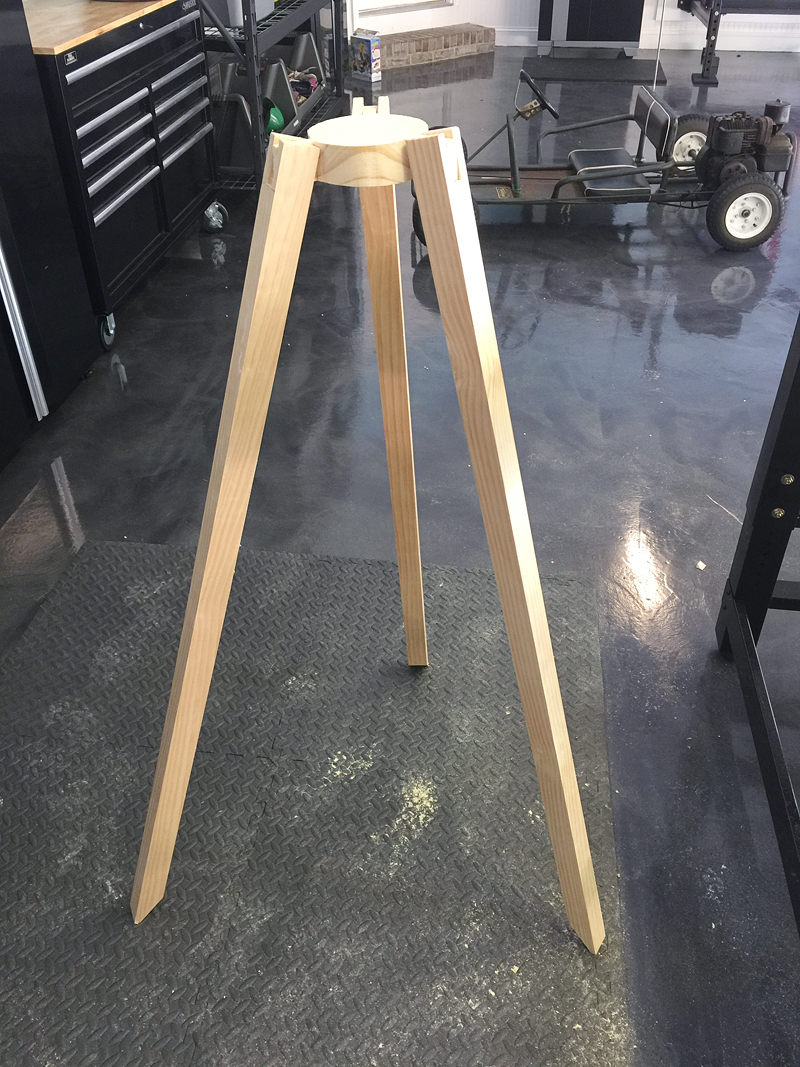
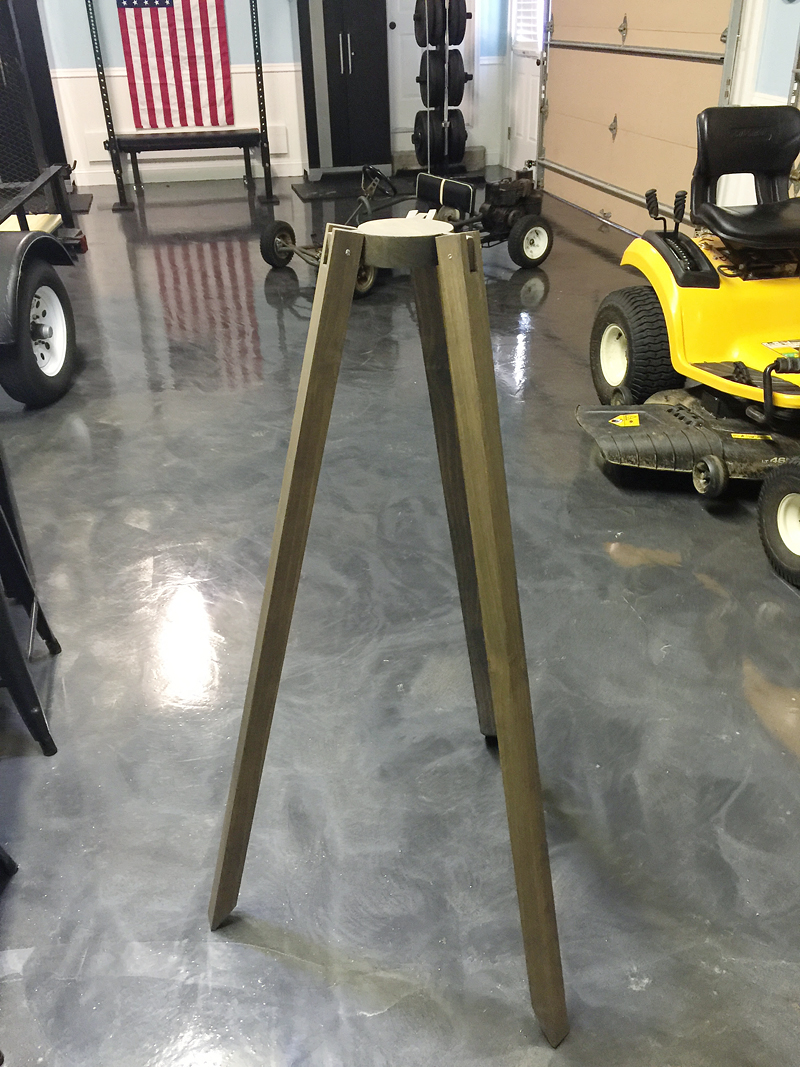
Make sure you do a dry fit to make sure that the legs fit with the centerpiece. Also note our neighbors awesome go-cart in the background. Yeah baby!
The TOP of the legs should come up slightly higher than the top of the centerpiece. If they don’t – notch further down on the legs.
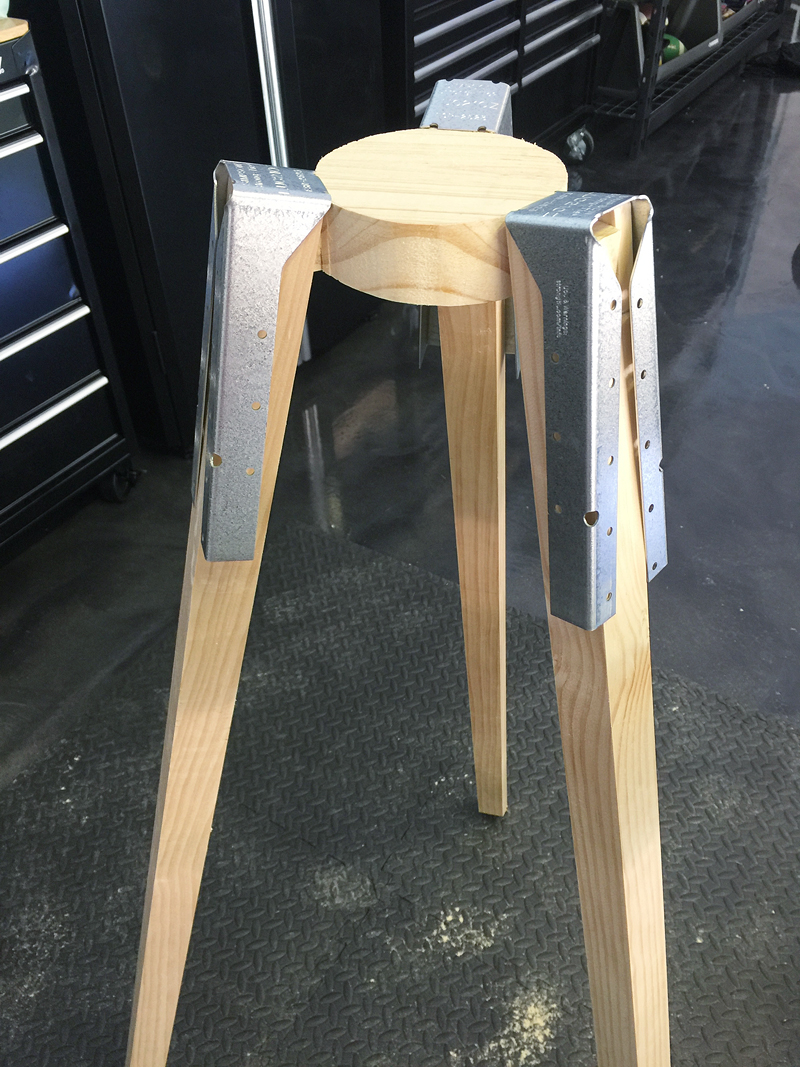
Once you have the legs and centerpiece in place and you think everything lines up – try the brackets to see if they slip on easily and fit correctly.
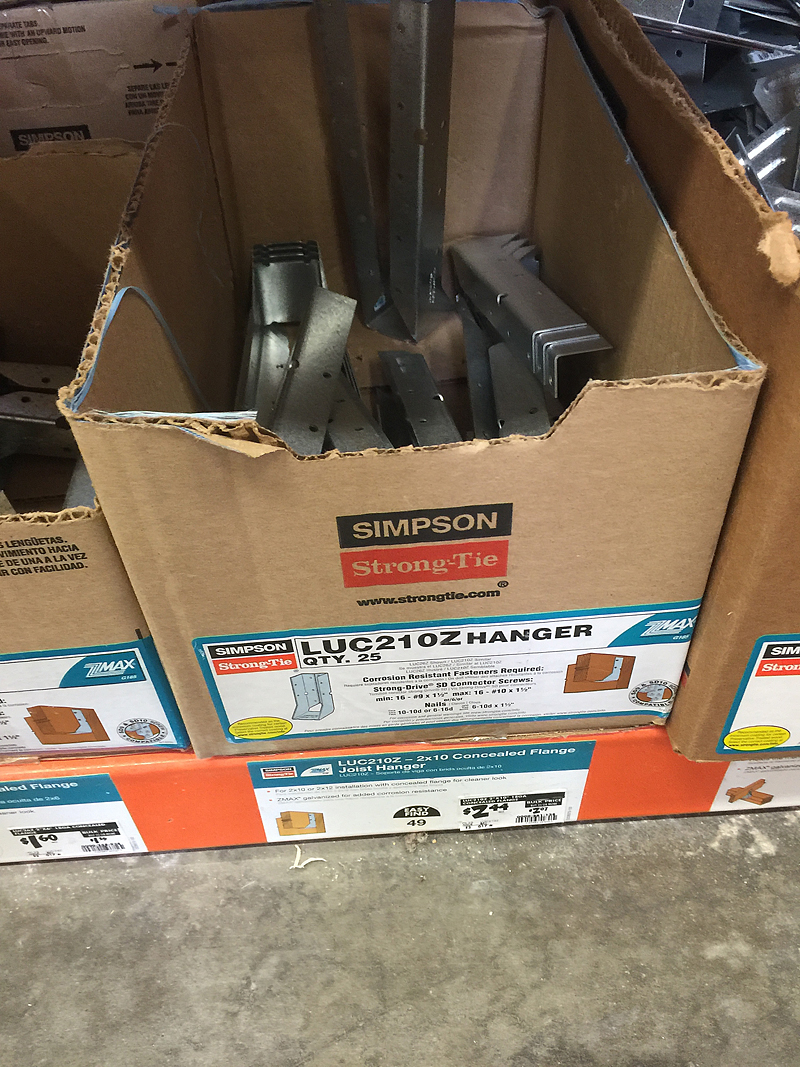
What brackets you say? These ones from Home Depot. They are called Simpson StrongTie LUC21OZ Hangers. They cost about $2.50 a piece but really make this fan look industrial. You are gonna turn them upside down and they should line up with your centerpiece when resting on the legs.
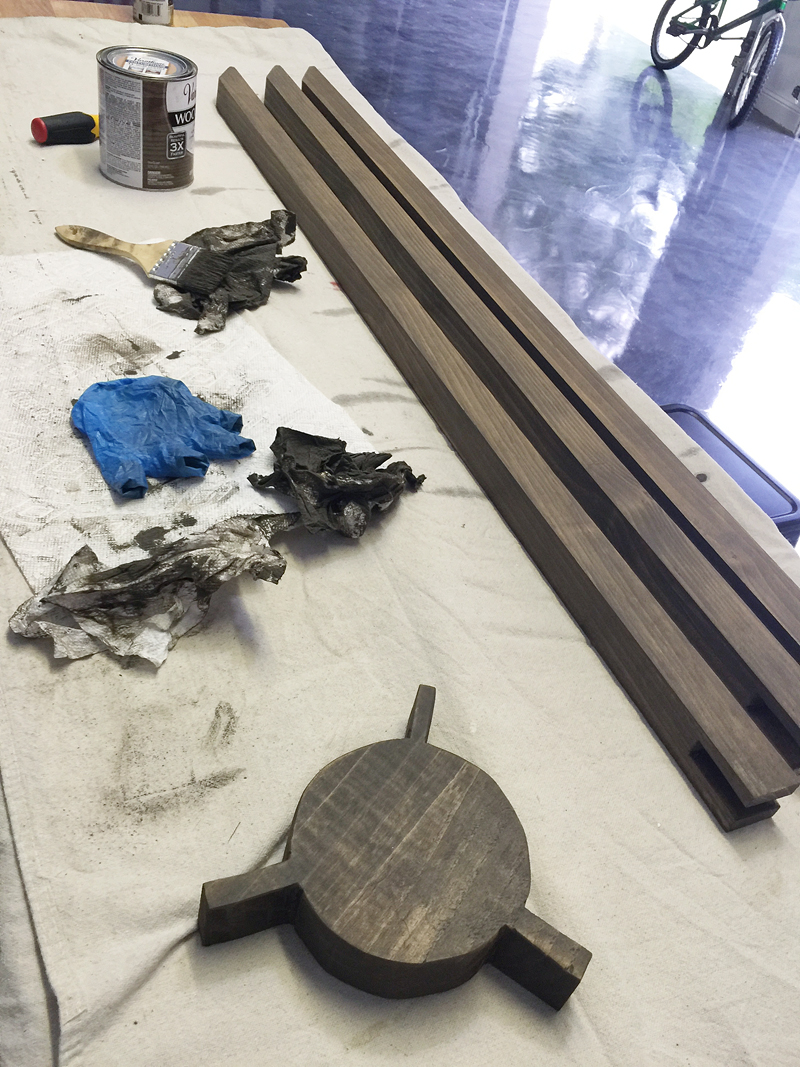
Time for stain! Sand everything down with 120 grit and then 220 grit and then I used Briarsmoke by Rust-Oleum to give it a nice old wood look.
Let that dry.
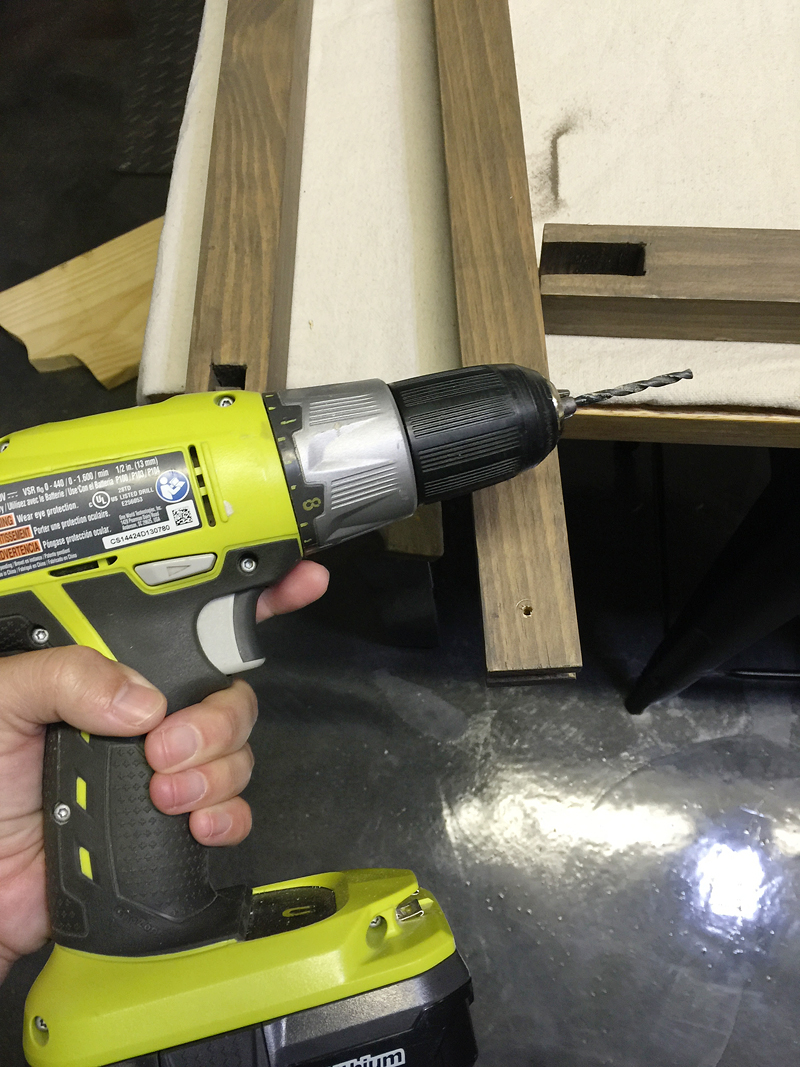
Then it’s time to drill your holes to attach everything. I drilled the holes in the legs about an inch from the end.
The holes in the centerpiece are about 3/4″ from the end of each arm and centered from top to bottom.
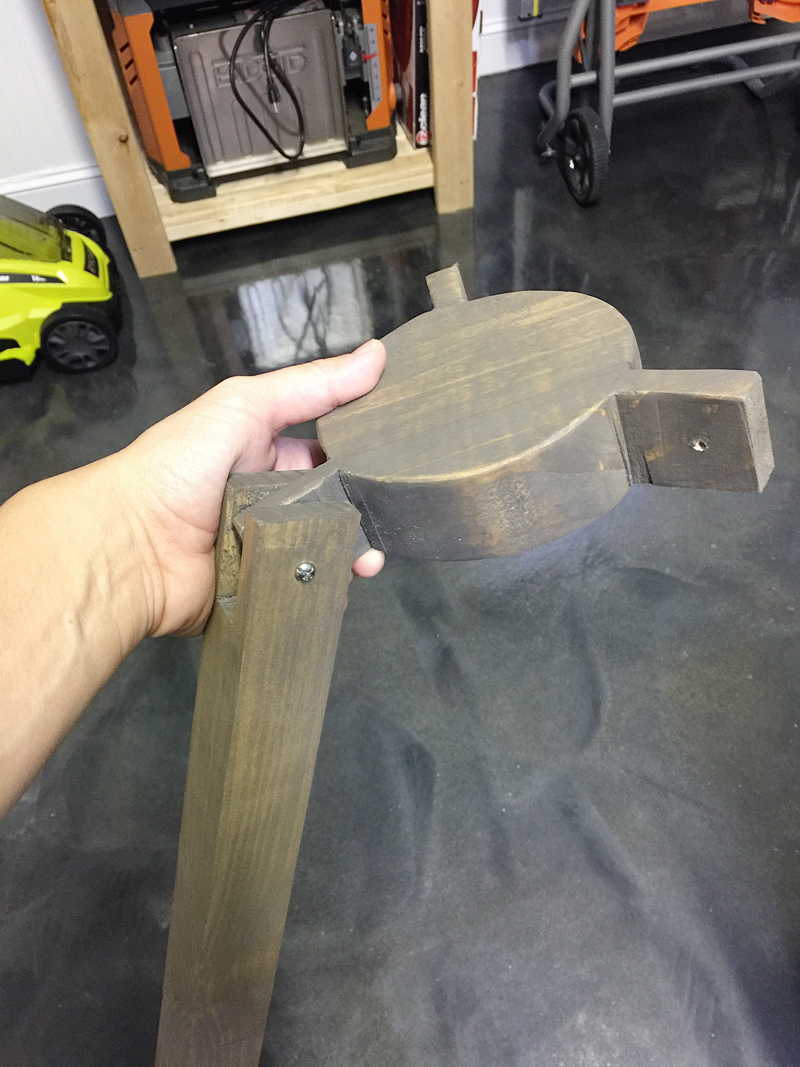
Then I used 1.5″ flat end screws to go through the legs and the arms to hold them together. That sounded kinda like yoga.
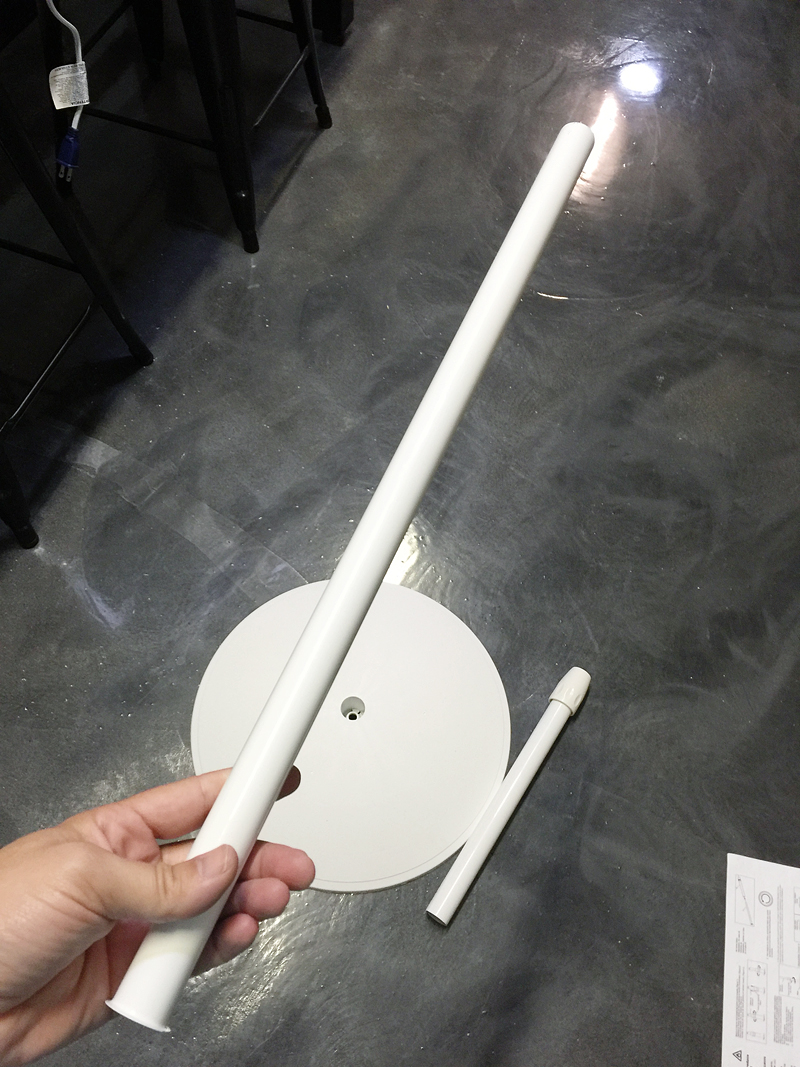
Time to attach the head. In the center of the centerpiece, you will want to make a little home for the support pole. This pole comes with the fan and just needs to be disassembled from the extension pole. It is what supports the head of the fan.
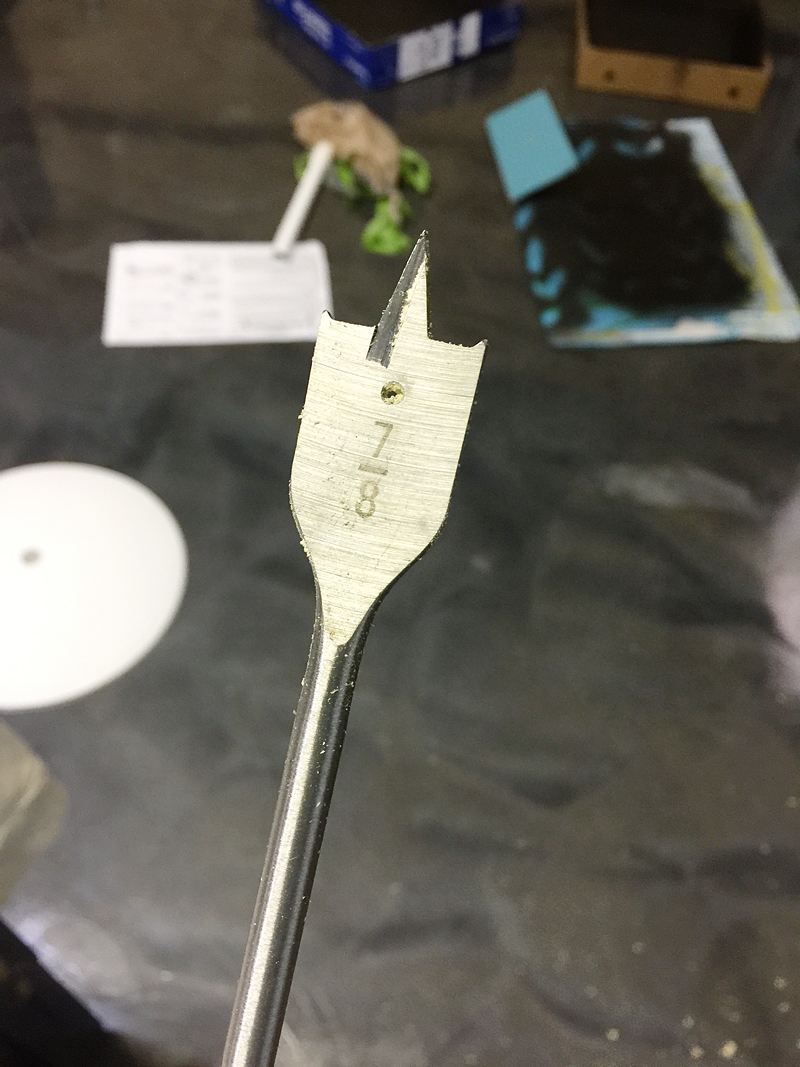
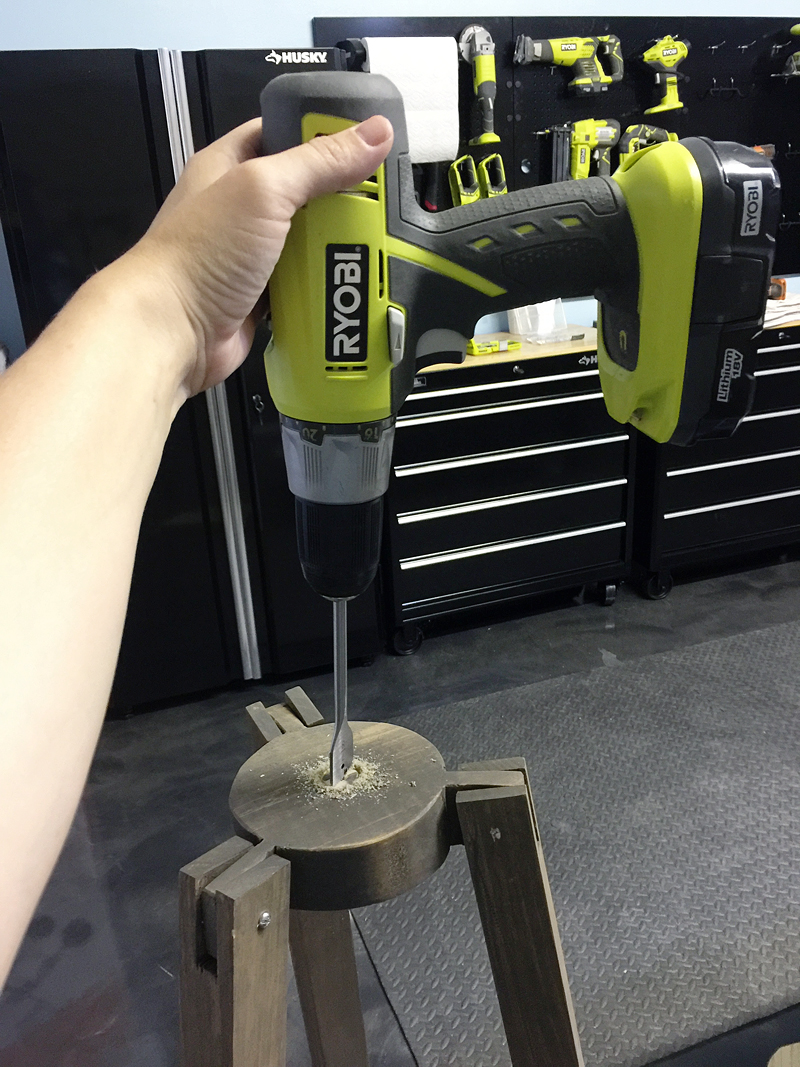
Using a 7/8″ bit, create a hole in the centerpiece about 3/4 of the way through. DO NOT MAKE THE HOLE GO ALL THE WAY THROUGH YOUR 2″ BOARD.
Okay – so this is the support pole that I was talking about. You will want to chop this down with a hack saw to 8″-10″ depending on your preference.
Once you chop it down – slip it into your tripod. Does it fit?! CELEBRATE! And then go spray it ORB to match 🙂 Include the brackets in your spray paint party. Nobody likes feeling excluded.
Time to reassemble your fan. Follow all of your steps backwards and put the housing back on the fan head.
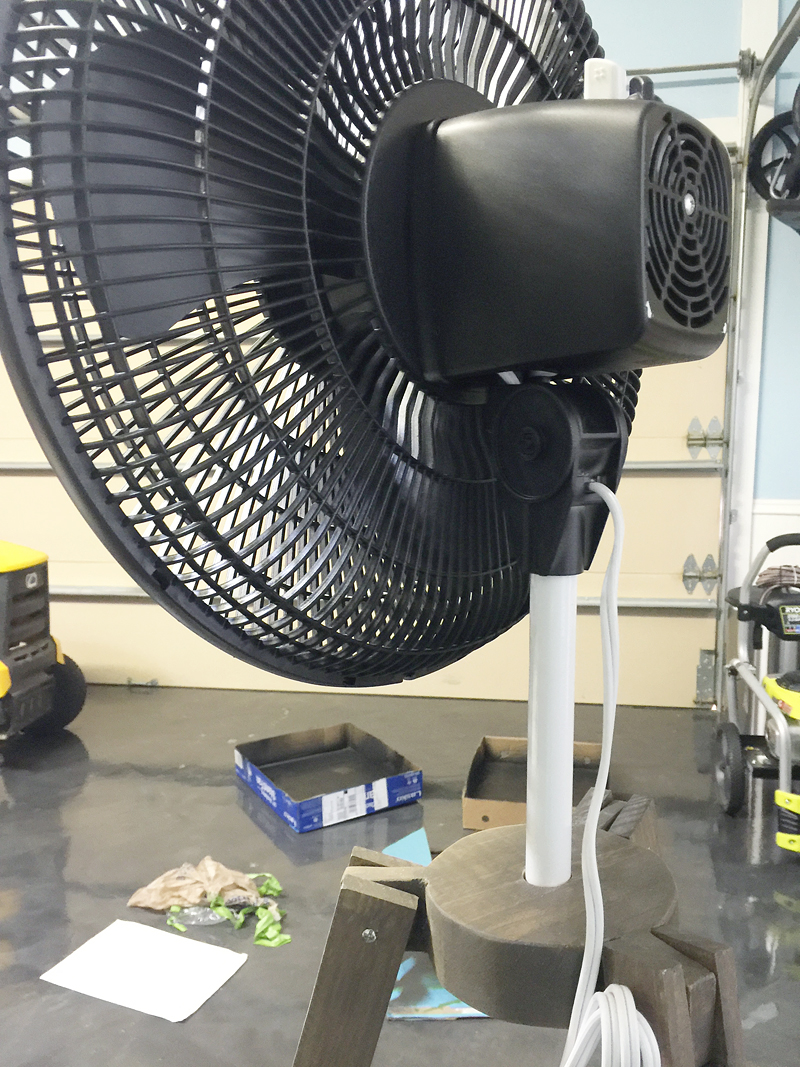
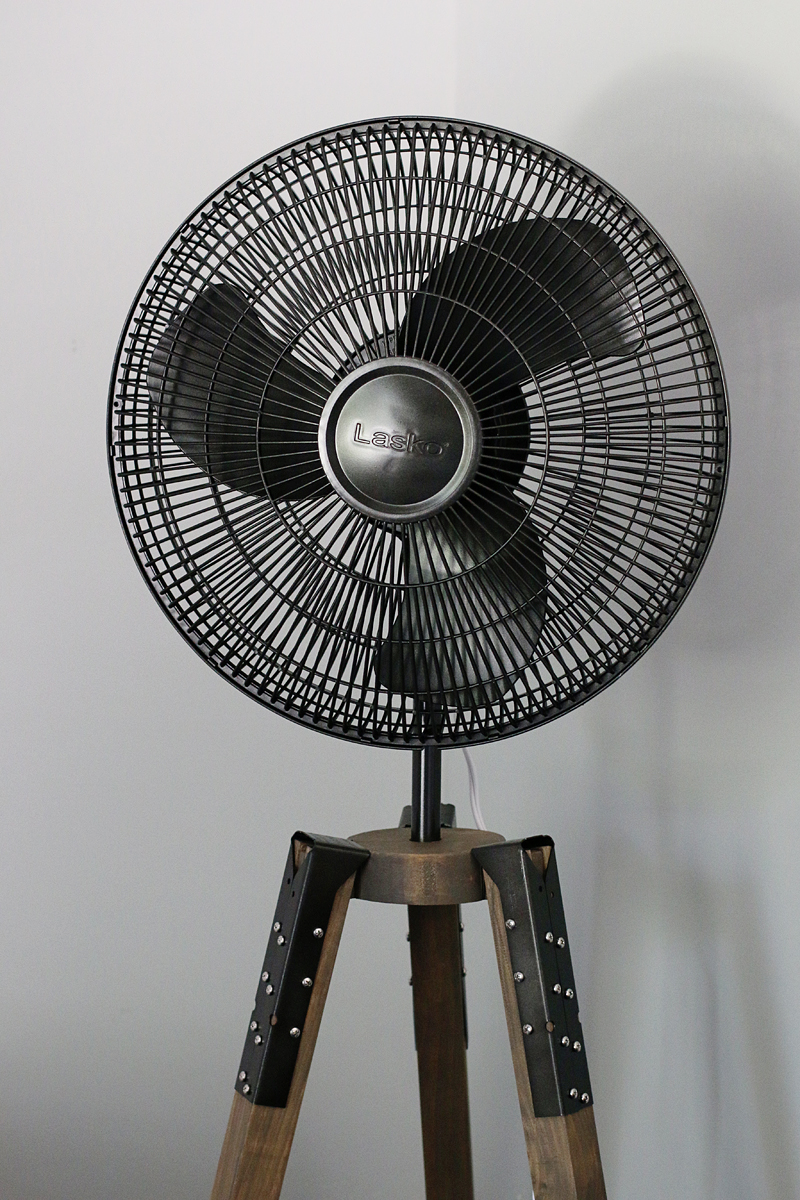
This is what it will look like once it’s on the tripod.
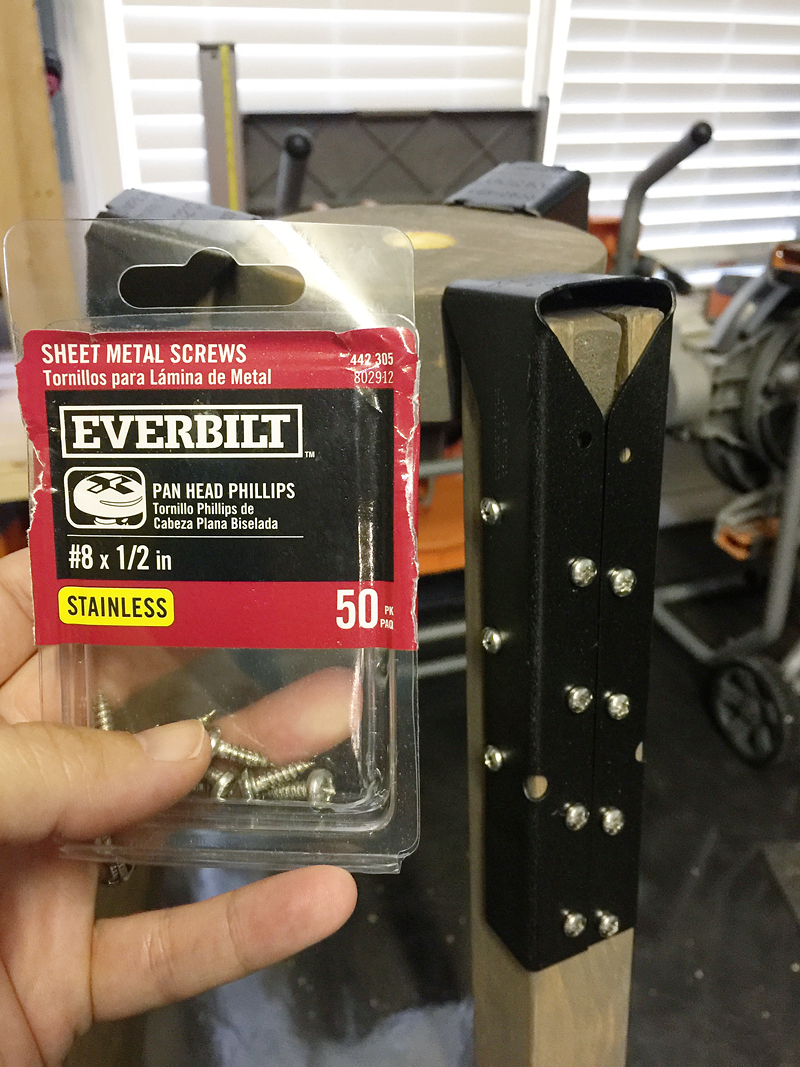
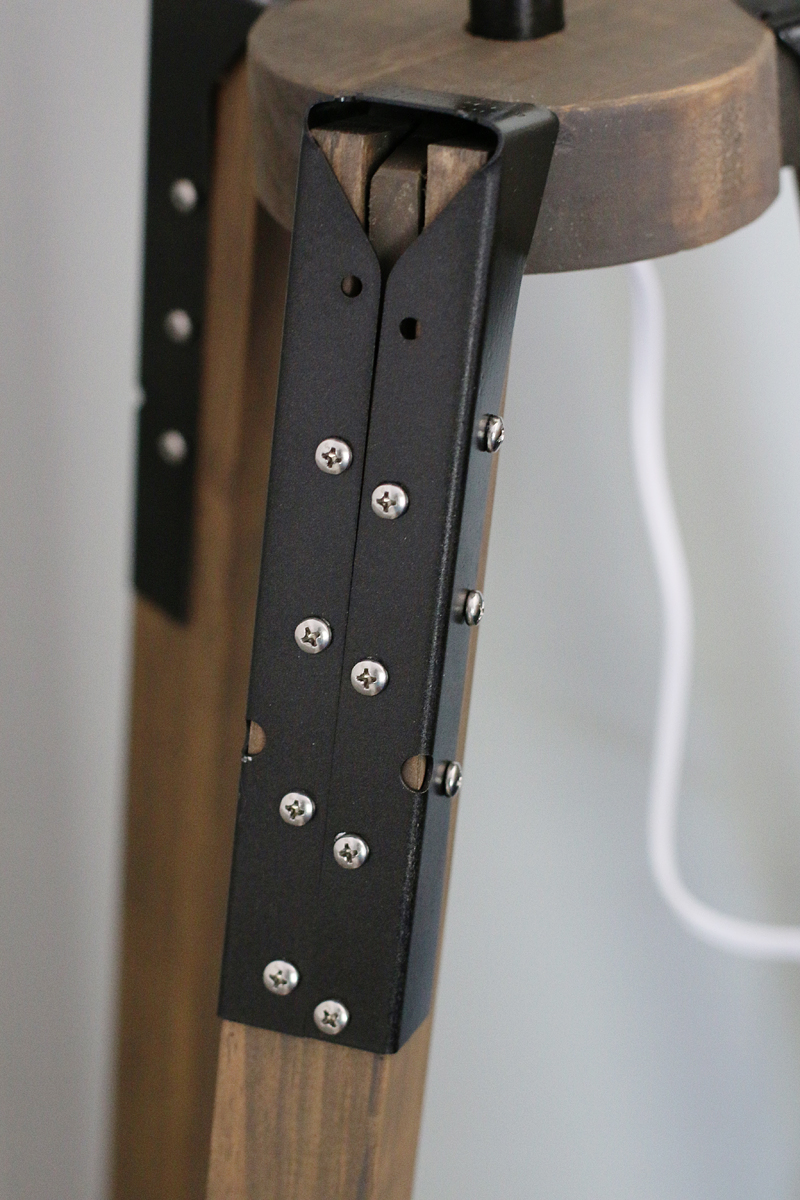
Once everything is dry – it’s time to attach the brackets. I used these sheet metal screws because I liked the rounded heads. I kept them stainless because I liked the contrast with the ORB. It’s like bling on a little black dress.
See how pretty?
Now slip the support pole in place, attach the motor head with the assembled fan and BOOM….
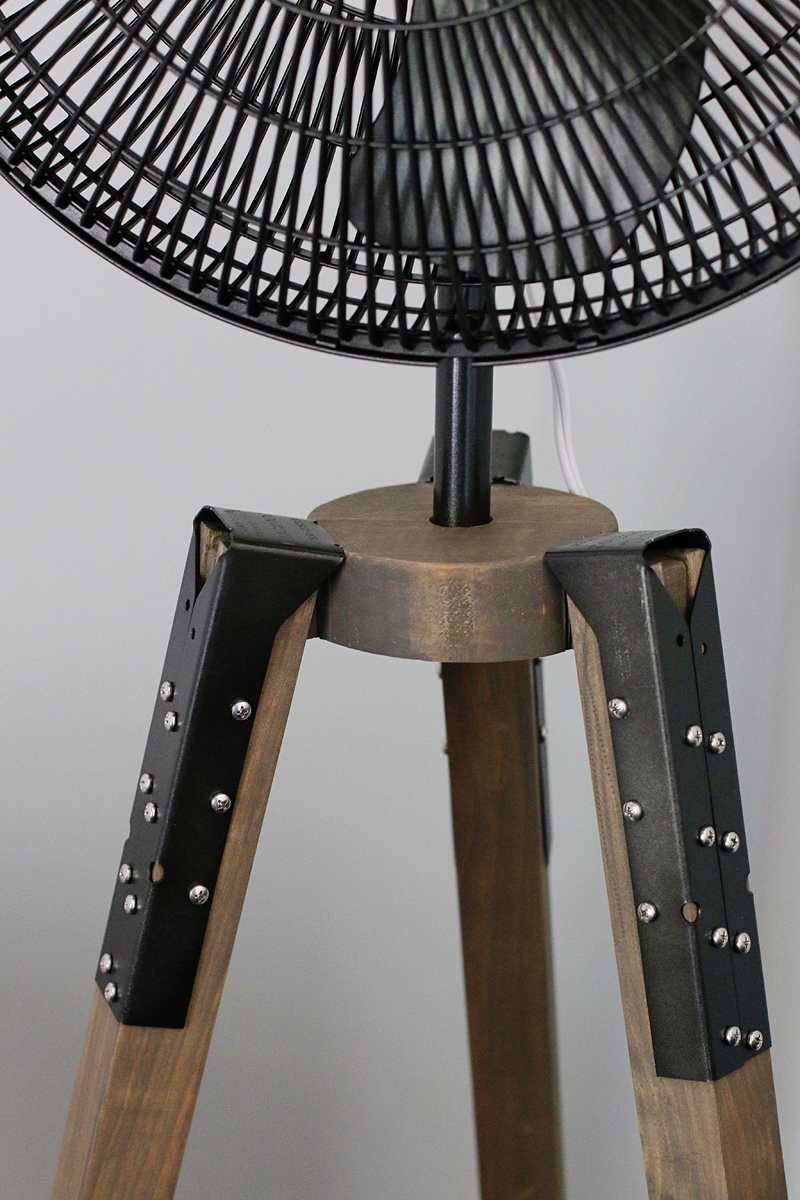
Instantly (ahem four hours later) you have an industrial fan that is pretty enough to leave out all year long.
I love ours. It still oscillates and the head still can tilt up or down and pivot.
Isn’t it gorgeous? And it was a much better price than the other $275 one…..here’s the breakdown
Fan – $35
Wood – $11
Brackets – $7.50
Spraypaint – $6
Hardware – $4
Coping saw – $5
(already owned stain, sandpaper, tools, and scrap wood)
Total of $69
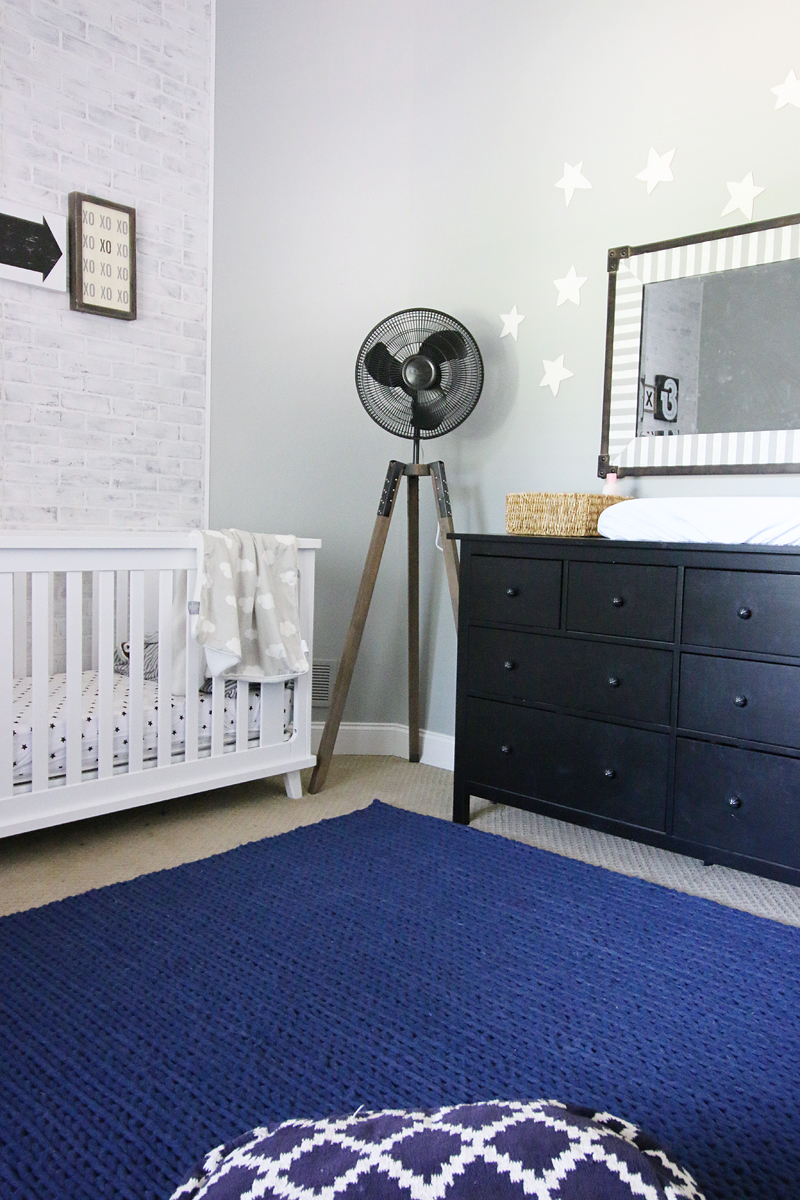
Not too shabby! But it really does feel like the main even in the room and it plays very nicely off the faux card catalog in the opposite corner.
It definitely took some time to figure out and it wasn’t the easiest DIY with the jigsaw (I don’t own a band saw so maybe that would have been easier or more precise?) but it was totally worth it in the end because it functions and looks great. And saved me $200 so now I can go buy some thing more fun….like chocolate 🙂

I’m in love with this and very creative thinking to design it they way you did! Definitely want to make one for our master bedroom. Question for you since I have a 9-month old obsessed with beelining it to our current standing rotating fan and trying to climb it (don’t worry, we beeline it right after him to stop him!) but do you ever have issues with your boys trying to climb it or stick their fingers in there?
This is very impressive! It looks great and is definitely worth the money you saved. Great job.
Katie, I love you and I love your blog… but the popup ad thing has to stop. It’s making it nearly impossible for me to read your blogs! 🙁
LOVE IT! Can’t wait to see the full reveal of their room. 🙂
I’m obsessed! Such a cool idea Bowers!
These are the kinds of posts I’ve missed from you!! I really love that you figure out projects like this. Seriously, this was great and really shows your talent and ingenuity! And I love that this post came out of an actual need – you wanted to make this fan – not because you had to develop a project around a sponsored product. Hope to see more posts like this one!
No wonder it looks so good. It takes a lot of work! And skill, alas. don’t think I’ll be whipping one out shortly (it took me 30 minutes to wire my first lamp!). So impressed. You should do this for a living.
Wait, you do! Still impressed.
We have the normal amount of interest from the boys for any new thing but usually we divert their attention or tell them it’s hot. They usually know what that means and it helps keep them from touching!
xo kb
Sorry Joanne! What are you using to read? Computer, phone, iPad? And what browser? We have found that some devices have more ads than others! I can tell my ad guys about the problem if I have a screenshot of the issue and the details of how you read!
xo kb
Incredibly ingenious tutorial! I’ve been searching for stylish fan options that are…
a) Not crazy pricey, and
b) Not crazy ugly.
Until this post, I had almost given up on what I figured was an impossible quest. Thanks for the inspiration!
Very pretty! And it looks like it’s blowing away the stars 🙂
This. Is. Awesome!
I have seriously impressed with your work on this. As Em says above, you made ingenious design decisions here and it reflects very well on you. Great job.
*EDIT: I AM seriously impressed….etc
Love the blanket hanging over the crib rail (with the clouds)! Can I ask the brand/ where it is from?? Thanks!!
Oh, love the fan too!! :o)
Is there a reason why you did not use a black fan and save you a little time like not painting de box where the motor is ? I am asking because I want to know what color I need to buy just in case I decide to build my own industrial tripod fan .
Waowwww !! Superbe !
Now you can make a lamp with the same pattern !
Hello from Belgium !
Great step by step instructions. Have you considered painting the white cord?
Love this!! I want several.
Love the fan design! Out of curiosity, what’s your stance on pre-stain wood conditioners?
I really like this. I have this exact fan and always thought it was an eyesore. Does it osculate still?
I don’t have the tools to make the stand so I will just have to drool over yours.
Coolest fan ever!!! I have been wanting a tripod lamp like this forever but they are upwards of $200-$300 as well. Thanks for the inspiration, you guys simply rock.
That’s really beautiful but would take me 40 hours and $500 of tool purchases. LOL. I wonder if you could do something similar by repurposing the tripod base from a floor lamp?
The is A-Mazing! I’m so impressed! Great job!
They work! You can also use just plain water too 🙂 And all of the Rust-Oleum products have the conditioner in it already…but it really doesn’t ever hurt to use it!
xo – kb
It does still osculate!
xo – kb
Probably! I already have ideas on how to hack another version so maybe I will do that for another space!
xo – kb
I did but I decided to just keep it white because it blended better with our wall color.
xo – kb
Here is the link to it! It’s literally the softest blanket ever on both sides!
xo – kb
Well at the time we bought it, the price for the white one was ten dollars cheaper than the black. I knew I would paint it either way because the ORB looks very different than black plastic…so I just figured I would save money 🙂
xo – kb
Wow, impressive. I have seen lamps that look like tripod fans too. Here’s a tripod fan in black for a good price
http://www.overstock.com/Home-Garden/Hunter-16-inch-Onyx-Copper-Retro-Tripod-Stand-Fan-with-Black-Finish/11832537/product.html?refccid=W6CABOCAS6II6C2BGCQMFHSAME&searchidx=1
What a cool idea, Katie!
thanks for sharing!
Can I just say, I really appreciate your attention to detail in your “how to” posts and all the photos you include in every post. I’m usually a bit impatient waiting for them all to load, I want to get scrollin’ (!), but I really appreciate you include them all.
P.S. That instagram pic of Weston and Clay is one of my all-time favourites – real joy.
I am your newest “fan”. Terrific tutorial!
Aww thanks Tori!
xo – kb
THIS IS AWESOME!! Do you have AC? Or do you just use fans at night? I imagine it would be pricey to use AC the whole summer. We are moving to a similar sized home and I am wondering if you have any tips on keeping the house cool if you don’t use it! Thanks 🙂
Wow! Wow! Wow! So impressed! You lost me when you disassembled the fan but I kept reading to see the steps. I’m not that talented but can appreciate your talent. Now can you make one for me? I live in that other climate you mentioned- hot & dry. High is 111 degrees today & just a balmy 115 tomorrow. That’s Vegas baby!
I’m also having trouble with it loading especially on my work computer. It just makes the website really slow (from my brand new Mac) and then it completely crashes when I use my work computer. I love your blog, but sometimes the ads are too much to deal with.
We do have AC and use it all the time….we have to or we would just die. Our units are for different areas of our house so we set ours for different settings for different times.
xo – kb
Thank you so much! I figured. We just have to suck it up then haha!
This idea came at the perfect time! I am just starting a big purge and my identical fan that broke where it fits into the stand was at the top of the list … as I’ve been cursing the fact that I can’t seem to throw it away. Here’s to new life!
.02
as for the ads, especially annoying is the newer banner ad along the bottom of the pages that has been ‘popping’ up lately among blogs. It obstructs the view and returns if you navigate to another page. I’m using Safari
What a great idea. I have an old wood tripod stored for “something” and this is perfect for my bronze fan. Will be using your support add-ons which make the whole project unique. Thanks for perfect timing.
I use Bloglovin’ on both the iPhone 6 and a MacBook and PC. I get the ad on all of them. To find this post to see if you had replied, I’m using Mozilla Firefox and have a Kroger popup ad. The ad always shows with an X to close out, but it never.ever.closes.
Ok – thank you! I’ll pass this along.
xo – kb
You are so talented! BTW, I purchased this same oscillating, 16″ stand fan, in black, last week from Walmart for $19.88 in case you are thinking about doing another one.
Great deal!
xo – kb
I’m in the midst of making this and I wanted to add that 4′ legs make this fan very, very tall – much taller than a standard oscillating fan (and much taller than the inspiration fan). I have found that 32″ legs work fine, bringing the total height to around 50″ with a 16″ fan perched on top. The other bonus of this is that you can make 3-32″ legs from a single 2x2x8′ (which I wish I knew earlier, because I could have saved $11. you live and you learn!)
Yes it is much taller. I should have mentioned that. We needed it to be well off the floor so that little fingers would not be curious but we also have very tall ceilings. Thank you for clarifying that Audrey! I am sure that will be helpful to others.
xo – kb
I just finished a tripod lamp with your instructions. Unfortunately, our Home Depot’s in Austin, Texas don’t have Rust-Oleum stain so I had to use a slightly darker stain but it still looks great. Thanks for sharing this post!
Yay! I’m glad it worked! I’d love to see it Meagan! Tag me on Instagram 🙂
xo – kb
Nice post i save a ot of money making it
Now im a new follower
I just finished making this fan; thanks for the tutorial!
Here’s mine: https://www.chrisfinke.com/2017/06/19/i-made-the-bower-power-industrial-tripod-fan/
This is just what I have been looking for. Really great design and very clever. Possibly when I make my version I might use like brass wingnuts as my bling as well as to make the legs adjustable. Great job.
These are adorable DIY project!v