Guess what?!
You are never gonna believe it. It’s a miracle. A legit Christmas miracle. Basically Santa came to our house and collaborated with Jeremy and I and now we are all doing the backstroke in a pool of eggnog and Christmas spirits. No. We didn’t DIY a pool….that would be awesome though.
Are you excited about this? Because things are gonna get real. We are gonna share a finished laundry room THIS WEEK! That is correct. You read that and I wrote it and it’s definitely happening. It is going to be our last reveal of the year and we are THRILLED. Some of you…the ones that have been here before….you understand the magnitude of this statement. We began tackling this renovation two and half years ago. It’s true. In May of 2013 we started this room and we have since birthed two children and finished other spaces. For whatever reason…don’t ask why….it just never was complete. I kinda chalked it up to being “the one that got away”. You know you have one of those. We started, got moving, but then faced obstacle after obstacle and then suddenly it was constantly filled with dirty jeans and muddy tshirts and we just ran outta steam. Well….I am really excited to say YES, it is complete. And YES, it is ready for it’s grand reveal.
If you would like to catch up on the past posts, you can read these bad boys….
Laundry Room Posts
Installing Floor Tile – Part 1
Installing Floor Tile – Part 2
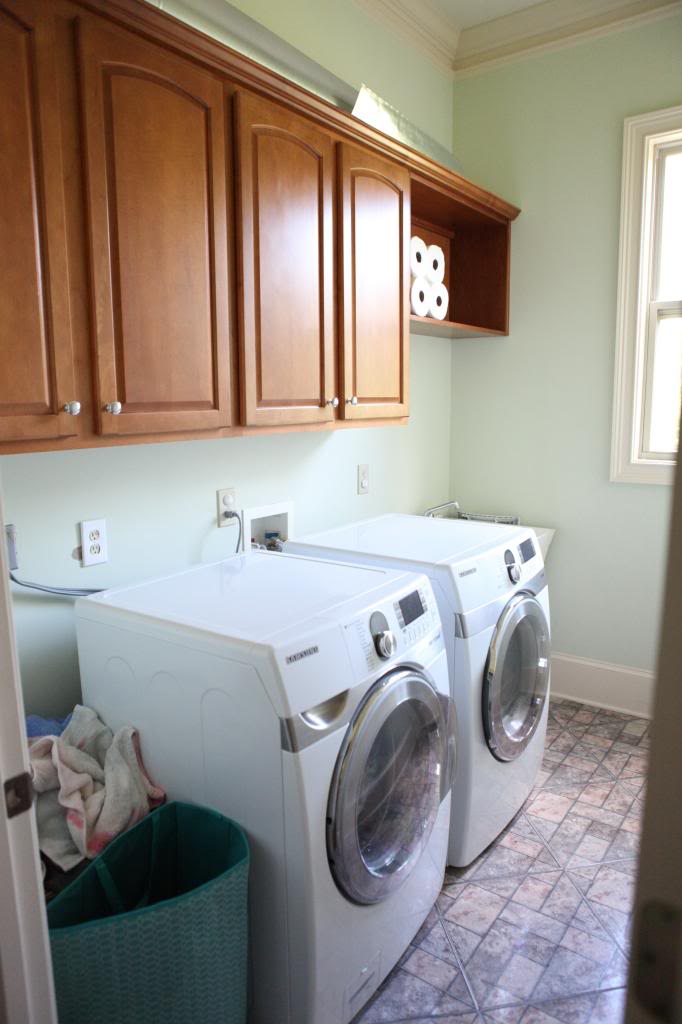
So this is what it started looking like….all that deliciousness….
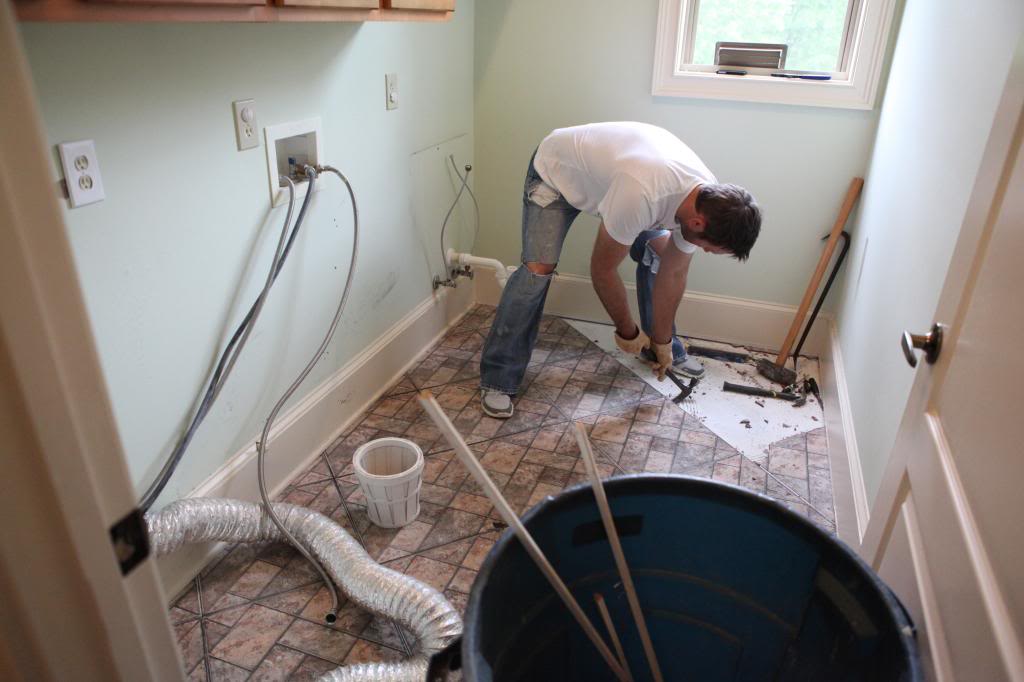
And Jeremy demo’ed the floors….
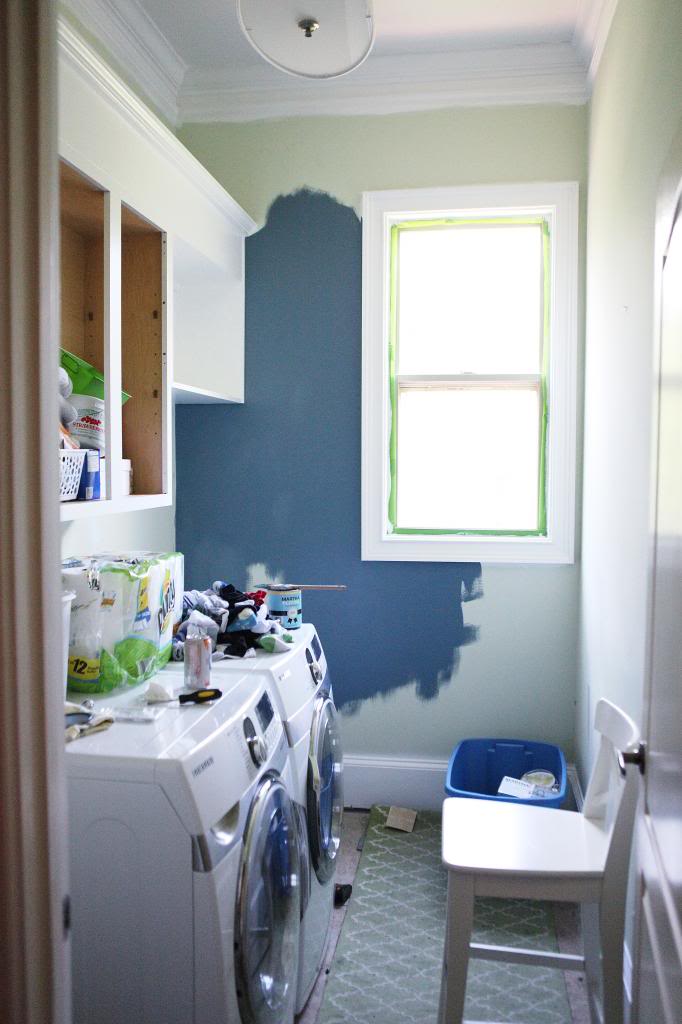
Then I started painting the trim, installed a light and painted the walls….
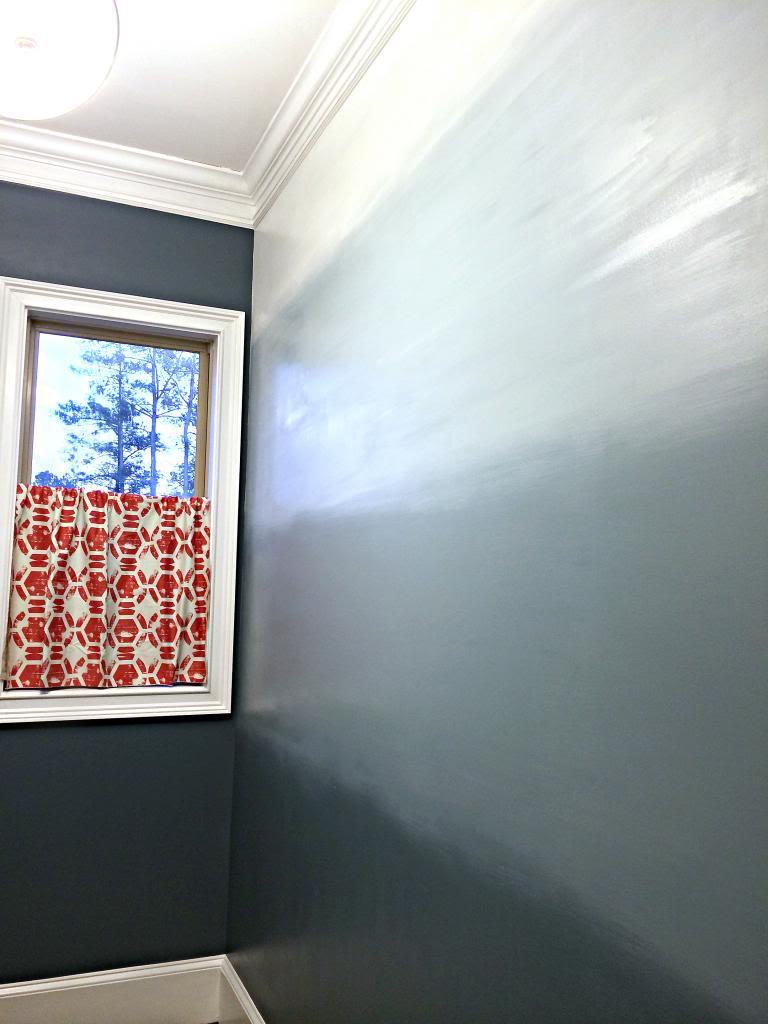
I also did a fun accent wall that has a cool ombre vibe. I don’t know if it will stay there forever, but I still love it 🙂
Then we moved everything back out to do the floors…
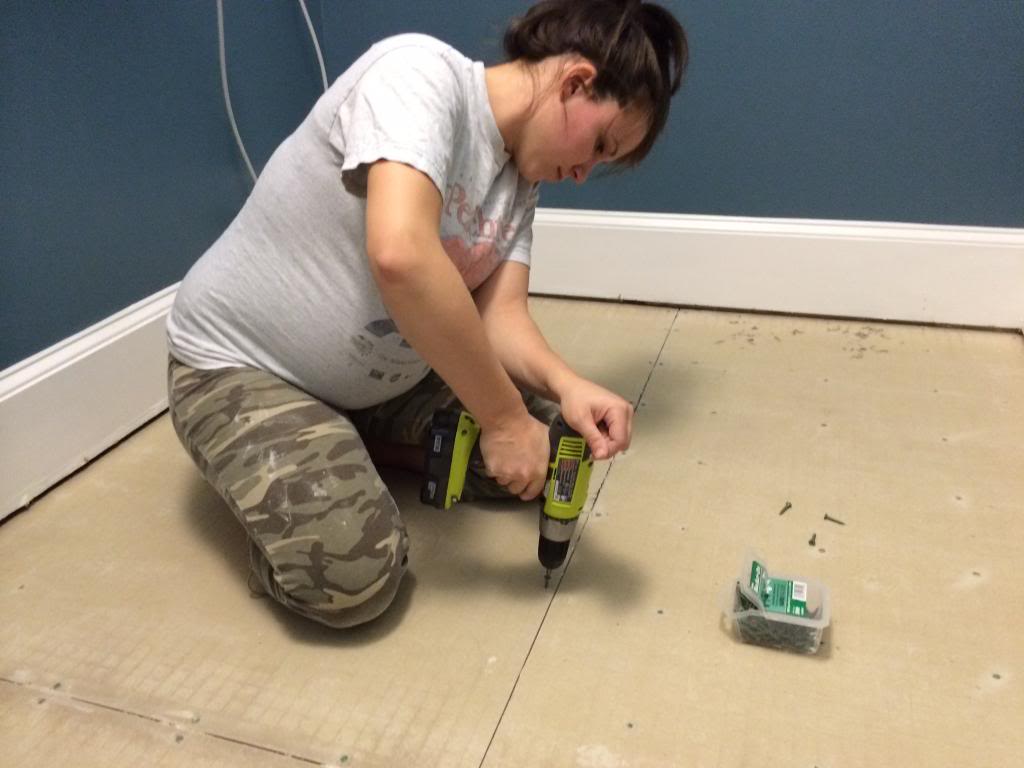
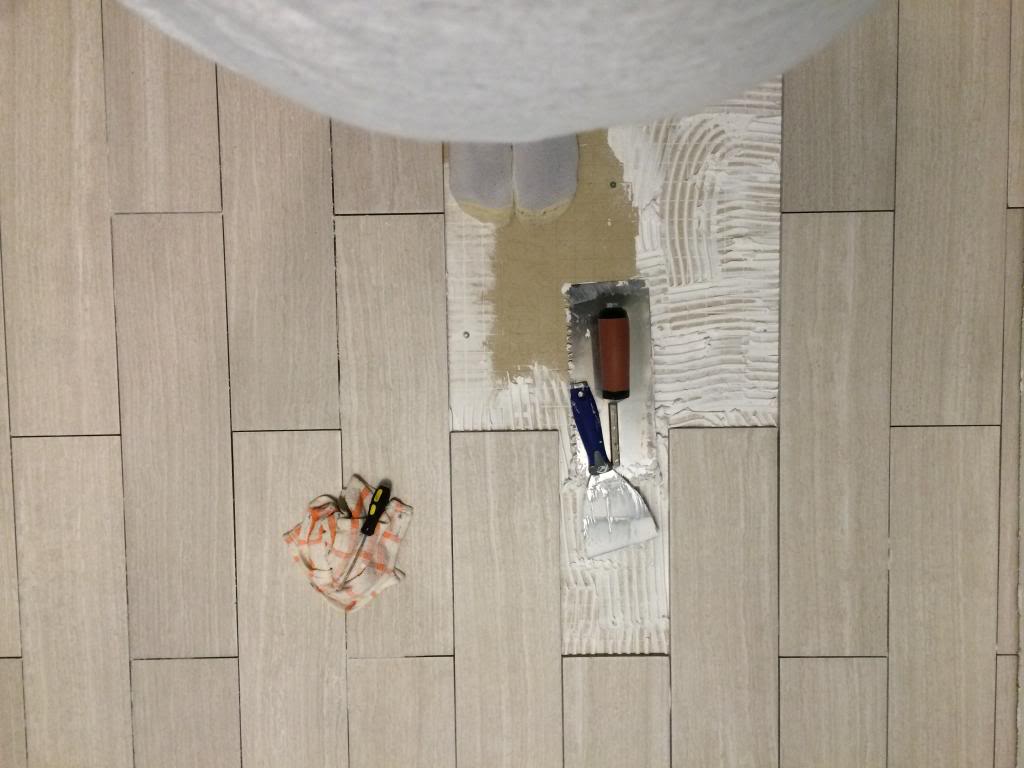
We tiled them and installed new trim…
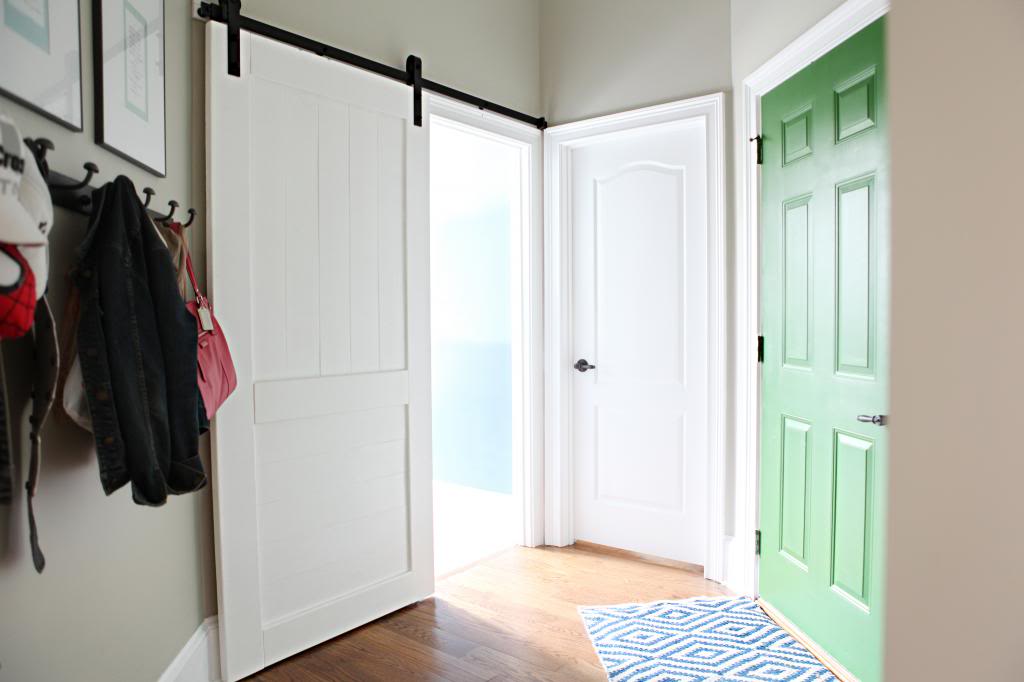
I also built this sliding door to free up some space…
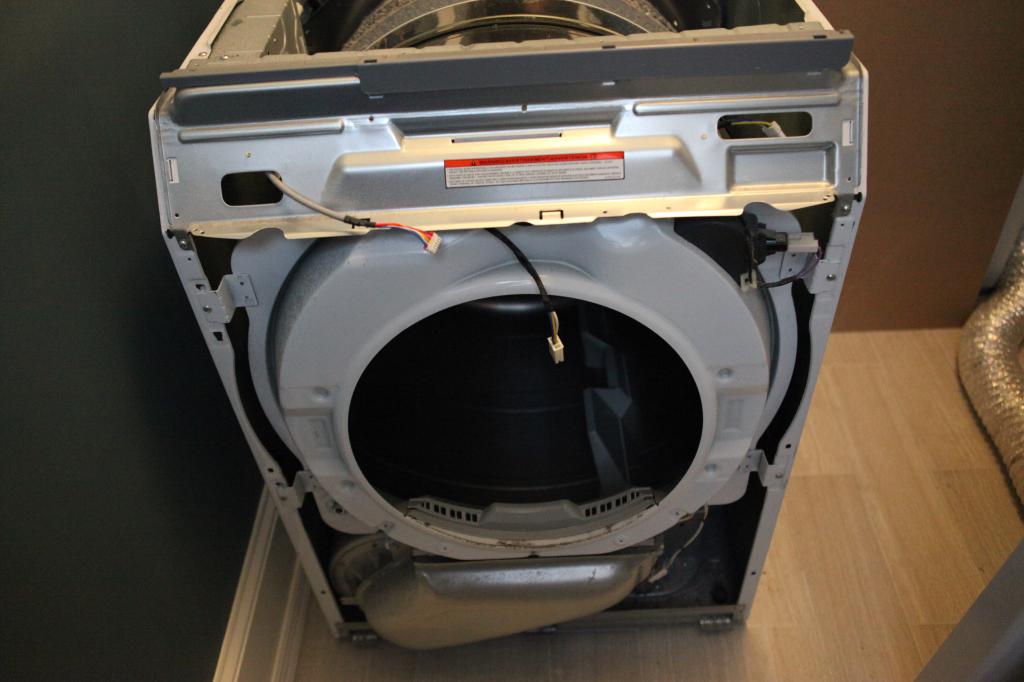
One of those hiccups in our progress was our dryer stopped heating….until Jeremy fixed it 🙂
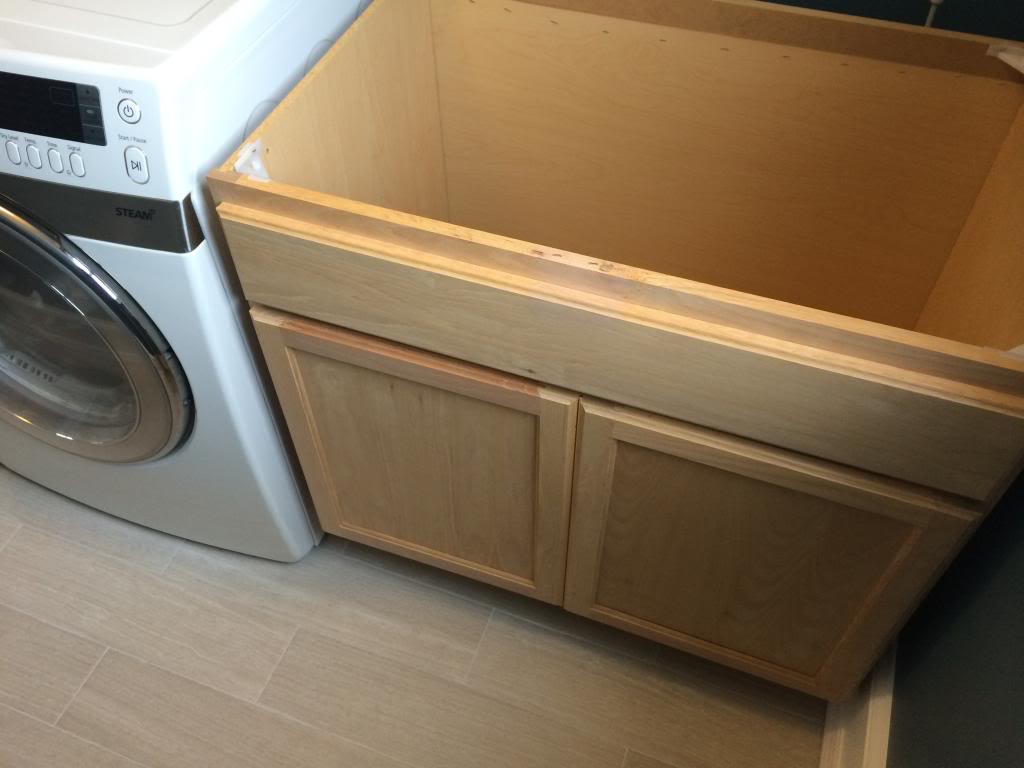
We bought a big cabinet to recreate a sink area…
And rerouted some electrical and did some drywall work so that our backsplash would be uninterrupted….
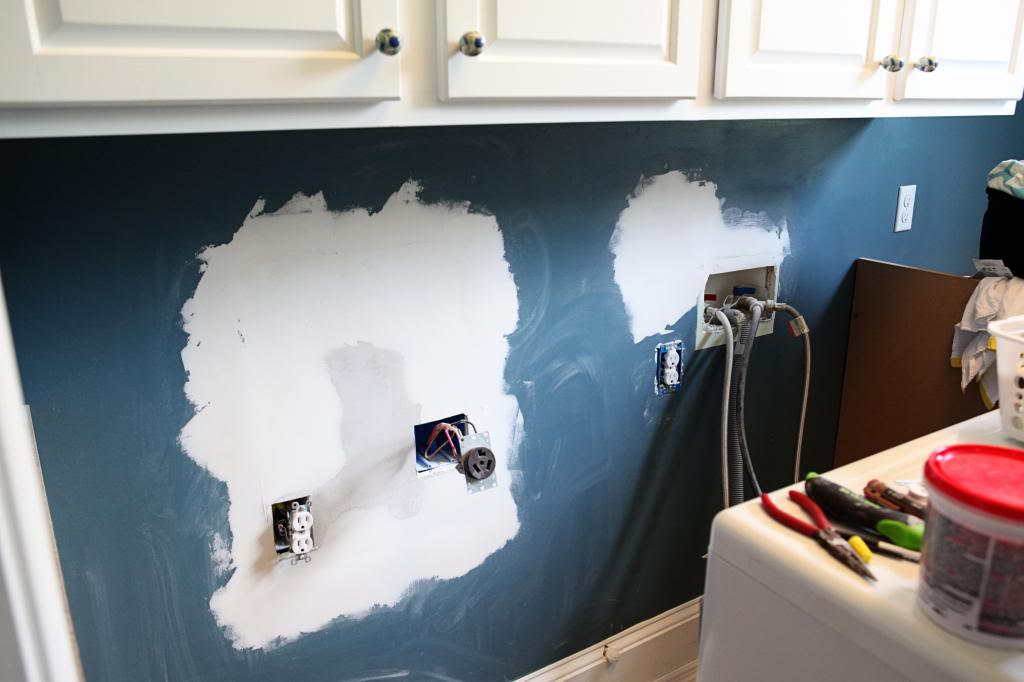
And we got to the point where were ready for countertops. The problem was….what kinda countertops to put in?
At the very beginning, I said butcher block. That was always my first instinct and unfortunately the laminated versions they sell at home improvement stores and at Ikea were too small. Jeremy and I thought maybe we could diy some out of lumber. We even bought the boards and measured everything out to see what they would look like….
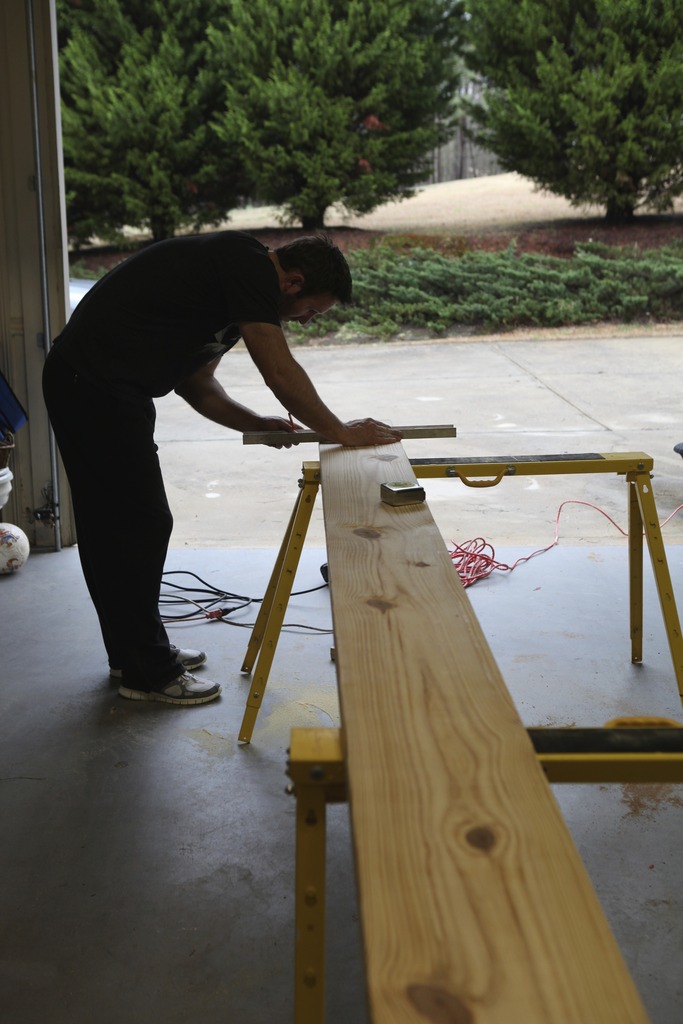
But we quickly scrapped that plan when we realized that we couldn’t’ get it smooth enough without a planer (which we don’t own)….

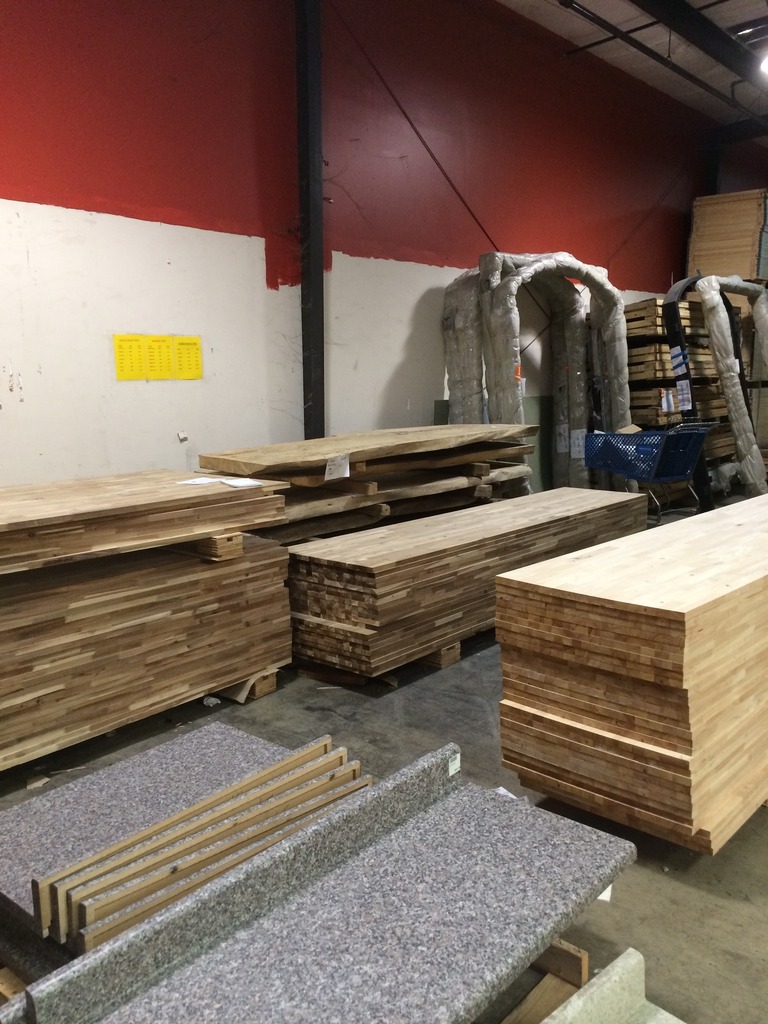
Then one time we were up in Chattanooga and visited one of our favorite stores – Southeastern Salvage. This place is like Bower catnip. We always plan our visits for family and always schedule in our favorite stop. Lo and Behold….countertop section…
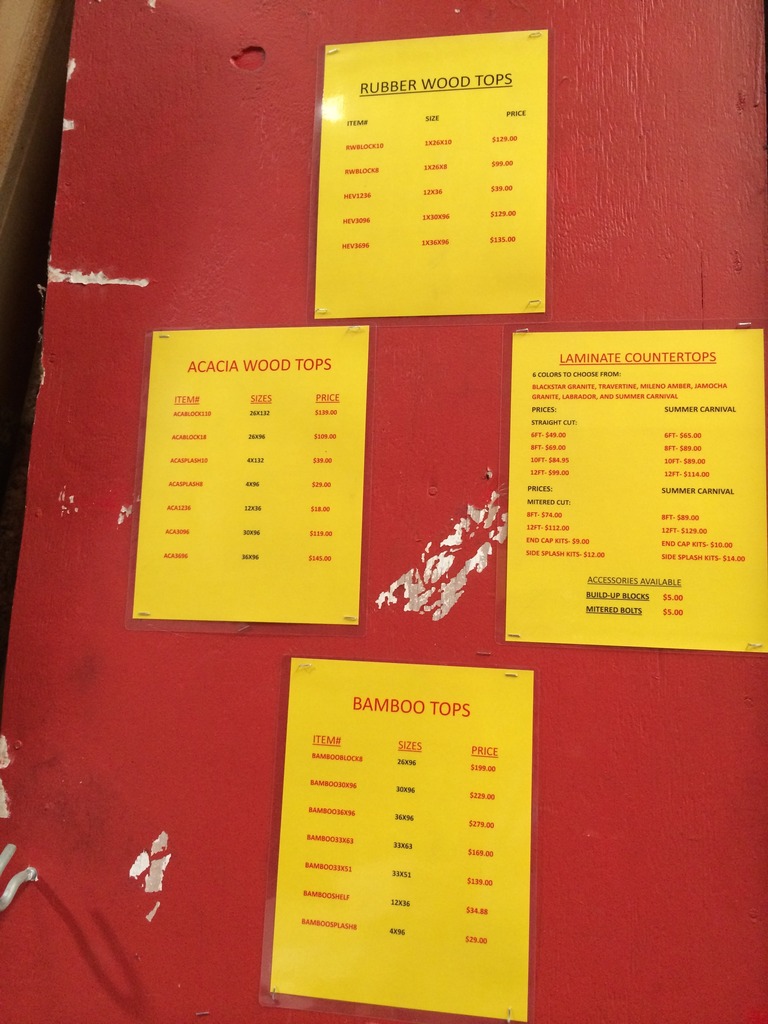
Most times butcher block countertops are sold as the standard depth for countertops – 25″. But ours was gonna go over a washer and dryer and needed to allow for the hoses and all that…which was 32″. Thankfully they did sell tops that were deep enough and we immediately devised a “how to strap these bad boys to our car roof” plan.
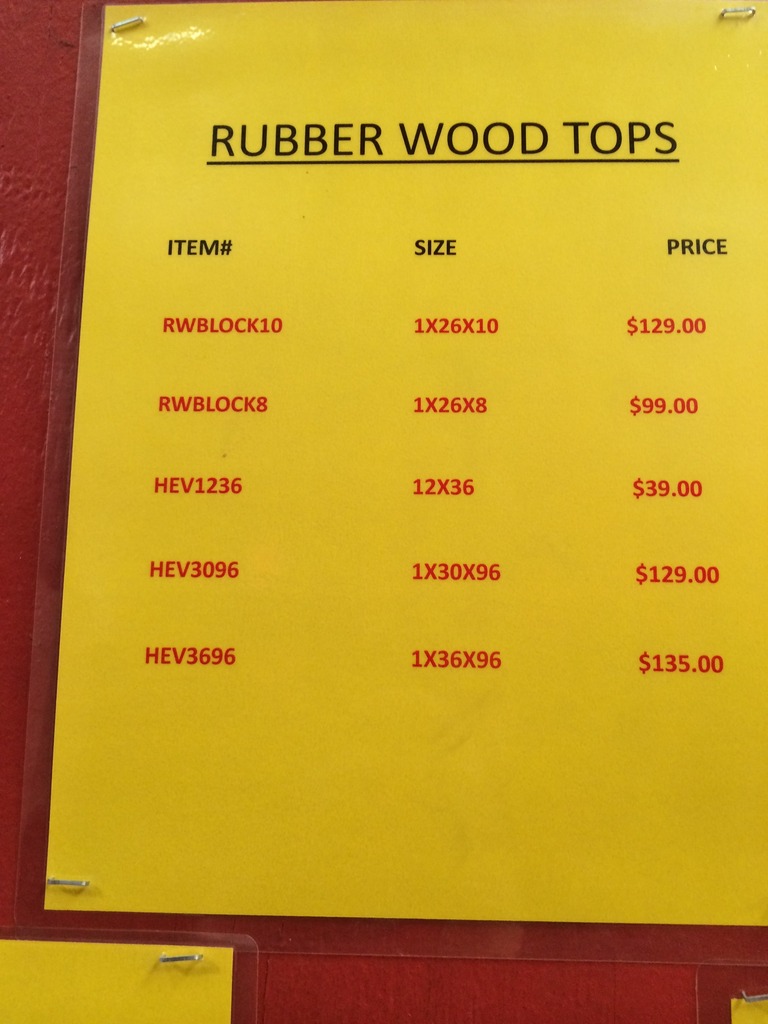
We picked out our slabs and headed home!
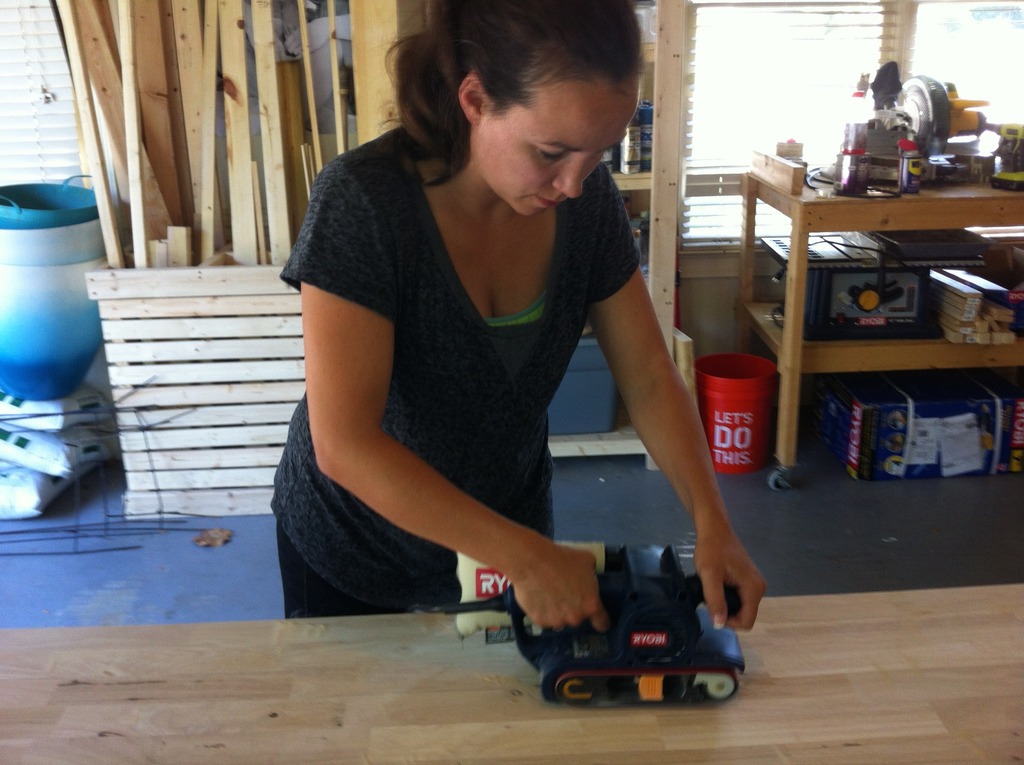
Our first step was to sand the entire thing really well…
And Jeremy cut it to length…
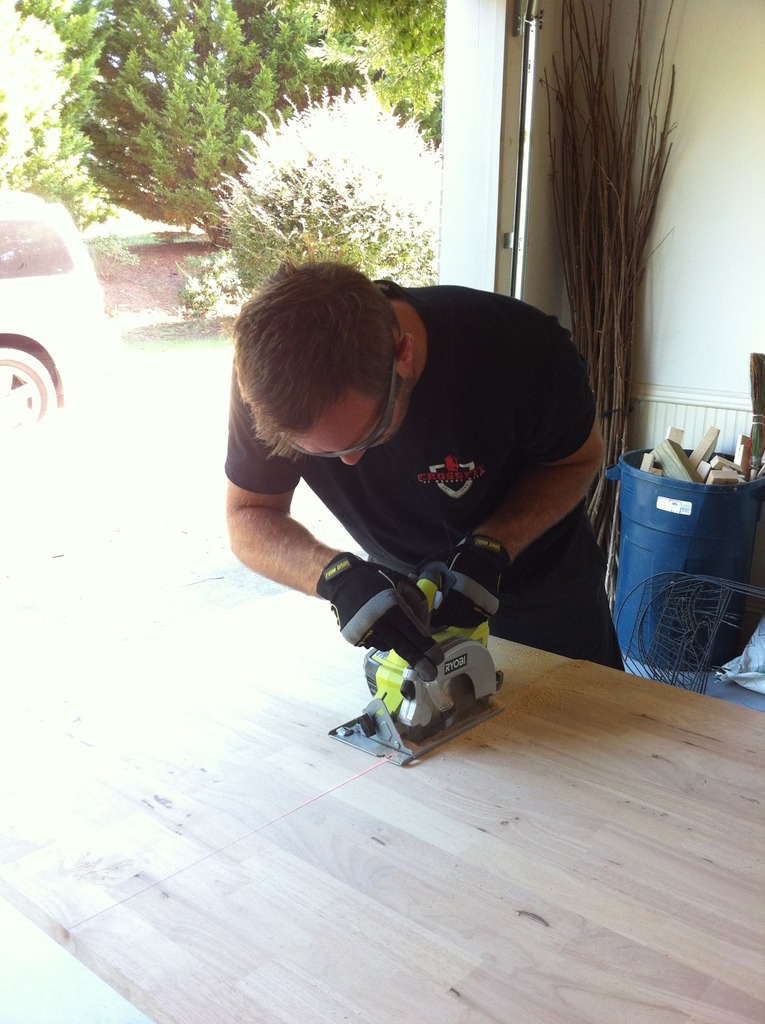
Note that all that happened about a year ago. (see Jeremy’s stubble vs his current full beard)
So fast forward to this month and us starting back at the countertop process….
Jeremy needed to cut the holes out for the sink and he made a little video to share it….of course it is time lapse because he knows how his sweet lovah is into time lapse 🙂
Okay….now onto the whole staining process…
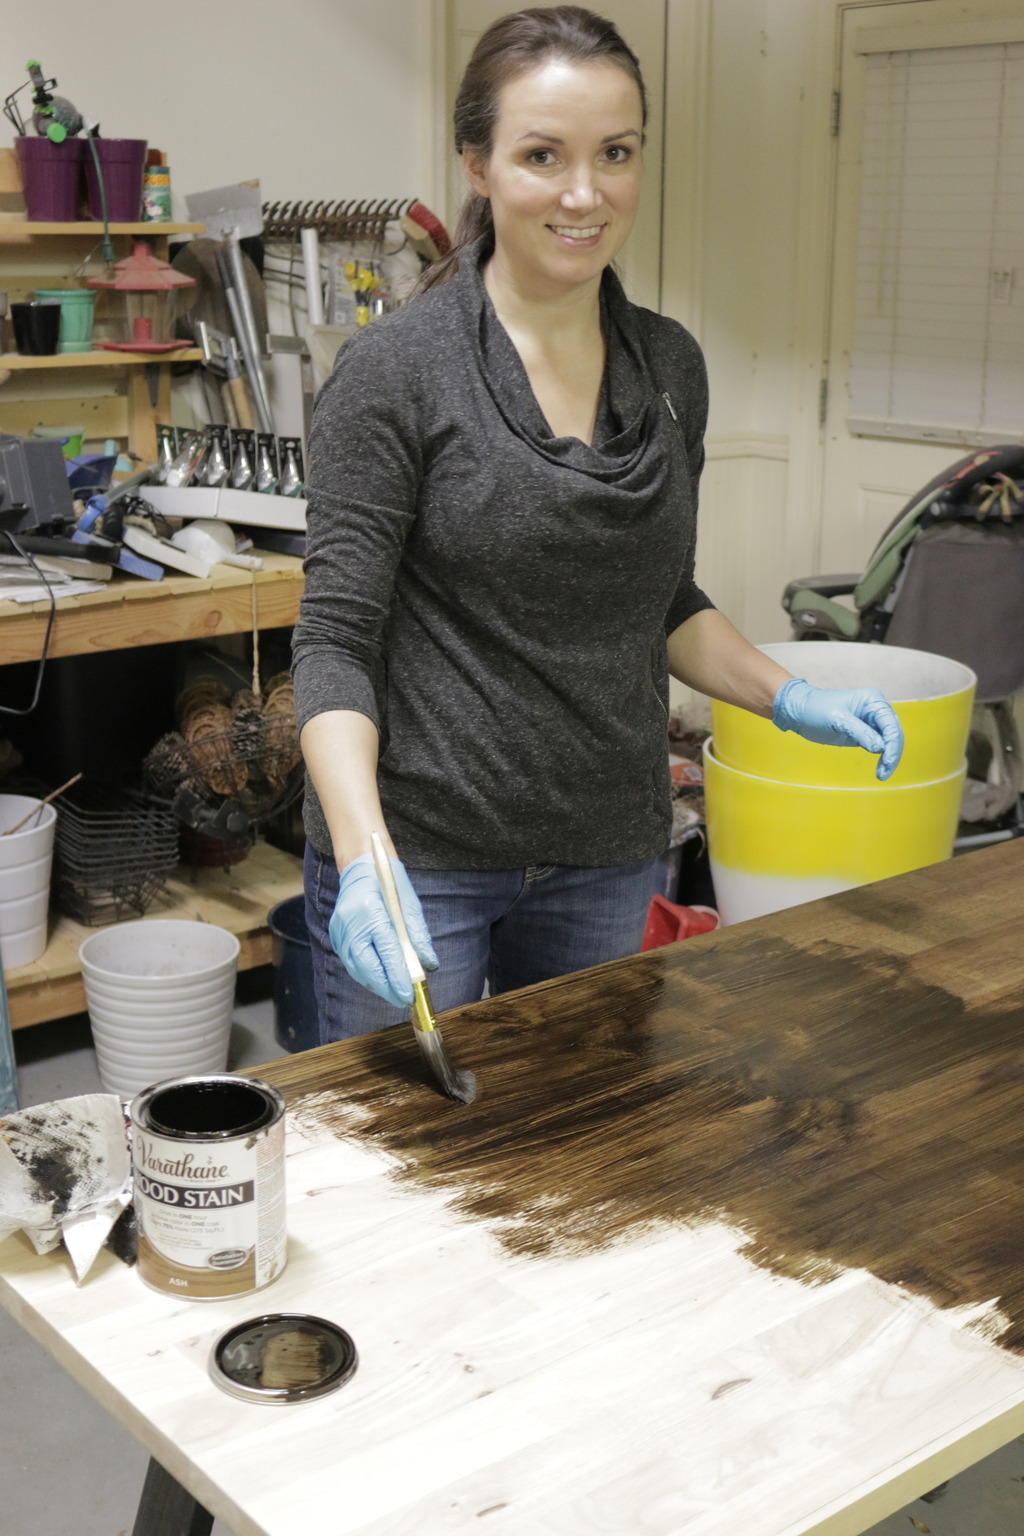
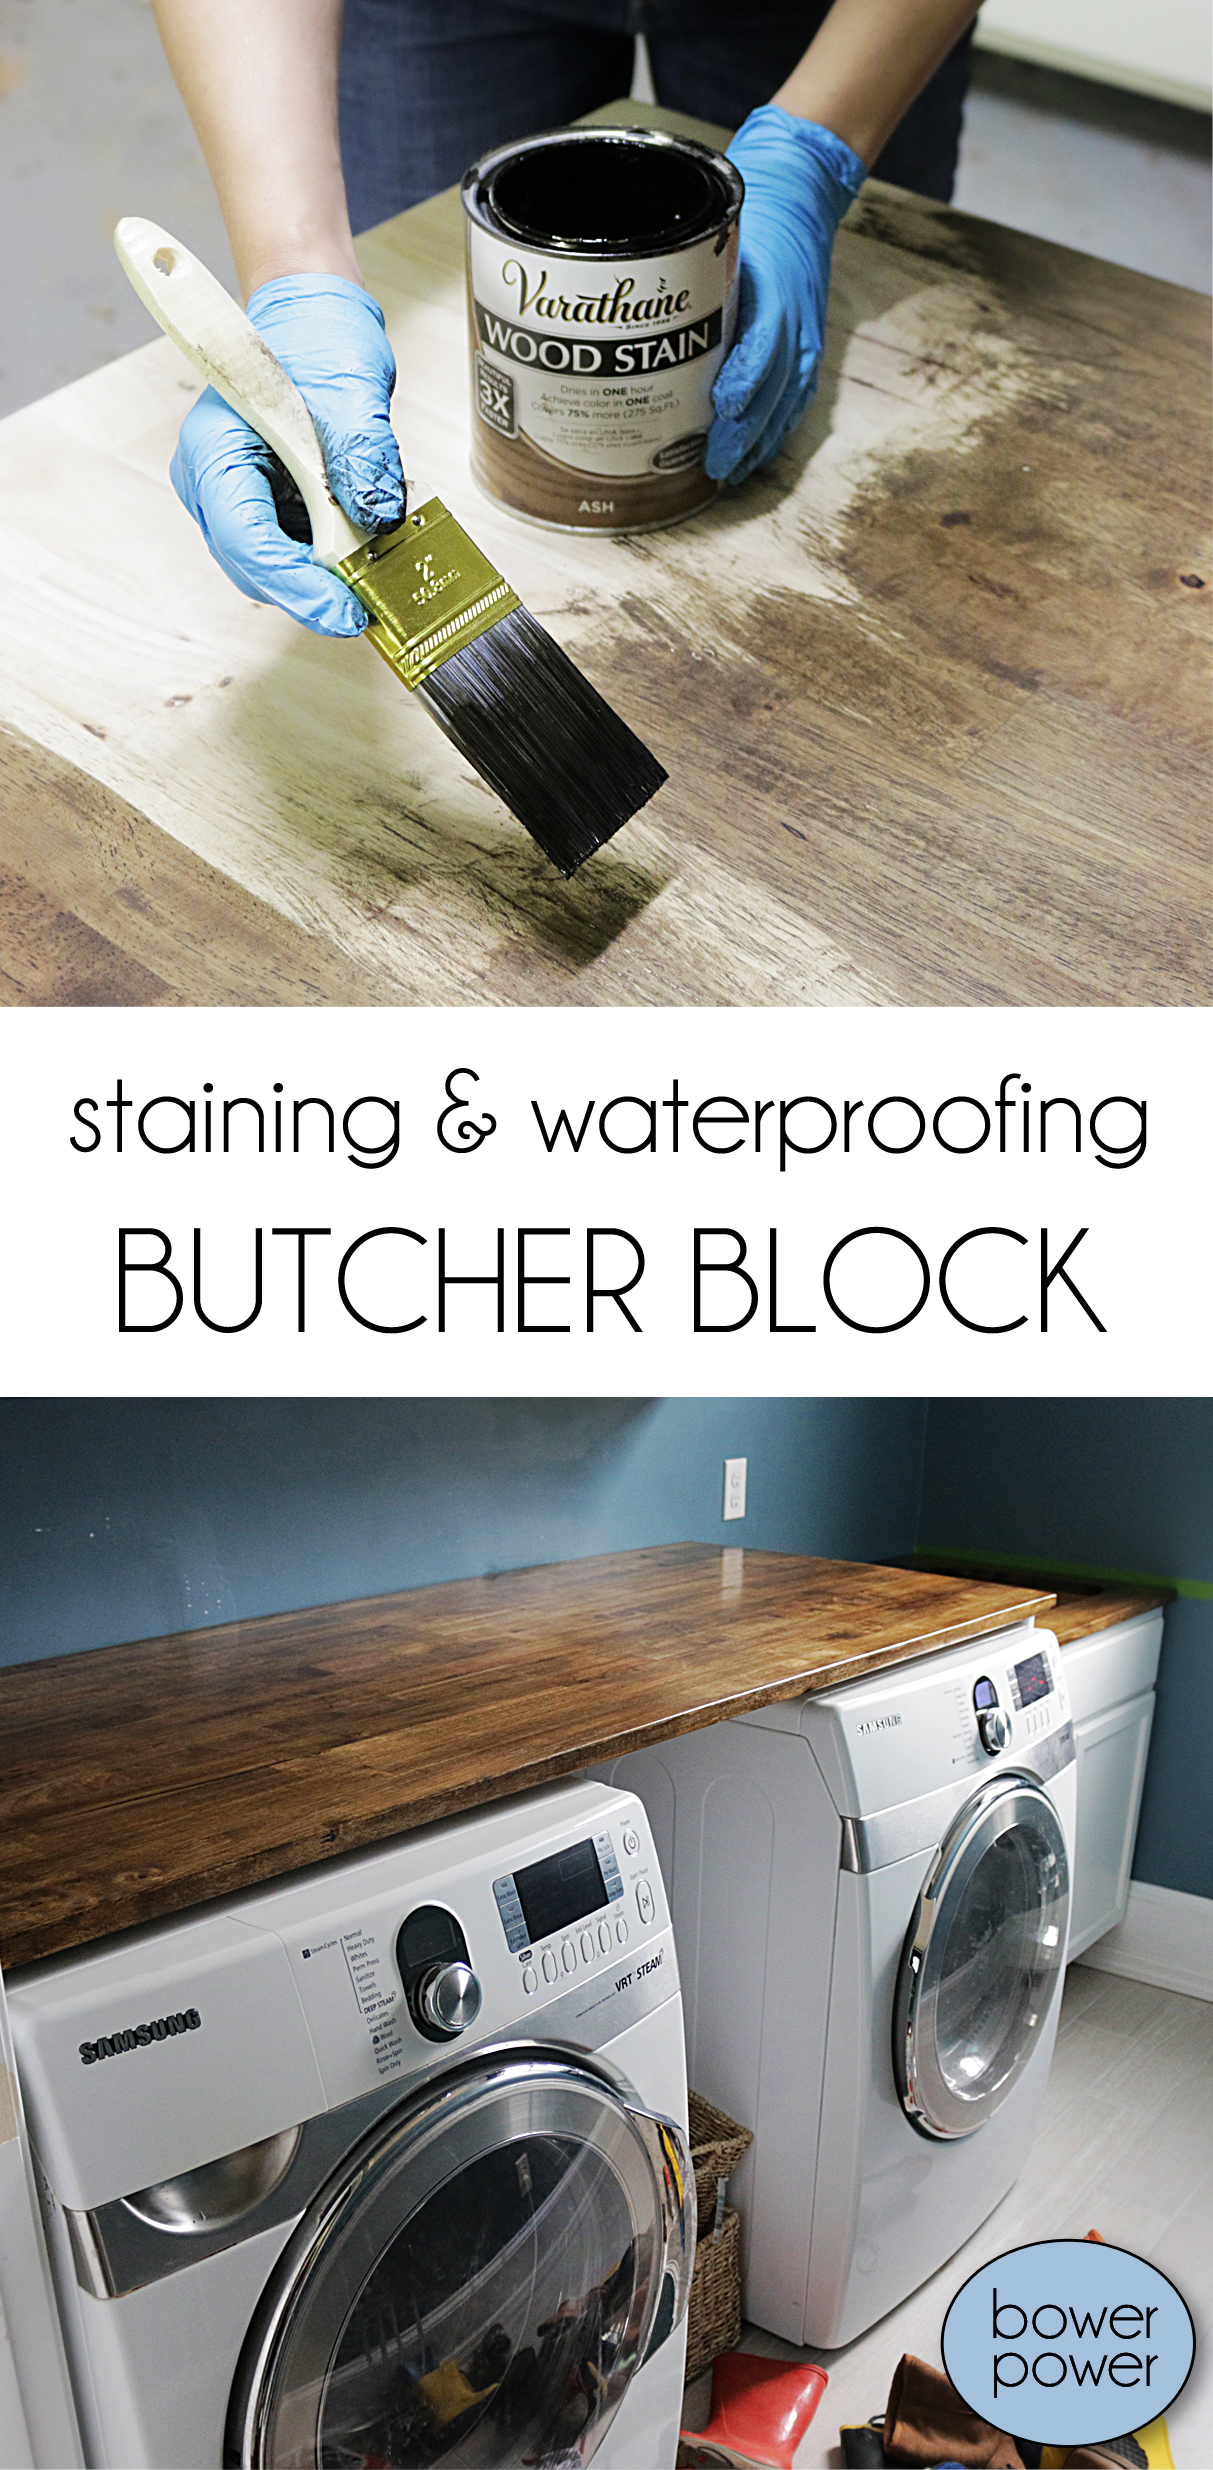
After a lot of research and testing, we decided to go with the Rust-Oleum Ash stain with a sealant top coat of WaterLox. The Ash stain was grayer than we wanted the end result to be…but we knew that our top coats would change the colors.
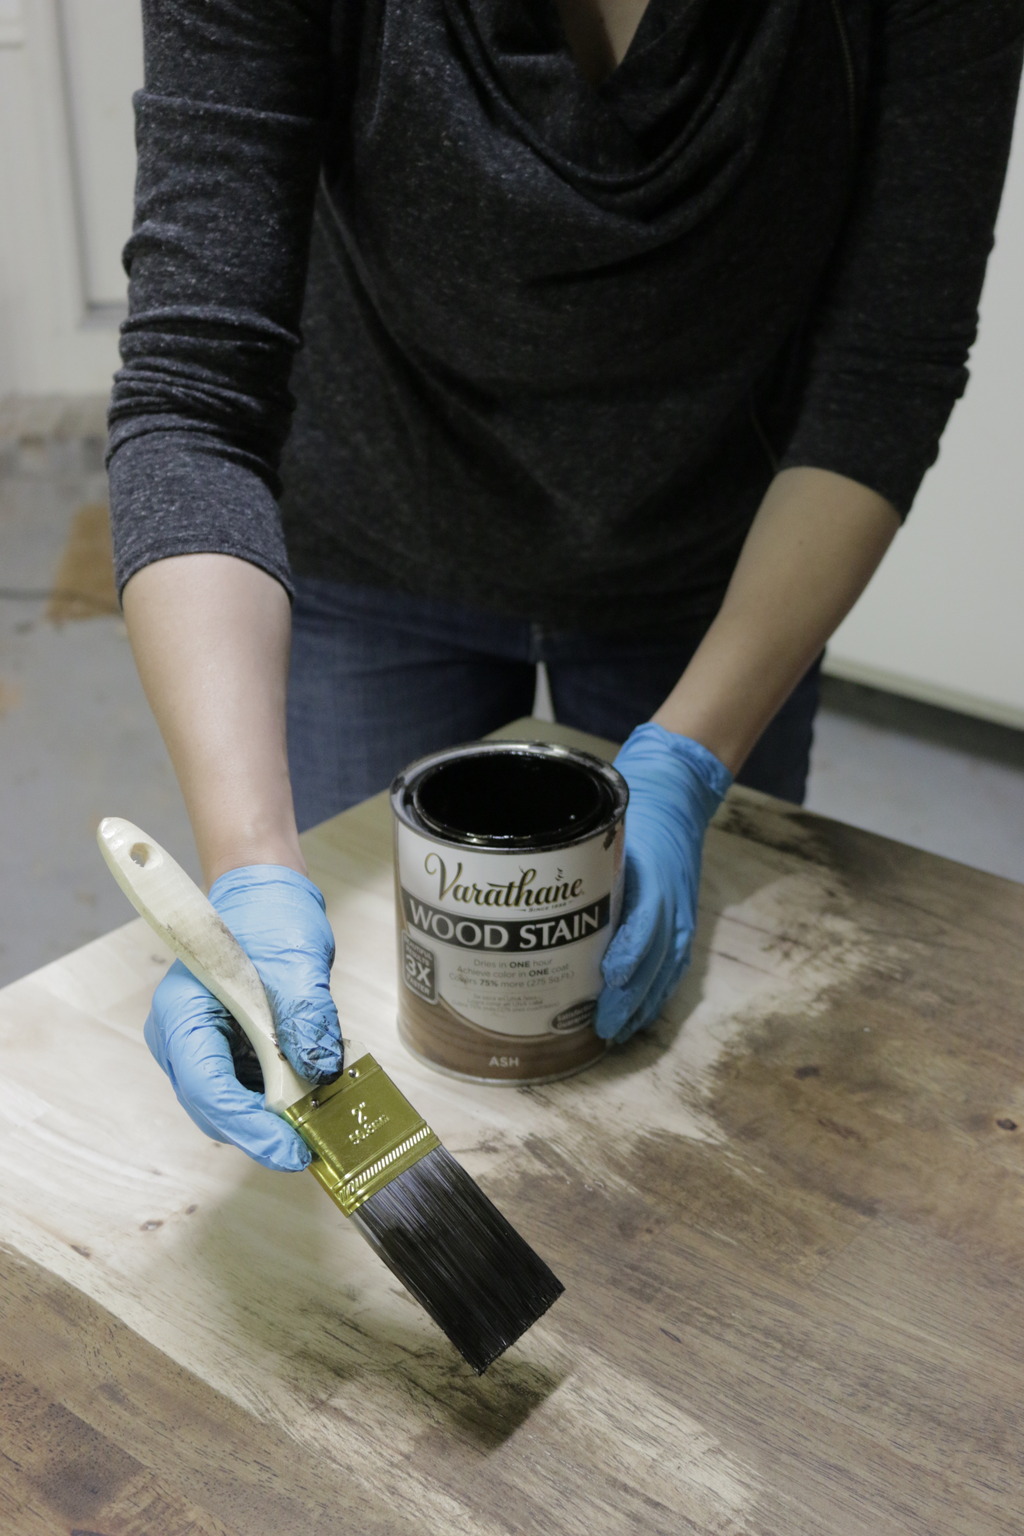
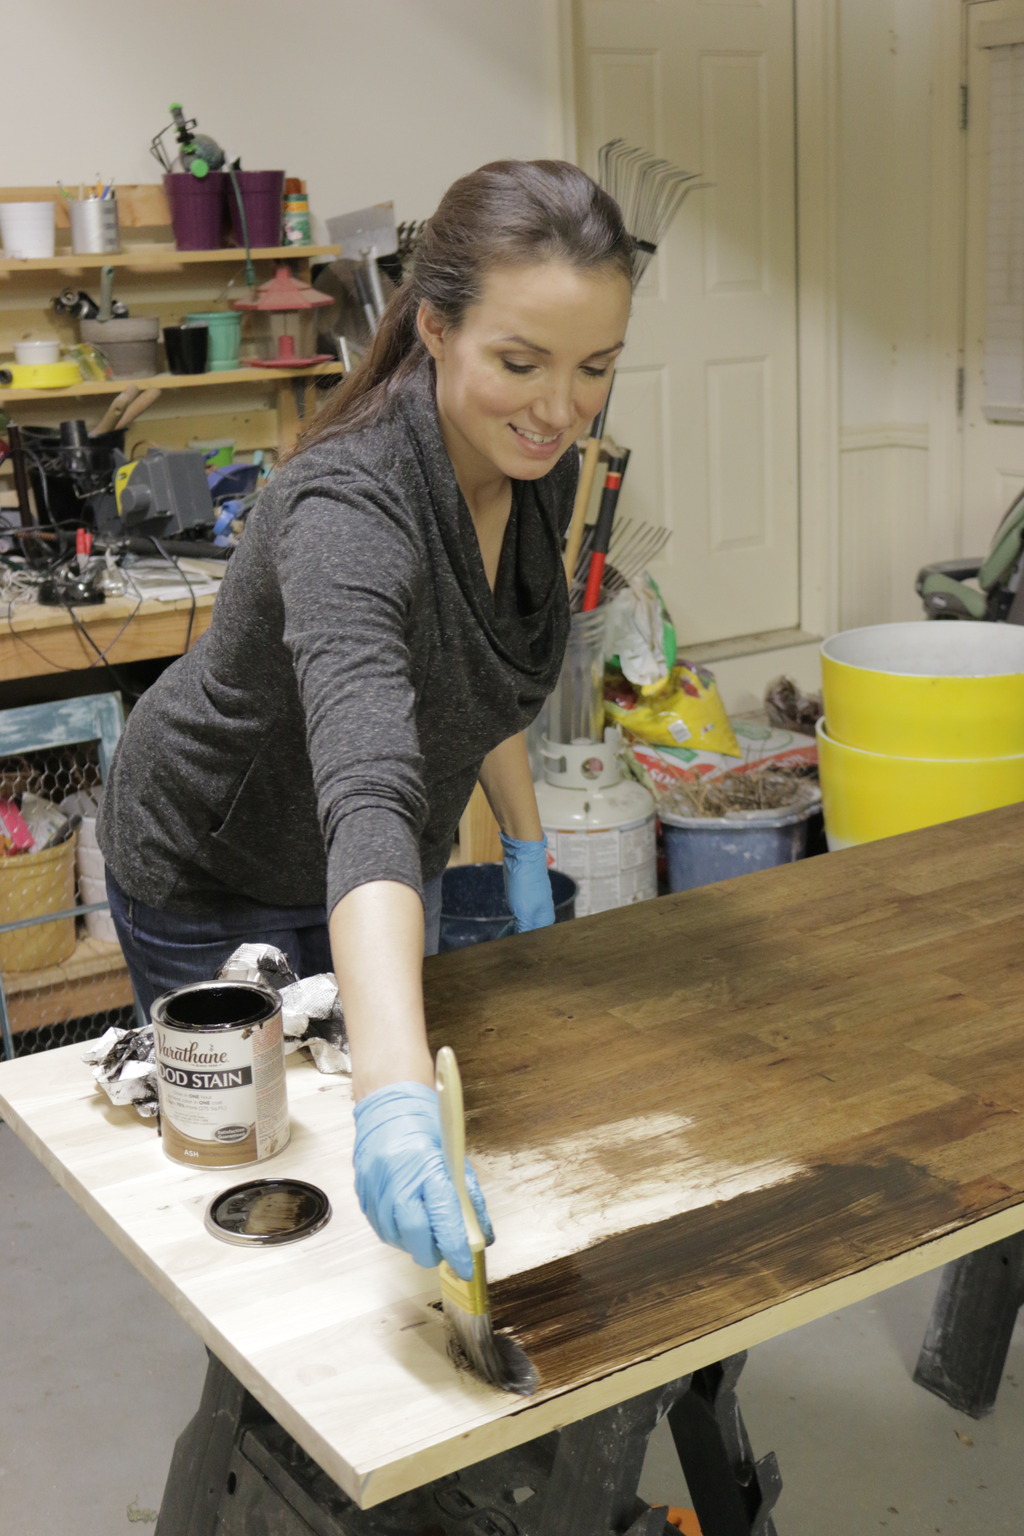
We simply did a section at a time to get a medium absorption time then we wiped off the excess with a paper towel.
Then came time for sealing. I had read a lot about how to seal these bad boys….imagine me at date night talking the pros and cons of sealants 🙂 It was very romantic. I wish I were kidding. Jeremy wasn’t into it 🙂
So in the end, I went with a marine grade sealant called Waterlox in satin. Everything I read gave it great reviews and highly recommended it – as long as you did proper application and allowed for the dry time between coats (24 hours between each coat!). I did about six coats with at least 24 hours between each coat. (THAT IS EXCRUCIATINGLY LONG!) I also sanded with 440 grit sandpaper in between them to make sure it was super smooth and cleaned them thoroughly between coats.
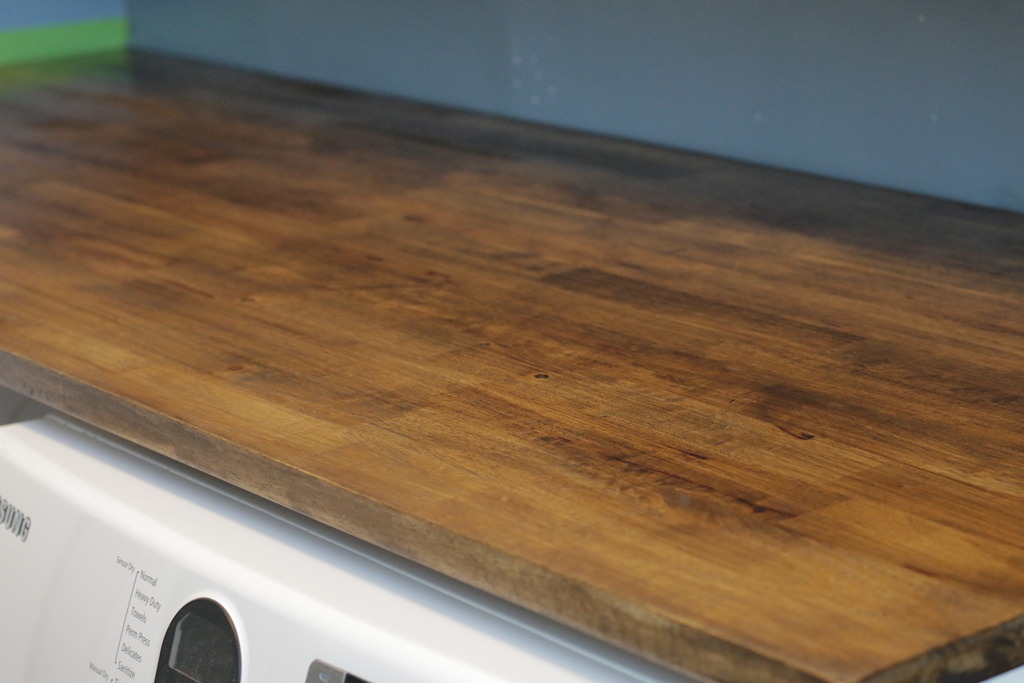
The Waterlox really warmed up the Ash stain color and I love love love the final result.
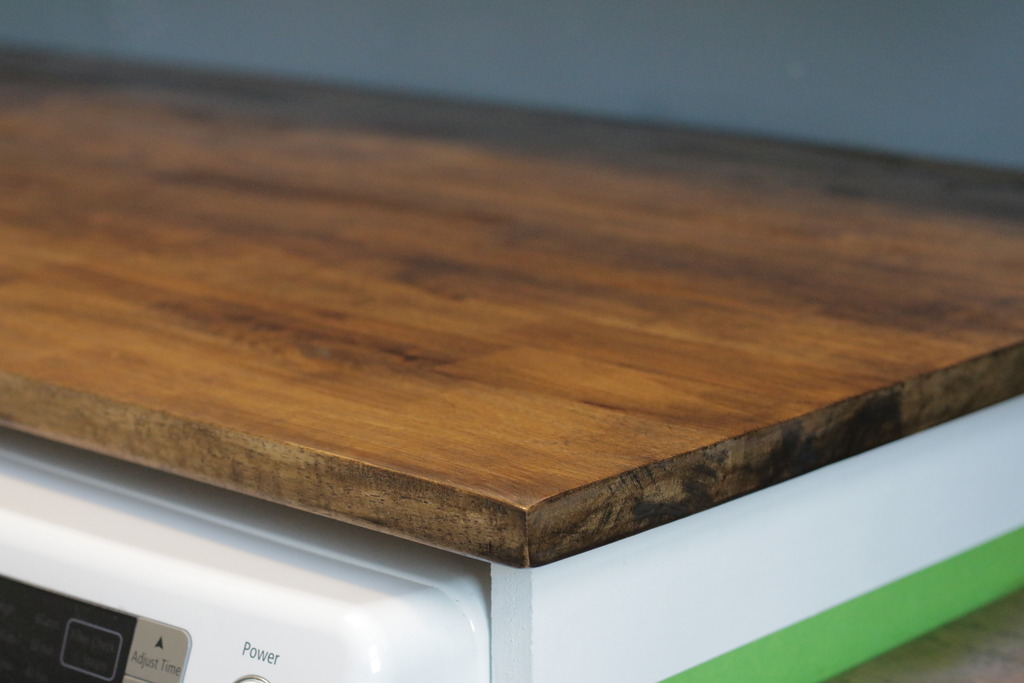
The sink area turned out great too and really sets off against the white of the cabinetry. These are all night time photos and you can see how warm they look.
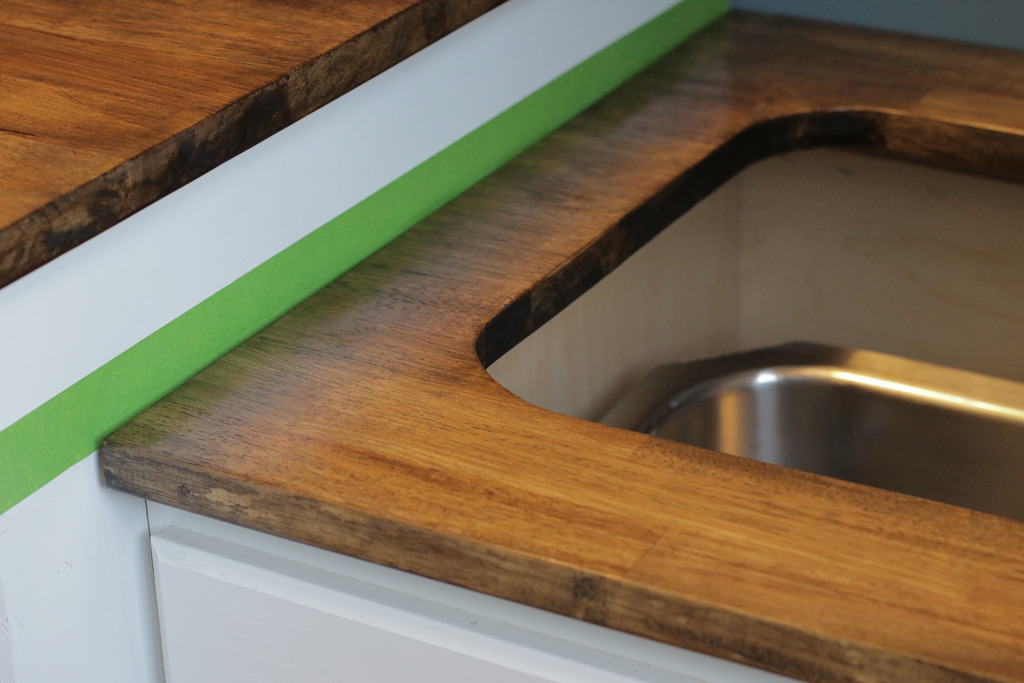
Here it is during the daytime.
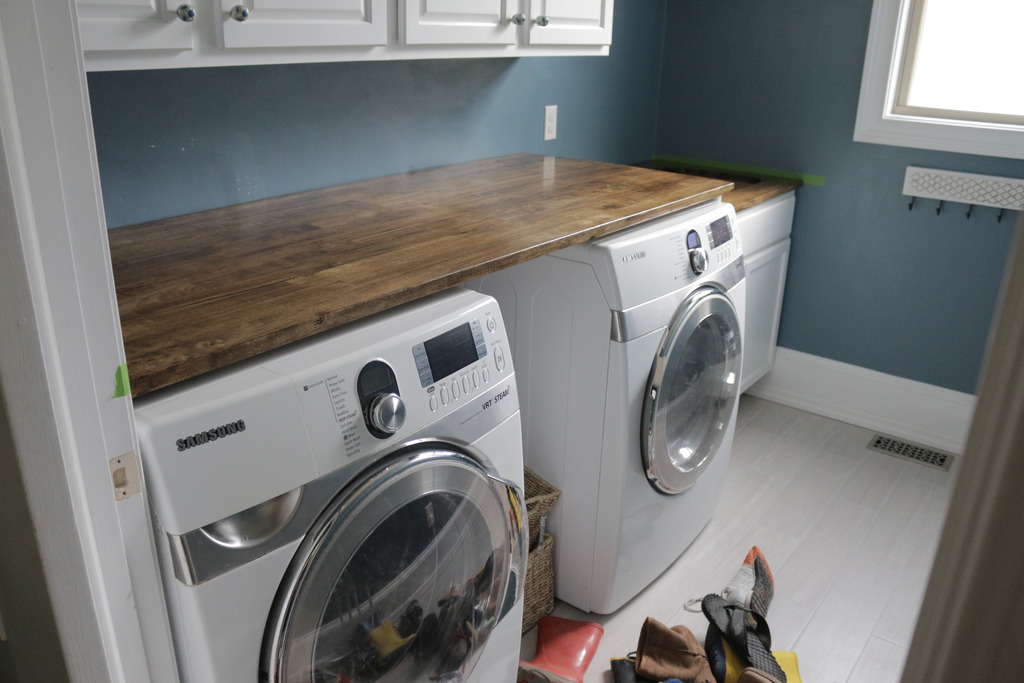
Not Ash but definitely not a super yellow walnut color either. It plays well too with the fact that our hardwood floors are just outside of the door and even though they don’t match perfectly, it is close enough to be neighbors.
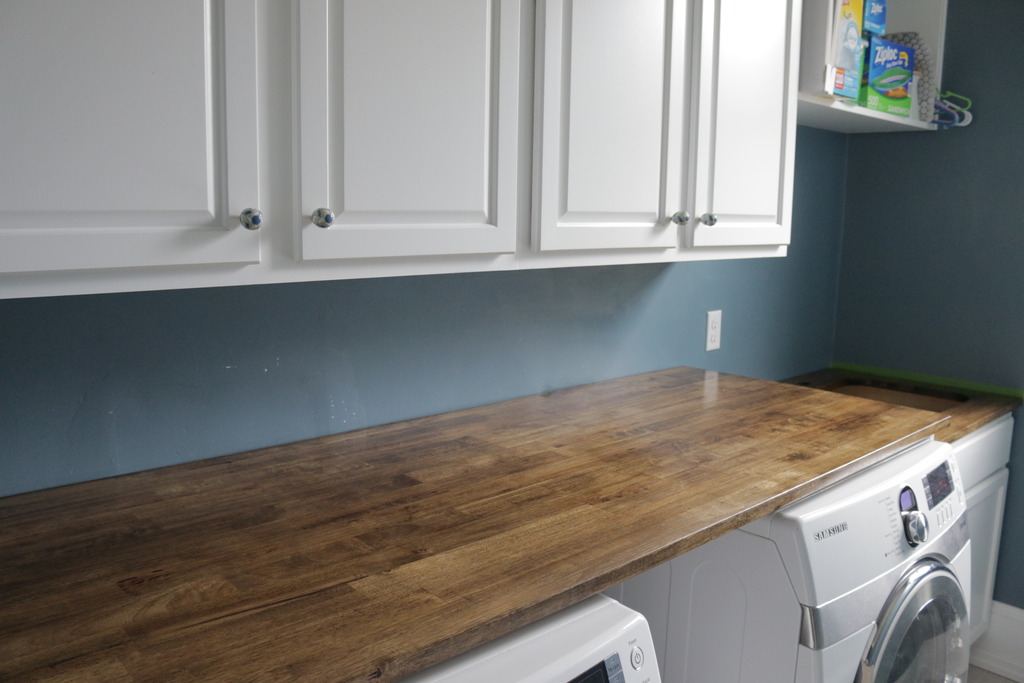
And I think it is nice with the wall color. Like they would definitely be friends in real life.
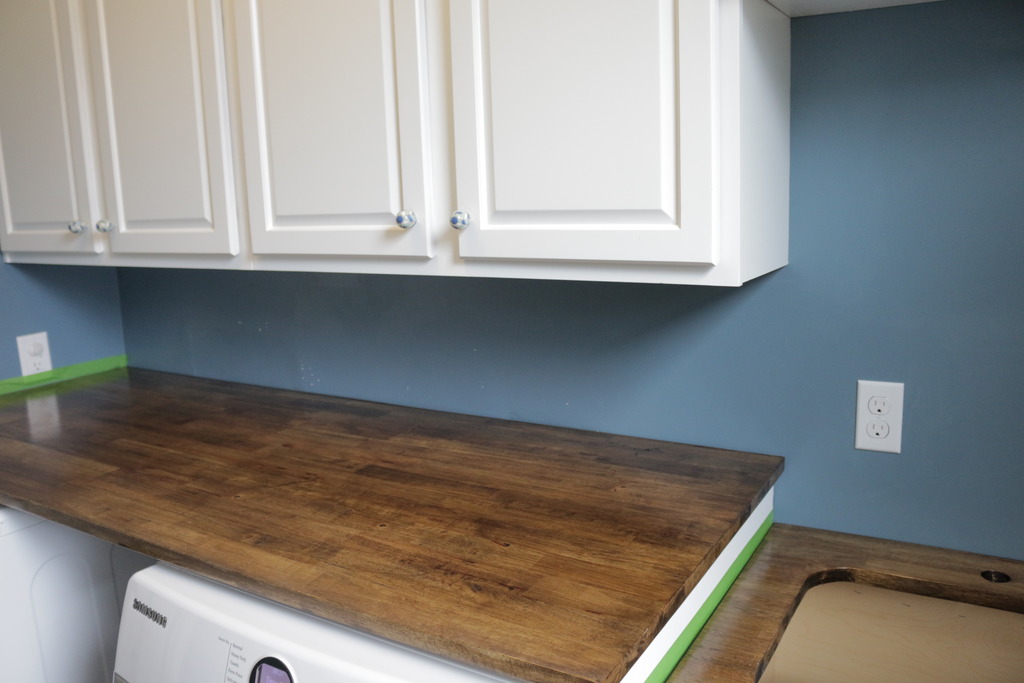
Okay so onto the sink installation…see that little dropped-down area to the right? That is where the new sink would go…
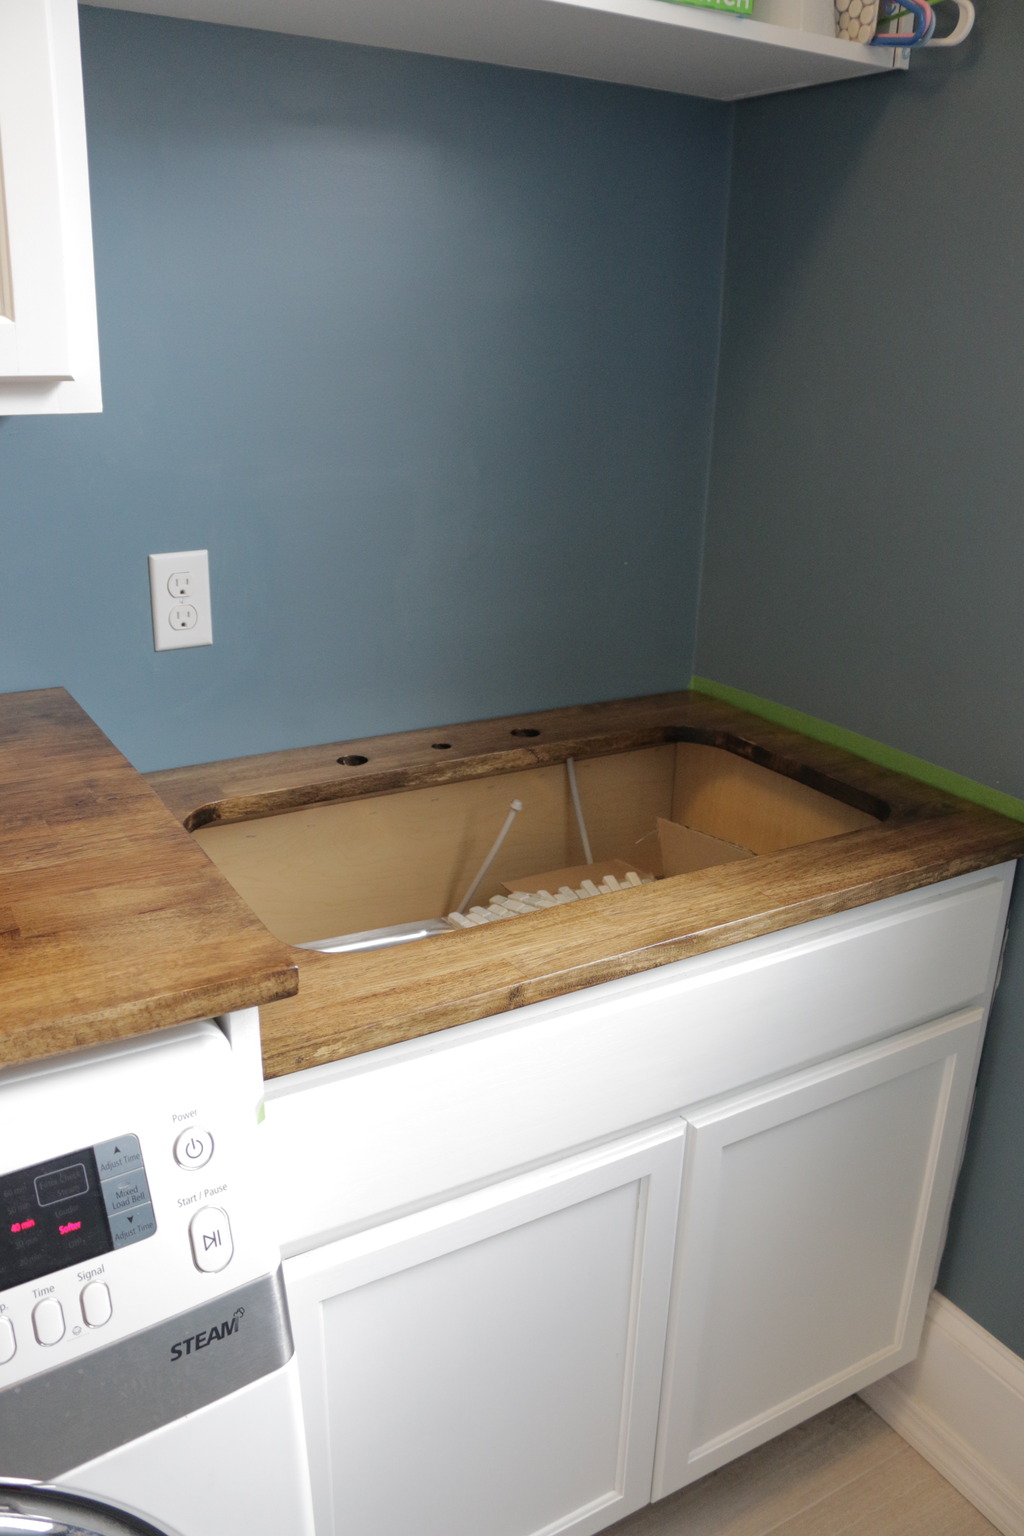
Previously we had a utility sink….which was great for function but really, REALLY ugly.

And I had this vision of a complete kitchen sink in there with double bowls – one for soaking dirty baby clothes (goodbye blow-outs!) and the other for cleaning paint brushes and scrubbing out stains. We searched high and low for the perfect sink only to find one in our stash in the basement during our big clean-out.
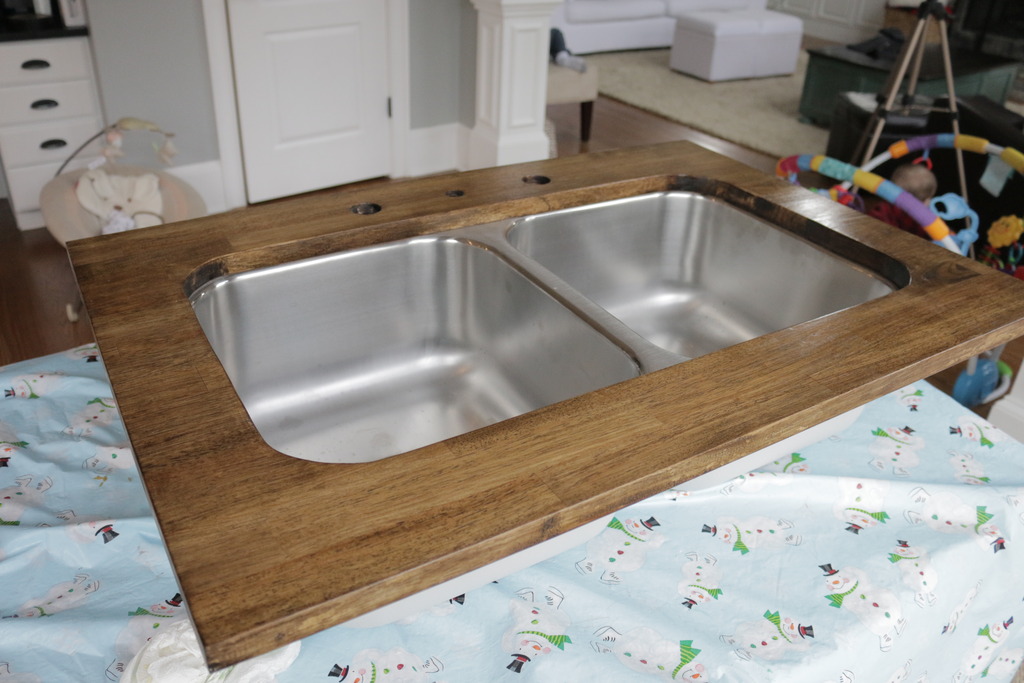
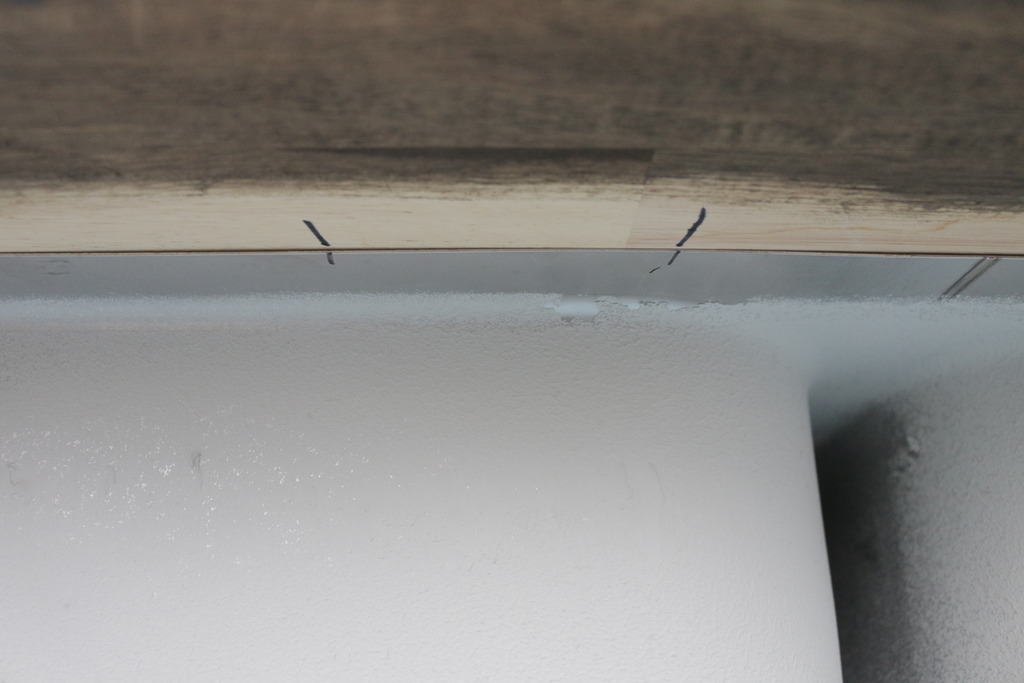
In order to set it perfectly, I placed it on a flat surface with the countertop on top. It was placed EXACTLY where I wanted it and then I marked it’s location with a Sharpie underneath.
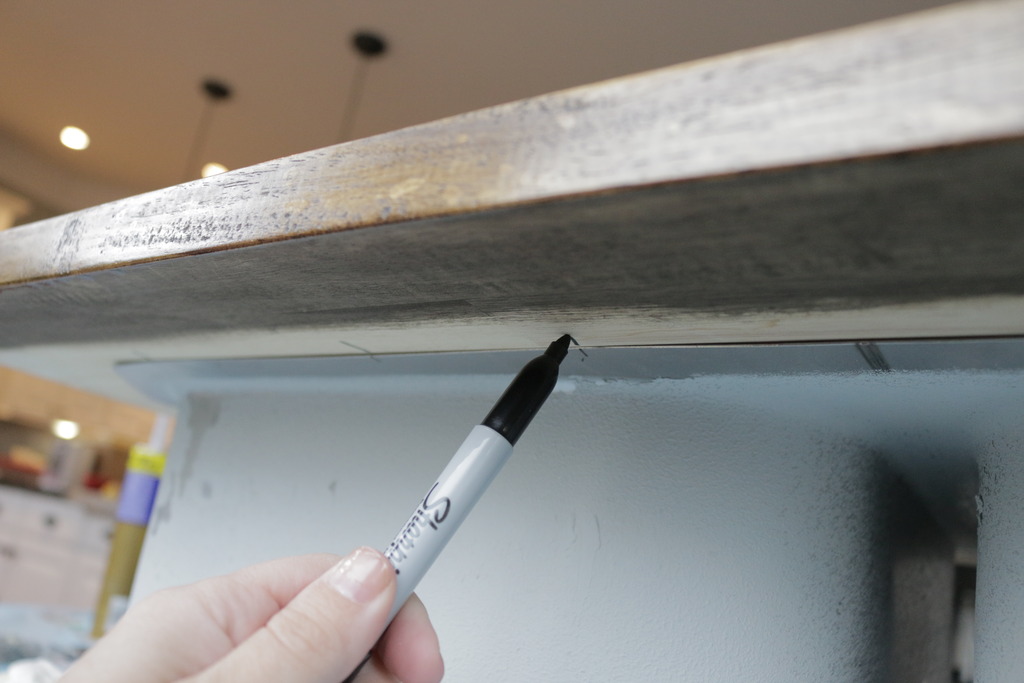
By tracing the edges of the sink and then also marking these little tick marks, I could get it perfectly placed even upside down.
Flipped everything over and put it back on it’s mark…
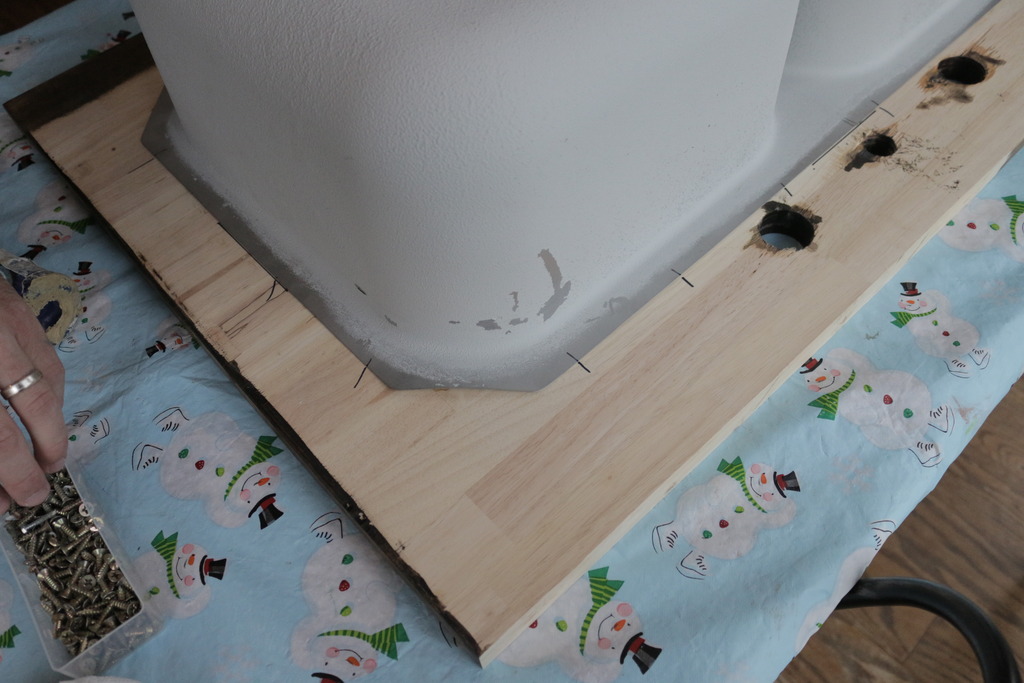
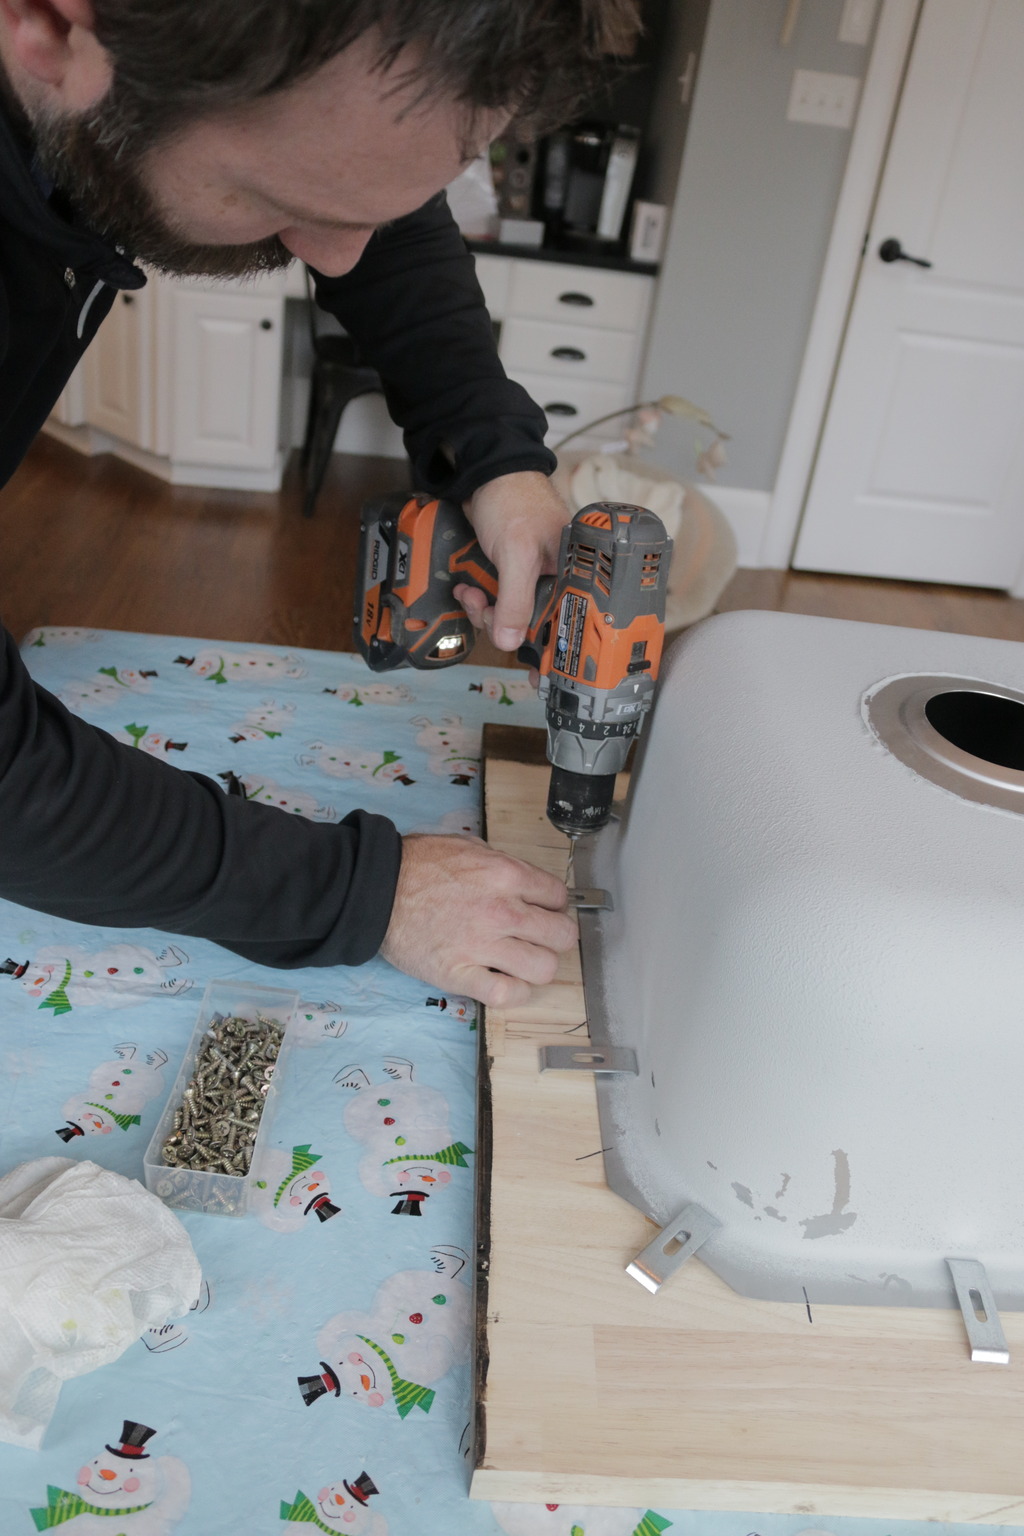
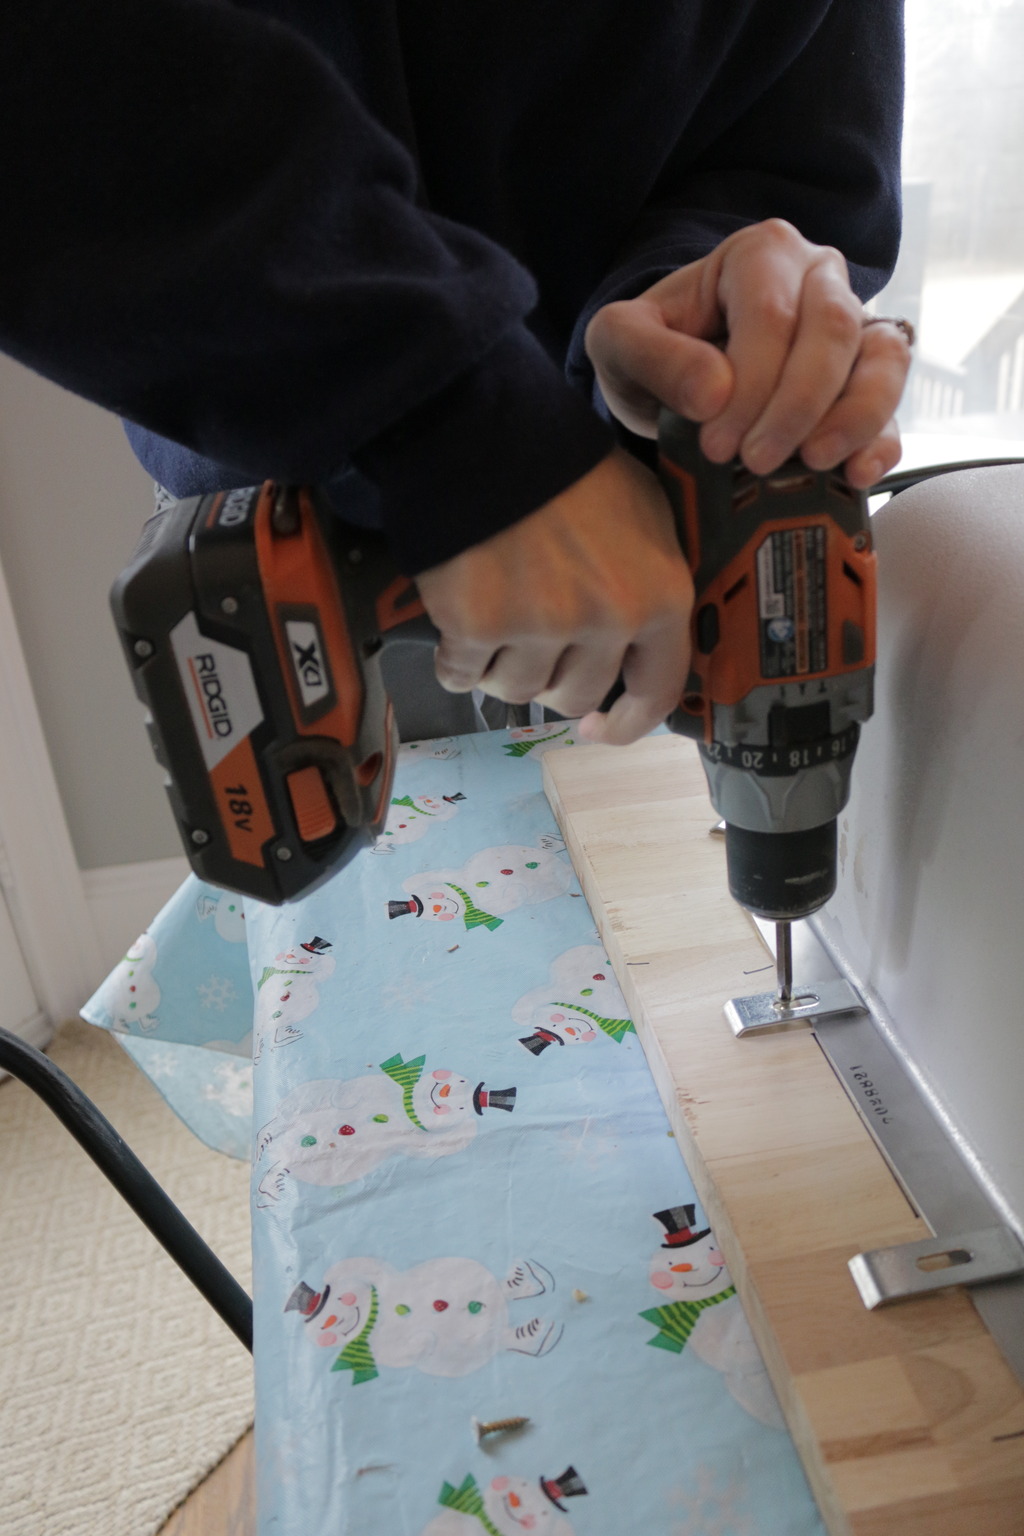
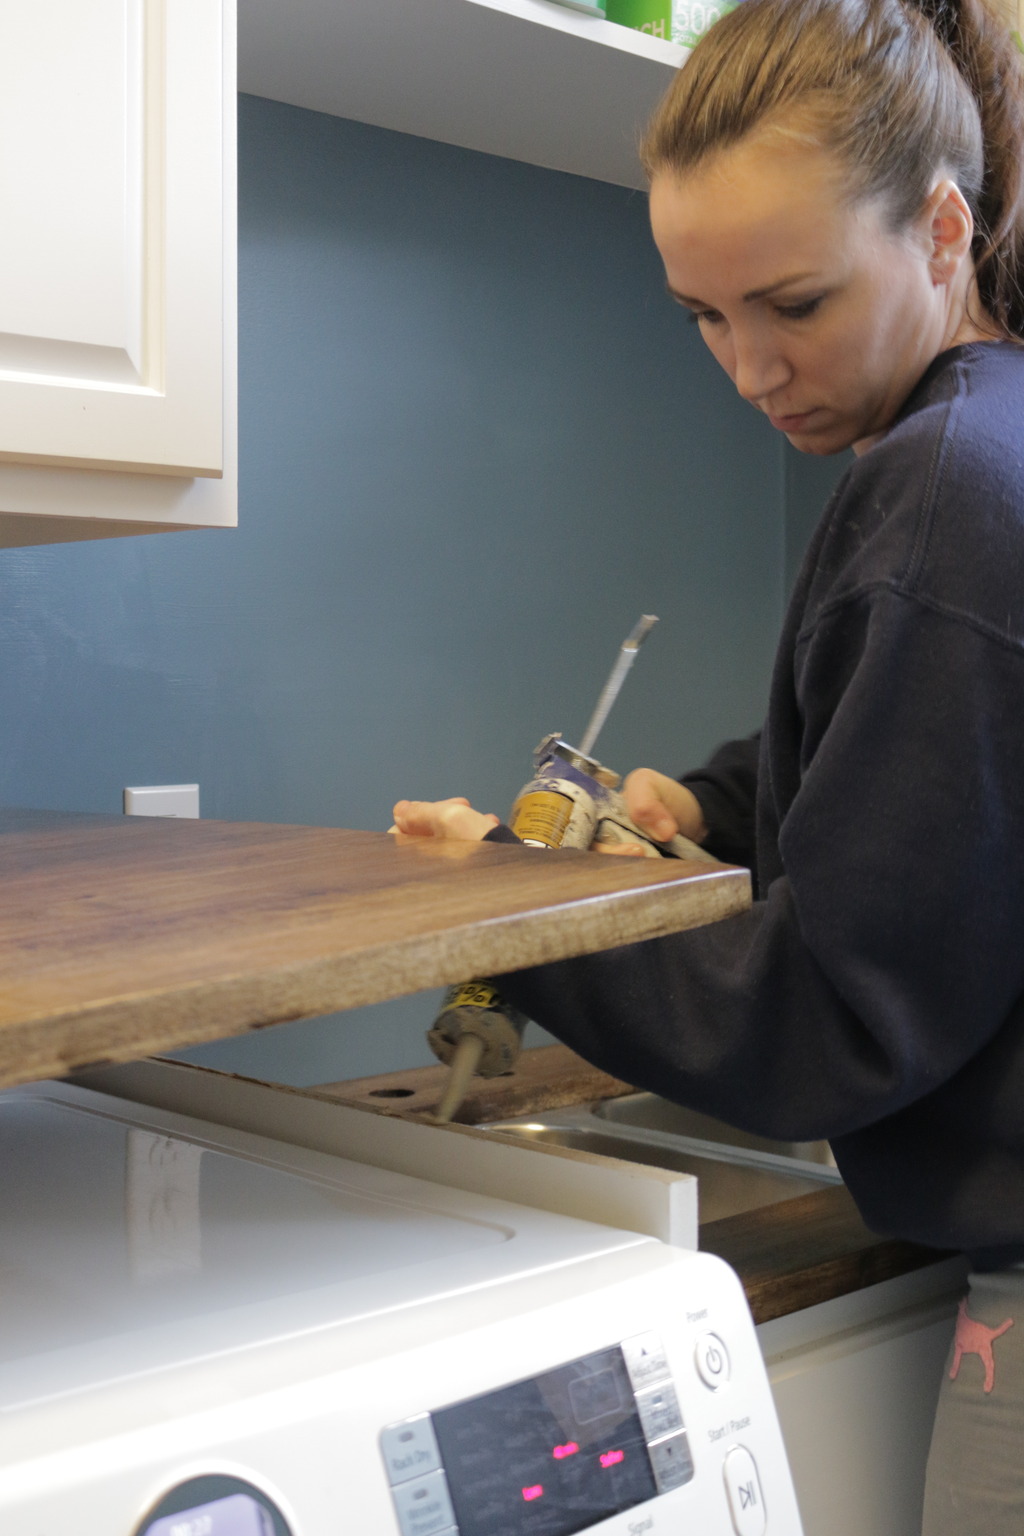
Then Jeremy and I placed all the brackets around the edges and he predrilled the spots for the screws.
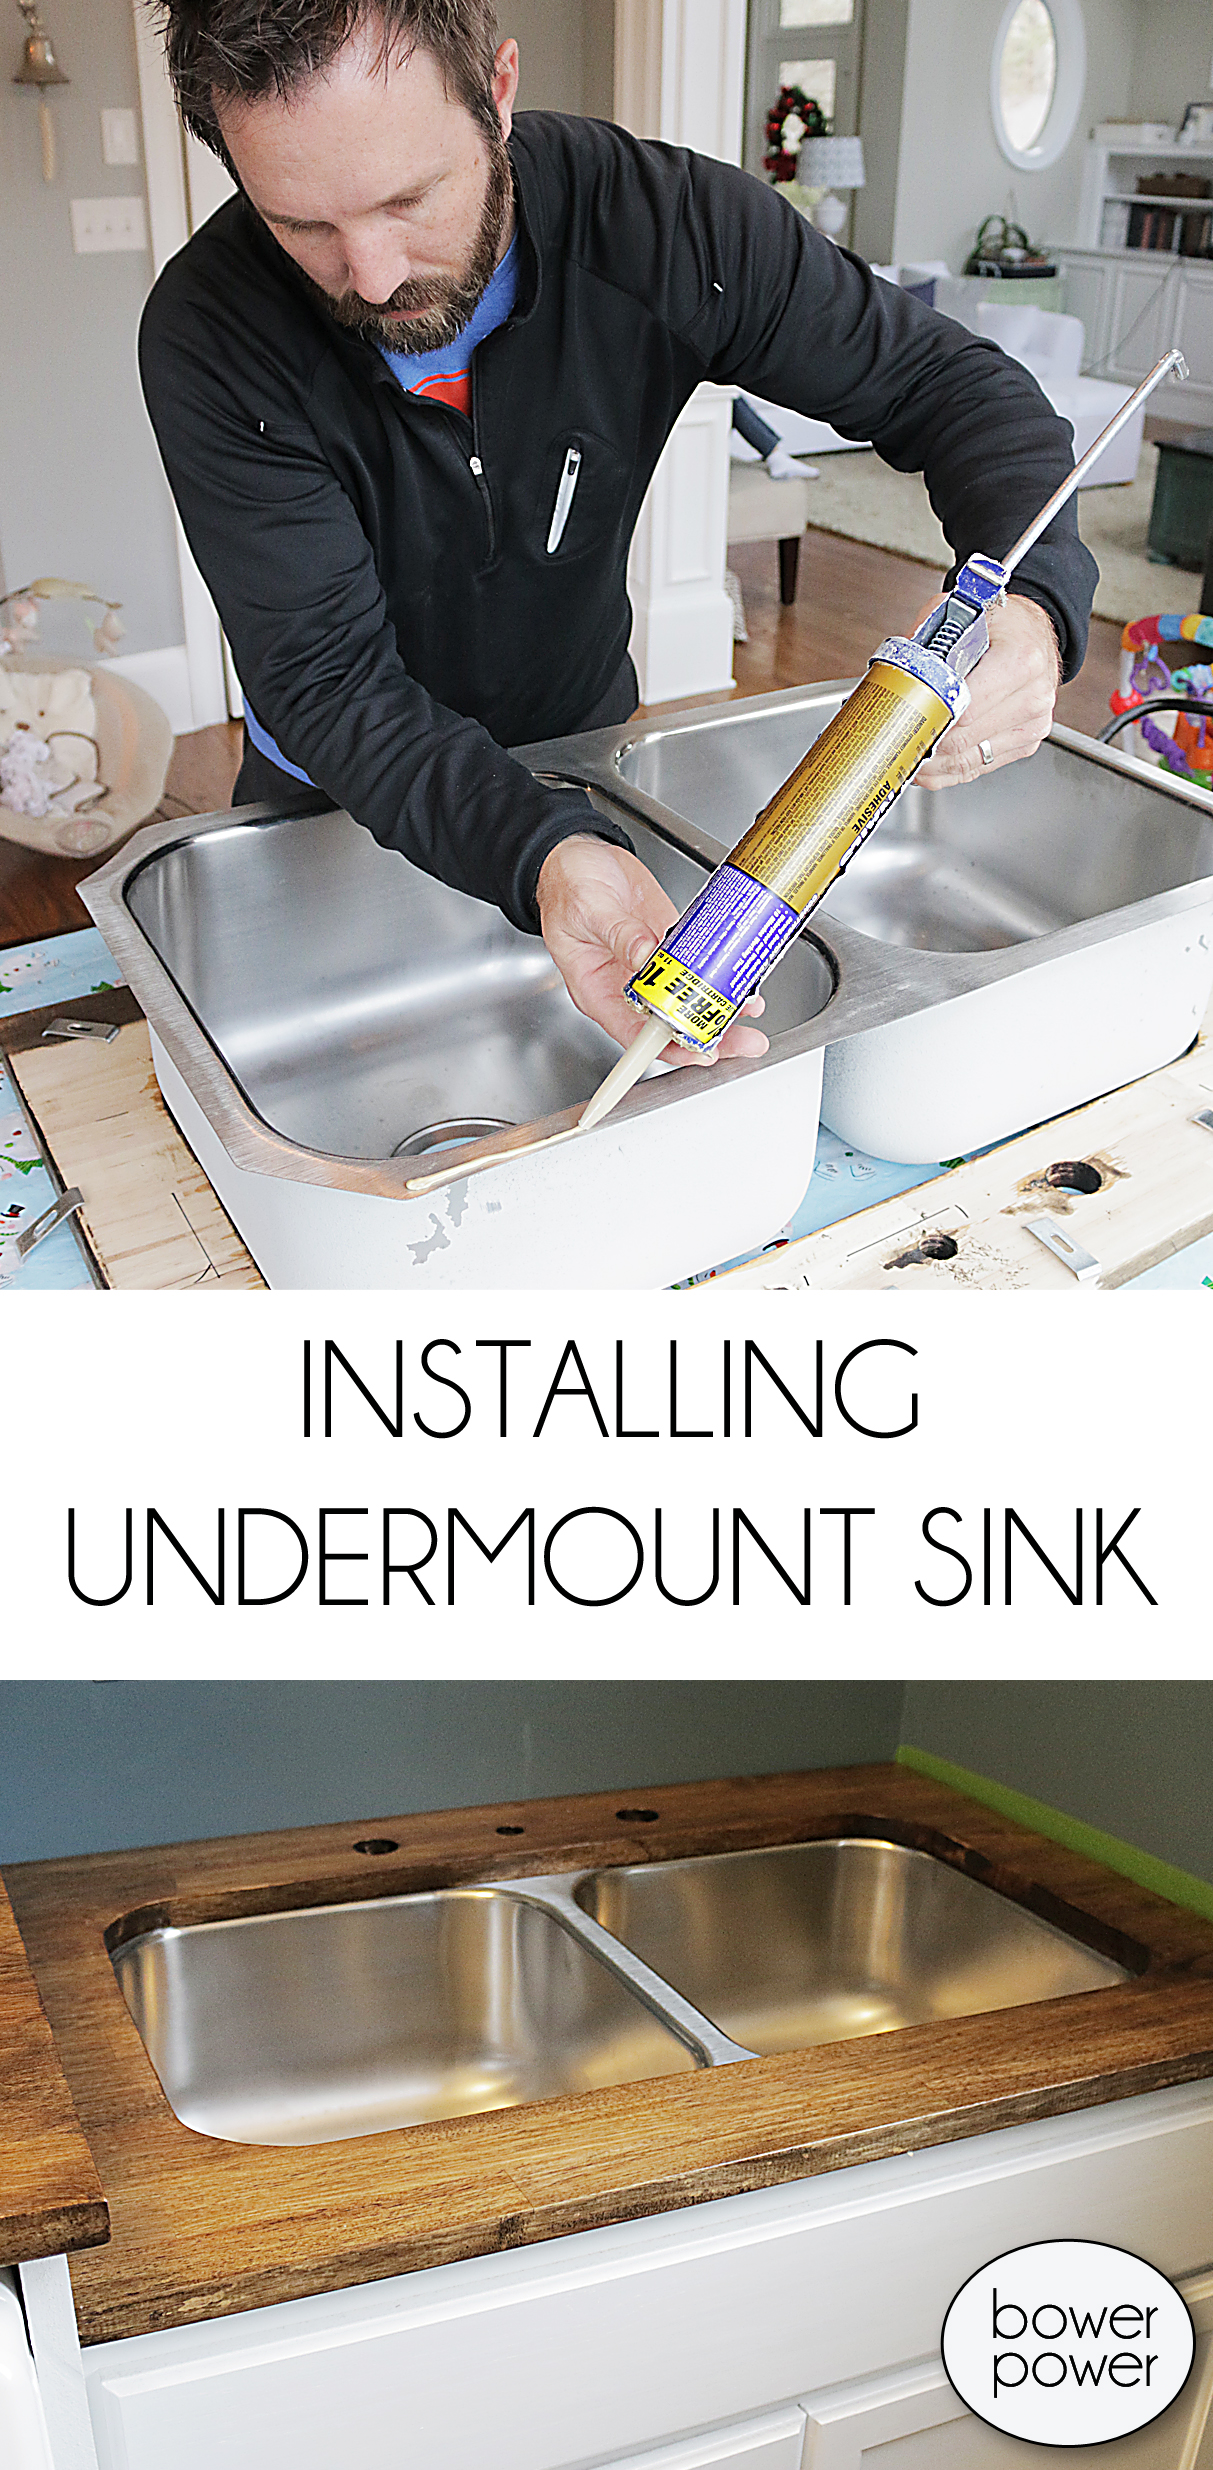
Then we applied construction adhesive to the sink and flipped it over into place.
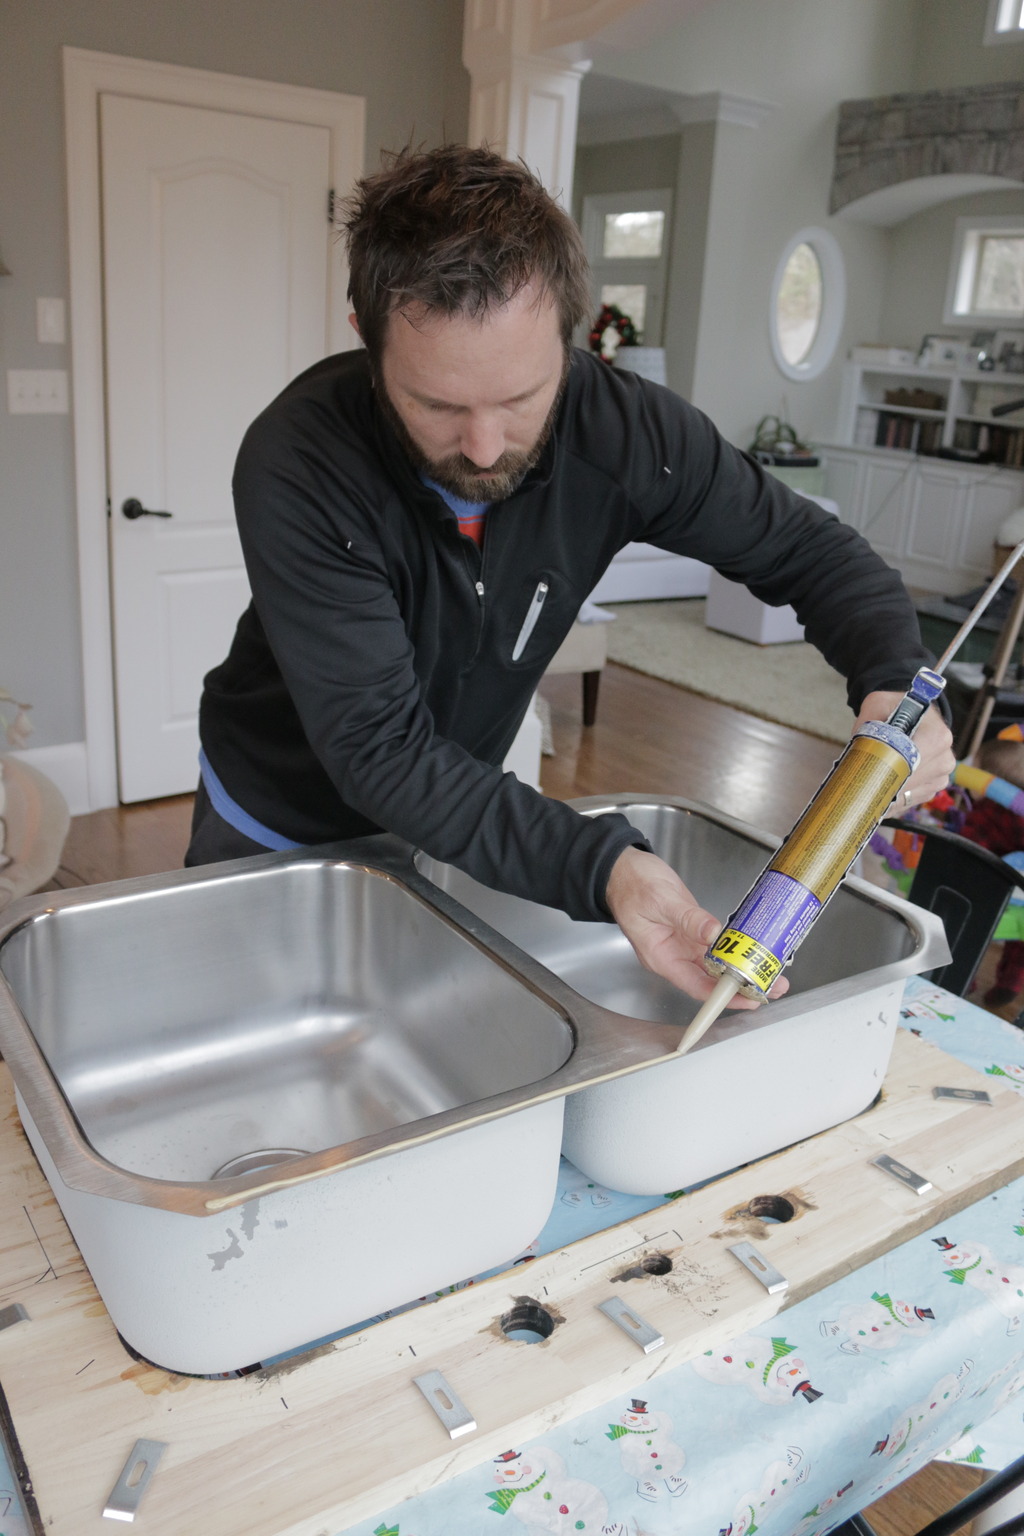
I attached the brackets and bada boom bada bing!
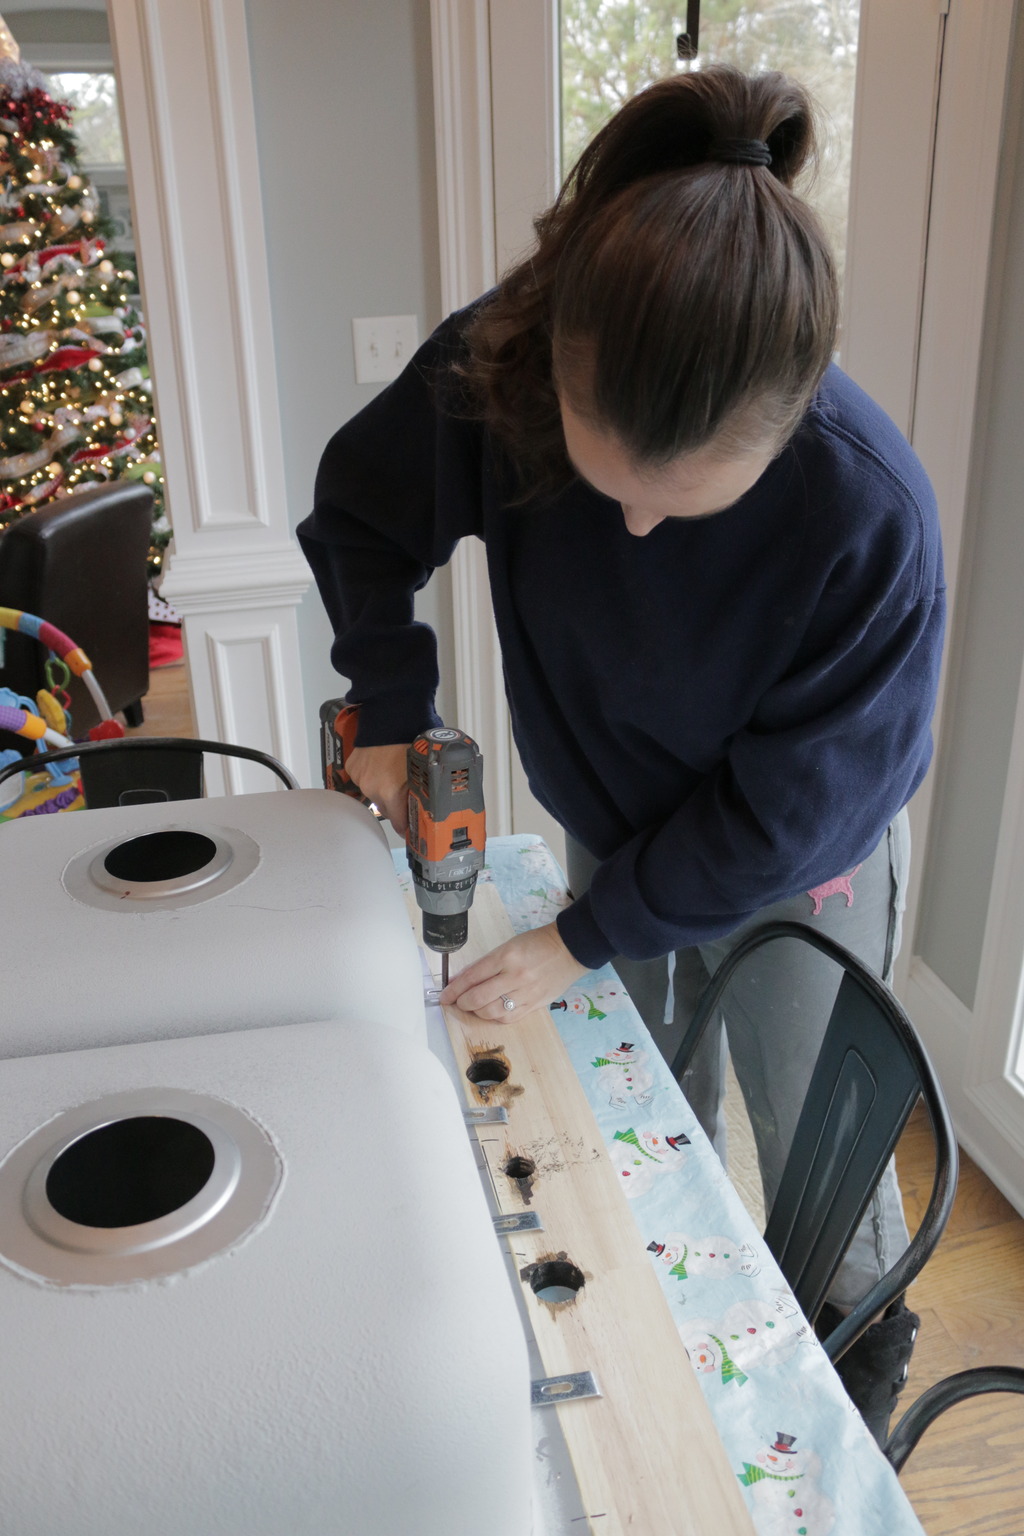
Bada boom bada bing means “hello sink” in Christmas.
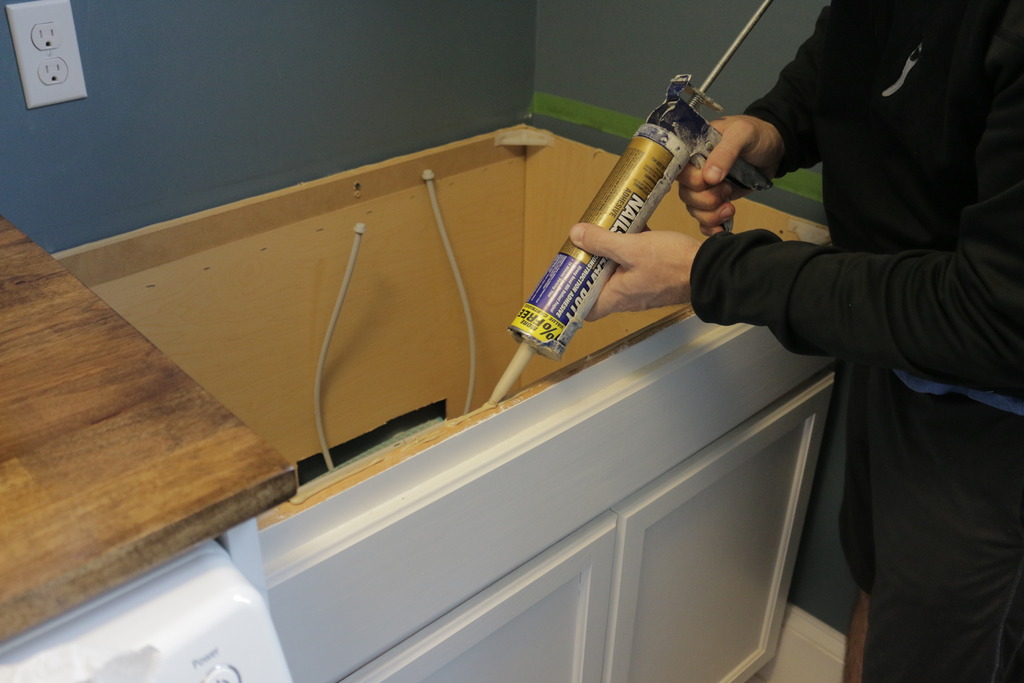
A little more construction adhesive around the cabinet edge and we were really cooking with bacon…a couple screws underneath and we were actually EATING the bacon…
Doesn’t it look so good?!
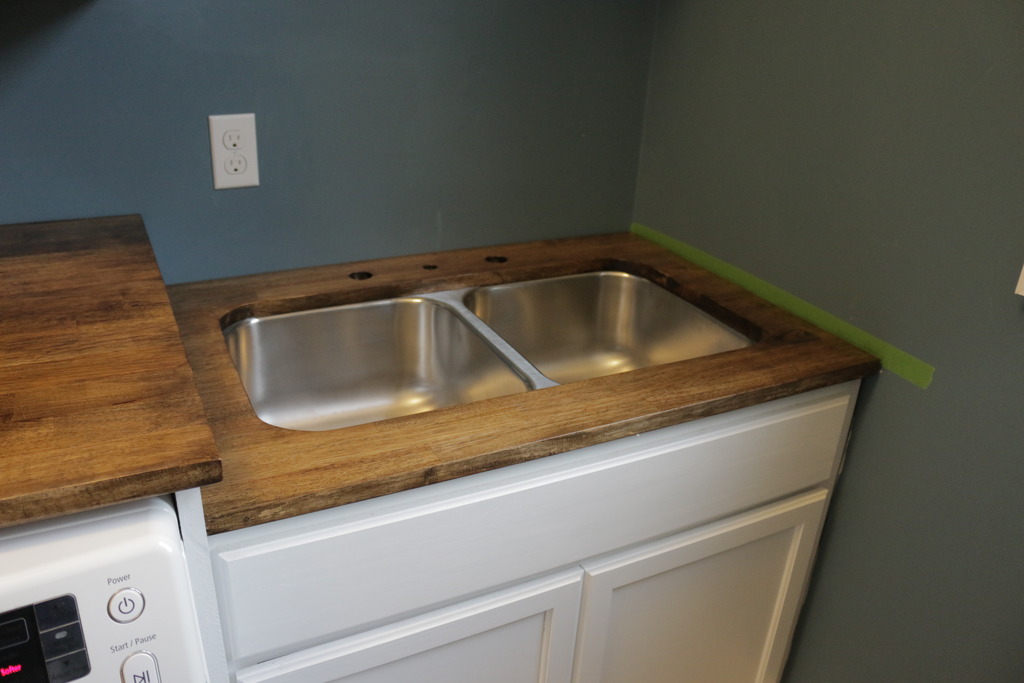
We also used construction adhesive to attach the other countertop too. It lies on MDF supports and is going to sag-proofed in the middle with a removable storage shelf system. Also…my elfin ears are showing. My brother used to call me Spock growing up.
So there you have it….only a few years in the making….but definitely worth it. A new countertop for me! And tomorrow I get to share the whole tile adventure. It’s SO pretty and definitely something that I am super proud of….I mean, if a normal person can be proud of tile.
*********************************************************************************************************
I love your little elfin ears — they are so cute! Do any of the boys have them?
Yeah for your countertop — and I can ‘t wait to see the tile! Its like Christmas all over again!! 🙂
Wow, it looks great!
And your ‘elfin’ ears are cool! Did any of the kids inherit them? 🙂
Weston has them but they are chubbier than mine so I sort of wonder if they will grow longer and leaner one day 🙂
xo – kb
Weston! But his are a little chubbier…they will probably lean out when he gets older 🙂
xo – kb
Counters look great. Just curious if you exclusively breastfeed? If so, you can leave the stained blow-out clothes in the sun and it will naturally whiten them/remove the stains! I couldn’t believe it but it works! I usually left it out for the day and tje stain was completely gone!! Pretty cool!
can’t wait to see the final product. It’s so fun to see each stage.
Your post looks like this to me:
I want to see your pictures. 🙁
It may not be widespread but I can’t see any of the images of the past projects. I’ve looked on 2 different PCs and no luck
That sink looks great! A Happy and Blessed New Year, Katie 🙂
I’m sorry. That was my fault. I fixed the photos so you should be able to view them now.
xo – kb
I’m sorry April. I copied the wrong photo code. It should be fixed now!
xo – kb
Yes I do. I used to do that with our cloth diapers but for whatever reason, it hasn’t worked on certain fabrics or if it has colored fabrics with it…like a striped outfit. Do you ever find that? Am I not doing it long enough?
xo – kb
Yes, it is. Thank you!
Oops, missed one: Right under “Previously we had a utility sink….which was great for function but really, REALLY ugly.”
Thanks for the quick fix on the others though!
Wow that looks great! I wouldn’t mind doing laundry if mine looked like that! The barn door, the floors the paint….love it all.
I became allergic to any DIY project that took more than an hour after the 3rd child began toddling all over. I admire you guys for finishing out any project large and small with 4 children at home!
I absolutely LOVED the butcher block before the dark stain! But oh well, it has to live in your house so I hope you are happy with it!
I thought for sure this was a teaser post like come back tomorrow to actually see it! Much to my excitement on a normal slow Tuesday I was blessed with seeing this beautiful countertop! I love it… I can’t wait to see the tile. Btw elfin ears are cute, and hopefully Weston’s lean out as you say over the years.
Great job!! Love the counter top. And… how kewel you had the sink in your stash all along. 🙂
Looks awesome!! What do you hang on the little row of hooks under the window?
OMGoodness! Finally Katie! You must be over the moon! 😀 Can’t wait to see it all!
Curious about your thoughts on your front loading washer. I moved into a house and “inherited” a front loader about a year ago and I have been disgusted by the mold build up in the interior lip… I am wondering if this would be the experience with all front loaders or if the previous owner just didn’t take care of this one. I would absolutely LOVE a butcher block counter in my laundry room but my hesitation for installing it is deciding whether I want to keep a front load washer forever.
I think there is still one picture that isn’t loading. I’d scroll up and tell you which one, but I have a website “issue” as well. I am not sure what it is, because I am on my desktop computer at work, and I LOVE your blog, Katie, so this isn’t me being nasty. My computer here at work is fast and does everything in normal time. But then lately on my lunch breaks, when I spend some time catching up on my favorite blog (yours!), the page scrolls down for me slower than mollasses!!! It takes me literally 10 minutes to scroll down and read the whole thing!!!! I have no problem on other websites (like news websites etc). Now I was on another DIY-type blog last week and the same thing happened! I am seriously not going to be able to take it much longer! I want to throw the dang computer out the window., only I don’t think it is my computer. I saw there was one video ad on your page, and I paused that, but it didn’t help. I did get that error message that says a script has stopped working, and I stopped the script but I don’t really know what any of that means. Please help ME!!! Is it me or is it your blog??? And btw, it just took me 5 minutes to write this comment because of the lag time for the letters to show up! Beyond frustrating! If it helps, I’m using Mozilla Firefox, the latest version. And please know I love you and your blog… I’m not trying to be a witchy reader or anything. Thanks!
All good, thank you xx
Hmm, I never noticed a difference. I would normally rinse with water and leave it in the sun. I do live in Arizona so we have plenty of sunshine 😉 however, I noticed I had to leave it for the whole day possibly 2.
I can see it now! I am ready for the reveal!! So excited for you. It’s always nice to check off another room done, especially with all the laundry you have to do. Those countertops are gorgeous! Happy New Year, my friend. May God continue to bless you and your sweet family!
I LOVE the countertops!! I am adding this to my very long house project list. Thankfully I am in Nooga so I can get the same counters at Southeastern Salvage too! Thanks for making this easier on me. 🙂 Happy New Year to the Bowers!
Wow thanks for the details of this project. This is almost exactly what I envisioned in my head for our laundry room but I couldn’t find a picture to show my husband and my sad sketch wasn’t of help. I love the long butcher block for folding clothes…. Or in my case for dumping piles of clothes from the dryer to make room for another load when I let them sit in there wrinkled forgetting to fold them right away. I so wish I would have planned ahead for the double sink. I’m constantly soaking clothes and I only have one huge basin. Did you Waterlox the underside? I’ve read to coat the bottom with a couple coats but I wondered if it’s really necessary since it’s not in the kitchen by a dishwasher. I absolutely love the finished look with the tiles too. What a transformation. That was a handy trick for lining up the sink too.
Maybe that is it…maybe I am just not doing it long enough. I definitely saw a difference with the cloth diapers so I’ll just have to try longer!
xo – kb
That’s for the boys. They get wet clothing sometimes and we are trying to teach them to hang things up 🙂
xo – kb
Well the only problem is that it is unsealed and if any water or wet clothing contacted it, it would be damaged. If I sealed it, it would change color and become more yellow (not my thing) and so that is why we went with the darker stain!
xo – kb
We haven’t had any mold but we do use it several times a day and definitely use hot water and lots of bleach so it might not have time to get grody.
xo – kb
Hmm….interesting. I don’t have that issue but we use Safari and Jeremy uses Google Chrome a lot. Maybe try clearing your cookies and see if that helps. Thank you for being a loyal reader…we do greatly appreciate that!
xo – kb
I read that too but I only did that to the sink top (not the long one). I am thinking now that maybe I will do a sealant on the edge where the sink meets the wood just so that no water creeps in.
xo – kb
Wow!! I am incredibly impressed with the transformation. Right after reading this post, I literally walked into our laundry room to see if I could use any of your ideas in our small space. Thank you so much!
Ok we literally have almost the exact same laundry room so ice been waiting to see your full reveal! We also have the exact same washer and dryer so my question is- do you have enough room to get them out if needed? I felt like if we ran a counter over top of ours we wouldn’t be able to get them out!
We do but we also built a shelving unit in between them that is removable so that if we needed to access it quickly, we don’t need to move them completely out.
xo – kb
Looks great!! Is it me or did you totally skip the step on how to attach the countertop to the wall? I have a tight space where my washer and dryer barely fit next to the fridge, and I want to put a countertop on top of the washer and dryer, but I don’t have anything to set it on top of, i.e. shelves, cabinets… What to do?
Our front loader is gross gross. We find little socks and things that get stuck inside that lip and make it stink. Of course it has to stink first, then usually the offensive sock or whatever is easy to fish out. But some of our towels and clothes are permanently stinky. I’m looking for good ways to wash our washer as well or keep things out of that space.
Do you do a vinegar or bleach rinse? Or have you tried those bars you stick on the inside and wash it?
xo – kb
Oh I kinda talked about it. We used liquid nails to fix it to the side supports. Here is the link to the post where I talked about those.
xo – kb
Yay Katie! This looks fantastic! So glad you finally got your sink and countertops!!
Where did you purchase Waterlox? I can’t find any locally and it’s ~$50 for one quart on Amazon. Yikes! Is that about what you paid? Do you think one quart would be enough to do several coats on a 4×8 island and 2×12 counter top? Thanks for your help!
We bought it online too. It’s really expensive…I paid $43+tax for a quart on Amazon and yes it goes very far because it is VERY thin.
xo – kb
Thanks, Katie! I love your blog!
Hi Katie! I bookmarked this post last year because I knew I wanted to do a countertop in my laundry room and it’s finally time. I had planned to use waterlox as well but after looking on the Waterlox website they say it is a two step process, there is a sealer and a finisher product as well. You only mentioned the sealer in the post, did you use both? Also, in the comments I saw that you coated the underside on the sink but not the length above the washer and dryer. Someone recommended to me to seal both sides of the wood because of the humidity (I don’t have a sink). Would you recommend that if you were to do another similar project? Thanks in advance 🙂
Hi Maggie,
We did not coat the underside but if you want to, you can. So far we have had no warping or buckling but we also knew that our laundry room has no moisture issues. So if you want, you can definitely do that. And the Waterlox is a sealer & finisher. It says on the bottle – penetrates, seals and finishes. We did butcher block in a kitchen – here is that post and we blocked the counter around the sink and over the dishwasher. Hope that helps!
xo – kb
Thank you for the link!! I didnt see that particular product, on the Waterlox website, there are two products for a two step process and I was getting nervous. I Can’t wait to finish this!
I hope that you get great results! Tag me on Instagram with @bowerpowerblog if you post a pic! I’d love to see it!
xo – kb