I am super excited to show you our styled up deck! For the last couple weeks, you and I have been hand-holding on this journey to make the space more livable, more beautiful and just plain safer for the kiddos and I am thrilled to say we are at the end! I can’t wait to show you these makeover photos! Seriously. If you hear a giant thud and there is no more words to this post….call my neighbors because I am on the floor passed out from excitement! I named the journey “The Deck Diaries” and just like in a personal journal, I told you the good, the bad and the ugly of our deck process. There was stain flying out of the bucket, frustration, sleepless nights, really tall ladders and gross flying deck sludge….but it was all completely worth it because now we have a space that our whole family can enjoy.
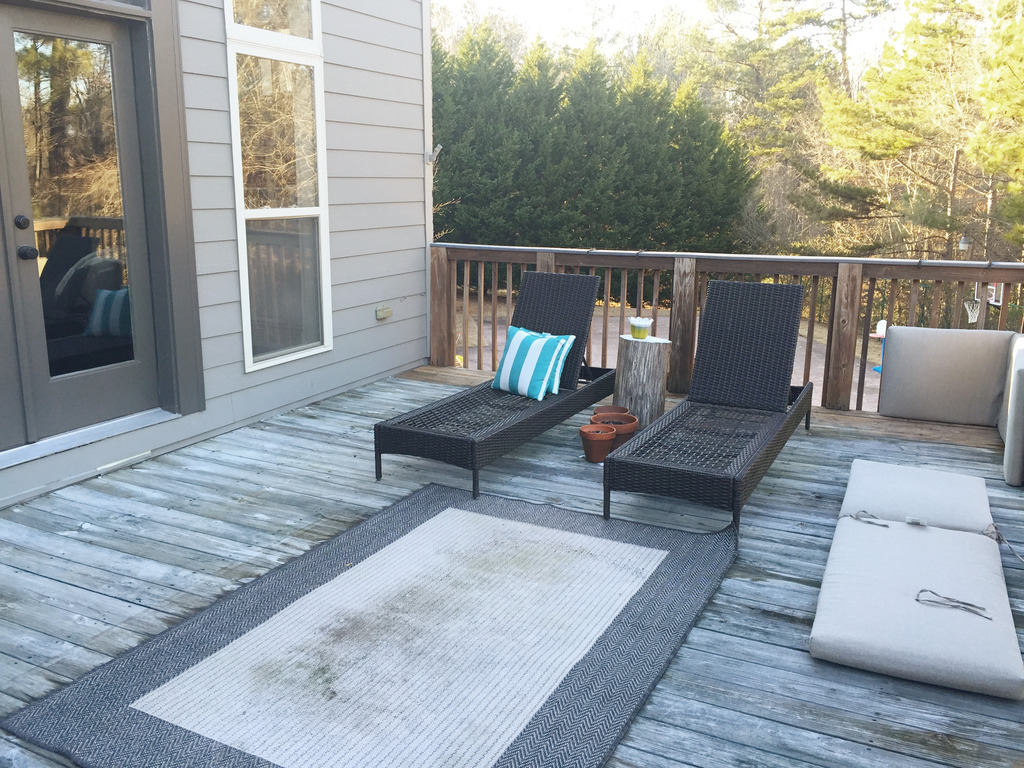
If you are new to Bower Power, let me tell ya….this space was completely neglected and unusable. We had broken balusters, warped and splintery boards and absolutely no style in this space. Oh and the dirt. It was crazy dirty. The rest of our exterior is looking mighty fine but this was like a complete eyesore on the back of our house. Not only that but we couldn’t even use it because of the three little kids we have that would get a shard in their foot every time they walked on it. And of course, I was terrified that they would fall off the two story structure and plummet to their death. (if you are new here, this is my brain. It’s not pretty. I have a flair for the dramatic and tend to exaggerate to the maximum extreme. You call it a splinter, I call it shrapnel of death.)
Something had to be done. We decided this was the year to give the space an overhaul and when Home Depot decided to pitch in a patio set, it was just the motivation we needed to, as they say here in the south, git-er-dun.
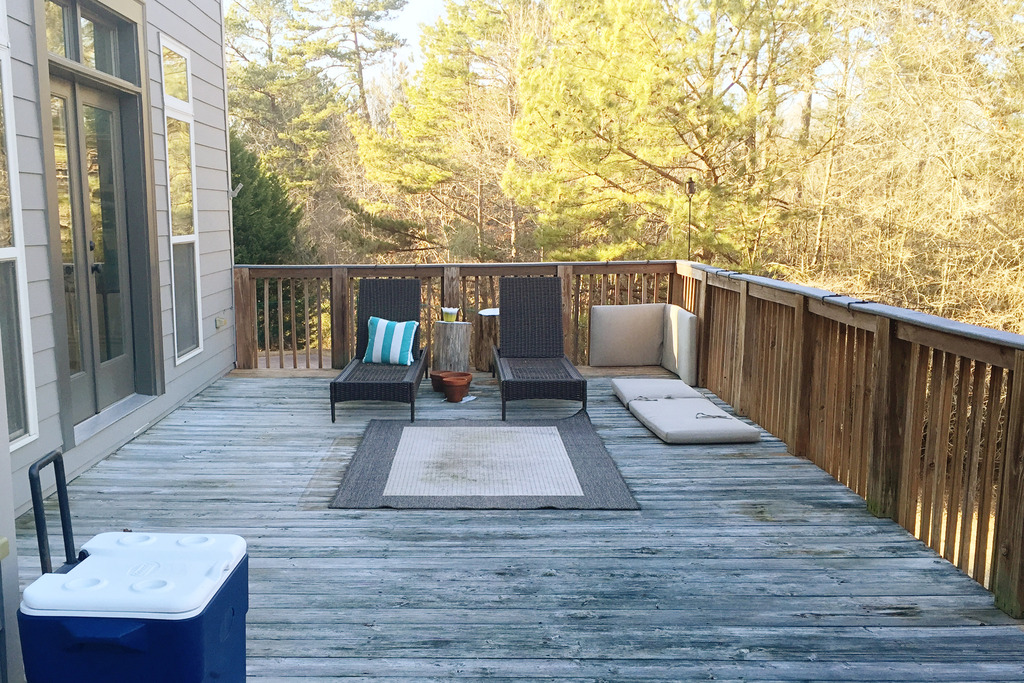
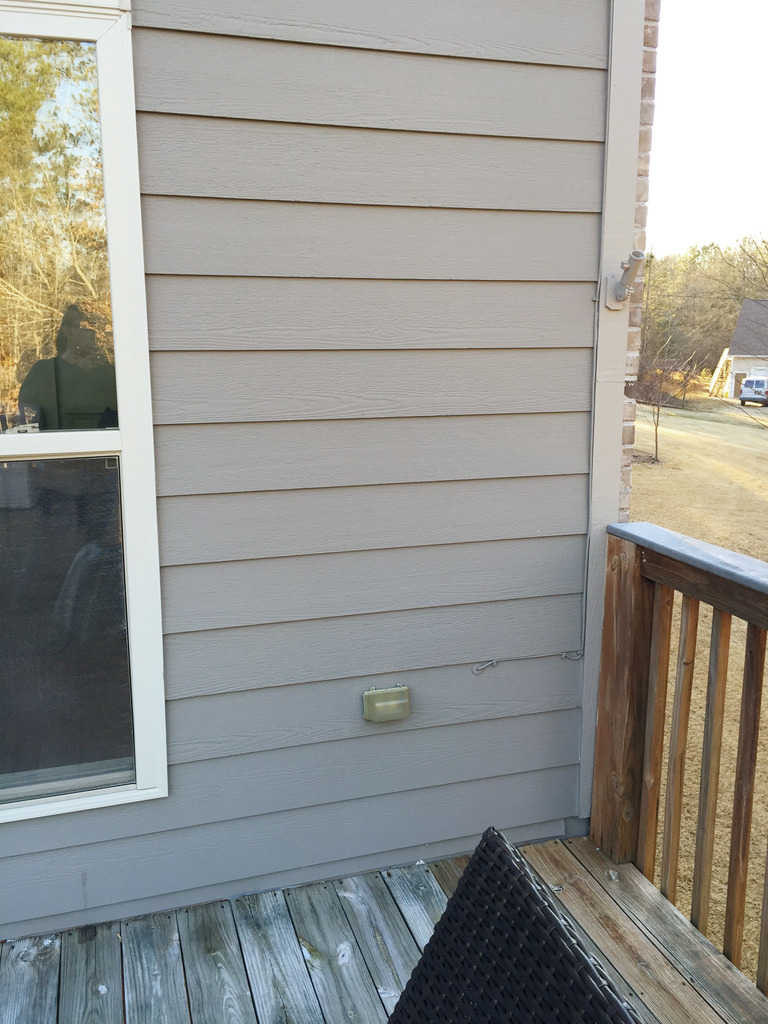
It’s not an illusion…the deck boards were different colors…and the railing was a different material altogether.
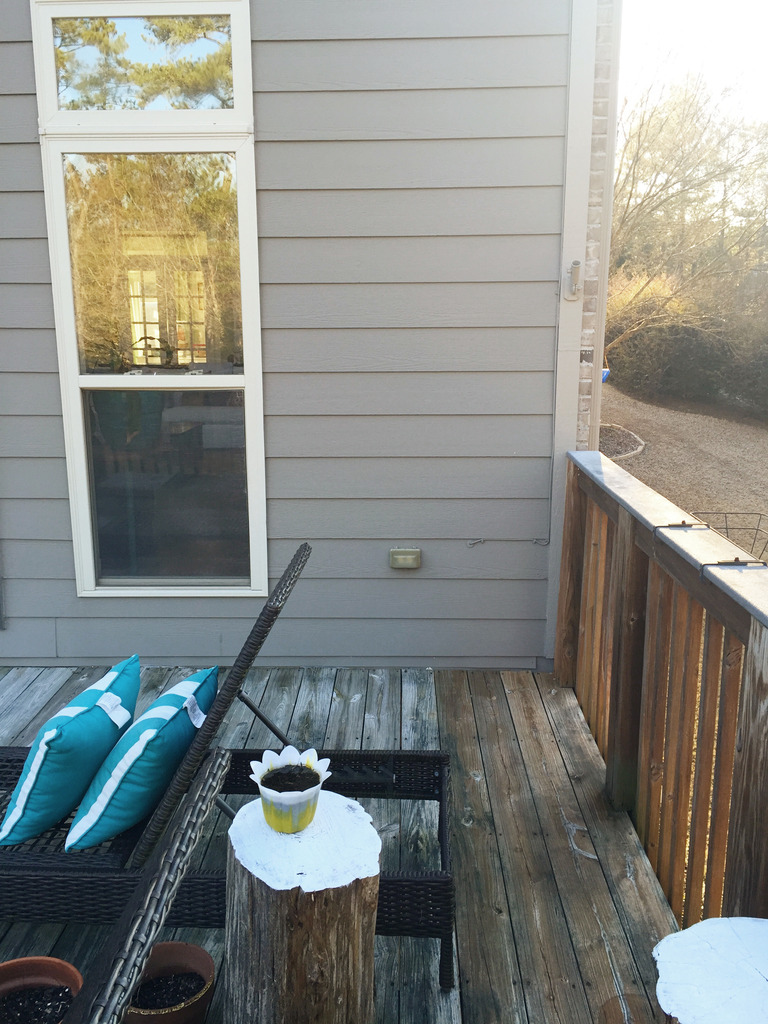
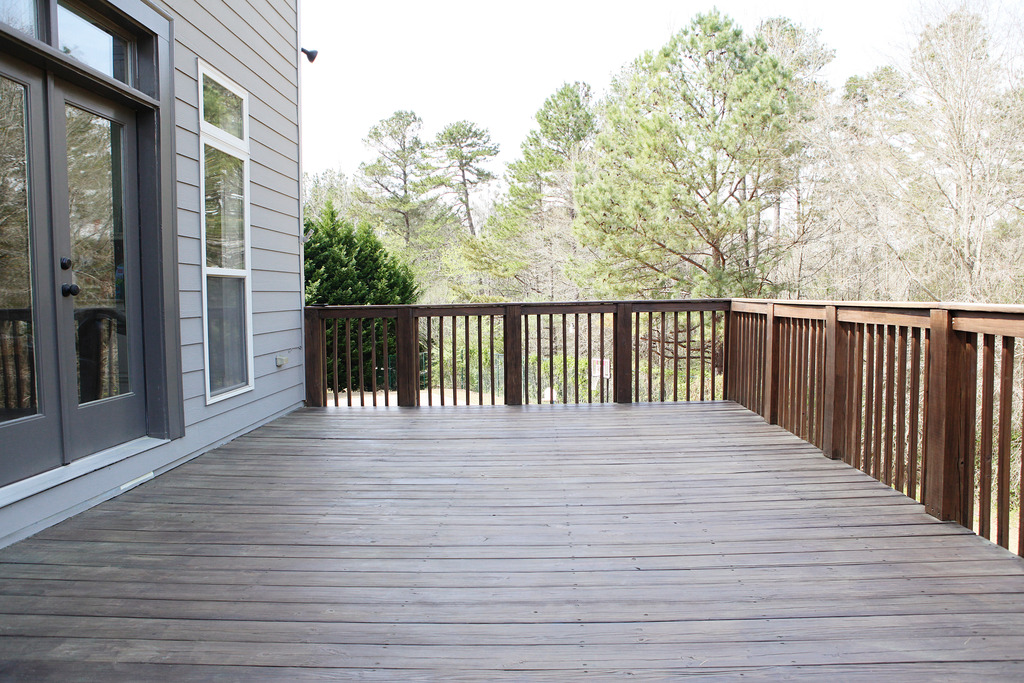
After we pressure washed the deck, we then added a bunch of wood for safety and for aesthetics, built a baby gate and then we sanded and stained. The process was long mostly due to the weather but well worth the effort and when it was ready for the patio set, I did a happy dance for a solid three minutes. And that is a lot of aerobic activity for this third trimester mama!
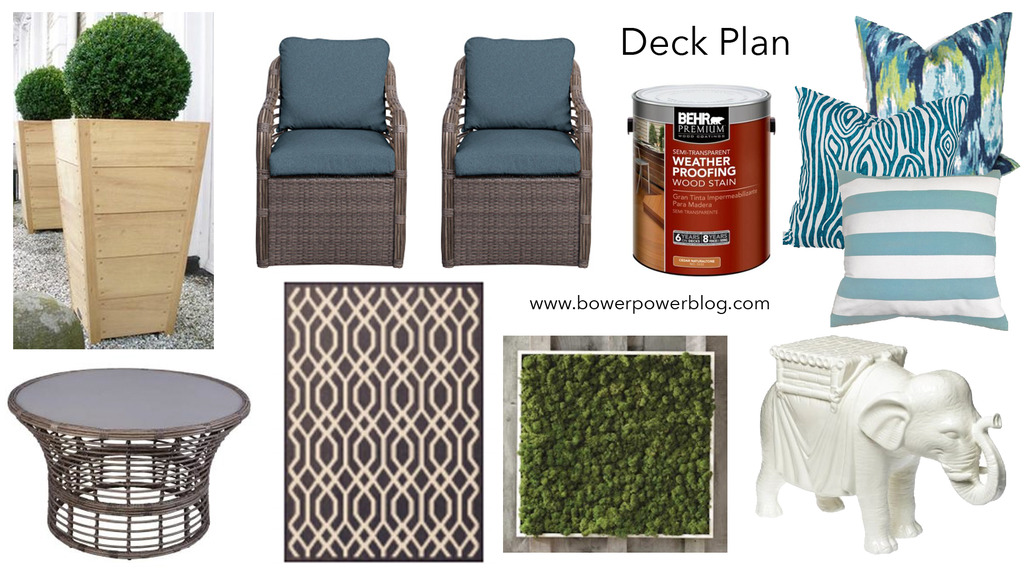
The plan was fairly simple….stain the wood, get a new rug, put in the patio set, add some tall planters and then add some style in the form of art and pillows.
This is how the space turned out…..
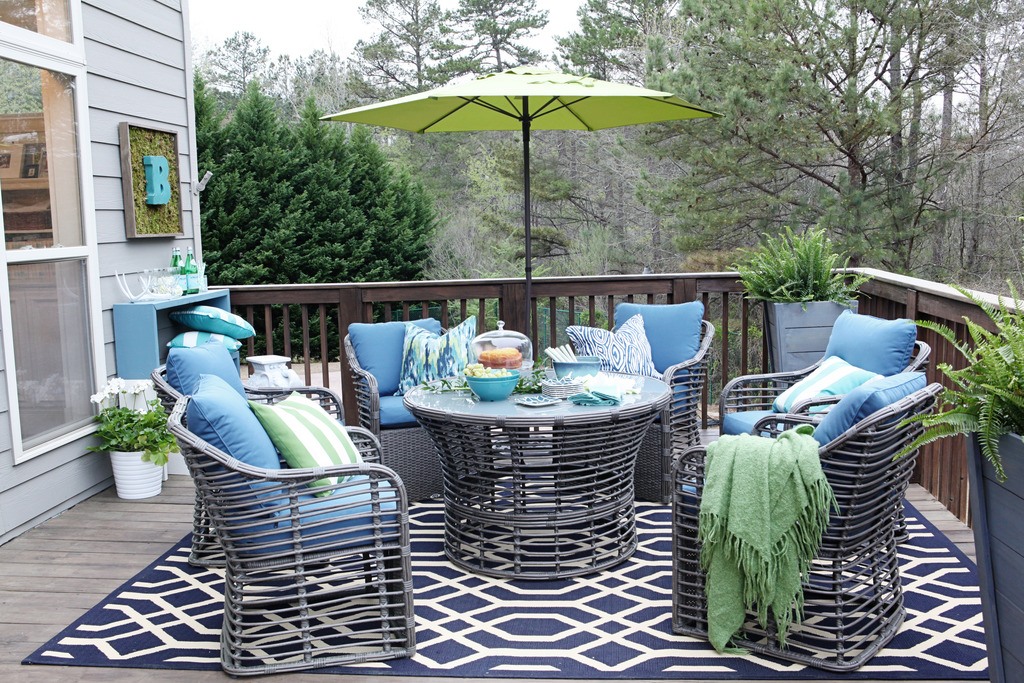
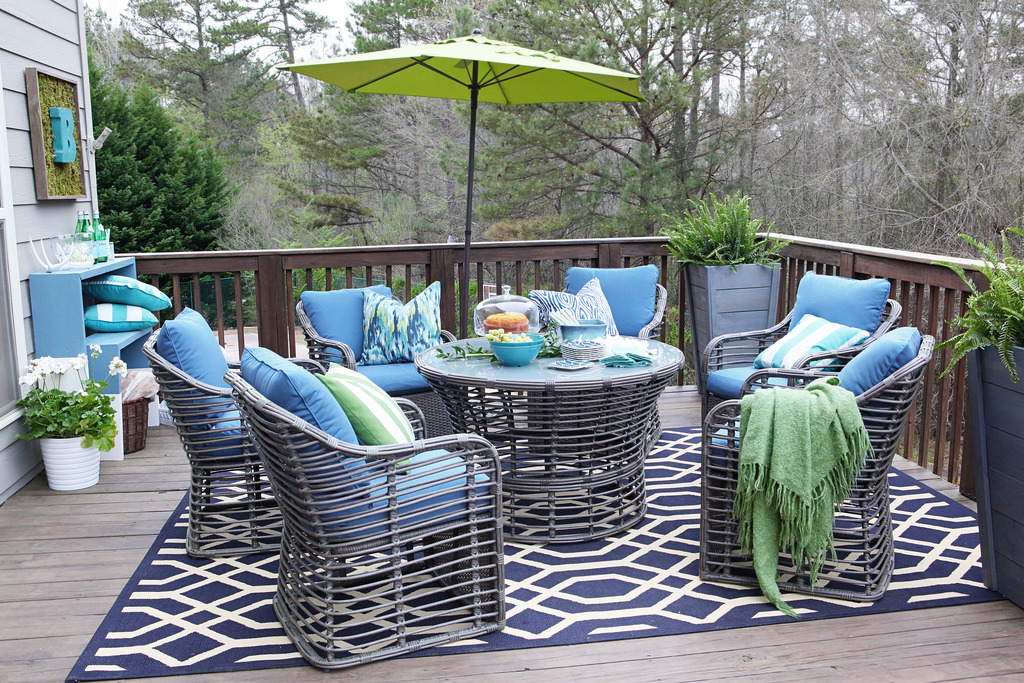
We began the process by picking out the patio set first. We already have a long table down under the deck and this chat table seemed like the perfect size and perfect compromise. We could still eat dinner on it but when we have guests and appetizers, it feels more like a conversation area vs. a dining room. Plus if the kids need help, it doesn’t require my go-go-gadget arms.
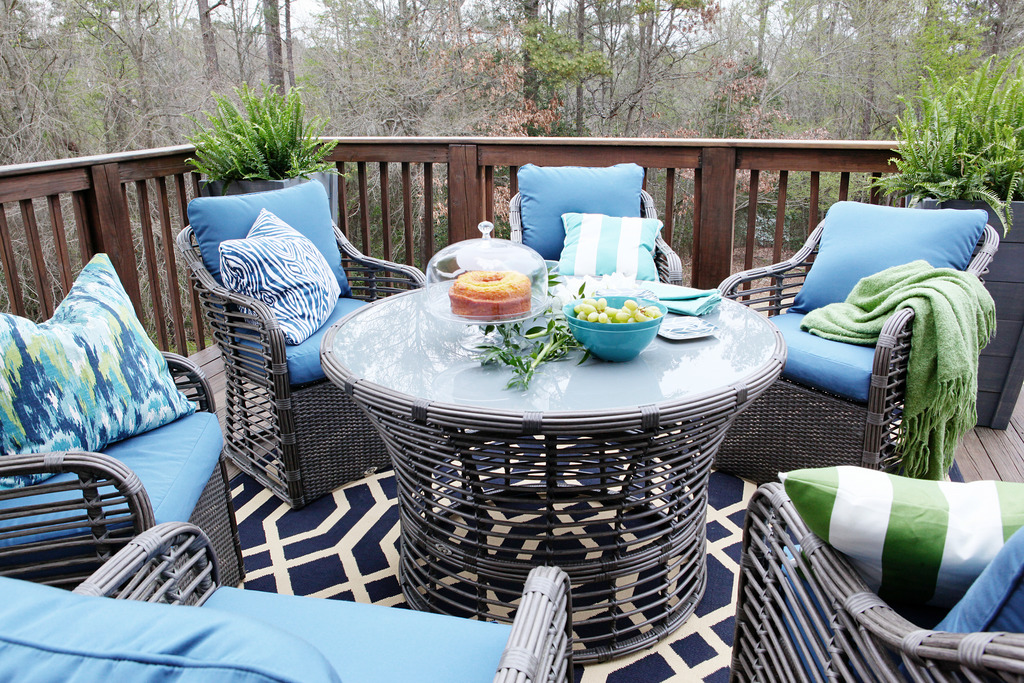
We were pleasantly surprised that the top is a smoky gray color. We expected clear glass but this is way better because you can’s see any crumbs on the floor below and it hides dirt better too.
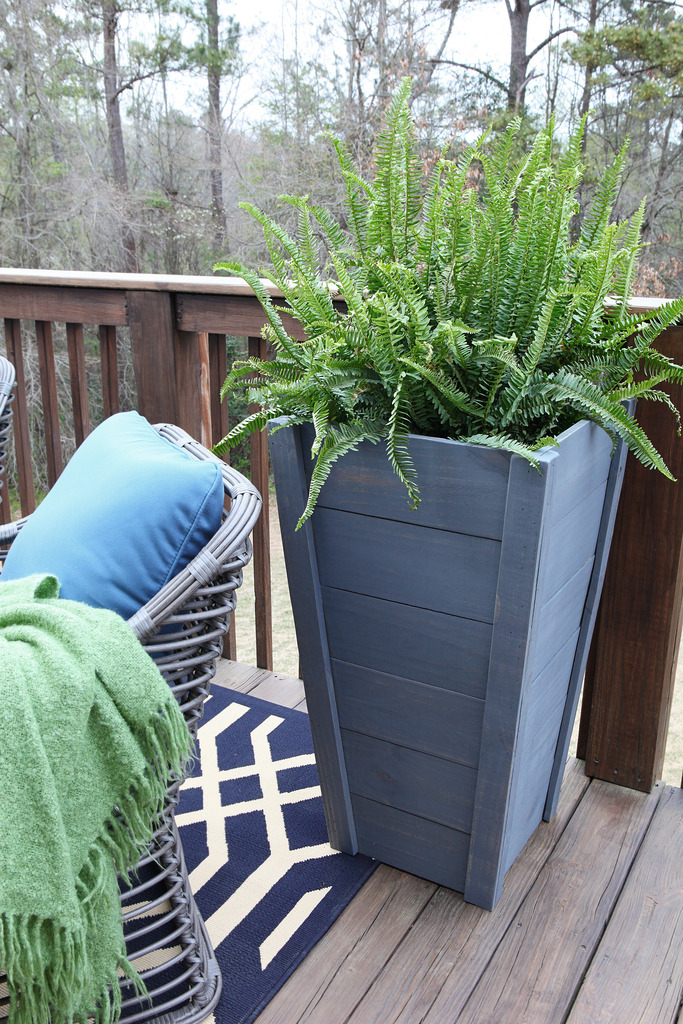
The color scheme was blues and greens and grays. We wanted to bring lots of green in with the plants and these tall DIY planters were the perfect way to get more life on the deck. Here is the tutorial if you wanna build some of your own.
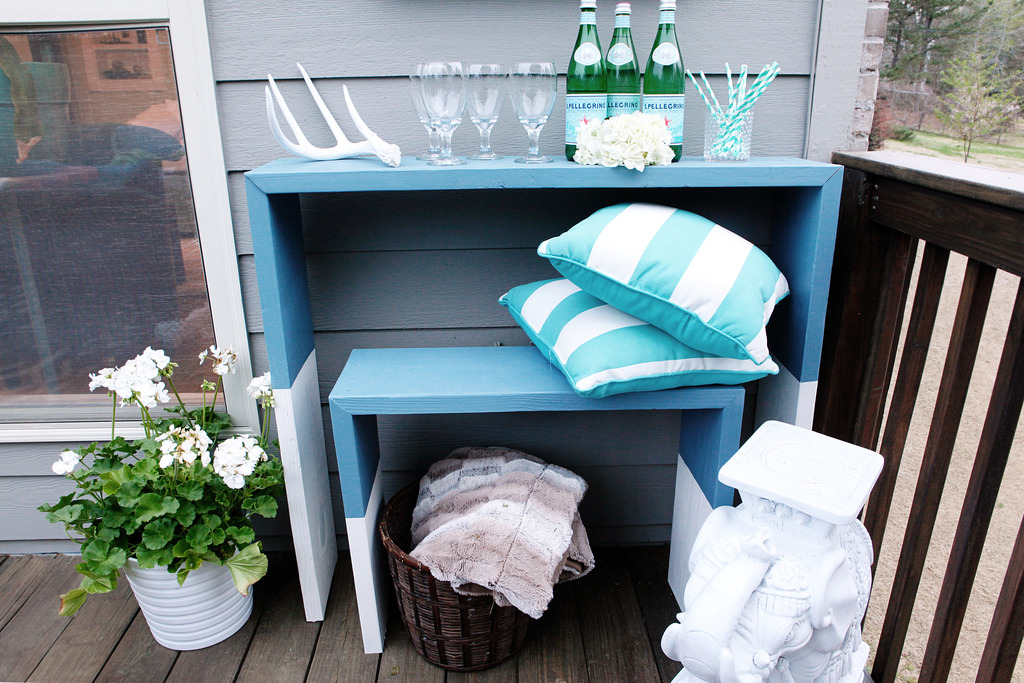
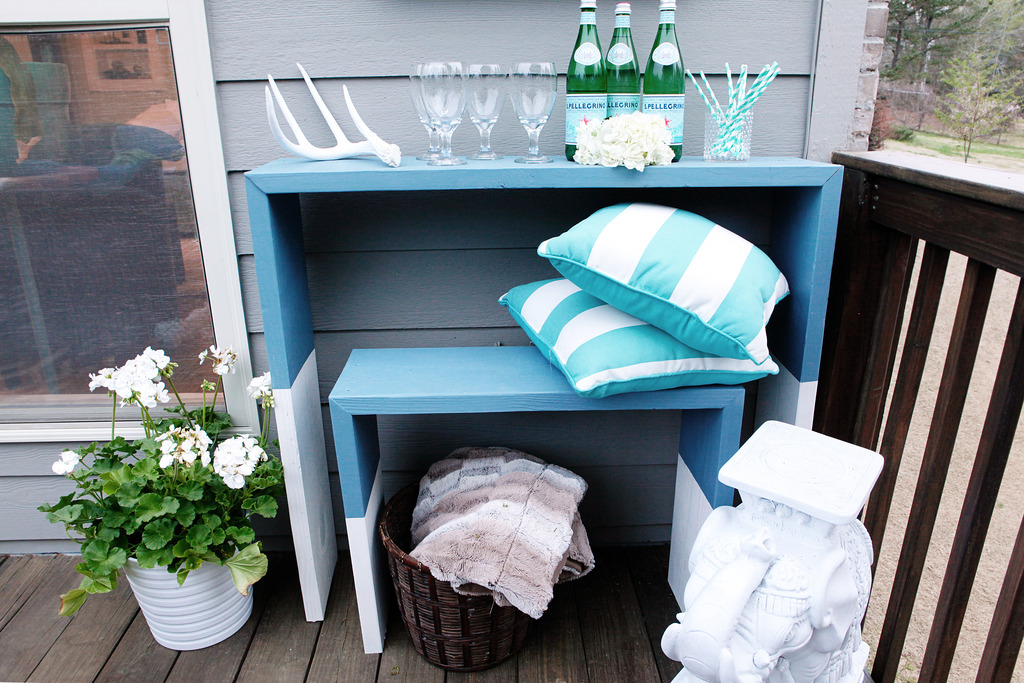
In the corner of the deck we had this little space that we wanted to utilize as an extra serving area. Before there was nothing there so we built some custom nesting tables and added some ‘art’ and other items to make it a little bar area that is perfect for stacking those extra items whenever you are entertaining.
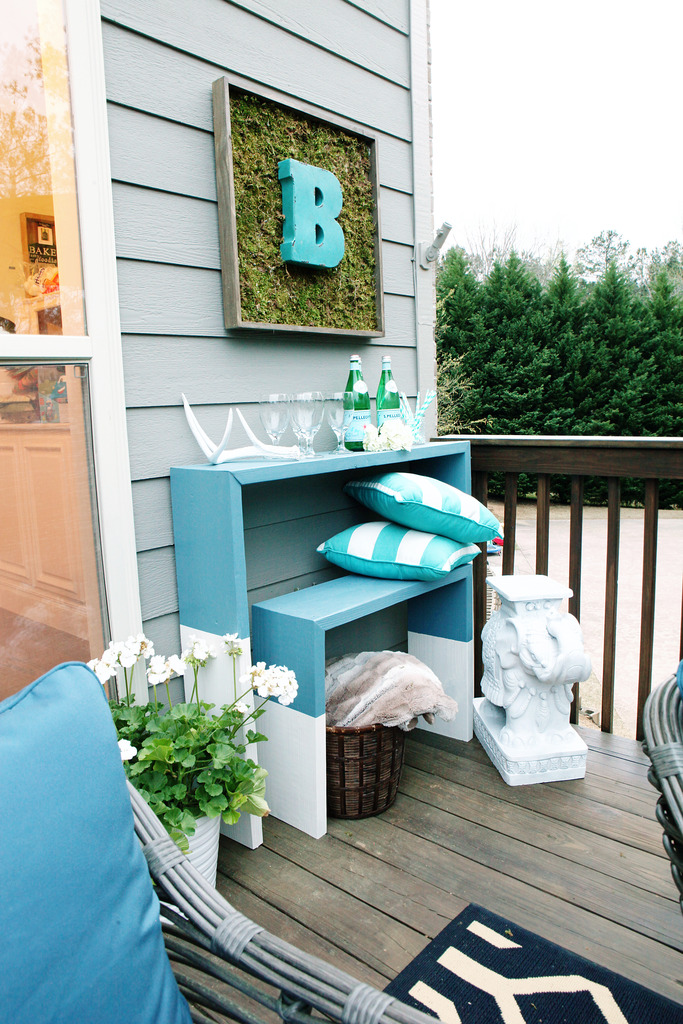
The little spot is great too for drinks or extra pillows or blankets. I also think it will be wonderful when it comes time for those summer nights when we have citronella candles and bugspray. High spots like this are so helpful for the moms that need something out of reach and still accessible!
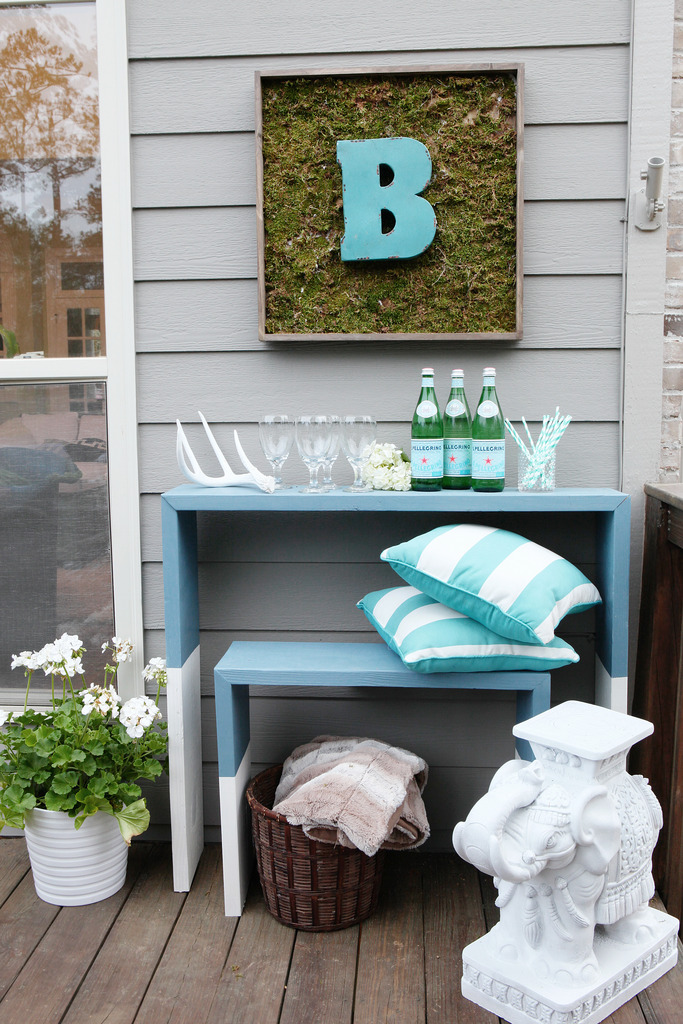
The art up above the tables was really easy to make. I can’t wait to share with you a tutorial!
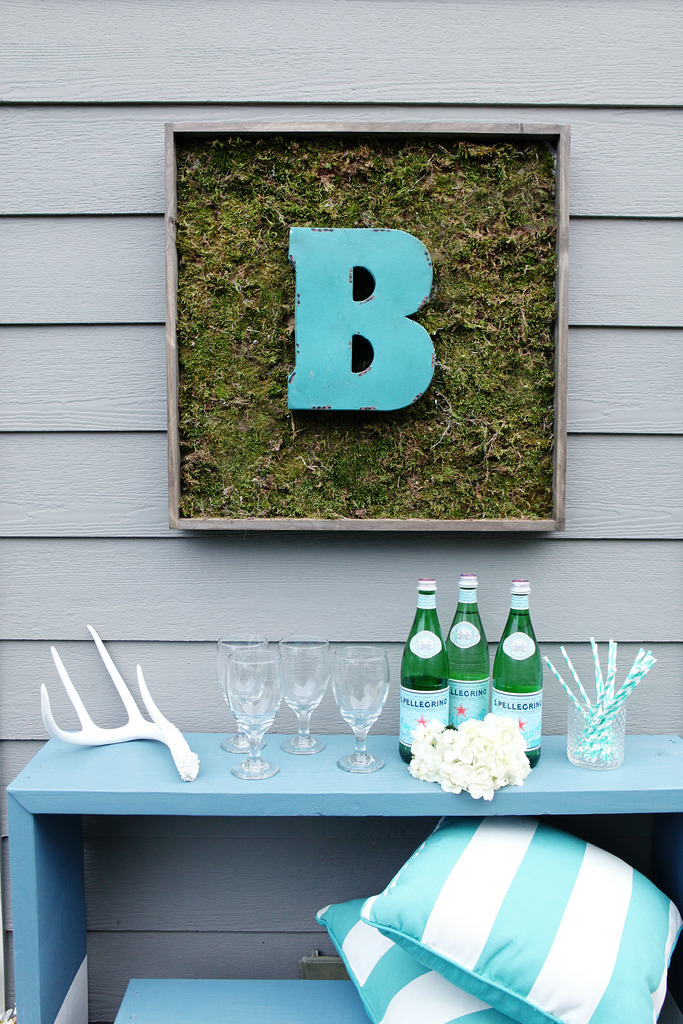
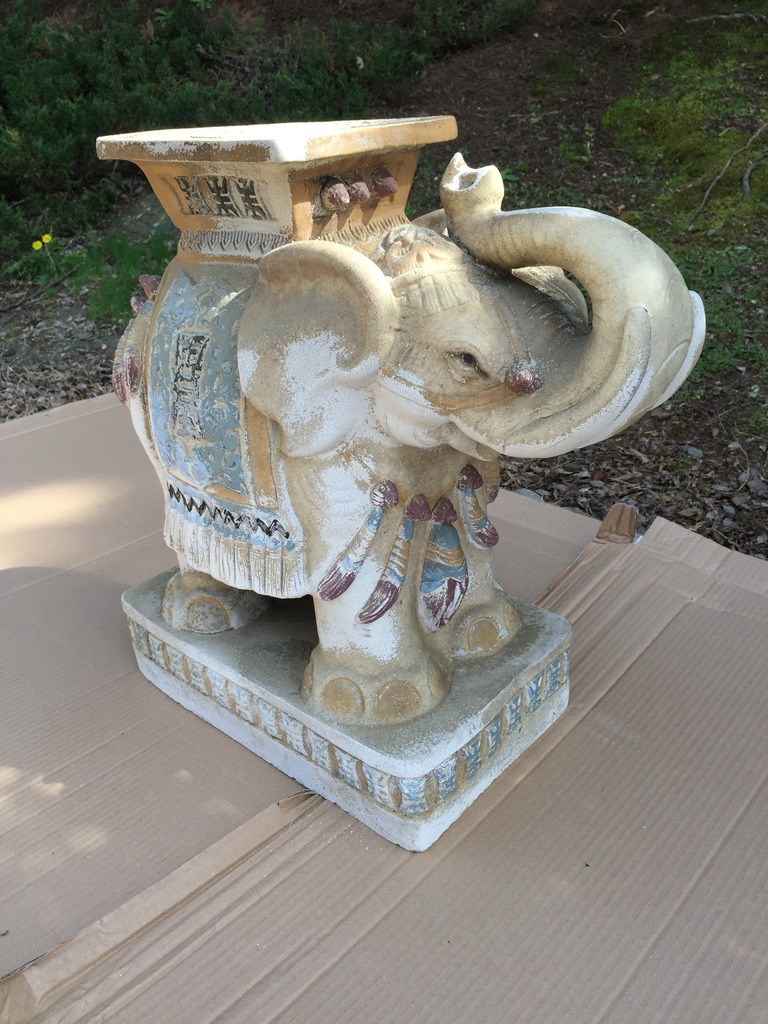
And did you see that elephant? It was a thrift store find that I bought literally on the spot….I didn’t wait, I didn’t stand in line with my other items….I headed straight for checkout and brought him home.
This is what he looked like before his makeover with spray paint.
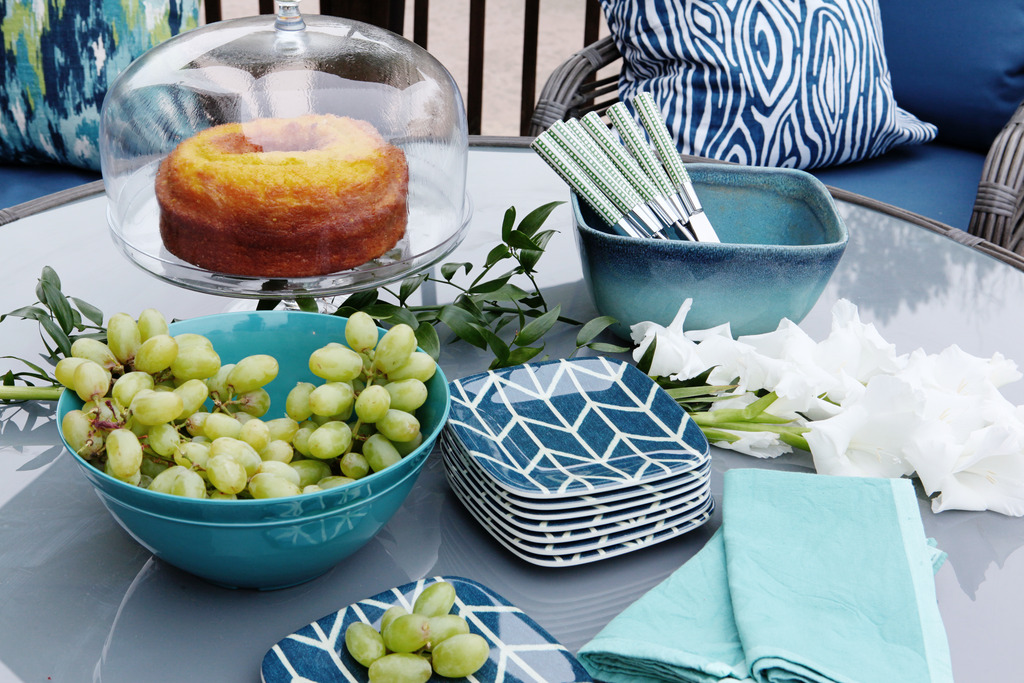
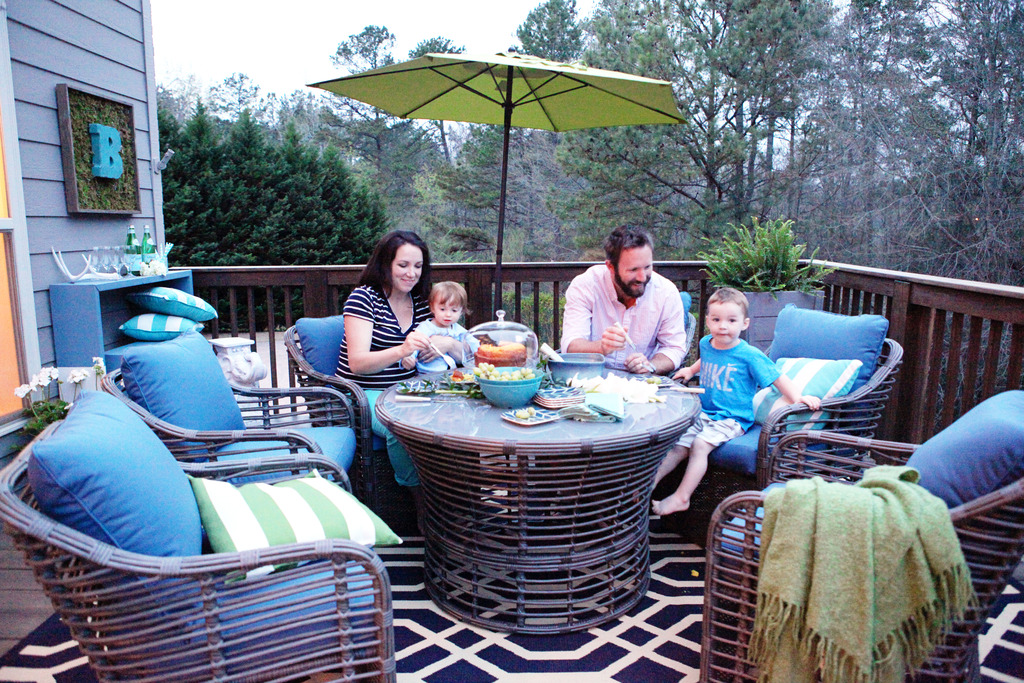
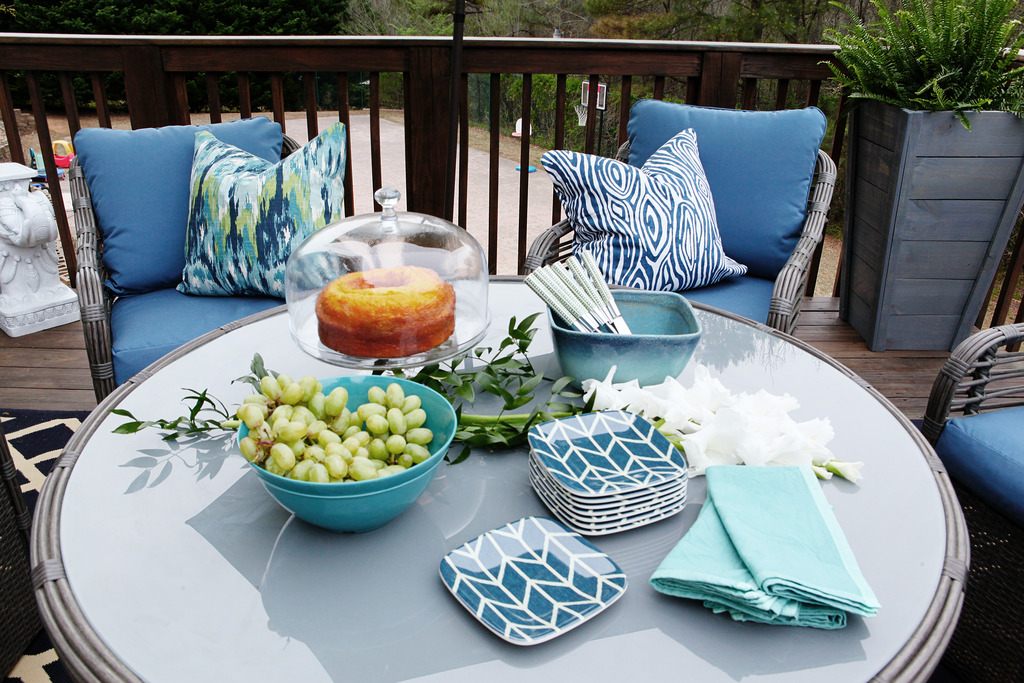
We have had so much rain in Atlanta, we haven’t yet gotten to use the space like we want but we did get to enjoy a bit of pound cake and fruit as a dessert one night after dinner. The boys LOVE it. And it does feel homey with the pillows and the blankets. Generally speaking, we keep those inside but our cushions have been living out there full time and they still look new. Here are some more pics….
One more time with that before and after, shall we?!
A very special thanks to Home Depot for the motivation and the patio set for this makeover. And for more pics and more info about this space…you can check out the post I wrote for their blog The Apron.
SHOP THIS LOOK! Click on the links below to shop similar items for your home….
Product Sources –
Rug – Hampton Bay Navy Lattice rug 7’7″x10’10” @ Home Depot
Patio Set – Hampton Bay Cane Crossing Chat Table and Chairs in Sunbrella Canvas Sapphire @ Home Depot
Umbrella – 7 1/2 foot pushup Patio Umbrella in Pear @ Home Depot
Tall Planters – Tutorial HERE (stained Rustoleum Weathered Gray, plants are sun ferns)
Monogram Wall Art – Tutorial coming soon! (stained Cordovan Brown, moss from backyard, metal letter B – Hobby Lobby)
Nesting Tables – Tutorial coming soon! (paint colors – untinted white and Martha Stewarts Kerry Blue Terrier)
Pillows – watercolor, faux bois, green stripe – home made (linked are similar), turquoise stripe – Target (similar)
Elephant – thrift store find spray painted Rustoleum white in satin
Green blanket – Pier 1 Imports
Brown basket – thrift store
Fur blanket – Target
Antlers – West Elm
House paint color – Sherwin Williams Pavestone at 200% darkness
Deck stain color – Cordovan Brown semi-transparent Behr stain
Now let’s get back to that celebratory dance! But first…stretching is necessary….and maybe a little drink….at least I have the perfect spot to rest after my workout 🙂
Update : Looking for more info on something you see in our house? We have a Shop the Bower House page with paint colors and links to accessories, furniture and decor!


WAHOOOO!!!!!!! Love everything 🙂
I love love love your deck! I love the colors and that little nesting table set–amazing! Can’t wait to see a tutorial.
SO BEAUTIFUL! You’ve got such fantastic taste and adorable children!
I can’t wait to see how you made those nesting tables! I just hope my novice carpentry skills can recreate them-my patio NEEDS them!
Gorgeous as usual! I’m always impressed about how much you get done with your boys underfoot (and pregnant to boot). I want a glimpse of where you store the cushions. I am super lazy, and sine there’s no convenient closet near my porch my cushions and pillows get left outside and become gross very quickly.
Katie, Katie, Katie- you really outdid yourself this time! I mean, wow! That patio set and table are to die for. The colorful umbrella, the cushions, pillows, and rug are gorgeous. I love the planter boxes, moss art, nesting tables, the elephant( put a jade plant on him, please!) All the accessories are perfection, the stained deck looks awesome and the happy family sitting there makes it all the more special. I would copy every, single. thing. Now after you have baby boy #4, mix up a batch of strawberry margueritas , watch the sunset, and gaze at the stars!!
Love the deck, it turned out beautiful, but what I really need to know is… did Will take that picture of you and the rest of the family?! Love it if so, but love it just as much if he was having a 5-year-old moment and felt like hiding out inside. Congrats on the excellent deck and excellent family! You’re doing a great job.
Love it Katie!!
Sensational! What a transformation. You’ve both done such hard work, but what a pay off, nice.
Awesome job! That looks so great. I love the chat set.
Bright & gorgeous! I love the blue & accents! Happy weekend!
Paige.Rose
from
http://www.TheQuaintSanctuary.blogspot.com
Katie, this is one of the best deck makeovers I have ever seen! I just love it! I really love the nook area with the nesting tables – such a great idea, especially since I’ve been looking for a bar cart to create that kind of vibe for a YEAR. Did you do anything to the tables to make them water-resistant with all of the rain/bad weather?
It looks beautiful! Well done!
You’ve done a lovely job. The bar/prep area looks great. Enjoy your new deck!
I love how it turned out! All of the hard work paid off. The skinny blue and white table vindicates me. I was wanting to put a simple and skinny table on my front porch. But my husband insisted it would look weird. Your porch has proven my point. The important part here being… I win!!! All of the accessories you picked for the porch are beautiful! You are ready for summer!
Beautiful!! Great job. Thank you for sharing all the details about where things were purchased from. 😉
Do the chair cushions take a long time to dry out after being rained on?
Looks great! I’m in Atlanta area too and we’ve had so much rain my porch and deck are lime green and fluorescent yellow…aka. mildew and pollen. So I know how hard you have worked! Quite an inspiration for me when we dry out a bit.
This really looks beautiful. I was thinking about putting an indoor/outdoor rug on our deck too, but am concerned about it trapping too much water and leading to rot. Do you have any knowledge on that?
You definitely need to clean it at very least annually and make sure it dries out after a rain…but other than that, it should be fine.
xo – kb
My best tip is to put them on their end when it is raining so that the water drains faster and easier. Then it takes about one day of full sun to dry out.
xo – kb
They are made of exterior wood and then painted with exterior paint so they should be good to go.
xo – kb
He was having a moment….and said that he didn’t want any cake so he opted out of being in the pictures 🙂
xo – kb
Oooh…a margarita party sounds fun!
xo – kb
We keep the cushions outside but we pull in the pillows and the blankets. Both ottomans in our living room open up and provide a ton of storage so that is where we are currently keeping them. I think I want one of those outdoor waterproof boxes though!
xo – kb
Wow! Looks fantastic!!!! Very impressive! ….also inspiring, as our deck is currently NOT beautiful.. 🙂
It looks gorgeous! You did an amazing job with it.
I am so behind on life and blog reading but I had to check out this deck and LOVE it. and I miss reading your sense of humor! you are so funny. AND i missed a baby announcement. You go girl! congrats!
LOVE LOVE LOVE!!!
Also, kind off subject but did you every reveal the basement kitchen? Did I miss that somewhere?
It’s beautiful! I’m so jealous. We have a really large outdoor area that is undeveloped that we’re trying to figure out a plan for. You’ve given me some inspiration. Bwahaha!
FYI: We received some gorgeous outdoor furniture 8 years ago from my mother in law. I regret keeping the cushions on the furniture when not in use. The sun has absolutely destroyed them, & they are really costly to replace or recover. Perhaps you will have better results since yours aren’t in direct sun. We live in AZ so it’s brutal no matter where your cushions are. I highly recommend an outdoor chest for storage. We eventually put the back cushions & throw pillows in there but the big bottom cushions didn’t fit. Those I’m going to try recovering soon. It’s also a great place to keep some of our daughter’s outdoor toys.
Enjoy your area!
Katie- the deck looks awesome-so inviting and relaxing! What does the other side of the deck look like–looking towards the steps from the table? We are trying to figure out a way to make our grill look less like a big stainless steel blob!
Katie! Your deck looks phenomenal- you pulled it all together beautifully!
I love seeing all your individual projects, but this has me wanting to see more full-blown, styled “afters” from you. (As if it’s as easy as snapping your fingers, right? I know you put a TON of work into this project.) I know finishing some rooms is a goal for you, and I want to offer you encouragement and affirmation- you’re doing a great job!
Fabulous job, Katie Bower! Love the look!
There is nothing yet…we haven’t done anything to that side yet.
xo – kb
We have not yet. We hope that this coming week we can share the basement laundry room…and then after that we will hope to work on the kitchen even more. You can follow me on Instagram to get sneak peeks!
xo – kb
Can you post a picture of the entire deck?
I’m so glad I wasn’t the only nosey so and so wondering about that side of the deck! I was imagining it was mostly full of the kid’s toys etc since it’s now safe enough to play out there! I imagine my kid would be out there non-stop. What a great space. Can’t wait to see what you do with the rest of it! Well done!
Fabulous job, Bowers! You should be so proud!
Looks great! Our deck is on the list for this spring and yours just makes me want to get started & commit to furniture, colors, etc. Question: How is the outdoor set from Target holding up?
love how the space turned out KB! My fave is the nesting tables/ drink bar! so fun!
It’s down on the patio below and it is doing fine…one cushion has a small hole in the seam…it’s something that is easily hidden 🙂
xo – kb
Fabulous!
Yay so pretty! Not gonna lie, that Napoleon Dynamite gif is pretty much how I imagine you would dance IRL. Not that that’s a bad thing, all the best people do 🙂
It turned out FANTASTIC! I love the colour scheme and the side table area. Hard work really pays off. How does the other side of the deck look?
So fun & lovely!!! Your hardwork definitely paid off with a beautiful useful space. I have serious deck envy now!
I absolutely love the deck! So inspiring! So I have a Debbie Downer question: Are you worried about the kids and things they can climb on so close to the railing? I would be afraid to put the elephant (awesome, by the way!) so close to where they can climb on/ over the railing. Or maybe your kids just obey better than mine…..
I have this Suncast deck storage box and it is awesome! We have it next to our patio set and it holds 6 cushions and a few pillows and keeps everything nice and dry. It sat on our deck all winter and the cushion still look great!
http://www.amazon.com/gp/product/B0044V3USU/ref=oh_aui_detailpage_o07_s00?ie=UTF8&psc=1
We bought that box for my mom….the only concern I have is that it might be too small. I would need it to hold the cushions for all six chairs…front and back!
xo – kb
How did you hang the moss art work on the siding? Its really cute!
Yeah, I was worried about that so after the styling pics were done, I switched the pot and the elephant. And the lower wood table gets nestled back in. In general, our kids are not big climbers….I don’t really know why…but there is always a chance skill that could develop so we play it safe.
xo – kb
It’s still empty. The grill is over there and the baby gate still isn’t stained. That’s about it.
xo – kb
Hi Katie,
I asked the same question – but my comment is still awaiting moderation? Per my original request: “Can you post a picture of the entire deck?” In all of your previous deck posts you had images of the entire space:
http://s554.photobucket.com/user/allbowerpower/media/Dream%20House/Exterior/Pressure%20Washing%20Deck/IMG_3402b.jpg.html
https://i554.photobucket.com/albums/jj424/allbowerpower/allbowerpower001/IMG_0915b_zpsrf4ju2an.jpg
https://i554.photobucket.com/albums/jj424/allbowerpower/allbowerpower001/stainingdeck10_zpsr4natbop.jpg
http://s554.photobucket.com/user/allbowerpower/media/Dream%20House/Exterior/Pressure%20Washing%20Deck/IMG_3948b.jpg.html
But you’re only revealing about a third of it now – it’s impossible to evaluate what you accomplished and how the space looks without like-comparisons of the before and after. This seems intentionally misleading.
Best,
Jackie
The rest of the deck is just empty and it has been raining…so it’s nothing to brag about.
xo – kb
Jackie,
I’m sorry your comment must have gotten eaten by the spam filter…I went and found it! It seems like you are really personally invested in the rest of the deck…the other side is empty….and your comment is weirdly aggressive to say that you want to “evaluate what I accomplished”….just putting that out there because you might not know how it came across. I can post an update on the rest of the deck when I do the post about the tables and the moss art, okay? Does that work?
xo – kb
Love it! Those are totally my colors too. I was just telling the man that we need a new patio set and I had something like this in mind. Our current set is an old one left by the previous owners but it’s too large for our patio.
Hi Katie,
Evaluate what you accomplished implies that you accomplished something – so there’s no need for you to be defensive about that. You accomplished a ton. That’s impressive to me at least.
Odd that you interpret a reader’s eager interest to learn from your work and projects as being “personally invested” (not sure if that was supposed to be a dig? haha what other investment options are there?) I’m just supplying my feedback on what I’d like to see – on the off chance you read the comments and consider accommodating some of the requests. I didn’t realize I was making demands haha.
For context behind my request – I want to see how many planters you had to make or still need to make, how they are spaced out, what to do about rug placement when it’s not a uniform space, what to consider when you have multiple doorways etc.
Best,
Jackie
I completely understand that people want more. Readers ALWAYS ask for more…I was just talking about the way your comment came across…referencing picture links, coming back after the first comment was missing, questioning accusation that I was misleading, not being satisfied with the fact that I did answer the question when someone else asked it…not all of them are bad things but things that lead me to believe you were not exactly passive. I don’t mean anything like a dig…I just delete comments that seem mean spirited…but I just wanted to let you know how it came off because I didn’t think you meant it that way. Does that make sense? I definitely am not one to hide things (by George, I talk about gas and diaherra for heavens sakes) but there was just nothing to say about the other side….baby gate and steps are still not stained…so I have found that putting up a picture of half-done DIYs that have no near completion in sight (when will this rain stop?!) only lead to more criticism. Make sense? I’m happy to post a pic when it clears up and I have time.
xo – kb
OMG!!! I totally just fan girled when I saw that you responded back. And now I’m red and flustered cause I am at work trying to explain. lol.
Am sure you will love using this for meals. We live outside of Boston, and I am always thrilled once it warms up enough for eating outside. Our deck is right off the kitchen – we eat every meal out there from May-September (unless it is raining). Can’t imagine what I would do without it! Every chance for less crumbs inside makes me very happy!
So lovely! I am a big fan of your nesting tables – so stylish. Great color scheme girlie.
We also need to re-do our deck. Is stain enough to protect the wood from rain/snow?
Stain with sealant is said to protect the wood from rain/snow from 2-3 years. You would have to reseal after that.
xo – kb
We hung it directly into the siding with a screw.
xo – kb
Hello. I have to echo everyone’s post. The space looks great. Good job. I’m doing a deck renovation now and planning stain colors. I will be using Cordovan Brown semi-transparent stain as well. My question is did you use it on both the railing and deck boards? The contrast between the two looks great.
We did. Even though we let the top railing weather the recommended time, it definitely shows different on the new wood vs the very old wood so I would recommend doing testing on what wood you have before making any coat decisions!
xo – kb
Thank you! I saw your plans for the planters and built them today. They turned out great. I’m excited to see what you turn out next.
Yay! So glad! Send me a pic on IG and I’ll repost!
xo – kb
The deck looks awesome! I’m going to try to convince my husband to make some planters for me. Can I ask where you got your appetizer plates and are they melamine?
They are melamine and I got them from Target on clearance.
xo – kb
Hi Katie,
I just stumbled upon your blog. I am redoing my deck and just love what you did to yours. The colours you chose for the cushions, rug and umbrella are beautiful together.
I looked for the Hampton Bay rug but I don’t think it is available in Canada. I am probably starting late in the season with my deck right now, but life has finally calmed down so I have a bit more time to work on some of my projects.
I will google image search Home Depot’s rug and see if someone else in Canada sells something similar. It is nice that yours is blue instead of the common black and white.
Forgot to mention…proper drainage is needed for all plants. A lot of the decorative containers don’t have adequate drain holes.
Beautiful
Hi Katie! I also have a large deck and I’ve been trying to convince hubby that we need a rug under the dining table and when we add a seating area I’d like one there too. He argues that it will rot the deck. Do you have any insight into this? We are on the Gulf Coast so our weather is similar to Atlanta and our deck is uncovered.
Thanks!
We actually have a couple rugs on our lower patio (the concrete one) and they are constantly wet but our upper deck rug is always dry because it gets more sun and dries really fast. I think as long as your deck finish is intact (like no chipping stain or existing dry rot) then you should be good to go. Remember that the finish is what protects your deck from water….having a rug would be the same as having it rain…and you aren’t gonna stop rain, right?! 🙂
xo – kb
I had a carpenter tell me that rugs on decks are why he is in business!! They do promote rot on wood decking. Unless you use poly on your deck to protect it from the elements, a rug will keep it wet much longer than it would be without one.