Oh boy, I am so excited to get on these building projects. So it’s a goal of mine to share more building stuff…mostly because I need more useful stuff built for my house….but also because I LOVE when a finished piece really helps a space be more functional or useful or just plain pretty. It’s like witnessing a miracle. Like when Jeremy built that awesome console table and my life was changed?! Yeah. And don’t forget our beloved toy cubbies….my brain is still recovering from how it exploded from those. Hopefully 2015 will be the year of building…small and large!
So here are the how-to for our chunky floating shelves in our kitchen. I was gonna name this post “chunky floating brown logs”….you can thank me later for not 🙂
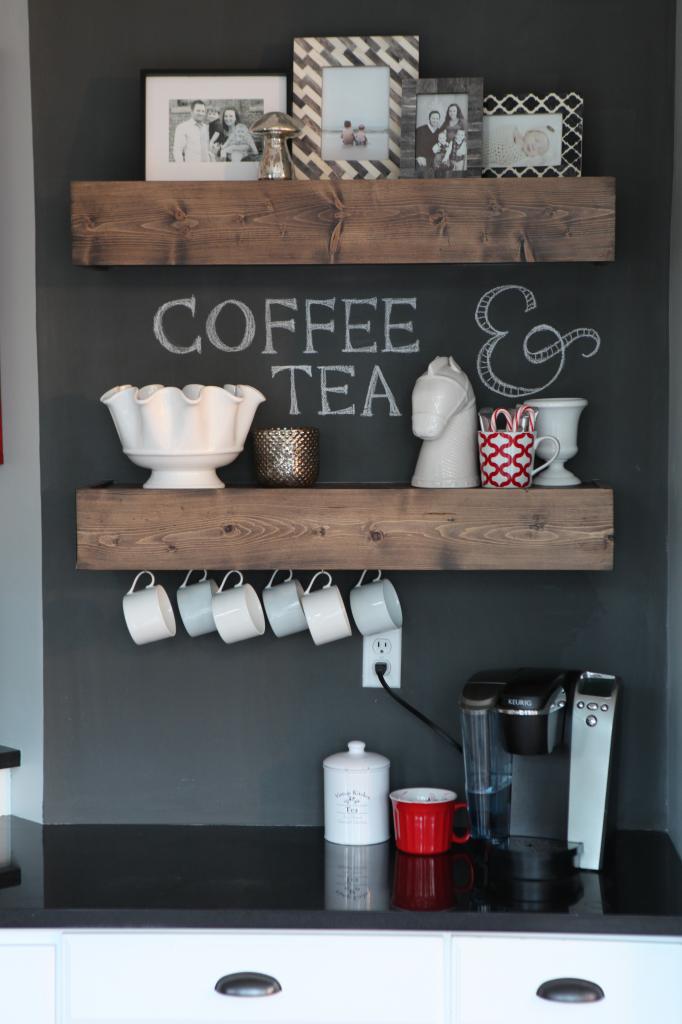
As you saw in our kitchen desk area reveal post, we turned this desk into a coffee/tea bar. It is a lovely little drink station and I am so happy that I get to enjoy it every day. So the first thing I did was mark where I wanted the shelves. I didn’t want them too low or too close together and I definitely needed space for my Keurig to open under the first shelf so that is sort of my jumping off point. I also had to make sure that the upper shelf was close enough to the old outlet plate so that the picture frames or whatever I put in front of it would block it from view. I also planned to make it have a little breathing room on each side. I left 4 1/2″ on either side and then measured for my overall width (36″). The finished size of these shelves I made are 36″ x 10″ x 5 1/2″.
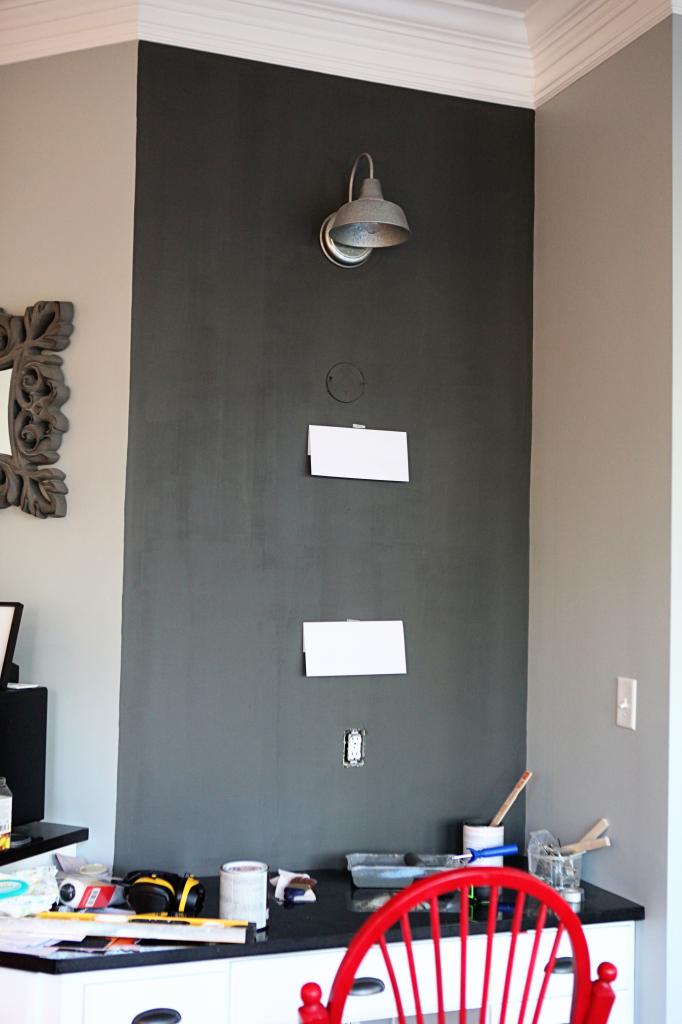
I used regular old 2×4’s for the inside braces and the outside was plain ole pine. These are very similar to our old chunky bathroom shelves…but these have mitered cuts on the front and on the sides because they are visible…and these were loads easier because we brad nailed them….so keep that in mind if you want to attempt those bathroom versions.
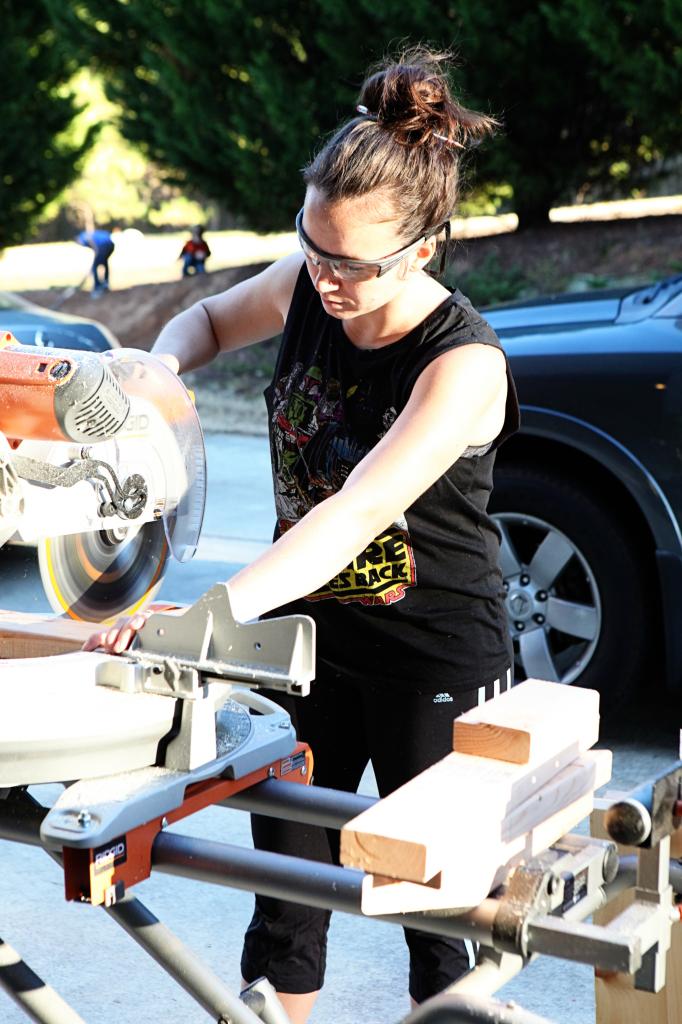
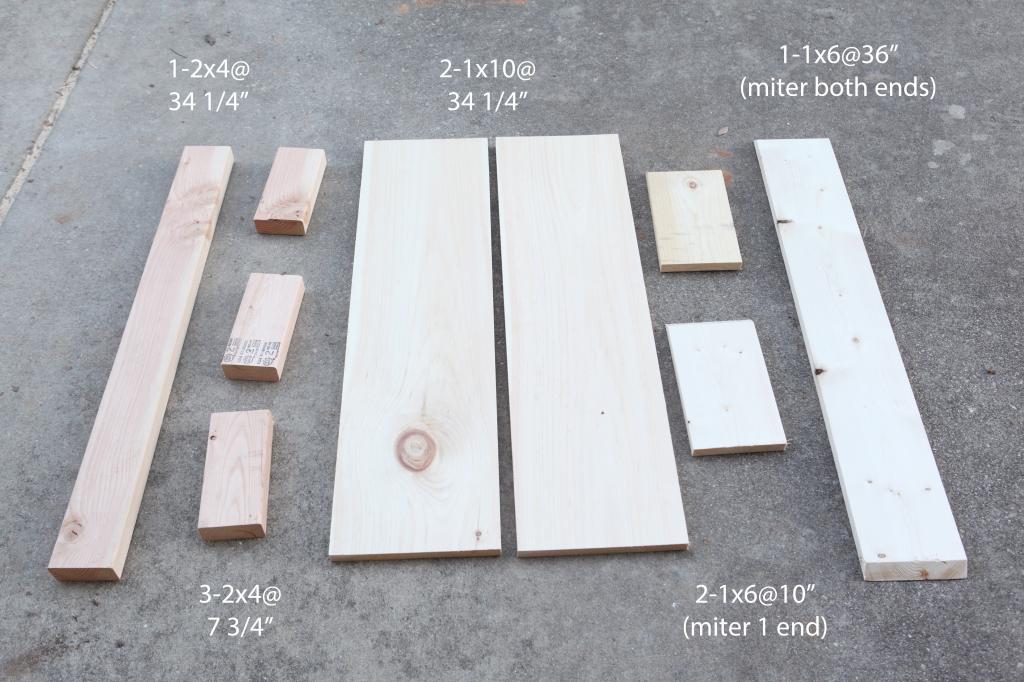
Here is the cut list. The mitered boards are measured at the longest point so miter in.
After everything was cut, I assembled the inside braces. It’s a good idea to do a nail test on your wall to see where the studs are. Mark that on your long 2×4 so that you can be sure to attach the arms somewhere else. You want to access that studly area when it comes time to attach to the wall. Otherwise the sturdy police (aka Jeremy Bower) will be very disappointed that these shelves can’t support a small SUV.
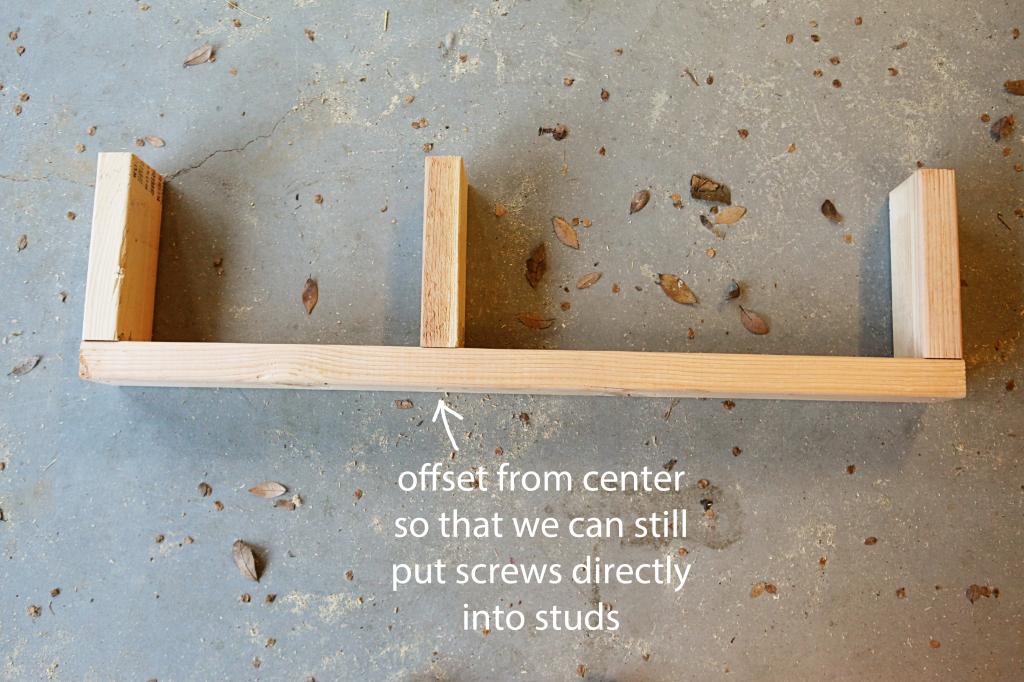
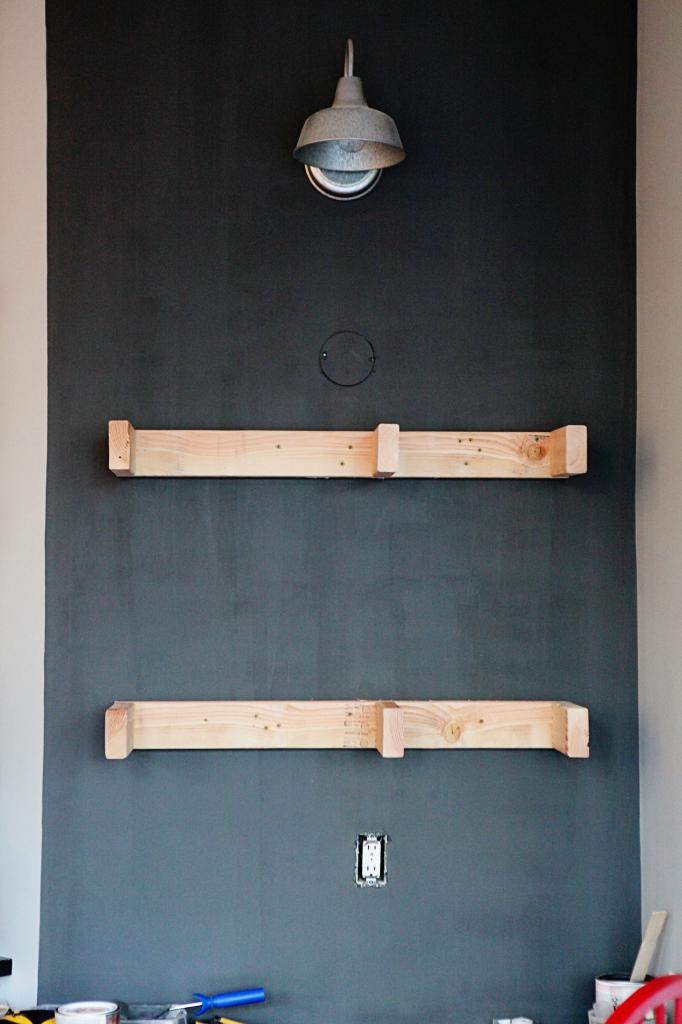
Then we attached these to the wall. We used decking screws to go right into the studs.
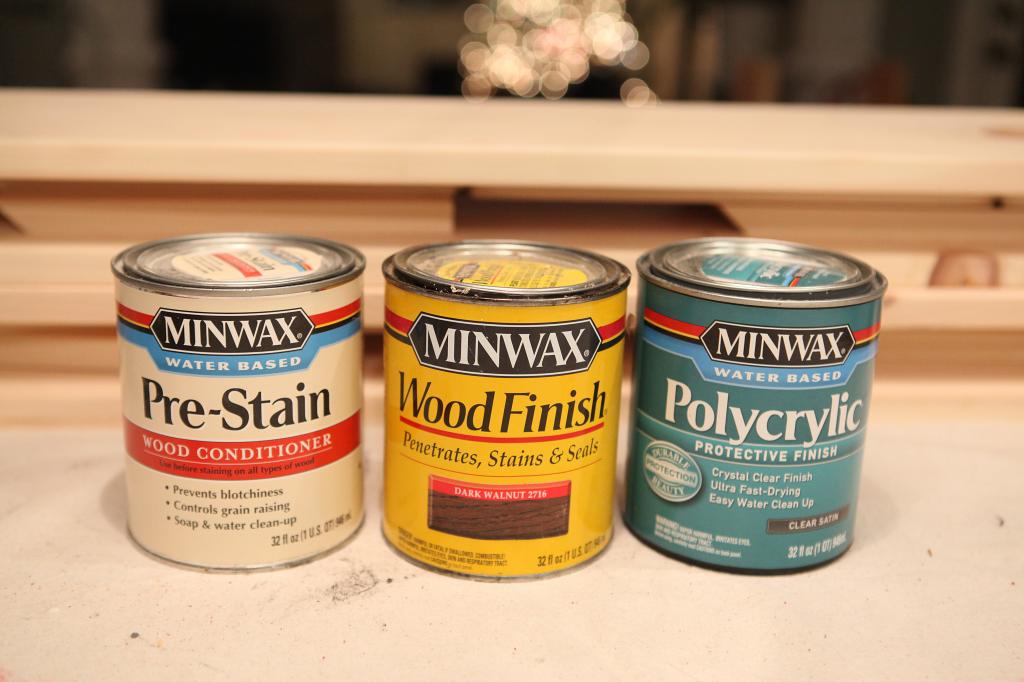
Then came staining time! I wanted the shelves to match our kitchen table so I used Minwax’s Dark Walnut. Here’s the products I used….
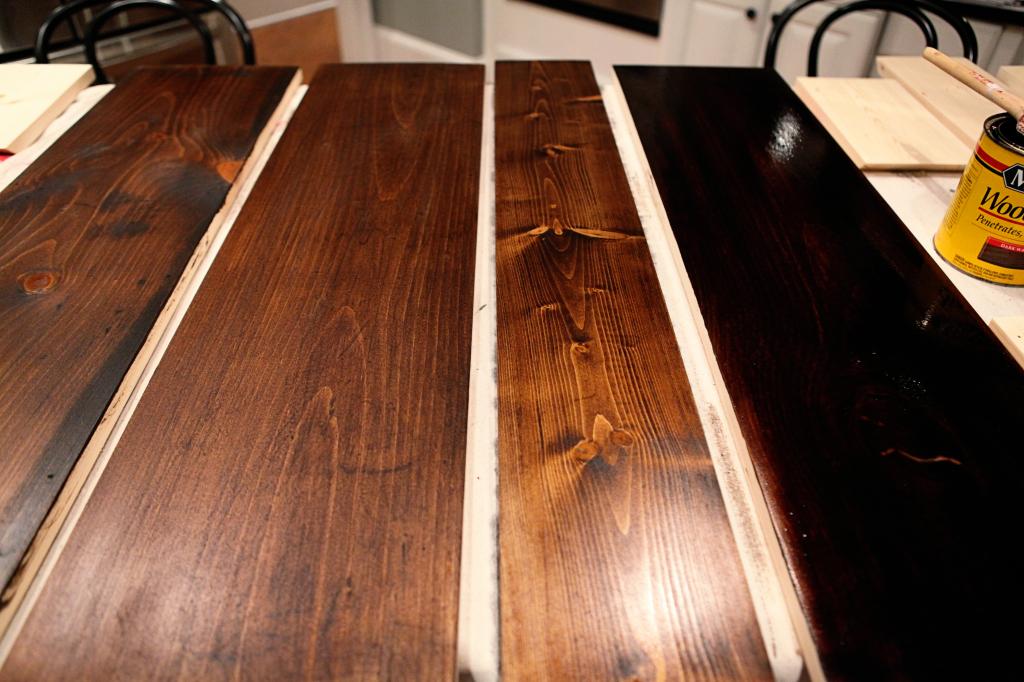
Sooo….my mom had a painter come stain her wood in her house….she has a ton of it….and he didn’t wipe off the excess. Later on, she went back and said that it was WAY too dark and that she didn’t think it was done right. That painter went through with mineral spirits and wiped everything down, restained correctly and then polyed on top. That’s such a ton of work and I was so impressed that the guy did that. He made it right. If mom hadn’t asked, it would still be REALLY dark – almost black – and over time, the excess stain would have made it sticky. That’s why it’s really important to wipe.
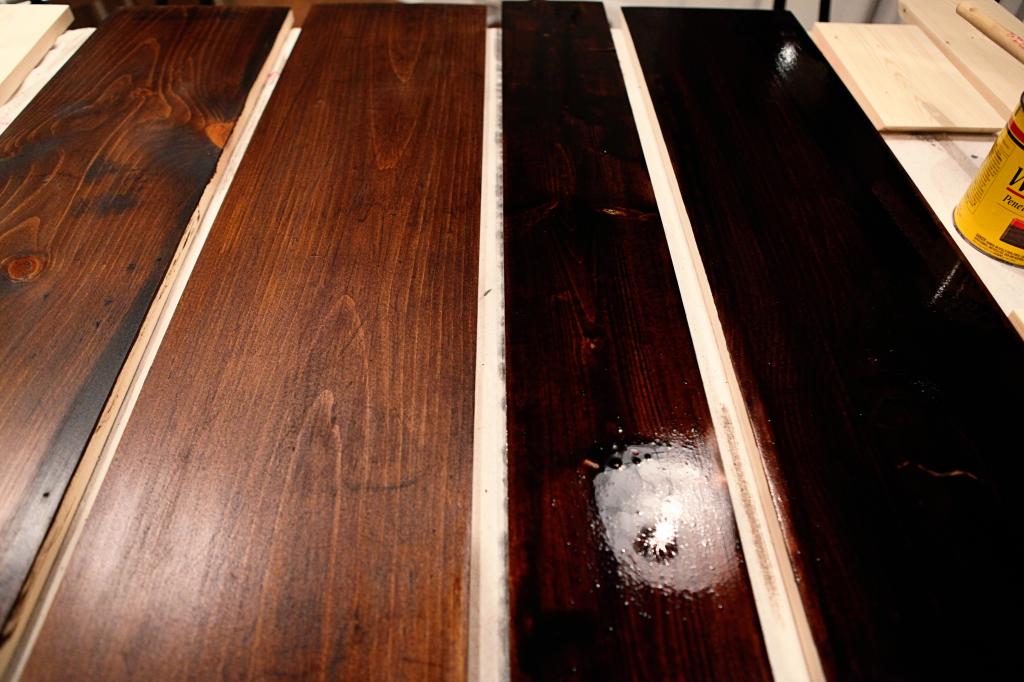
You can see above the third board from the left is stained….and below it is wiped. It shows way more details and character of the wood.
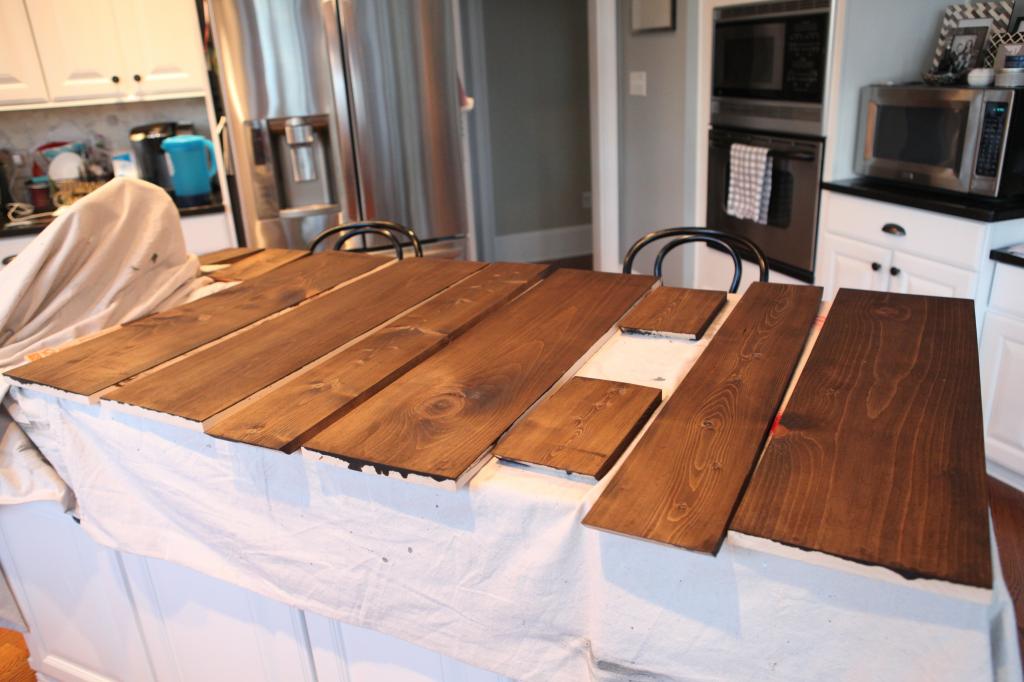
After everything was dry, it was time to put these bad boys together.
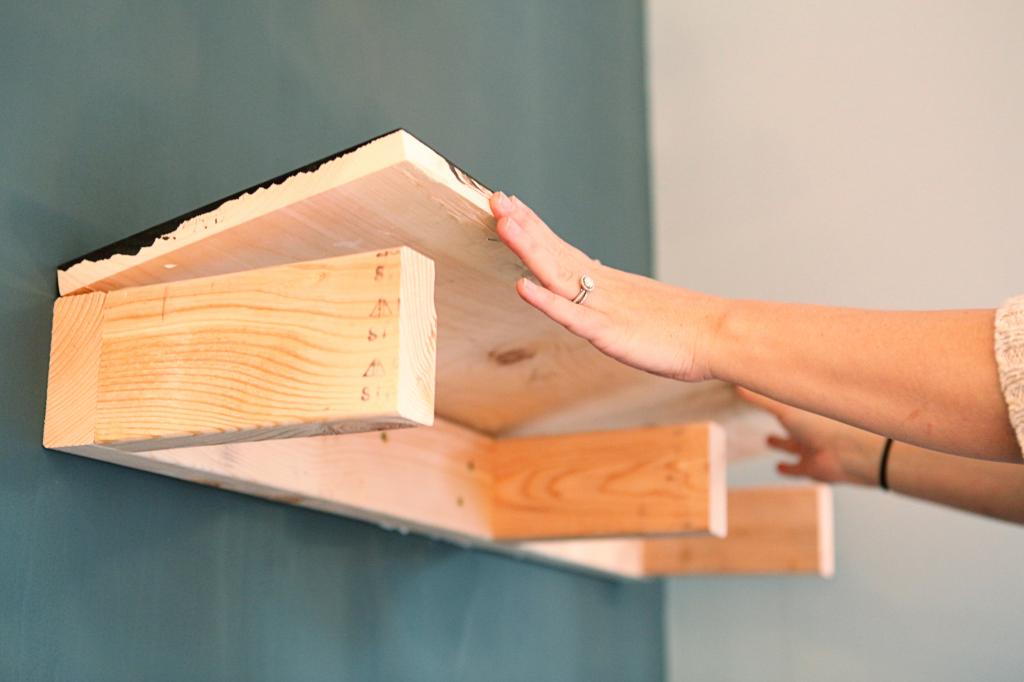
First the top goes on.
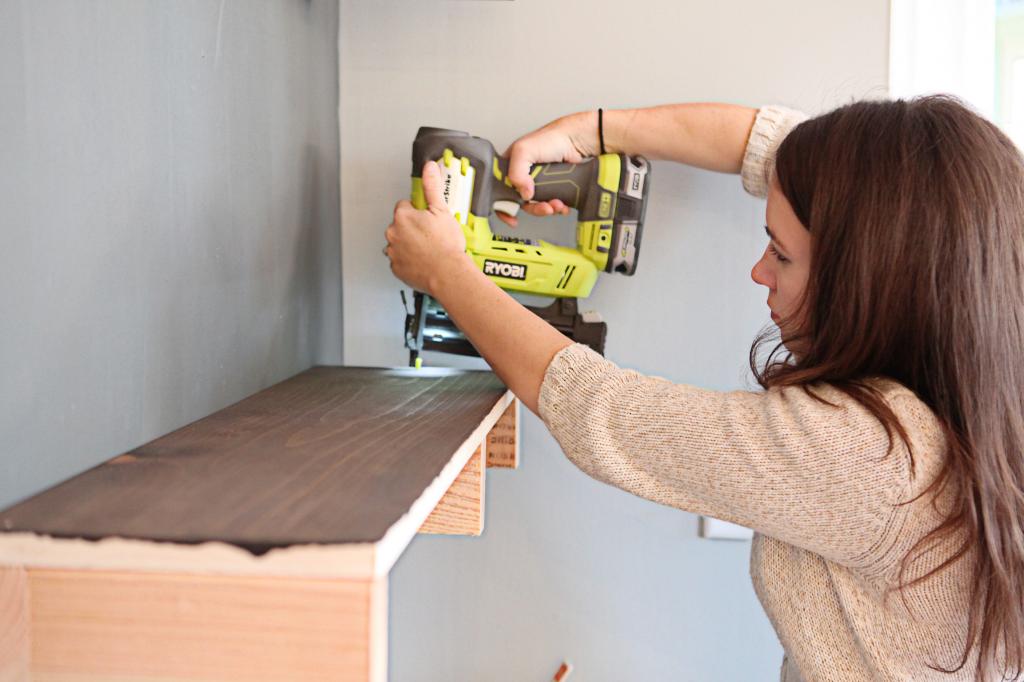
Brad nail that in place.
Then the bottom. Make sure you use wood glue and then tack it into place. Then do the front and sides. You just nail directly into the arms of the 2×4’s. It’s really that simple.
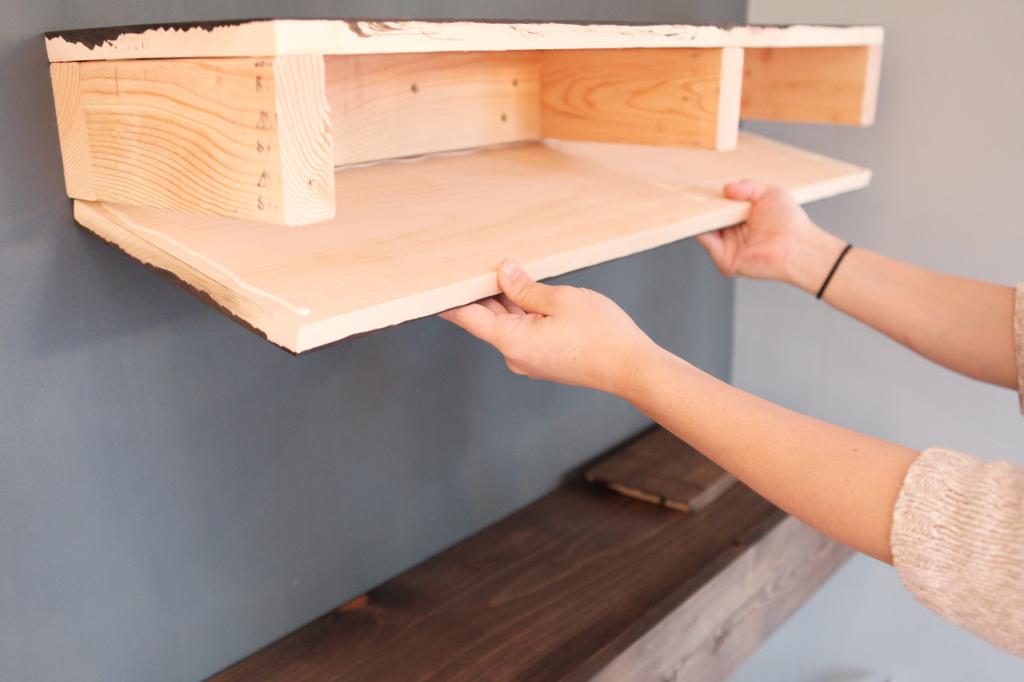
Afterward, I had to touch up any unstained bits, tape off the walls and apply the polycrylic. I did two coats of poly and used 400 grit sandpaper in between the two coats for an extra smooth finish. Afterwards, it just needed some styling and ta-da!
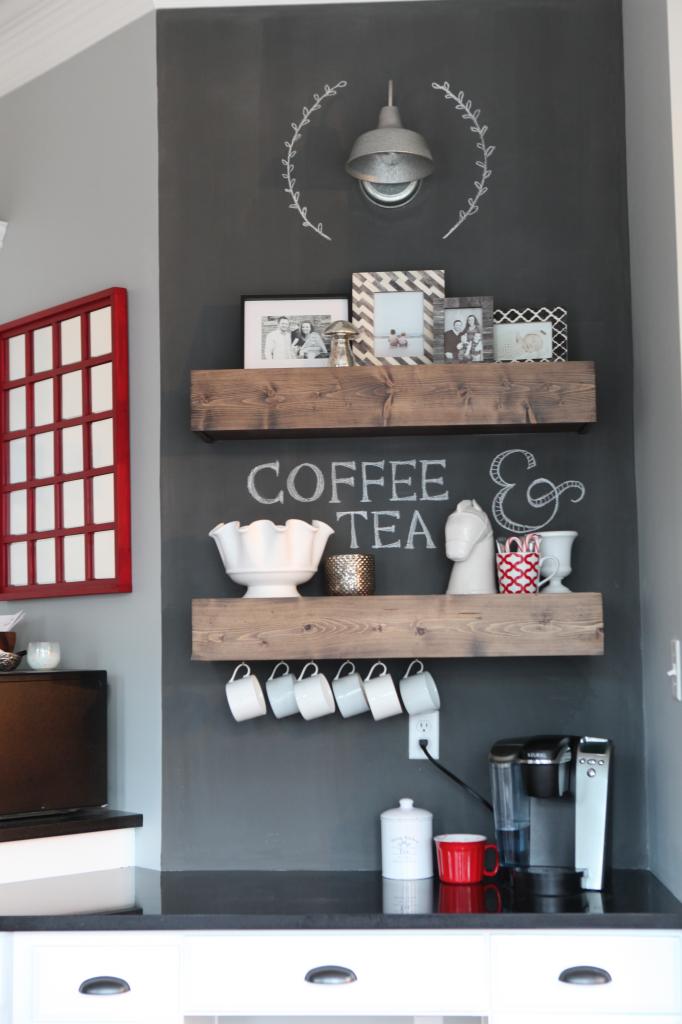
Some people where asking in the last post where I kept stuff…and what I was gonna do with that little area under the desk. I don’t know yet. I just haven’t decided. There are a ton of suggestions though….great ideas to mull over. For now, here is what the functions are for each little thing on the shelves….
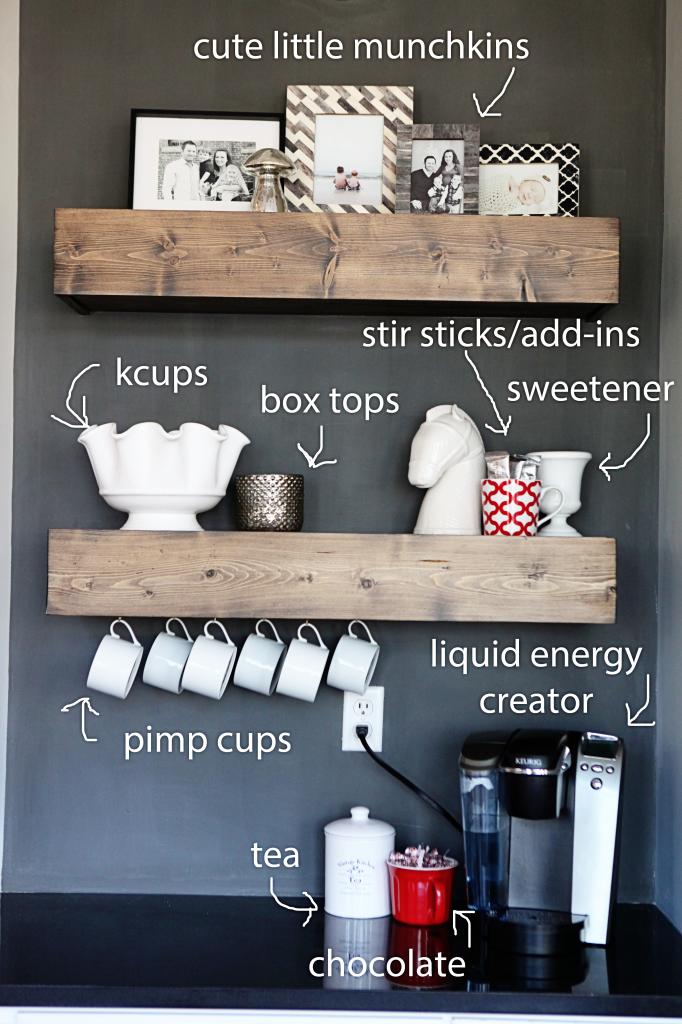
Fun right?! Now go build a bunch of shelves. I promise it will change your life in a rainbows and unicorns kinda way!
Love these shelves and this whole coffee area! Totally adorable. This might be a weird question, but – would you have to tear these shelves apart if you decided to take them down some day?? That seems sad! Hopefully they’ll live a long and happy life right where they are though!
I so love this coffee station! Saving this for the day that I have space for my own coffee and tea station.
Okay, you made that seem SUPER simple. I could do that! Build all the things!
Love the shelves!!!! And thank you for the tutorial…..I think I have the perfect spot in my house to give these a go. One quick question for you – if/when I tire of these shelves and/or do some rearranging, is there an easy way to remove them without complete demolition? I imagine that taking them down might be a bit tricky and may involve a crow bar (yikes!!).
Do these not compete visually with the shelves on the other side of your kitchen near the window? It seems strange to have two sets of shelves so close to each other, especially since they vary in style.
So this might be a silly question, but did you use plain, old-fashioned chalk for writing on the chalkboard paint? I read somewhere that there are chalk pens available. I think they are supposed to end up staying put (i.e. not smudging) very much, but are supposed to be able to wipe off easily with water (maybe)? I think that’s what some restaurants use on all those fancy chalkboard signs. 🙂
We have the same desk thingie in our kitchen. Clearly you must do what we did with the cubby underneath — put the dog crate for the puppy you’re going to get in there 🙂
You are so creative. Looks great!
http://www.mintnotion.com
You would think so but they don’t because you can’t really see both at the same time. From the living room the pantry blocks the coffee bar and from the other hall entrance you can’t see it because it’s around the bend and blocked by the stove. If you face the coffee bar, your back is to the white shelves so it just doesn’t compete. If we had a smaller kitchen, I probably would have done this just because it would though.
xo kb
Yeah we would because they are built in but that’s what makes them super sturdy!
xo kn
Yes taking them down would involve a little demo but really I imagine that it would only be that front piece that you need to pry off…then unscrew from the wall 🙂
Xo kb
I’ve tried out the pens but didn’t like them as much! I feel like they ghost a lot more too and that’s never good for someone like me who erases constantly 🙂
xo kn
“liquid energy creator” = YES!
xoxo
Dude, I am freaking out right now. I am in the middle of watching a prime time show on Hulu and I just saw you and your boyfriend in a for-real commercial. Seriously?! I am sure I am behind the times, but that is AMAZING!!! So excited for you right now!
I love that you made these completely built-in and that’s what made them extra sturdy. I have commitment issues, however (not the kind where you won’t get married… been there/done that (err – doing that? Happily married, just to clarify.)! For some nervous about such a commitment such as myself, do you think that hanging the brace and drilling into the wall, and then assembling the outer frame could still be really sturdy if it was slid over/around the brace and drilled sideways or up from the bottom into the outside pieces of the brace? (does that even make sense)? I’m wondering if it could still be just as hearty this way or if it would lose some of it’s sturdiness, in your opinion… or is it like 6 of one and a half dozen of the other? Tks!
They turned out beautifully! Great job!!
My parents had a similar weird desk space in their house. My mom decided the chair space would be way better used as a spot for a wine cooler. That got way more use than the desk ever did!
Ahhh I really love this. The whole look is awesome.
Thanks for the amazing tutorial and wealth of pictures! One of the best I’ve seen.
This is really bothering me. Why was the middle bracket not centered “inside” of the box??????? Driving me crazy! Haha
I love this! I took down ALL of our uppers in our small cabin kitchen. I was thinking of doing a shelf (or shelves) like this on one wall over the stove. Would it be possible to hang a small range hood on the bottom of one of these – is it that sturdy??
..and is that a completely hideous idea :)???? Totally respect your advice.
I think this makes so much sense- functional and adorable! I wish I had a spot for something like this…. Sadly my keurig died… 🙁
I also just have to say that I am surprised that you didn’t crack a joke about the importance of wiping…. 😉 if I had a nickel for every time I asked one of my kids if they wiped in a week…. Hahaha!
Great timing on this post!!! We are about to make a floating shelf to go above our washer/dryer and below the cabinets overhead. Now I don’t have to go hunting around online for a tutorial! Thanks!
These are beautiful – thanks for sharing.
I would love to see pictures of your miter cuts – you mentioned them, but I can’t really picture what you did.
Ahhh! I haven’t seen it yet on Hulu so I probably look like such a dweeb!
xo – kb
It definitely could still work if your ‘sleeves’ were perfect….or you could just rest the upper shelf on top and not nail or glue it in…then you can have access to the screws that would hold the brace to remove it. Hope this helps!
xo – kb
Like it said in the picture…you have to mark where your studs are, so my stud was smack dab in the middle of the shelf. We couldn’t put the middle arm in the middle of the back brace because then we wouldn’t be able to screw directly into the stud. Does that make sense?
xo – kb
It’s a 45 degree miter…the most standard one and you can see it on the photo of the cut list. The one on the right hand side is the one that is most visible. Sorry that is the only photo I have.
xo – kb
It is really sturdy but if you do attach something with that amount of weight, just make sure your bottom 1×6 is attached with screws (not just glue and brad nails).
xo – kb
Shoot…cabins are free for alls…you do whatever you do girl 🙂
xo – kb
Can you take a closer shot of the mitered corners and the sides? Maybe on instagram or something? those were the pieces I was curious how you laid out and there’s no pictures! Love the shelves though. I’d like something similar in my office.
These are awesome, Katie. I love the chunky look! Maybe that explains some things.
Now, if only MY chunky looked as cute as the chunky shelves.
I love this!! I would love to have a little coffee station!
I love this coffee bar SO much!!!
That’s a great little storage area. Well planned out.
Hi there! I’m new to your blog and am loving your posts. I’m not sure if you’ve already answered this before but I was wondering where you got the cup hooks for the shelves and how you installed them. Thanks for the awesome post, it’s given me a few ideas!
All I did was mark the spots for them and used my massive upper body strength to twist them into place 🙂 I got them at Home Depot I believe.
xo – kb
This may be the solution for the laundry room make over because the brackets I wanted are sold out 🙁 Do you think this would be good in a deeper length to hold a laundry basket over a washing machine??
Technically it could I guess….but I don’t know that I would recommend it for deeper than 18″. That would mean a super small laundry basket.
xo – kb