I’m still booty shakin’ and shrieking like that guy on Home Alone with the tarantula on his face over my Bower Build Off win. Seriously….whoever rigged that voting machine, thank you.
I promised the tutorials on both projects and am so excited to share the progress in the guest bedroom today. This post is obviously about the board and batton project but it also shares how we repainted the room and what the future plans are for this space.
I shared recently that I partnered with Home Depot and did a HUGE makeover in the guest bathroom. (the countdown to share that big reveal is ON like Donkey Kong) When I saw that final bathroom and the gorgeousness that now oozes out of it, the guest bedroom looked like the ugly friend. Ya know. The one that tags along to clubs to make the hotties look even hotter. Well, no more ugly friend for my guest bedroom. It was time for a makeover….Cinderella style.
We already tackled the trim and ceiling and now our attention turned to the walls.
Our house color scheme was really helpful when trying to decide the color to put on the walls. Since this is a space that is primarily used for sleeping, I decided to go REAL DARK and use Benjamin Moore’s Secret paint color. It would be like a cool dark cave for my hibernating guests. We also used Secret for the dining room so I knew I would love it.
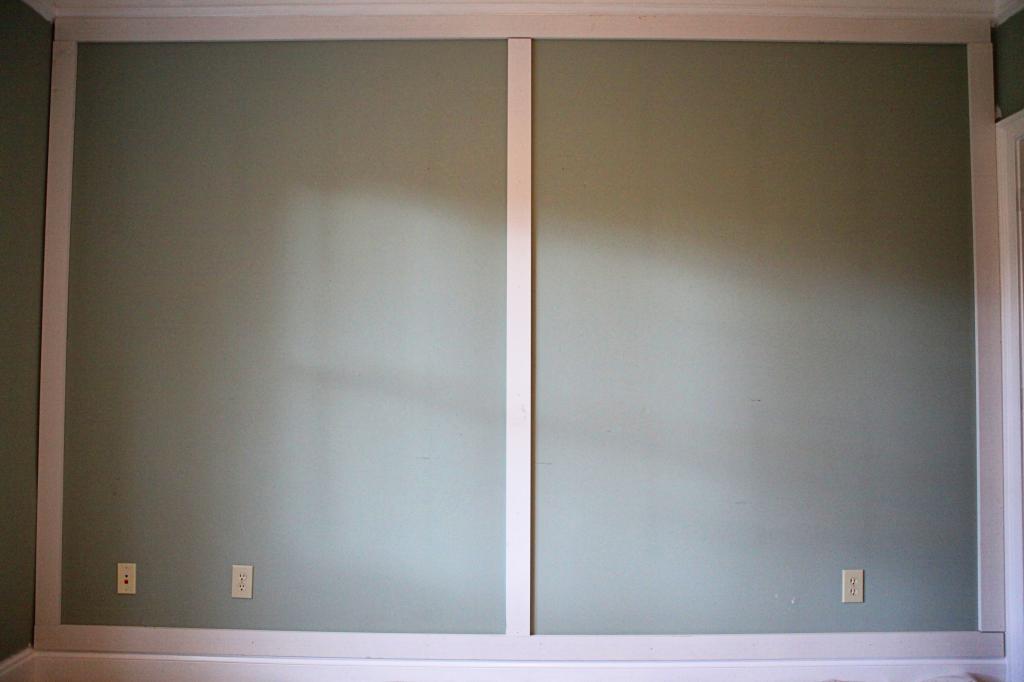
When it came to the accent wall, I knew that I wanted to knock off Chris Loves Julia’s old living room wall. They recommended using Wainscoting America’s design tool and it did come in handy when it came to doing the calculations. The materials were super simple…we just used primed 1×3’s and construction adhesive. We also used a brad nailer to secure the boards if the wall was slightly warped so this made it extra secure.
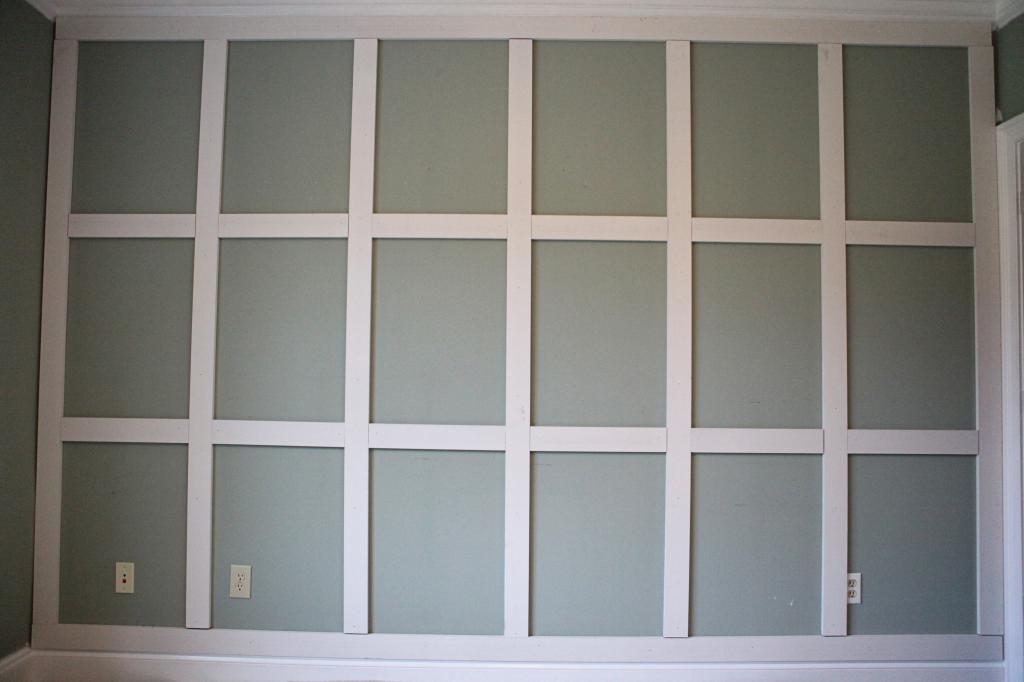
We started with the horizontal pieces and then put in the vertical pieces.
After that, it was just a case of measuring the spaces and cutting the pieces to fit. I filled all the nail holes, spaces and tiny gaps with caulk and then got to painting.
Here’s the play by play for those of you that are gif-friendly.
Painting was fairly easily – it just took a lot more paint than I had originally expected. I had to do three coats…four in some areas…to get great coverage but finally I got it to look brand new.
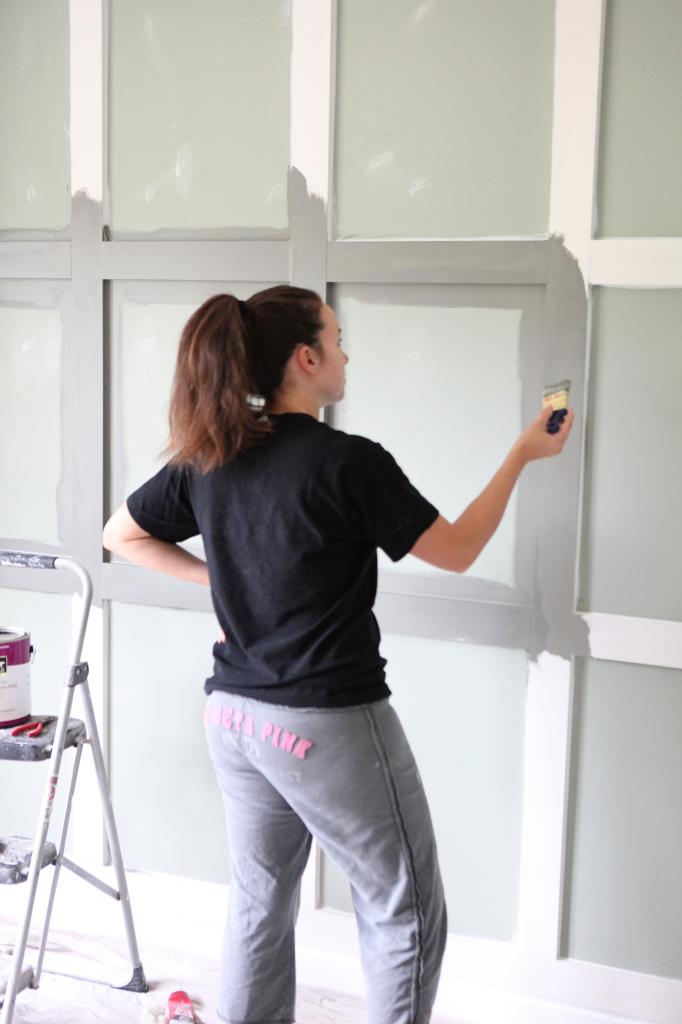
As you can see, it’s best to do the inset areas first.
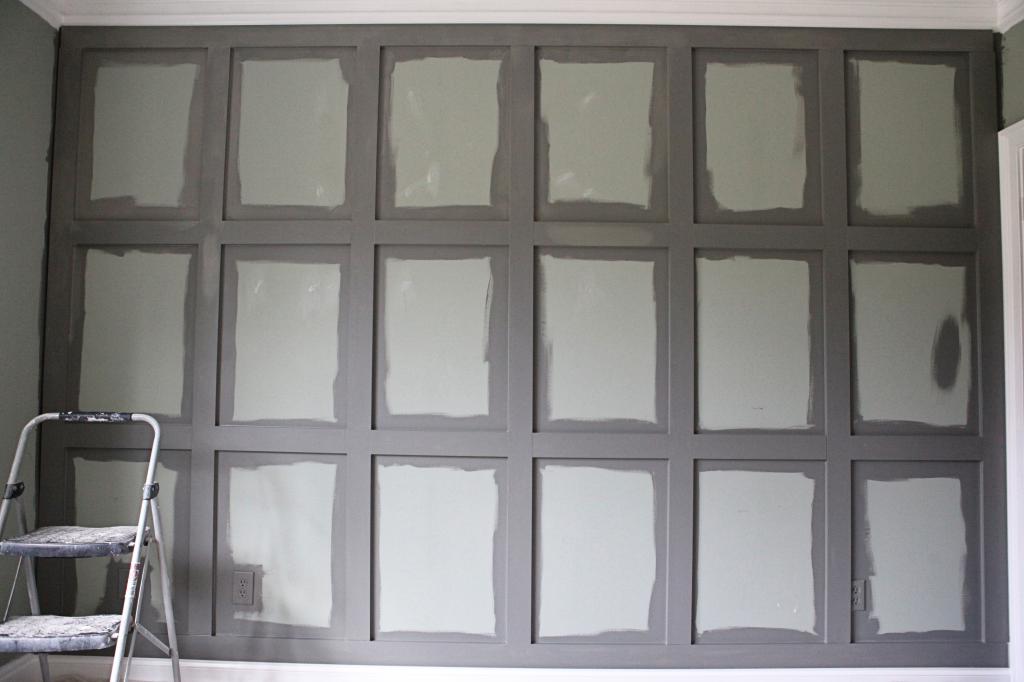
Then I used a roller to fill in the spaces between.
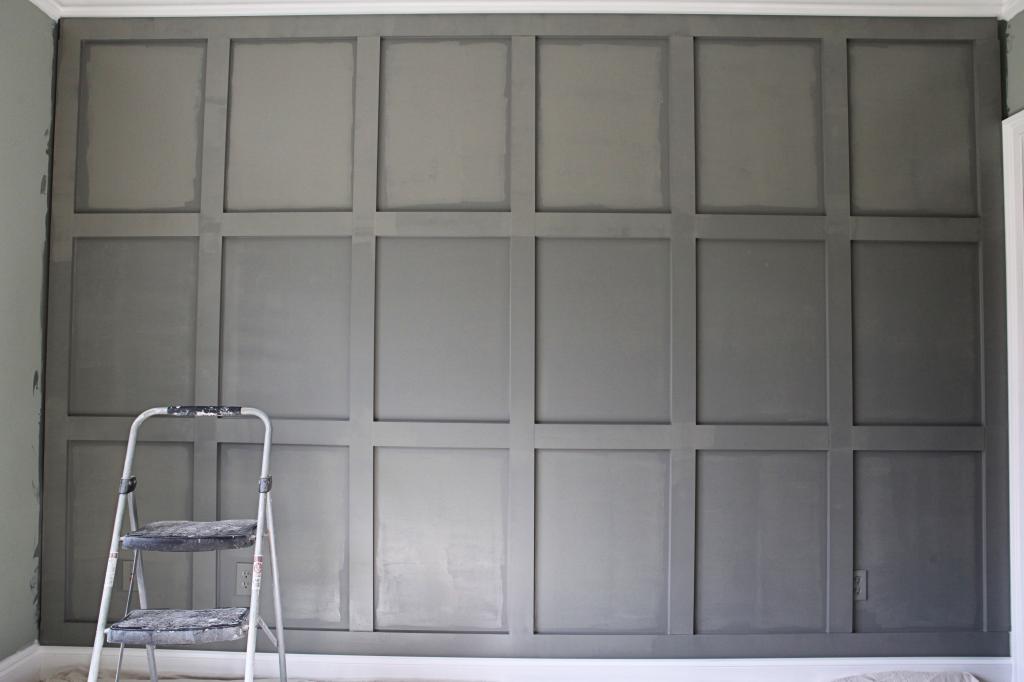
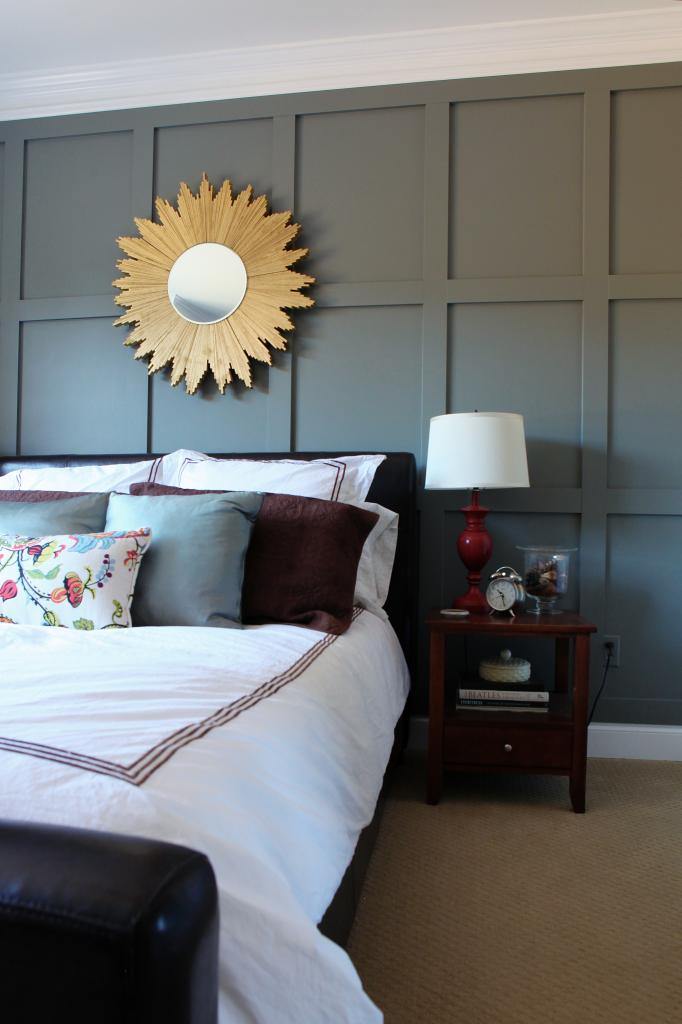
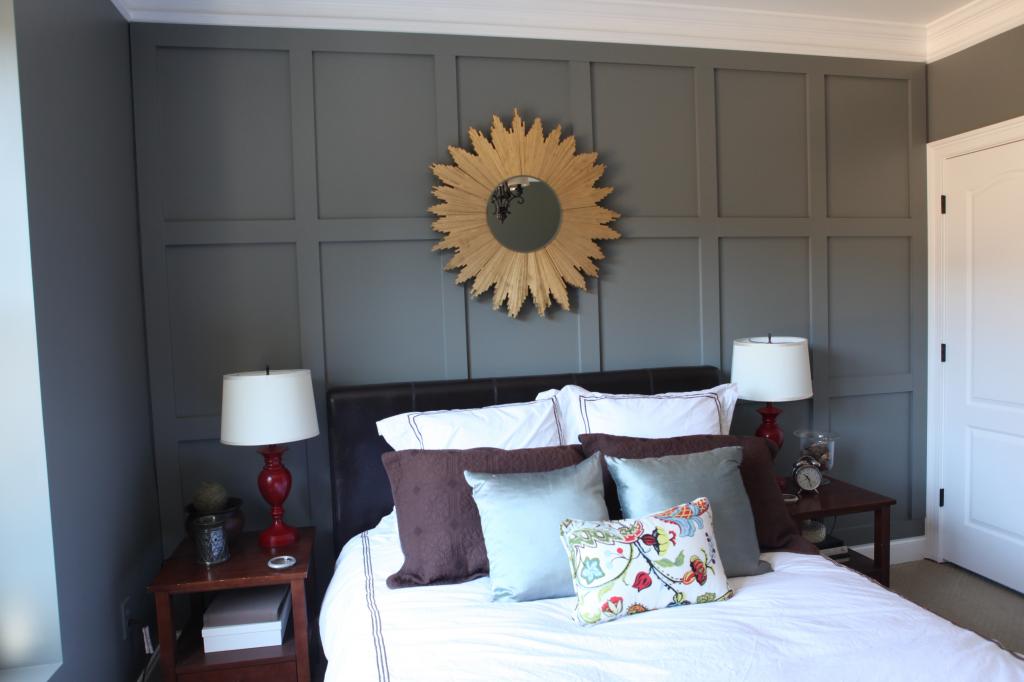
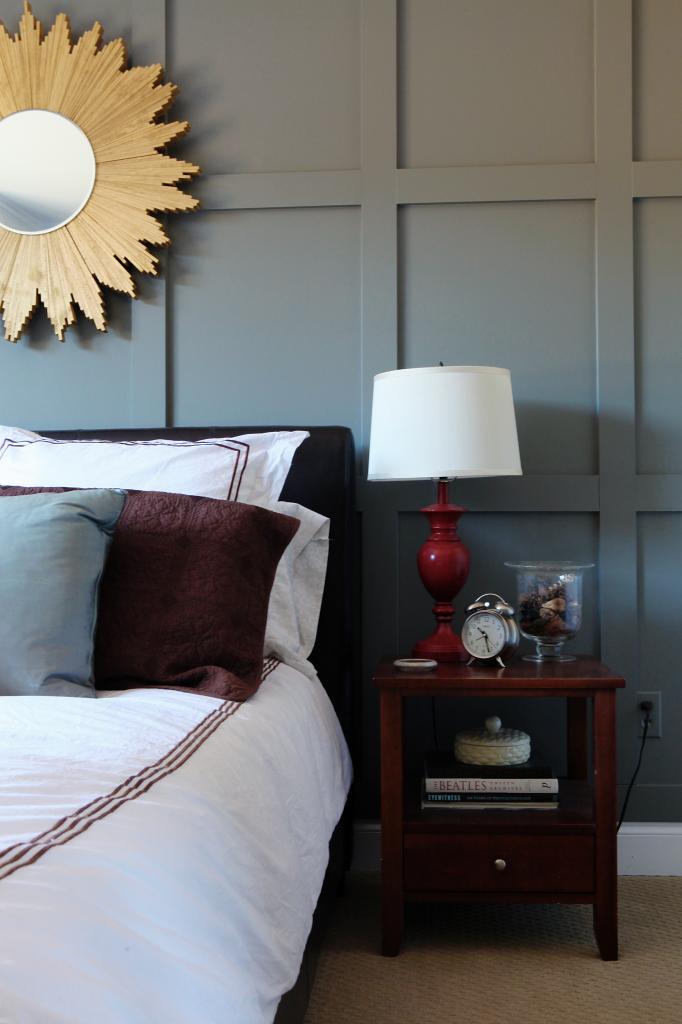
After that, I did paint the rest of the walls to match. I love how sophisticated it already looks just with paint! A dark room always screams GOLD STARBURST to me…so I had to move in my DIY shim mirror.
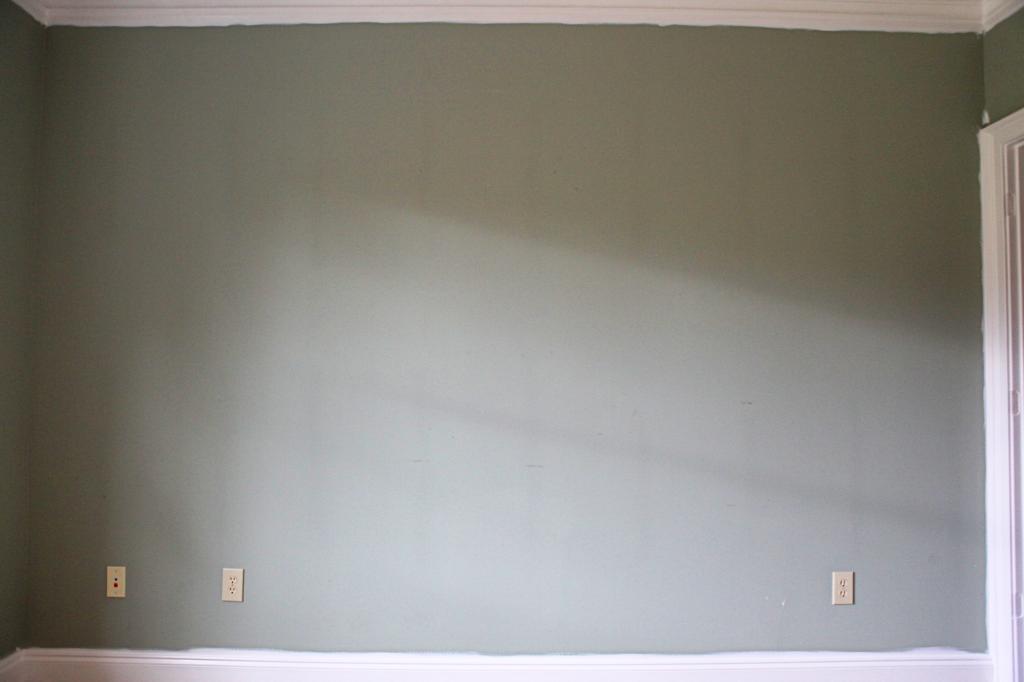
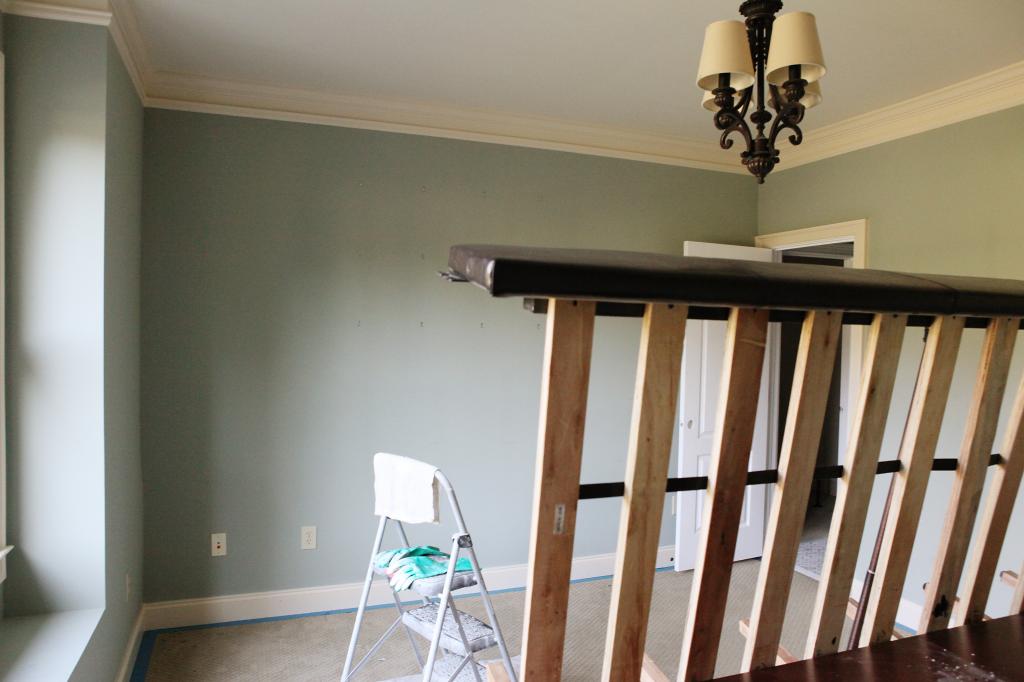
It’s hard to believe that just a few short weeks ago the room looked like this….
Of course, there are a million posts on the inter webs about doing board and baton….I wish I could share them all! I’m just surprised that I never tried my hand at it earlier….seeing as how I have a crazy addiction to accent walls.
So since this room is a low budget makeover, my future changes are very inexpensive. I decided to add a picture ledge wall….I also want to make some stretched fabric wall art….and add a bit more decor in here to balance things out. Also, if I find the right light, I did decide that I would like to switch out the chandelier. That’s about it. I’m thinking maybe a couple hundred bucks will finish the room off….and make it the luxurious space my guests deserve.
Nice! Thanks for sharing your process. Is there a particular brand of construction adhesive that you recommend?
I always love what a good accent wall can do to a room and this low-budget project looks fantastic! Thanks for sharing the tutorial!
I absolutely love how this looks! We hope to do a board and batton wall in the front entry we are working on right now.
Hi Katie!
Such a great project. Maybe my cheap new statement lamp – which is actually a result of one of your crafting tutorials – is a solution for you 😉
http://heim-elich.blogspot.de/2014/12/dyi-sternlampe.html
and
http://heim-elich.blogspot.de/2014/12/weihnachtswohnzimmer.html
Love everything you do and can’t wait to see the bathroom!
Greetings from Germany
Jenn(ifer)
Love it Katie! We did a treatment like this last year in our house and am still obsessed with it. Love this look – amazing job!
So, I have a probably stupid question. My brand spanking new house has textured walls. Do you think it would look bad to do a board and batton wall with the texture? Removing the texture would be hard, and since we built this house and just signed the papers I don’t think my husband would been keen on doing that either.
I really like the look and would like to do it in our master bedroom, but I’m stuck on the texture situation. Thanks for sharing!
LOVE the space… it adds such a pretty architectural interest to the room!
I love, love, love this. Love the color you chose and love how the board & batten just takes the room up a notch. I’m so impressed that this is a DIY job. It looks professional and hard to do!
Looks amazing! I’m trying to figure out a wall in our house we can do this to!
Looks great! I’ve been wanting to do something like this in my house too… in my formal sitting room area. My biggest question is how it will look with my crown molding and baseboard. Does the woodwork sit out far from your existing molding or is it a pretty clean transition? I was thinking that I’d have to remove the molding in order to do lay the 1x3s behind it, but I can see that you didn’t do that.
Katie, the wall looks great! I’m thinking about doing the same thing on my dining room wall.
How do you feel about how the 1x3s overhang the baseboard and crown moulding? I’ve seen others redo the trim to sit flush with the new boards, but it’s a lot easier not to do that part!
We just finished our own version of a wall like this in our office/Playroom. We used MDF boards and nailed rather than using adhesive. We also painted our wall before putting the boards up. We primed the boards before putting them up, but then painted them the matching wall color once in place.
We bought an old ranch house and one wall in the room originally had wallpaper and then was painted over. The reason for doing the boards on our wall was to hide the wallpaper seams that were on the wall, and it’s turned out better than I could have imagined. It saved us from having to remove 50 year old wallpaper, which would have probably meant texturizing the wall or redoing the drywall.
I love this- great job!
LOVE IT! Been wanting to do something in our master (we just moved into house we built three weeks ago) and this would be perfect. Thanks so much
I vote the lamps need a makeover…pronto! The red doesn’t cut it anymore! 🙂
Oh man I love board and batton….but the thought of dusting all those horizontal surfaces makes me cringe! (granted, I live in dusty Colorado)
Are your walls textured or skimmed/flat?
Flat.
xo – kb
Really? I love the red.
xo – kb
Ours butts right up to the crown and the baseboard…we didn’t modify at all and it looks fine in real life. I think if there is a sightline that shows the profile of the wall (you can only see ours from straight on), then it could possibly warrant the extra work.
xo – kb
We used Loctite all purpose adhesive for this project. But there have been times that we used Liquid Nails for certain projects. Both work great.
xo – kb
Cute!
xo – kb
Some people add thin boards (they are like flooring underlayment) under the board & batten. It might be a good solution for your textured walls!
xo – kb
I actually love the red too. 🙂
It looks great, and I’ve been itching to do something similar in my dining room, so it’s great to see a tutorial, thanks!
At the risk of sounding pedantic… it’s actually called board and battEn, not battOn. Phonetics are the same though 🙂
*battEn
just had to do it lol…looks great!
I love the room! And the red nightstand lamps still look LOVELY! Don’t change them! xo
I think it looks great! FYI, batten is spelled with an E. 🙂
Love the board and batten! I’m curious why you used construction adhesive instead of just nails?
Wow – the before and afters are fantastic! It’s amazing how a little wood and paint can completely transform a room. (The before room still looked great though). 🙂
YES!!! Finally! A simple explanation of how to accomplish this! Every other tutorial seemed so confusing. Thank so much for sharing Katie!
Because our walls (like most walls) have a slight warp in them. So the construction adhesive will keep all parts of it totally on the wall. Also…nailing into drywall isn’t the most secure thing…it will pull away with time if it’s not into a stud. Glue however really cements it to the drywall. Also because my husband is the security police when it comes to DIY projects.
xo – kb
Hey Katie – I love this project!!! Did you make sure that would 1X3’s were thinner than your trim or does your board and batten “stick” out more than your molding/trim work?
Looking forward to tackling this same project in our house!
Suzanne
I feel like you meant that you started with the vertical, then did the horizontal.
Otherwise, it’s stunning. If you ever want to show the boys a blizzard you should head up to Ohio and make an accent wall for me!
This turned out so good! I love that dark moody grey.
You inspired me! Ran to Home Depot, bought the materials and the hubby is currently installing it on one of our dining room walls. Just what we were looking for, something simple that makes a statement. Thank you!
Me too! I was going to say they look really nice and ask you where are the lamps from?
Great job at the wall Katie!
It’s batten: board and batten. 🙂
Could you have painted everything before you put it up? Or, having done it now, would you still paint after the fact?
I still would have painted afterwards because you have to caulk all the seams and holes.
xo – kb
They are old Target lamps that used to be black and I sprayed them red!
xo – kb
It sticks out further than the trim but there is no way to tell because you can’t see it from that angle.
xo – kb
The new boards are very slightly out more than my existing crown. It doesn’t bother me though because you can’t see it from the side at all.
xo – kb
Do you have a suggestion for how to do this with a vaulted ceiling? I would love to do this behind our bed, but the ceilings in our bedroom are vaulted and at an angle. Would you just do it lower, like stop 8 feet high, or continue up into the “triangular” part of the wall near the ceiling?
I guess it just depends! I probably would look at pinterest to see if I could find anything with board & batton and vaulted ceilings.
xo – kb
Katie, do you happen to remember where this bedding set came from? I’ve been looking for that same set for a long time, and I noticed it in your project gallery. I’ve tried all the different posts about this room and I can’t find it. I love reading your blog, thanks!
The duvet came from Bed Bath & Beyond years ago…like seven or eight years ago. I think it’s called Hotel bedding and it’s pretty generic if you google.
xo – kb
I have been mulling over how to blend the Horizontal board with crown moulding. Thank you for posting this–I can proceed with the project knowing that it will be fine if the horizontal boards extend out further from the wall than the bottom of the crown moulding!l
Are you sure those are 1×3? 1×3 is actually .719 x 2.5″. This looks more like 1×6 or 1×5. Correct me if I’m wrong?
I went and checked to be sure…they are 1×4’s – so 3.5″ technically speaking. Sorry for any confusion!
xo – kb
Hahha thanks. I thought the 1×3 looks awfully skinny at the hardware store.
Katie, what a wonderful family you have.
I have just discovered your website.
Could you tell me how big is your guestroom? I mean, the length of the wall wher you installed the board and batten. Thanks.