Our guest bedroom makeover continues with a easy fan update. Let’s take a look at the space to see what we started off with…
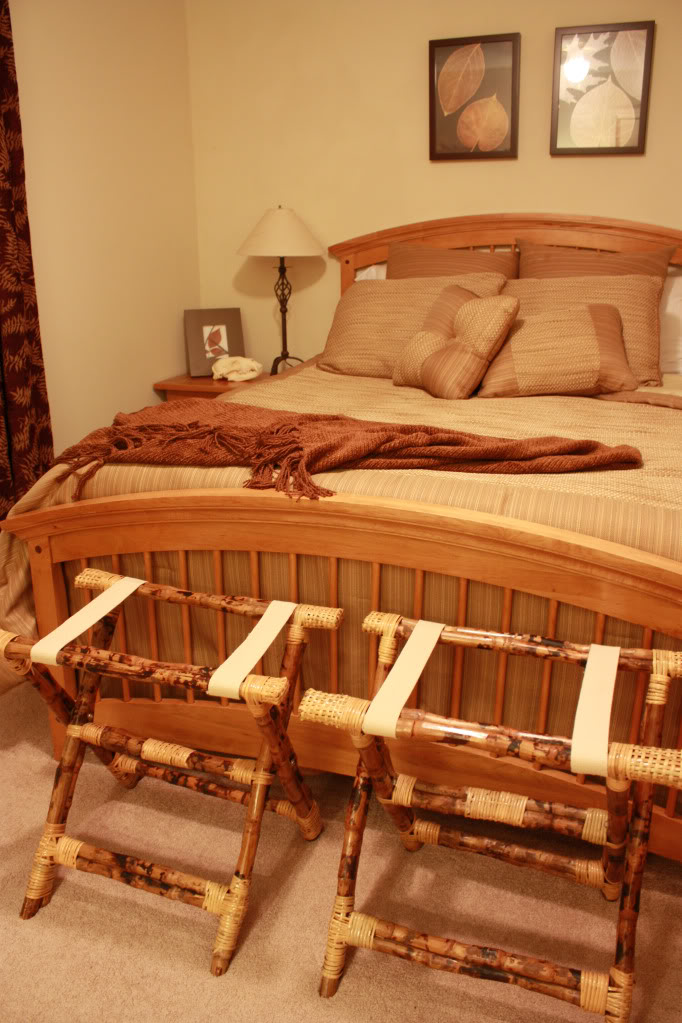
The room was all the same color of boring brown. And being a girl that loves all sorts of chocolate and tan, it is really something to say that this space did not strike a cord with me. Not only was the color pallette falling flat but the walls were desperately seeking a coat of paint, the bedding was oh-so-1990’s and the furniture fit worse than Mariah Carey’s dresses.
First thing we did in this makeover was to tackle the bedding. It’s always a good idea to pick your linens and upholstery first when redoing a room…that way, paint can be easily matched to undertones and you won’t feel the need to search high and low for that perfect shade of blue or green or whatever in your fabrics. Luckily for us, we chose a very basic hotel style bedding that is versatile enough for any complimentary color. In this case, we decided that the accent color would be RED.

Then we decided that it was time to tackle the walls. And boy did they need it. Armed with sandpaper, the messy walls were smoothed out and the painting process began. We decided on the hue of Dusty Trail because it was neutral and we already had quite a few rooms downstairs in that hue. Now our home’s overall color palette was simpler and easy to remember.
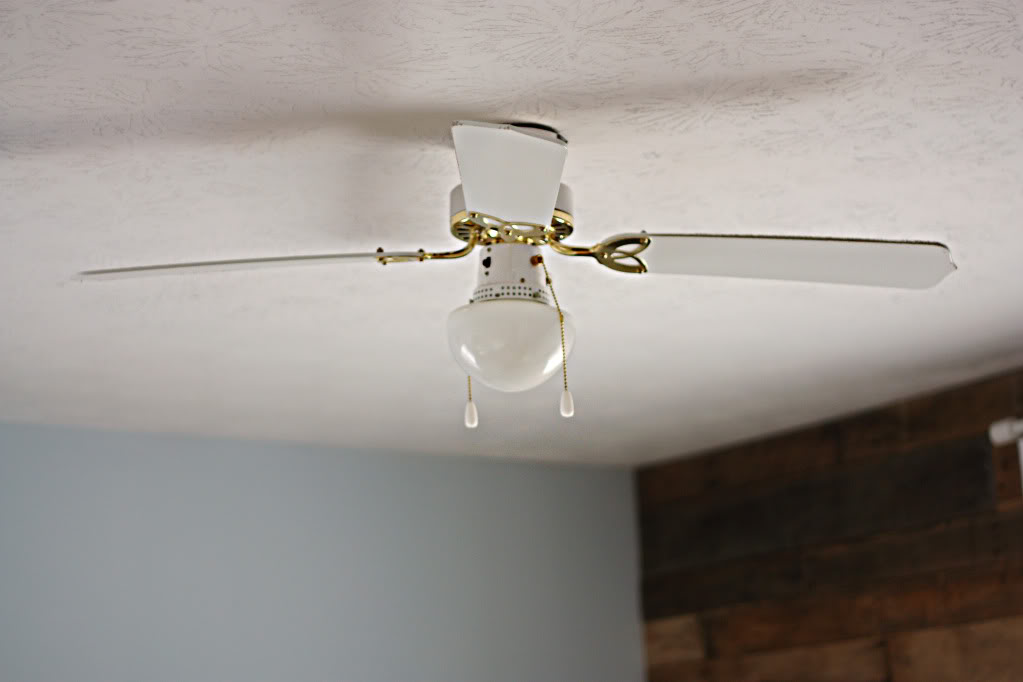
Time to update the lighting situation. Before the overhead light was dim and small (identical to the one formally in our nursery – pictured below). It didn’t provide much light or circulation due to it’s undersized fan blades and single bulb. We realize that fans aren’t usually the most beautiful thing in a room (personally I would love to hang a chandelier in here) but since this room wasn’t necessarily about us but our guests’ comfort, we decided that an overhead fan was definitely the way to go.
We set off to our local home improvement store to see what options were available. Our decision was based on what we decided was our priority list:
- Size : definitely needed a full-sized fan
- Price : cheapest option possible
- Multiple sockets: more than one light…at least three
- Fan blades : blades with the dark rich chocolate color
The fan that we ended up choosing had three outta four of our priority list items…the only one left out was the fan blade colors but after a cartoon lightbulb over the head type moment, I knew that I could find a cheap solution for that. When we got home, Jeremy got to work unpacking everything and preparing to replace the dinky little light with our el cheapo full sized version.
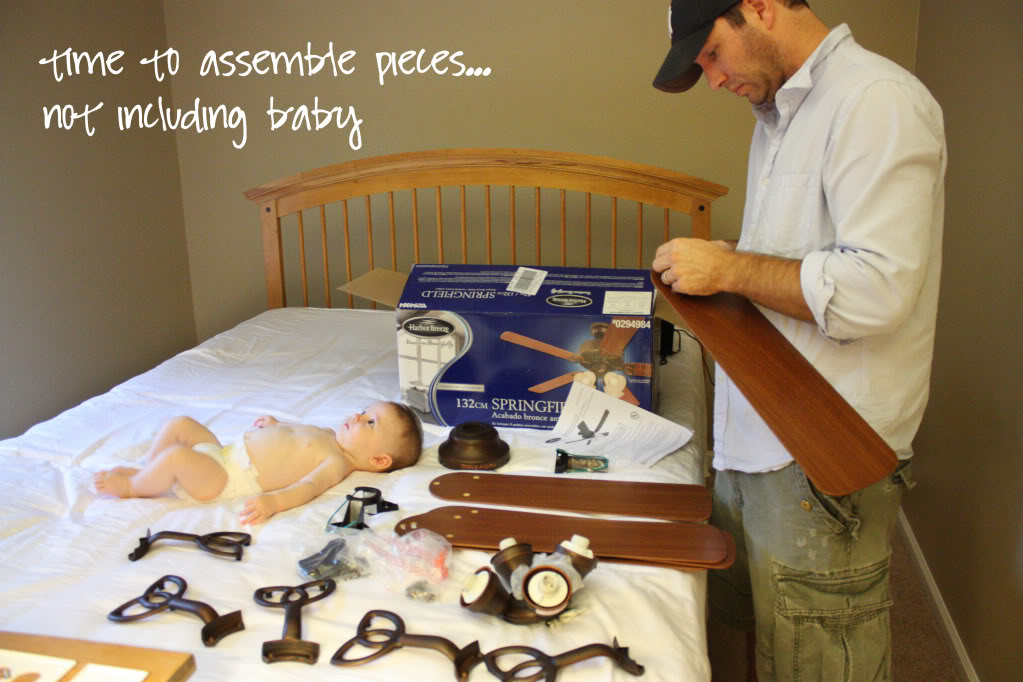
When replacing any light fixture you want to first shut down the power. OTHERWISE YOU WILL DIE. Shocking, I know 🙂 Seriously…shut off the power and then double check it with a handheld voltage tester. Using a screwdriver or twisting the unit usually allows the light fixture to be lowered off the ceiling.
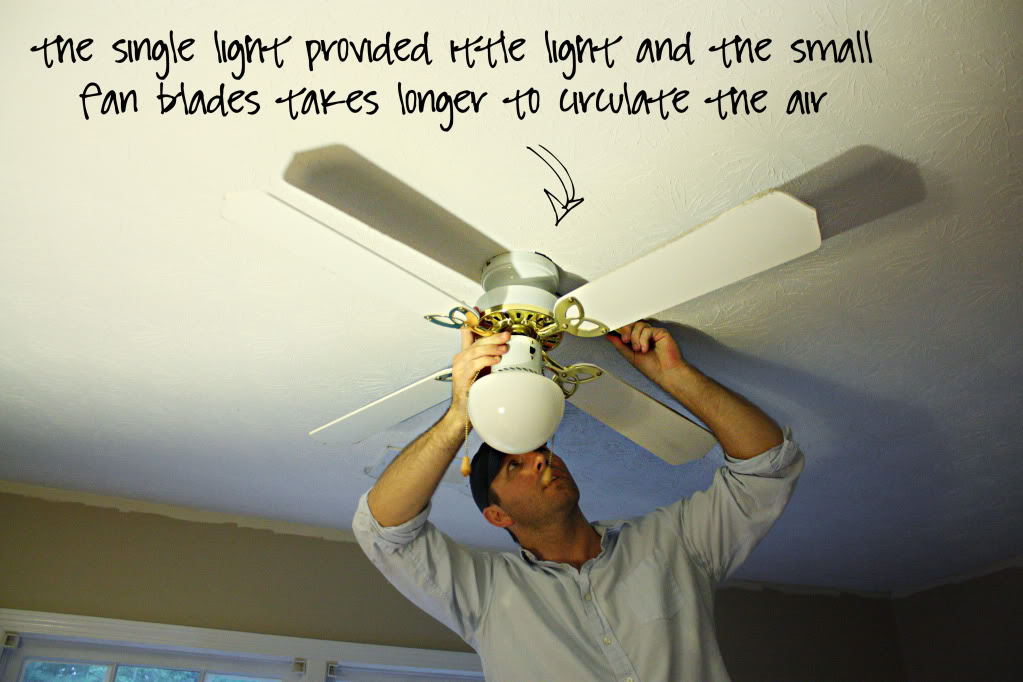
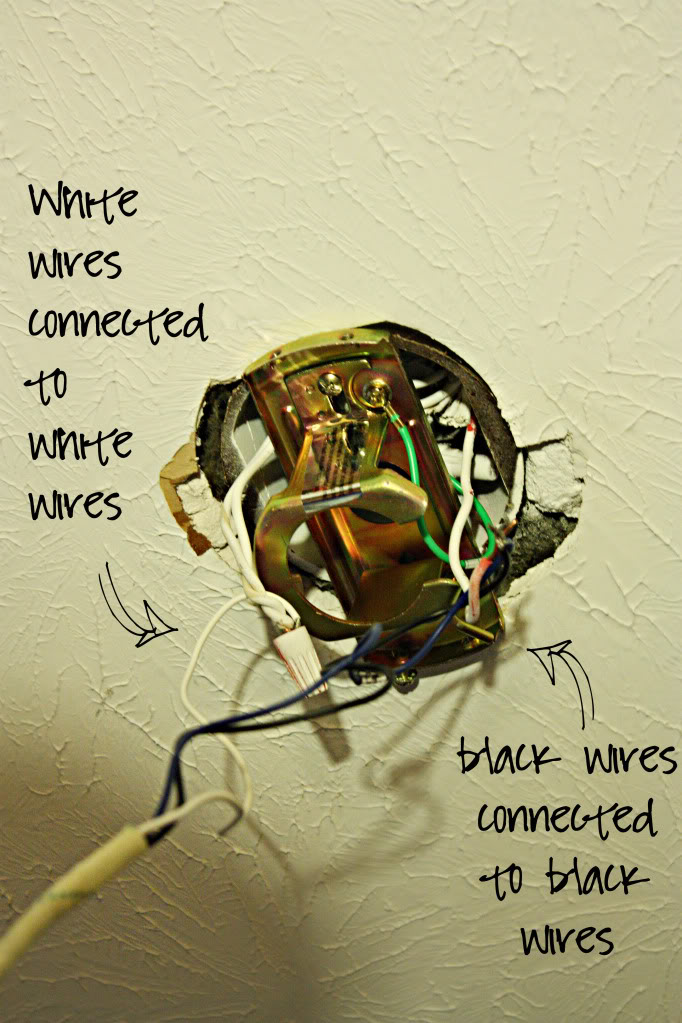
After you lower the light fixture you should see two sets of wires…one black and one white. The black wire from the ceiling is connected to the black wire from the fixture. Same with the white wires.
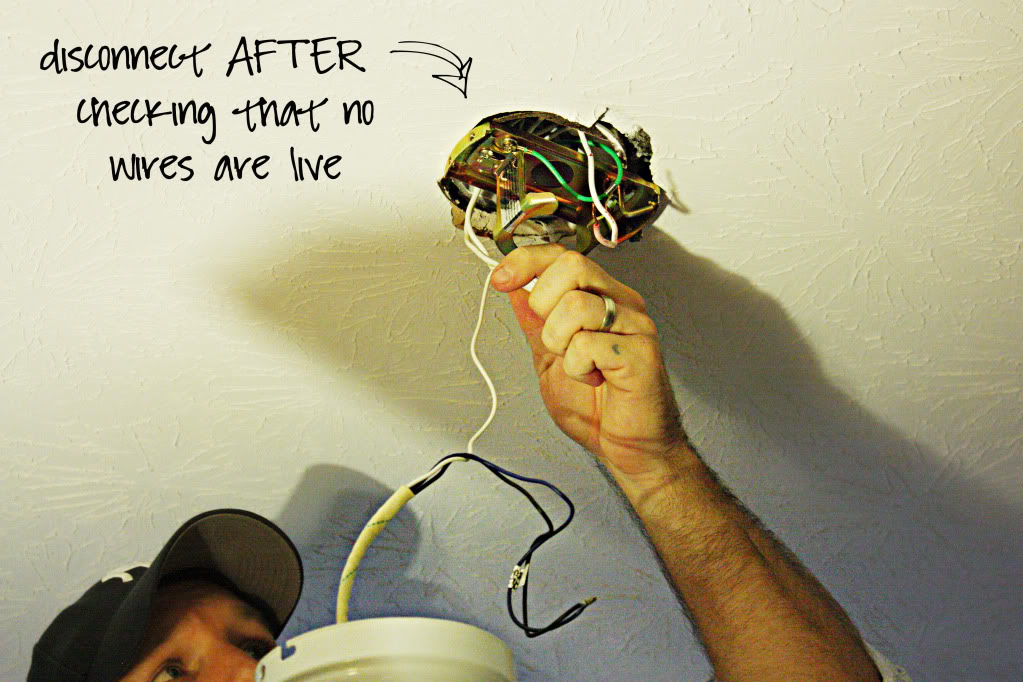
Once you double check that the light fixture does NOT have juice flowing through, it is time to disconnect by unscrewing those electrical caps holding the wires together. Then you can fully remove the old light fixture. Attaching the new one is usually as simple as attaching black to black, white to white and then affixing the light to the electrical box. Note that if your fixture weighs more than 50 pounds you will need to secure it independently of the electrical box.
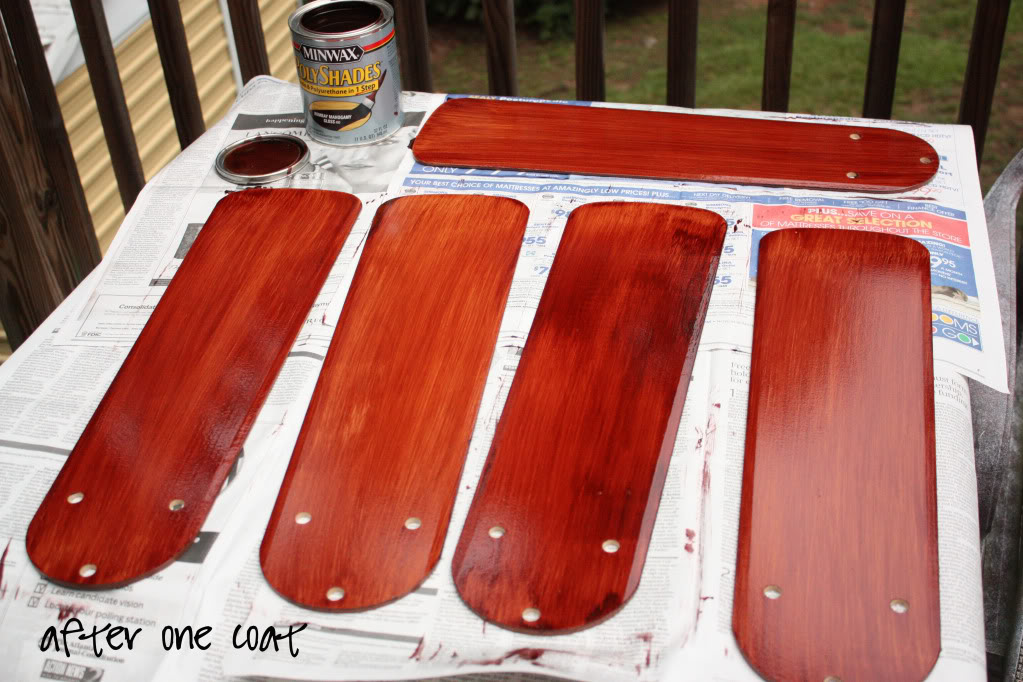
So how did we accomplish the last item on our priority list – dark fan blades? Well, since the fan blades that came with the fixture were double sided, we already had two options…cherry and walnut…but neither of them were very dark. That’s when I decided to use PolyShades curtesy of True Value to apply a few coats of glossy stain.
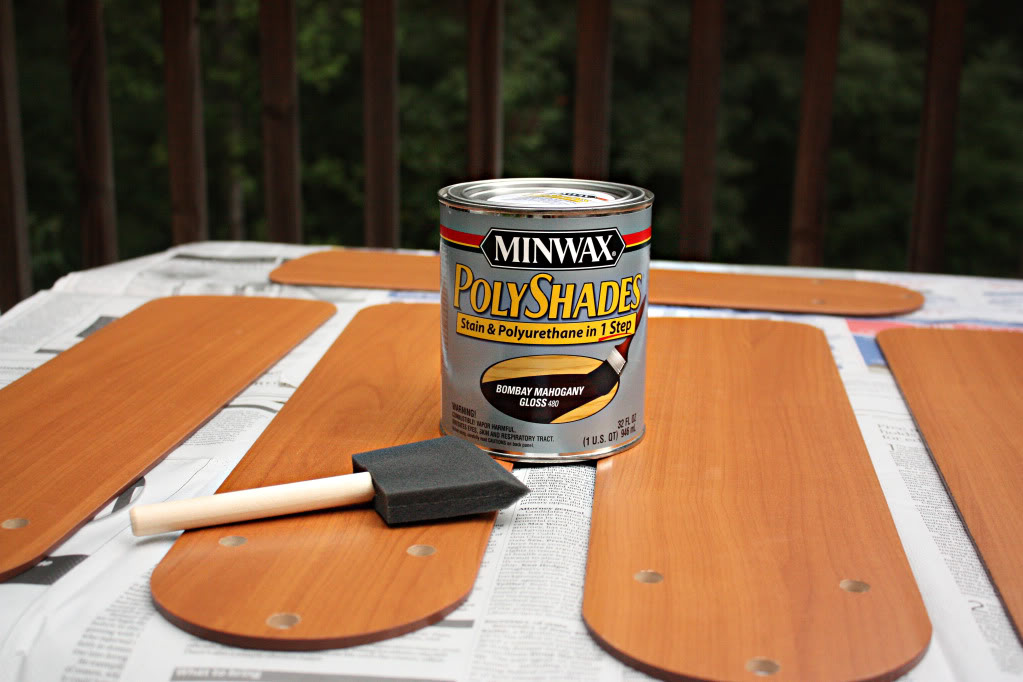
After a single coat the color was dramatically changed. I was finally satisfied with the color after five coats.
Now for the finished product:
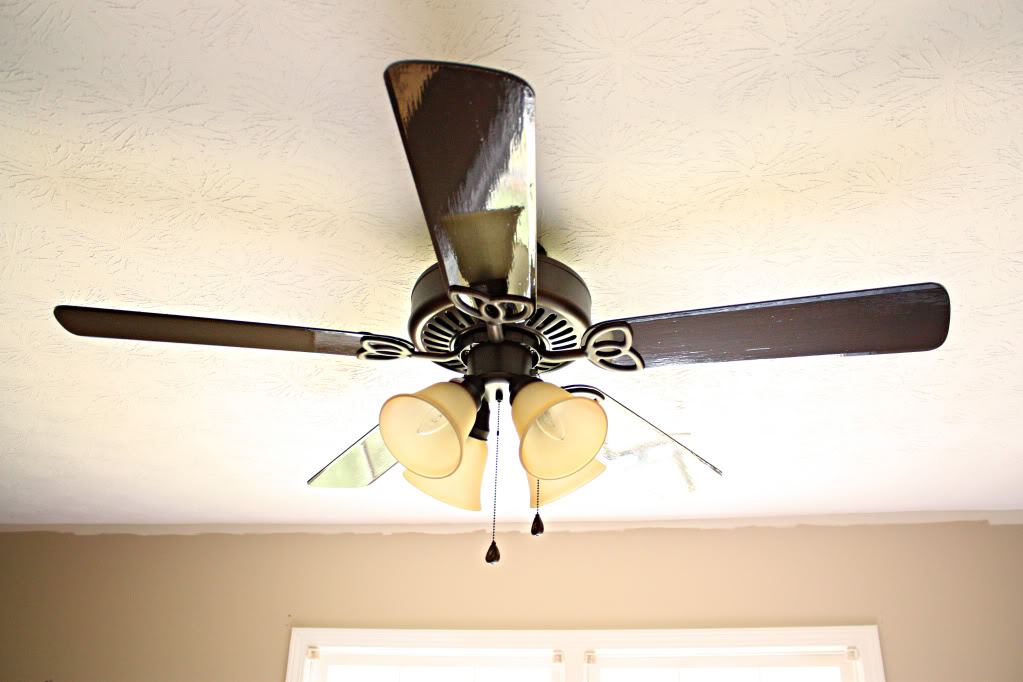
Pretty shiny huh? Yeah…I don’t mind. If you were going to do this and wanted a less shiny blade, you could always use satin Polyshades. What I really love is that rich chocolate color. Yum. Seriously. If I could em chop up and bake them into cookies, I would try. Granted the polyuerathane might char a little 🙂
Anyhoo, that is how we switched out the old light fixture for something a little newer. Have you updated any light fixtures lately? What about fans? Did you choose a regular four light fixture fan like us or did you get a fan with the infamous ‘boob’ light? We actually have a fan with a boobie light in our master bedroom. Which sounds really strange if you say it outloud.
“I was one of the bloggers selected by True Value to work on the DIY Squad. I have been compensated for my time commitment to the program as well as my writing about my experience. I have also been compensated for the materials needed for my DIY project. However, my opinions are entirely my own and I have not been paid to publish positive comments.”
We have a boob light fan above our dining table. I wish we could use a big pendant drum shade but we don’t have a/c so the fugly fans must stay : /
That was a great idea using poly to stain the blades. We just painted our ceiling ‘harvest brown’ and our blades don’t match as well as I thought they would. I might need to stain them chocolatey brown too.
Such an improvement Katie! We don’t have any ceiling fans right now but the Pacific NW weather makes them optional.
Our guest room has an old, ugly ceiling fan with a “boob” light that I want to replace but that room doesn’t get great airflow since it’s an addition. I need look for a better fan for in there. And possibly get rid of the ones in other rooms, too. We live in Florida though, so they’re kind of necessary/helpful.
Looks great! Can’t wait to see the finished room! We’ve changed out 2 ceiling fans in our house so far, both were all white numbers from the ’80’s. Light fixtures make such a huge difference- pretty easy way to update a room. BTW- I love your writing style – your posts always make me laugh- Mariah Carey’s dresses- hahaha- I’ll be laughing about that all day!
What a difference! Great idea on staining them yourself. It looks great!
What a novel idea to stain the blades yourself, who would have thought of that… KATIE! Looks great. I agree, love the deep chocolate brown. The guest room is looking better already! We have ceiling fans in almost every room (okay, only 3 rooms, but we live in a condo, so not a lot of rooms), need to look at blade color, might consider staining. Oh, we have a mixture of the boob light and the cluster, prefer the cluster.
After reading your post (and commenting) I couldn’t stop thinking about ceiling fans vs lights in our own guest room. Any input on the issue is welcome! http://hernandohouse.wordpress.com/2010/10/01/question-for-readers-ceiling-fan-vs-light/
We are going to stain our stair banister with the same color stain. (Its currently light maple colored.) Funny thing is I had no idea what the color would actually turn out to be. I’m happy to see that your final color is exactly what I’m going for. I’m not so excited however, about the fact that I might have to apply 5 coats to my whole banister 🙁
Oh well, pain is beauty right?
“When replacing any light fixture you want to first shut down the power. OTHERWISE YOU WILL DIE. ” Hahaha. I laughed out loud at work, then looked around to make sure no one was staring. My engaged-to-be-father-in-law (who’s pretty handy) was helping me replace a light fixture once and told me to just flip the light switch off because that will cut power to the light. I was like… you really don’t want your daughter to get married, do you? I flipped the breaker and married his daughter FTW. I think flipping the switch will technically work but electricity is something I don’t mess around with.
Great idea to darken the blades yourself! I agonized over my last ceiling fan purchase because the color of the blades “weren’t quite right”…I could have easily painted them whatever color I wanted! Doh! Your guest room is coming along nicely…
I hate ceiling fans, but yours is definitely an improvement over the last one. The blade look so much better, too. I totaly agree that a chandelier would look better. I actually have a similar project on our to do list. NEED to add pretty lights to our boys’ room and the guest room.
http://ourhumbleabowed.wordpress.com/the-grand-tour/
I love the finished product – the stain was a great idea! I can’t wait to see the next step!
Great DIY! The fans in our house is next on the list of updates. I, too, wish we could replace them all with pretty chandeliers but that’s not always practical.
Looks nice! Just wondering if you sanded the blades before staining them?
While I agree ceiling fans are not the prettiest thing in the world, they really are very energy efficient and necessary. We have central a/c, but who wants to pump all the power to circulate some air while you sleep. I have this weird thing where I need to feel air moving around when I sleep or I feel kinda claustrophobic, but that is long story.
Go team Bedroom Boob Light, ours is below. I actually don’t mind it at all:
http://styleandcentsability.wordpress.com/2010/06/02/before-and-after-master-bedroom/
And we have a 4 fixture one in the kitchen I think is pretty classy as far as they go:
http://styleandcentsability.wordpress.com/2010/04/19/before-and-after-kitchen/
Oooh the fan looks so good! Nice transformation 🙂 Happy first day of October!
I’m not a fan of ceiling fans either – but in some rooms they are a MUST. We sprayed our outdated ceiling fan in our living room a glassy white so it would disappear, lol I looks so much better! The last light fixture we updated was in the Summer, we took down the nipple light in our sons room for a cool wood drum shade…loving it
I like the fan you picked much better the original! It’s so glossy and dark now, yum
We redid an indoor sconce as well as an outdoor sconce. This give me some inspiration for our ceiling fans!
http://michigandersinaz.blogspot.com/search/label/lights
i thought you guys were cloth diapering? will’s diaper look so, normal, do they all look like that? i thought they all came in bright colors/paterns
Hi Maria,
That is a disposable…you were right. You are also right about the cloth diapers…they can come in bright colors…but can also come in plain white. We do more of a hybrid approach…we cloth diaper during the days that we are home. If the cloth diapers are all in the wash, we don’t hesitate about slappin a disposable on him…and same goes for if we are gonna be outta the house all day or traveling. We have also found that he pees too much at night for the cloth version so every night he sleeps in a disposable. We love being able to do both…and know in the long run, we will definitely save money (which was our ultimate goal).
xo – kb
Nope Jennifer I sure didn’t. Polystain sticks to surfaces of all kinds so I just slapped it on there as is.
xo – kb
Mike – I think that switching it off COULD work but not always…I think I recall hearing that if the electrician did the flow backwards (like they connected the fan to a alternate source and then ran a line from the fan to the switch) that even flippin the switch would not cut the power off. Let’s assume your FIL didn’t know that though…otherwise you might be in trouble 🙂
xo – kb
Hi Heather,
WARNING…I failed to stir the polystain and so this color was just the result of the top of the container. If you are looking for a less RED version, I would recommend a WALNUT 🙂
xo – kb
Good choice on the fan! It’s the same style that we have in our house too!
Looks super! I have to tell you, while reading about the fan update, I couldn’t help but look upward, towards the “maybe was perrrtty in 1995, but I’m not even sure of that” fan that is one of a family of awful fans we have residing in our home. With that much brass, I fear replacing is my only way out….
Love the blog, btw!
I just took your advice and idea of painting the ceiling fan blades. I just ended up doing the same thing today, and they look soooo much classier and nicer than before. Thanks for the inspiration.
I don’t mind ceiling fans. They help us keep the AC off, so we save a little money. We put them in our bedrooms before our son was born when I read fans reduce the risk of SIDS.
Did it take a while to put up? All three of our ceiling fans took an hour to put up, even the “5 minute” ones.
A couple months ago we switched out the vanity lights in our bathroom. I kept telling my husband that he needed to go turn the electricity off, but he kept assuring me that just turning the lights off in the bathroom would suffice. And silly me, I listened. About 15 minutes later he got shocked. And if he hadn’t been ok I wouldn’t make fun of him, but since the shock only resulted in a little more curl in his already wavy hair, I like to make fun of him. Here’s a post about our new light fixture (the first of many, hopefully!)
http://lessonsofanewlywed.blogspot.com/2010/09/lesson-93-lights-mirror-action.html
Thanks for your reply. Does any of the old wood grain still show through, or is it just solid brown now?
i love this post…my partner and i will start painting our interior soon and i was always stumped with what to do with the fans in each room, i never thought about having a go at painting them…i think i might go white 🙂
love your work
thanks for sharing
http://krystalleeart.blogspot.com/
x
Hey Katie! This is off topic but i figured i would ask. What form of Budgeting do you and the boyfriend use? I just got married 2 weeks ago so hubby and i are still trying to figure out how to budget our money together as one. I would love to see a post about how you budget your now 1 income family. Do you make a spread sheet of what each of you have spent over the months? or do you set a special amount that you will spend for the next month? Im sure others would like to see one too! Any advice or help on the matter would be great!
Thanks!
Maggie
LOVE IT! I totally didn’t think about the idea of painting/staining the fan blades – DUH! I will definitely have to keep that in mind during my search for the fan for my living room. Like many of your readers I try to avoid the a/c (we have wall units) so having a ceiling fan is just so much more helpful – especially in the winter, too, for getting that warm air back down since we lose so much through the floor.
Also, loved the comment about the boob lights and am SO glad I’m not the only one who thinks they look like that. I told my mom about not wanting to get one that looked like a boob and she thought I was completely crazy!
What a difference paint color and new bedding can make! I totally want to repaint my guest room now (I tease my husband that instead of “Chocolate Cupcake” the folks at Behr should have called it “Poop”. 🙂
Laura – your comment gets the favorite-comment-of-the-day-award 🙂
xo – kb
the room is coming along nicely. i’m currently in guest room limbo myself. hopefully it will be finished soon. you can see my progress on my blog.
quick question for ya: when we replaced our ceiling fan, the base of the new fan is smaller than the hole in the ceiling that was cut for the old fan base. do you know any way to fill in/ cover that gap around the new base?
Hi Bridget,
If the ceiling hole is larger than the existing electrical box, then it can be patched with drywall and a bit of mud. That is the difficult way to fix it though. The easy way is to get a bigger ceiling medallion at your local home improvement store. You can retrofit most to fit around your fan base.
Hope this helps!
xo – kb
I was using the Opera browser but your blog is messed up in it so I use Firefox. Just a headsup.
Hey Katie,
Your fan blades weren’t wood right (I was just so surprised you could stain laminate)? Do you think regular wood stain would work as I have some minwax walnut leftover and then spray on some poly? I suppose I would have to sand first.
Thanks!! What a fab idea!
Yup – no real wood just the fake stuff.
xo – kb
I tried staining laminate and it bubbled up a little like it wasn’t setting in. Did that happen for you on the first coat?
Now why didn’t I think of that?!?!? I have some great PolyShades already! This will be on my list of things to do. Thanks!
Thank you for pulling this one out of the archives- I swear you were reading my mind! I had been laying in bed the other morning staring at our ugly fan, and wondered if I could update the color of them… looks like you proved I can 🙂
Great use of Polyshades, Katie. Good luck in your future projects!
-Bruce
I saw this just today and immediately bought a can of Polyshades. I have two laminate display cabinets/file cabinets. It is office furniture, but I use the display cases for my doll collection. They are a light alder color, but we need something darker and I hate to get rid of them. I want to try painting them, but I have seen some pages that say to prime and some to just paint it on. Your blue desk was primed, but it doesn’t look like the fan blades were. Which is better? Again we age going light to dark and these are huge so I would like to avoid primer if possible. The cabinets are the typical particle boar put together yourself variety that has the laminate glued on. Any advice you can give will be appreciated.
You have a light laminate cabinet and you want to make it darker? Polyshades will work and so will paint but it is recommended that you sand first just simply for better adhesion.
xo – kb