What the heck is an Adornament?
Well, simply put, it’s an ornament you adore.
Or an ornament that you have adorned.
Or a dorn you have mented.
Whatever floats your boat.
What floated my figurative Christmas boat was thinking about making my own ornaments. I don’t know about ya’ll – but sitting in an office all day is hardly the way to get me into the holiday spirit. So when I got the chance to be Mrs. McCrafty in my own house, I was really oozing Christmas cheer.
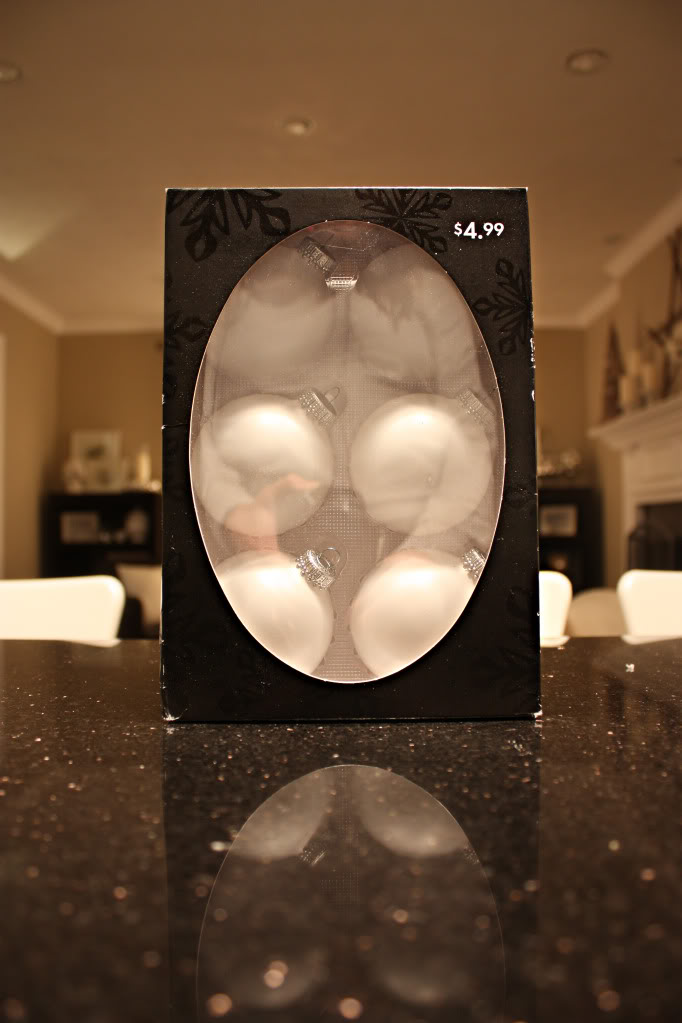
I started by snagging a box of plain opaque white ornaments at my local Hobby Lobby for half off:
And then I gathered some inspirational ornament photos:
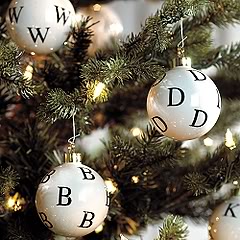
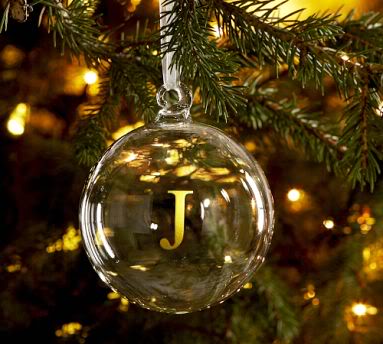
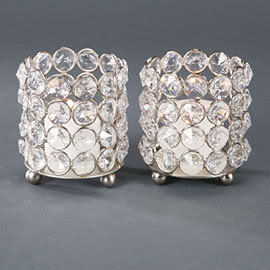
I loved the Ballard Designs alphabet lettered ornaments – don’t they kinda look like Lotto balls? They would be just darling for teaching a baby their ABC’s since they sell them in packs of 26. And the monogrammed ornament from Pottery Barn is oh-so-classy. Finally we have some fabulous blinged out votives from Zgallerie. I know…what do candle holders have to do with ornaments? Well, you’ll just have to read the rest to find out. In the mean time – you could order these sparkly suckas to give at your office gift exchange (both for $10!).
So now that you have seen my inspiration – let me show you how I DIYed a few ornaments for around the Bower house.
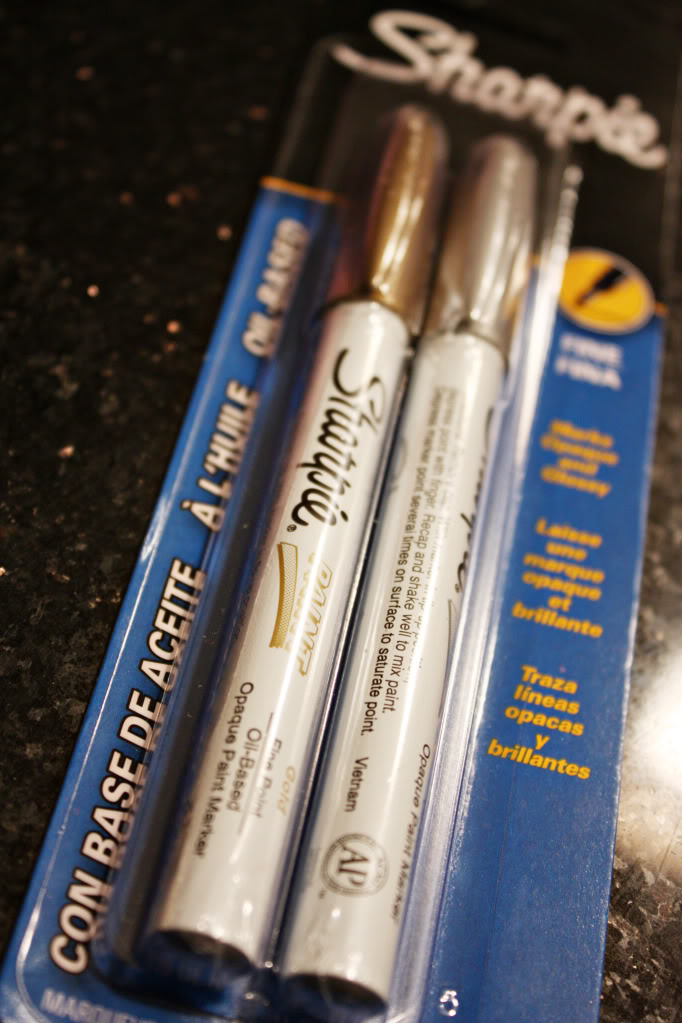
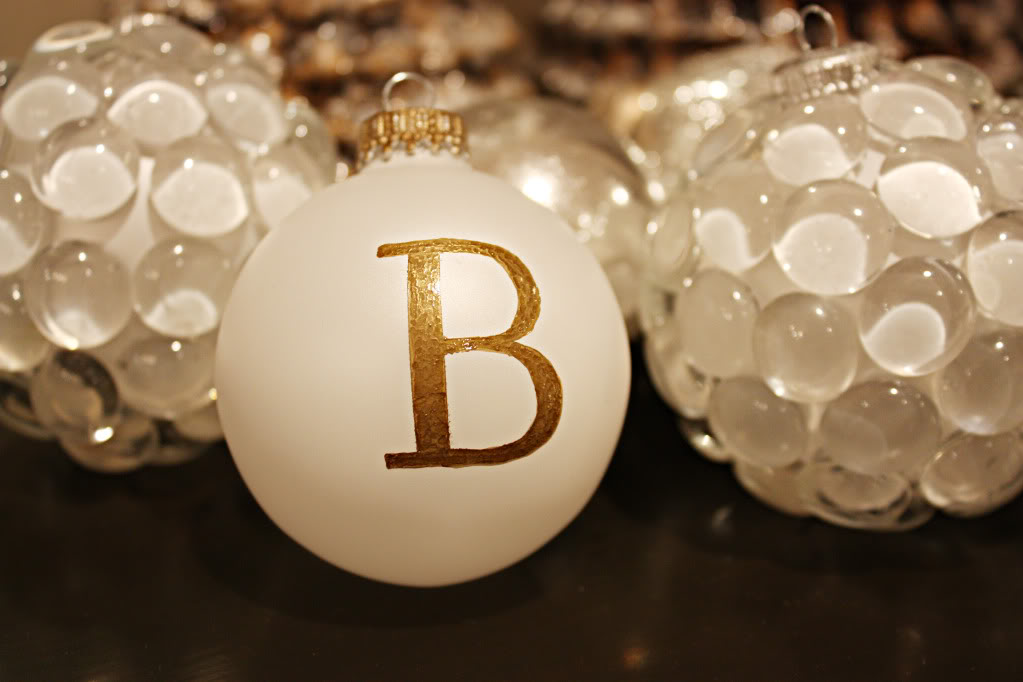
First I located my Sharpie paint pens – I love the metallic colors.
And then I used a bit of painters tape to give me a guideline for my monogrammed ball:
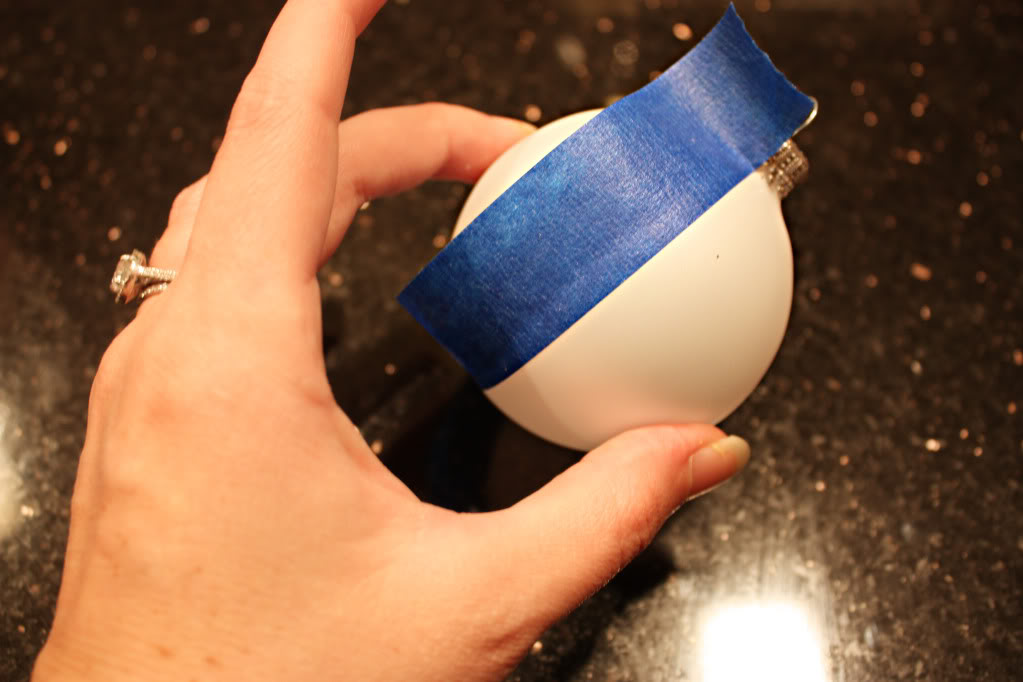
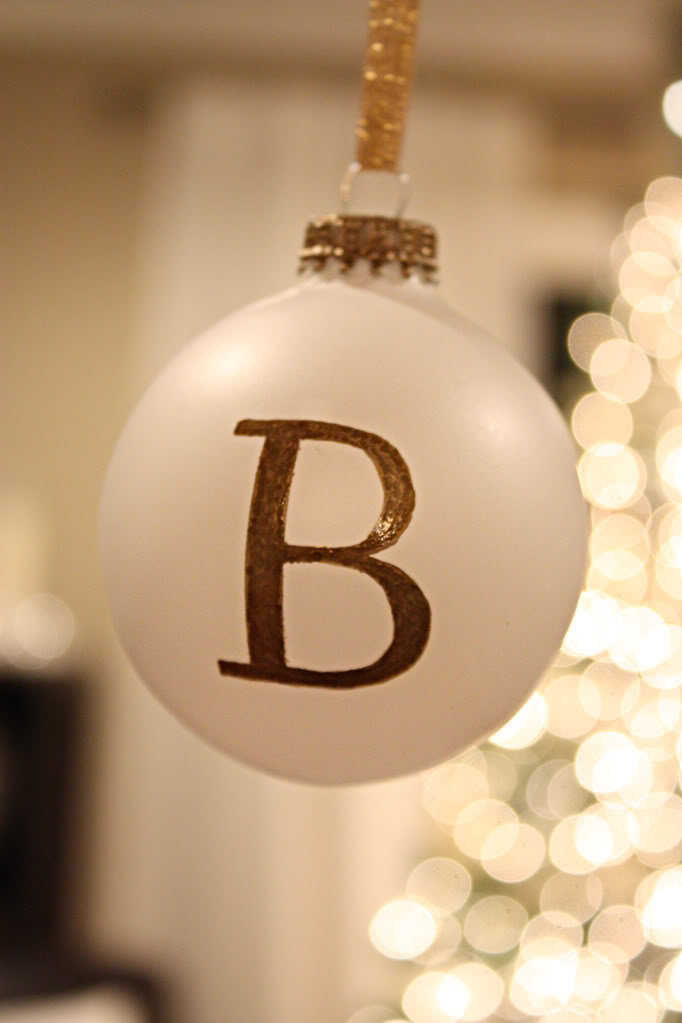
Then using the paint pen against the painters, I just drew two straight lines to give me my stem for the letter “B”. The rest I just free-handed. If you have a letter with all straight lines – well, consider me officially Christmas green with jealousy.
Unfortunately when I finished, I had some uneven clumps of paint on the letter – so I used the pen tip to dot inside the painted letter until it appeared a little mottled – like snakeskin. (I also painted the little ornament cap to give it an overall cohesive feel!) In the end it looked a LOT better.
Not only is it cheap but it’s totally personal too – perfect for a putting at the dining room place setting, identifying who gets what gift or just classy-ing up your tree.
My second ornament was inspired by those ZGallerie votives. I just dug out some old clear vase filler stones – ya know the kind that weighs down a jar full of flowers. And I also whipped out my trusty glue gun.
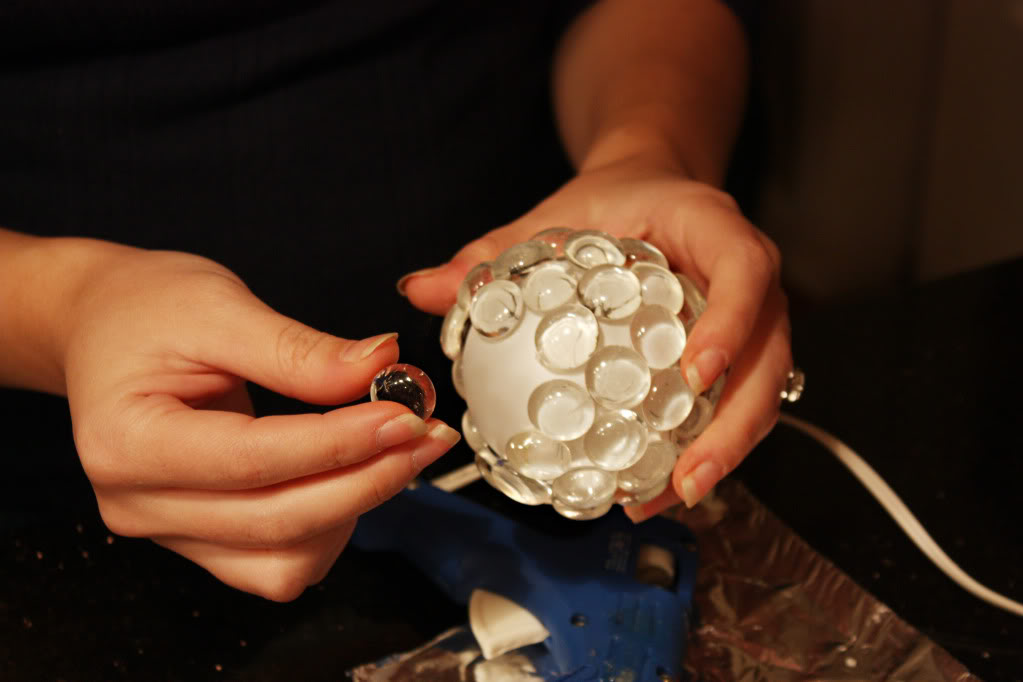
After gluing as many clear stones on the white ball as possible, it goes from glah to glam. (Does anyone else want to spell out GLAMOROUS Fergie style with me?!)
Anyhoo…I definitely would like to try this on a clear ornament as well. Oh and this one is more like a paperweight rather than a tree ornament. I found that the weight of the stones was a little too much for the weak little cap…so my fellow crafters, it is a good idea to keep this kind on the tabletop.
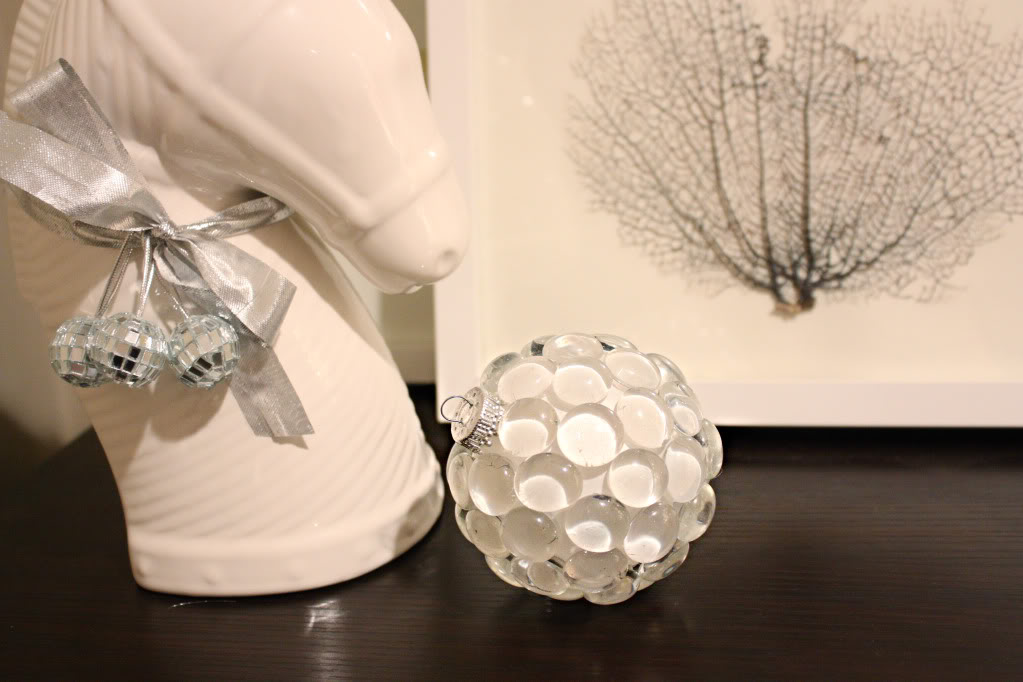
Don’t make fun of me. I like mixing and matching the ornaments in a grouping…and then taking photos. I had about ten. But I will only subject you to one.
My third type of crafty ornament was inspired by the Alpabet lettered ornaments. At first I thought it would be nice to just stamp on the bulb. But then I saw my embossing stuff way back in the craft drawer. Not only is embossing fun (you get to use a heat gun) but it is super shiny and gives a little more 3D effect.
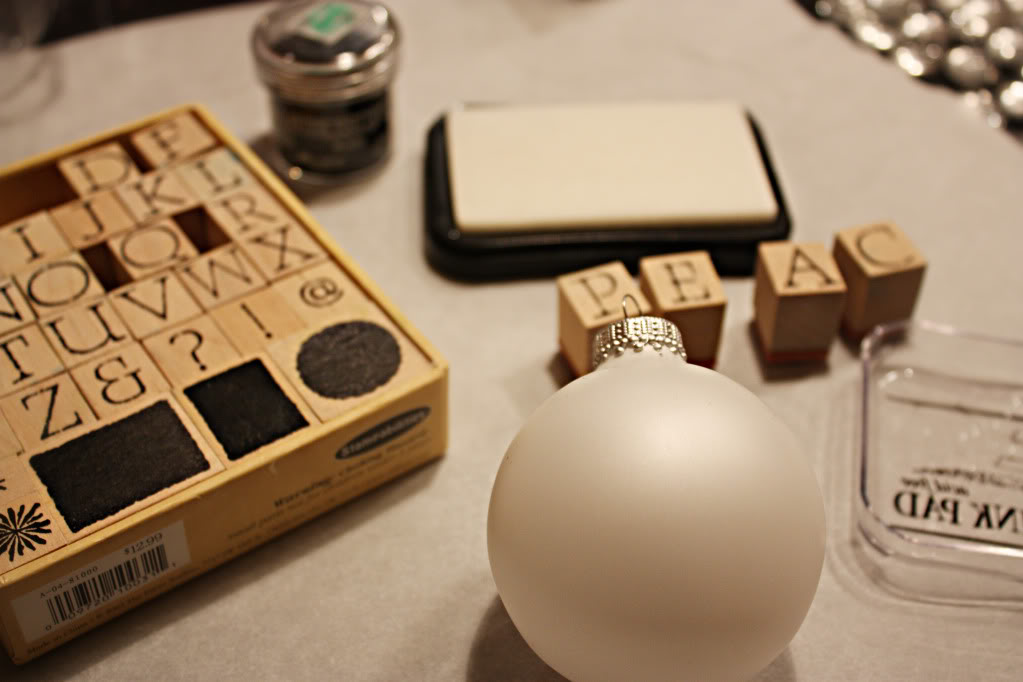
So I stamped the word “JOY” on the ornament with the lettered stamps and sprinkled a little black embossing powder on the letter before heating away.
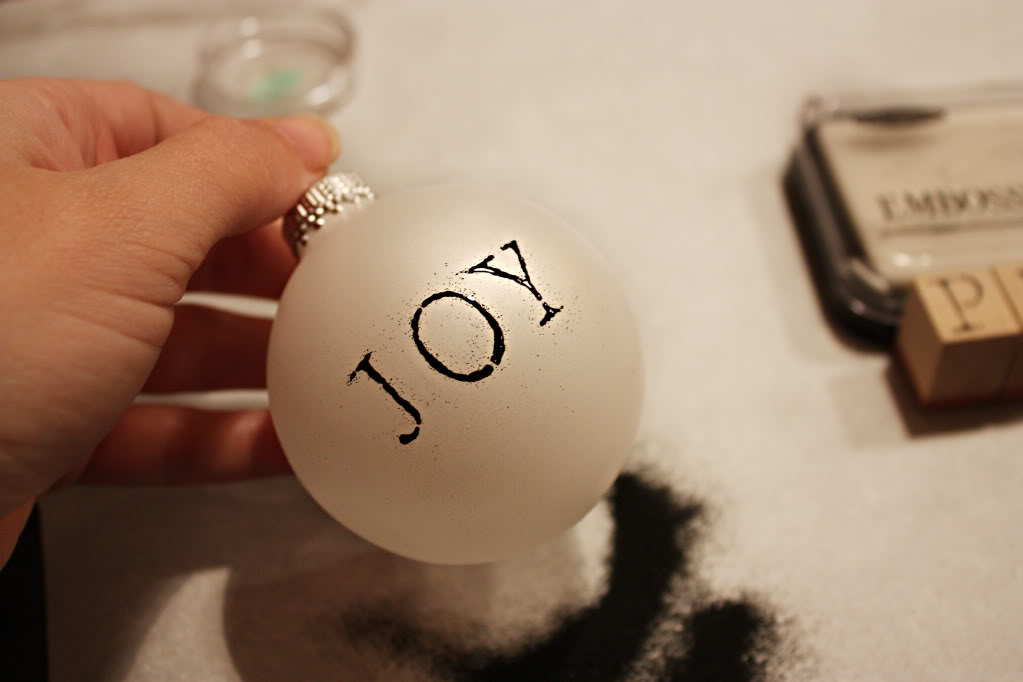
I even like the little specks of black dust around the word…it gives it such a homey feel, doesn’t it…homies?
(crafting must make me even more cheesy).
And this homemade version would be grand for doing numbers (maybe one for each of your child’s age that Christmas) or words that invoke Christmas cheer (stamping “T’was” or “Naughty” or “Peace” or even “Ornament” would be a fun way to spread the holiday spirit). And don’t forget that you could use stamps that are stars or holly leaves or bells and the powder comes in every color you can imagine.
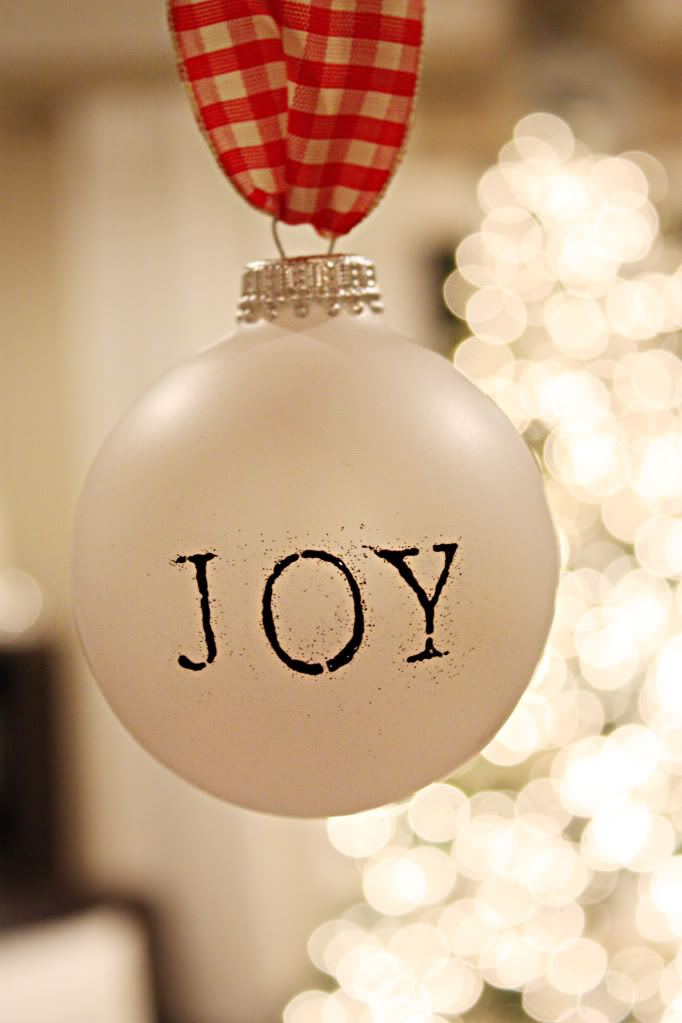
And the last ornament I wanted to share with you was actually inspired by a mistake.
I started a chevron pattern on an ornament and totally messed it up.
So what do you do with botched craft ornaments? Well, I figured that the solution to my paint-pen mess-aster was to cover it all up…with twine.
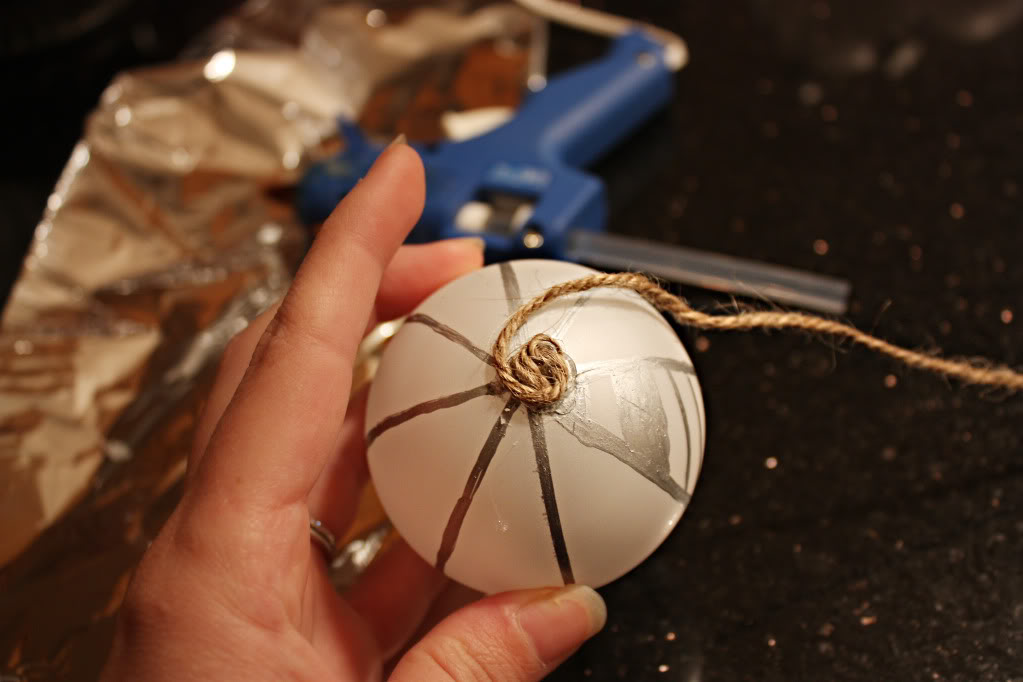
I just simply started at the bottom (you could start at the top too) and kept wrapping the twine around the ball as I dabbed some hotglue in it’s path.
But twine is not the only solution! Using yarn, thin strips of felt, or even moss would be a great way to cover up your funky ball and have a very merry Christmas. (that’s what she said).
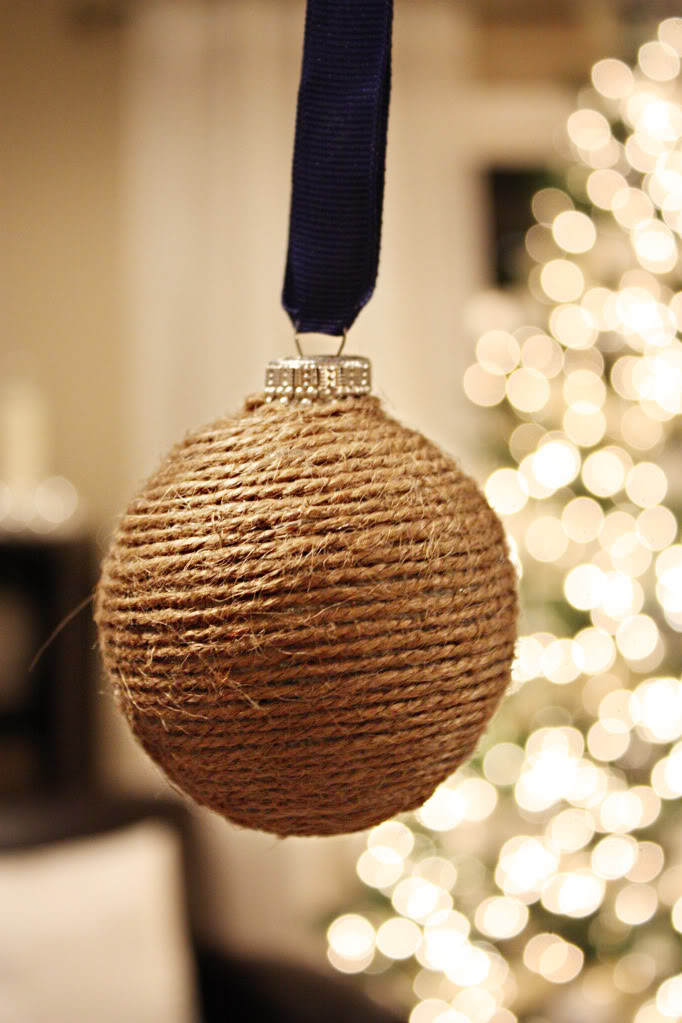
So whattya think? I think I wanna make some more…now that my fingers know what to do. I think those twine balls would be perfect for a seaside themed tree…or a rustic kind like the one in my living room. And the embossed version was so easy – it might be just the thing for friends Christmas hostess gifts. Wouldn’t a mini-initial ornament look just darling around the neck of a bottle of sparkling cider?
I know you guys have made ornaments before – any favorites? Tell me what you did to jazz em up and then tell me if this was a holiday tradition. Or maybe you tried and failed miserably (like my chevron pattern) – how bad was it? Did you attempt a quick fix or just toss it? Whatever the craft, I’d love to hear all about it.
For more adornament inspiration, check out these crafty plaid shirt ornaments from Eddie Ross.
OHhh Twine balls–err…ball…so CUTE!
Love it!!
I also REALLY like the one with the little rocks on it. Way to go katie bower!
-the other kb
You’re so stinkin’ creative. Love these!
Katie Bower–please! Please stop creating awesome-ness that I want to copy because I am running out of time. I already went out and bought materials to make that avent calendar, and now I want to make monogrammed ornaments! >sigh< I guess I could get a headstart on next year..
They all look awesome, but I especially love the twine ornament!
Love them all!! I am not craftly but you are turning me into a crafty want-to-be!!
Love them all – guess I’ll have to get crafty this weekend…
Are you a scrapbooker Miss??? 🙂
You should try cranberry ornaments! They look cool on a rustic tree w/the contrast of red to browns/greens. I gave it a go and it was sooo easy… http://oursoftspottoland.blogspot.com/2009/12/4-days-of-ornaments-day-1-cranberries.html .
Really LOVE the second one! Do you think you could glue on the caps so they stay and you could hang it on the tree? Please say yes. If so, I am going to make this…!
Very nice. I too appreciated the Ballard alphas. But I think I like the single monogram best. It would be nice to stagger them on a line of ribbon with my disco ball ornaments and spell out “merry.”
The twine ornaments, frankly I would buy those if you sold them. Very sharp and original. If a person wanted to make a lighter version of the studded ornaments, there are epoxy like studs that can be purchased from scrapbook stores or Hobby Lobby/Michaels. Although I can see why you would want to use what you had on hand there. They are schnzzy.
Don’t you love the creativity the holidays can inspire?
those are all so cute! the glass vase filler ones are great – you could use those year round!
I just love making my own ornaments! And yours are gorgeous! I especially like the twine one — very cool 🙂
I know you’re been posting like a madwoman with all these awesome x-mas things — but can you believe it’s already here . . . ? Just one more week!!!
Hey Elisavita –
Thanks to Sherrie, now I know that there are epoxy like studs that are lighter…maybe you should check them out and let us know. Otherwise, I would recommend getting a plastic ornament and reinforcing the caps with glue like Liquid Nails. Good luck – and let me know how it turns out!
Thanks Leslie for the ornament recommendation – I’m on my way over right now to check it out 🙂
XO – KB
Dang you! I FINALLY dug out the Christmas decor last week, and how I want to totally redo my tree! Hello, Twine balls – where have you been all my life? (That’s what she said?)
I also love the monogrammed ornament, but I’m so bad a free-hand I’d have to get a stencil… or change my last name to something with an “I”.
I also thought of Layla at the Lettered Cottage when I saw the twine ball. That seems like something she’d love.
Thanks for sharing such awesome ideas! Love it!
I love the stamp and emboss idea. That would make the perfect “place card” for a Christmas table. You could make up ones with peoples names, or nicknames on them. It makes a nice little favor. You’re really creative.
What great ideas! Thanks for the inspiration 🙂
love them all! you are so creative!
Katie, these are awesome! My favorite is the glamorous one. When do you have time to do all these beautiful crafty things?!
Awesome work girlfriend! Isn’t it funny once you get going you don’t want to stop! Great ideas. thanks now I’m at work itching to make more ornaments! gosh!
Check out our attempt at some fun crafty ornaments…
http://eatdrinkanddecorate.blogspot.com/2009/12/tree-trimming-party.html
Katie, you are so creative. Seriously!!! Love all these great ideas now I just need to find the time to do them 😉 Merry Christmas
LOVE the twine one. I will have to keep those in mind. Feel free to throw out some more crafy ball ideas. haha! Another idea for the letter one if you weren’t so crafty with the paint pens would be scrapbook letters.
Dear Katie-
I think we were separated at birth. I’ve made several of these same ornaments. Only with a G, because, well, that’s my name.
I found that if you glue the cap on that it will then hold the weight of almost anything. I even used little rocks. Oh, and to match your twine balls, wrap a cone in twine for a little tree. Or a big tree. Whatever you’re in to. : )
Great work with the adornaments! I actually started working on a wreath with all those little vase filler gems. its taking forever! and i’ve got a lot of glue gun injuries from it. wish I would’ve just done an ornament instead!
Very nice! If you happen to not like the extra speckles around the word ‘JOY’ there is a super simple trick to getting rid of them. Rub a dryer sheet over the surface before you stamp and emboss and it will allow the powder to stick only to your letters.
oooh – thanks for the tip Sarah – I might try that next time!
XO – Katie
I love all of these! I can’t believe you free handed that ‘B’ – very impressive! Now I’m seriously considering making all of these when I pick up all of my after Christmas goodies at the after Christmas sales…after Christmas?
LOL – I think listening to A Very Chipmunk Christmas is starting to reflect in my behavior.
-E
I never knew i could love balls (christmas balls) so much!! Thank you for the fab. ideas!
P.S. What a great way to see all the funny ‘ball’ comments!
I just made some sewing themed ornaments the other day with glass balls. I blogged about it here: http://skooksplayground.blogspot.com/2009/12/holiday-decorating-in-my-imaginary.html
How creative are you!?! I love the one with the glass vase filler. How can you not have a holiday without some blingy goodness?
My freshman year of college I handpainted a bunch of clear glass ornaments for my girls as gifts – the great thing was that I used craft paint, so if I made a mistake, I could just wipe it off and try again!
Oooh! I love the twine wrapped one! What a great idea!
They’re all great, very creative. I am envisioning a twine ball with some faux holly and berries attached to the ornament cap.
I loved the ornaments with the glass beads so much! I just made a bunch for family and friends. I glued the tops on the ornaments so hopefully they will hold up on the tree!
Wow! You are providing me with a lot of inspiration with your “12 Days of Christmas” series. I’m loving the twine ornament and will be adding glue gun to my wish list so I can attempt it!
I love your ornaments! I just bought some of the clear glass ornaments and wanted to put letters on them (like those Pottery Barn ones) but I didn’t know the best way to go about doing it.. Any suggestions?
love love love the twine!!!
I love these, great ideas Katie! I’m featuring these ornaments on my blog today, thanks for the inspiration!
http://www.diynewlyweds.com/2010/12/diy-handmade-christmas-ornaments.html
If you use clear ones, fill a third of the way with fake snow and add tiny pinecones; you have a tiny forest ornament!
I found some lovely glitzy thread the other day from Anchor – it’s called Arista. It’s thinner than twine (but thicker than stranded cotton) and has metallic threads running though it. It would look fabulous if would around a bauble like the twine one … you could use multiple threads at a time so it didn’t take so long. Gonna give it a go ….
I love these. I bought silver ornaments and fashioned people out of them. I used felt for the legs with small ornaments or jingle bells for their feet. Pipe cleaner arms again with jingle bell hands. I made Scotsmen wearing tams and scarves made from leftover plaid fabric, angels with fluffy white wings, ladies in painted straw hats, elves and Santas. The ladies had curly ribbon skirts. Santa’s beard is fashioned from white cotton balls. The faces were painted on but could just as easily be done with Sharpies. This year I have so many friends with newborns, I will be doing pink and blue babies in bonnets, I am thinking the babies will be swaddled in scrap fabric blankets. I used some left-over doll hair (available at Hobby Lobby) to give them all hair.
Love your ornaments – especially the glass covered and the twine covered!
xoxo
Joy
I know this was posted forever ago, but I just found them, and they turned out super cute! Your ornaments reminded me of some I did years ago with colored glass ornaments from the dollar store and white metallic puffy paint. They looked SO cute and expensive when I was done, and all I did was make simple snowflakes, words like Joy, Hope, Faith, etc on the ornaments and let them dry…wish I would have taken a picture, but that was back before Facebook, and even before, gasp, myspace!
What me and my mother did one year was take clear ornaments, take off the cap, pour some paint in them, and then twist them every which way so the paint sort of mixed together (we used orange and black for Harley Davidson)
These are all awesome! I am looking at changing my Christmas tree decorations this year and these are great ideas! Thanks!
I fell in LOVE with the vase filler ornaments and had to make some myself! They turned out awesome! You should check it out on my blog!
http://idpinthat.blogspot.com/2011/11/diy-vase-filler-ornament-or-decorative.html
Alex
These are really beautiful!!! I wanted to let you know that I am featuring these in a post about ornaments and linky party on Wed. of this week. Hope you can come by and check it out! http://nap-timecreations.blogspot.com/
LOVE, LOVE,LOVE ‘UM- THANKS SO MUCH FOR SHARING. HAPPY CHRISTMAS AND HEALTHY NEW YEAR TO YOU AND YOURS, LIS
Your ornaments are inspiring. I hope to see more. Suggestion to try with the embossing…wipe the ball with a drier softener sheet before starting and it will reduce the static cling that held all the stray embossing powder on the ball. Then after heating, it should be clean and crisp.
i loved your ornaments! I’m going to give them a try. Thanks for the ideas.
I love, love the ornaments that you glued with the clear vase fillers. I would love to do these and hang them on my tree. I’m going to try it, but I think I’ll super glue the tops and see if that will keep them from coming off. I really hope so.
I loved them all and will try all of them I’m not really crafty but think it would be fun and very personal
You are totally amazing! I love the way you covered up the oops ornament with twine. Pure genius!
I made similar ones using eyelash yarn on styrofoam balls, I like the twine idea!
Love your ornaments. My favorite is the glass bead one!!!! I am featuring this post at somedaycrafts.blogspot.com
Great Craft! What’s kind of material are you used for the last ball? Thanks from a new spanish follower! 😉
It’s just garden twine…some folks call it jute 🙂
xo – kb
What do you do with the heat gun on the ornament where you stamped JoY?
Since I stamped with embossing powder, the heat gun makes the little dust particles melt a tiny bit and meld together and raise up just a hair. It’s very cool.
xo – kb
I love love love my paint pens… and have found that nailpolish remover makes the “boo-boo’s” better… fyi…. thought I’d try it and wa-la… worked like a charm.
Love your blog and all of these ornaments – so creative and fun and unique! Just wanted to let you know I featured it in my roundup of glass ornament crafts here. Feel free to check it out if you want and hope you like it! : )
-Mel the Crafty Scientist
Wow they look stunning.