Who knew that your knuckles swell after tiling for 8 hours?
I didn’t.
Why didn’t you bloggies tell me?
It would have been helpful info…any time someone posts about engorged body parts, I am interested. Don’t make that dirty, girls 🙂 I am talking about fingers, ankles, knees, even my thighs look bigger…and that is never good.
Ok – start over…
My goal is to get the kitchen/den area done for the upcoming Christmas party parties…this includes installing the ventilation hood (raise the roof!) and the tile backsplash.
Introducing our wee kitchen – hoodless and tileless:
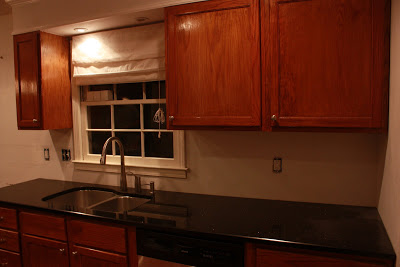
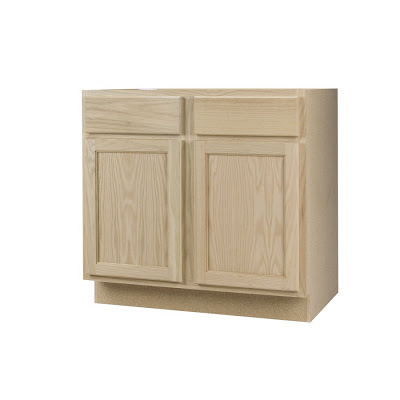
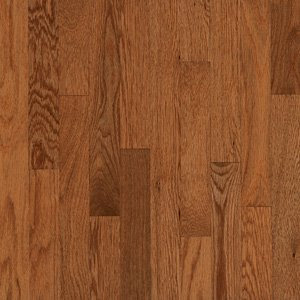
 The cabinets were stock cabinets at Lowe’s that we stained to match our wood floor (Bruce hardwood in gunstock).
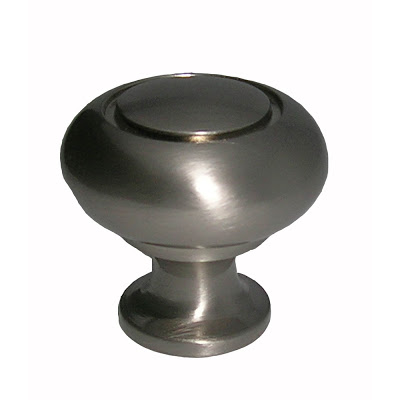
The hardware is cut-out knobs and sleek handles from Lowe’s (sorry don’t know the name) but I do know that they passed Jeremy’s comfort test. Apparently, knobs should be smooth to the touch, easy to hold, and have a solid, sturdy feel to them (or so the boyfriend said). And these got the go-ahead.
 Back to the backsplash project…and here is our kitchen after day one that included 7.5 hours of tiling:
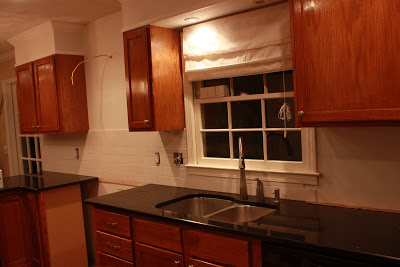
and after day 2 – running total of 16.5 hours of tile work:
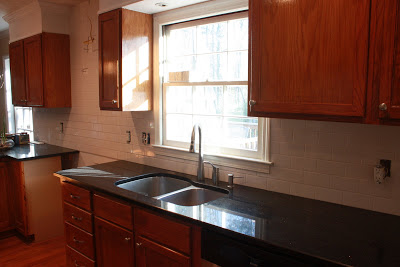
Fortunately for us, when we centered the tile work on the range, the tiles also centered on the sink – funny, it worked out for us…this might be the first time ever! I was pumped.
- tile on opposite side of kitchen behind microwave
- scrape any remaining thinset (or icing as Jeremy calls it) from the cracks.
- clean the entire backsplash
- grout
- seal grout
- install breaker so hood can get some juice
- install hood
- reattach any molding
- paint window and trim
- replace light above sink
- sand kitchen wall
- paint kitchen
If you are about to start any type of backsplash installation, here are some Bower Power tips to make your life a little easier:
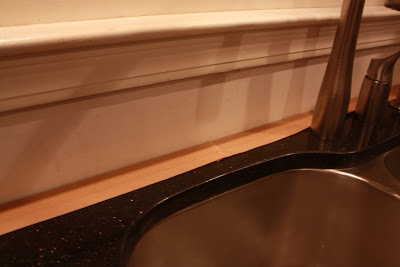
Tape off the tops of countertops
Not all countertops are perfectly cut. Not all walls are perfectly straight. Therefore, not all countertops are perfectly flush with the walls. We had some minor cracks between the wall and the granite – and because I hate scraping thinset outta cracks, the tape gave us a barrier for any excess that squished out. It also made clean up a snap!
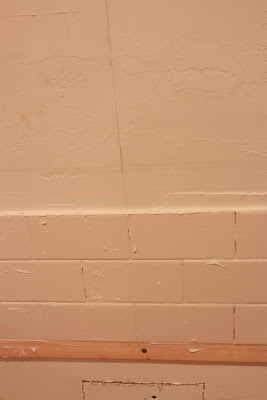
Add some support
We decided to begin the first tile by centering it on the range. After drawing our guideline on the wall, we added a supportive piece of wood to help keep the entire project straight and even. And every girl knows that gravity is not your friend when it comes to droopage.
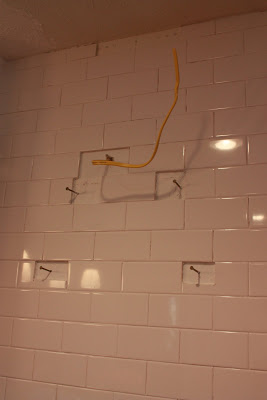
Mark your cutouts with nails
Well I didn’t know about the swelling fingers. Just the aching back! Guess I’m dorky… I miss a good tiling job right now. So I live through yours. It looks great!
Katie
Loove the black granite, subway tile and the stain of your cabinets. You have classy taste.
I love hearing about this. We’re planning on doing our backsplash. Don’t know where it lies in the list of priorities, though. Any tips I can get, I’ll take. Looks great
I think that your choices will very much appeal to the masses! Good luck this weekend, holy crap girl, I do not envy you!
I love love love the tile and the black granite.
That’s not mass-style, that’s class-style. =)
Cannot wait to see the hood.
I love love love the tile and the black granite.
That’s not mass-style, that’s class-style. =)
Cannot wait to see the hood.
It looks great! I love the black granite!! Lookin’ good!
Classy and timeless!! Anyone would love to have that gorgeous granite, those cabs, and a subway tile backsplash. OMG is that backsplash bee-yoo-tiful!
I don’t have any tips on grout (seeing as how you definitely outrank me on renovation expertise) nor do I have stories about engorged appendages (giggle, snort), but I’m so excited to see the rest of this reno, I could pee.
Here are ideas for tile mural installations , tips on framing the tiles and using field tiles to coordinate with the mural.. Considering the use of found vintage labels and a great way to showcase retro art.
http://aliciatappdesigns.com/customer_testimonials.htm
Love the new cabinets and black granite. Looks like a lot of work, so I don’t envy you. But it will be great when it’s done.
It’s looking fantastic Katie! Can’t wait to see the final results!!
I love the black granite…can’t wait to see the hood installed. Your home is absolutely stunning…down to every little detail!
you all are so handy!!
We’re considering tiling our own backsplash but I’m worried about it looking “professional” in terms of having it look right at the edges and around the window sill/apron. We have a very similar window to yours. How did you work around that, and how did you finish off the edges?
P.S. Thanks for all the inspiration – we’re a young couple as well and have tried many DIY projects around our house (including tiling a floor, which *almost* resulted in divorce – just kidding! sorta…), but I don’t think we could ever do everything you’ve done. So thrifty! Do you have a post about installing your wood floors? We’d be scared to do that as well… but I can’t get over how inexpensive it was for you without those labor costs!
Katie
Katie,
We started the tile on the level of the countertop and tiled right up to the window sash. The tiles sometimes needed to be a little modified (by modified I mean cut) to fit…and then we continued the tile all the way around the window trimwork. We then grouted the entire thing. It works & looks professional 🙂
As for our flooring…we live about two hours from the mecca of hardwood flooring here in the south. Literally builders from all over come to Dalton GA for cheap hardwoods…so all we did was call around until we got the best price on the Bruce hardwoods that we wanted. We also saved some loot because we went with TAVERN grade flooring vs. PREMIUM grade flooring. There are more discolorations but in the end, we didn’t mind because we figured that kids would ruin it anyway. We borrowed all the tools from a friend who happens to be a builder…and we googled for all our instructions.
Seriously – none of the stuff we did was that hard. We just made sure to research well before starting. And when we came up with a question…we had a few friends who we were not too proud to call 🙂
XO – K to the B to the POWER
Thanks for the advice! I wasn’t sure if we had to remove the window sash and tile under it or if we could just cut around. We might just try to tackle this ourselves since we’ve already spent WAY too much on the kitchen.
You’re very lucky you have so many great friends and connections to help you out! My husband is in the Air Force so we move around a bit. We’re in NC, but I’m thinking that’s a little far to drive to get flooring. Looks like we might have to leave that one up to the professionals. 😉
Thanks again!
Katie
So, did you nail that little piece of wood up as a guide ONLY where there was no counter?
Yup – sortof like a guideline slash support beam while the tiles are set.
xo – kb