Wood walls are a total normal thing now. I see pallet walls CONSTANTLY. And ship lap is now something people want in their homes….thanks to JoJo & Fixer Upper…..which by the way….you must read The Lettered Cottage’s educational post about what is ship lap and what is planked walls. THERE IS A DIFFERENCE PEOPLE 🙂
As someone that started that wood wall trend (BAHAHAHA – my evil sarcastic laugh with eye roll), I am no stranger to the fact that wood looks good vertically! So why not in the basement kitchen?! It would go nicely with our industrial vibe and make me think outside the box when it came to the floor tile.
When I saw this wood laminate floor go on sale at Home Depot, I figured out the quick math and we could literally save HUNDREDS by doing this with the wood look vs. tile. Here’s how it all went down….err…up….
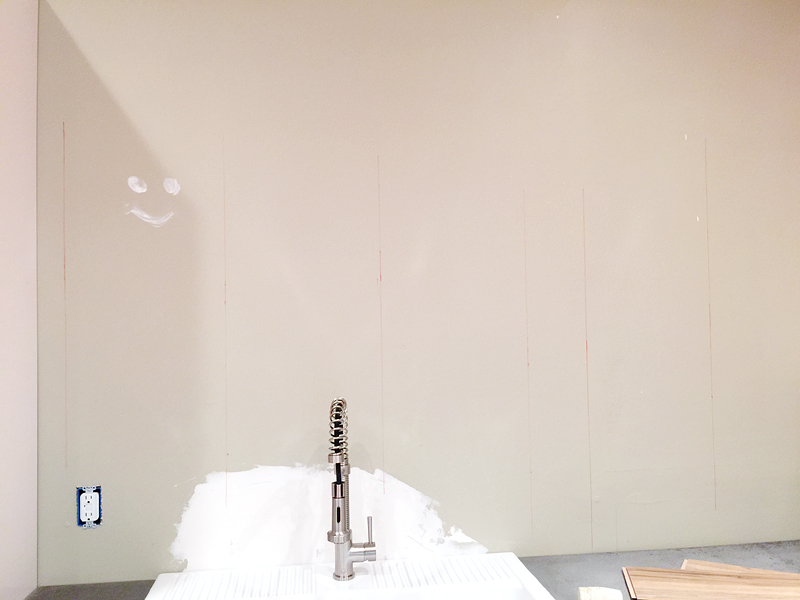
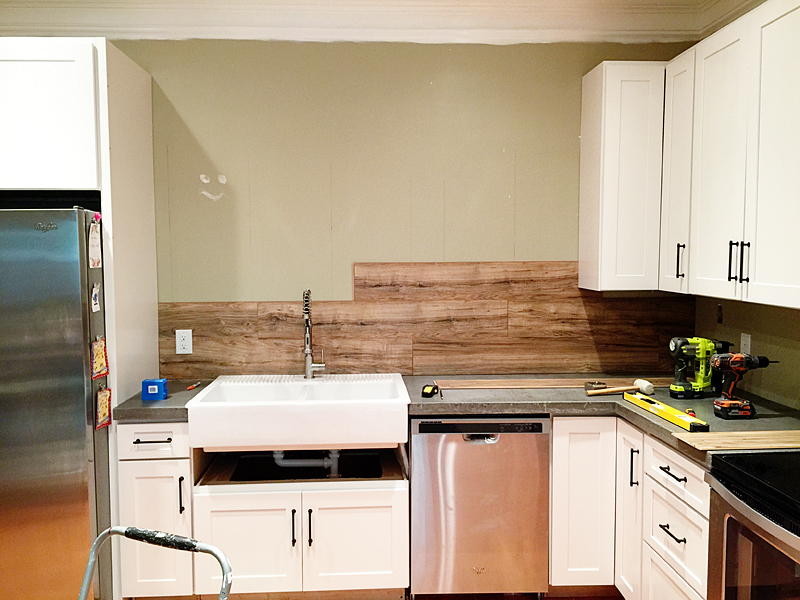
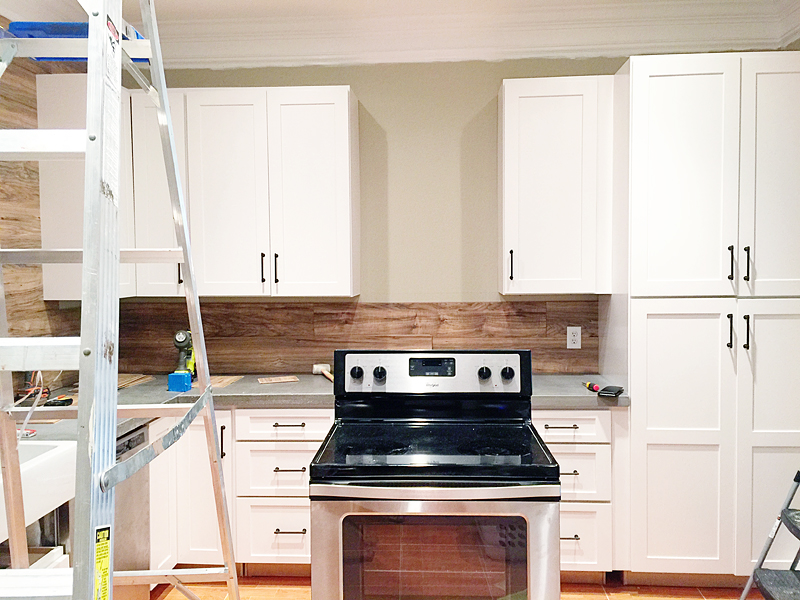
First we marked all our studs. We figured that we could tack the flooring directly to the studs and it would be secure without any additional glue. That way if we changed our minds down the road, it could be easily removed without huge amounts of damage to our drywall.
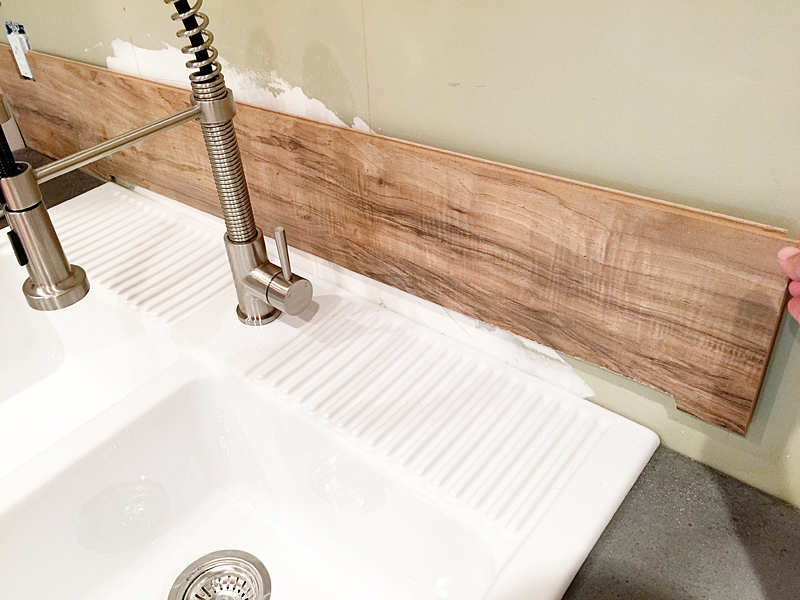
Then we chose where our first seam would be. I definitely did NOT want there to be a seam behind the kitchen sink (eewww yucky growing stuff!) so we started there.
Cutting the laminate was REALLY simple. We just marked it with a pencil and then used our miter saw for any straight cuts and our jigsaw and table saw for any weird curved or corner cuts (like around the sink corners).
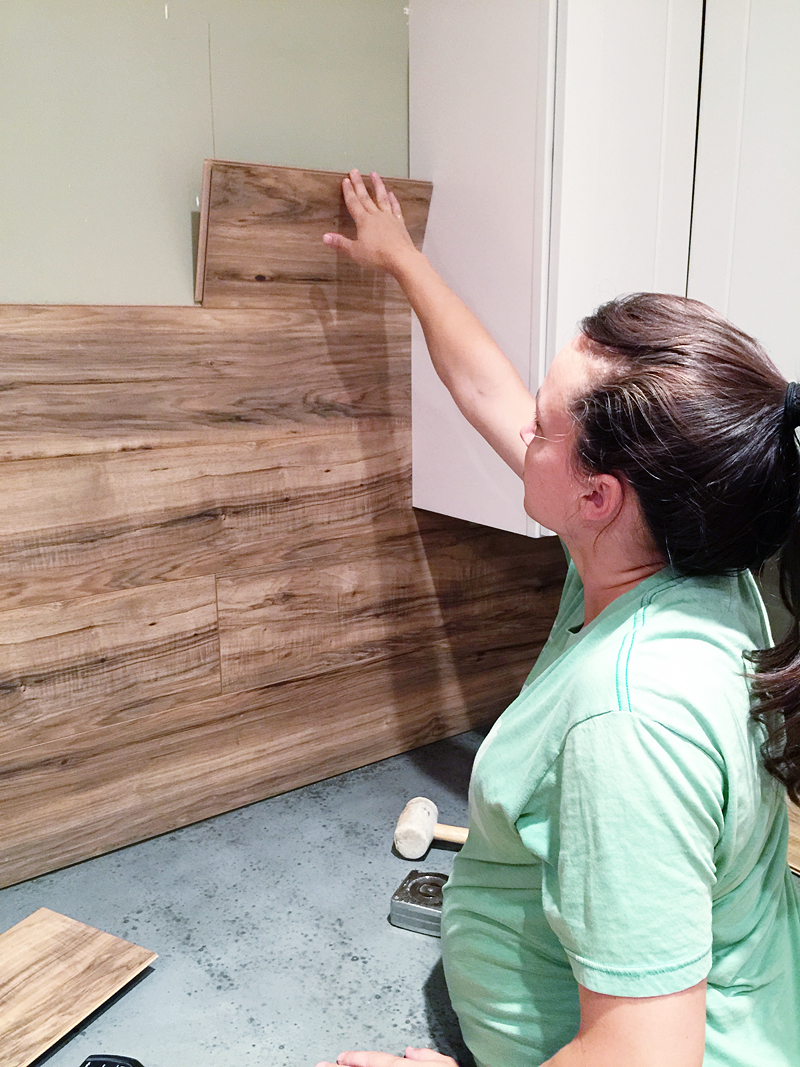
It is helpful to make sure the laminate is laid so that the tongue side is up. Trust me on that one.
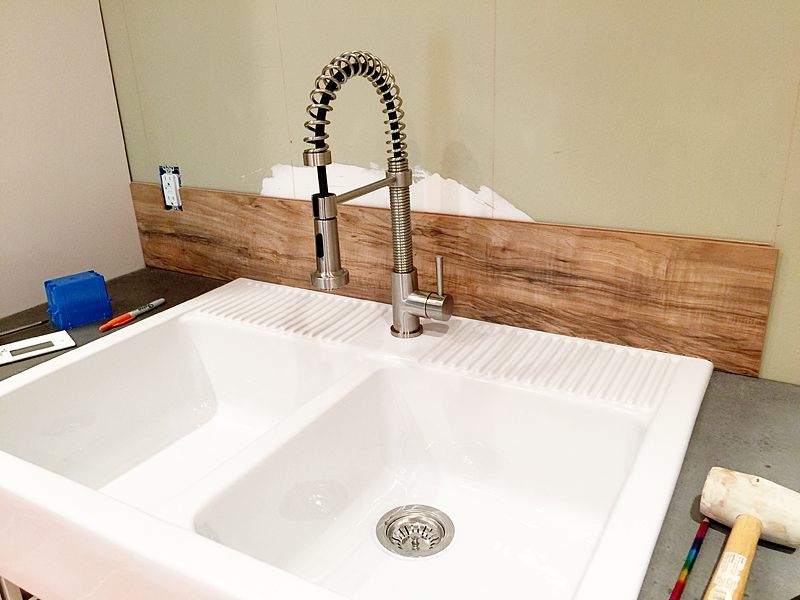
So the process is super simple. You get your cut piece and you made sure to stagger your joints. Put it in place….
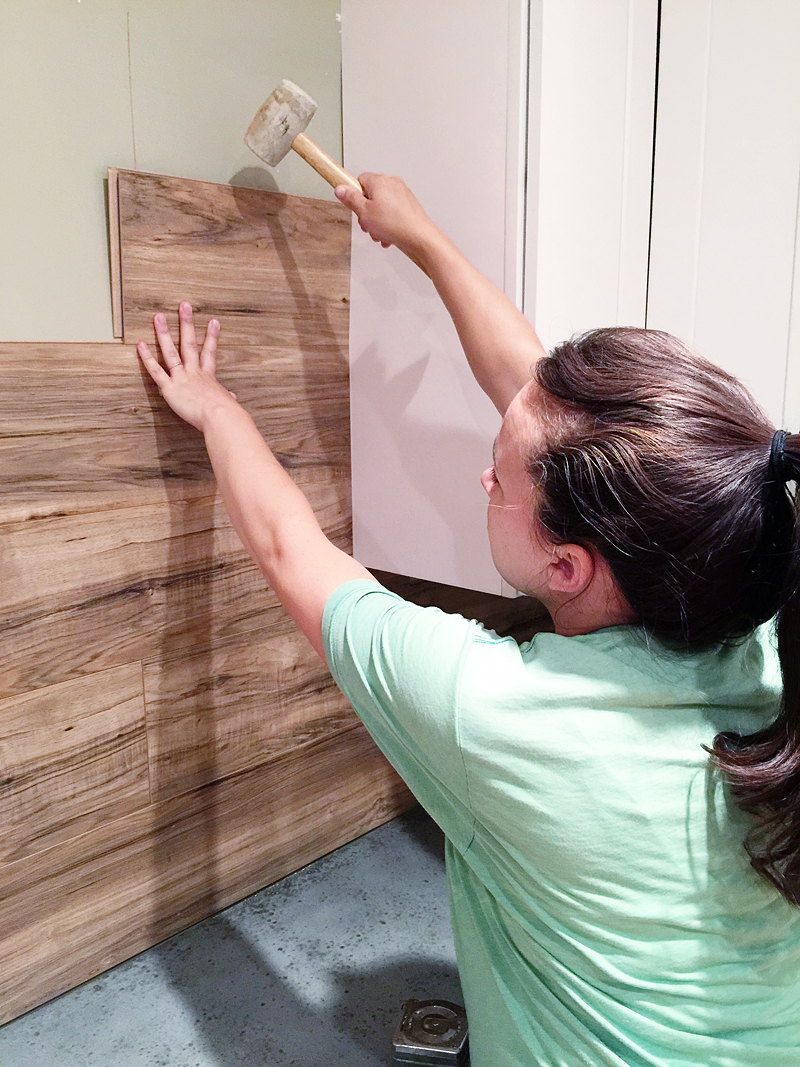
Knock it down with a rubber mallet so that the groove overlaps that tongue below it properly…
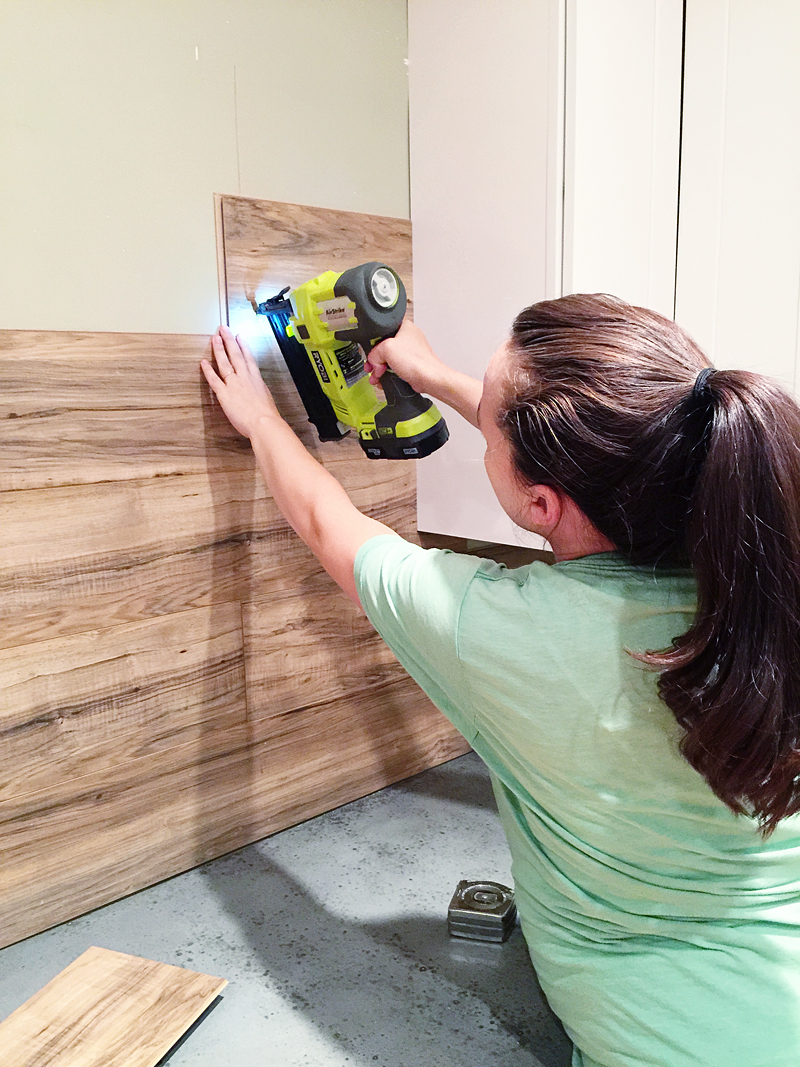
Then just use a brad nailer to tack it into the stud behind it. It will work if you tack it into drywall too but studs are always best. Note my lack of safety eyewear #dangerous #dontbelikeme #stayinschoolkids
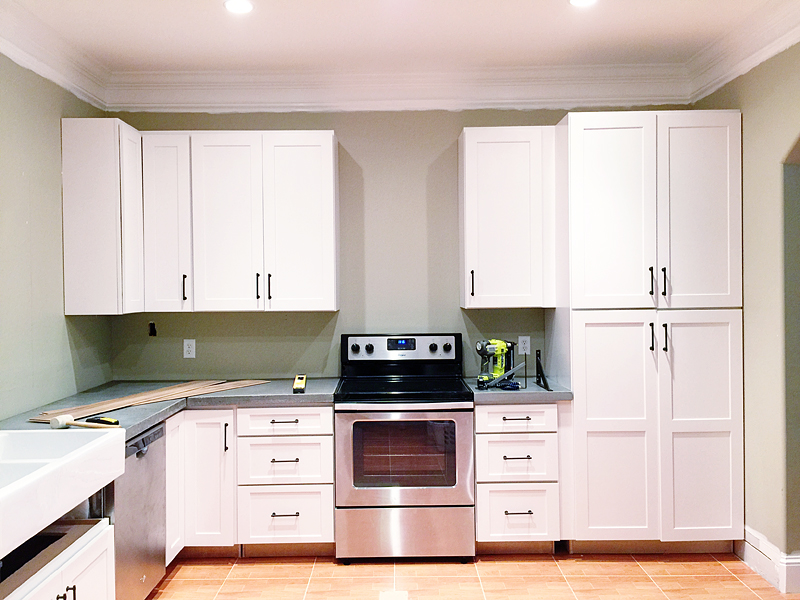
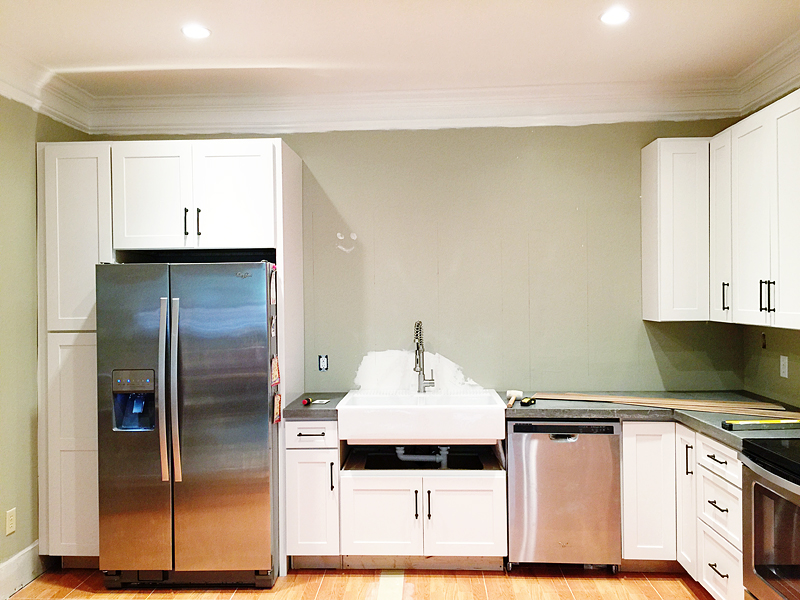
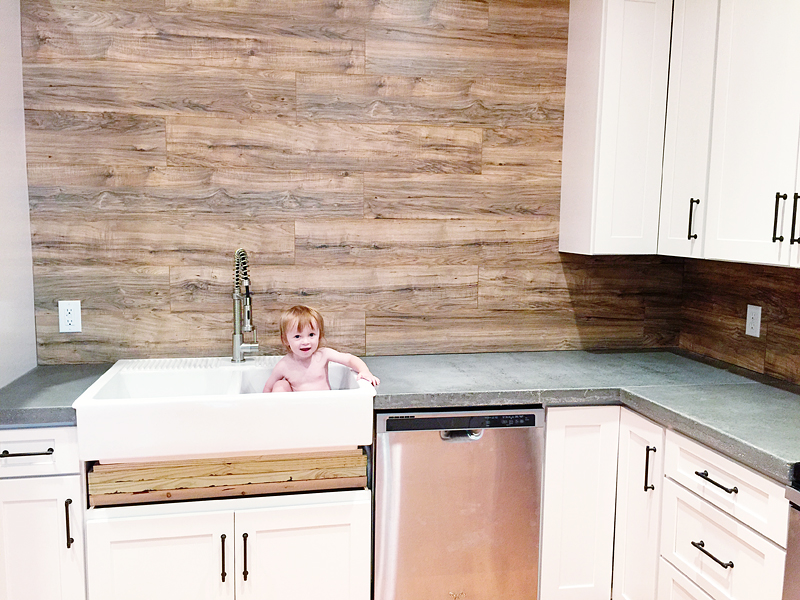
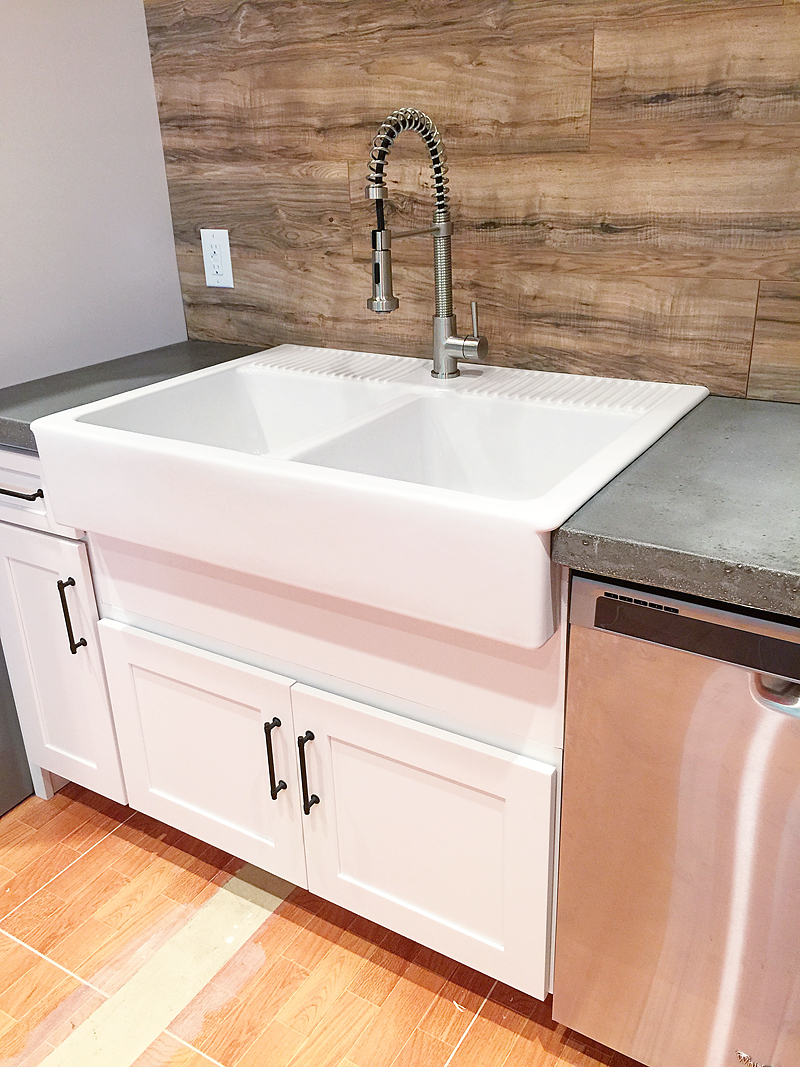
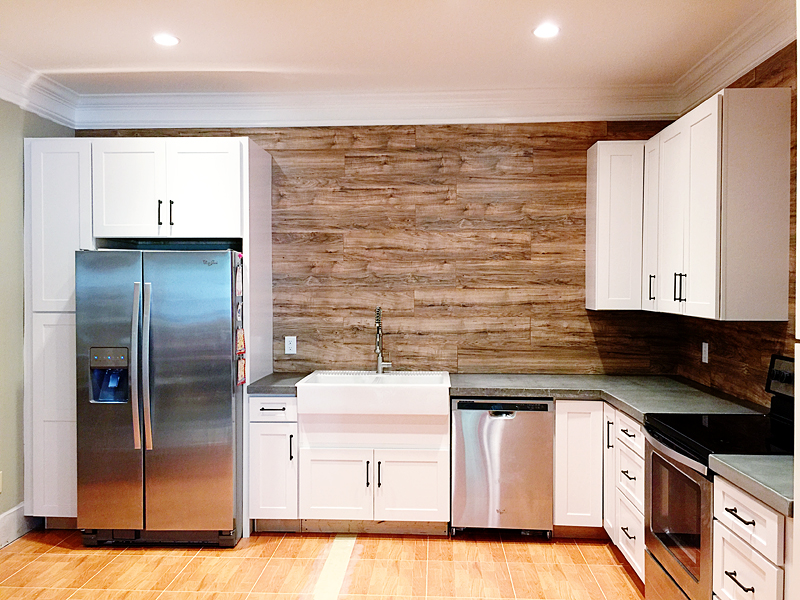
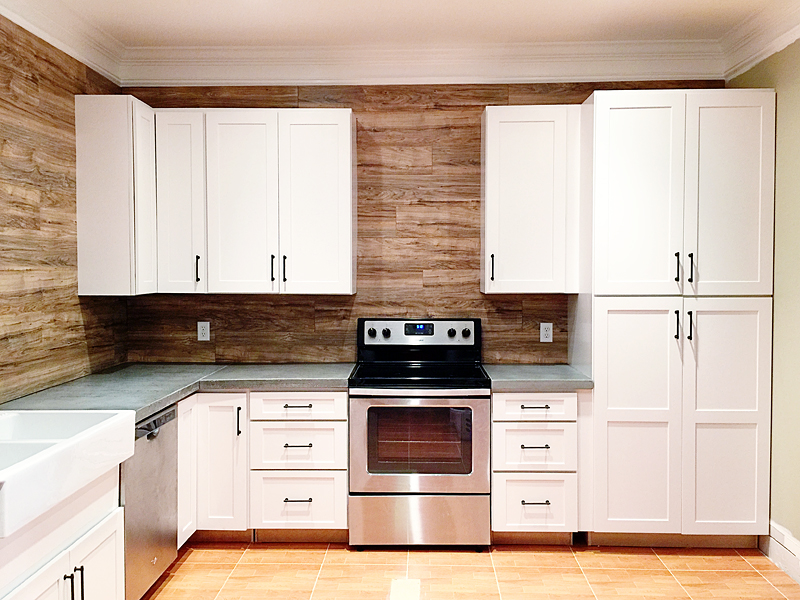
We did two entire walls – even up around the cabinetry so that it completely covered all the walls and it only cost us $60.
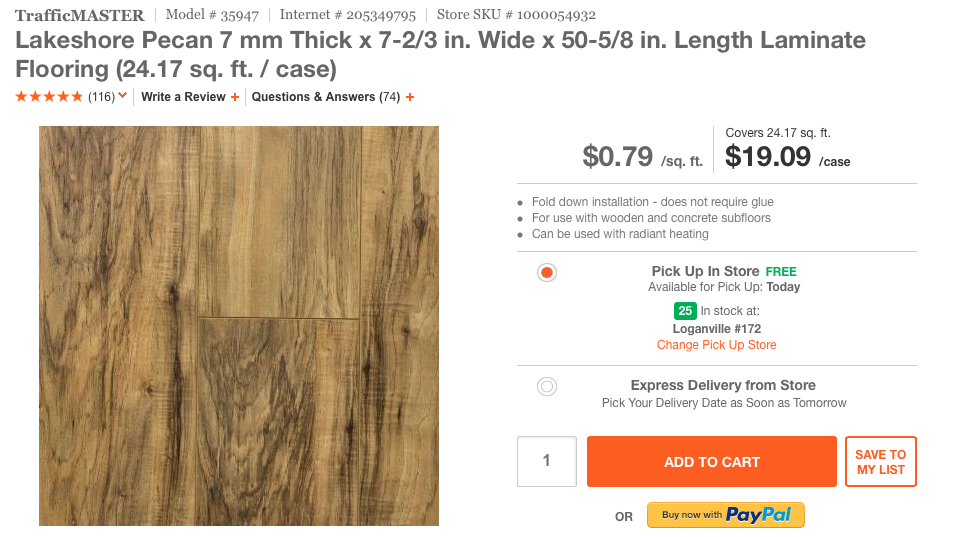
The laminate we used is this one at Home Depot….
And yes, these photos were taken before we added that front panel to the sink….BUT SERIOUSLY WHO CAN SEE THAT WHEN TINY LITTLE LJ IS IN THERE!!! That kid kills me….
The backsplash is REALLY easy to clean up since it is wipeable which is MUST when it comes to all backsplashes. And the fact that this is affordable, removable, and looks amazing – it’s like the triple crown of backsplashes!
And the big wall is ready for open shelving….
And the little wall is ready for the hood!
All that and more in the next post! Happy DIYing!
p.s. If you would like to catch up on past basement kitchen posts – here are the links….
- Clearing out the Basement
- Planning the kitchen
- Assembling the Cabinetry
- Saving on appliances
- Building concrete countertop forms
- Screwing up the concrete (attempt 1)
- Successful concrete countertops
- Concrete countertops FAQ
- Retrofitting a cabinet for a farmhouse sink
*This post contains affiliate links.
We just used this same laminate in our house! But ya know, on the floor. Band aid fix to get rid of nasty carpet until we can afford to put in hardwood. Never would have thought to use it for a wall!
LOVE THIS!!! I am so excited about this little kitchen coming together!
But when do we get to FLOORS?!
That looks amazing! Can you come remodel a kitchen for me? 😀
When we built our basement office 2 years ago we covered an entire wall with laminate flooring, as well as the staircase wall entering the basement. Besides being awesome focal points, the staircase wall has remained dent free even after moving huge pieces of furniture multiple times up and down. If it would have been drywall I would have been patching and muttering under my breath about the ability of my movers (aka my husband and brother). My laminate wall has kept the peace, and my labour costs down!
This is an amazing idea!!! Off to Home Depot I go!!! Thanks all of your great ideas!!!
Love, love, love it!!
I like the warmth this adds to your kitchen!
Love it! My husband and I actually used this exact same laminate on a wall in our laundry room last year! We get compliments on it all the time, and it holds up incredibly with our boys running in a out throwing shoes, jackets, hats etc 🙂 can’t beat the price and the look!
Did you do anything to seal that raw edge against the countertop. Since laminate is MDF would it not expand when you wipe that area with a wet sponge?
The edge is slightly behind the concrete due to the rounded countertop edge but yes, we also did the standard clear silicone caulk to finish it off and protect the edges. I should have included that!
xo kb
This is a great idea! Keep us posted on how it holds up. What did you guys do for venting above the stove?
It looks beautiful, wow, great job!
xx Kelly
Sparkles and Shoes
We actually used a ventless hood that has a chimney pipe so it looks like the vented version. It’s kinda like the vent you would get if you went with a microwave/hood.
xo – kb
I LOVE this look. My husband and I just did a wall of barn wood in my craft room. Typically it runs $5 a foot around here but I got it for free!
If you want to see how ours turned out go here:
http://www.flimsypi.com/installing-a-barn-wood-accent-wall/
Maybe just a little bit more work…but worth it!
great idea! looks amazing 🙂
Wow nice kitchen, well done!
Interior&more
http://toutelanuite.blogspot.com/
I am literally dying for your fridge! Do you know how much food you can fit in there?!?! Enough to feed a hungry girl like me! Love it so much!
Rabecca/ http://www.midnightburnout.com/
Katie, I’ve been considering this for one of the bedroom ceilings in our 1949 “renovation ranch” as I like to call it. We’ve considered so many things–cedar planks, tin, drywal (this plaster ceiling has some pretty bad damage to it), and the list goes on. Thoughts on how this would look on a ceiling?
I think it would look fine! Although I must warn you that any time you put a darker color on the ceiling, it will give the illusion of a shorter room and more closed quarters. I always recommend checking out other rooms with dark ceilings just to make sure you like it!
xo – kb
Thanks, Katie! Maybe we can go with a lighter one. There are so many options. I would like to buy a few different colors and see what they would look like.
We did the same thing for the exact same reasons after we bought our first house this past August. 100% no regrets! I just want to put this out there in case anyone might be considering this for their floors. This laminate is holding up to a busy family with four young kids just fine (even in the kitchen). I am conscientious about cleaning up spills as soon as I find them, but I’ve had no worries, warping, or bubbling. It’s quality laminate at a really great price. Wah, when I saw this post I couldn’t believe I was seeing my floors as a kitchen backsplash :0
Great idea and nice job. Having installed several laminate floors I was under the impression that it doesn’t get glued or nailed and needs adequate spacing from walls, etc. because it’s a “floating floor” that expands and contracts. Won’t tacking the planks to the wall studs cause problems in that way?
This is a clever idea to repurpose a widely accessible product and I think it looks cool, but I have a couple concerns in the vein of the earlier comment that asked about MDF expansion. Maybe, like with that comment, Katie addressed these IRL and the particulars didn’t make it into the final post.
The first thing is acclimation: did you let the floor acclimate for a couple days before installing it? Did you leave an expansion gap around the edges/at the corner of the wall? I sell flooring for a living and professional installers will not touch laminate (or engineered hardwood, or bamboo) that has not acclimated properly and the expansion gap is crucial if you want to avoid bowing.
My second issue has to do with moisture. Katie mentioned her vigilance in wiping up spills, but the part where she nails through the product — through the wear layer that can handle splashes –is what worries me. With all the moisture in the air of a typical kitchen, those little holes create access to what is essentially cardboard. It’s thirsty by nature. I’ve heard horror stories of a tiny pinhole leak in a dishwasher completely ruining properly installed laminate floors, so putting a bunch of tiny holes through the product scares me.
On the other hand, nobody will be walking on your walls so perhaps following the floating floor rulebook is not necessary. I hope that the backsplash continues to work out for you.
Would this not bubble and warp under the heat and moisture of a boiling pot of water. I understand flooring is durable, but people don’t place hot items in and around their floors for long periods of time. I worry about the amount of time this will last especially behind the stove.
Well…um…people have drywall behind their stove and that doesn’t melt…so I imagine that it will actually be much more durable than that. And if it does happen to warp then we can always just take it down and tile instead 🙂
xo – kb
Yes! The laminate did acclimate inside for several weeks before we installed it. And yes – we will be sure to let you guys know about how well it holds up in the future.
xo – kb
I am so doing this in my bathroom! I will insta you if I start to fall apart 🙂
YAS!
xo – kb
Your kitchen looks great! I am thinking about using a similar laminate behind my bar. But we have 2 outside corners. What do you think I should use to finish the outside edges?
Maybe a floor transition? That’s a good question! You could probably get a bit of hardwood trim too that would work!
xo – kb
You should double check the building code requirements in your area as typically only non-combustible materials are allowed near/behind a stove. Drywall is considered non-combustible…hence it doesn’t melt. But laminate flooring is very combustible (mdf and plastic) and could be a fire hazard. Building inspectors in my area would never allow this.
We had everything checked out! Nothing was mentioned. I guess this is one of those different areas allow different things.
xo – kb
This looks great! I would love that for our small bathroom. How bad do you see the nails? Did you cover them with anything?
Great job! Thanks for sharing
You really don’t see the nails….but if you want to seal them with a smidge of clear caulk that wouldn’t be a bad idea for a bathroom.
xo – kb
Love this! Did you butt the planks together in your corners or use a trim piece to make it look finished? How about the edges such at the end of a wall where the plank would be exposed, how did you make those look finished?
We built a new home last year but did not add kitchen backsplash due to a tight budget. Have been looking for unique, stylish & affordable ideas for a backsplash without going the tile route, this totally fits the bill!
Thank you for sharing this, its awesome!
Our corners ran into each other and then they also ran into the wall. The inside corner where they ran into each other, I just chose one side to overlap the other….the same as tile would. It’s a straight cut on the miter saw and one side is over the other.
xo – kb
I love this! Am longing for wood backsplash myself, in my kitchen, but where’d like to paint it white. Could this be painted? If not, any ideas? Thanks for your time! Cabell
Hmm…probably not for a wipeable surface. If it was just an accent wall…yes, but otherwise I would just go for white laminate.
xo – kb
Love your look!! I am wondering how you like your faucet?! Considering one but wonder how the reach is? Can you swirl around the bottom of your sink? Thanks!
To be perfectly honest, I have washed two dishes in there. I guess I never thought to ask a guest that question! :/
xo – kb
When you’re done with it on your floors, then you can put it on a wall!!
We are considering doing this ourselves but would like to know how has the laminate been handling the heat from the stove?
Also, How has it held up overall?
Thanks
We actually haven’t used the stove that much. It has been maybe a handful of times that we have cooked something down here…and it’s been fine so far.
xo – kb
i’m in love with this idea. so easy, and looks great!
You have done a beautiful job! I’ve been considering doing a wall behind toilet and sink in a powder room this way. Your explanation is so helpful. Thanks for this post!
I would love to do this but my contractor says if there is water spillage it will ruin the backsplash have u found this problem ?
We have not had water spillage at all…so I have not had this problem…but in general, I don’t think I’ve EVER had that much water on any of my countertops. It’s funny to me to consider because we caulked the bottom (where the backsplash meets the countertop) and the first seam is five inches higher than that….so that would have to be a whole lot of water 🙂
xo – kb
This is awesome, I’ve been searching for ideas like this and couldn’t find it, so glad I did. I’m doing my kitchen backsplash on the weekend. Thanks for sharing
Did you have to fill the nail holes after tacking them on with a brad nailer ? Great idea for my kitchen. Reno
Hey thanks for sharing this wonderful set of ideas and am going to implement this and see. the results.
How’s it holding up around heat sources? I’m thinking about something similar in my kitchen around my cooktop.
We have had no issues so far! I wipe it down with clorox wipes and it works great!
xo – kb
Hi Katie, we actually did this about 10 years ago and it is still holding up just fine no issues at all, though ours is behind our cooker, it gets lots of condensation on it never been an issue..
From jac in the uk
Such a good review of this concept! Thank you for speaking up!
xo – kb