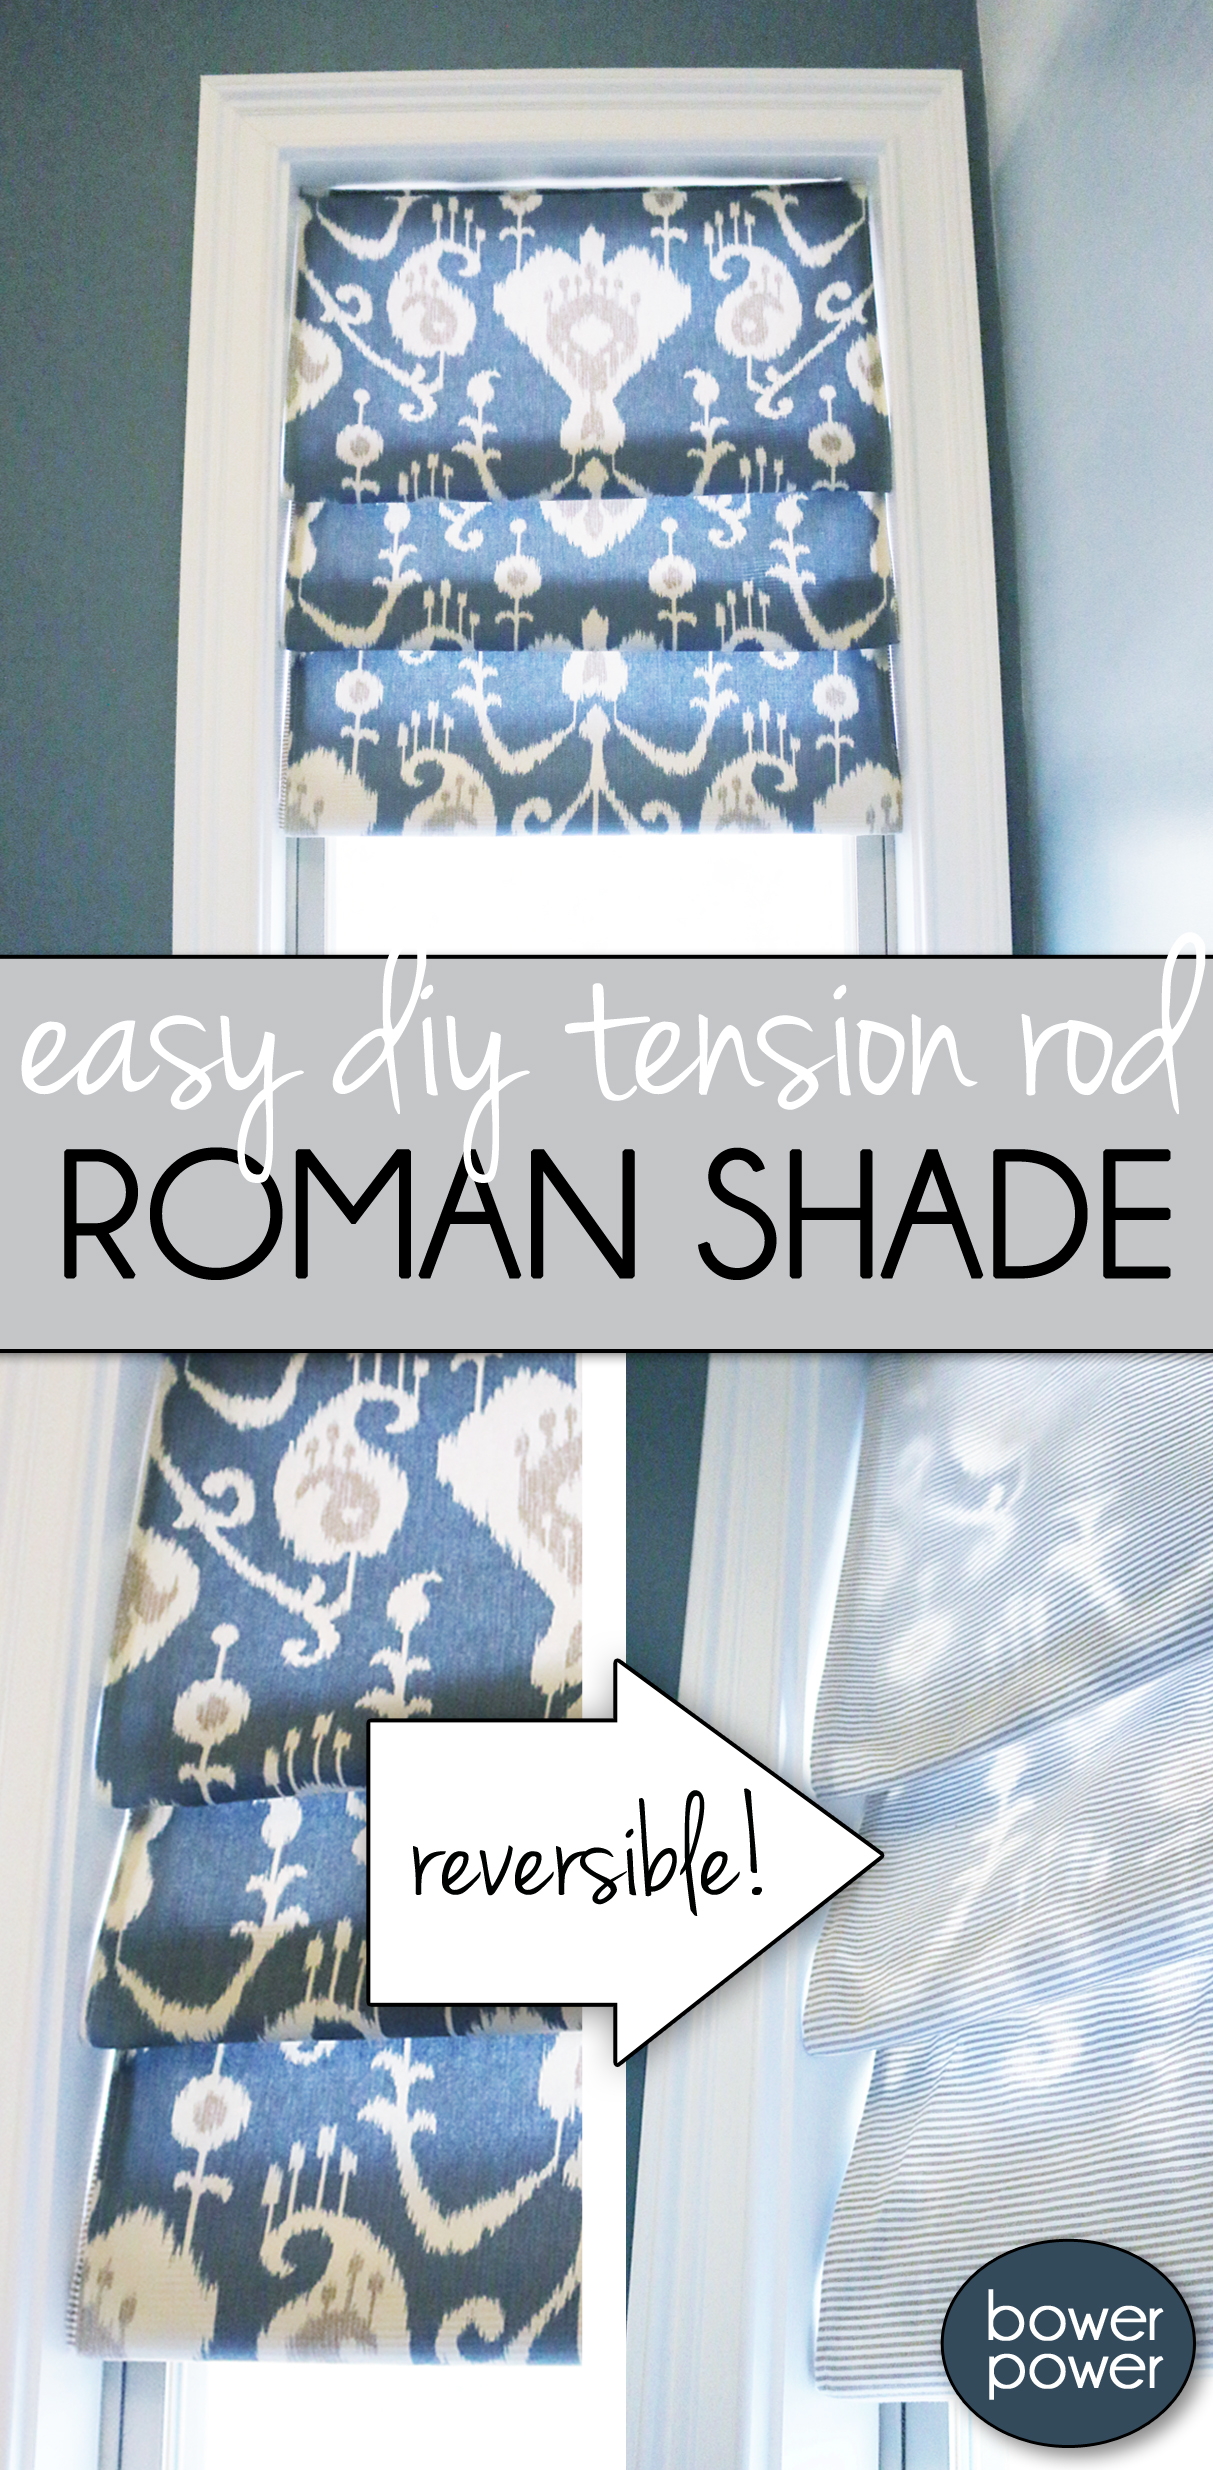
This is the easiest window shade ever and it will change your life.
Like all of a sudden you will be ten pounds lighter, your bucket list will be nearly complete and you will never need antiperspirant again. It’s true. Believe what you read here. All of it.
So here is the tutorial so that you can make this at home. My windows are a bit bigger than normal size windows so this tutorial will not have measurements – just know that you have to have basic sewing skills and an iron is helpful and you also need four tension rods that fit your window width. I got mine at Amazon – I paid $3 each.
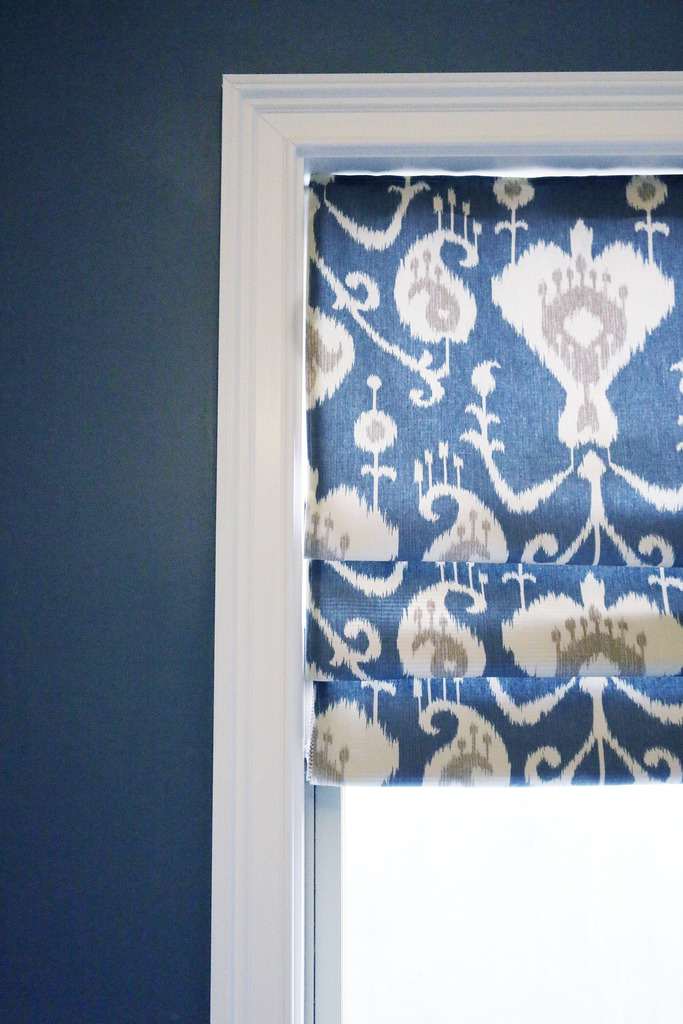
Okay so basically you need two lengths of fabric. They will each be…
window length + a couple inches to hem bottom X window width + a couple inches to hem sides
Cute kid is not optional. You must have cutie-patootie present for moral support 🙂
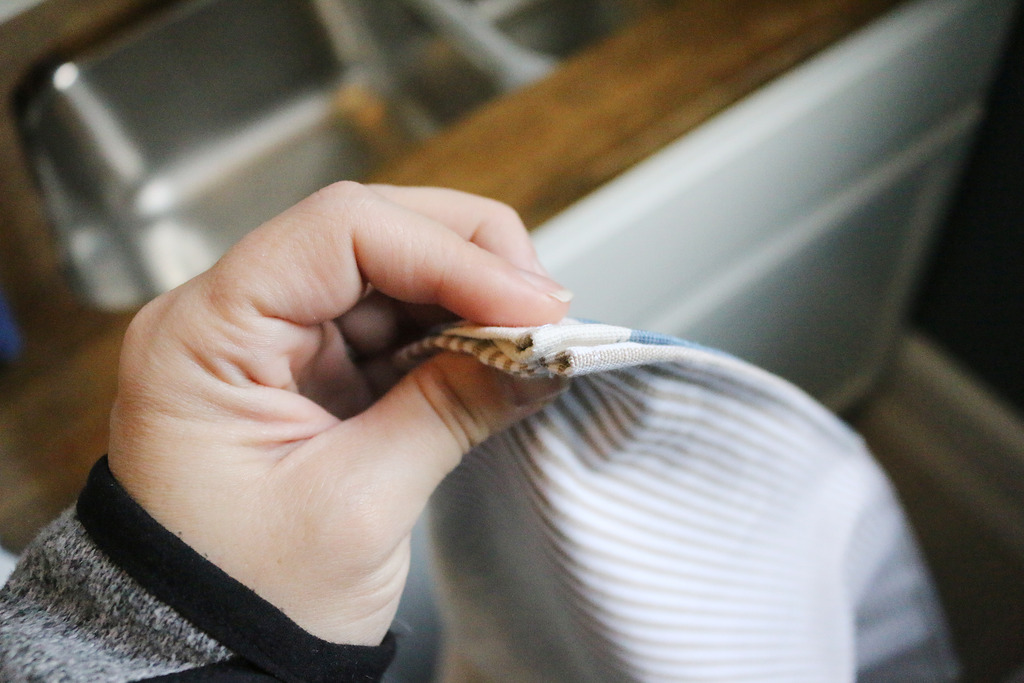
Hem all the sides and make sure they are both the same length and width.
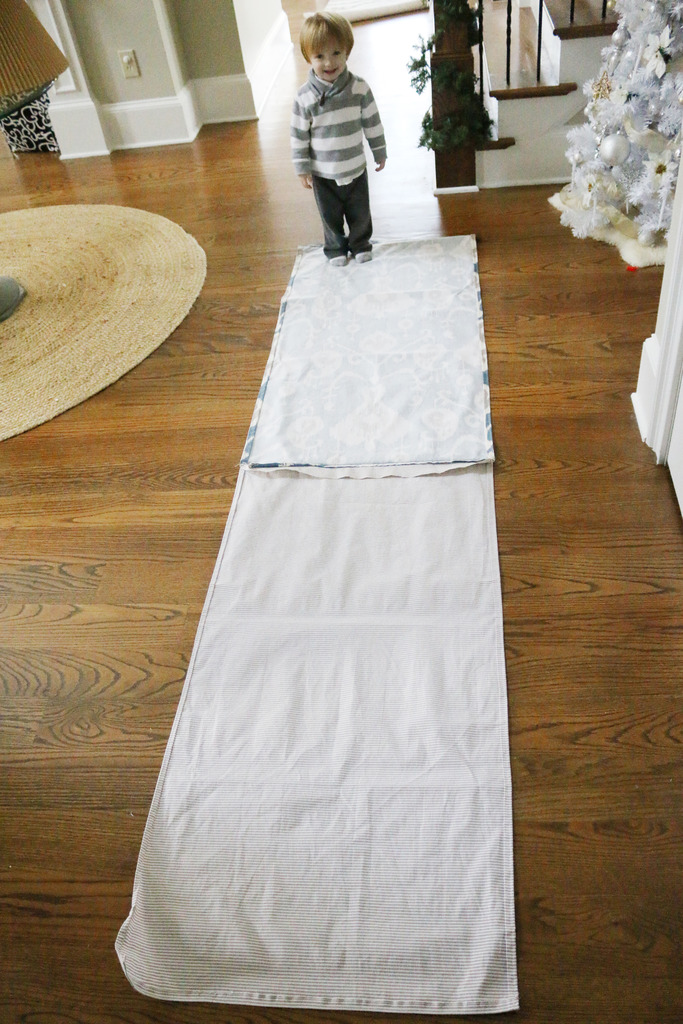
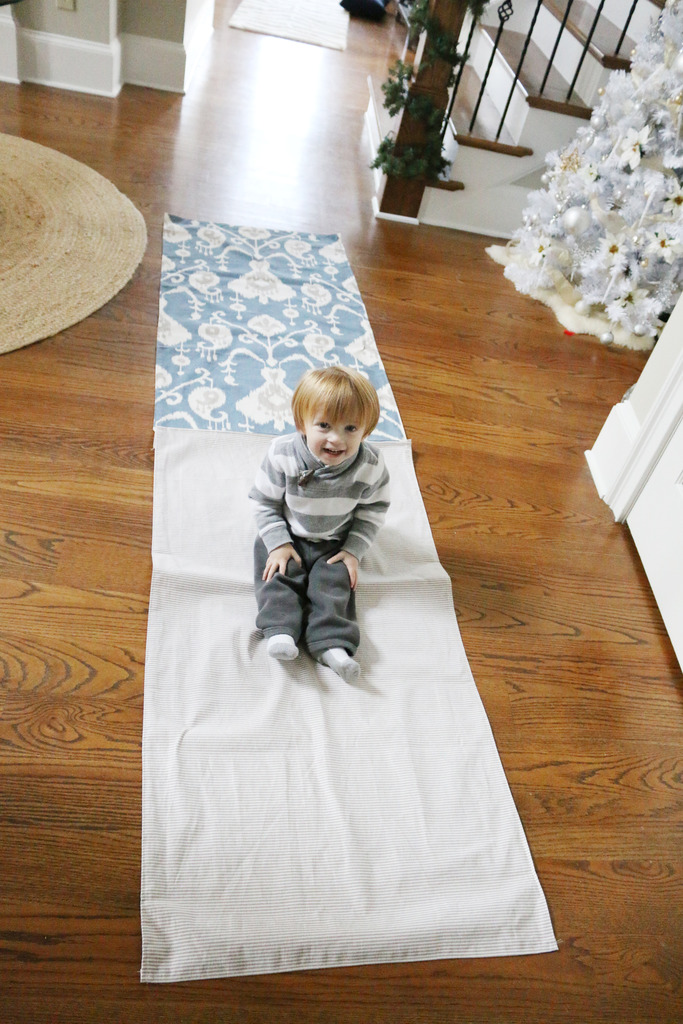
The top hems will be sandwiched together and sewed.
The entire thing is like two runners that are sewed together on one end.
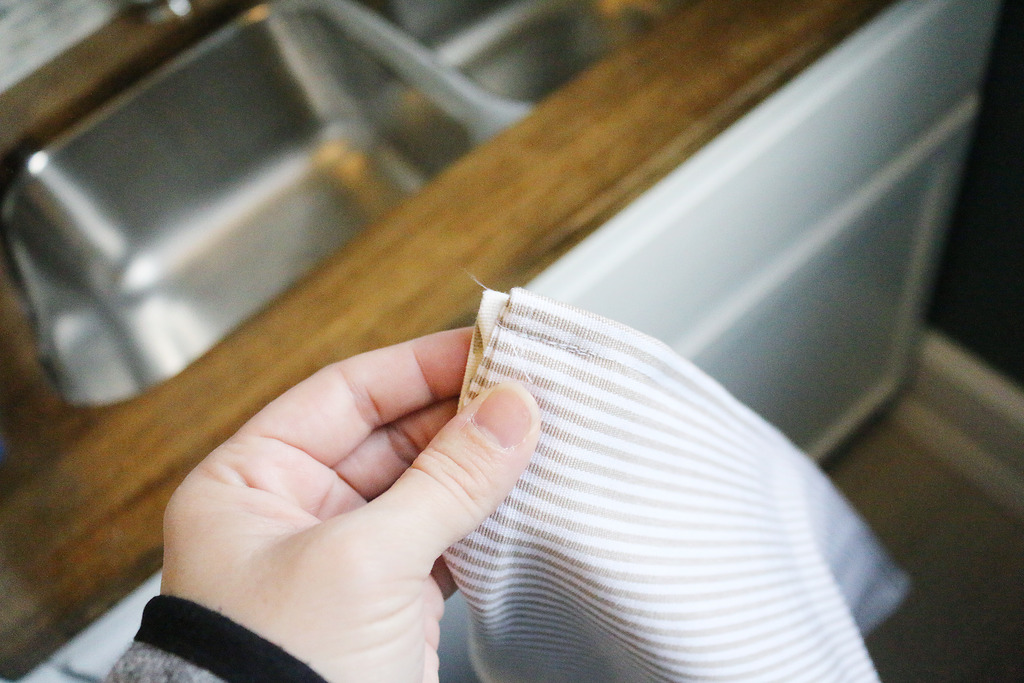
Then you put your tension rod at the very top of the window and loop the fabric over the top.
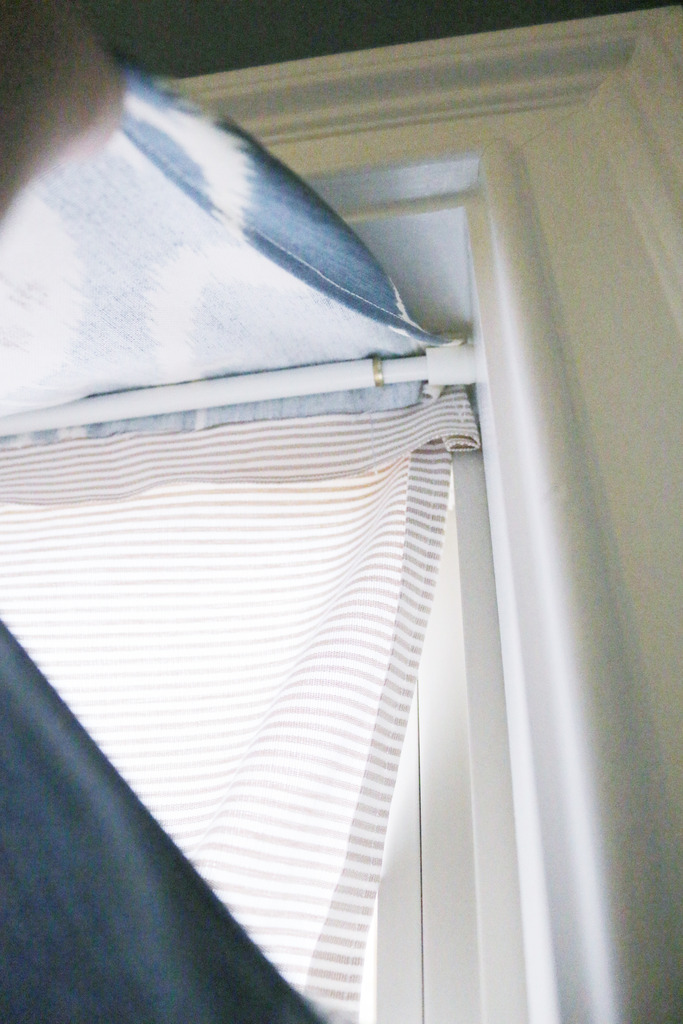
You can see how my fabric was a little bit short. I was a little hem happy. It’s kinda like being tweeze-happy – just don’t end up with a two inch curtain, mmkay?!
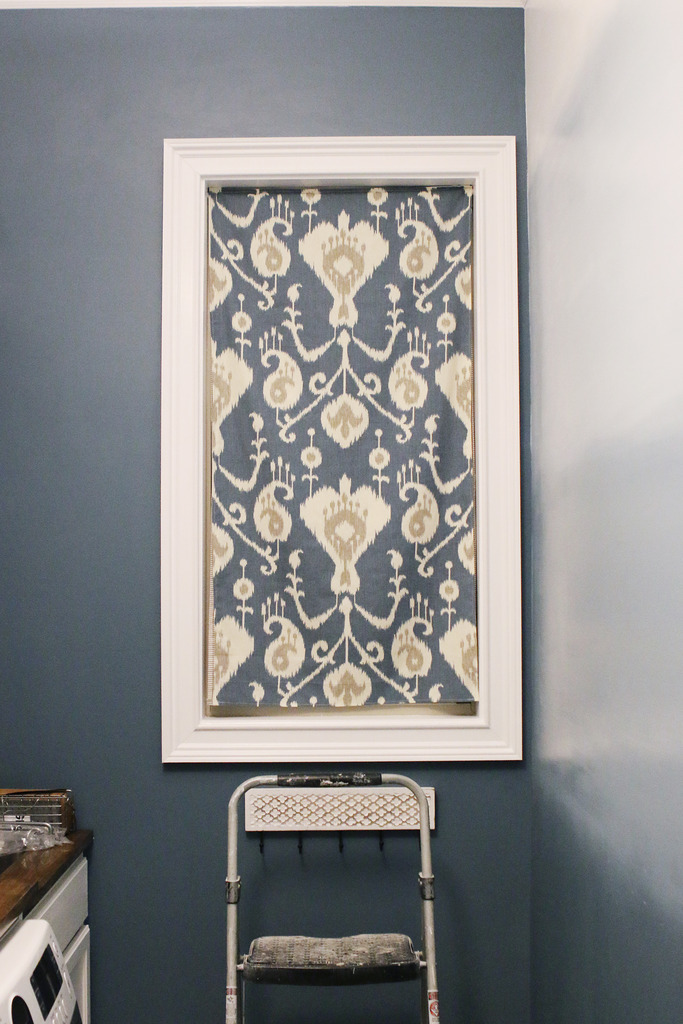
In front of the curtain, you will want to put your remaining tension rods. I spaced mine about six inches apart. The first one is about ten inches from the top.
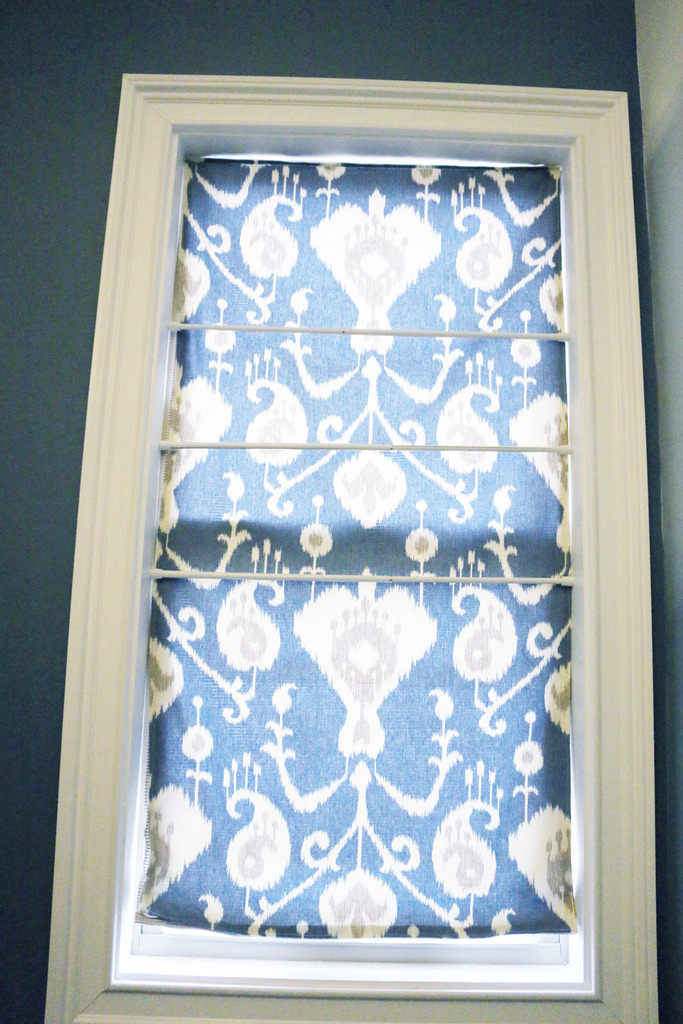
Then you take both layers of fabric and loop them over the first curtain rod. Then do it again for the second and the third.
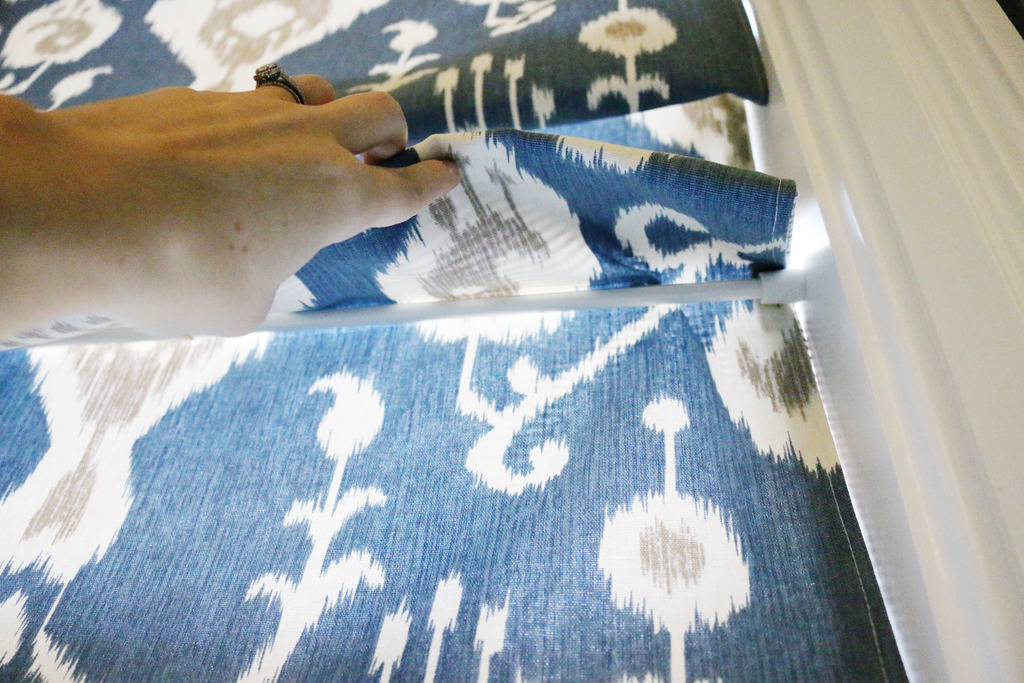
The bottom will be just looped enough to cover that bottom hem.
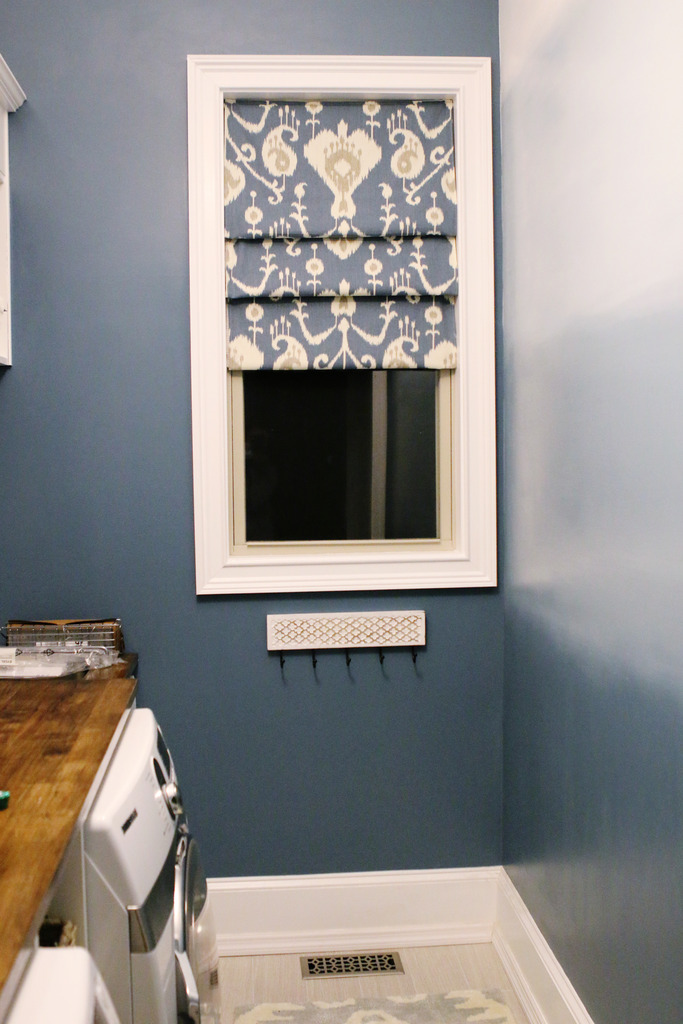
Bonus! This shade is reversible! Boom! Exploding internet!
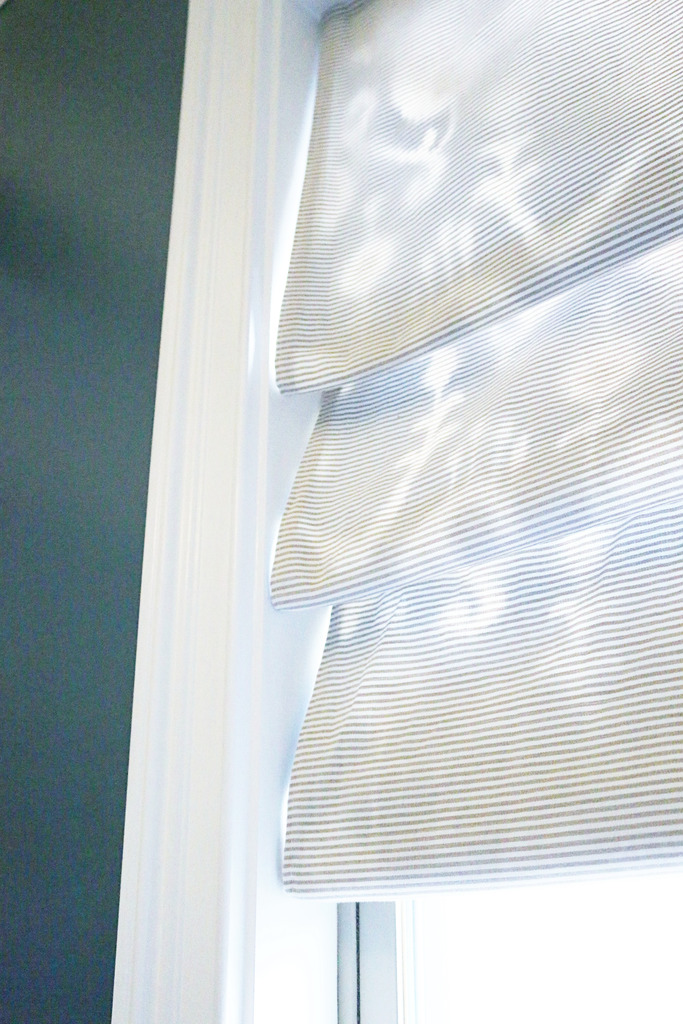
This room stinks to take photos of during the day. It’s just awful. Ruins my life. If I had done the other fabric in something other than this striped ticking, it would be more dramatic than a Kardashian reunion show.
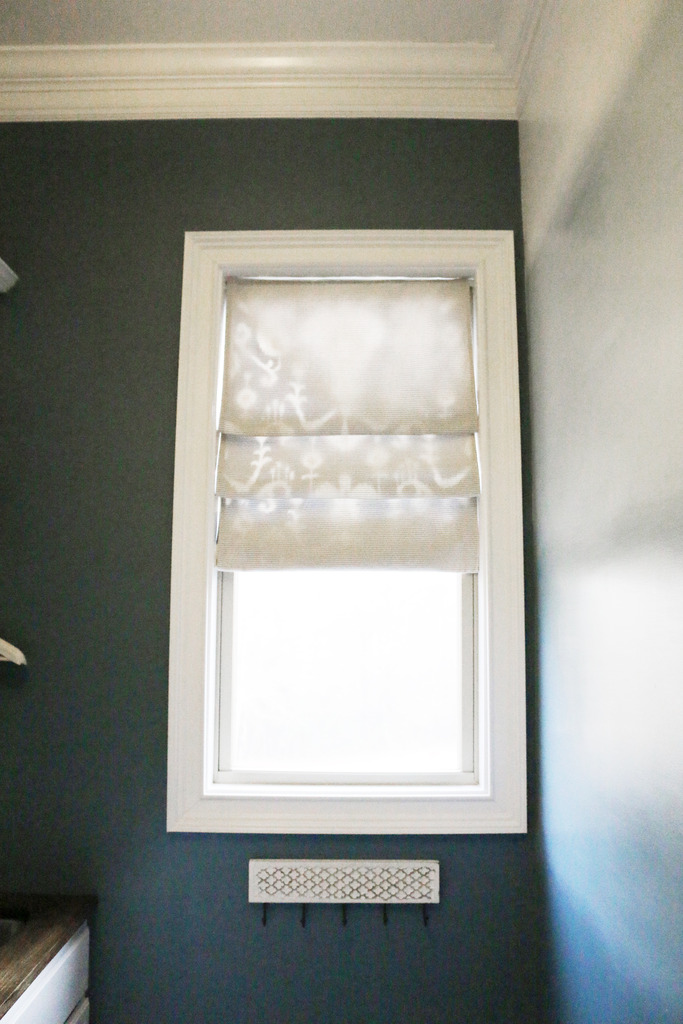
Hope you guys have a happy day and good luck making your own window shade!
p.s. Here is the link to my ikat fabric. It’s called Magnolia Home Java Ikat Yacht Blue.
*This post contains affiliate links.
i am confused. How did you hold them on the rod at the top? Sorry..being dense. You hang them over and attach them so how?!
Katie I’m OBSESSED with this ikat fabric. Did I miss a source somewhere? Does it have a name? Thanks. 🙂
Thank you thank you!
I think even I can do it!!
I’ve been waiting for this tutorial so I could find out the name of the fabric, but you didn’t say. Do you happen to know? It would match my kitchen, I love it! Haven’t seen a tutorial like this one for a faux shade, good idea using the tension rods!
It’s just held in place by draping it over and then looping…it’s not attached to wood or anything so that you can launder it later.
xo – kb
oops! Sorry! I will put in the post as well 🙂
Here is the link.
xo – kb
Here you go!
xo – kb
Mind. Blown. I totally need to do this in my kitchen window. 😀
Smart! I love this idea.
Love it! There’s so many tutorials for roman shades and they all involve cutting apart apart blinds or sewing precisely in 1000 spots. Thank you! Also, you’re a genius!
VERY CLEVER! Love the fabric and really cute idea for a room that doesn’t need adjustment in shade height! My mom is an angel and will custom make working roman shades for me out of fabric I choose. She may utter a few, ok many, curse words throughout (it is HARD!), but she does an awesome job and I’m lucky she’s willing! My home office has 2 shades made by her and I’m happy I can adjust them on long days in there when the sun moves about.
Great job on the laundry room!
Will do, thanks! Definitely been on my to do list for too long. And your home Depot ad came up in my fb feed today You rock!
So easy! And I love the antic you chose!
Looks great, and I love the fabric! It would be perfect for my dining room chairs! I’m now stalking it on the website…do you think that would hold up on occasional-use chairs?
I wouldn’t quite call that reversible when you can see right through it with the sunlight, maybe put some lining between the two different fabrics. Just a thought to make this more useful to someone else who would actually want to be able to reverse it.
True. I would definitely line it if you wanted to use the lighter side.
xo – kb
It’s not as thick as other upholstery fabric but if it was very occasionally used, then yes.
xo – kb
Oh you are so lucky!
xo – kb
haha! Consider me blushing 🙂
xo – kb
You have made this easy enough that I will actually do this. Theoretically I do know how to sew … put in set in sleeves, sew a zipper, I try to limit my tasks to straight seams. I’m big on easy peasy ideas. This is easy peasy to the max … or L. J.
How about for the back of the chair instead of the seat? Get the look without the wear…
bhahaha!
xo – kb
Yes – it would definitely be great if you were doing something like this.
xo – kb
Work smarter, not harder!! Love it! If you have a huge window that won’t support the weight of a tension rod you can beef it up and use a shower curtain rod: http://megandmartinmen.blogspot.com/2015/10/week-5-rooms-1-and-2.html
Thank you!! I have nothing to do with this right now but I’m pretty sure I should just buy a few yards for a later project. Haha
Thank you!!
Such a great idea! Love Roman shades, but with 3 kids & 3 cats could never stomach idea of non washable window treatments. This is wonderful. Unfortunately, it would require figuring out how to add trim to my windows for tension rods to lean on. Le sigh…
I’ve read this three times because you make me giggle. Great post. Cute shade! Thanks girl!
I have a 34″ x 34″ bathroom window that I want to do this to, but the window will stay covered entirely (not looking like the shade is raised, as yours is). But I’m not sure how much fabric I need for the length to accomplish this. Thoughts?
So you want the roman shade “loops” but for the entire window to be covered correct? I would probably do roughly 2-3x the length of the window per side in fabric. That is a lot of fabric but it should be enough to be fully covered. If you decide another route, may I suggest doing a regular shade like the one I did but using a window frosting film to still give you privacy!
xo – kb
How do you raise and lower the shades. I will want to do this in the morning and at night.
I must be dense!
Thanks in advance
Well, you can literally just pull the bottom of the panels and they will go down…and then to make them go up, just loop them over the tension rods again.
xo – kb
did you use regular weight fabric, or upholstery fabric? any lining fabric? so, just the two pieces , one in blue design, and other in tan stripe? thanks, Nancy
They are both heavy weight fabric but I don’t think they are as heavy as some upholstery weight fabric. And no lining…just the two fabrics.
xo – kb
Gonna make this for my nieces Boston Apartment – LOVE IT!!
But if you would clarify for me….
~BOTH pieces (front and back) are first independently hemmed on all four sides – THEN you hem them together at the top only? Which would mean they are still two pieces of fabric that are not sewn together except for at the top only?
Just checking!!
If so…I’m thinking once all is looped and in place, I’ll tack them together at each tension rod as well as at the bottom just so they stay together….
She has privacy blinds in the windows that she’ll use as well as this – which we’ll use as a valance.
Thanks!!
YES. You got it. You can definitely loop it and tack together.
xo – kb
looks great! This shade is meant to be stationery — does not go up and down, correct?
Correct. Stationery….but you can adjust the tension rods if you want to make it longer or shorter.
xo – kb
Love this idea!
Love your humor even more!
I got a good laugh at 6 am trying to avoid getting up!
Thanks for sharing!
Love your humor!!! And I just happen to have several tension rods laying around, plus spare fabric, plus a cute kid to assist. Pretty sure this tutorial is going down today! Thanks for sharing.
Yay! Good luck and let me know if you do tackle it by tagging your finished product on Instagram with @bowerpowerblog….I’d love to see it!
xo – kb
Wow. I tried toman shades about 40 yesrs ago. I spent a fortune on hardware and grommets and tapes. It was awful and I never got them on the windows. Therefore I almost did not read this post. Perfect. Somple. Cheap. I will use white for my reverse side. Thank you.
Clever/easy/not too much sewing manipulation going on here. PLUS it removes easily for laundering. And cheap – did I mention cheap??? But it doesn’t look it.
College kids who want style in their rooms: heads up!
I can’t wait to try this. Thanks.
I kinda love the Ikat showing through the ticking, though.
It looks to me that you can’t open and close the blinds. Is that correct? Do they remain as is?
Actually since nothing is sewn in place, you really could pull it out and make it ‘closed’ or raise the tension rods higher to make it ‘open’….it’s not as easy as it would be if you had a cord….but it’s not necessarily hard either.
xo – kb
Love it!!! Thanks for sharing. It looks great. Nice job!
What does it look like from the back side? Do the tension rods show? I just bought the rods and am ready to buy my fabric but down want the rods to show.
Nope the tension rods do not show from the backside.
xo – kb
Katie,
Forgive me this is my first attempt. I am a little confused about how you pull it up and down and how to fit the lower tensions rods. I feel like there are lots of steps missing.
It loops. So it can be manually adjusted by moving the tension rods up and down but it’s not fixed…and there is no string. It just loops the top fabric over and then behind the first curtain rod….extend it down…then loop it over and behind the second one…etc. Am I explaining it clearly?
xo – kb
HI Katie can be done for a ovol window???
I don’t know how but I’m sure someone could figure it out 🙂
xo – kb
I’ve been wanting to do Roman shades for sooo long but to purchase them is incredibly expensive. And the mini blind thing is very cute yet very confusing and hard. This tutorial is so awesome! Easy Peasy! Thanks so much! I’m definitely doing these today!!!! How clever. So thankful and happy I just happened to come across it!
Katie
I had picked out this same fabric in the grey, they call it midnight. I wasn’t sure what I wanted to do with my one kitchen window. I knew I wanted it simple but tailored. So I went to pinterest, and boom there it was ! Just what I was looking for and even in the same fabric I had selected. How easy was that. Thank you so very much for making my life a little easier !
yay!!! So happy! Share a pic if you get it done 🙂
xo – kb
I made these today!!! They are beautiful and so simple to make!!! Thank you for sharing this idea!!!
I’d love to see them if you want to tag me on Instagram pics! I’m @bowerpowerblog 🙂
xo – kb
You could probably use fabric glue at the top tension rod after fabric looped around it. I have to do an outside mount over blinds. How would you suggest I do that . LOVE what you did!
I have two obscenely wide picture windows that I’m going to use this genius trick to cover! But I’m going to make an adjustment first.
I’m going to add two vertical 2 x 4s to create 3 separate long window “panes” and paint them white to match the trim to look built in. I can then make 3 narrow roman shades instead of one giant shade. This way I can adjust them independently to account for the angle the sun is coming into the rooms.
I need to cover these windows to protect my flooring, and this will allow me do that without blocking out all of the light and view all of the time. YOU’VE BLOWN MY MIND. Thank you Katie!
Get outa here! Kitchen windows will be done tmrw!!!
That sounds amazing Shannon! Clever you.
Girl you are Genius…with a capital “G”! Love this idea!
I just love this idea! Definitely gonna do for my kitchen over-the-sink-window, that sometimes is too glarely certain times of the day.
One question—what about the bottom of this ; is that sewn together along that edge? Thanks! Linda
It is basically a large rectangle that has all the edges hemmed but it’s not sewn together to form a circle.
xo – kb
Wow! Thank you for this idea!