Y’all ready to jump back into some heavy DIY? How about how to install cement board for tile?
Anyone?
You don’t actually have to lift a finger….err….maybe one just to scroll but it’s relatively low energy….
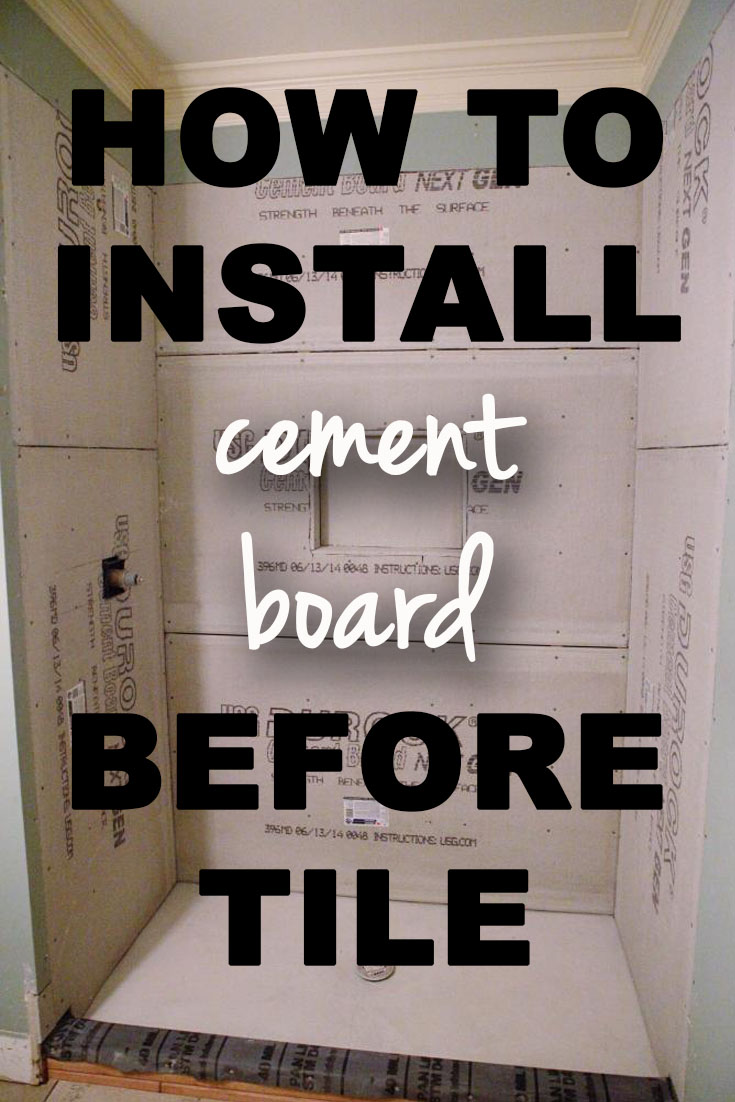
I’ll take that silence as a resounding YES to the DIY post. I am sharing the journey that we took to get our bathroom in guest-ready shape and let me tell ya…this was probably the hardest reno we have done so far in terms of ‘what-the-heck-are-we-doing’. That’s right. Majority of the time we were googling our pants off (that sounds weird) so that we could get the answers to our DIY questions because this was the first time we were tackling a bathroom and messing with the really functional parts of it. Like most of blogville, our DIY projects are mainly cosmetic in the past. There are very few true DIY bloggers out there…people that tackle everything from electrical to drywall to flooring. I mean…do you know of any? Not just designers…but tried and true hands-dirty bloggers? People…I need names because I only have a couple of them in my reader and I need more. I would eat that stuff UP.
Anyhoo…I’m saying all that because this was a huge project for us. We have never installed a shower and we were under a huge time crunch. You read in the last post that we hired a plumber to move the drain (confident now that we could have DIYed that) and move the controls (also 85% sure that this isn’t as hard as we thought after watching him work) and then install the shower pan (totally could have tackled this too although I am glad we watched for an example). So overall…hiring out was a learning experience and one that we are thankful to document because now we feel ready if another bathroom needs fixing. Jeremy also moved some studs around and now we have a niche roughed out in the far wall.
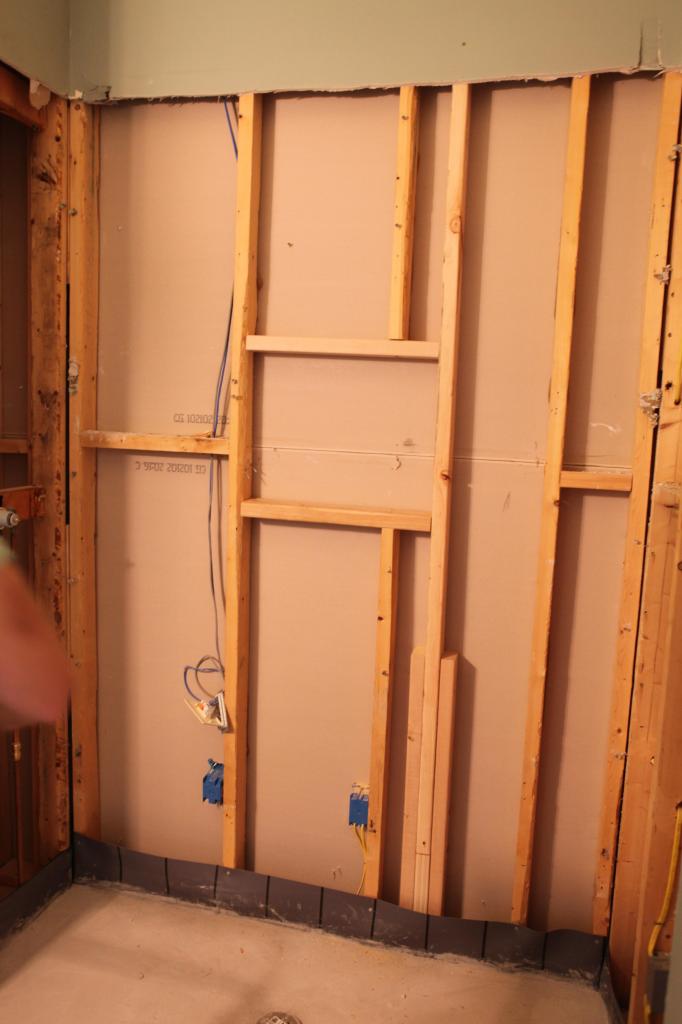
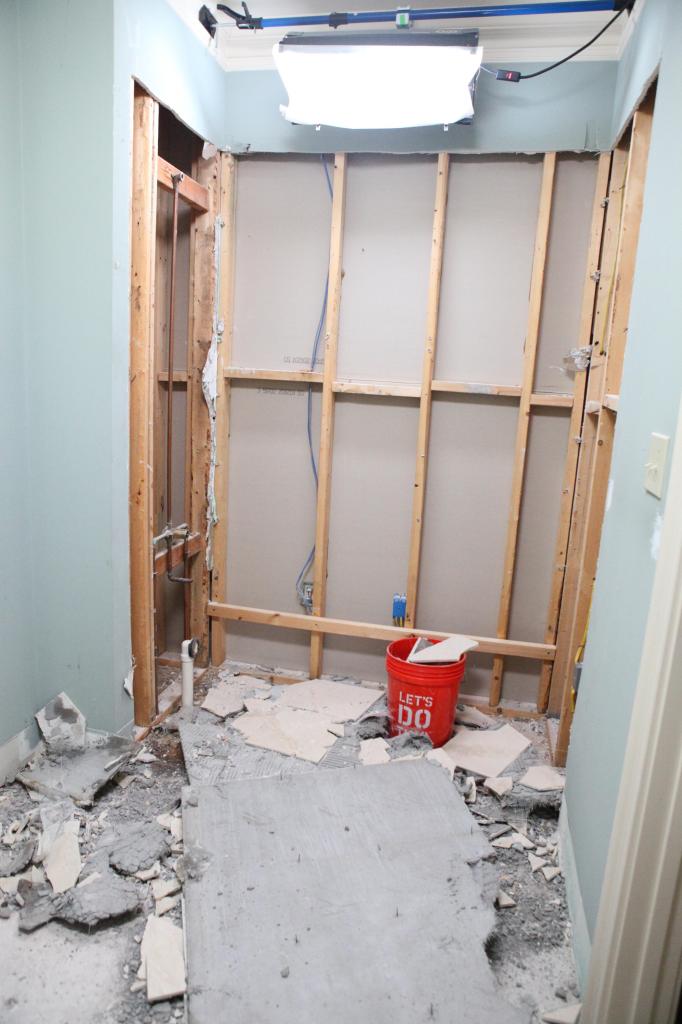
I’m just thankful it doesn’t look like this still….because that would have been a possibility if the deadline wasn’t breathing down our necks….
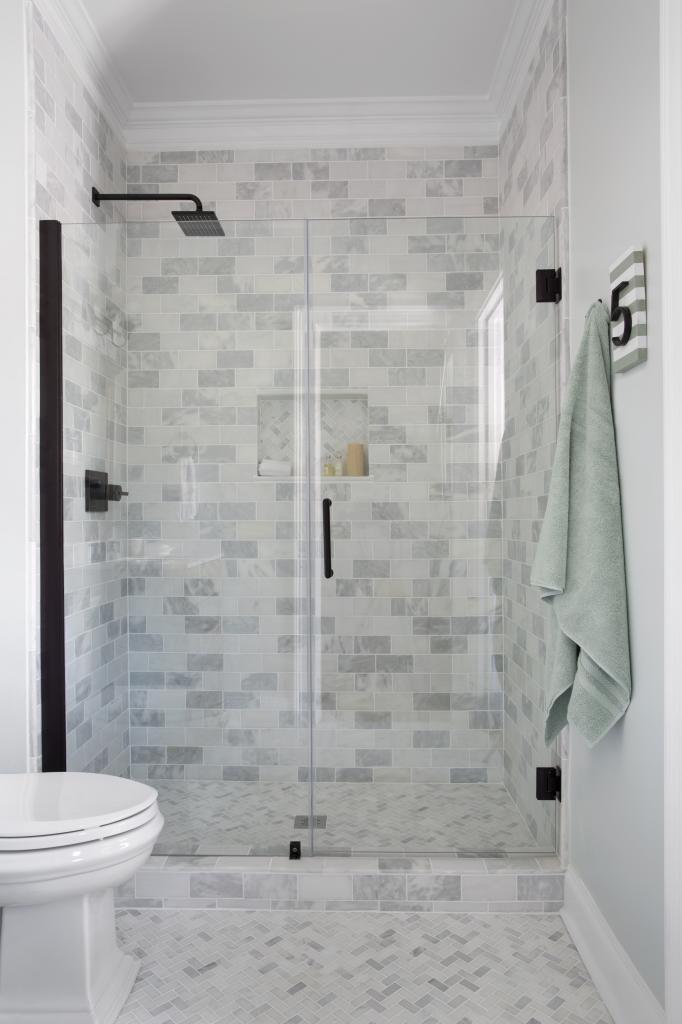
And just for those of you getting itchy looking at all that dust….this is what it ended up looking like…..go ahead and breathe in a sigh of relief now…
Well, today we are gonna talk about boards….cement boards to be precise. This might make you fall asleep….you’ll be that BOARD. sorry I had to 🙂
Under any tile surface, there needs to be cement boards or backer boards. There are different types (Durock & HardiBacker are the main two types) and we decided on HardiBacker for the floor (because it is thinner and we would prefer to not have a huge step from the carpeted bedroom to this tile floor) and then Durock for the shower (it matched up the drywall and although heavy, it is less expensive).
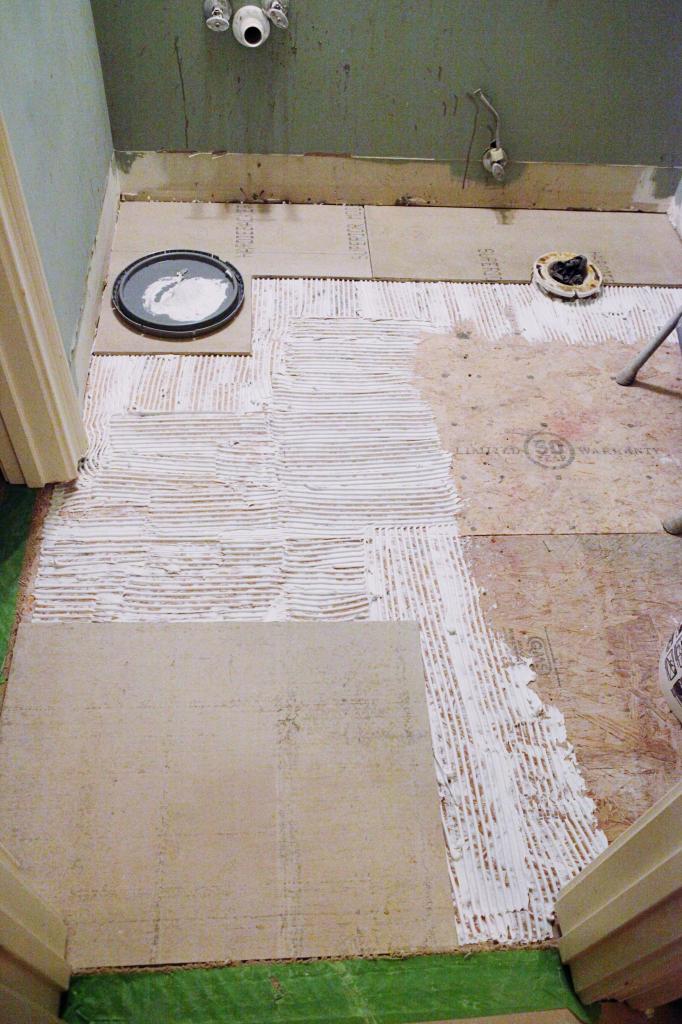
So this is our process for prepping the floor. We first tape off any doorways and carpeting because we don’t wanna ruin it. And then we have to cut cement boards to fit the space. We had a bunch of random leftover pieces of HardiBacker and we basically created this giant jigsaw so that we had the entire floor covered and didn’t have lots of waste leftover. Also…this saved us some moolah which was really helpful.
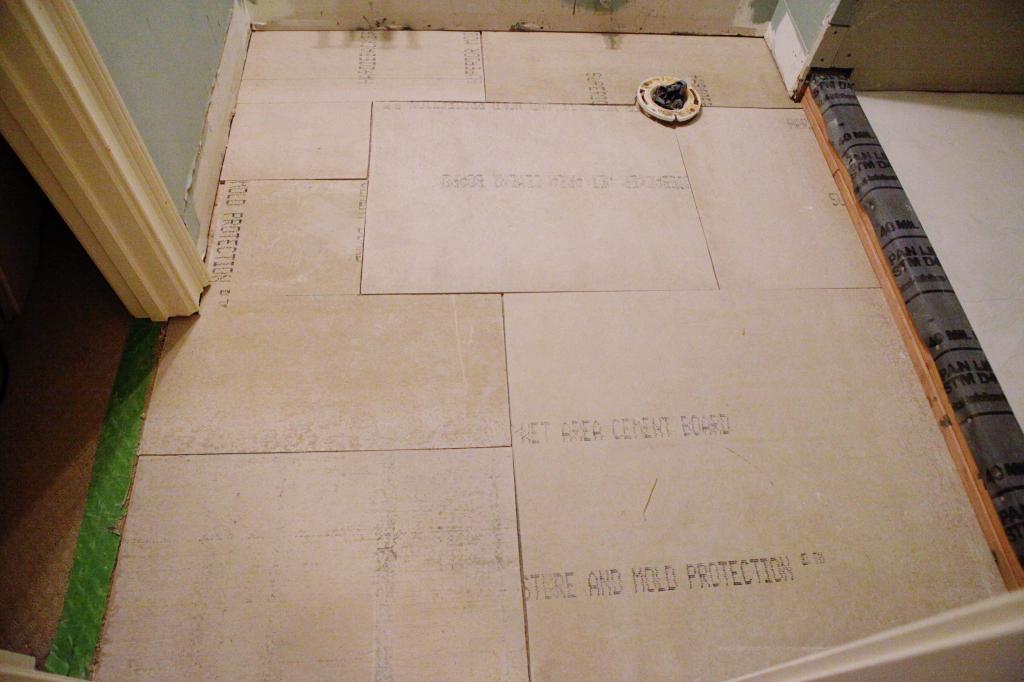
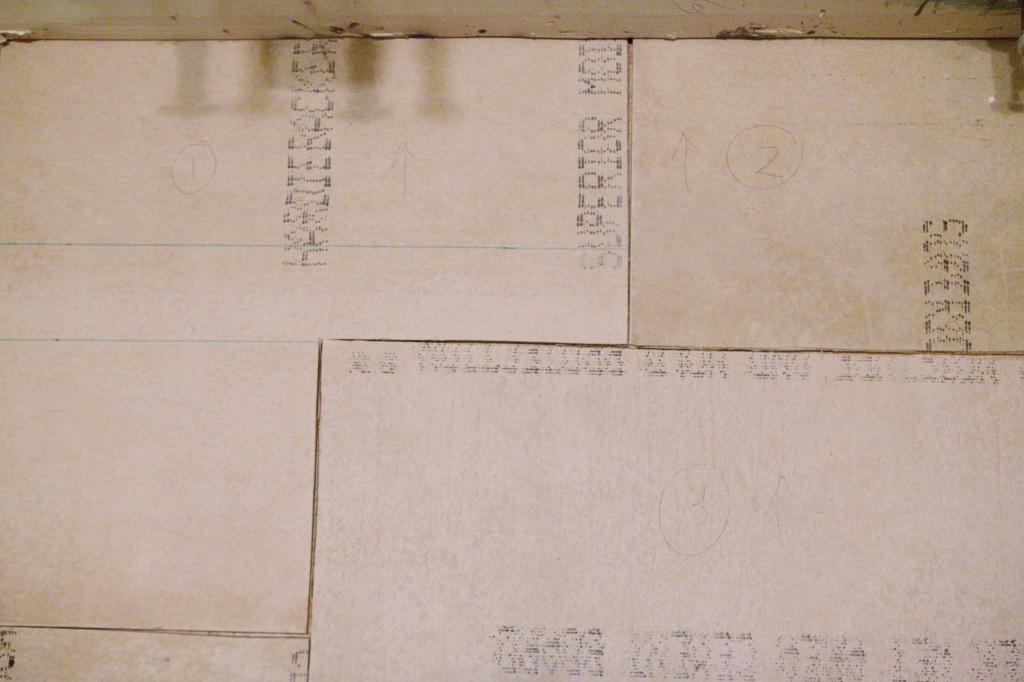
After Jeremy had them all cut and ready, it was time to pull them all back up and put down some adhesive. But before we did that, I labeled each jigsaw piece with a number and an arrow to show exactly the direction it should go for the best fit. Jeremy also bounced around on the subfloor to see if there was any squeaks that needed to be put down.
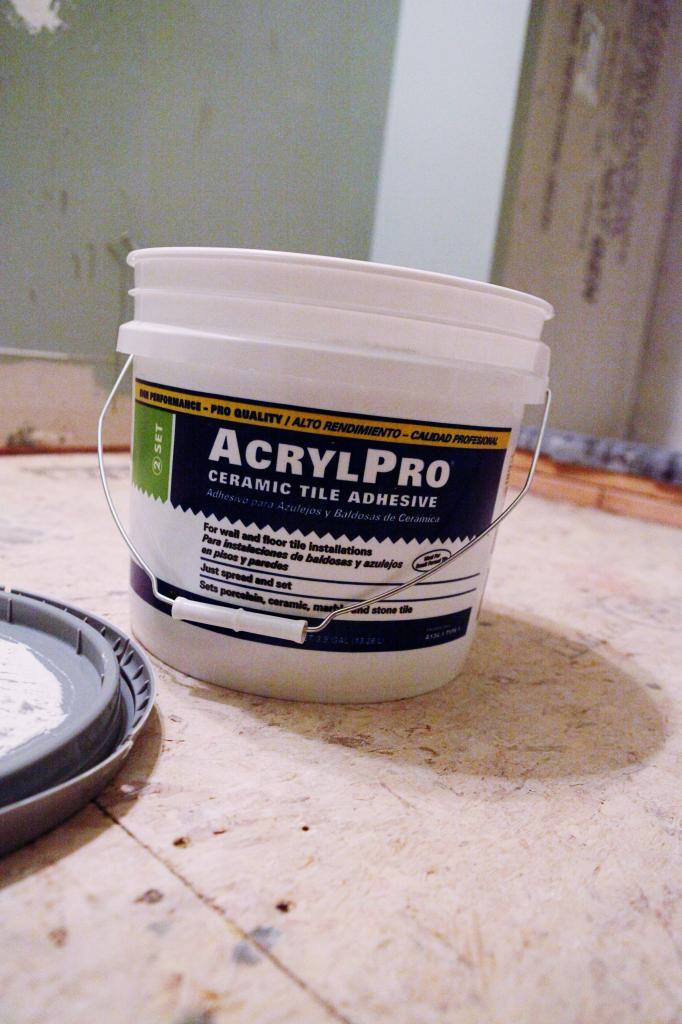
Speaking of adhesive….this is what we used. We already had some leftover from a previous tile project so that made it simple. This is an adhesive called mastic and it shouldn’t be used for tilling a shower but is great for things like this no-moisture floor.
You just spread it on and then using a notched trowel, you can create some mad grooves for maximum adhesion.
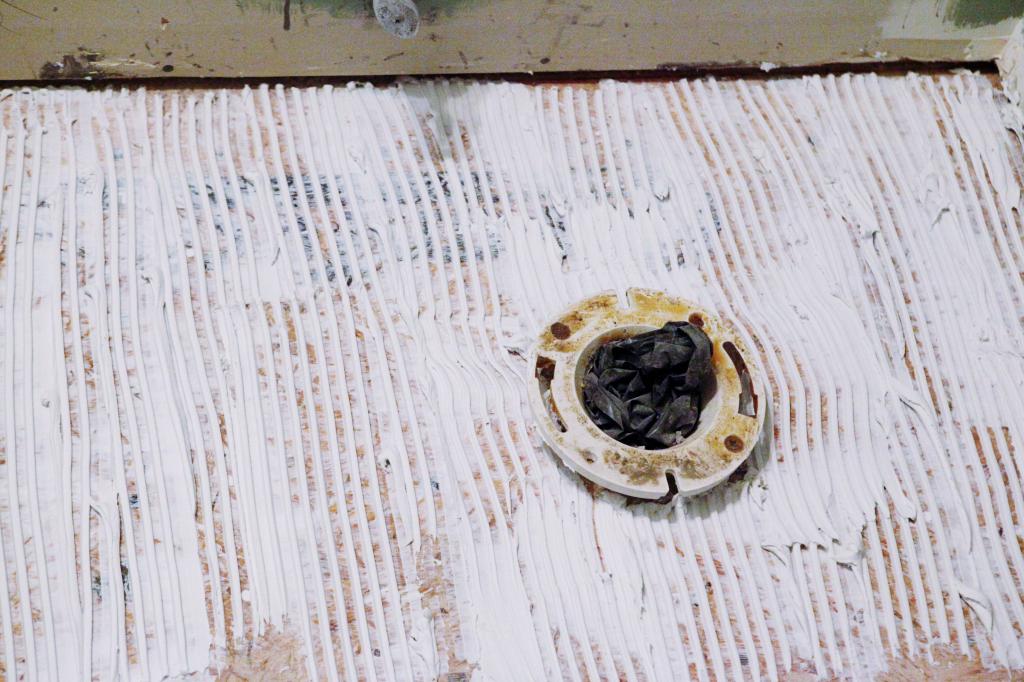
Smear, groove, board. Repeat one million times.
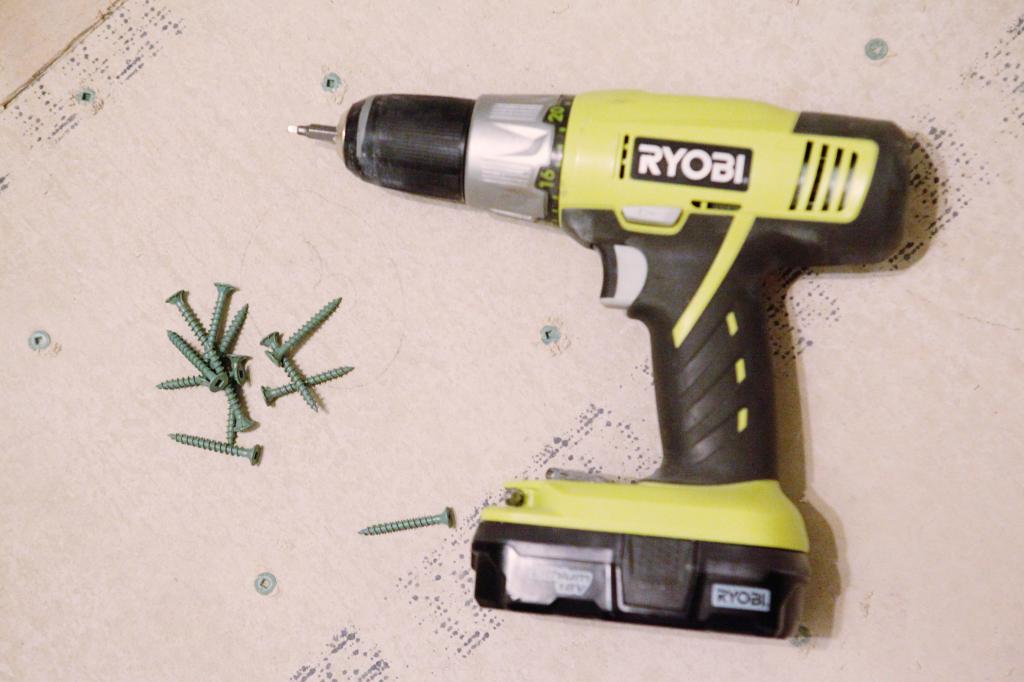
Once all the boards are glued to the floor, you want to set them with concrete board screws. They sell these in the tile section. You want them spaced evenly (about 4-6 inches apart for the best most secure floor). You will get a blister on your thumb from doing all screwing….be warned.
All DONE!
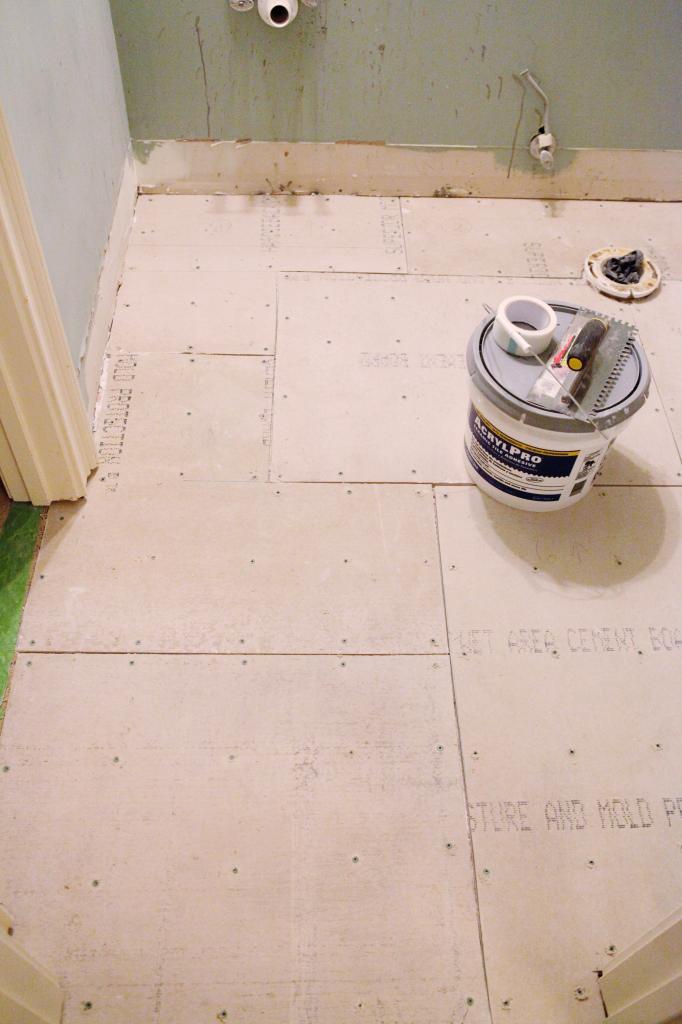
Yeah right.
Next we had to fill the cracks. (mandatory butt joke here). I’m gonna walk you through this because it is super easy.
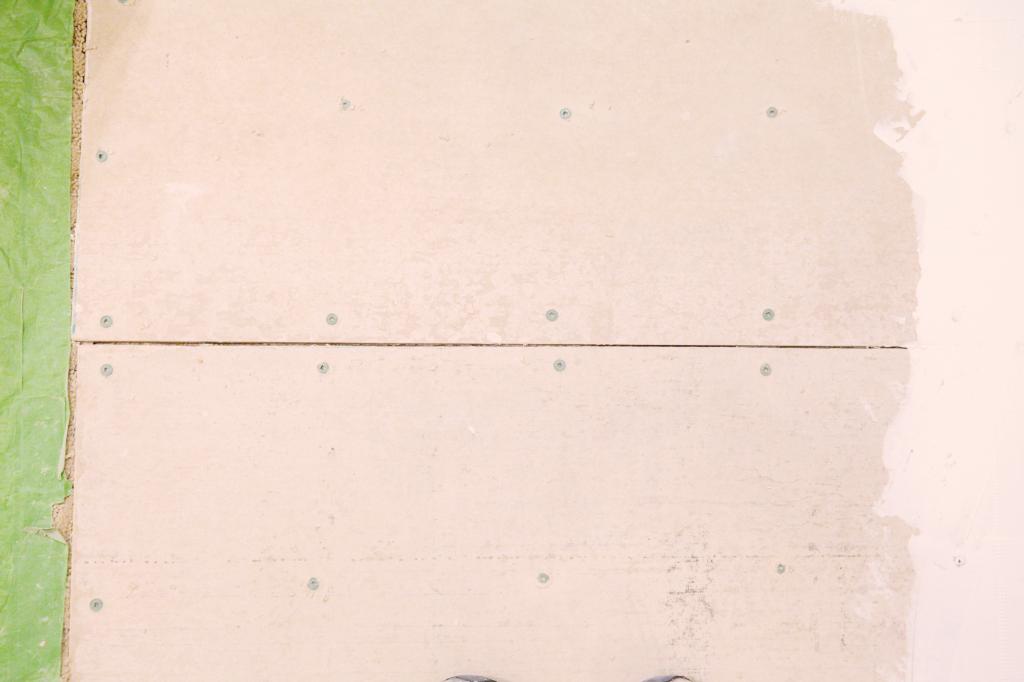
First you need a trowel. It’s best if it has a flat edge. Smear your crack with your thin set. (seriously, am I the only one laughing?)
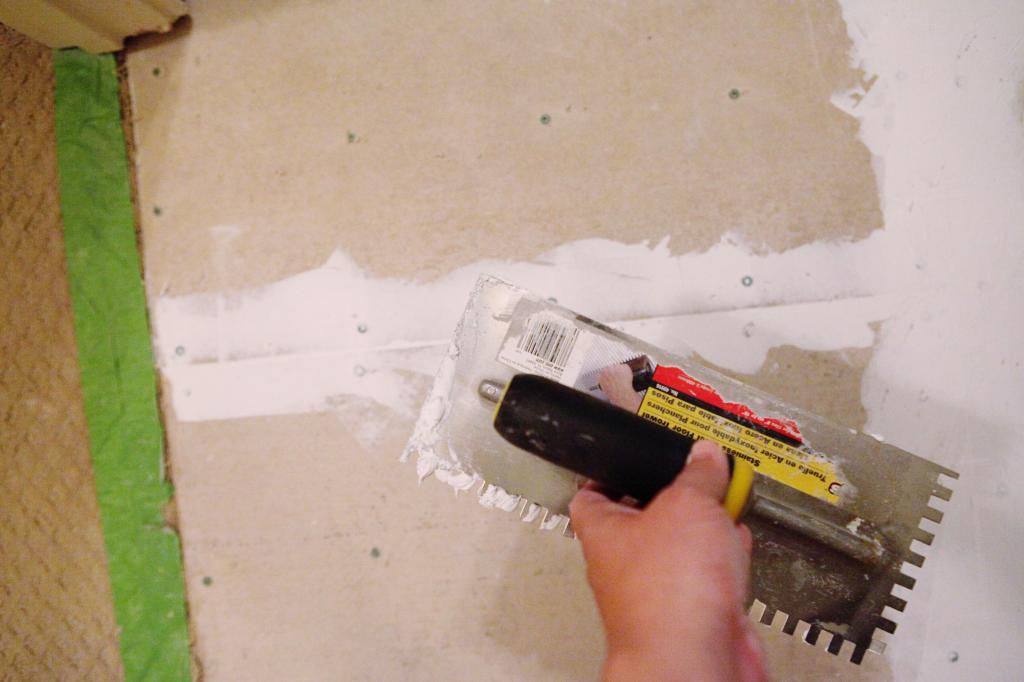
Next you need to break out the mesh tape. It’s easy to work with but it will basically bond your boards together and make them one big surface…preventing future cracks in your tile!!!
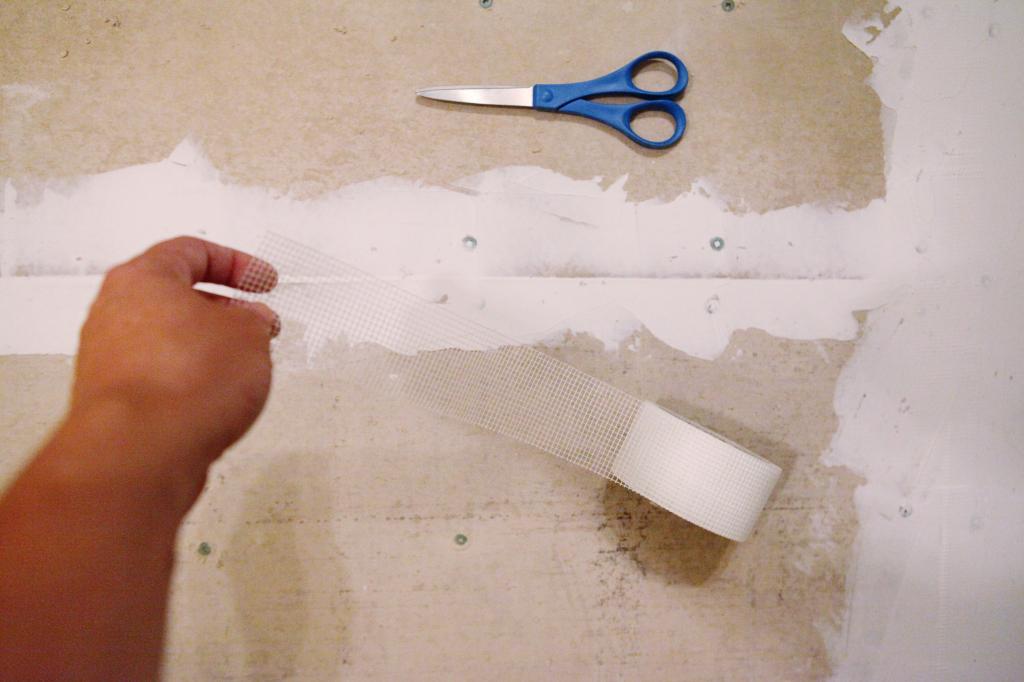
Cut your length and embed it lightly into the thin set.
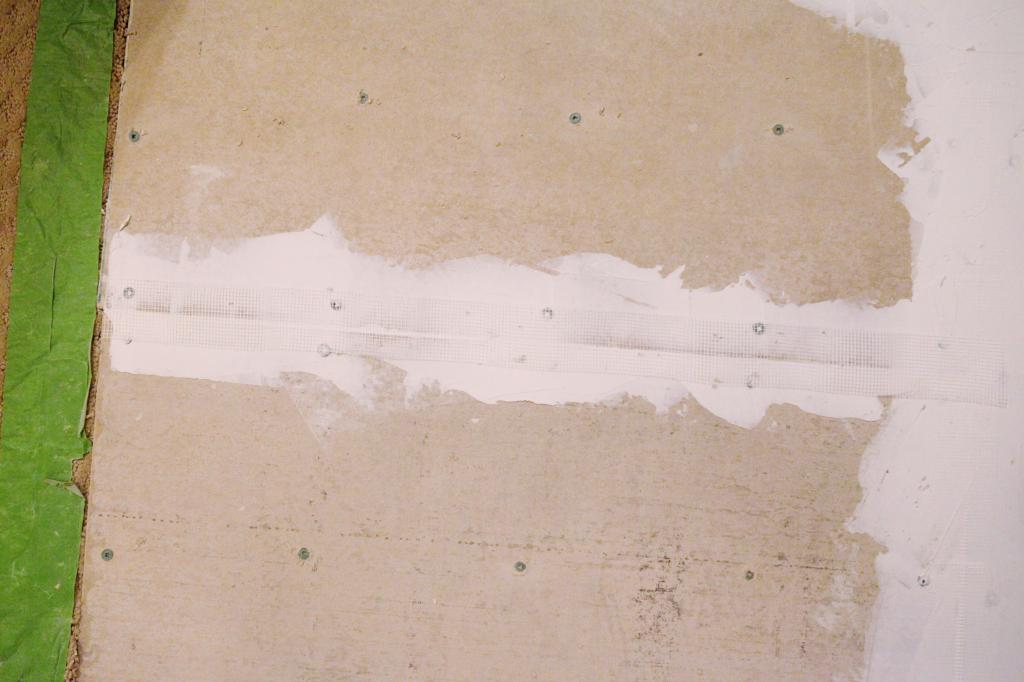
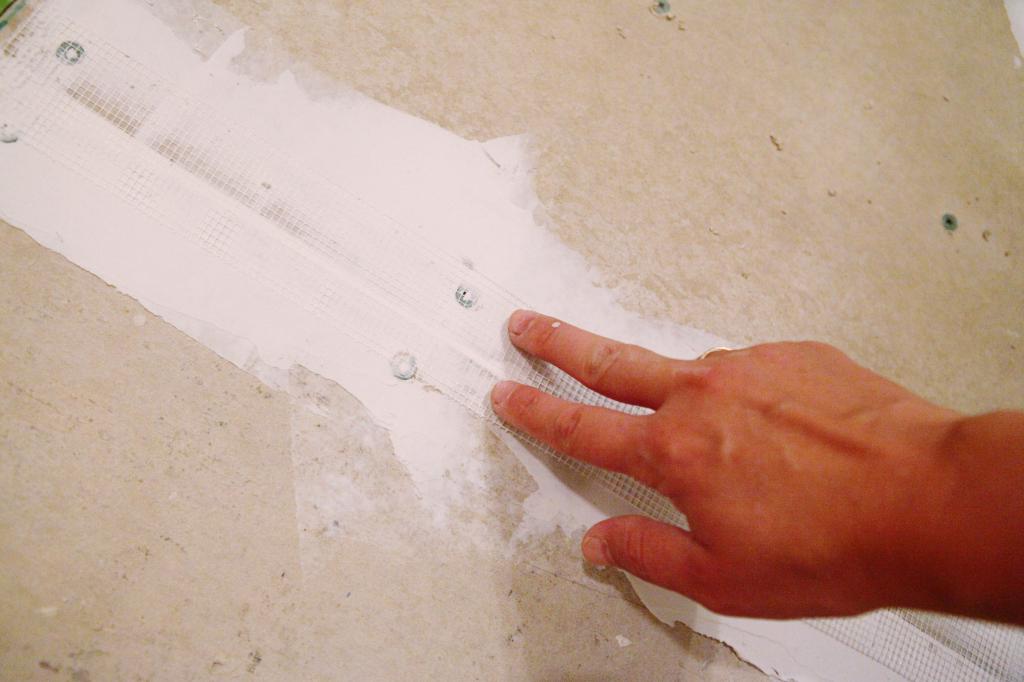
I get nervous and like to double check that it is in place and not squirming around like toddler in church so I use two fingers and rub along the length of the tape just to make sure it’s really stuck in there.
This is how it looks from far away.
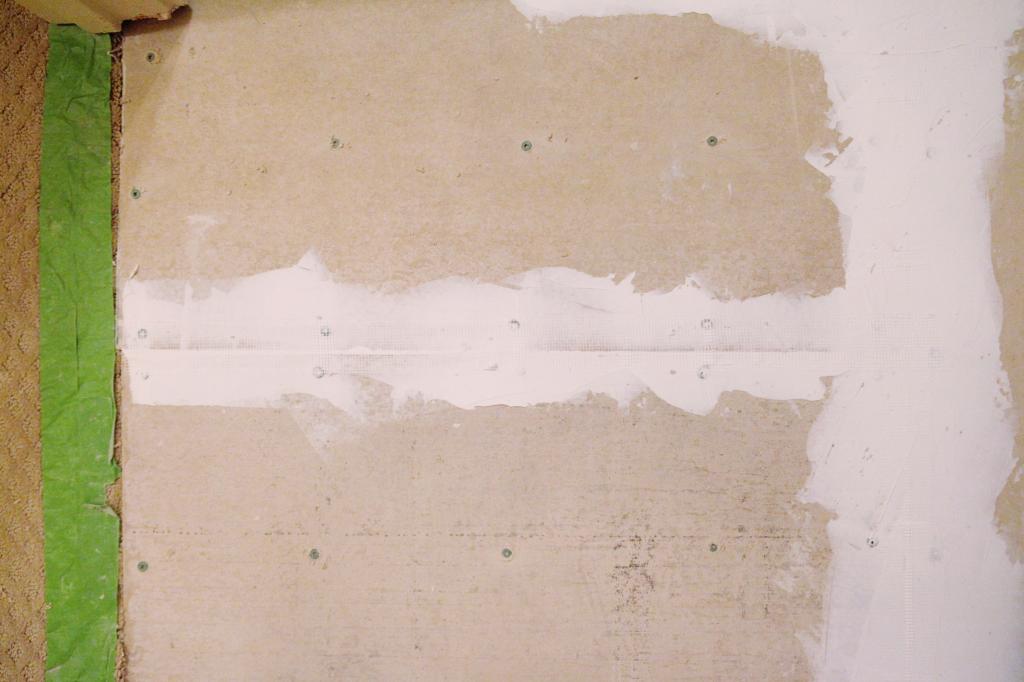
Next you will need another layer of thin set….make sure it’s RIDICULOUSLY thin. You don’t want mountains to have to tile over in the future!
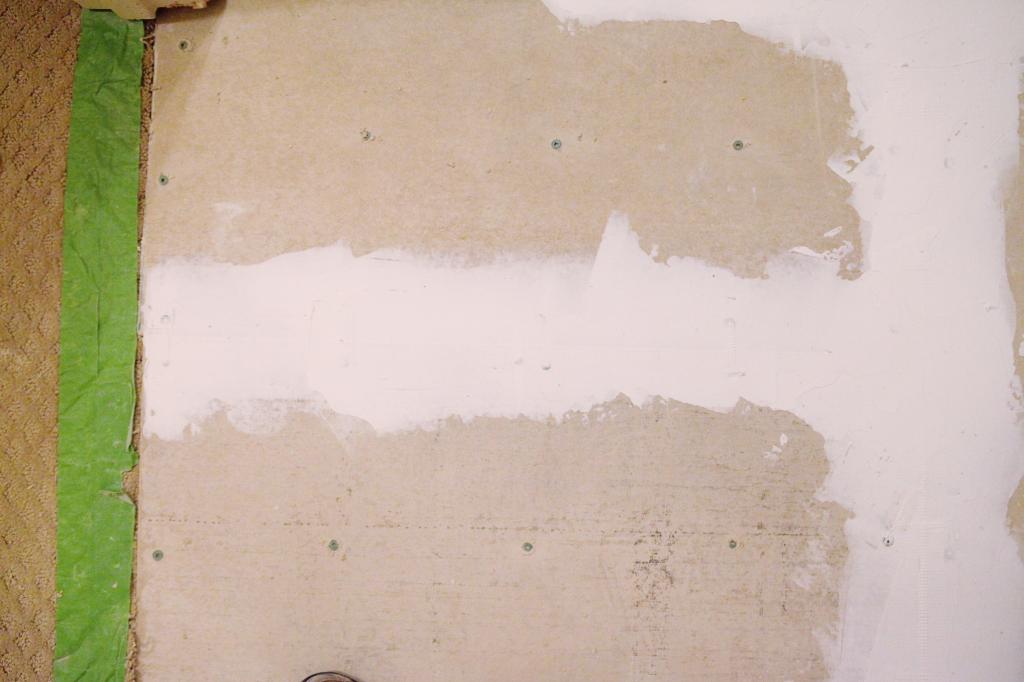
And ta-da! Done!
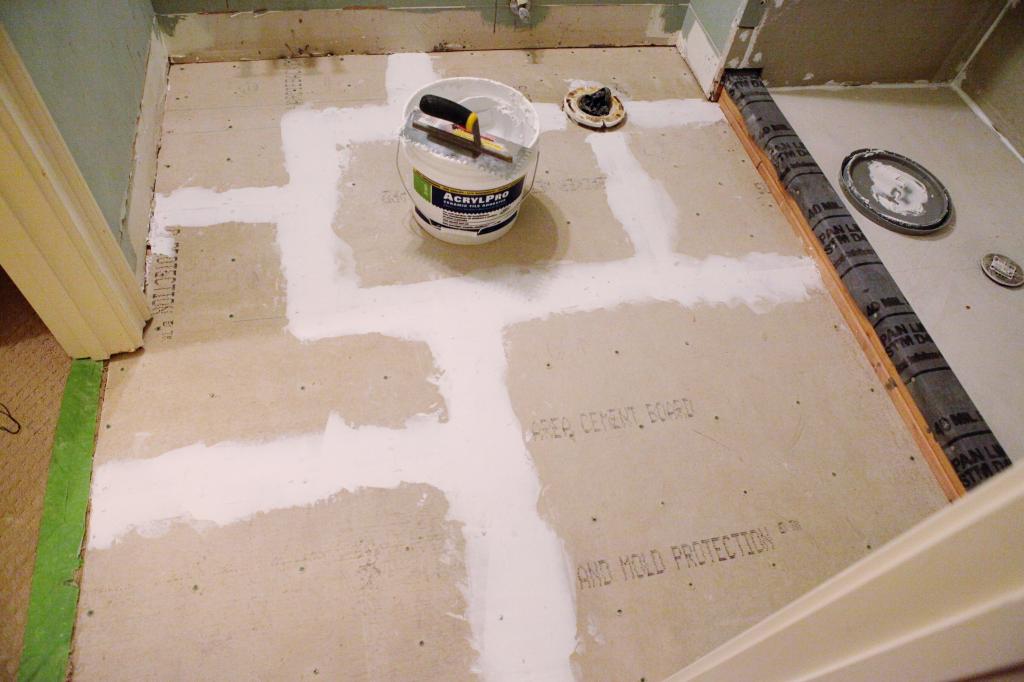
Next up is the shower. This is where it gets a little hairy.
You want to install your cement board using as big boards as possible. Don’t use screws too close to the shower pan because you don’t want to puncture your liner….it would be a fatal mistake and then the shower police would come arrest you.
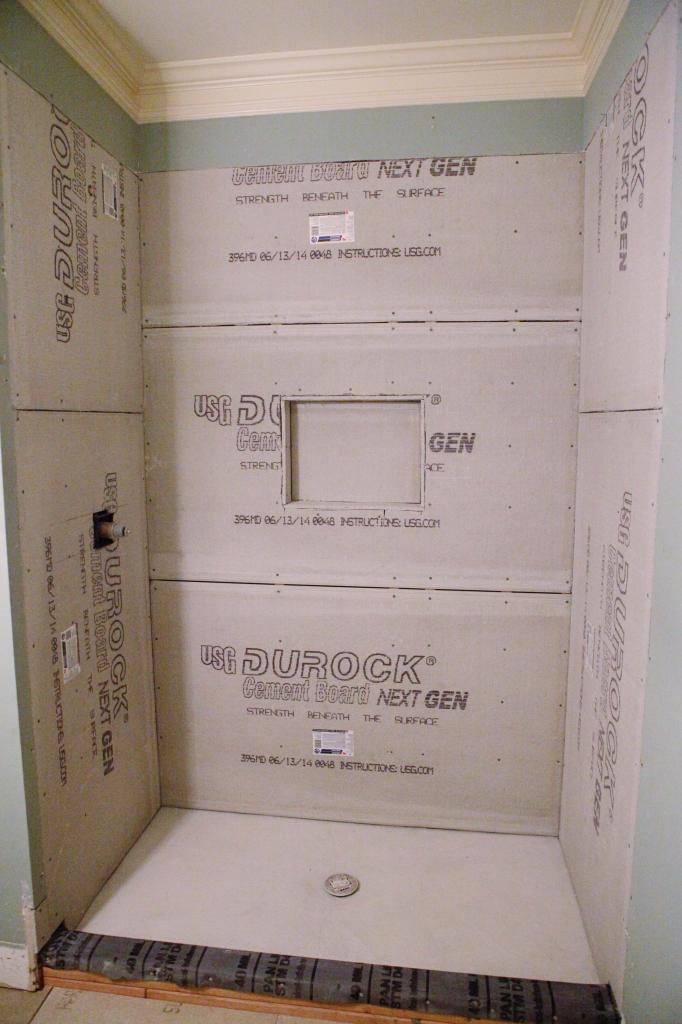
You want to make sure there is a little gap in the boards for expansion of the supporting 2x4s so get a little paint stick and use that as your spacer between the boards.
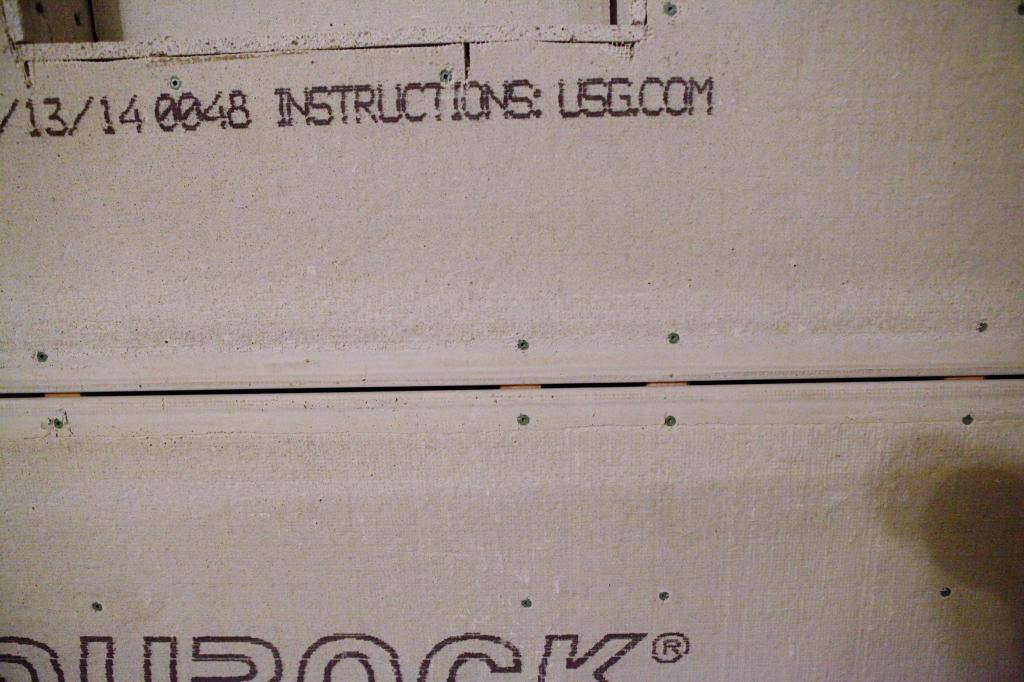
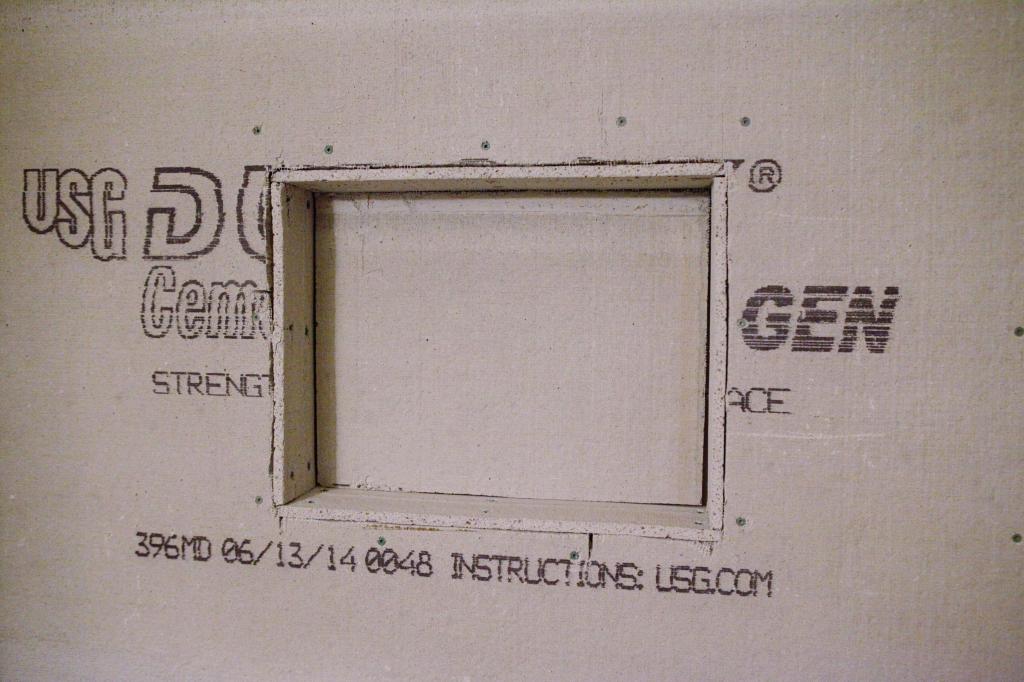
The niche was a first for us and basically we did the floor and the ceiling of it first…the walls second and then all the surrounding areas had to back off 🙂
We talked to several handymen who have installed hundreds of these showers and their advice was to use Sikaflex for the skew oles (sorry – auto correct fixed screw holes and I can’t change it because it is too dang funny) and then also the corners.
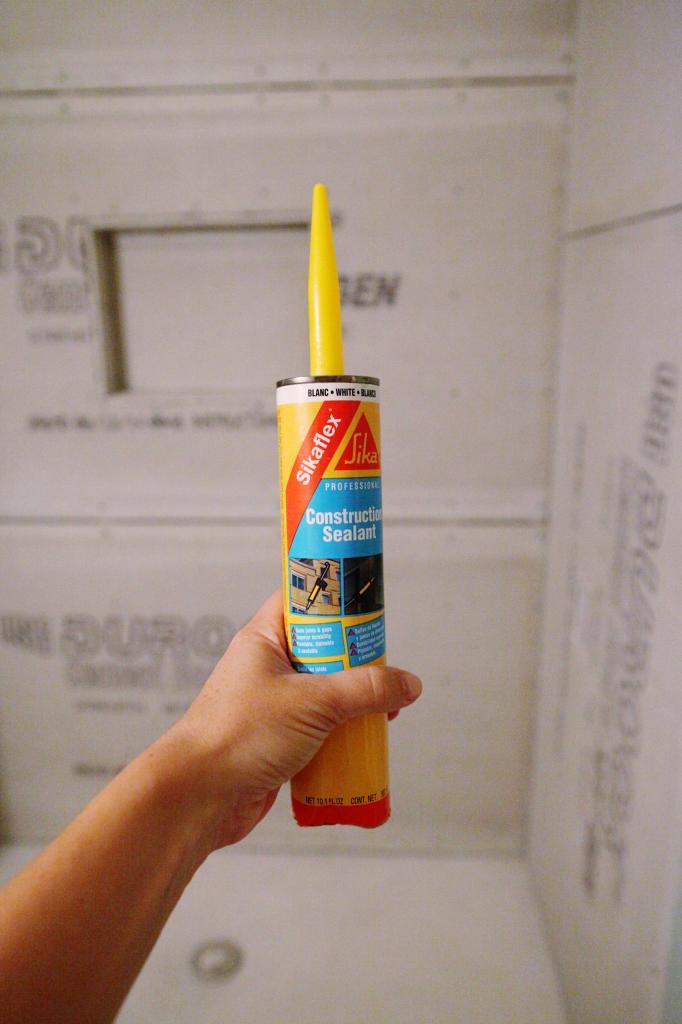
This stuff was REALLY sticky so make sure that you have some paper towels present and wear gloves.
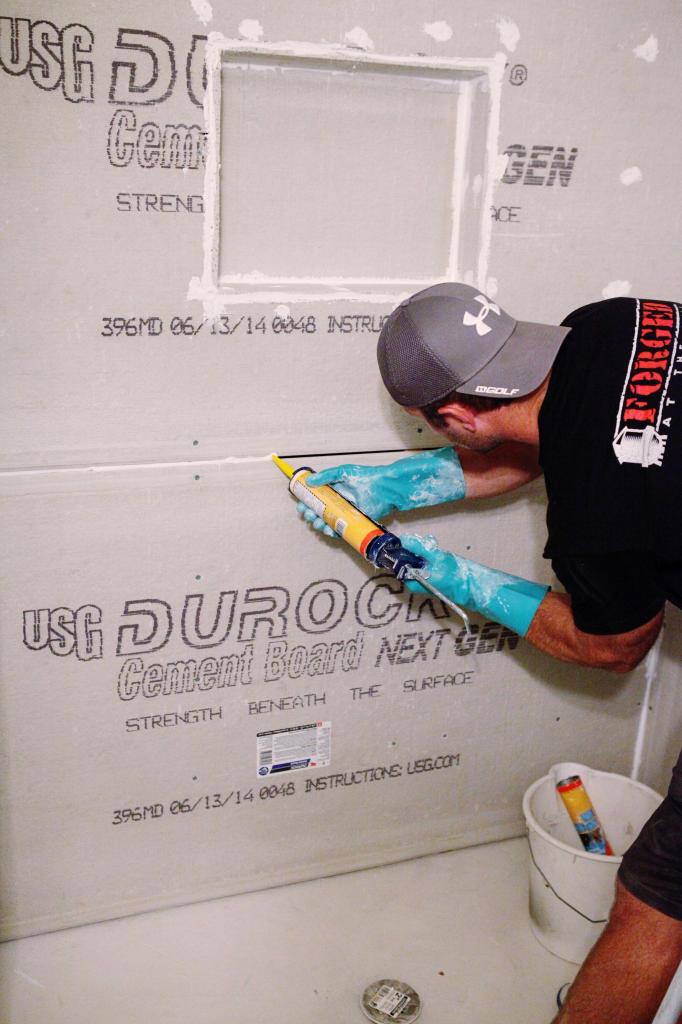
In a ton of forums and videos and instructionals, we heard varied advice….it was really hard to know exactly what is the right way to do this process. In the end, we did the STUDS then the CEMENT BOARD then the WATERPROOFING then the tile. This SilkaFlex is a beginning step in the waterproofing stage. You don’t want to layer one waterproofing over another (like studs, waterproofing, cement board, waterproofing) because that is what they call a “mold sandwich”. Not good.
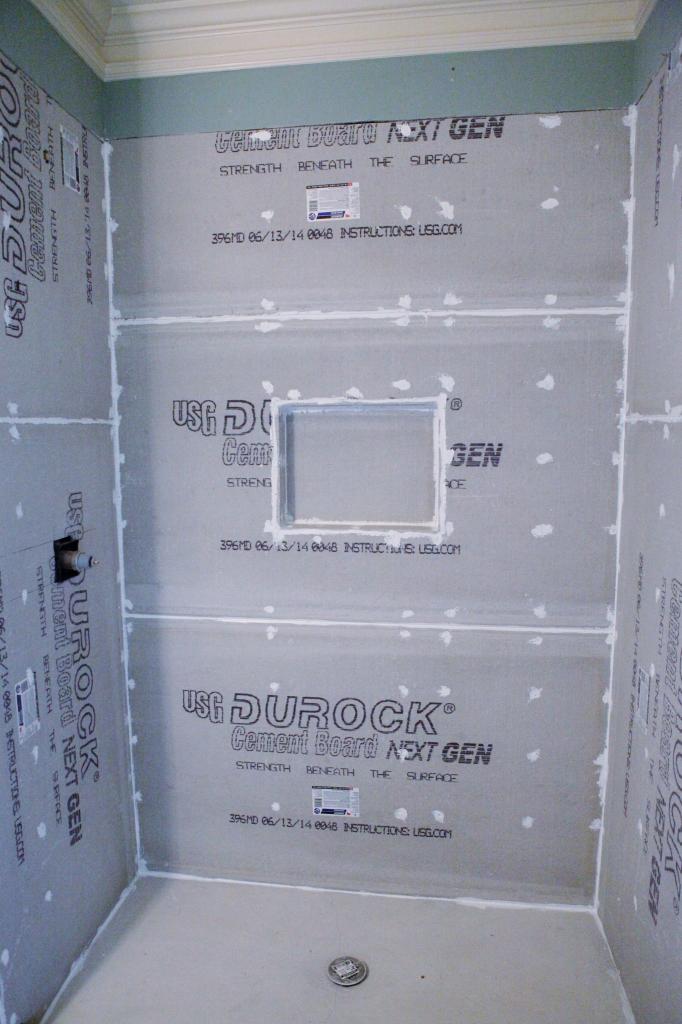
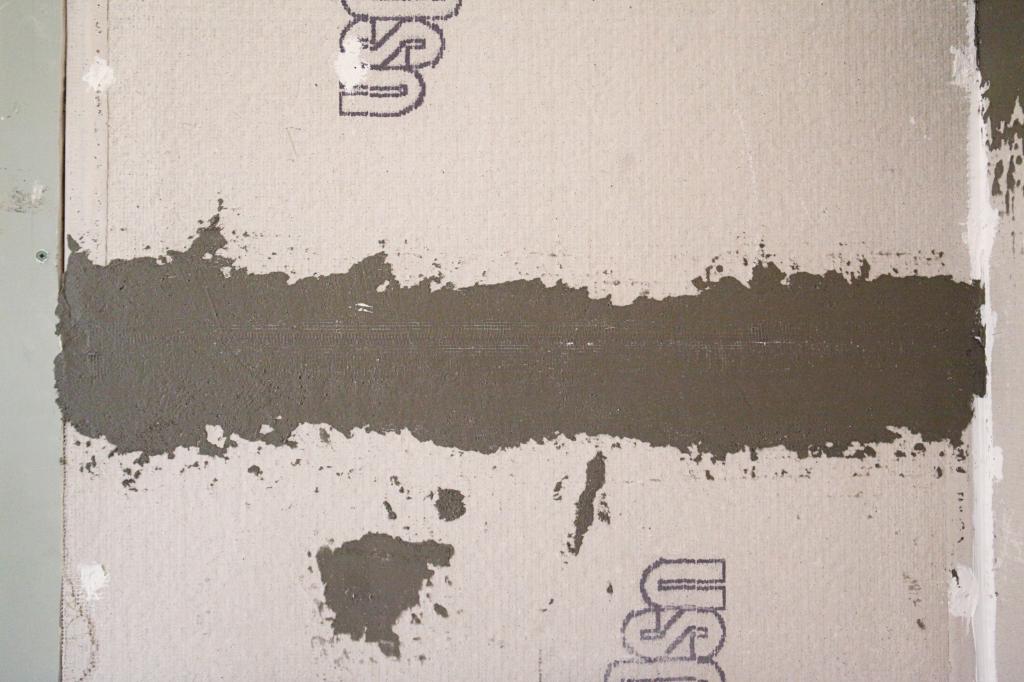
After the SilkaFlex was applied, we added the mortar to all the cracks and edges. Mortar comes in different colors and you can see we opened a different color half way through the process 🙂 It is different than mastic and more gritty too and you will be able to feel the chunks of cement and sand in it. It’s also harder to work with but you can not interchange the two when it comes to doing this process. You smear it on all the screw holes and the seams between the Durock and the Durock and the Durock and the drywall.
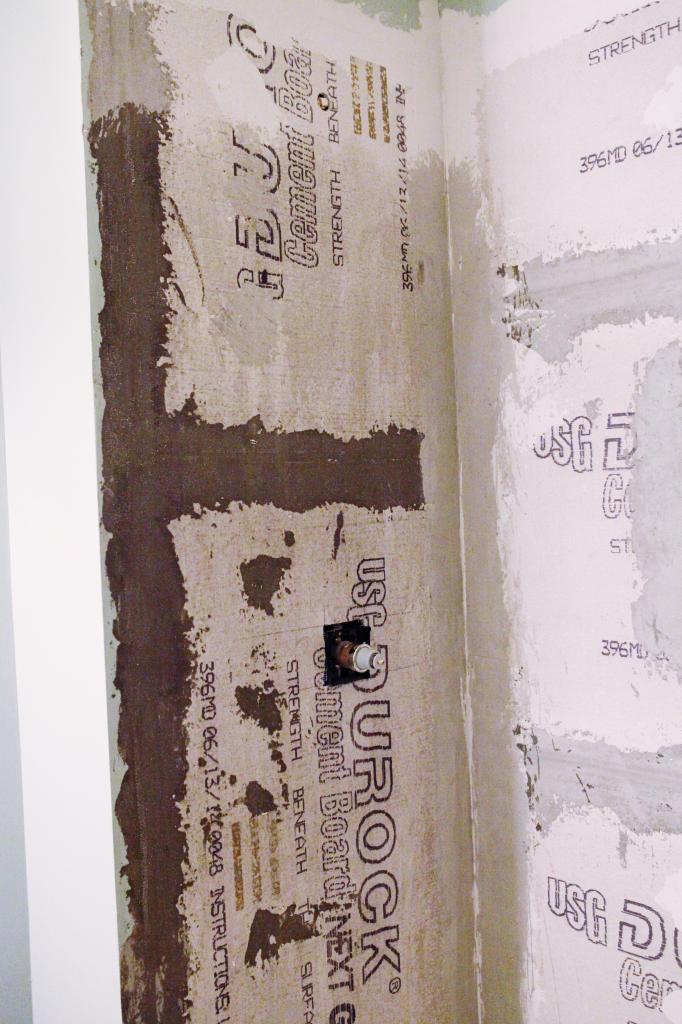
Then what do we do to make two pieces of cement board like one giant one? You know the answer to this…..
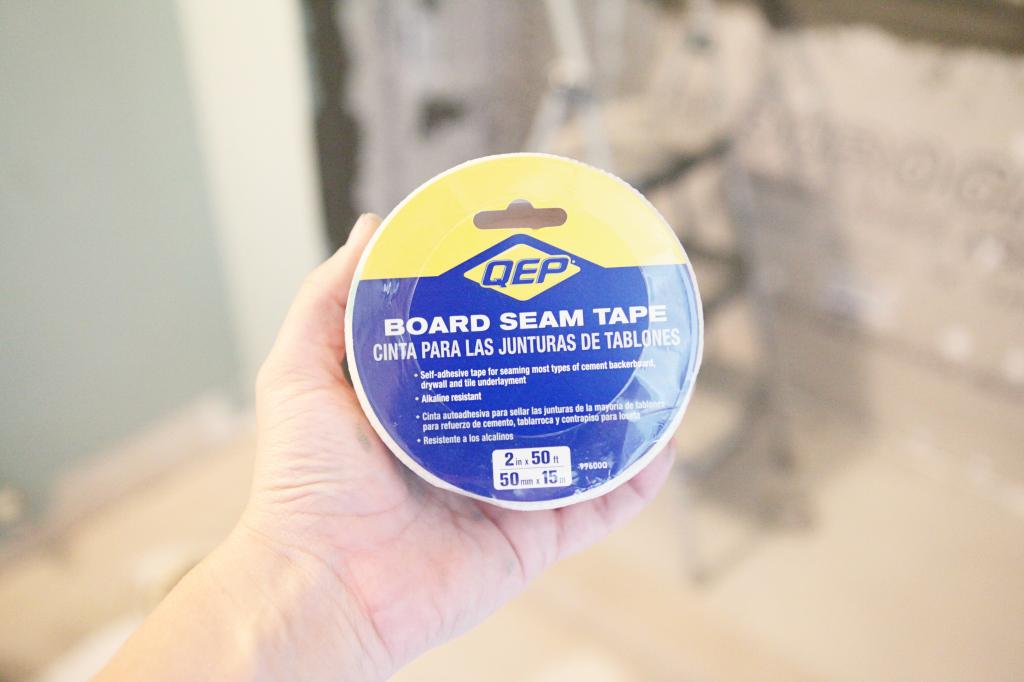
Yup, you have to tape those seams. Cut to length and smoosh her in….
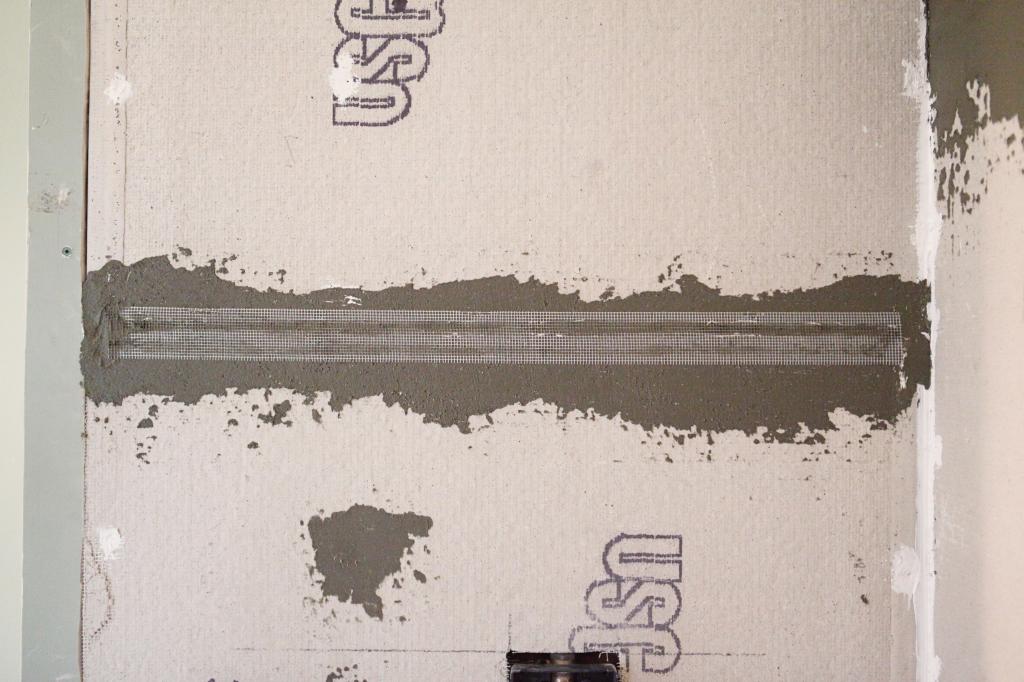
Make sure you mortar over to get a good smooth surface. It’s RIDICULOUSLY vital to make sure you don’t use too much mortar because you need a flat and plumb surface for that future tile. Otherwise you will be dealing with mountain peaks when you go to put your tile on.
And here is where I did a major blog fail….I didn’t do pictures of the curb. I know. I looked and looked and thought I had some but I guess I was too busy doing and not photographing. I did get this one after shot when it was all dry. Basically you make a little wire lath form to fit over it and then you use the deck mortar to pack mud on the wire. It’s not a hard process…kinda like playing with a form of playdoh….you just want it to be square and the top to have a slight slant IN toward the shower. If you are a step-by-step person, here is the process I followed.
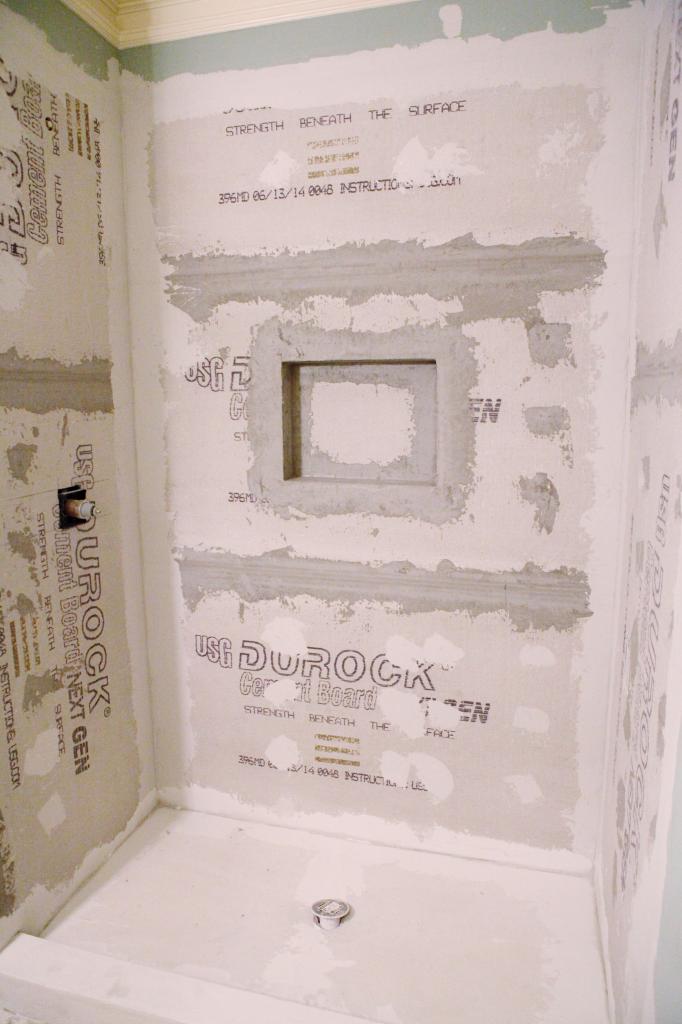
I’m gonna have to show you how I did the niche in the next post because this thing is getting crazy long….but don’t worry, I will also show you how we waterproofed this bad boy.
Now about those DIY blog hard hitters….anybody know of any? Preferably ones that are not contractors or forums or anybody that is anti-pork….because ya know…those kind can’t be trusted 🙂 I’d love to add some to my list….
Hi Katie! I love the progress on your bathroom & basement remodel. You guys are seriously kicking butt. I really like to follow Kristi at http://www.addicted2decorating.com/ and the process of updating her fairly recently purchased home in Texas. Not sure you guys have the same style, but she does about 90% of the work all on her own.
Oh – and congrats to you & Jeremy!! I just had my daughter in November & am already dreaming of having another. I may have lost too many brain cells during the pregnancy, but another kid now sounds like a great idea!
First, congrats on the pregnancy announcement!
Second, I don’t recommend Googling “your pants off”.
Third, these are some of the best tutorials you guys have done. Really top notch stuff. Also very timely, considering we want to re-do our master bath in the next 12 months. Awesome examples in which to start planning, so thank you!
Thanks for posting this! We have the world’s largest bathroom in our basement that was 90% finished according to our listing (giant lie #1!). The shower has cement board, but I wouldn’t have even thought to waterproof it… good thing it is still just cement board!
I am working on the tub first and then will be on to the shower- hopefully the next post is up by then : )
Madeline
http://www.createbakecelebrate.com
Your bathroom turned out beautiful!!
Boy, would I love a shower like that.
DIY Diva – she is the best 🙂
http://diydiva.net/
Not only does she have her own blog, but she guest posts on all kinds of badass DIY subjects !
Thank you for sharing the step by step. The room is gorgeous. Our mater bathroom is next on our to do list and this is exactly what I need to know.
I wish I was a blogger. My hubby and I are almost finished with a complete gut job reno of our kitchen that is being done by us, cabinet building and all. I wish I was a blogger so I could share all of these great things we’ve learned. Like when you bring home plywood, you must square it before using it to build cabinets. Who woulda thunk it? That was a $150 and many days wasted lesson.
I love your blog and read daily. Congrats on the little newbie. Can’t wait to see who he looks like. 😉
Wow, it’s absolutely stunning!
I love your blog and never minded you being politically incorrect sometimes. But now I’m a little torn… What exactly do you mean by people being “anti-pork” can’t be trusted? Do you refer to Jewish or Muslim people? For me, this would really, really cross the line. Please tell me this is a misunderstanding.
http://diydiva.net/ LOVE Kit and her donkeys and chickens! 🙂
We just finished up a shower like this in our master bathroom. Your reno is beautiful! Addictedtodecorating is a blog I recommend. Also congrats on the sweet baby news!!!!
Love how that came out, but yes, lotsa work to get there. I want to do the same in our master bath but we have hard water and not sure tile would be the best thing with all the residue I have to remove weekly. The thought of having to scrub in between each tile makes me ill just thinking about it! As for recommendations, check out Sawdust Girl and Addicted2Decorating blogs. They get pretty down and dirty and do more than just make things pretty.
“Preferably ones that are not contractors or forums or anybody that is anti-pork….because ya know…those kind can’t be trusted :)”
Anti-pork?
Great step-by-step. We’re going to be re-doing our bathroom this year and I’ll be sure to refer back!
My favourite true DIY girl is Kit from DIYdiva.net . She’s a licensed contractor and when possible tackles all of her own home reno projects. Highly recommend!
Totally a misunderstanding. I make jokes about my love for bacon and really don’t care if someone eats pork or not. In fact my mom doesn’t eat pork.
xo kb
diydiva.net
I spent a good two months reading her archives from begginings to end, she’s awesome
It was just a joke about my love for bacon…I really don’t care what people choose to eat or not eat.
xo kb
I really love this in-depth look at gutting and rebuilding a bathroom. We did a mini-budget-DIY-friendly refresh on our main bathroom last summer, but in the next few years we’re planning to do some more major renovations, so this is really helpful. On our blog (Rather Square, http://www.rathersquare.com) we chronicle both fun projects and the nitty-gritty get-into-the-walls projects we’ve been doing on our 1920s home. Take a look if you get a minute – we’d love you to visit!
This is looking good so far, that bathroom is gorgeous! We have gotten into drywall just recently. We are in the middle of tearing down a wall in our laundry room/mud room to make it bigger. In the middle of tiling the floor at the moment. Also we had the fun job of finding where a leak was coming from in our bedroom. Which meant half of one wall had to come down to find the leak. I just realized that I have never shared how we resolved it. Blogging fail! I will have to do that soon. We also re wired and added two sconces in our bathroom and added a new light in our dining room. Each time we do I am terrified we are going to knock the whole street out of electricity (somehow) or my husband will die from electrocution. Neither have happened so far! I got the joke, thought it was funny, and my husband is a bacon obsessed man. I got him a sign that said “You had be at bacon” last year for Valentine’s day. It is truly the way to his heart. Love your humor and jokes, makes the tutorials and heavy DIY stuff interesting.
OMG I’m so excited about this post. The hubs and I are about to DIY our guest bathroom and I was starting to get super nervous about the steps in between demo and laying the tile. But after this post, I feel like I have way more of a handle on things. Thanks so much!
I second the vote for diydiva.net – she’s done some major renovations, handles lots of large tools, and loves her donkeys and chickens:>
Manhattan-nest.com has been doing a whole house reno as well as updating his own home.
Keep up the good work Katie! Love to read your posts:>
I love DIY Diva. She’s true DIY and even ended up getting her contractor license after (I think after?) DIYing a whole house addition and remodel. Now she’s slowly remodeling her super old farm house, which includes gutting bathrooms and a kitchen and more. Plus she’s really rough around the edges and always doing something a little nuts.
This one: http://oneprojectatatime.blogspot.com/
Right now they’re redoing a family lake cabin and it’s just phenomenal work.
LOVE her! Kit is my hero seriously!
love http://www.ourhomefromscratch.com/ too, John is super detailed with his projects.
oh good lord… she’s referencing her well documented love of bacon… its a long running joke on Bower Power! why must people take things so seriously?! i mean do we really need the etiquette police on a blog?!
love you Katie B!
People who don’t eat bacon? More bacon for the rest of us!
Hi Katie, why do the pics on your blog go super pale when look at them? Is that a problem on my end? Im not very tech savvy I guess….. congrats on #4 you have a beautiful family!
2nd this! Kit is an inspiration!! 🙂
Beautiful! – Now can we talk about how seriously buff Jeremy’s arm is? (Or am I the only one who noticed)? How is the crossfit gym going? And the Monroe house?!
Hi Katie. First…YOU ARE AWESOME. This series is getting stars and bookmarks from us as a reference since we’re tackling our bathroom soon. I agree – I would eat more of this stuff right up. Can you pretty please share the few true DYI blogs you have found? Thank you!!
Looks wonderful! Y’all are so talented. Just curious, is Jeremy a full time DIYer/blogger with you now? I would love to tackle some smaller projects around our house, but my husband has so little free time.
Hi Katie,
Firstly congratulations on your exciting pregnancy news.
I had two questions for you.
Will you be finding out the sex of the baby? Also, with regards to your renovations I’m curious if you had a leak down the track would you be covered under insurance? Here in Australia, well Melbourne specifically you need a certificate from a certified trade for any changes you make to ensure it’s covered by insurance. Really curious to know how it works over there?
Thanks
Emily
I’m glad I read too much into it (I’m totally pro-bacon, by the way)!
And congrats on the baby news!!! So exciting!
We get down to the nitty gritty of DIY in our blog. I have been on hiatus for a bit (went through IVF, now pregnant with twins), but we definitely do it all!
I wouldn’t exactly call myself a hard-hitter based on the fact that I only update my blog every-so-often, but I did tile my own shower and your process looks pretty familiar. You can click around to see the different stages, but here’s my post on how we installed backerboard: http://lifebeyondsilicon.com/2014/07/08/make-your-own-shower/
Katie, have a look at Old Town Home. Alex and Wendy have done some pretty extensive projects that are planned, executed, and documented in excruciating detail. I wish I were half as motivated! I also like Chezerby.
We don’t know if we are finding out early. And as far as insurance, it all depends on your plan…everyone’s is different here. If the leak was due to a pipe that wasn’t installed correctly, technically I think you could sue the plumber but if it was just from water damage from the failed waterproofing, it may or may not be covered depending on the reason it leaked. It’s really all about the plan and the adjuster’s assessment.
xo – kb
He is never going to be a blogger…sorry ladies 🙂 He just works from home now so he has a lot more time to help with projects than before when he had a two-hour-each-way commute! I hear ya on free time…when he had to travel and commute, it was ridiculously hard to get anything done.
xo – kb
I read some that are MORE hands on…although I wouldn’t say full-blown DIYers….some of my favorites are Addicting2Decorating, Jenna Sue Designs, Ana White, just to name a few 🙂
xo – kb
Haha! I’m sure he is so flattered. The box is going great. And the Monroe house is at a stand still…we were planning a lot more for this year but we will have to wait and see with the baby on the way.
xo – kb
When you scroll your mouse over them, they turn pale because of the Pin It feature 🙂
xo – kb
No idea on DIY blogs…mostly I just feel terrified thinking about doing that much work so I stick with the design-y ones 🙂
But KB the part of this post that really shines is all the double entendres. I mean…you’ve outdone yourself – I think this is a new Bower Power record 😉 I was snickering to myself the whole time!
Daniel over at manhattan-nest.com is pretty fun for DIY renovation. He’s in the process of making a condemned building super cute. 🙂
You must check out Kit over at DIYDiva.net. She’s the sh*t. Really. Single gal renovating a 100+ year old farmhouse…by herself. Yes. She’s a legend.
Thanks for clarifying ! I was also a bit upset by that sentence and I am now very happy to know it concerns delicious bacon and nothing else. Sorry for misinterpreting and not understanding good bacon jokes !
First up, congrats about Bower baby #4! That’s awesome news and such happy times ahead for you all. Here’s my fave home reno blogs: Karah @ the space between; Kim & Scott @ yellow brick home; Frederik & Amanda @ our renovation blog; (and I was going to say Alex & Wendy @ Old Town Home, but Rebecca got there ahead of me)! 😉 Best of luck with any future renos! heather xo
Stunning bathroom – seriously amazing and so impressed you DIY’ed, while being filmed! We DIY everything top to bottom…and I mean things we probably have no business doing 🙂 Last summer we ripped off our front porch and rebuilt it (and we also spent many hours on google). Oh and we had 3 boys under the age of 3 – chaos you can relate to!
I’m pooped just from reading this. I don’t know how you did all of that!
DIYDiva is a good one for actual construction/plumbing/electrical type stuff and it helps that she is funny
Oh my goodness! I continue to be just so impressed with you guys and all of your DIY projects! I was totally “LOL-ing” at all of your “crack” comments. HAHA! And also, I totally bragged too my Fiance when I saw you guys featured on Home Depot’s FB page. I said “Hey look this is my favorite blogger!!!!”
We are getting ready to redo our bathroom shower (it’s a prefab with a crack in it) and I’m totally pushing it back until you’re finished because these tutorials are so good!
I’ve read/watched a lot of other people’s but you speak my language! Also everyone thinks I’m crazy because my diy skills have not really been tested but I figure the worse that can happen is I have to pay someone to come fix my mistakes and since I’m not doing any plumbing (no drain moving) if it comes to that it won’t be too costly and I’ve already done the demo! (holy run on sentence)
The ones I really enjoy reading are http://diydiva.net/ and http://www.sawdustandembryos.com/
Yeah, I like that guy too. 😉
Congrats on the announcement, KB and the shower looks phenomenal!
Pretty Handy Girl is another great blog.
There are plenty of heavy DIY blogs on http://www.houseblogging.com/
I vote for these two as well. DIY Diva also has her contractor’s license (I believe) so she has an extra layer of credibility and knowledge.
I second Addicted to Decorating!!! Kristi is amazing! She does almost all of the work herself(her husband is in a wheel chair) and I have been completely inspired by her!!!!
Can I just say THANK YOU for this shower series? We are getting ready to re-do our shower that had a leak in the cheap acrylic liner and this has been so helpful! I do have one quick question for you. I have read a couple places that you need to shim out the studs for the hardi backer walls to make an adjustment for the pan liner thickness. Did yall do this? I can’t decide if it’s a necessary step or not.
We did not need to do it (I don’t remember if our studs were slightly bowed or why exactly) but as long as you use a level and make sure it’s plumb for the tiling part, you should be fine.
xo – kb
Hi there! Thank you very much for having shared these thoughts and pictures on how to effectively waterproof and remodel a bathroom! There are many reasons why it is important to waterproof a bathroom, as few rooms in the house handle and treat as much water. I think it’s important to make sure each room is properly fit for the conditions it will receive in the future.
Thank you for these posts. We’re redoing our bathroom and I’ve referred to this series often. Quick question, how long did you wait between applying this sikaflex and the thinset/tape? The directions on the tube were of little help. Thanks!
We waited at least 24 hours for the sikaflex to dry.
xo – kb
Love this bathroom. What is the name of the paint you used for the walls? I can’t find the name and brand in the post.
Here is the final reveal and it has links to all the info 🙂
xo – kb
Great Ideas! On how to install cement board for tile. Amazing tips, indeed it would help a lot for the beginners. Nice blog.