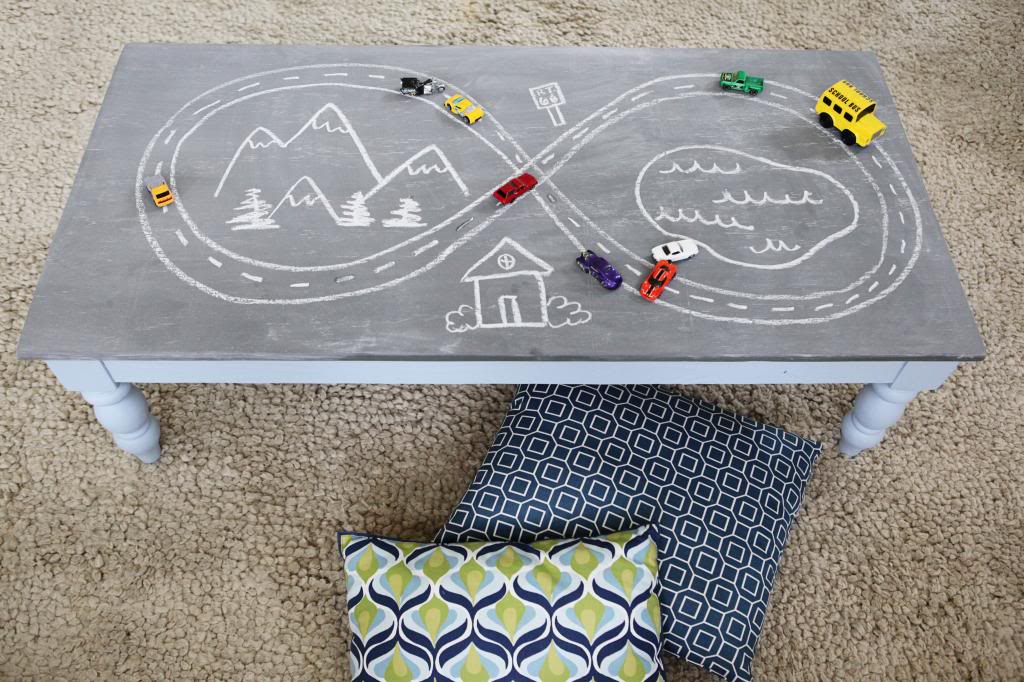
No, we didn’t get a new coffee table. We just gave an old one a much needed makeover. And did it so now it can double as an outdoor play table (somewhere in Mom-ville, I just got extra points).
Remember this bad boy? He lived on the patio area and was a super cheap thrift store find that got a couple coats of red paint.
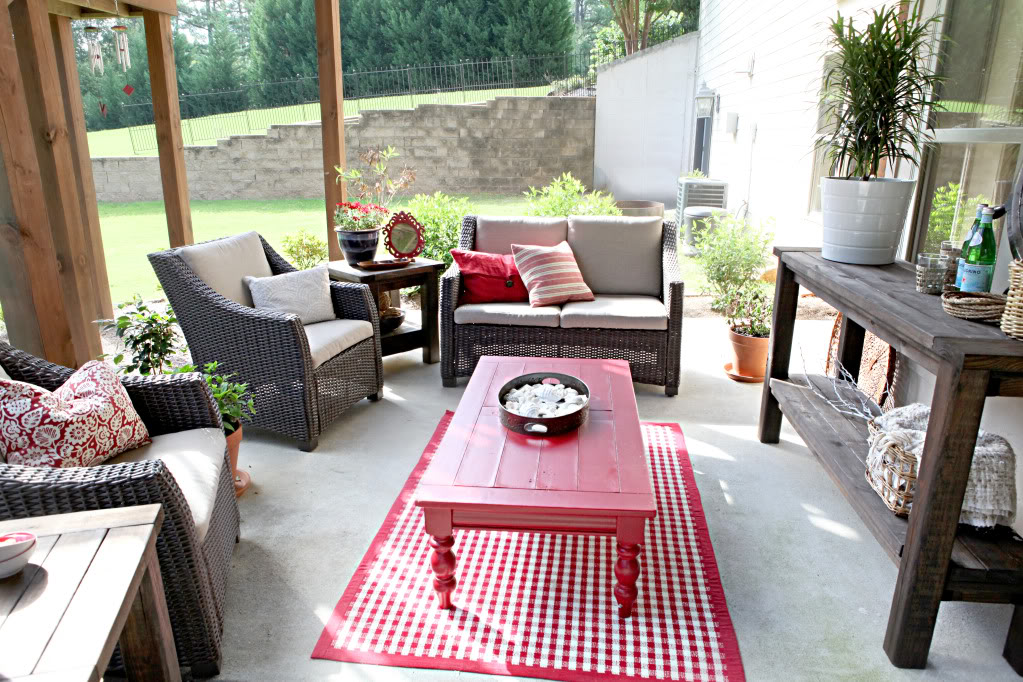
Don’t get me wrong. I love the way it looked before. The red was my jam. Like a strawberry jam with hints of peach and vanilla. And I loved the planked look with our homemade side tables and console table. Well, apparently I didn’t inspect the table well enough before leaving it outdoors because this is what happened…
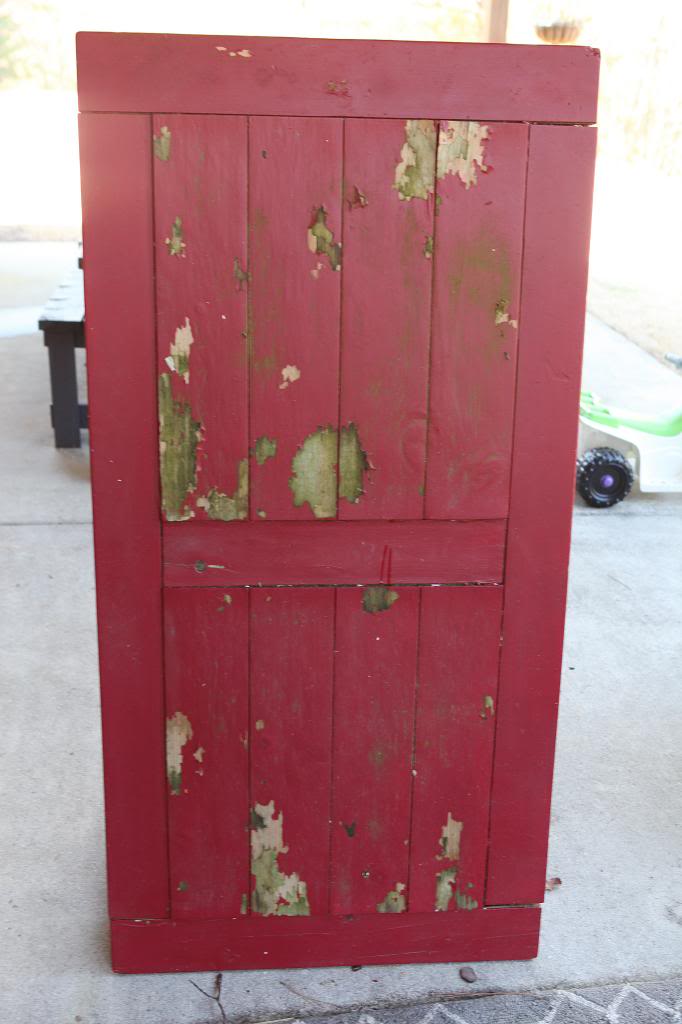
Those inner panels weren’t solid wood. DOH!
They swelled up with the rain and started breaking the rest of the table top. The rest of the table would have held up fine but those inner pieces looked like my midsection after a food truck lunch.
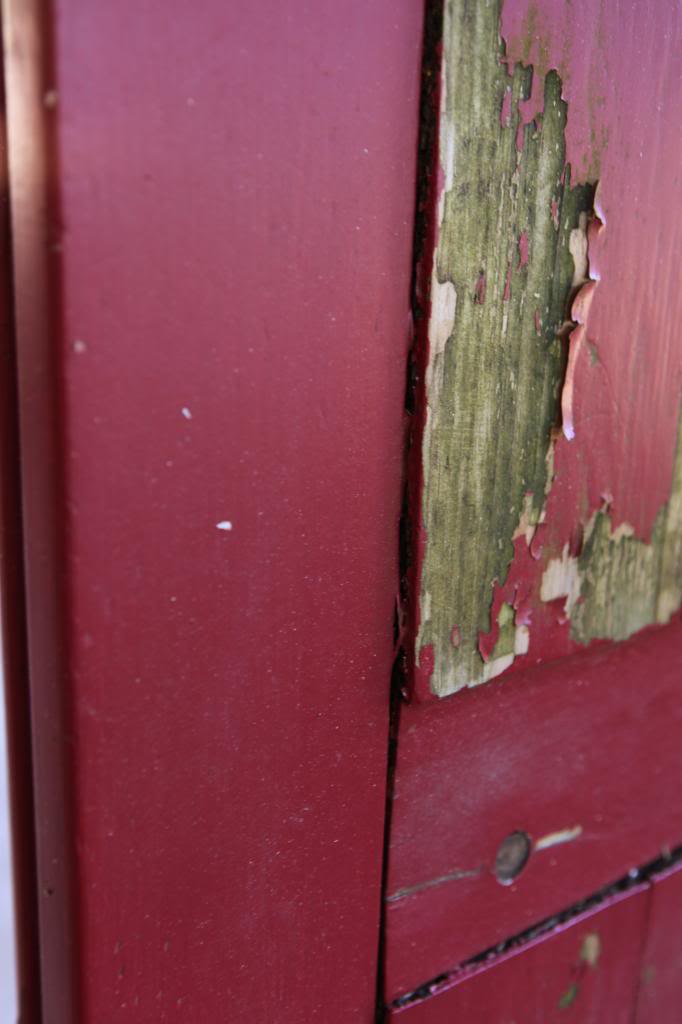
Yup…that’s me after a blazing burrito and maybe some blue cheese fries…
kidding.
That’s LJ in there. This post started a long time ago…things just take us extra long to finish with the little guys running around. So back in March, we started cleaning up the patio. We pressure washed the rugs and cement and got it all ready for Will’s Marvel-ous party in April. But before that, we had to figure out what to do with this crumbling table….so we did what any parent of a four year old would do…handed over the mallet.
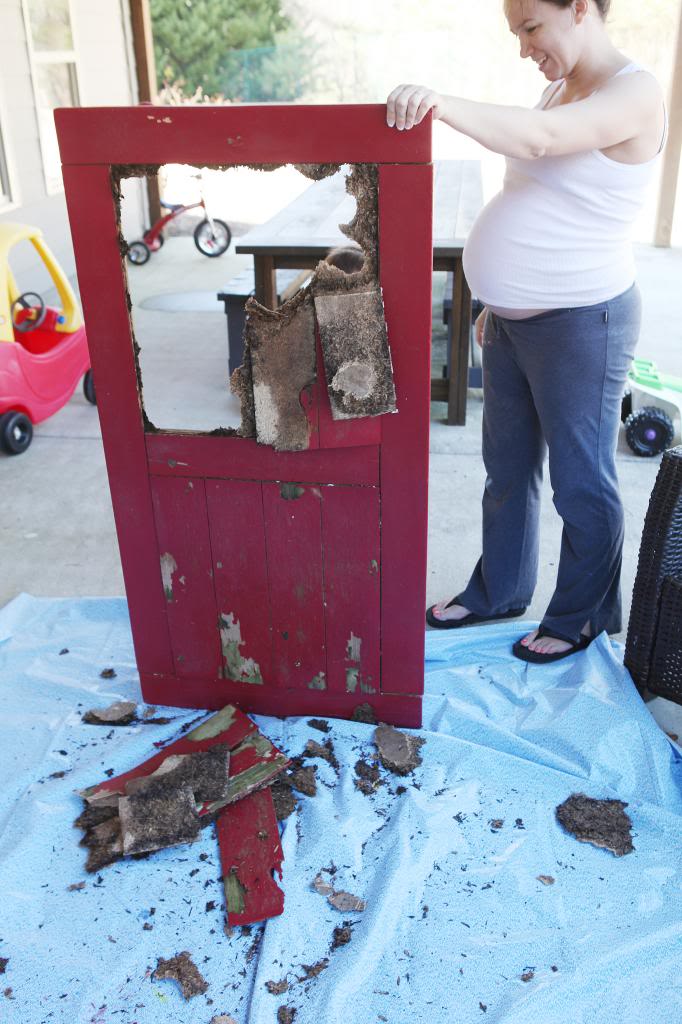
(I can practically hear the Rocky theme song here)
It was like a DIYers piñata except without the candy and just way more destruction. (There is just way too much underbelly in this post. Sorry to your eyeballs.)
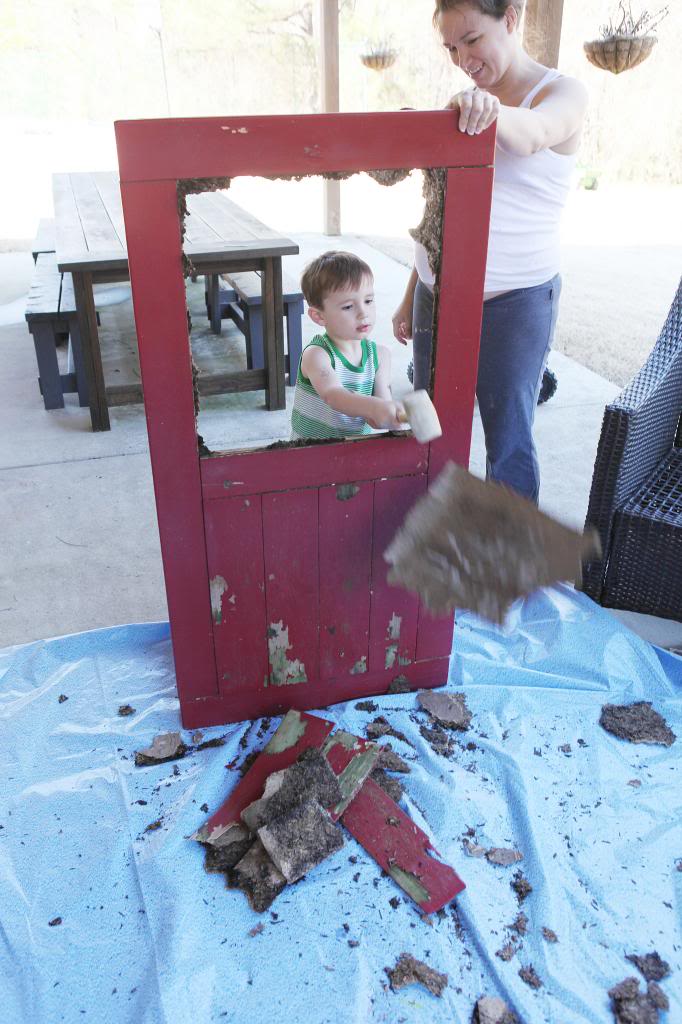
After Will was finished, we knocked the rest of it apart and were left with the legs and the hardware. Legs can run about $10 to $20 a piece for nice big fat ones so these were definitely worth salvaging. We simply got some exterior 2×4’s and pressure treated plywood before our reconstruction process.
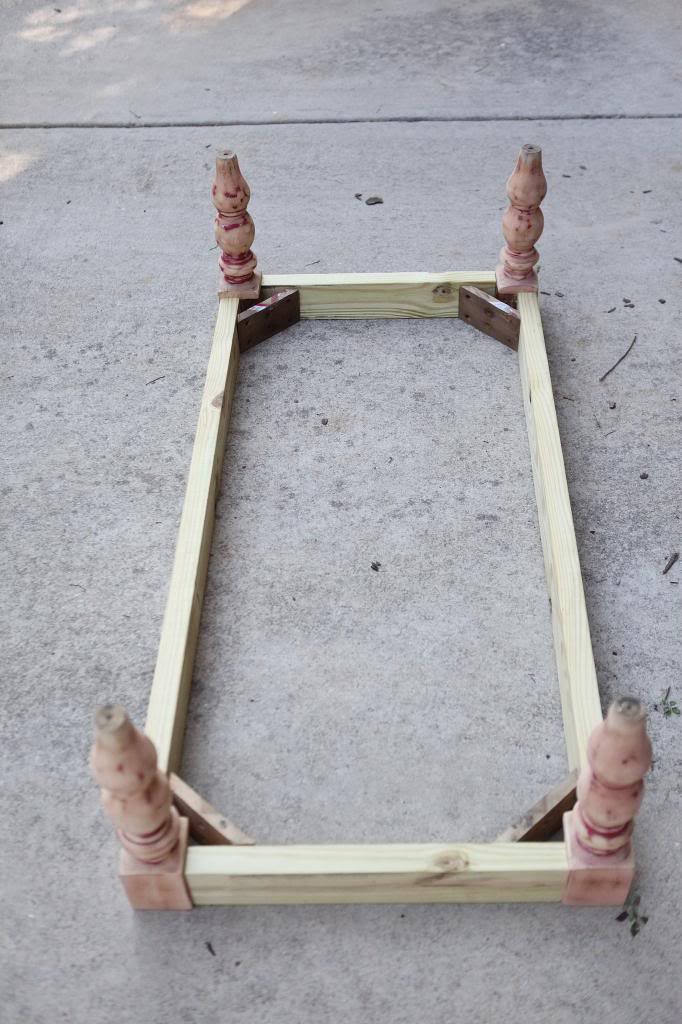
Oh and I would be wrong to not mention that Jeremy gets all the credit for sanding all the wood down. Those rounded edges are not fun. So at this point is when we decided that it should be an outdoor chalk table. We always pick up a big box of outdoor play chalk for the boys at the Dollar store but Jeremy gets irritated at the fact that there isn’t a designated spot for it to happen (chalk in mud has happened more than we care to admit). We’ve learned that designated spots mean that the boys play longer and with more focus. I had suggested an indoor chalk board area but the dust is just another thing we don’t have time to clean up….and don’t even get me started on Weston+chalk and what that equals INSIDE.
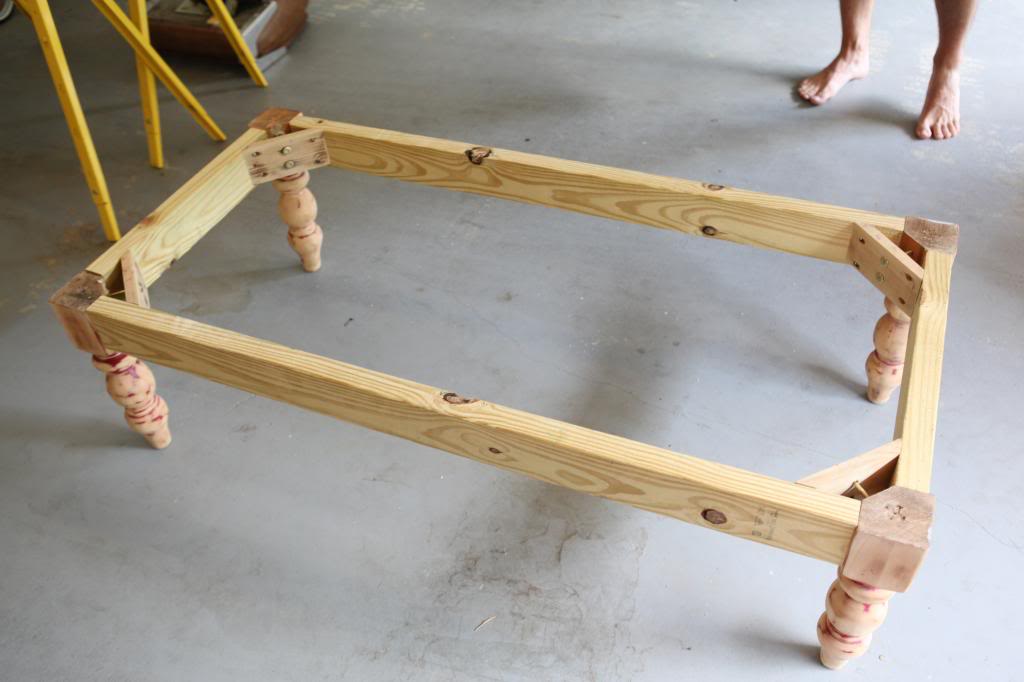
So a smooth plain table top would be just the ticket for a chalkboard area. The fact that this would be outside meant that it had to be pressure treated so that it didn’t warp or swell and it was like a bonus that it would be exposed to rain (God’s natural chalk eraser!).
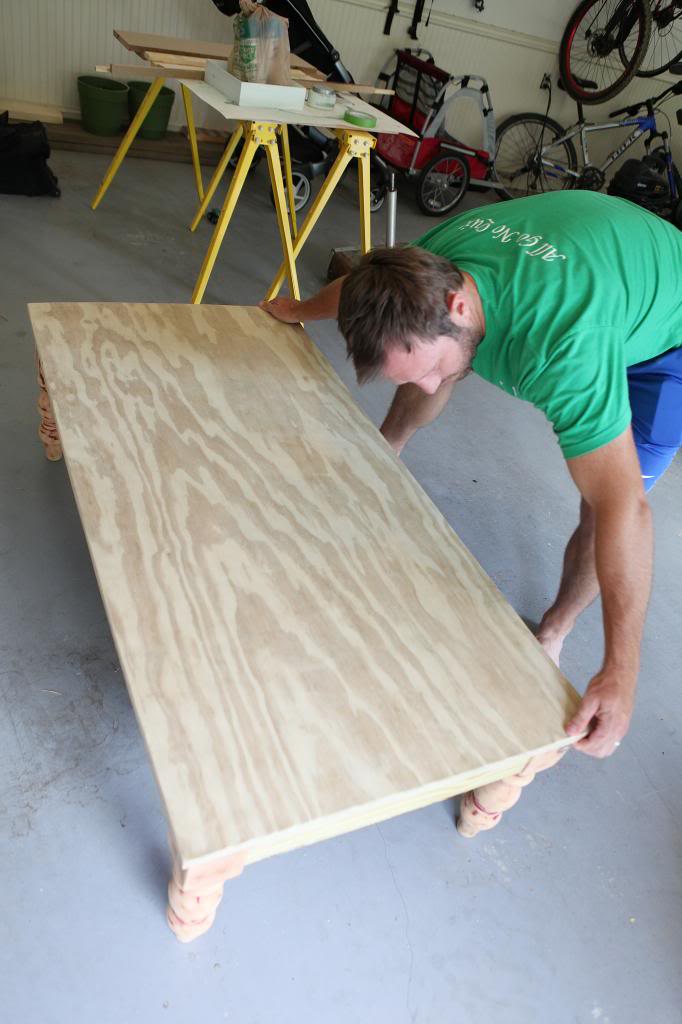
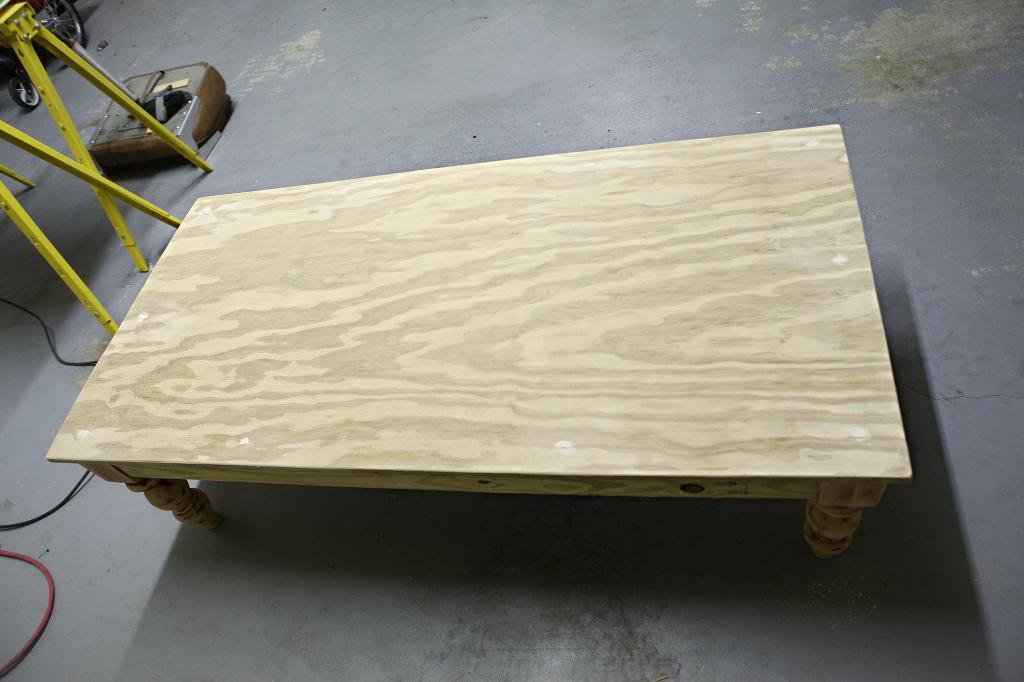
The table top was cut to overhang the edges by one and half inches all the way around. Jeremy just used exterior decking screws to go directly through the plywood into the legs and sides. Then we filled the countersunk screws with wood filler and sanded it smooth.
Next came the chalkboard paint. We used the Rustoleum Specialty Chalkboard paint – the roll-on type. Did you know that you can have the specialty version of this tinted at the paint desk to a ton of different colors? It’s true. And in my store, the black top and the colored versions are exactly the same price.
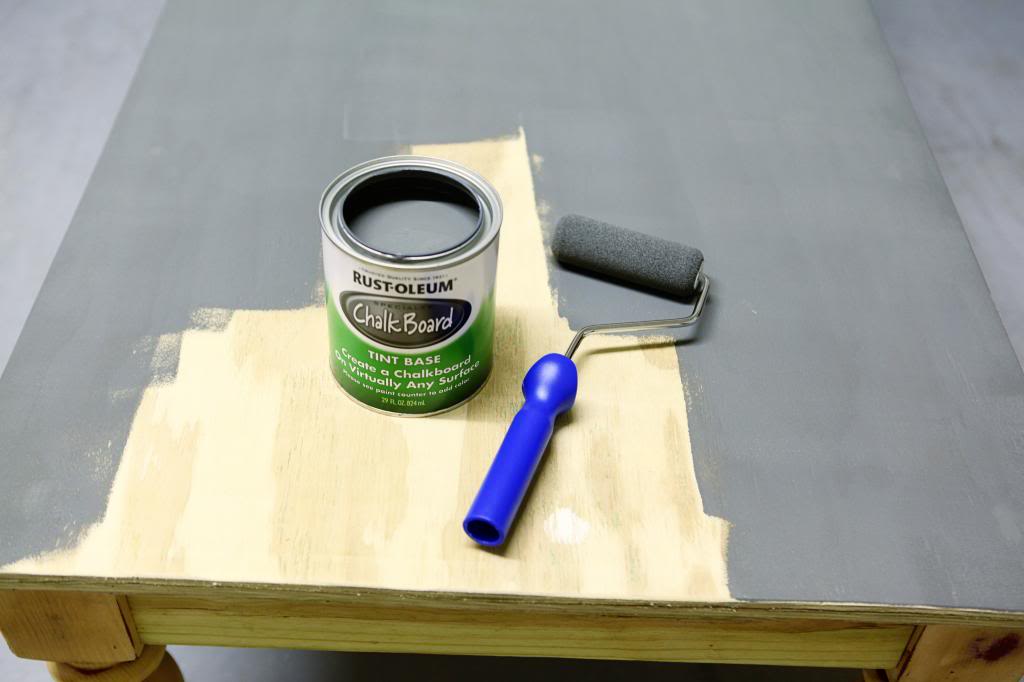
We went with two coats of the color Moonstone because we thought that the black would be too dark paired with all the furniture down there.
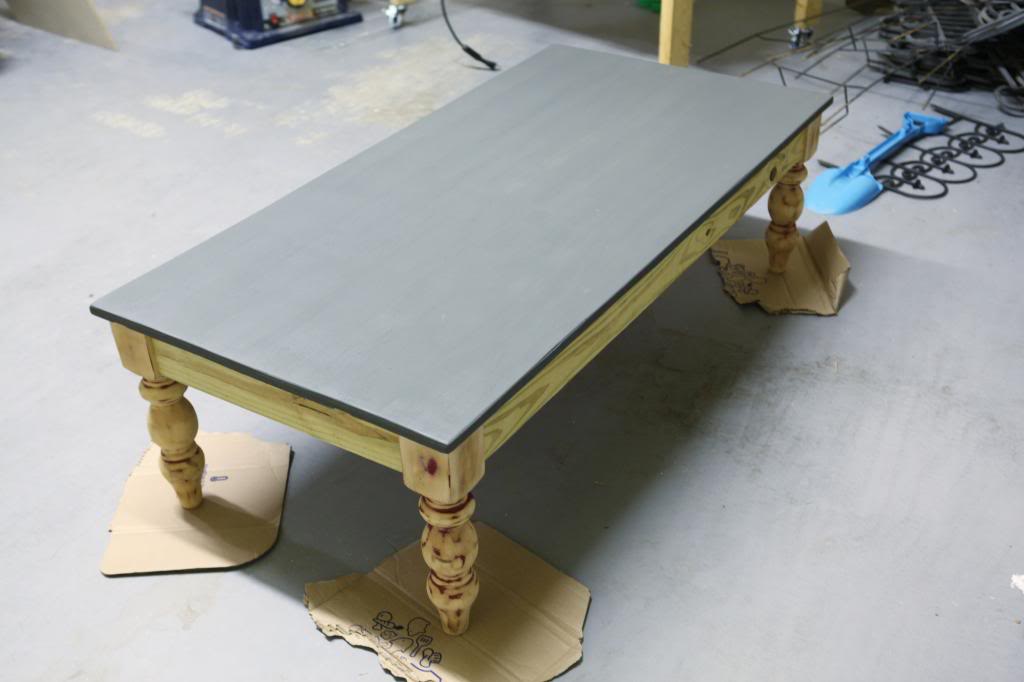
I wanted to paint the base red again but Jeremy suggested blue so I went with that to mix things up.
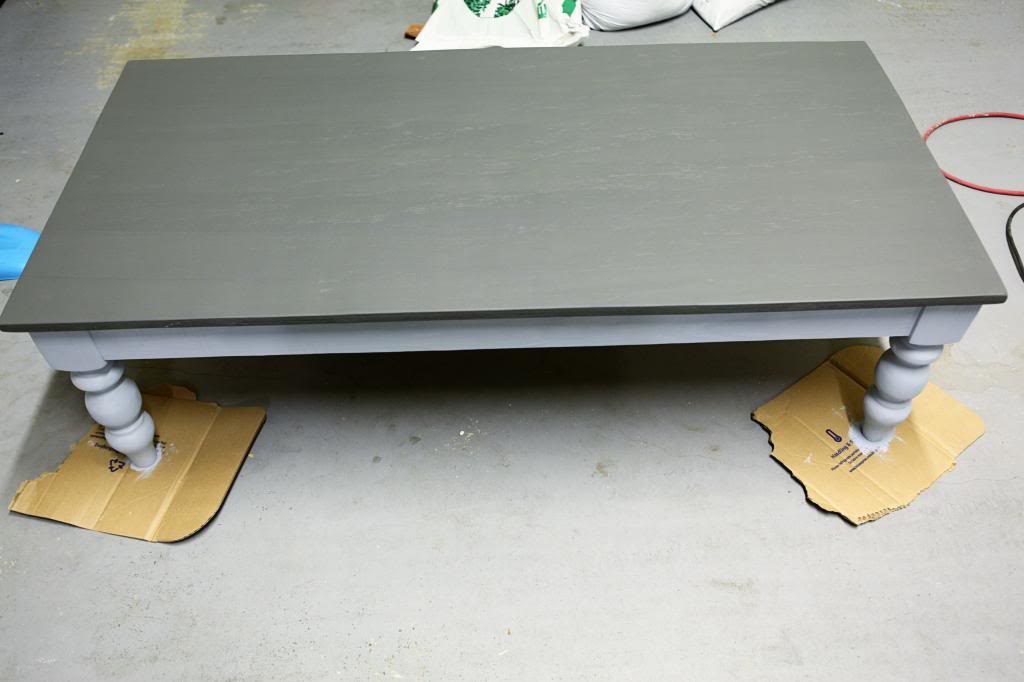
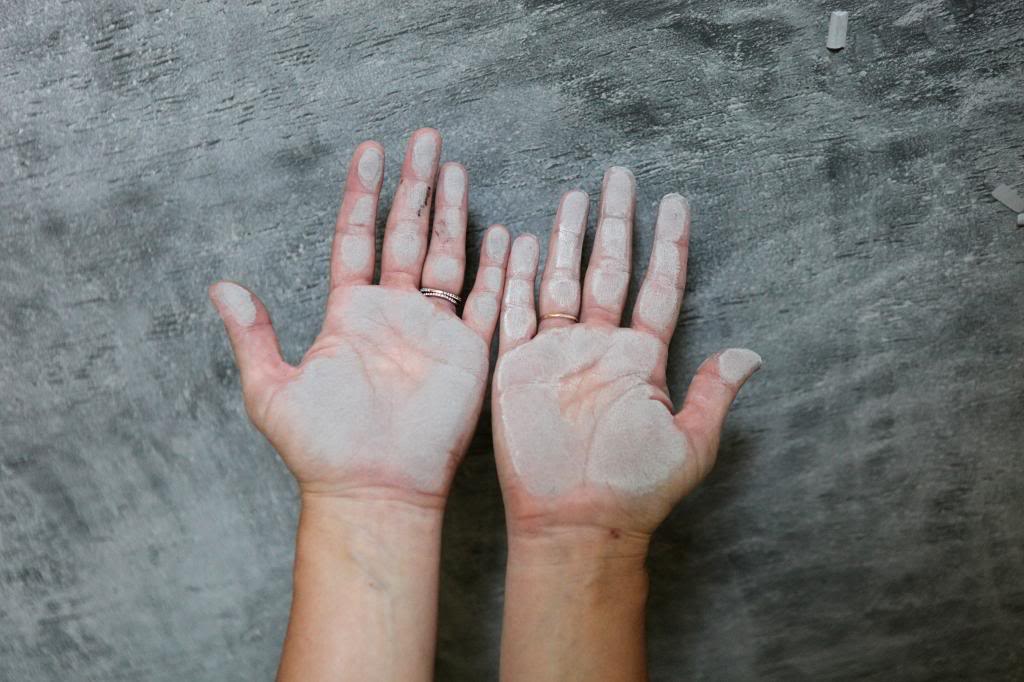
With any chalkboard project, you have to season the chalkboard so that it doesn’t end up with your original words always showing through. You do this by rubbing a piece of chalk over the entire surface. I like to actually rub it in too with my hands. It’s not the cleanest project but it helps so you don’t have ghosting later.
After it was done, I told Jer that we should stage it to surprise the boys. They loved it and played for a solid five minutes (enter victory dance here). It’s moved outside now (I’ll have to get some more pictures of it out there when this rain stops. Seriously…this has been the wettest summer ever here. Is there a rain cloud that just camped out over our property or something?!)
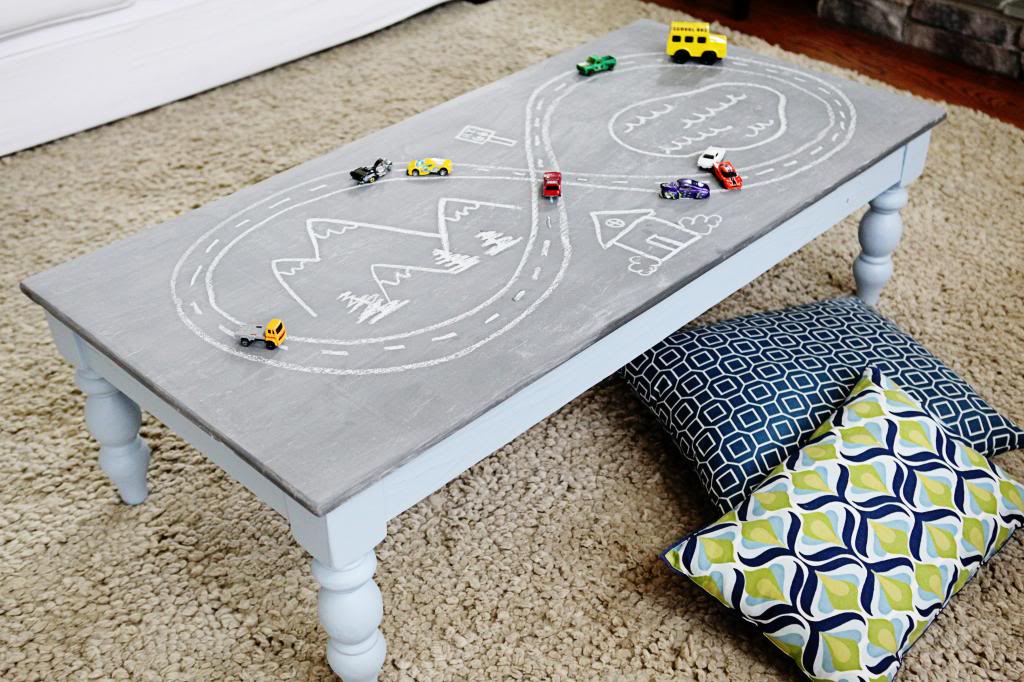
All in all…it was a really easy project and I am loving the fact that it is so kid-friendly. And hopefully that table will help keep the kids off our death-trap of a deck. Ok ok…it’s not a death trap….but it definitely doesn’t pass Jeremy’s safety test…so we practically live on the patio under it. Have y’all been chalkboarding anything lately? Food trucking? Underbellying?
p.s. for more Bower Power chalkboard projects – click here. and here.
So cute! And thanks for the idea with the salvaged coffee table that I have had stashed away for the last two years. 🙂
Send the rain up to Mass! Our grass is all dried and burnt! Boo.
Do you have a post/tutorial about that farmhouse console table?
I’m inspired every time I visit the blog. Sadly I lack the skills, motivation or time, maybe all of those, to do these kind of projects. Where on earth do you find the time?!
I recently decided to repaint our speaker/doorbell faceplate on the front porch. I thought ‘this is totally something Katie would do in like, and hour flat.” So here I go with my phillips screwdriver, took the faceplate off and gave up as soon as I saw all the wires. No idea how to disconnect them or reconnect them for that matter.
C’est la vie! Not all of us can be so gifted with DIY I guess. :o(
PS – Fellow Georgia girl here. This summer has been crazy wet hasn’t it?! Driving me nuts. Hope it ends soon.
x
V @ Life+1
Does Jeremy think it’ll only fall if someone is on it? But not that it’ll fall on its on? Or is he worried about something else in terms of it being a death trap? If he’s worried it’ll collapse with someone on it, I would also be worried about it collapsing on its own. But if that is what he’s worried about, then don’t show him this comment. I don’t want him to not allow anyone on the patio either. Lol.
Neat idea, Katie! I just repainted my daughter’s chalkboard easel she had when was a child, which makes it 26 years old!! I had never used that chalkboard paint. I bought some in a spray can from Walmart, and it was a disaster. I shook it and shook it like the directions said, but it still came out in drips. Then I went to Lowes and bought a can of the paint and brushed it on with a quality brush. I was told by a friend it wouldn’t leave brush marks if I used a good brush, and it looks great now! On another note, my husband and son replaced the boards on the top of our picnic table and the bench parts of it a few months ago. They used pressure treated wood. But, it has already warped!! I wasn’t expecting that to happen! Do you have any idea why this would happen?
Love your chalkboard table, Katie! I really like your thought, too about having designated spaces for certain activities 🙂 I was actually just writing about doing something similar to our coffee table today! Hoping to tackle it this weekend! I’m a little worried it won’t work since my coffee table has a glass top – but I’m really sick of all the smudges :/
http://thesimplepalette.wordpress.com/2014/07/25/a-weekend-project/
What do you think?
It isn’t a structural issue…the boards are warped and the nails are pulling out with the warpage….and some of the railing spindles are coming out (the space would be big enough to fit a child’s head if they pushed the whole wood piece out) so of course the rule is…nobody on deck…unless you are an adult who doesn’t push their head out through railings.
xo kb
It’ll probably work…you might want to use a spray primer though 🙂
xo kb
Hi Katie! How many coats of the chalkboard paint did you need to do? We bought the same paint but I wasn’t sure if the instructions on the can is accurate.
I love it! And YES, it has been rainy as all get out! I live in Northern FL and I’m pretty sure it’s rained every day this summer so far.
Great idea!
I love that it takes you so long to work on stuff too! I have a million and one half finished projects around my place and I can never believe that bloggers work on projects so quickly.
I did three but two would probably work if they were thick.
xo – kb
Warpage happens because of the grain patterns. I hear that proper storage before and after construction helps (I could be wrong though!).
xo – kb
Love the table! I built a small one for my son and plan to do the top in chalkboard paint. I have a can of the spray kind but I don’t know if I want to try it based on the previous comment……what do you do to remove chalkboard paint if it doesn’t go well? I wouldn’t have known to season it either so thanks for the tip!
Quick question- do you think the chalkboard paint will hold up okay outside with the elements? And be enough protection for the wood? Thinking about doing a wood top with chalkboard paint for a “pallet bar” in an area that does not have any coverage. Not sure if that would offer enough protection to the wood though. Thoughts? Thanks!
Cute idea and great use for an old coffee table!
As much as I love chalkboards for kids, I never could get on board with having one in my house because of the dust. Our backyard is on the small side, so I’m hoping to build a chalkboard that I can mount directly on the fence.
Did y’all have to seal the legs to protect the wood/paint job?
Thanks, Katie! We bought the boards at Lowe’s and came home and built it. Maybe we should have let them acclimate to the outdoors for a while. 🙁
We just used exterior paint again for the legs as they held up fine before.
xo – kb
I assume that the exterior wood won’t need protection because it is pressure treated…and it isn’t ever sitting in water to rot. And I am thinking the chalkboard paint will hold up fine but we shall see 🙂
xo – kb
I am guessing that you probably could sand it like any other paint and then use the roll on type.
xo – kb
I did a doorbell one time! I got the instructions from the new doorbell so it was easier than I thought!
xo – kb
I haven’t posted about it 🙁
xo – kb
Thanks for the tip, Katie! I had a goal of spending $0 on this project – so I was kind of stubborn and just used the roll-on primer I had on hand… 😉 Hopefully that doesn’t come back to bite me in the butt!
Thankfully, I think it turned out great – here’s the link if you want to check it out!
http://thesimplepalette.wordpress.com/2014/07/31/chalk-top/
I’m really glad you posted about your table – thanks for the inspiration!