Nothing is safe.
Nope. Not a thing.
Not one item is safe from the paintbrush mania of June 2014. It seems as if every single day I am taking hold of a brush and giving something a coat or two. Maybe it’s just me taking that whole “Everything I know about life I learned in Kindergarten” poster a little too seriously. Remember that bad boy? It was in the era of inspirational posters like the one with the word LEADERSHIP and had a picture of a bald eagle. Because obviously bald eagles are good leaders (fun fact – they steal food from other birds). I would have used the word FIDELITY. Because ironically our national bird is faithful to a single mate till poacher do they part.
But the poster I am talking about is the one that says…
Learn some and think some and draw, paint, sing, and dance and play and work everyday some.
True dat. I love that. I think we would have a much happier planet if we all followed that poster’s advice.
And these days I have been painting on this bad boy…
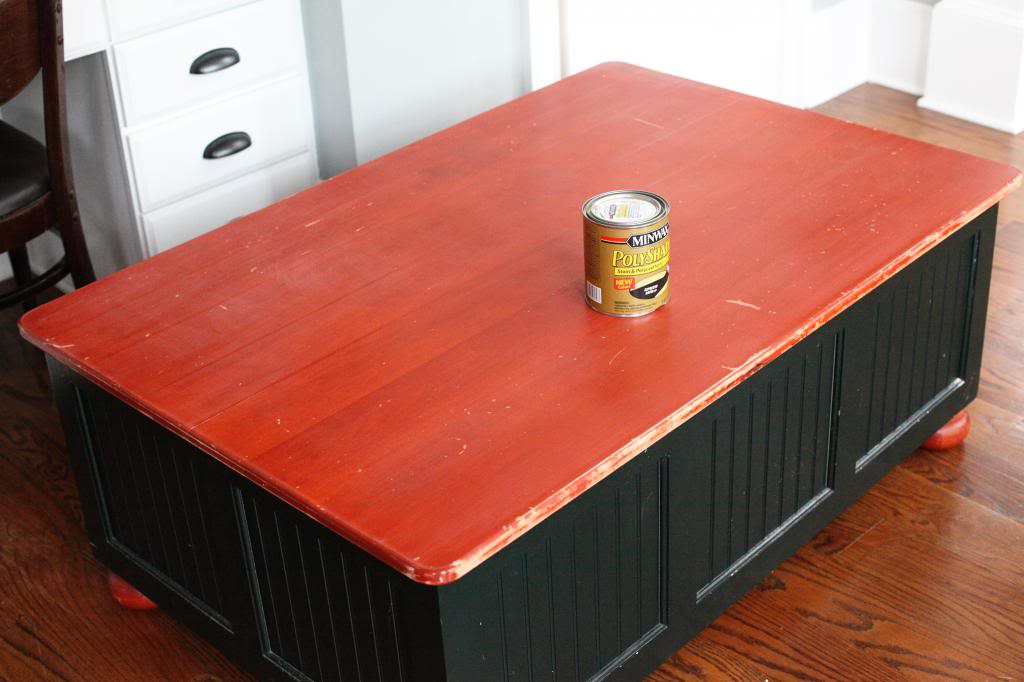
That’s our old coffee table before it got a quickie makeover. It was a $20 find at the thrift store and needed an update so I slapped some white paint on the base and two-toned it with PolyShades on the top. I blogged about it a while back.
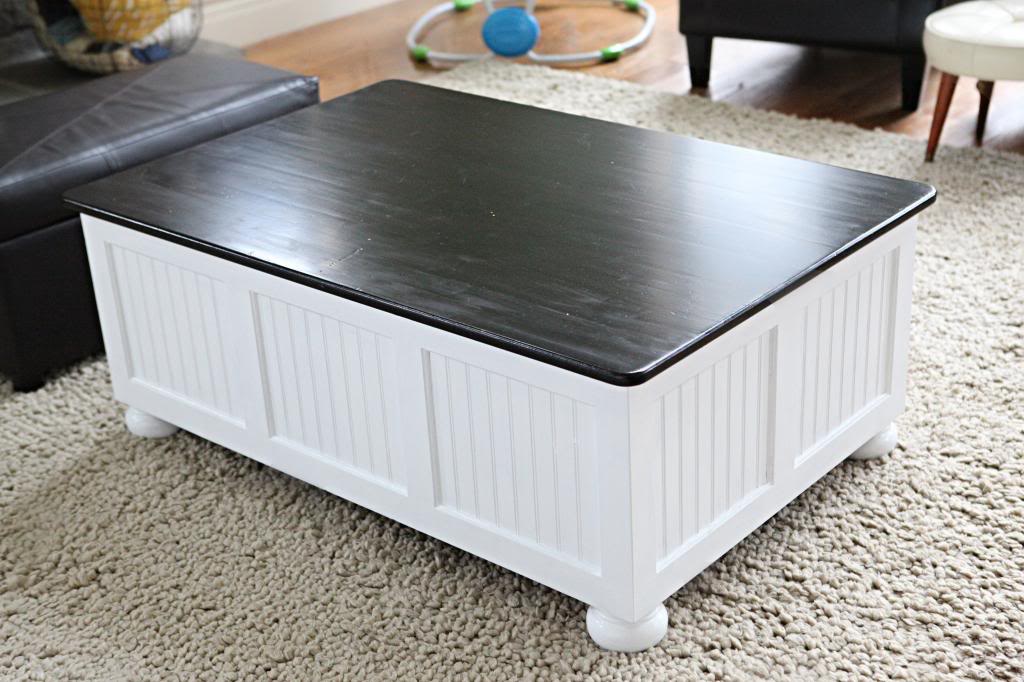
The only problem is I live with two little wrecking balls. If there is a way to destroy something…they will find it. They are awesome like that. I always say that someone needs to hire my boys to test out products. They have managed to open canned foods…without the use of a can opener.
So when it came to this coffee table (aka their matchbox car roadway and launching pad for American Ninja Warrior practice), the tabletop stood not a single chance. Soon little bits of the PolyStained top looked very celestial.
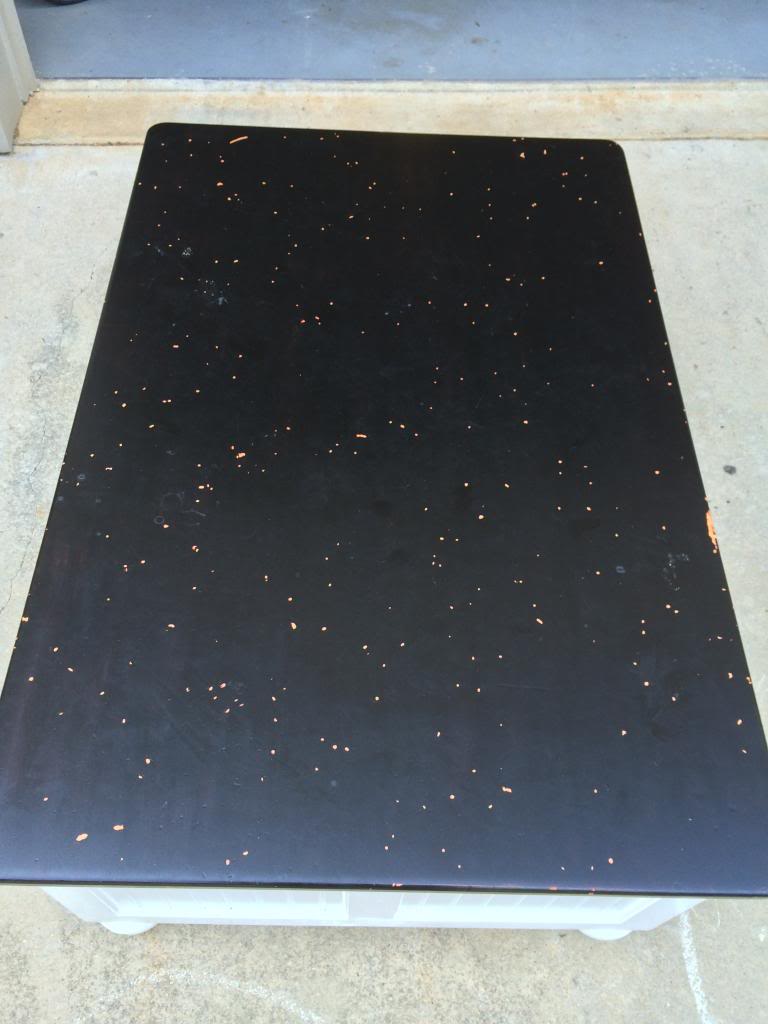
All those flecks are little chips in the poly. It was probably a lot of my own fault. I don’t remember sanding in between coats and the finish can only withstand so much.
So I decided that enough was enough and the entire thing needed a makeover. Now it looks like this:
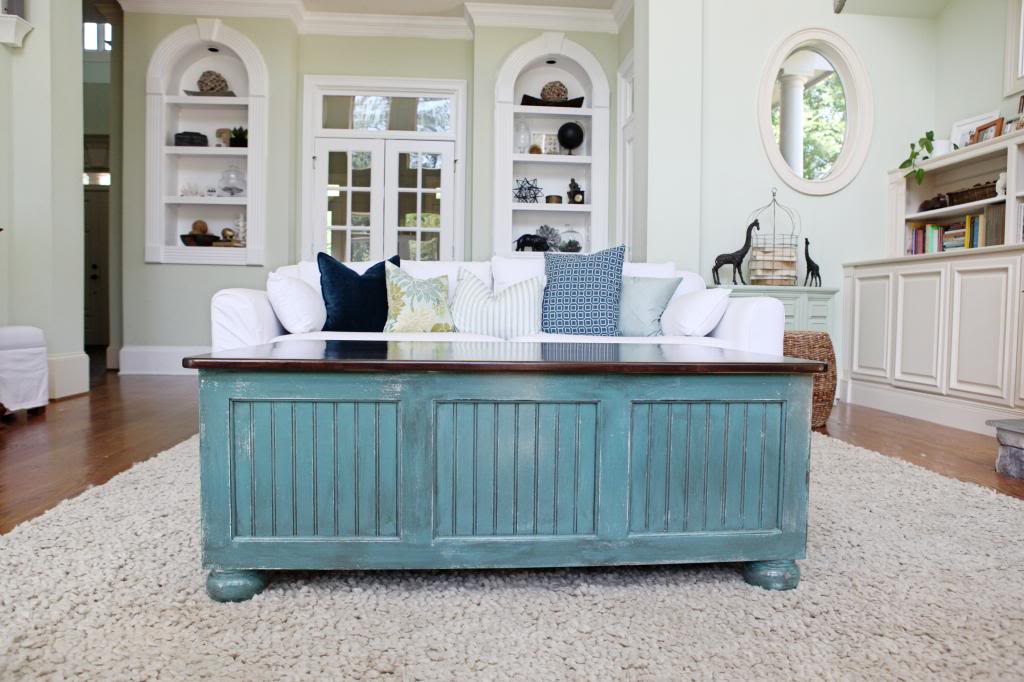
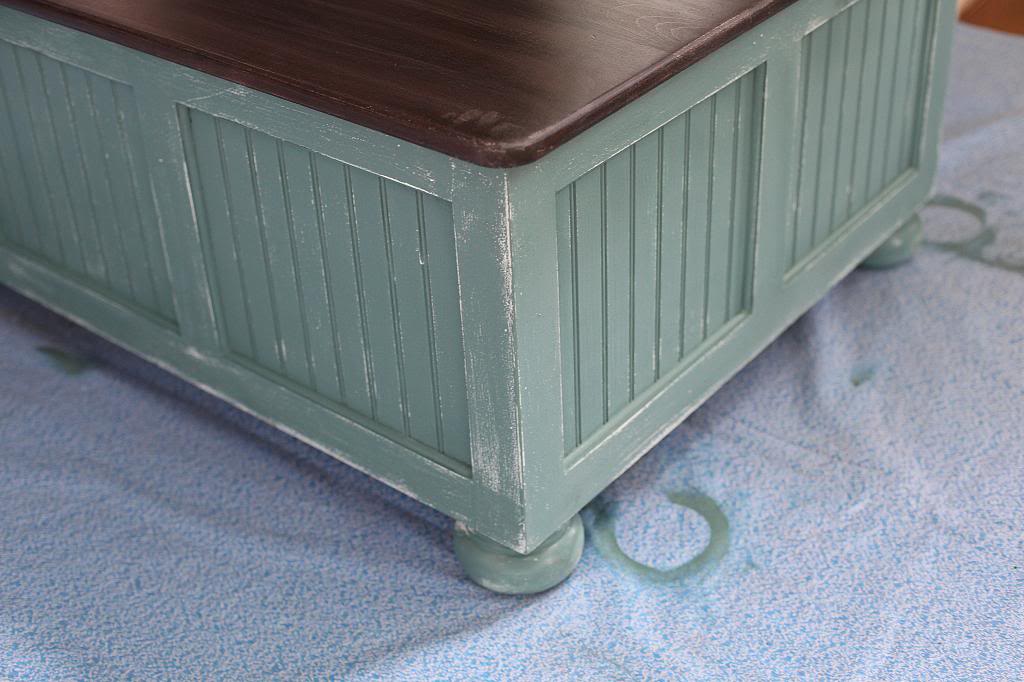
Yup. I three toned the base and completely redid the top properly.
Let’s start with the process of how I did it. I first had to strip the top completely. It involved a whole lot of sanding.
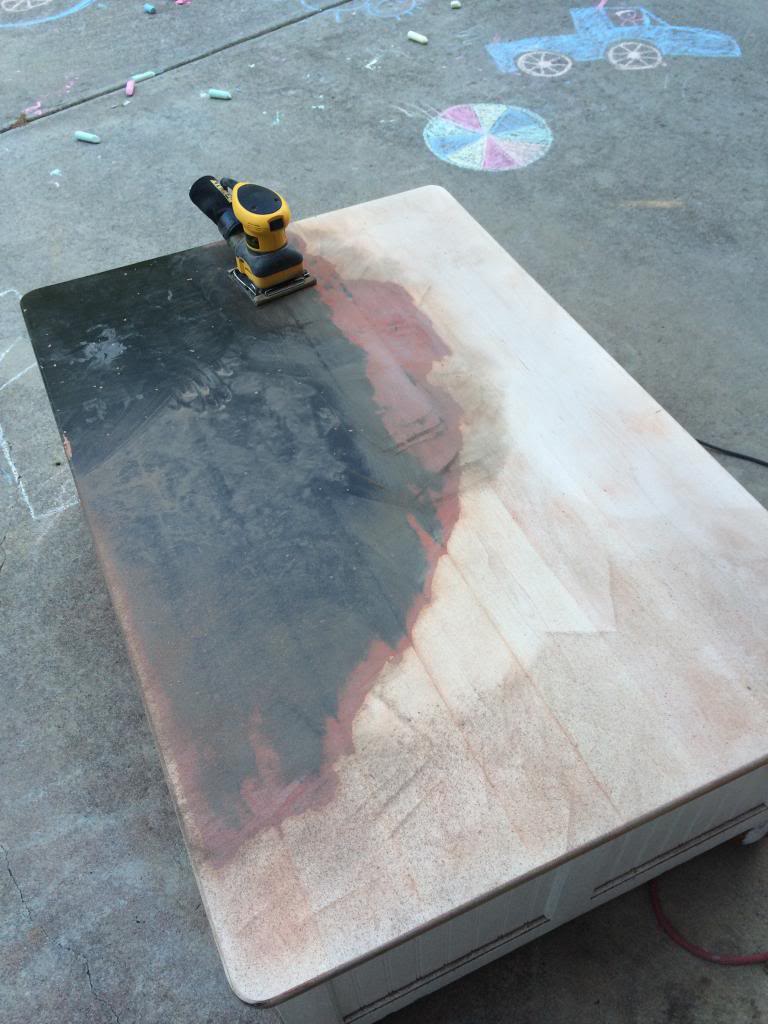
Will took this photo….he is my budding assistant. He did pretty darn good too…
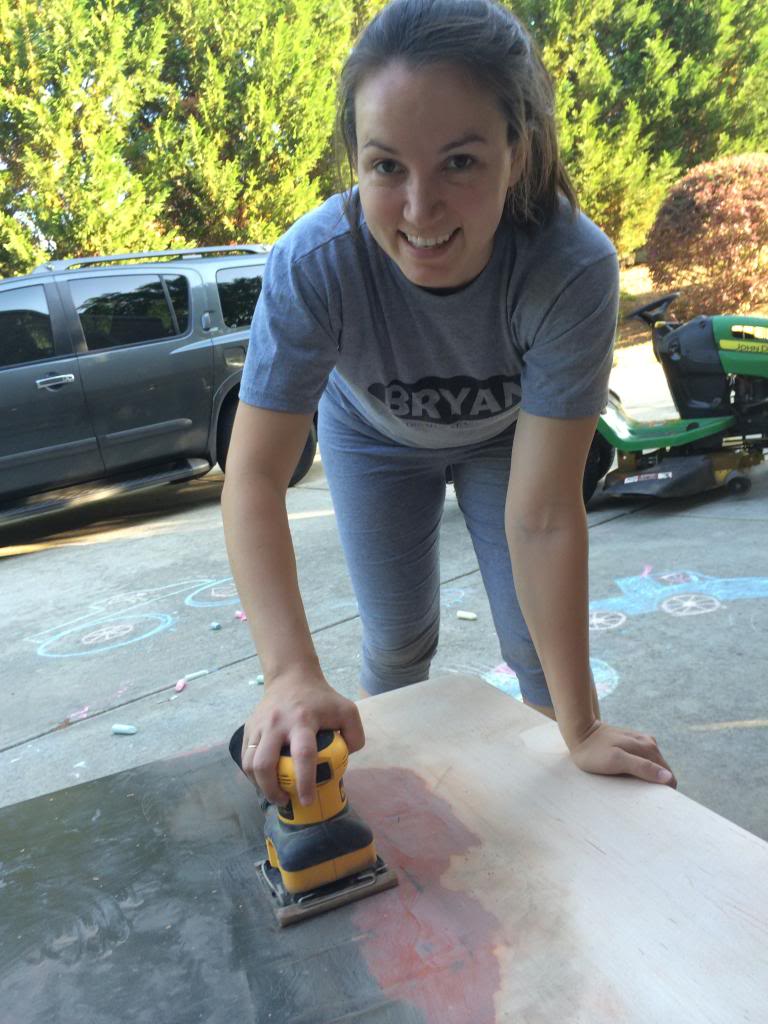
I used a low grit sand paper till all the poly and the paint that was underneath came off completely. The wood that was left was bare and ready for staining.
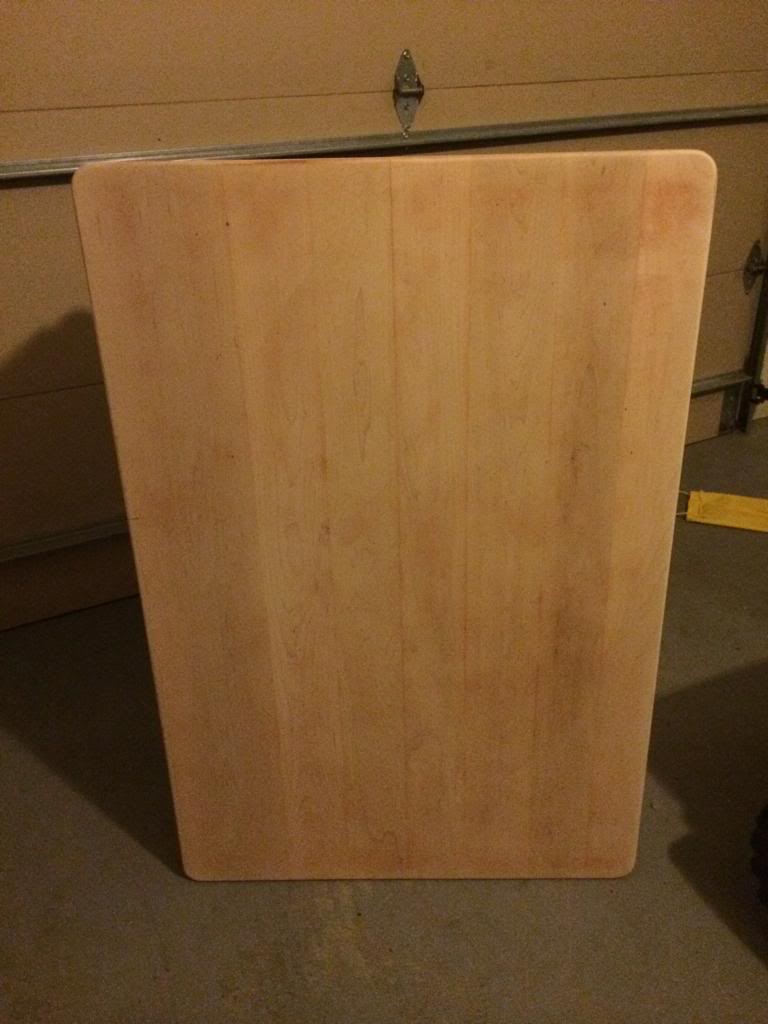
I applied two coats of Rustoleum’s Kona stain and made sure to do full length strokes for the best and most even coverage. Then I wiped it all down with a tack cloth and did my first coat of regular poly in satin finish. As that dried, I painted the base with a sample can of Valspar’s Liquid Jade in Satin. TIP – sometimes magazines like Better Homes and Garden has coupons for free samples of Valspar paint! Amazon has these subscriptions for $5 at times (which is only two dollars more than a sample pot!)
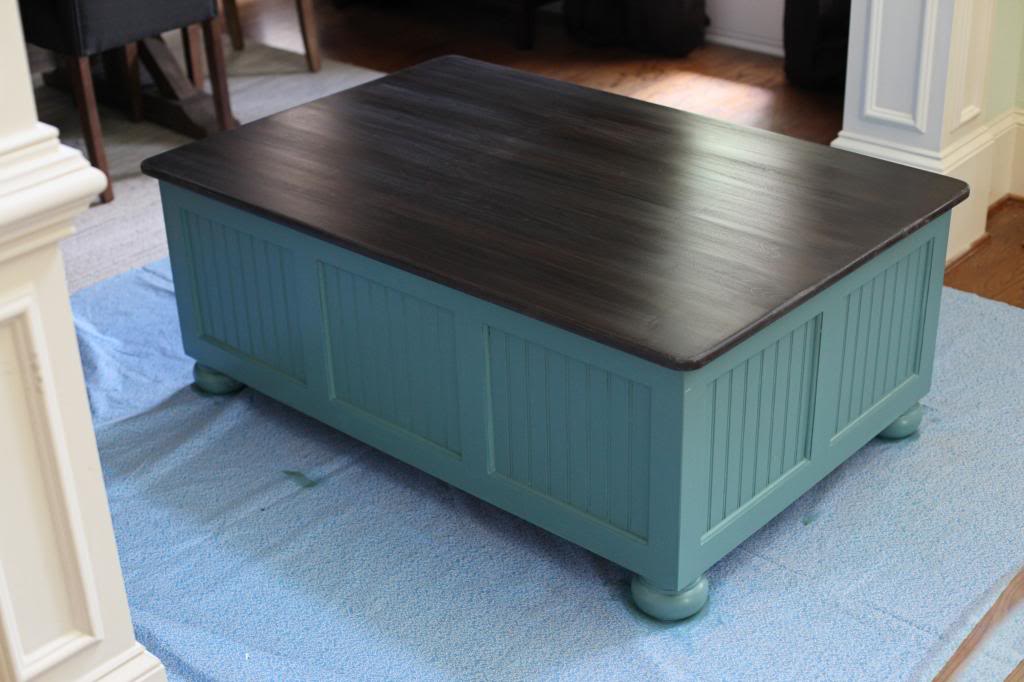
After two coats of the paint on the base, I distressed the paint so that the white would peek through. I just use a sanding block with a low grit and rub it all over to get the worn look.
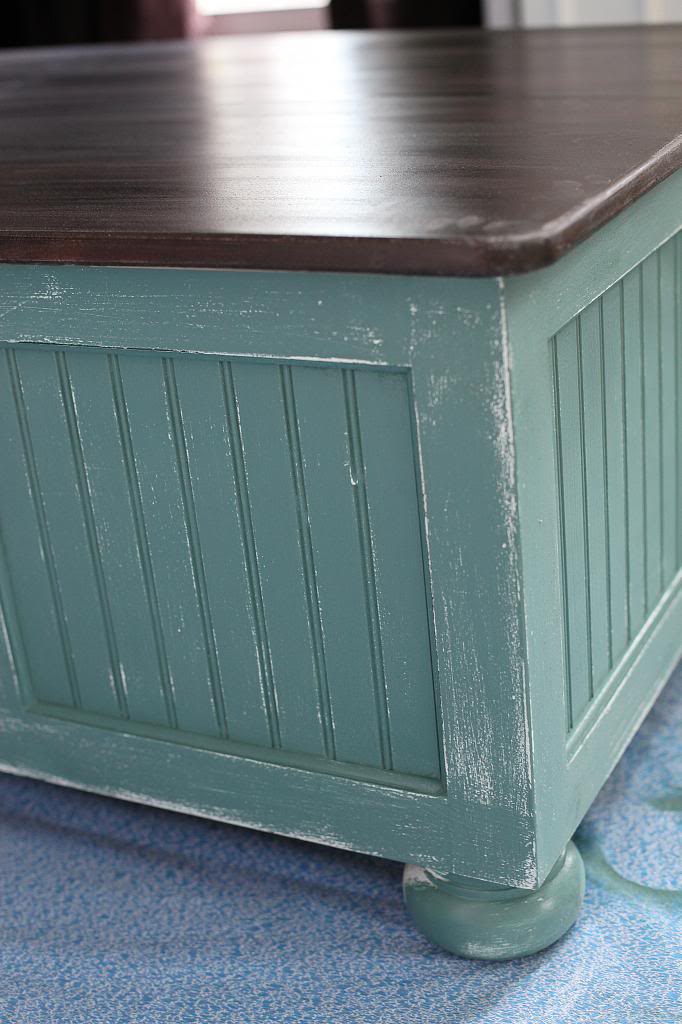
At this point, I could have left the base as is or just sealed it with a few coats of poly. But with my destructors in the house, I decided to add one more tone to the mix to allow for a complete dirt hiding factor. That’s right. I added a glaze. It’s really easy to do.
Here are the complete steps.
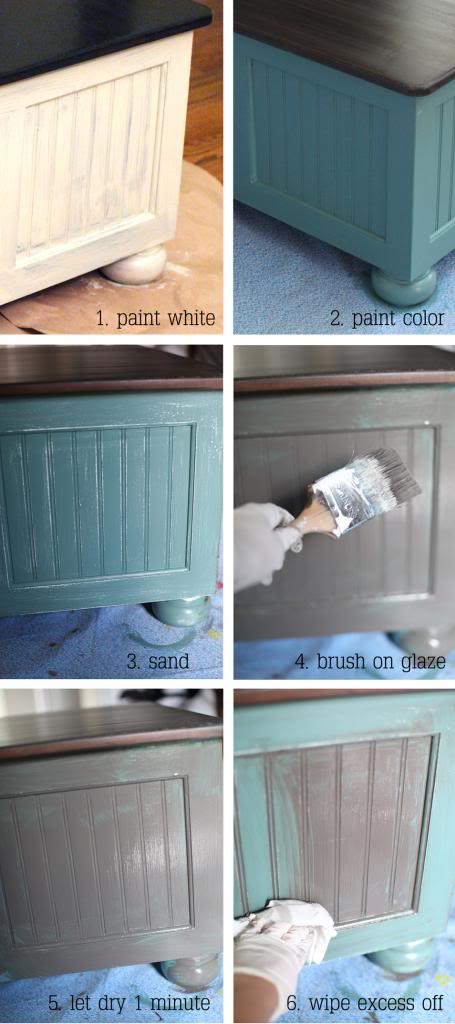
I used a faux glaze technique that I have done before. It is using Glidden’s Faux Glaze and you mix it with your desired color of paint. In this case, I used Valspar’s English Tea Party in Satin (also another sample pot that I scored for free). You just mix it 50/50 with the glaze medium and then brush it on. After a one minute drying time, I wiped off the excess with a paper towel.
Not only did it mute my Liquid Jade paint color but it brought out the detail of the bead board and made the entire piece look richer.
After I was done glazing I simply did two more coats of satin poly on the entire thing (sanding with 400 grit between-coat sand paper and using a tack cloth after) to finish the piece.
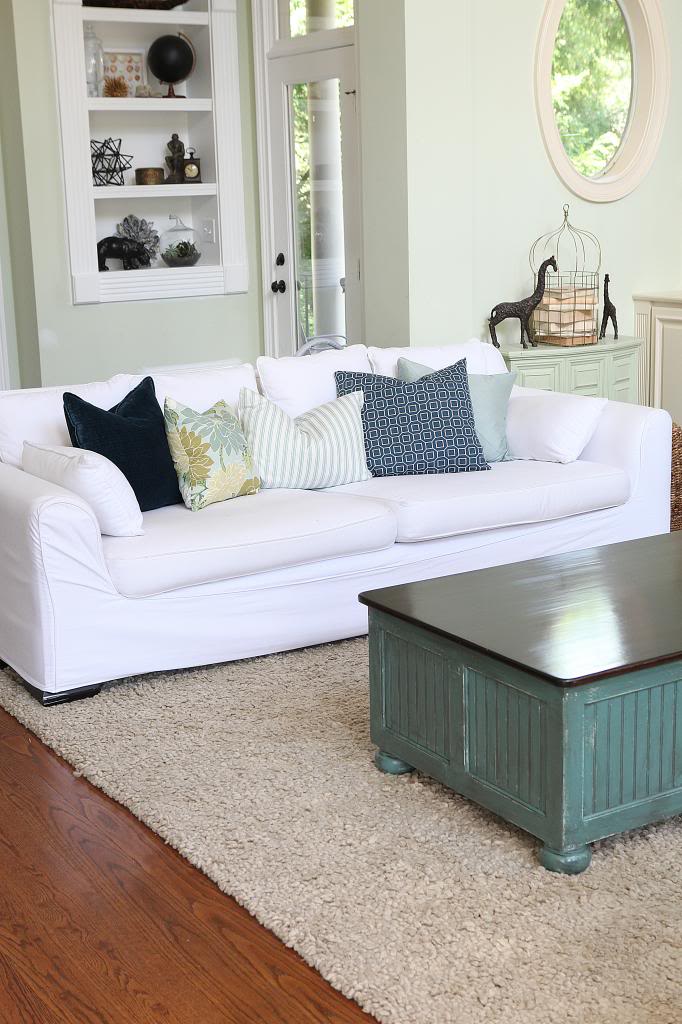
Also – I let the poly cure in the upstairs guest room for a couple weeks (always a good idea to put it out of site and out of reach when it comes to toddlers) before I put it in the living room and now it really adds a burst of color in our otherwise neutral space. The good news is that so far, it has held up great to the beatings.
So that is what I have been doing these days…painting all the things. And now its time for my other kindergarten tip – take a nap everyday 🙂
Update : Looking for more info on something you see in our house? We have a Shop the Bower House page with paint colors and links to accessories, furniture and decor!

My goodness that is one gorgeous piece of furniture! Hubba hubba!
Looks great. You are so creative.
Love that you went with the darker turquoise on the bottom and now I’m in love with Kona, too! Have you ever used an oil based glaze? I just gave it my first shot on this island and the color felt richer than my normal water based glaze. http://www.krusesworkshop.blogspot.com/2014/06/a-rustic-reclaimed-wood-island.html
I love the distressed table. The color you chose is gorgeous! But now let’s talk about that white couch and how it looks SO good when you have three (and counting the big kid, 4) boys!?!
It looks so great! What a great find too!
L.O.V.E!
Wow, I love how it turned out! Go Katie!
Looks so good Katie!! You are a true master with the paintbrush…like a Jedi with a light saber. Love it : )
That is a great subtle color. Really nice in that room! I don’t usually like the glazed and distressed look but this is really pretty! Maybe because of the contrast with the sleek top? Looks great!
Looks good! I love the natural look of the stain on top!
Awesome!
Have you ever reviewed your white couch and/or shared how you clean it? I’m dying to replace our sectional with a white one but my husband is horrified by the idea. I’ve found oodles of reviews online but I feel like you’re honest about your home and also have young kiddos like me – so I’d love to hear how you feel about it!
It looks awesome – I’ve been looking for a coffee table like that for a while!!! Question though… Both our Home Depots and Lowes always tell me they only have test pots in the flat finish. How do you get them in different finishes?
Ours only have them in satin!
That’s funny!
xo – kb
I have! We love our white slipcovered couch! Here is the post all about it!
xo – kb
Crazy huh?! I love bleach 🙂
xo – kb
I haven’t! I will have to give it a try though!
xo – kb
So pretty! It looks like a brand new piece and I love the color you chose.
I love that this is the at least the third life of the coffee table. I love the finished look. This process is new to me. We are currently getting to the spot where we can begin thrifting to fill our new home with furniture. I am saving this post for later use…hopefully we will be successful in our thrift store adventures.
I love it! I always have this feeling that you complete these projects in 2 days flat and Im the slowest creature on earth, but reading that you let it sit for a few weeks made me feel much better 🙂
Van Dyke brown glaze from Sherwin Williams is most standard and common glaze used on cabinetry, which is what I used. They only sell it by the gallon though, which would take years to use up. So if you buy some, split it with four friends!
Looks great, love the way the three toning looks!
WOW!!! This looks amazing! My mom just started refinishing furniture. I will have to tell her about your redo; so cute!
http://happinessiscreating.com/
Love this — it looks like a million bucks! I have a hand-me-down TV console that’s in great shape, but needs updating. I think this may just be what I’ve been looking for!
Wow! You always amaze, lady! These colors are so pretty in your room!
Great job, Katie! I’ve to say I’m always impressed with your paint jobs (like your recently painted rails) and attention to details, even if it means way more time and work to get it right. The results are always amazing. Love how it turned out although personally I’m a fan of all things black and white.
As for your two little wrecking balls – I guess that’s the real hardship of being a mom to boys. A friend of mine just started re-renovating her home and is looking forward to a brand new kitchen and living room now that her boys are in their twenties. 😉
Hi Katie!
This post helped me prove to my husband that you CAN paint black furniture another color – even white!
Question for you though… how do you decide what you paint with a brush/roller vs. spray paint? I bought 2 nightstands that I want to paint and am trying to figure out the best method…
Thanks for your help!
Katie
Love the color!! 🙂
That’s tough. Sometimes I decide based on the overspray factor. Like in this case, if I would spray it, the overspray would get everywhere. So I brushed it. I also like custom colors…so if I need something a specific color, I always brush because the cost of custom spray paint is higher.
xo – kb
Thanks for the tips! I will definitely have to check it out!
xo – kb
Oh shoot…we didn’t have a coffee table for a month!
xo – kb
Gorgeous! I’m beginning to wonder if you really have three children with all that you manage to accomplish. You make a poor mortal woman like me feel totally inadequate! Seriously, though, thanks for sharing your knowledge and your adventures!
I have loads of help! I couldn’t do this stuff alone 🙂
xo – kb
New to your blog found it thru YHL. I just had to say how great your coffee table turned out. I love that last step with the glaze really made the piece look professional!!! I’m now off to read about your slipcovers since I also have a white couch or used to be white……..
So glad it’s not just my boys. I swear I have received perfectly pristine handmedown clothes, toys and gear. One week later–tatters. Done for. It’s like they have sandpaper hands.
Love your honesty Katie! You are the most relatable, down to earth blogger I follow. Love the table, especially the top. Have you thought about making the feet dark like the top?
I thought about it but they were already painted and was feeling lazy about sanding down the round surface.
xo – kb
I am always inspired by your projects, but I don’t know how you find time to do them. I have a baby and a toddler, and when I’m not at work, they demand ALL of my attention. And what’s left of it must be directed to the piles of laundry, dishes, messes, etc. calling my name. I keep coming back to your blog for the inspiration, though!
Do you use polycrylic or polyurethane? And do you apply it with a brush, foam roller? I’ve been trying to use the polycrylic but end up with places that dry white instead of clear.
I used polyurethane on this because the piece wasn’t white and I applied it with a foam brush.
xo – kb
We were just thinking of using polyshades on our cabinets and we also have 2 wild boys. Would u not recommend that? Have u ever used general finishes?
Question for you, since you sanded it down in places to the white does the glaze cover the white? Or does it come off when you wipe the excess?
The glaze is like a paint that is partially dried…so when you wipe, you have control over how much glaze is left or removed. Does that make sense?
xo – kb
I love what you did with your coffee table- V. Inspirational! I especially loved the quote “nothing is safe.”(from furniture.)
Yours is one of the easiest tutorials to follow on glazing. I tried it and loved the resulting finish. Here’s my post, and I linked to your page here. Thanks so much, great redo!
https://higherrepurpose.wordpress.com/2016/10/21/beastly-dresser-becomes-beach-vibe-bookshelf/